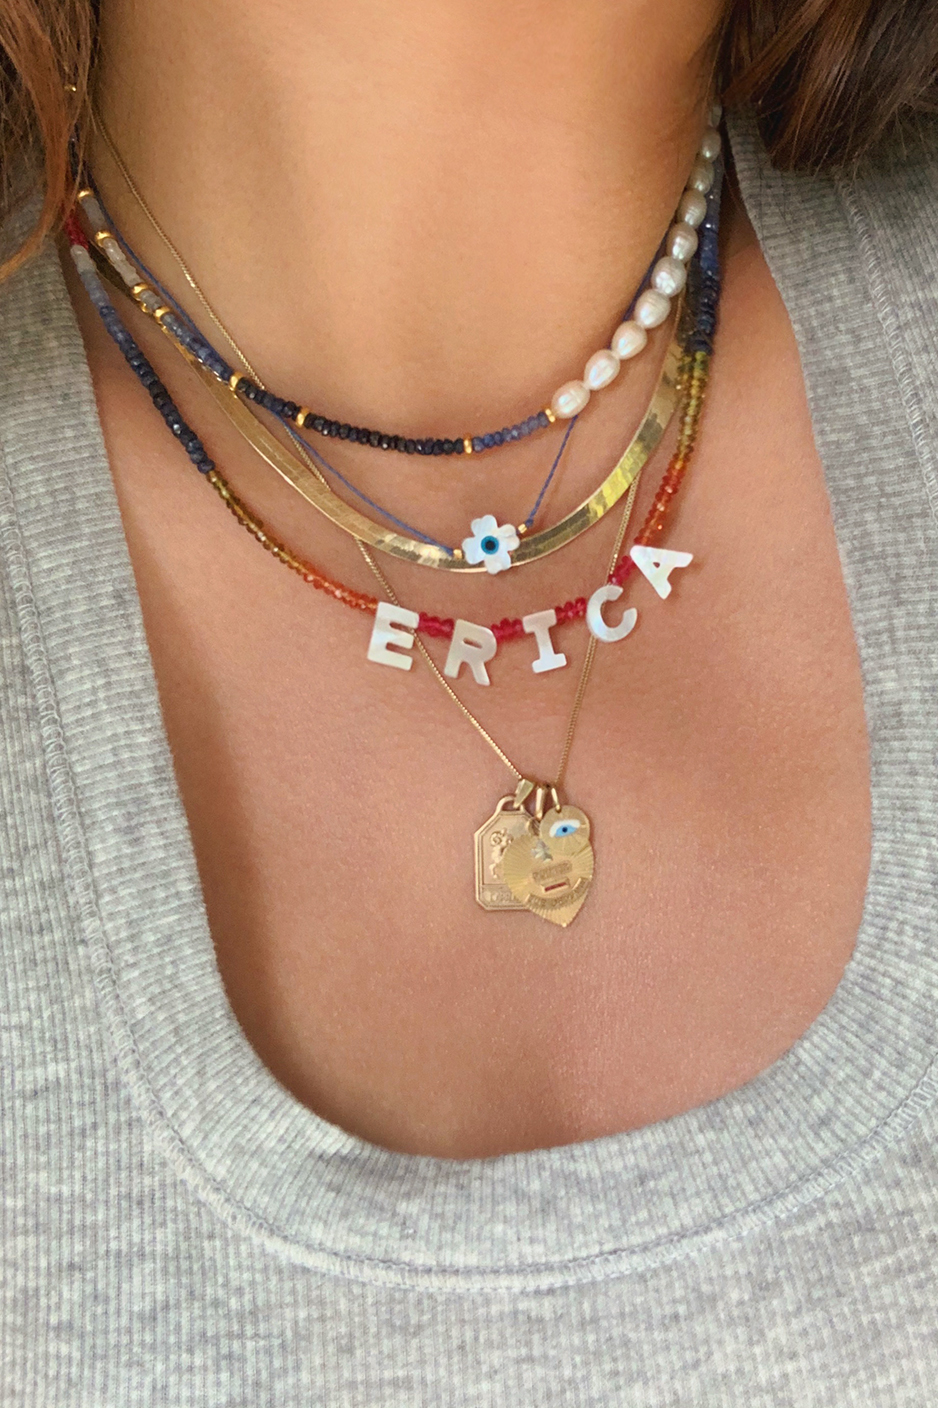
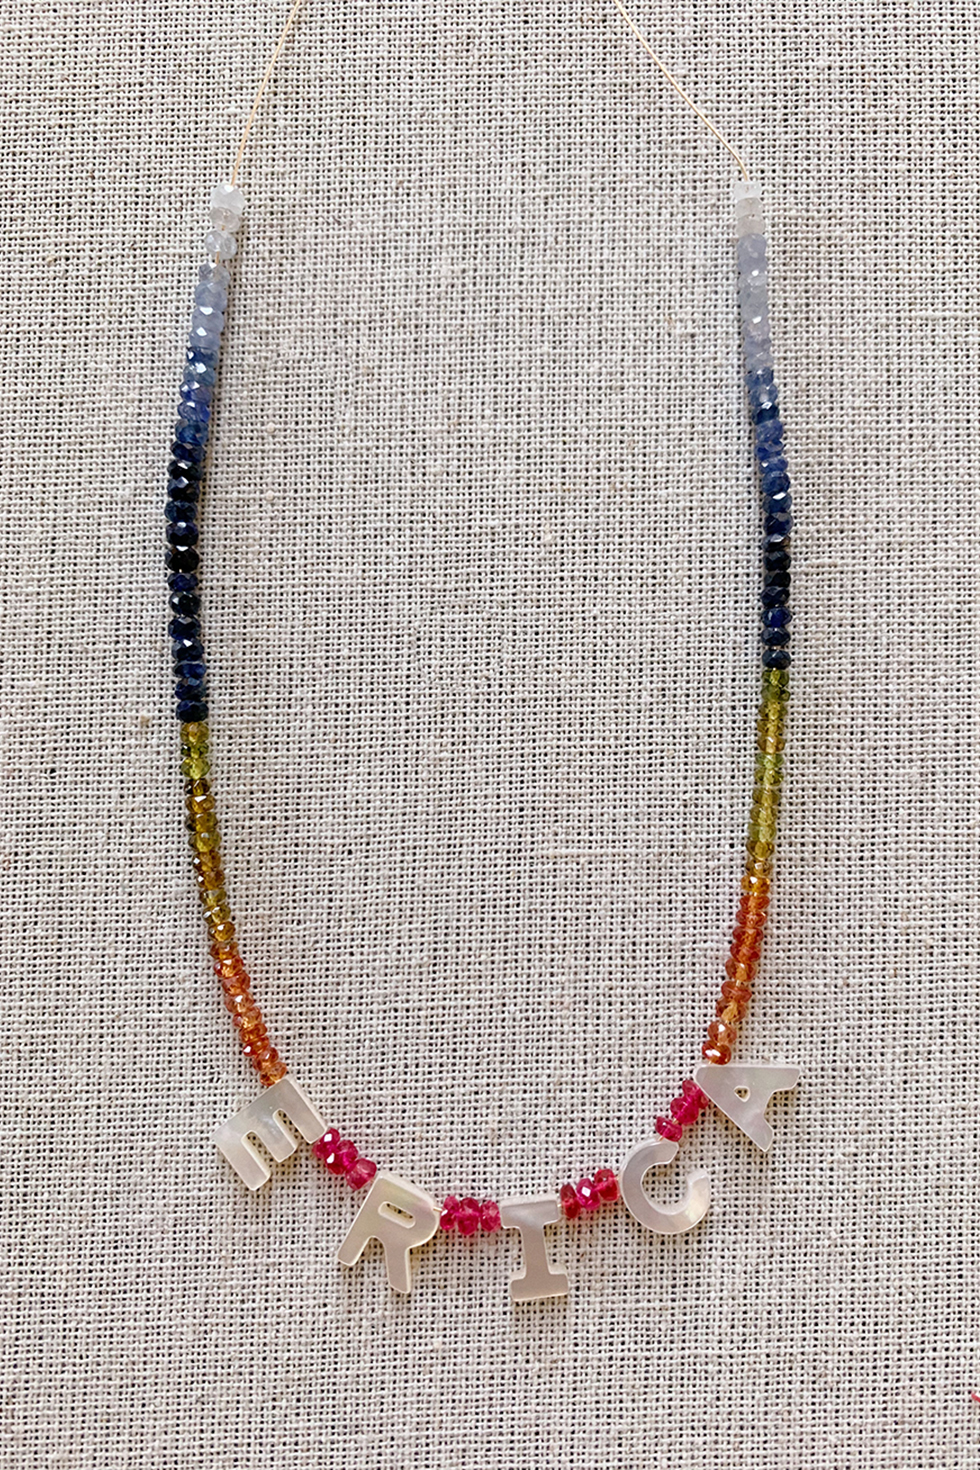
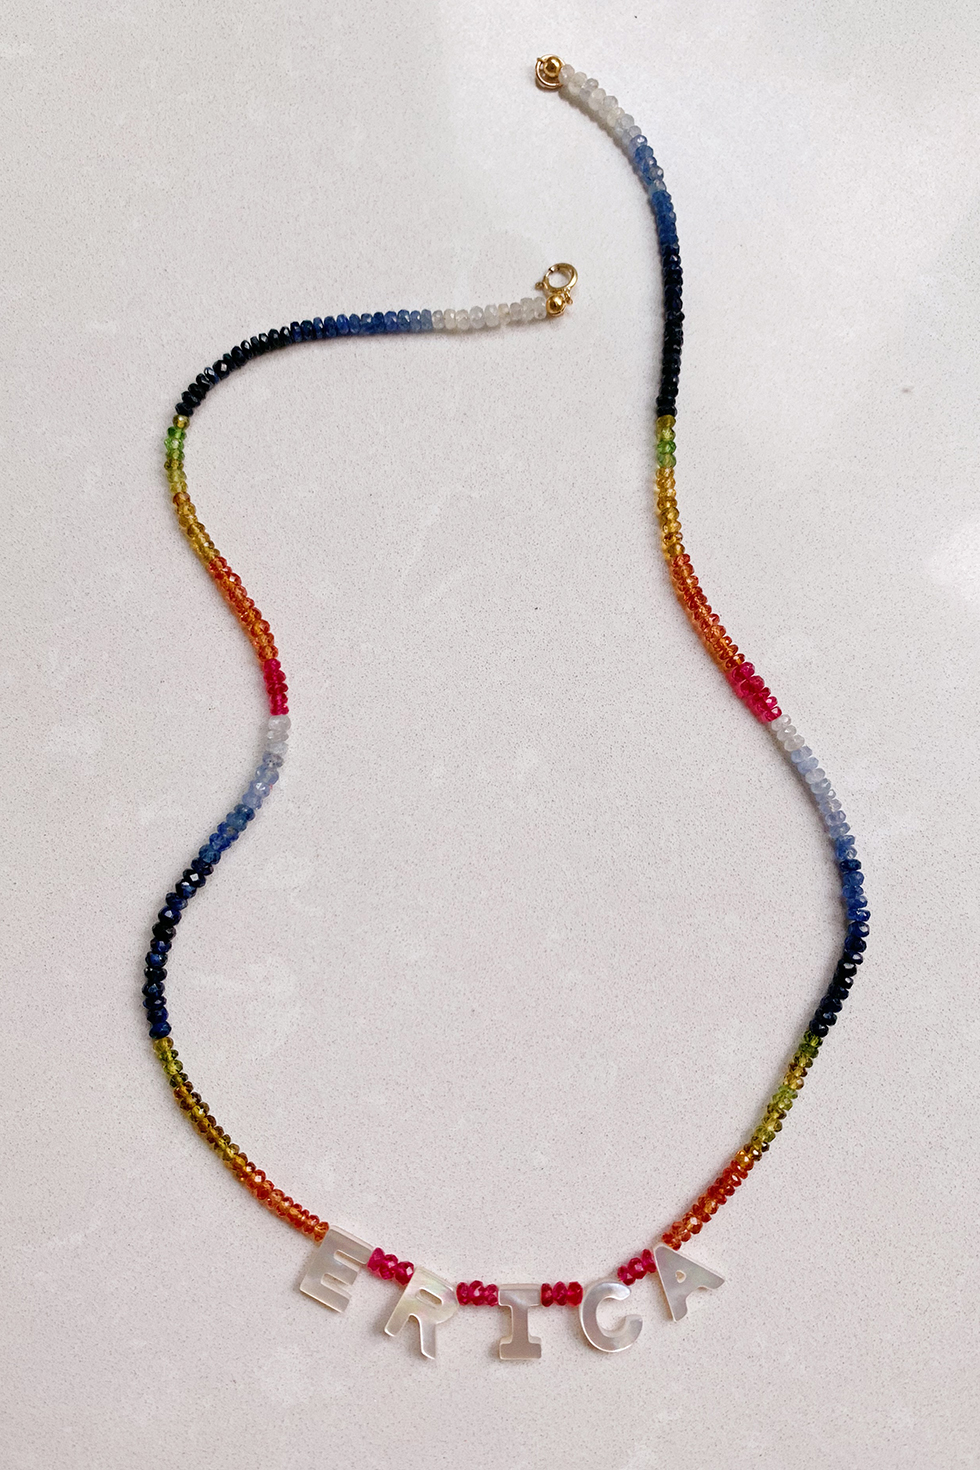
Summer is just weeks away and although we don't quite know what the near future will look like just yet, I'm looking forward for easing up on just about every aspect of life. I recently stumbled upon these adorable mother of pearl charms and the idea of incorporating them into some necklaces tickled me pink. They're just perfect for summer!
You'll Need:
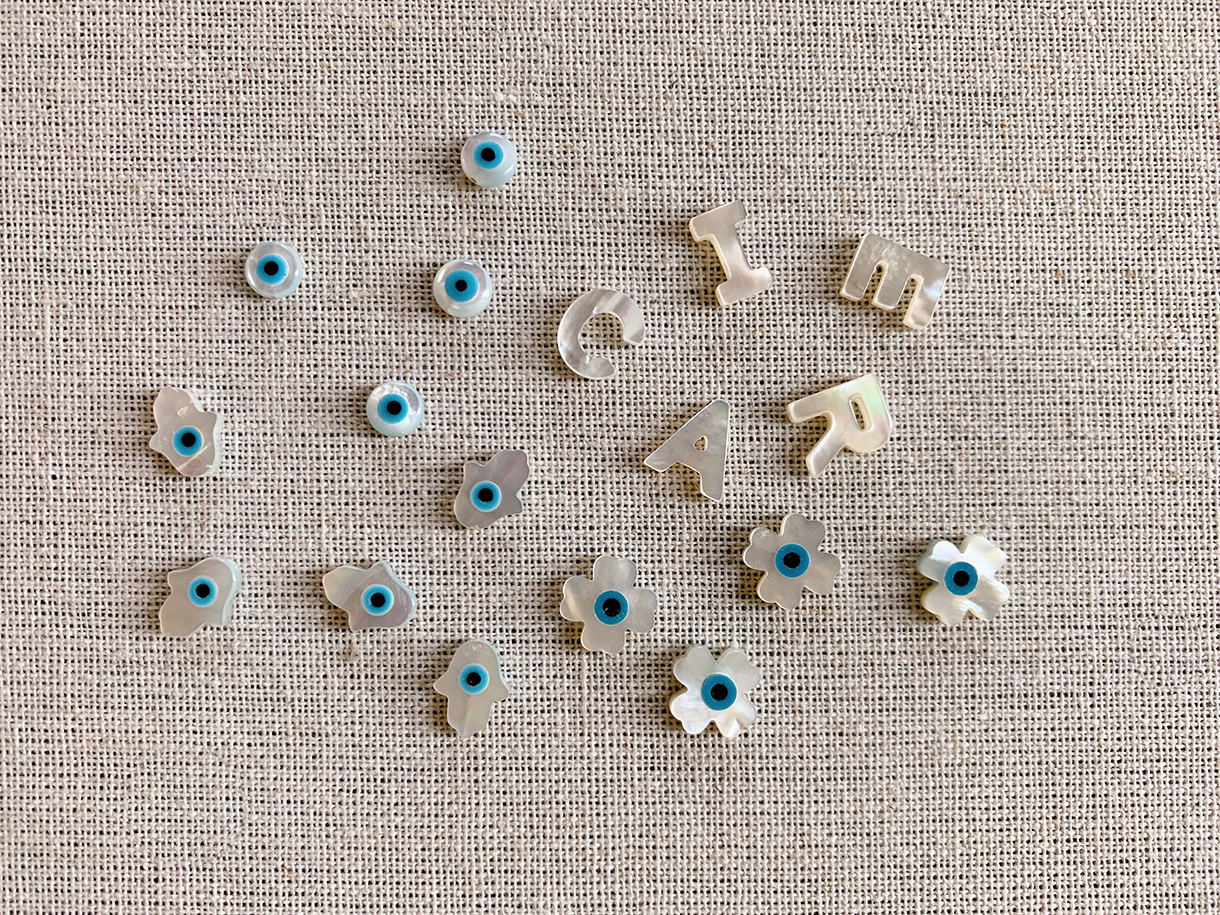
- mother of pearl letter charms
- mother of pearl evil eye clover charm
- mother of pearl hamsa charm
- mother of pearl bows, bunnies and zodiac
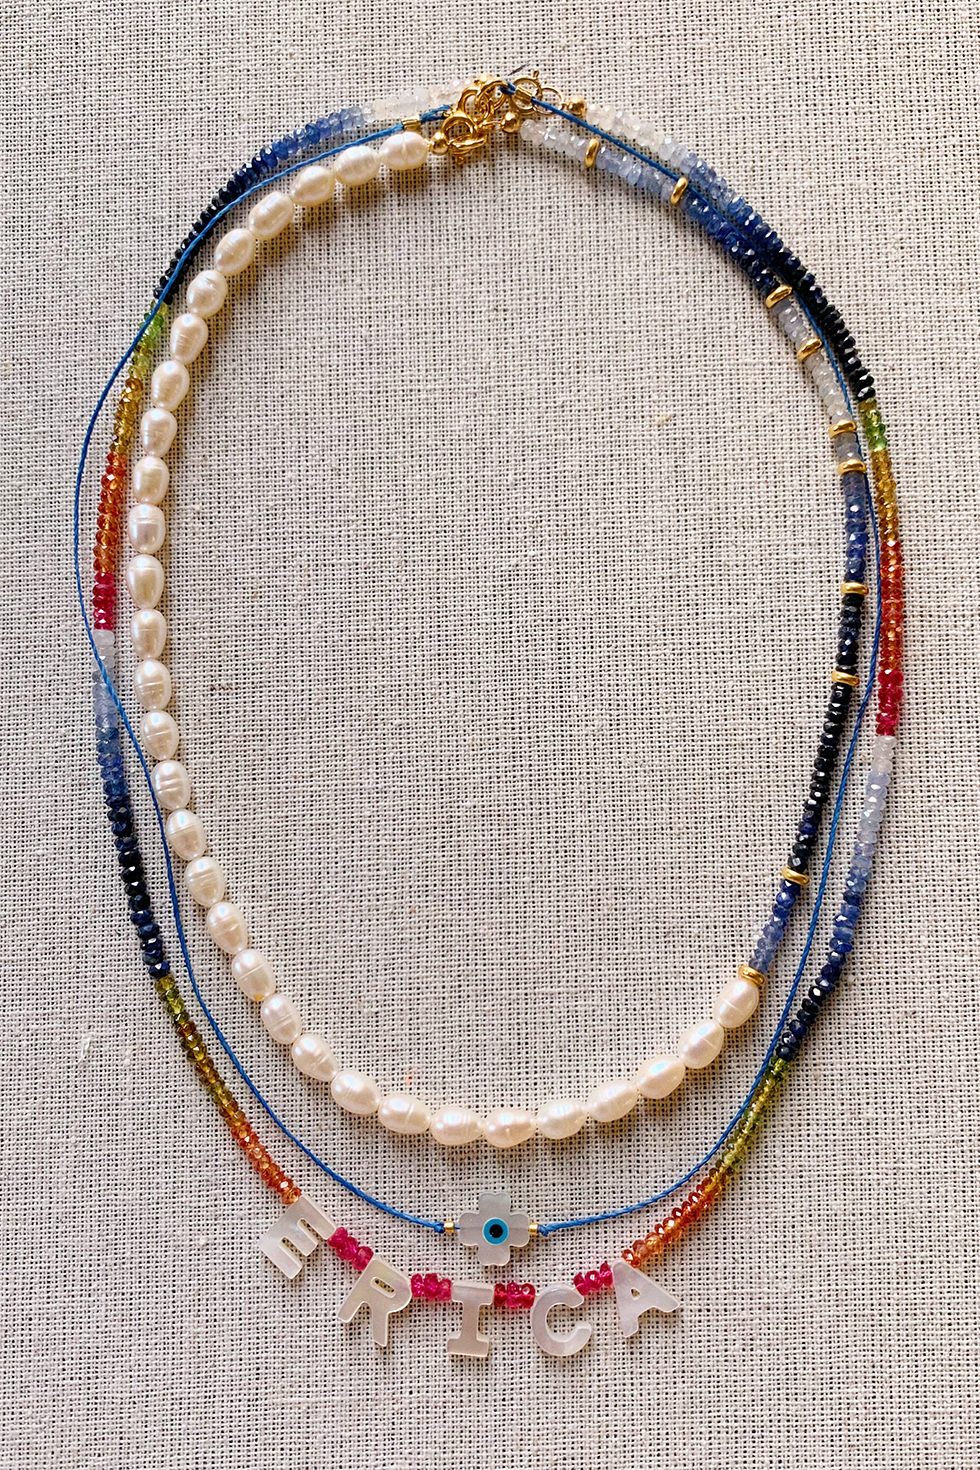
- ombré gemstone rondelle beads (pink opal, rainbow sapphire, tourmaline and blue sapphires)
- freshwater pearls
- gold spacer beads
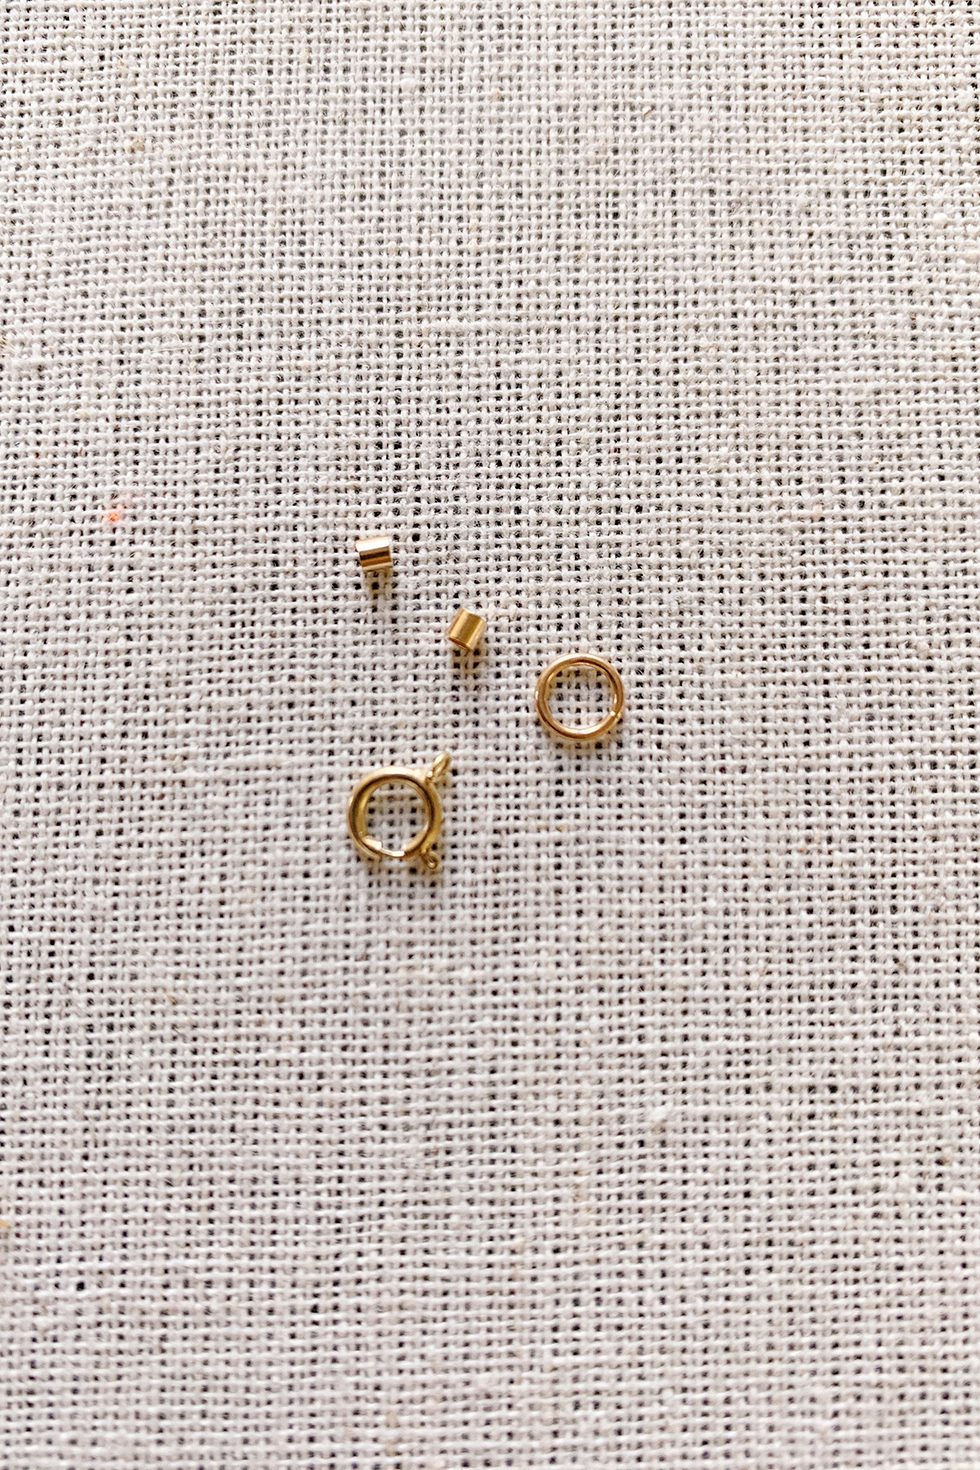
- 4mm gold filled crimp bead covers
- 6mm closed jump rings
- 7 x 12mm lobster clasps
- metallic flex wire in gold
- 0.5mm waxed cord (for single bead necklaces)
- chain nose pliers
- crimping tool
- scissors
- scotch tape
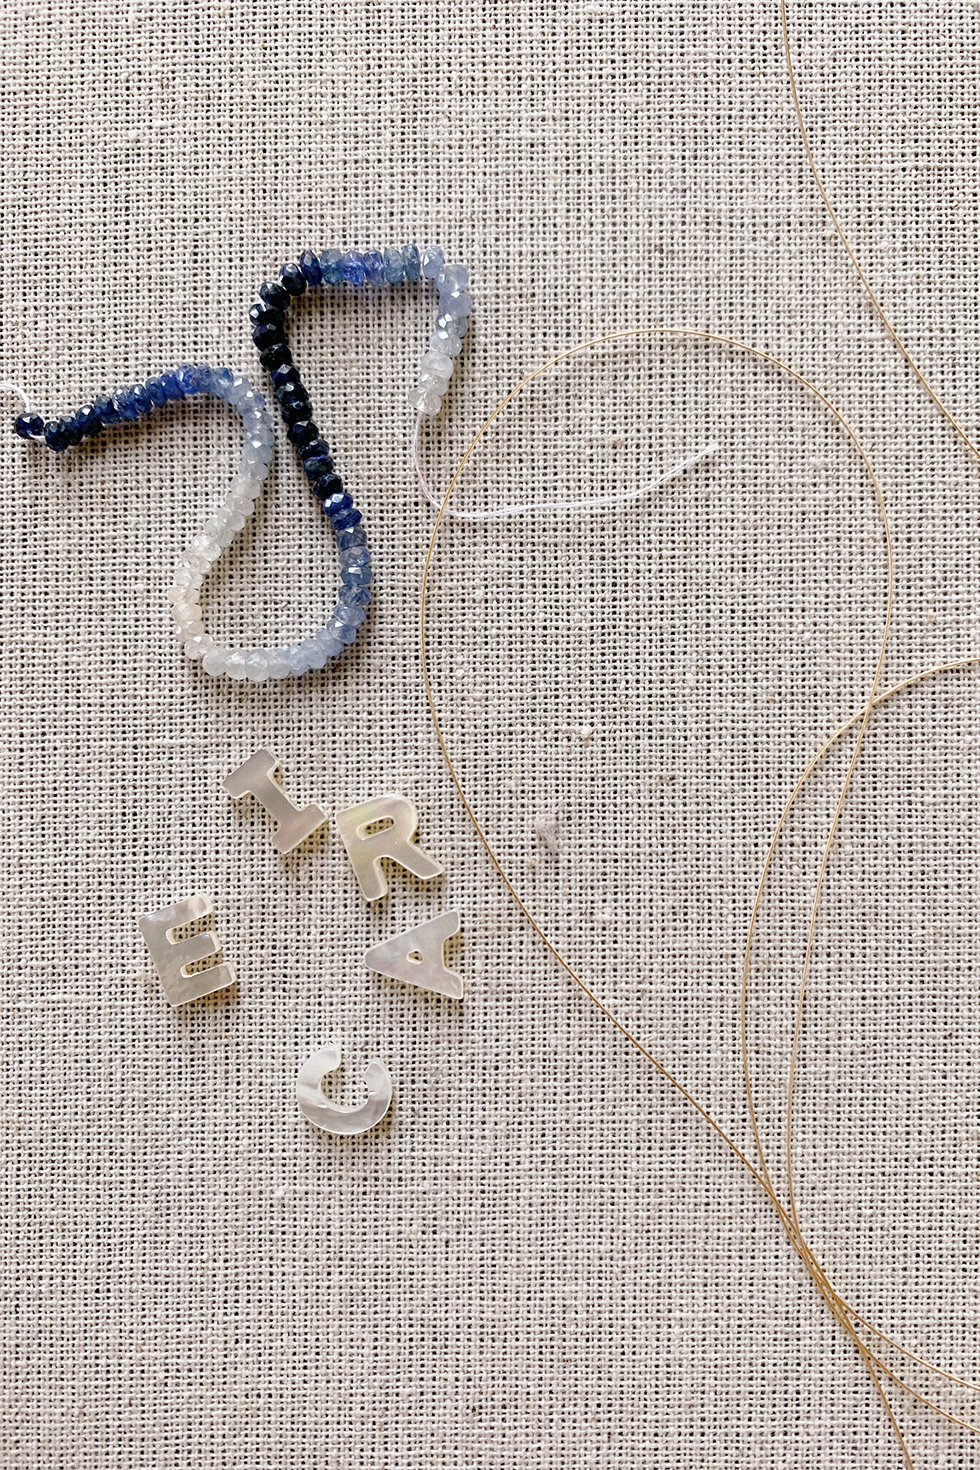
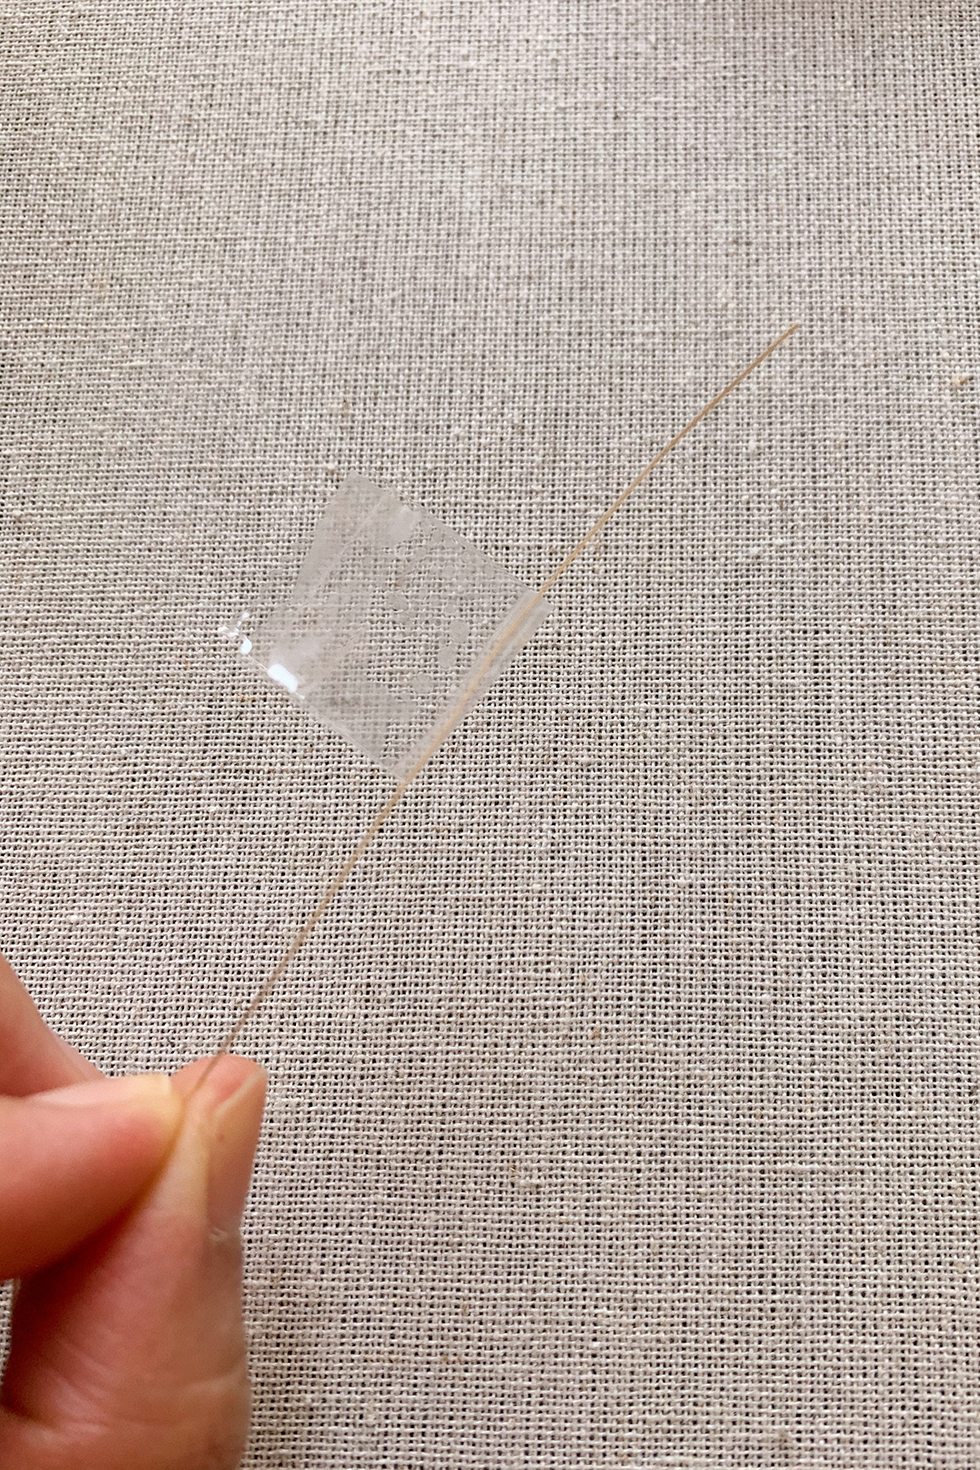
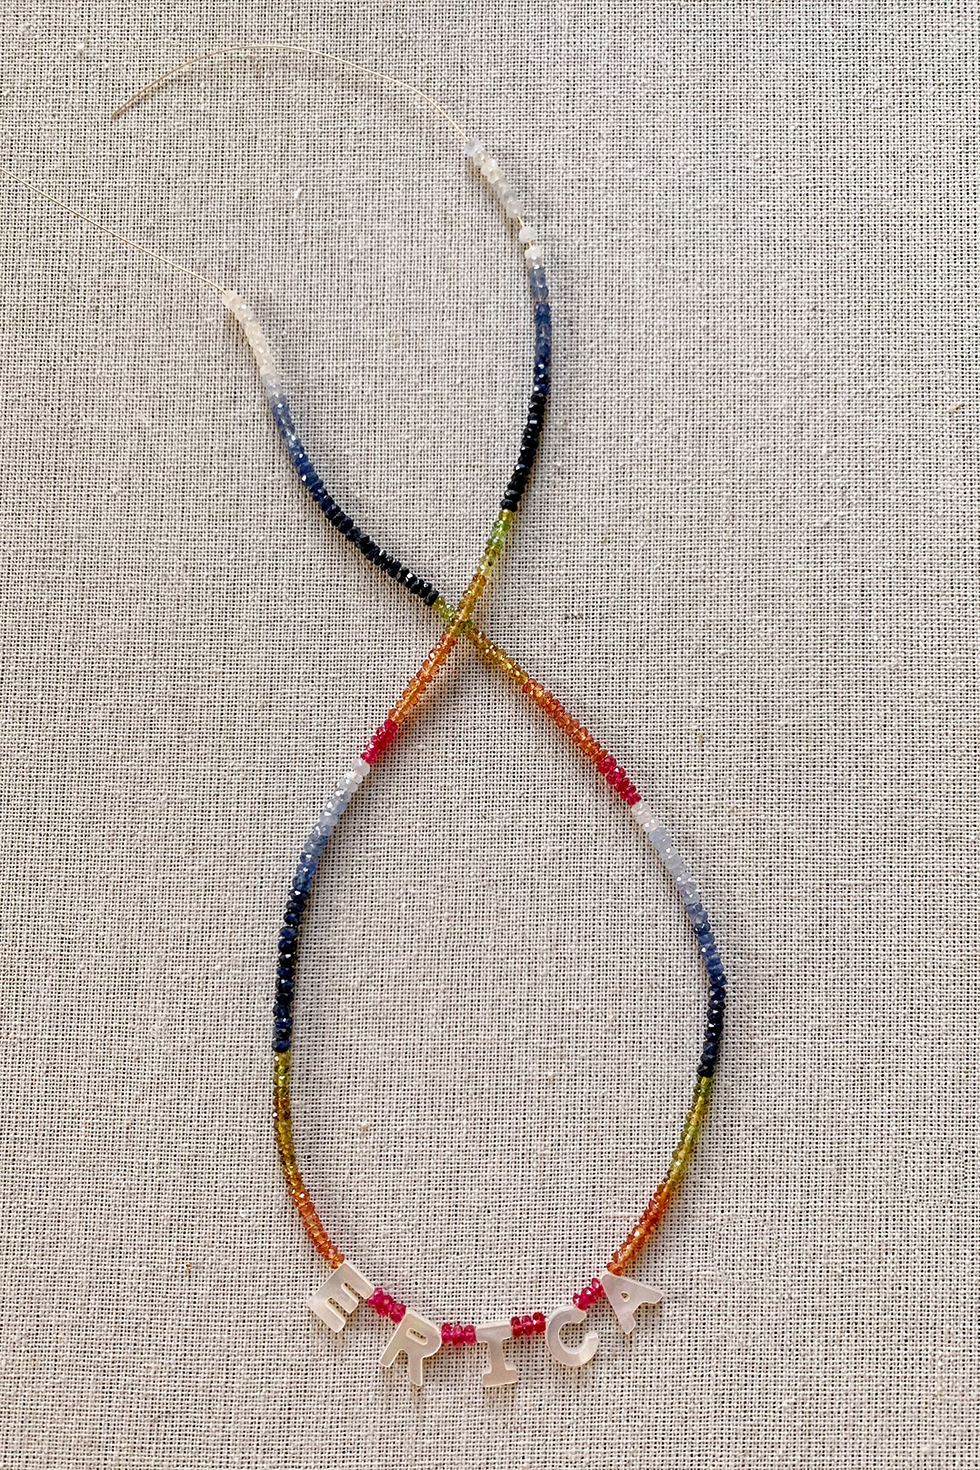
I'm using gemstones here because I just happened to have them. But you can definitely replace them with seed beads or African trade beads from previous projects. Cut the desired length of your necklace plus 6 inches. Fold a piece of scotch tape over the end of the wire.
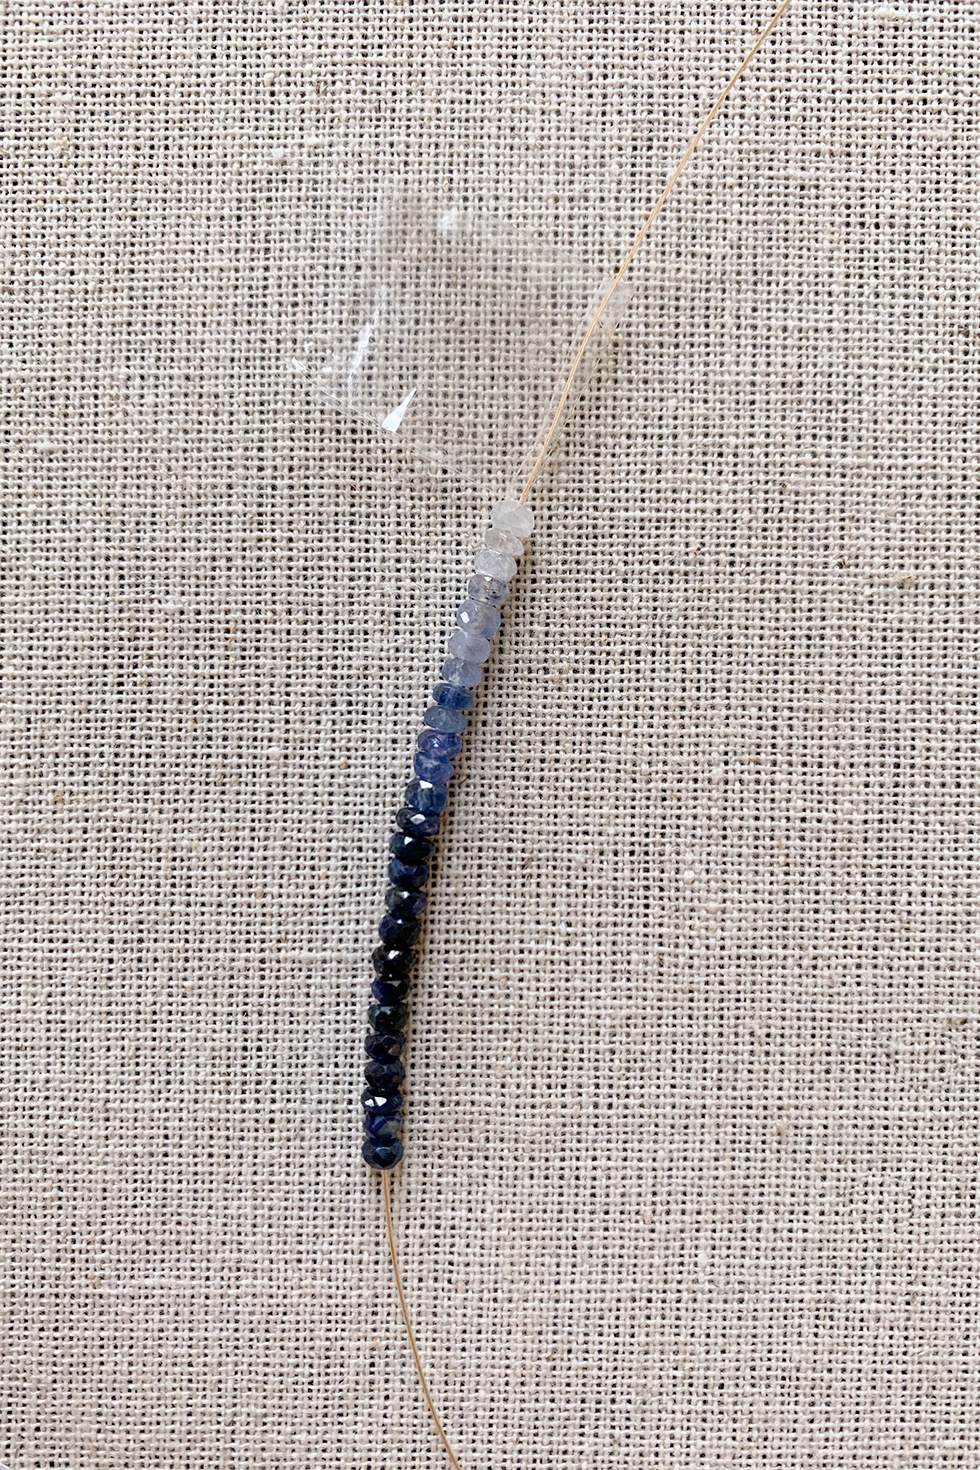
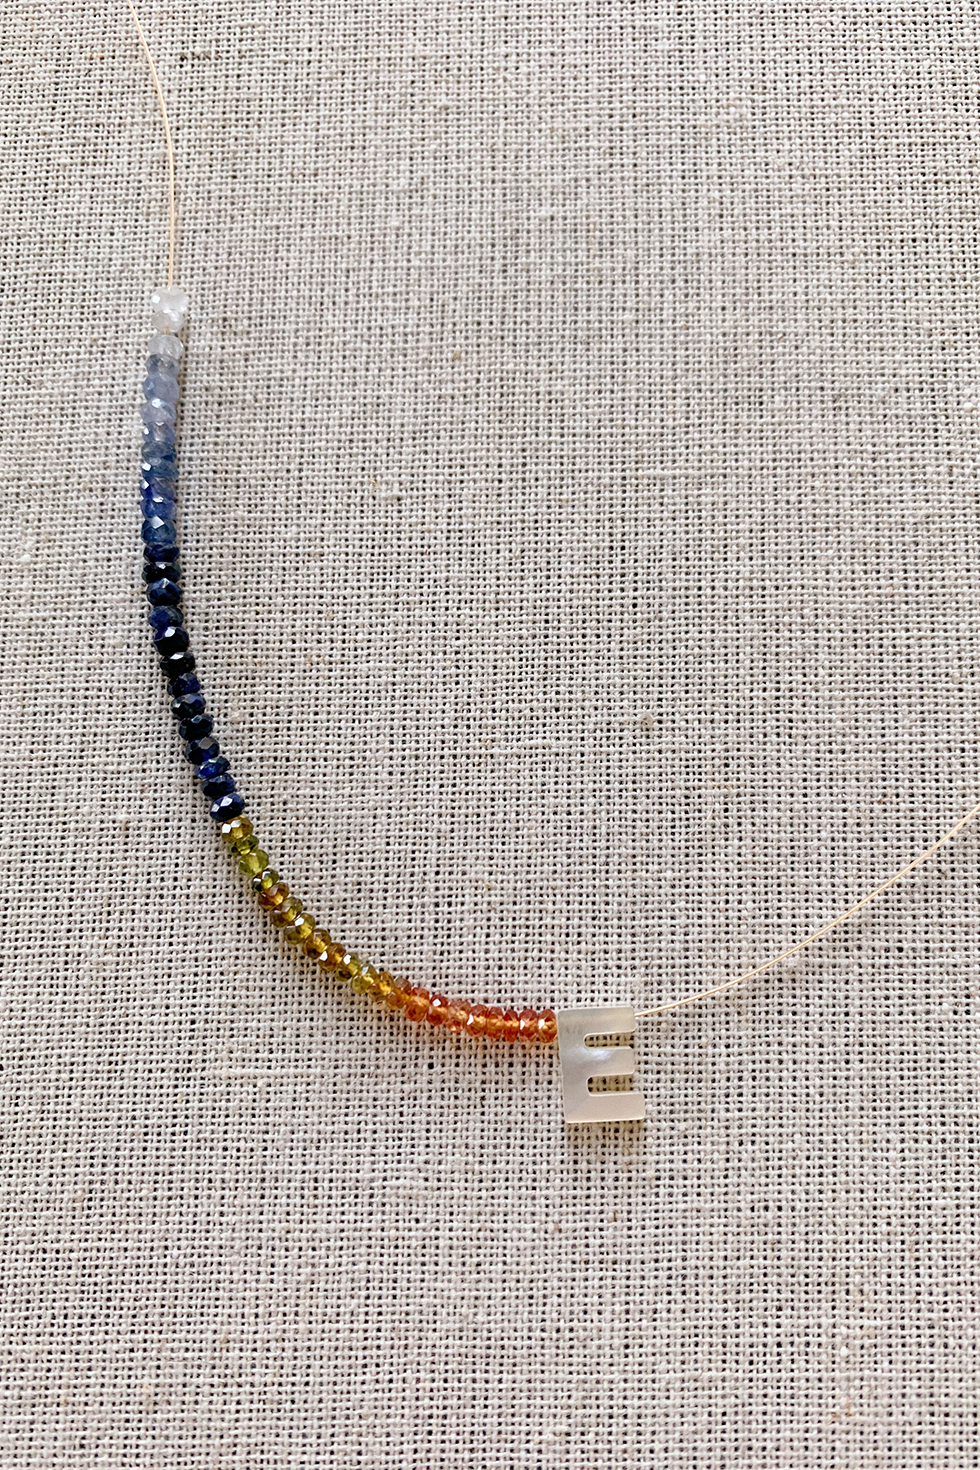
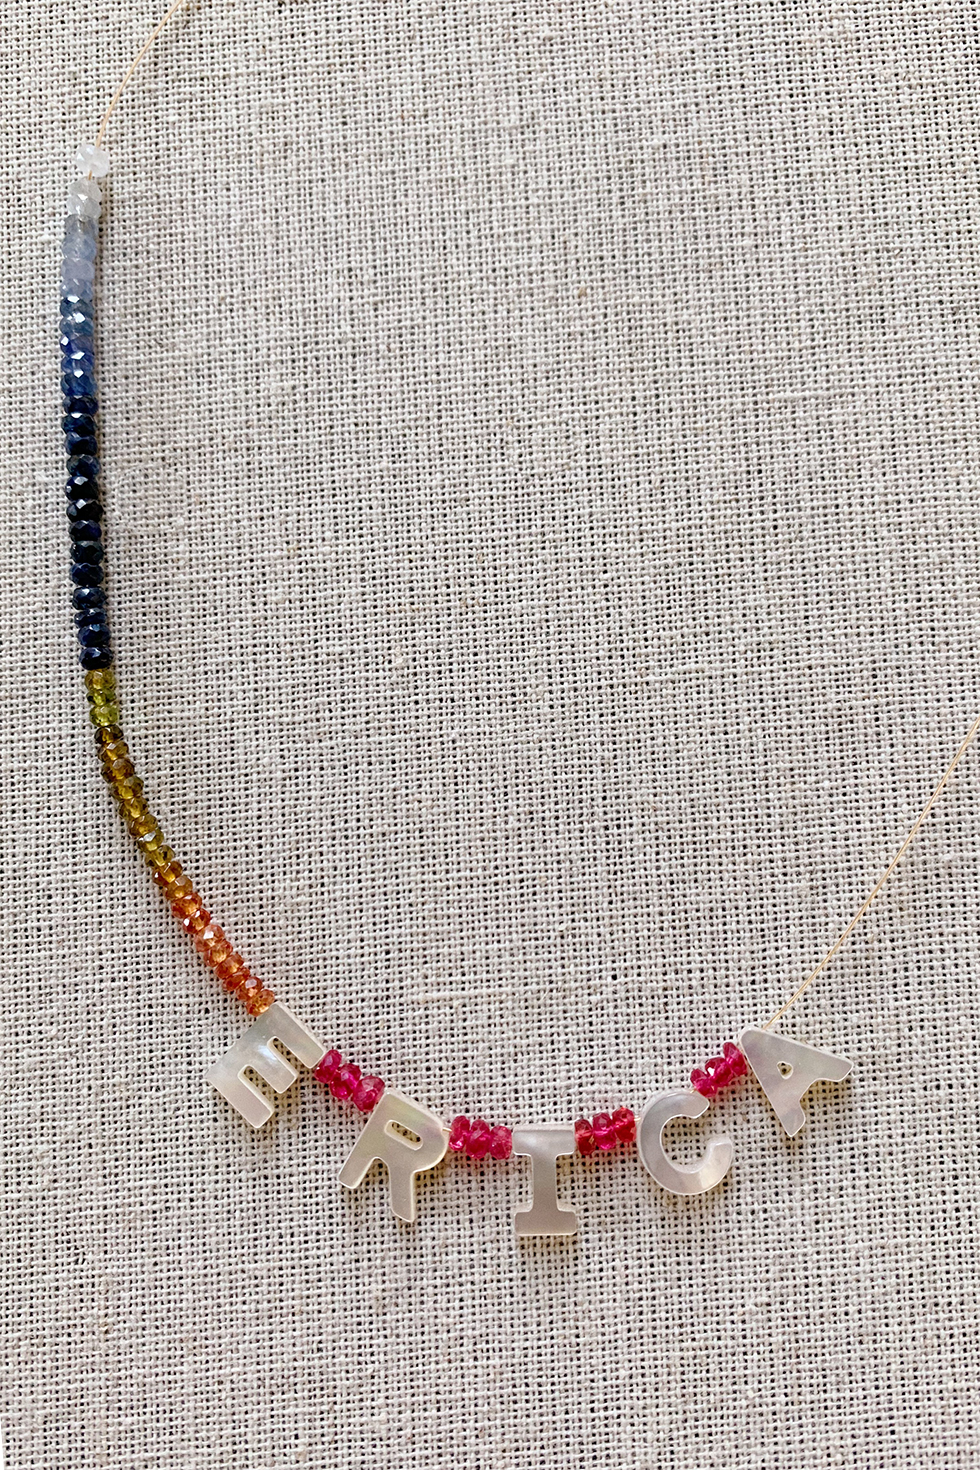
The reason why I don't add the clasp on now is because I want me the letters to be centered on the necklace and I'm not sure yet how many beads I'll want to add on each side. By taping the end, it allows you to add beads to either end to balance the beads out. Start adding your beads. When you've figured out your pattern, you can start adding your mother of pearl letters.
Continue adding beads until it's even on both sides.
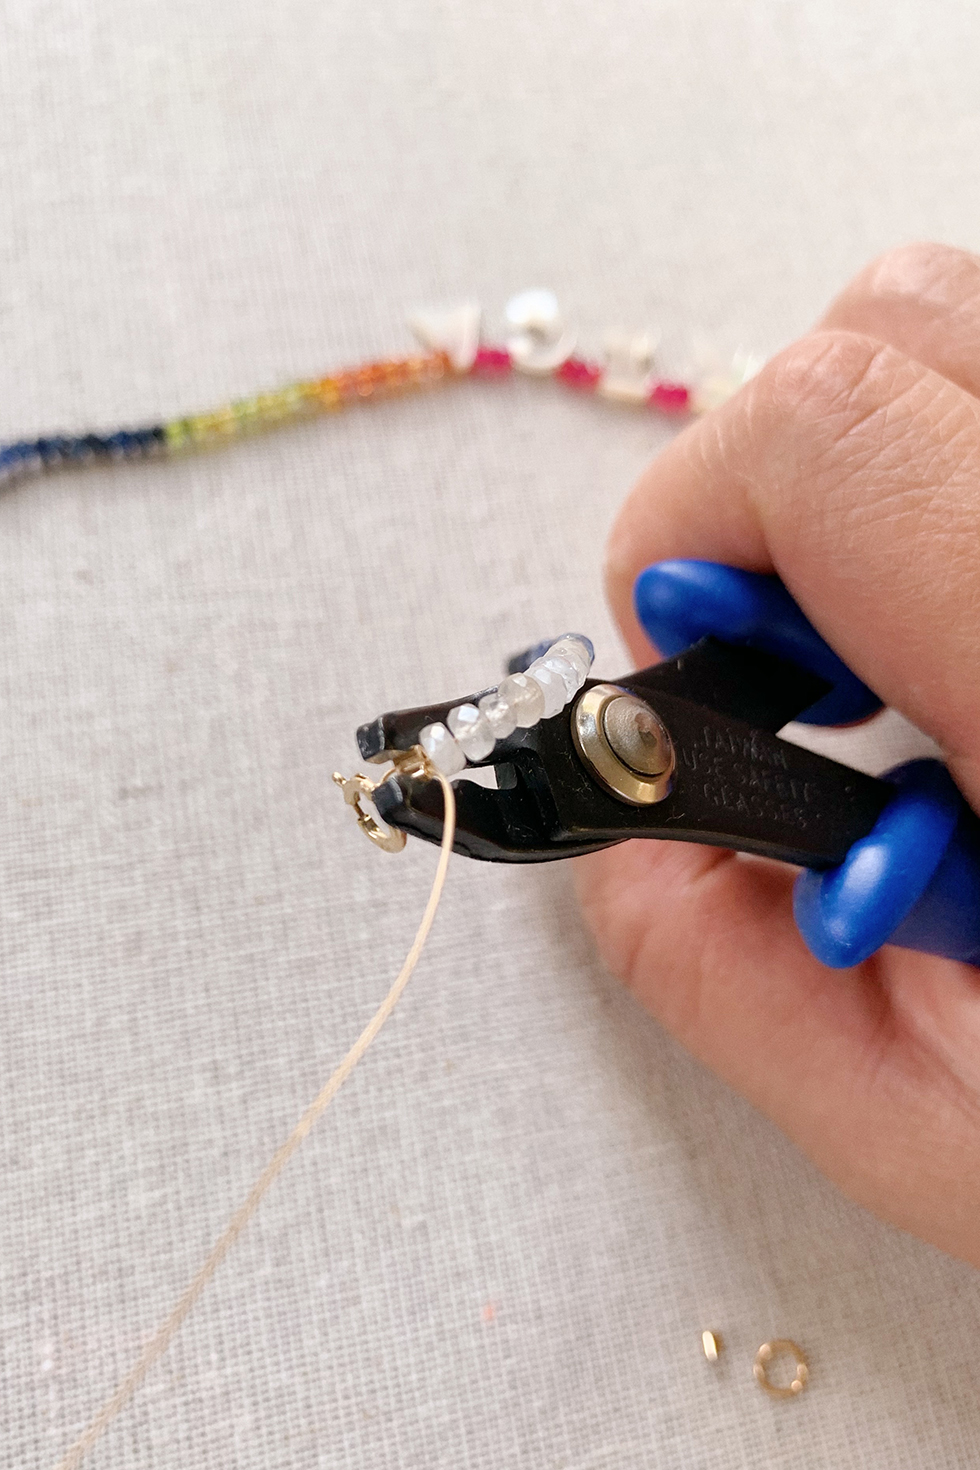
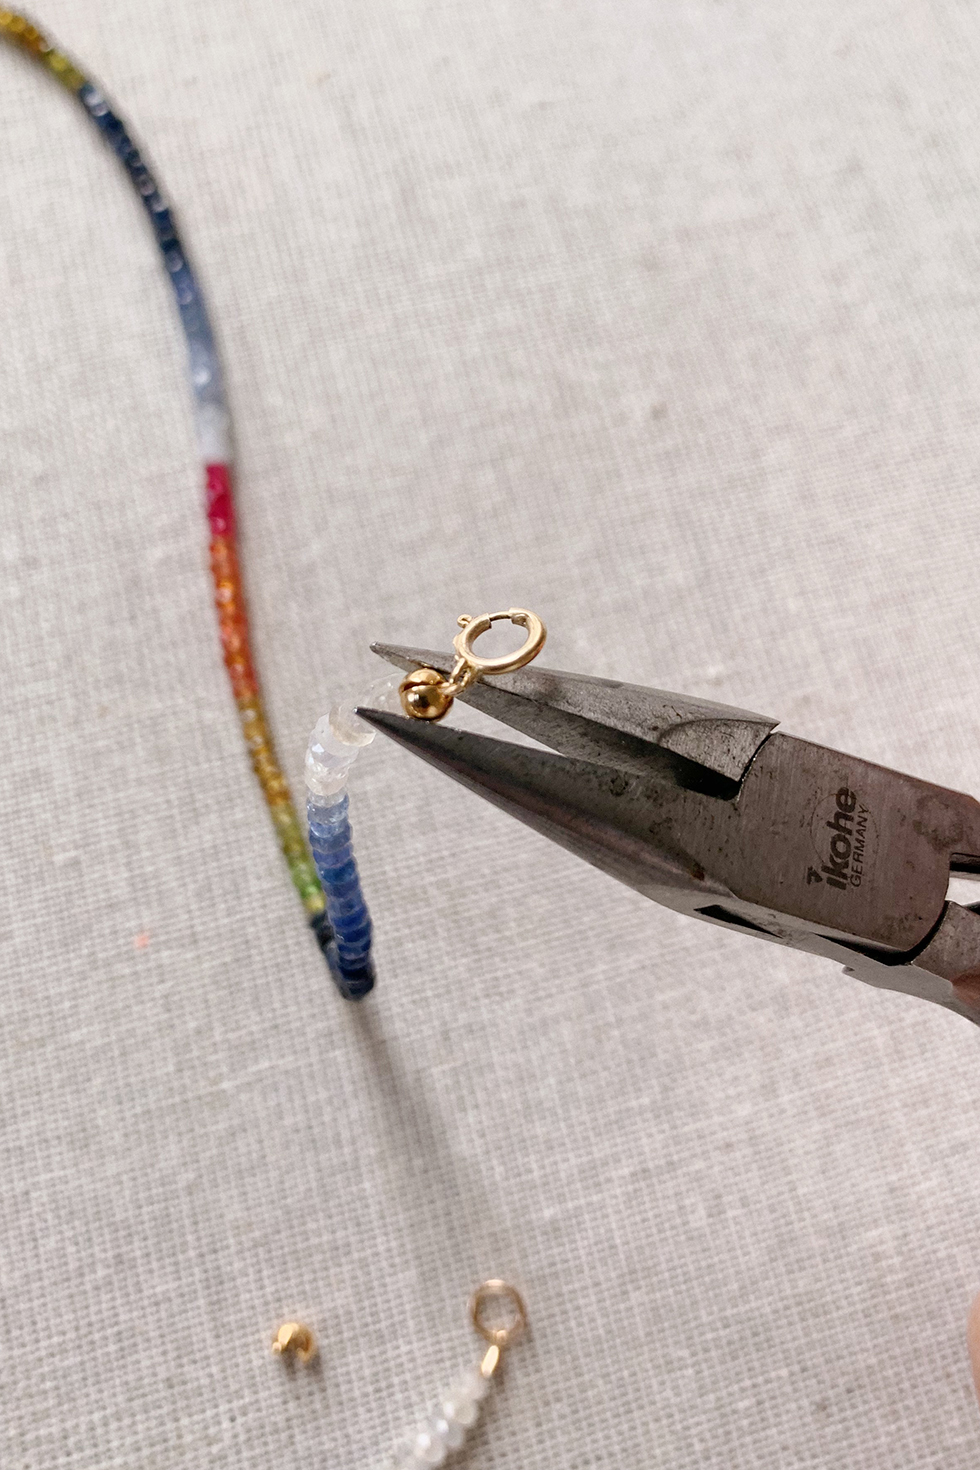
You can start adding beads on either side to achieve the desired length. When you're finished, you can start adding your clasps. You'll need a closed jump ring, a clasp and 2 crimp beads.
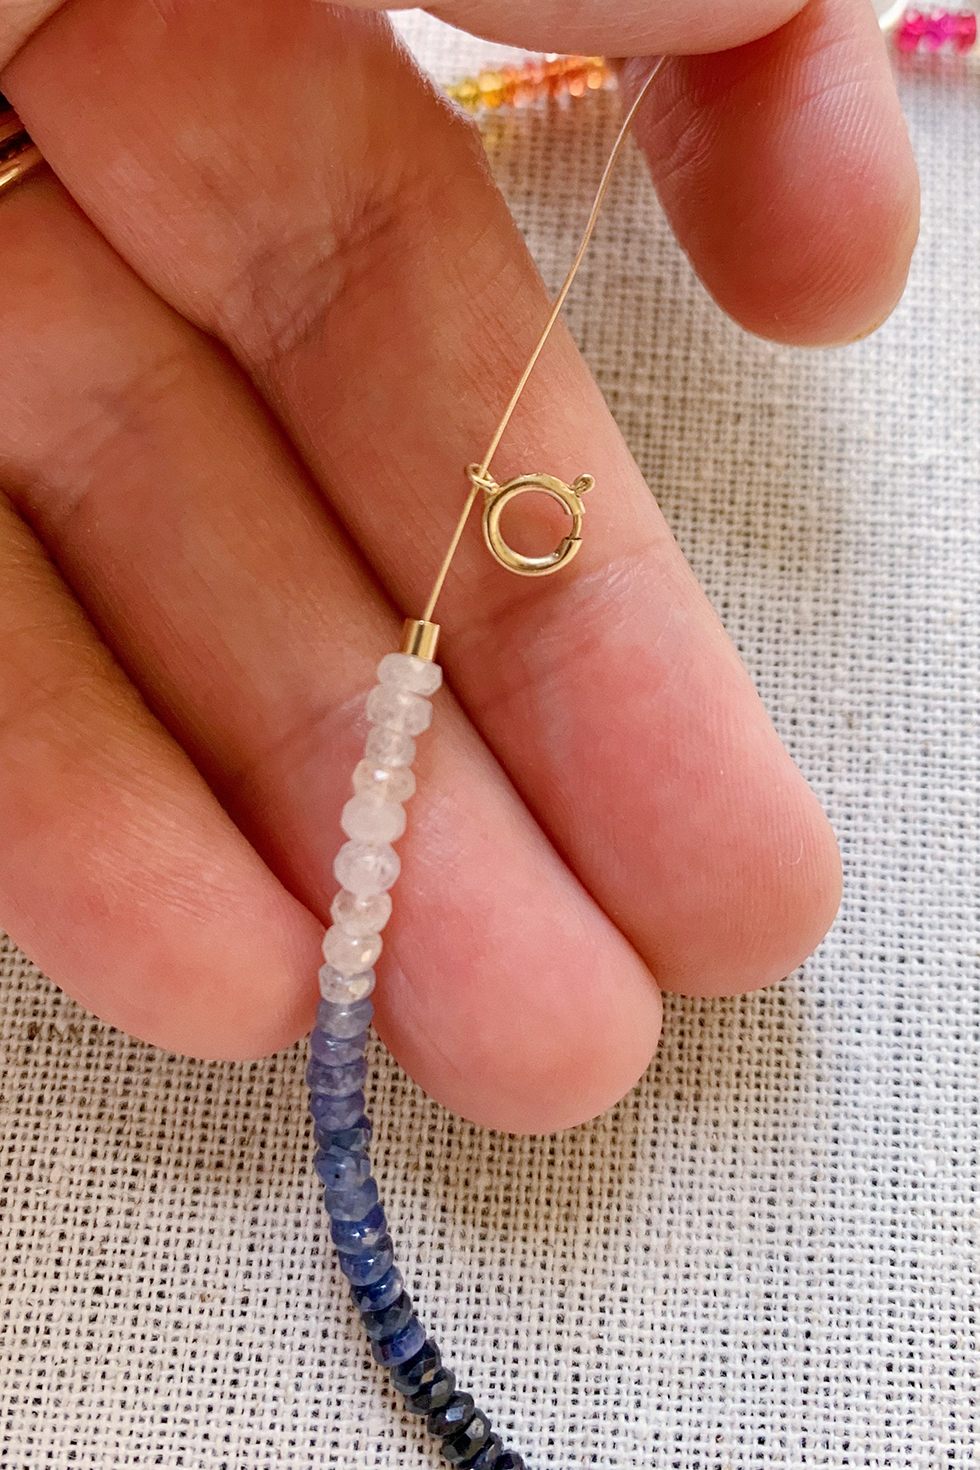
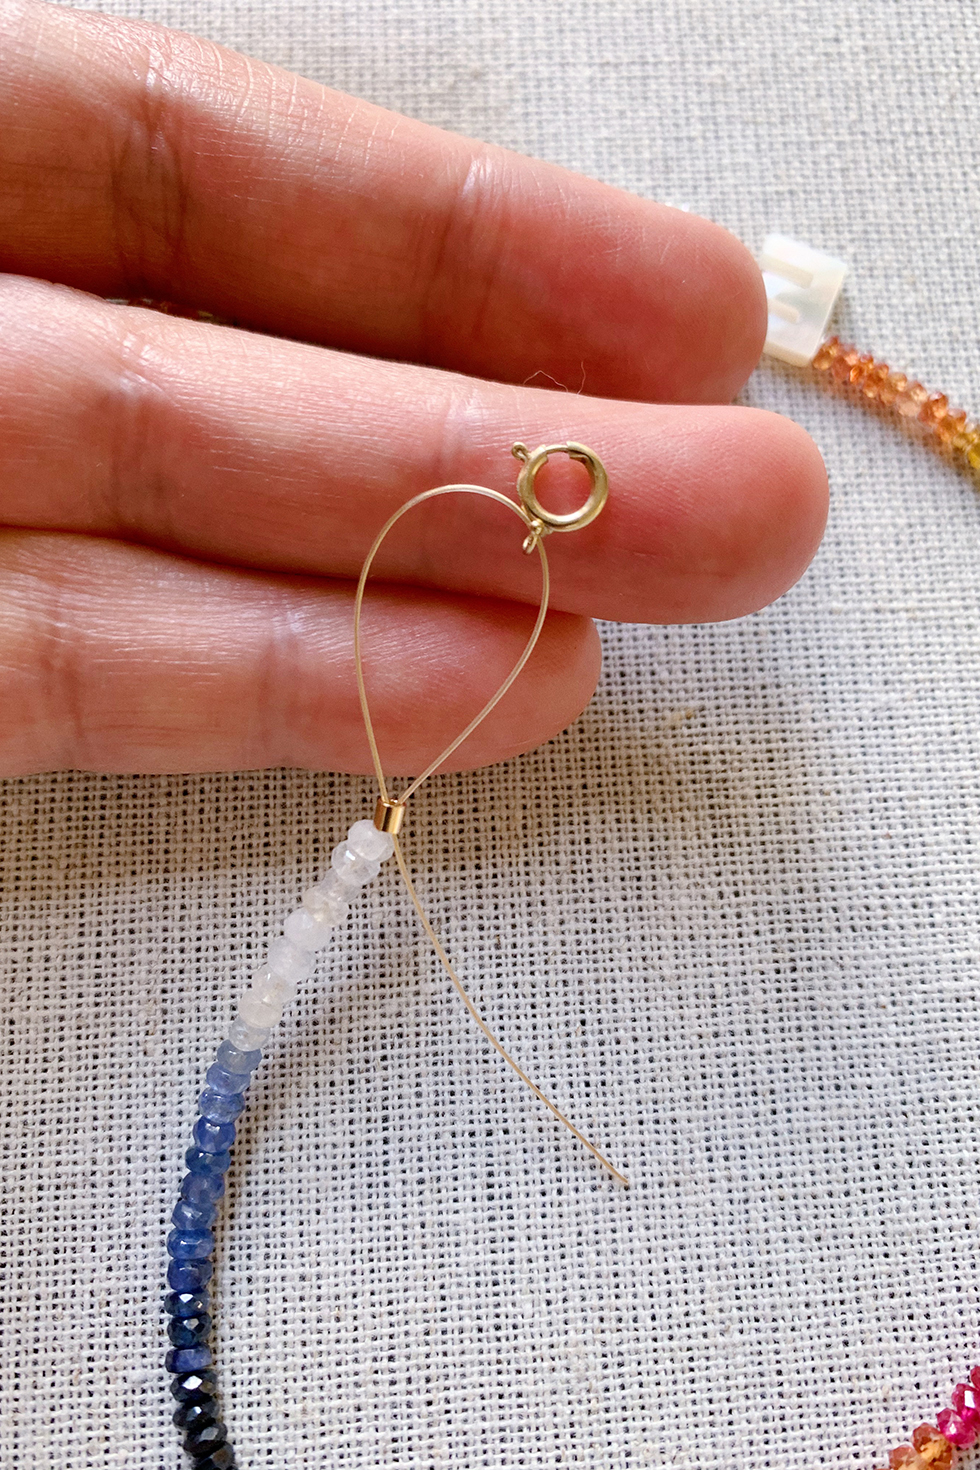
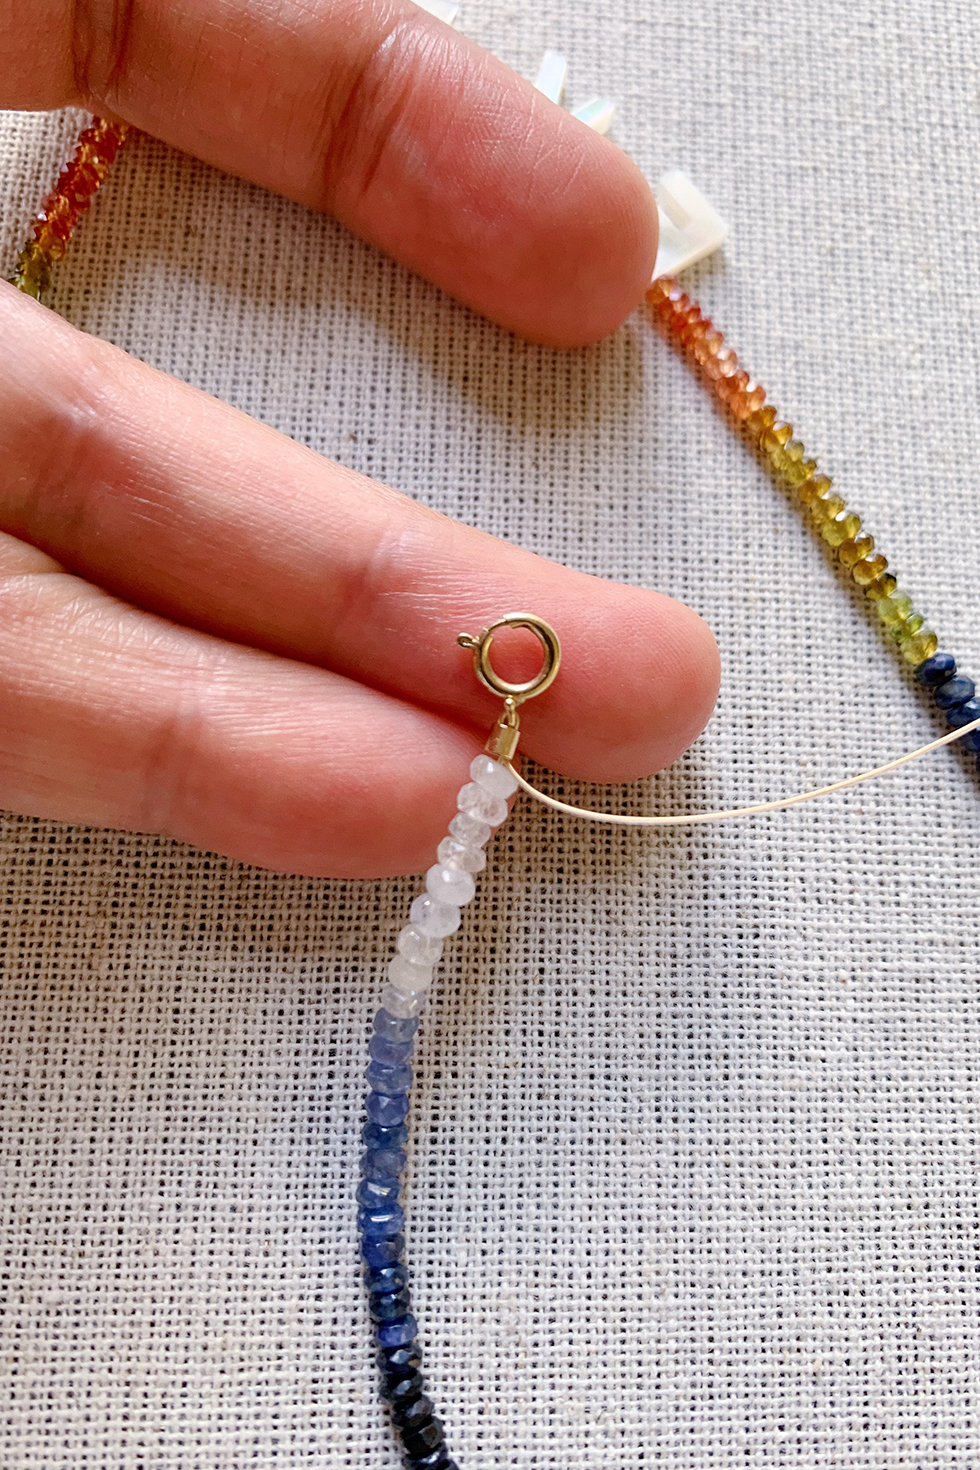
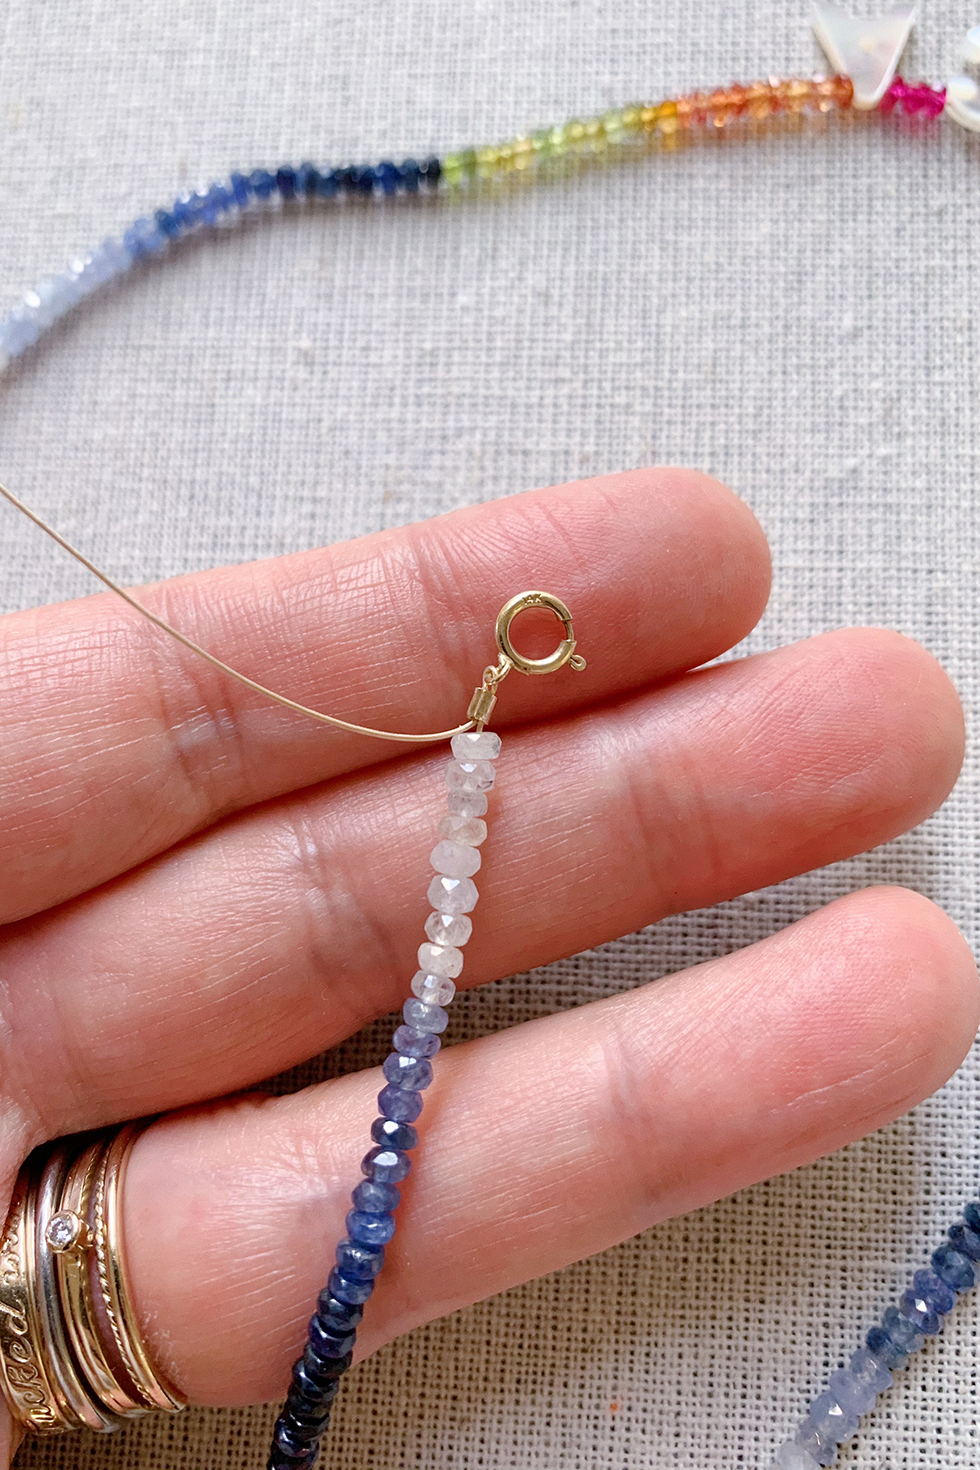
Thread a crimp tube on and then the clasp. Thread the stringing wire back through the crimp tube and pull to tighten, leaving a little tail
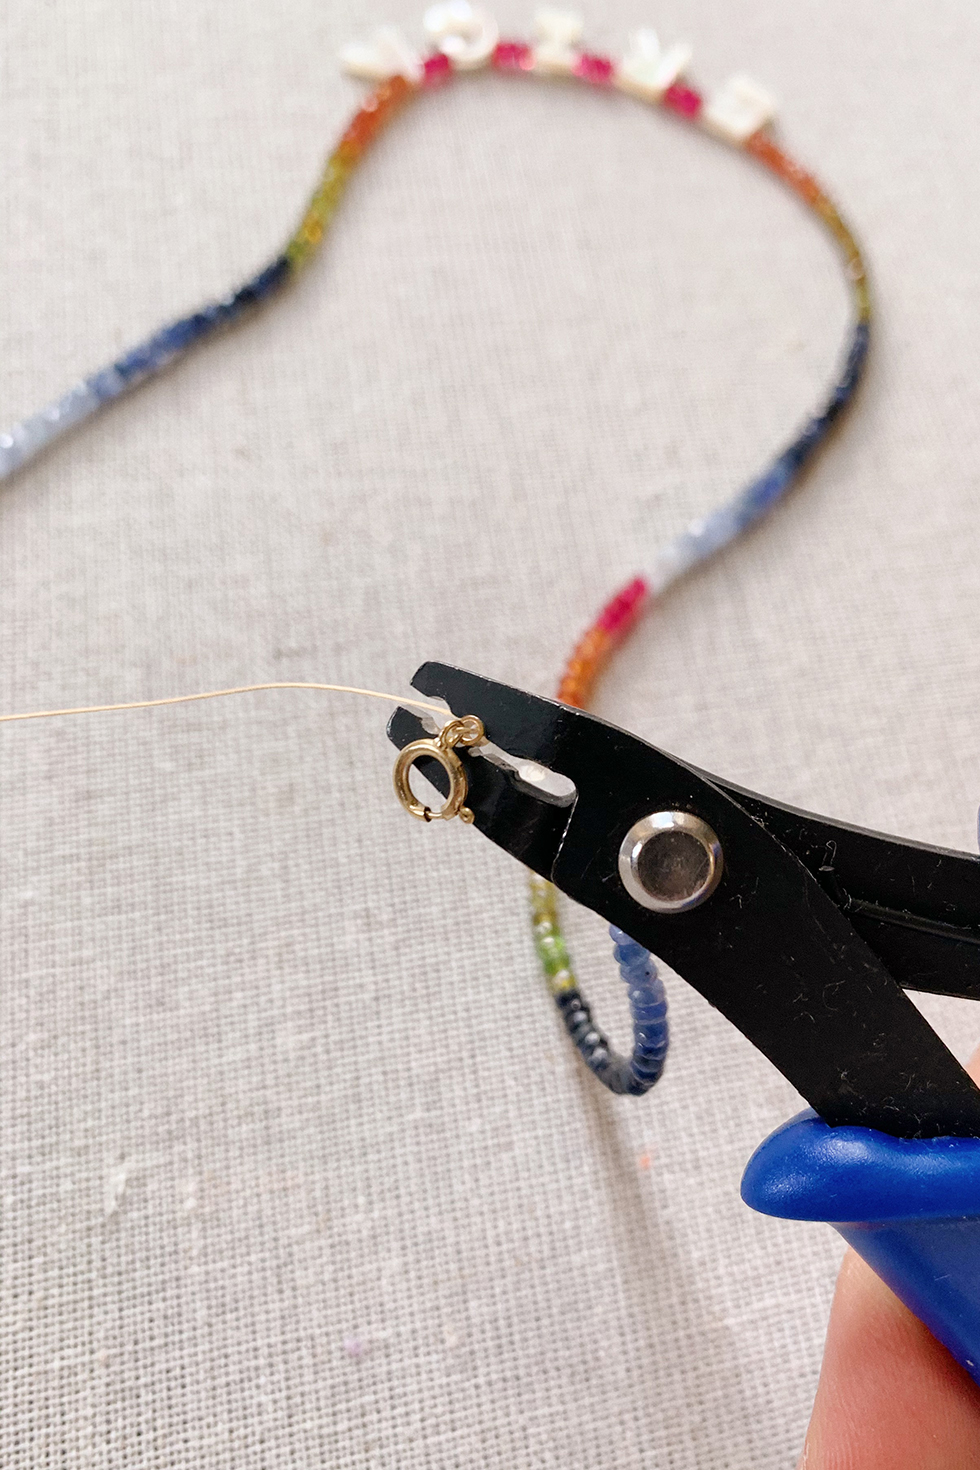
You can close your crimp tube with a pair of chain nose pliers but a crimping tool can be even more efficient and handy for closing crimp beads. They're about $8 and a good tool to have in your craft tool box! Position the crimp bead and thread in the second oval of the pliers (the one with the dip), and close the pliers around the bead. You'll see it curl.
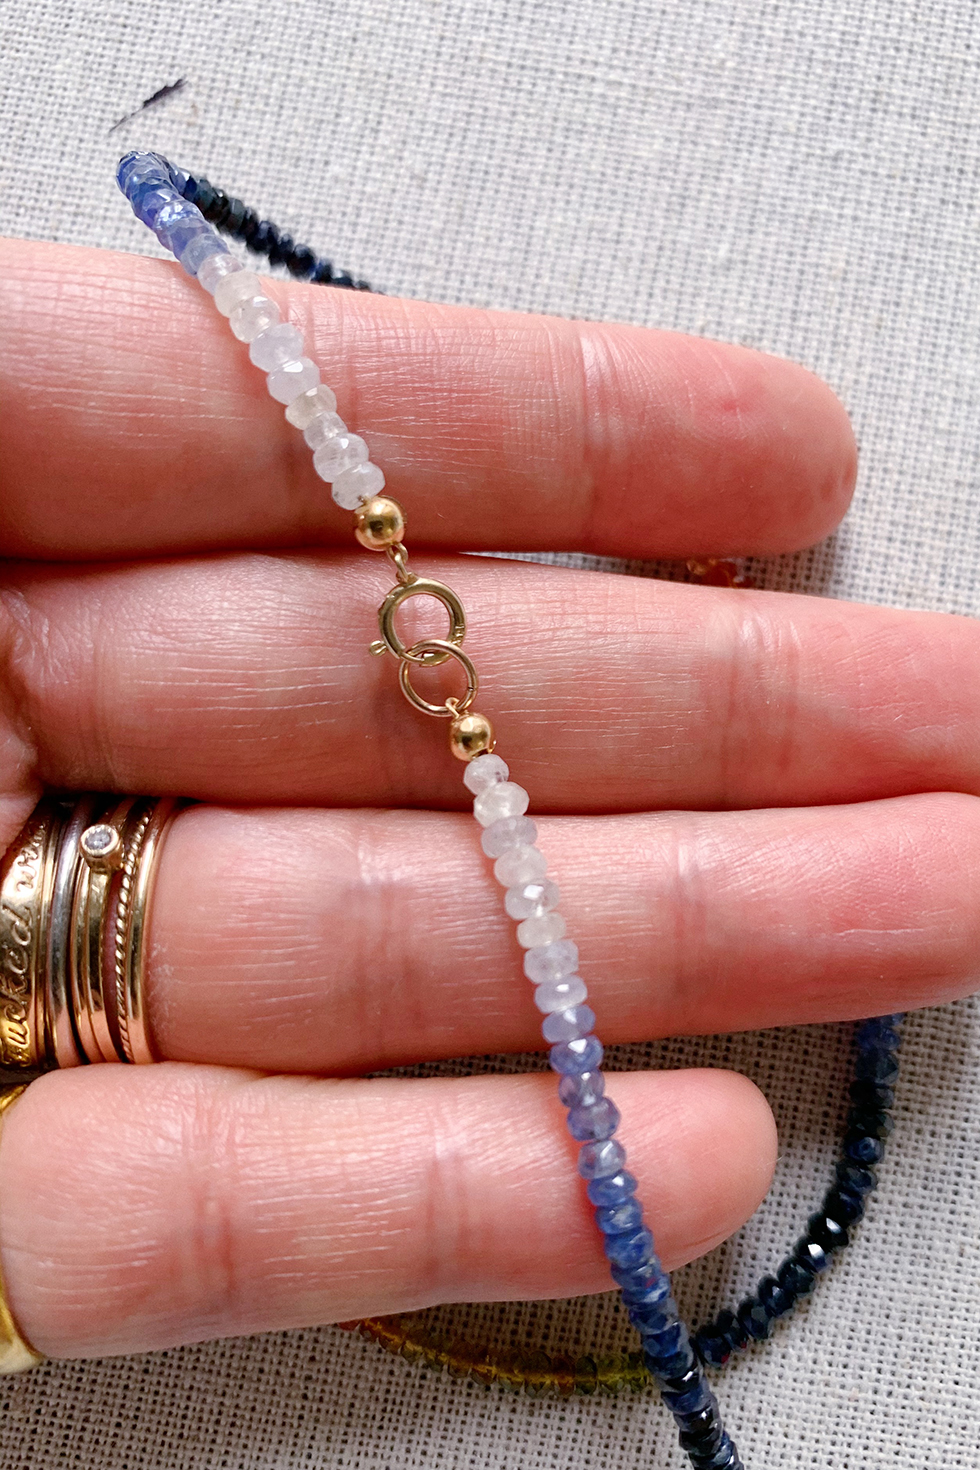
Next, turn the crimp bead to its side, position it in the first oval, and close the pliers around the crimp bead again so that you're compressing the curled bead into a rounded shape.
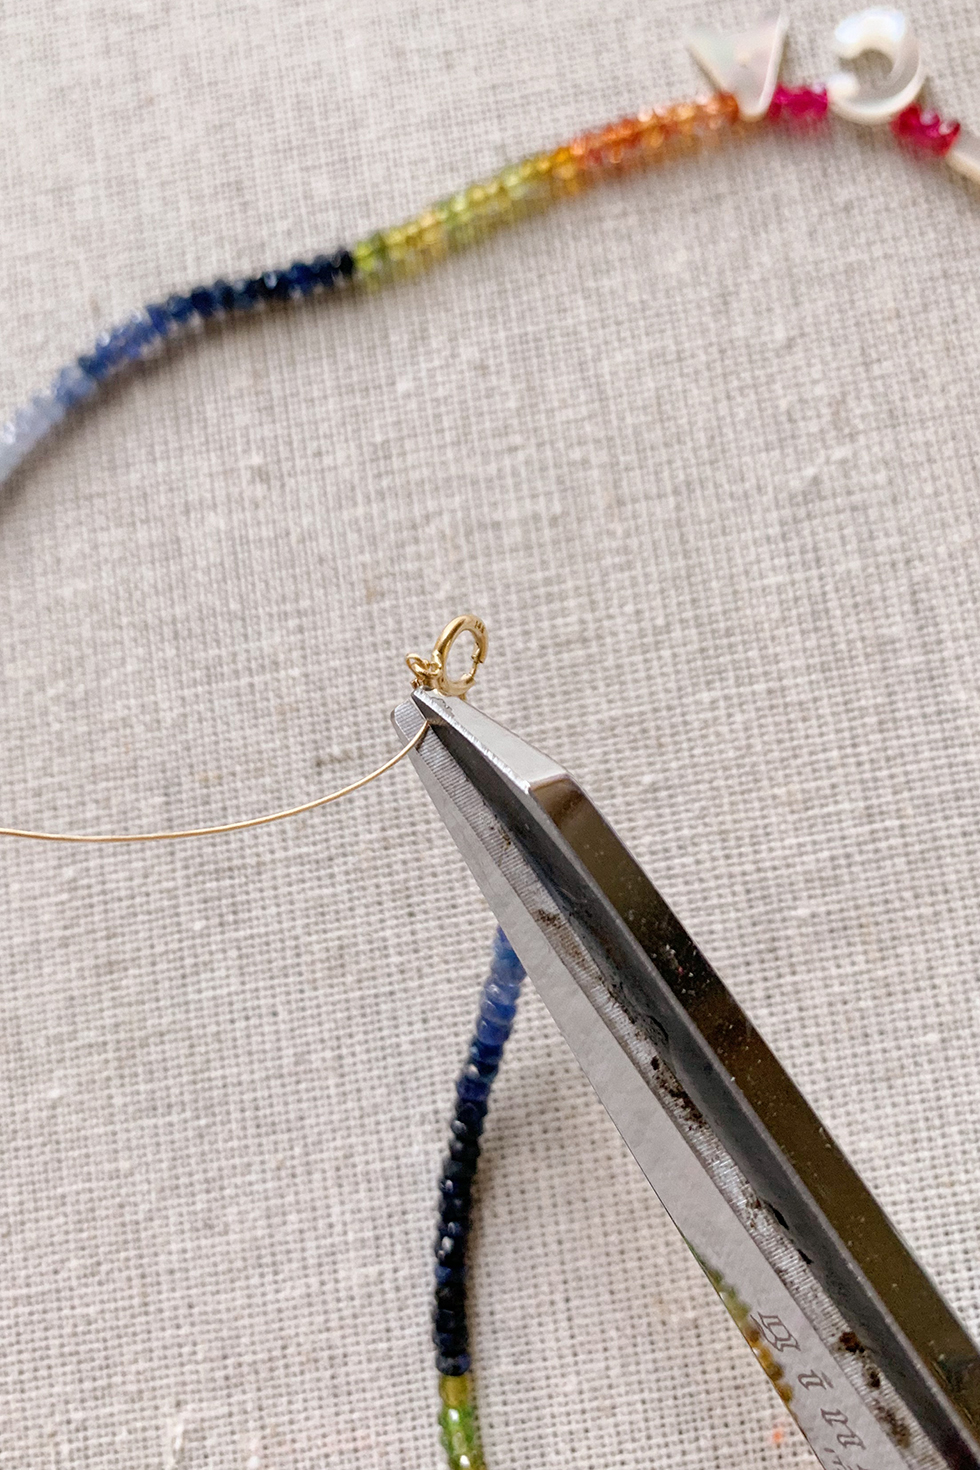
Give it a little tug to make sure the stringing wire is secure. Then trim the excess wire.
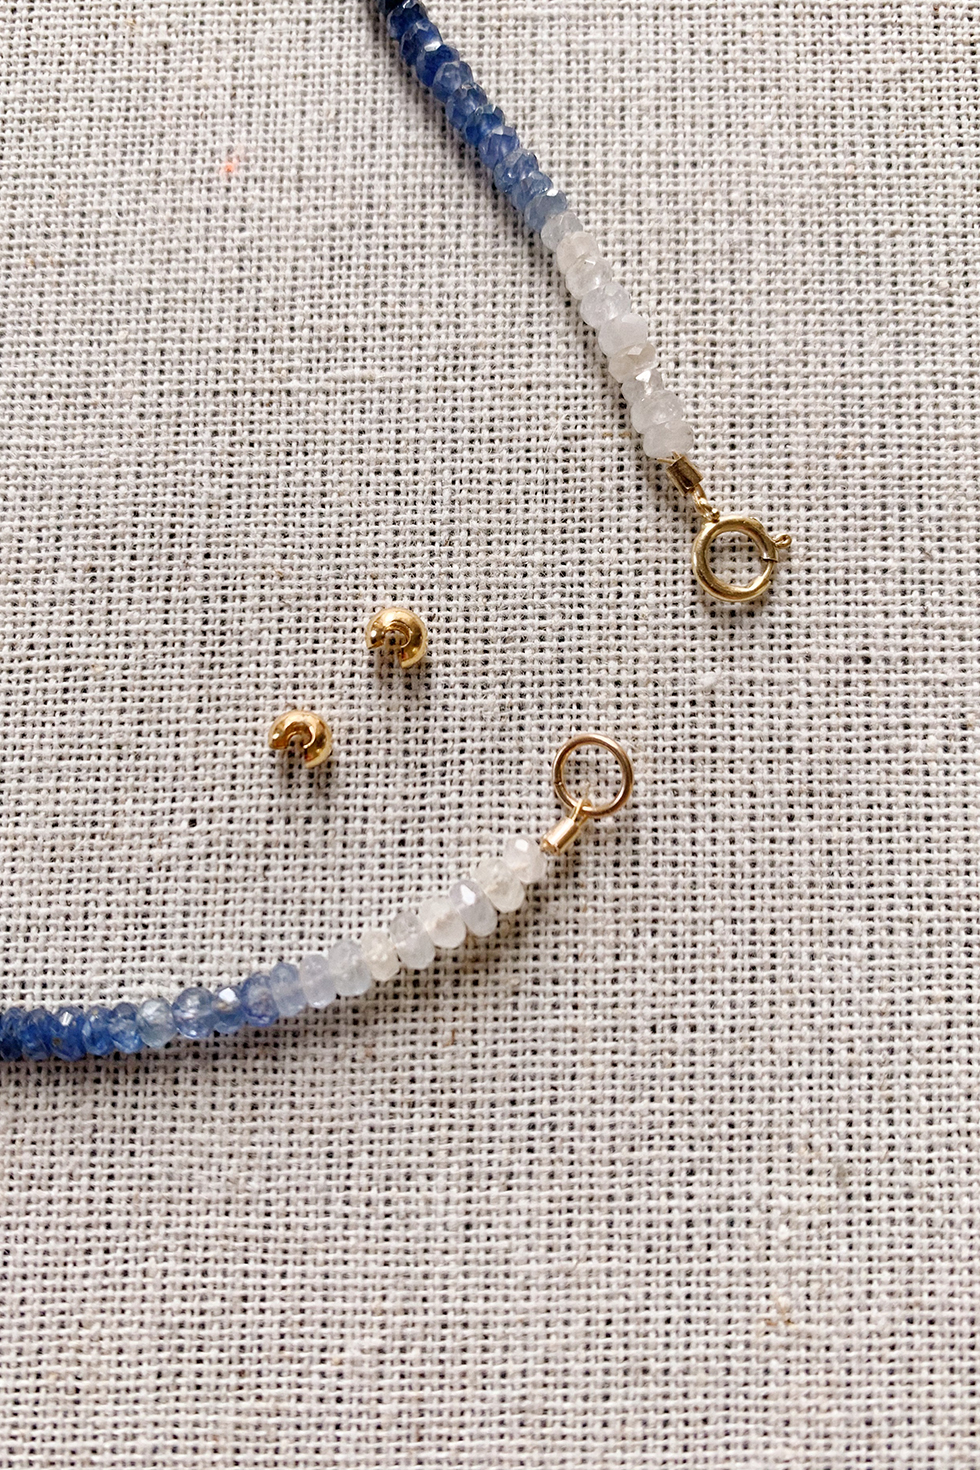
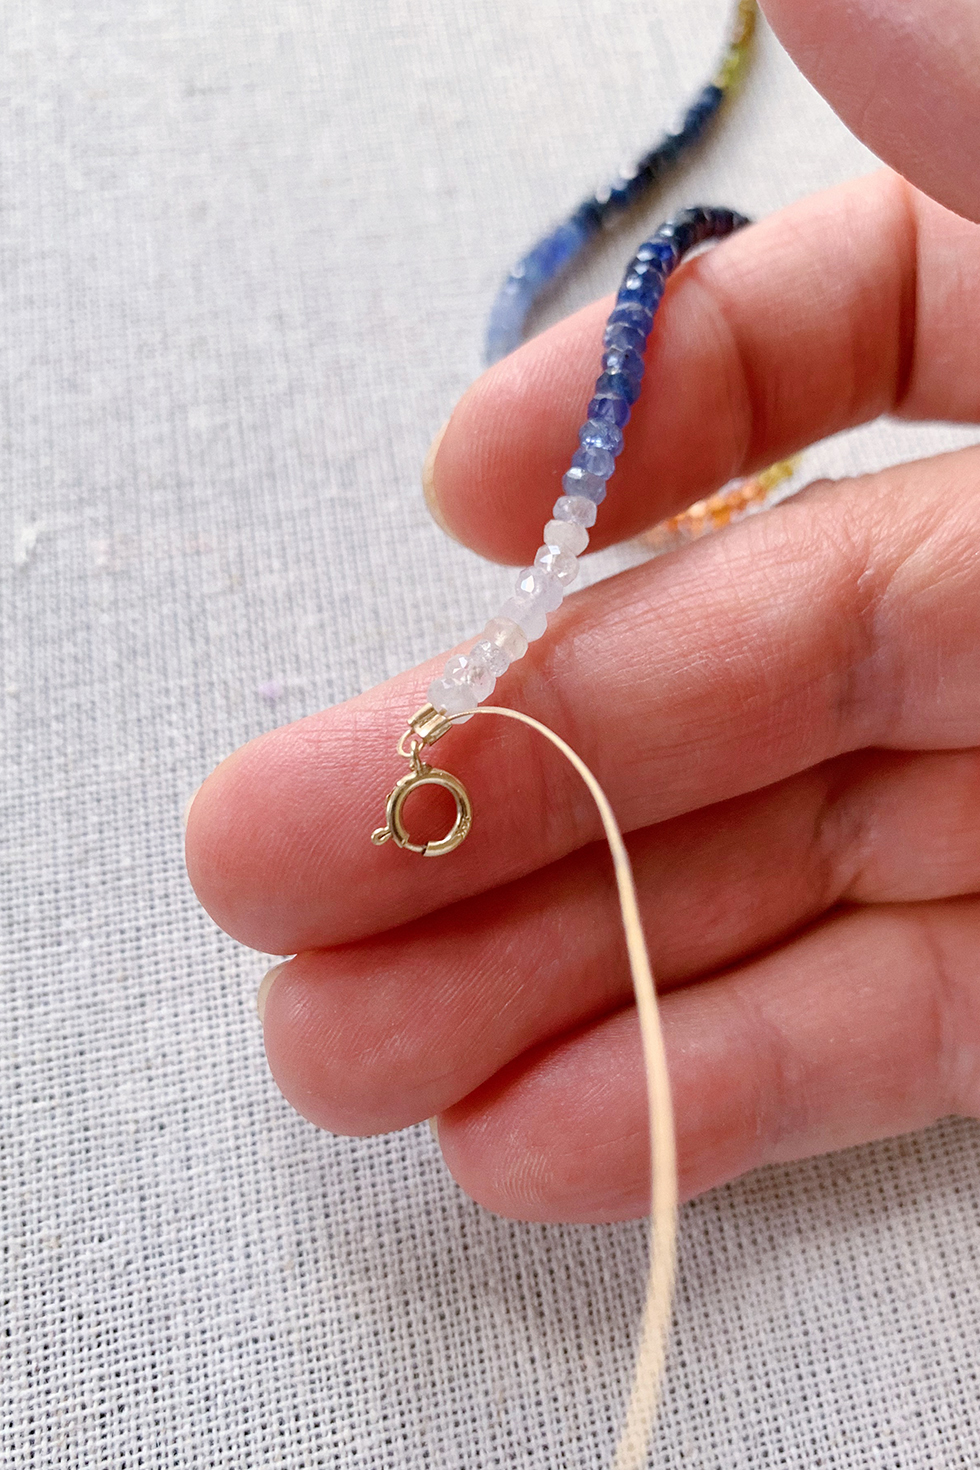
The edges of the crimp tube can be rather scratchy so I recommend using a crimp cover to conceal the crimp tube, making the clasp smooth and seamless. Slip the crimp cover over the crimp bead and use your pliers to squeeze it closed.
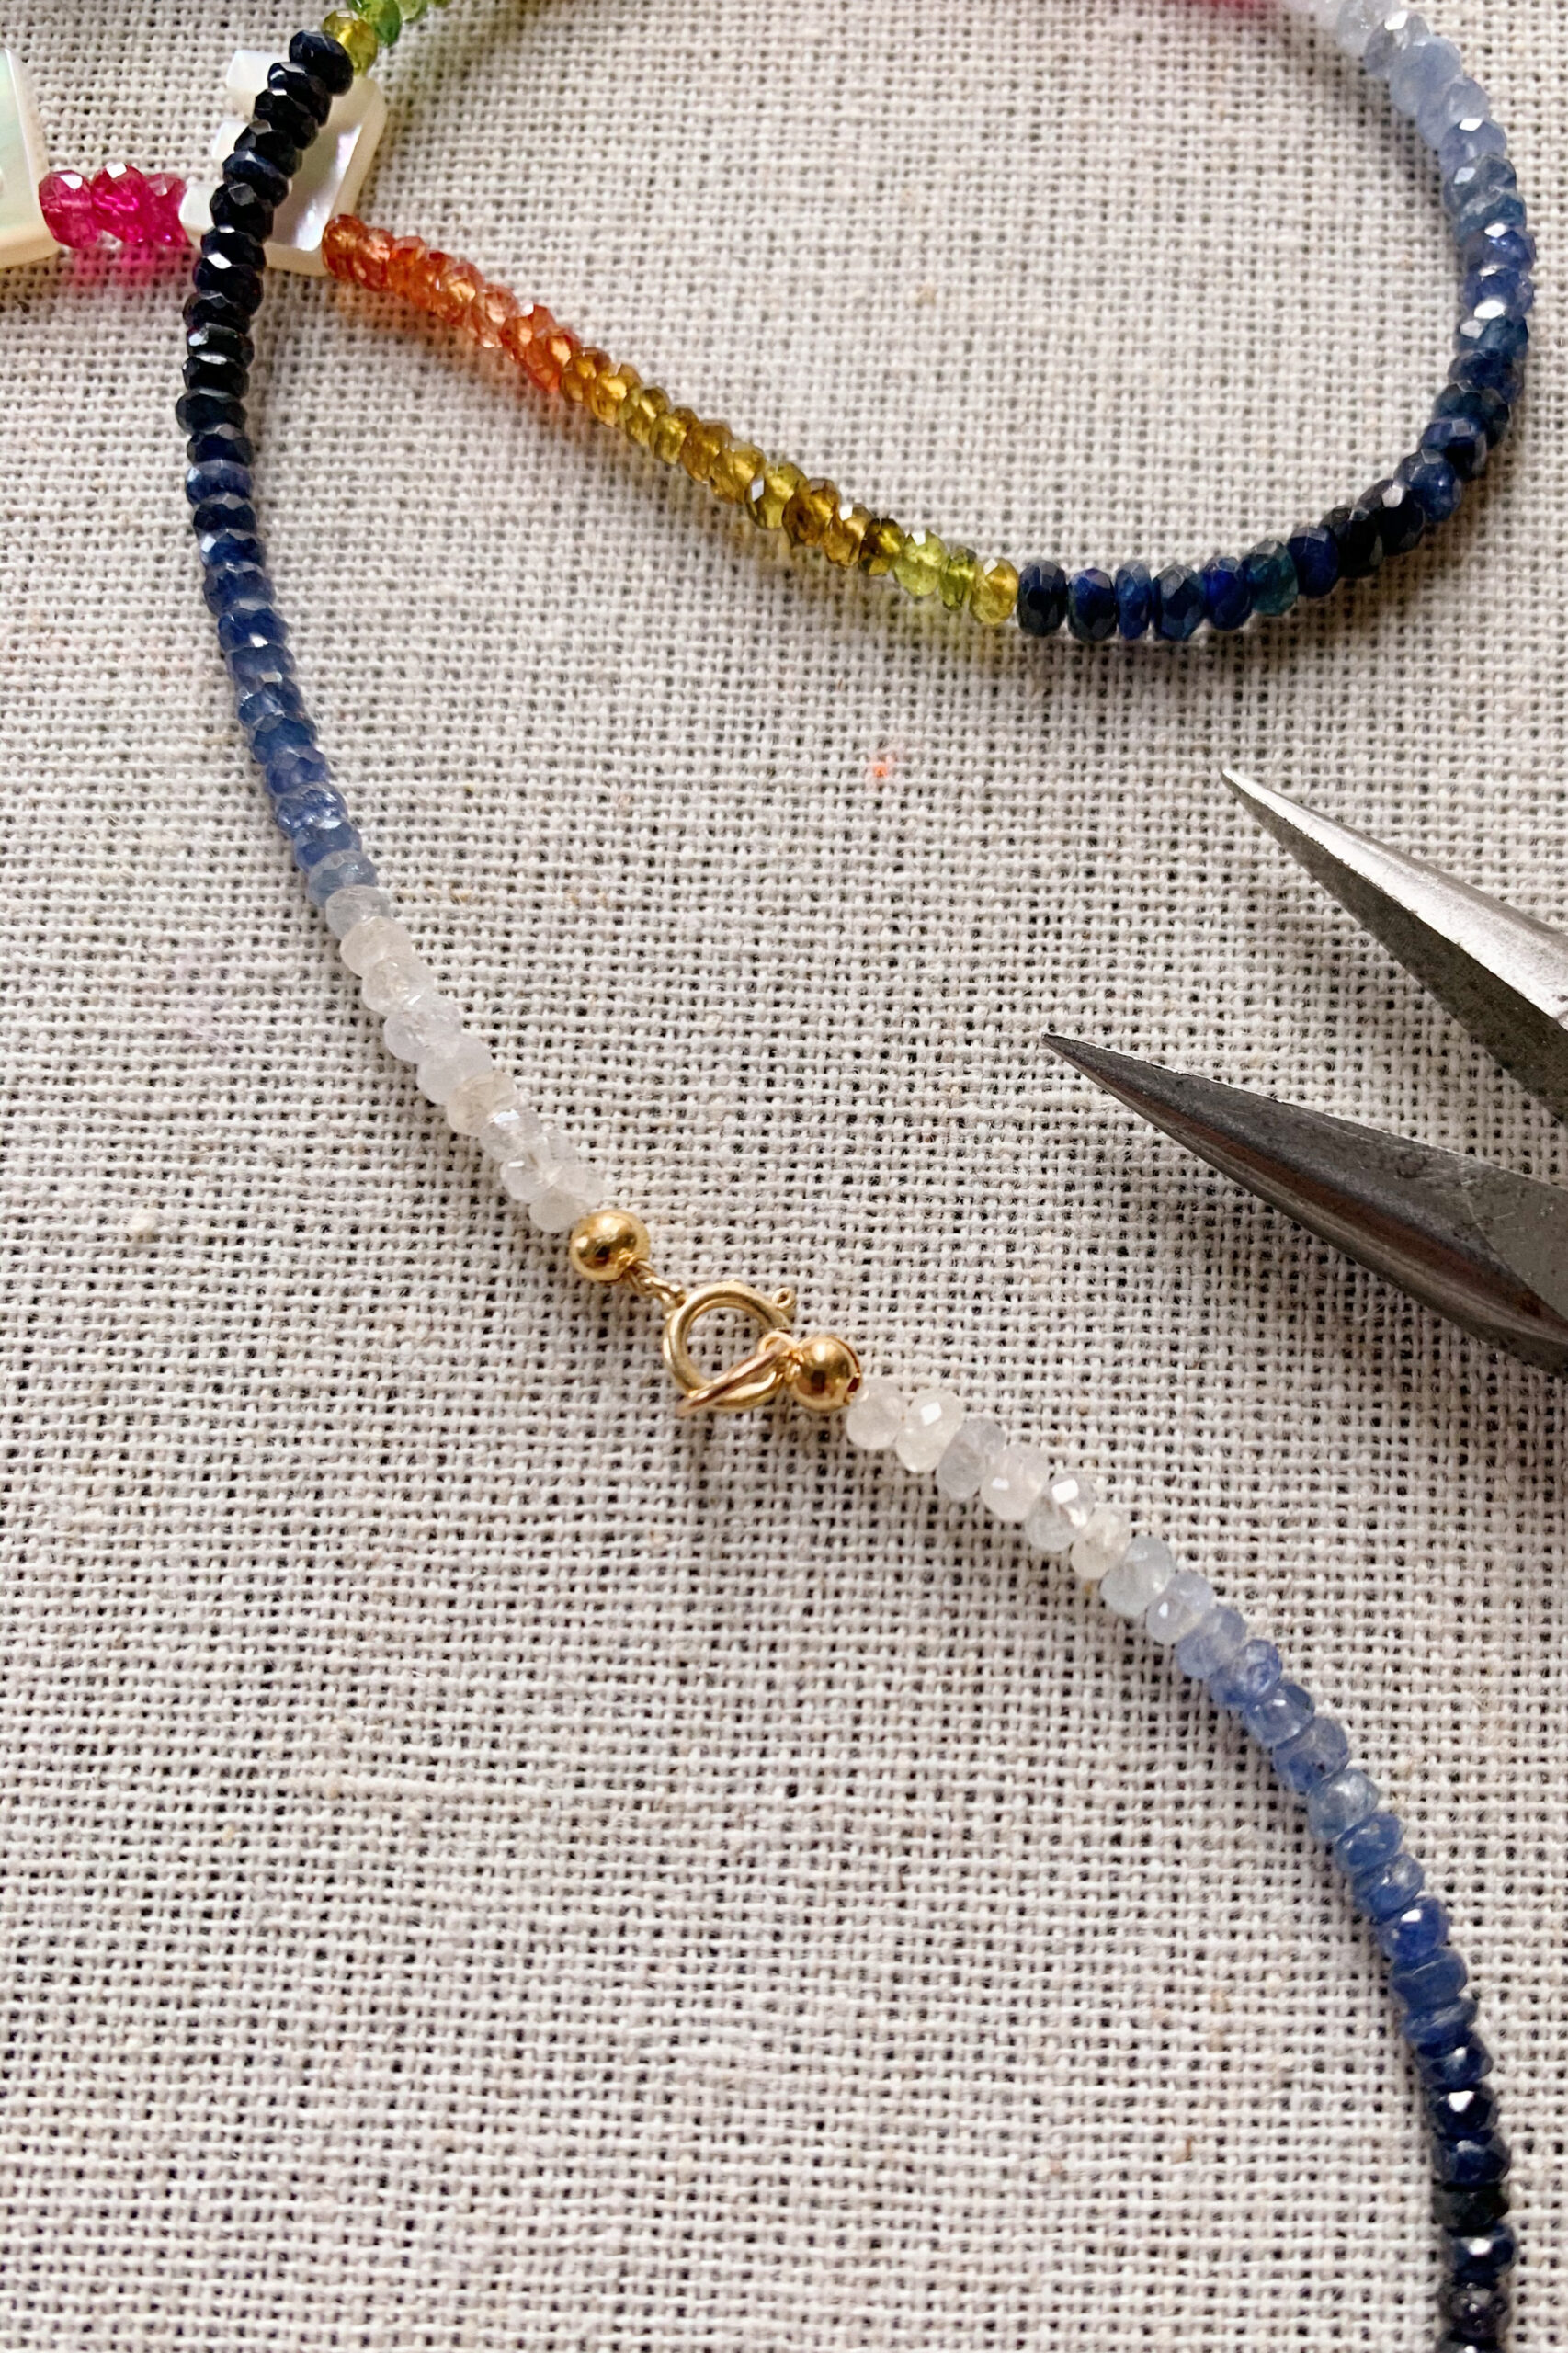
Repeat on the other side and you're done! The same method can be used for any beaded necklace.

images & tutorial by HonestlyWTF
Hoi,
I just want to have it!!Great idea!
I’m digging this.
Normally can I purchase the supplies in a bead store? I would prefer gold filled crimp rings and covers clasps, jump rings, lobster claw clasps etc. The glass rondells I like them to be in glass, all in multicolor to choose from…. if theres a specific place to purchase these accessories please let me know.
Thanks a mil!!! It sounds like fun to do this summer!!! Sandra
Earth treasures gems on Etsy
this looks so soo beautiful!
I would love to see more of your stuff
Wow loved this necklace, simple but cute!
Hi! Can you please share how to make the necklace with the large pearls? It is beautiful!
Hi. Can you show the clasp on the daisy Hamsa? I bought the stuff to make it and I’m not sure how to do the necklace.
Thank you!
I always love you DIYs! These are beautiful! Can you please share where your other pendants are from? I love the zodiac and the heart and evil eye! Thanks!
Thank you! The Zodiac is from Ariel Gordon, the evil eye is from Louison Rare & Fine (she sells them on her IG account), and the heart is vintage from Metier
I also really like this kind of mix between pearls and chain: https://northernlegacy.dk/products/nl-kattegat-pearl-halskaede-guldtonet