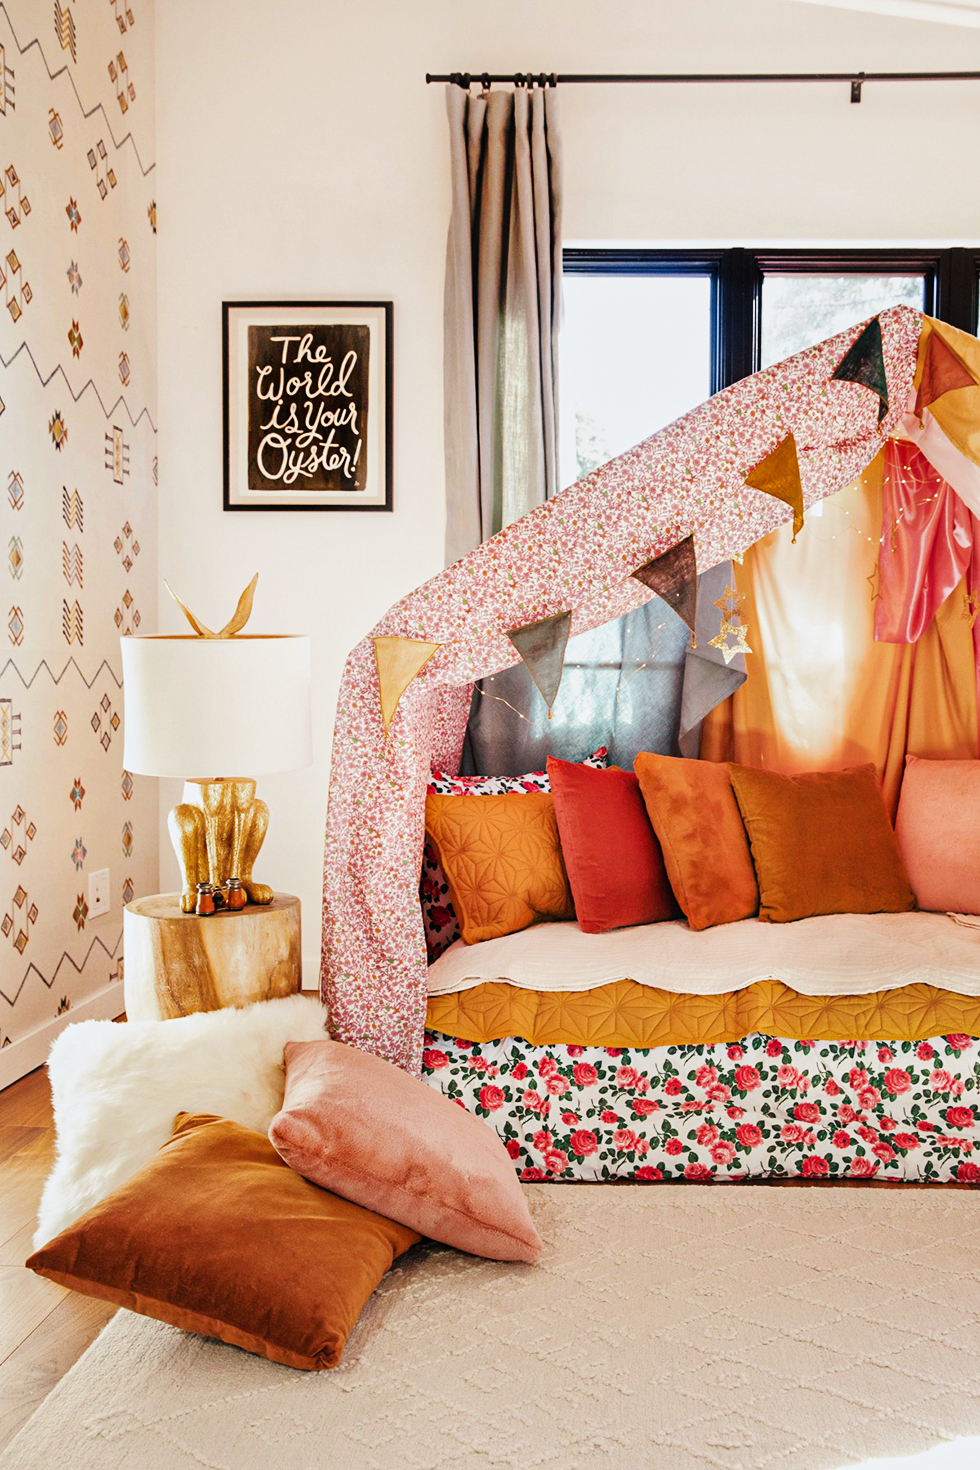
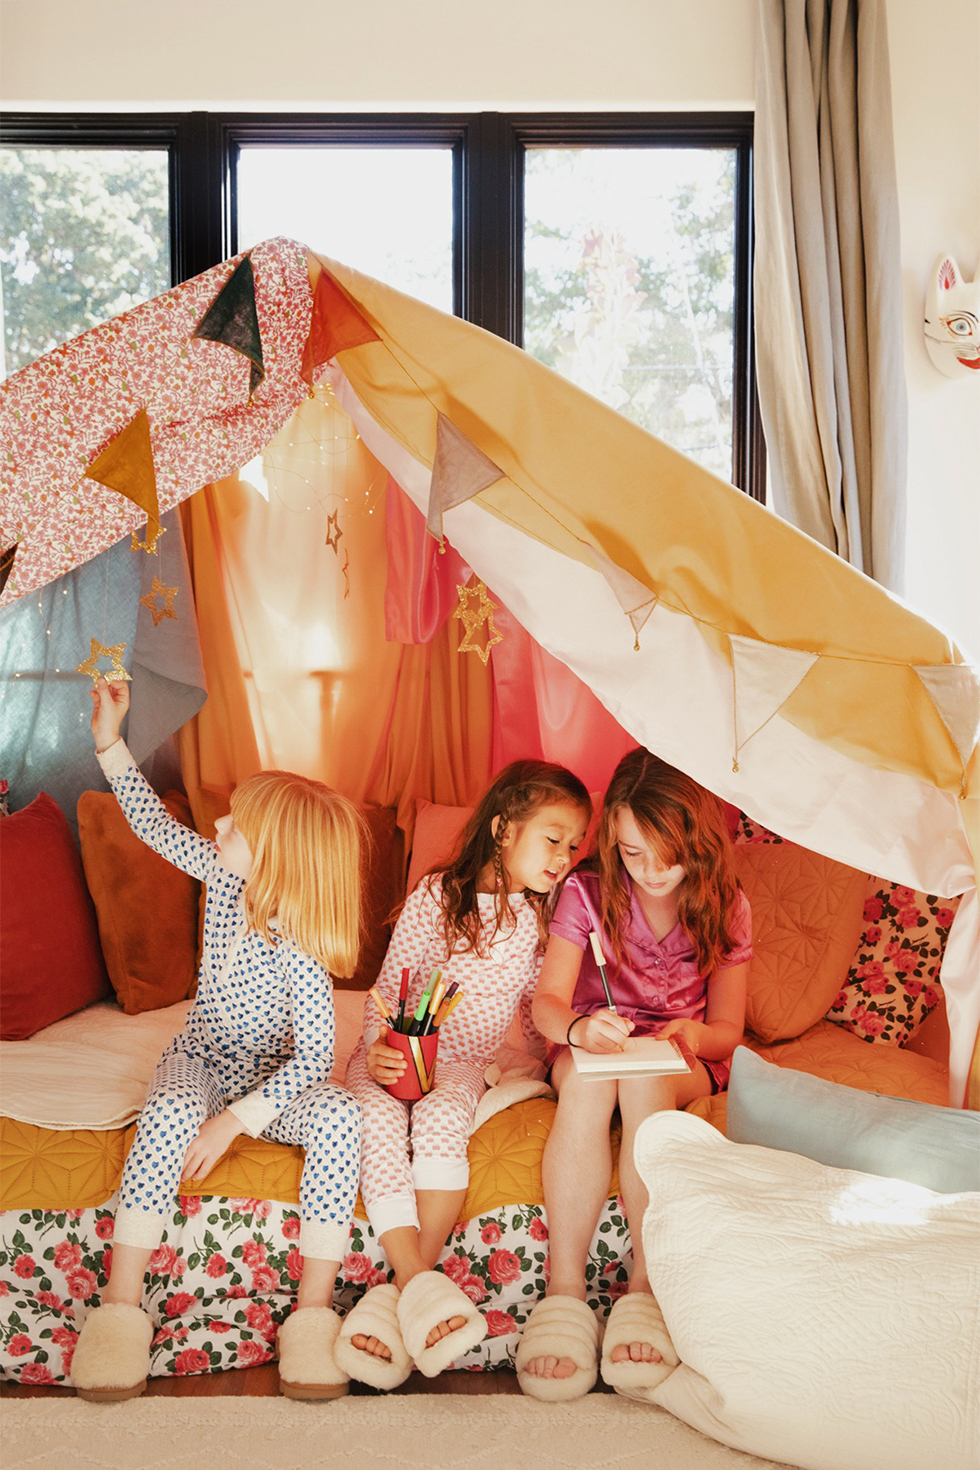
One of the most joyful things in life is observing the magic unfold beneath a homemade fort. Whether it's made of old cardboard boxes or built around a makeshift frame with bed linens, cozy nooks & spaces are the perfect way to unleash a child's imagination. One of the most difficult things, however, is to reconcile the eventual need to break down the fort when all is said and done. So when Zappos asked me to create a cozy corner with their latest assortment of sheets, blankets, quilts and throws, I immediately knew I wanted to experiment with creating a rebuildable structure. PVC piping seemed to be the most practical material choice as it's lightweight and easy to disassemble and store. I designed the fort to fit around a twin-sized mattress to accommodate playdates and daytime naps. Needless to say, it was a an absolute hit.
You'll Need:
3/4" PVC piping (total length 68' minimum)
- a. (1) 77" length
- b. (9) 35" length
- c. (6) 41" length
- d. (4) 29" length
- e. (4) 12" length
- g. (8) 1.5" length
3/4" PVC joints (no threads)
- A. (8) 3-way elbow
- B. (2) 90° elbow
- C. (6) 45° elbow
- D. (8) T socket
PVC glue (optional)
bed sheets and quilts

Start by cutting all the PVC pipes to their appropriate sizes. Measure, mark and cut using the PVC cutter. I recommend labeling each end of the pipes to corresponding letters provided. It makes assembly much easier!


The lower case letters represent the PVC pipes and the upper case letters represent the joints. All sizes and quantities are above in the supply list.

The only complicated parts are the 4 points where you will have multiple joints connected. This is where the shape of the roof is formed using 3 joints at each corner, as well as those little 1.5" pieces (f). The 1.5" (f) pieces will allow you to connect the joints together. For example, if the diagram says CBA, it means pipe b will connect with A. Then use pipe f as a connector between A and B.


Then add another connector (pipe f) followed by C and then pipe d. If you would like to be able to dissemble the fort and reassemble it later, I recommend at least glueing these three joints together so you're not having to pack and unpack all those little pieces. Ultimately, the frame should look like this.


Lovely as always ❤️ Would you share info on that wonderful lamp?
Thank you!
Wow I love this! A great rainy day project 🙂 I recently made several daisy chain necklaces from your site, I might try this project next!
I love this idea for my daughter who is ready to move up from a toddler bed! Can you give me some info on the setup for the mattress? Is it just on the floor or on a box spring or frame?
Love this article! Im gonna try these tips
Thanks and keep sharing great content.
Alexandra
Hijab-style.com
*Priority comment*
You guys are amazing.
That’s all. Carry on.
Love all this personalized decor! Always love decorating bed
this is a great idea! btw, would you mind sharing where that amazing wallpaper is from?
Thanks! Mercedes
Oh my goodness this is so fun, I absolutely love it!! Thanks so much for sharing 🙂
this is cool i like it.
this is a good for the every one.
Fantastic idea! By the way, would you kindly share the source of that incredible wallpaper? Many thanks! – Mercedes
Great post!
I love it!! What a cute idea! Definitely save this for this fall room design ideas!
Creating a DIY bed fort is not just a playful activity but a profound metaphor for the sanctuary provided by LifeChoice Hospice, a part of MyLifeChoice. This engaging project can transform a simple space into a comforting haven, much like the care and support LifeChoice offers to individuals with serious illnesses, ensuring they live their remaining months in comfort, managing pain and symptoms. Building a bed fort involves imagination, care, and a sense of security, reflecting the hospice’s approach to care, where comfort, dignity, and personal preferences are prioritized. Just as a bed fort becomes a cherished place of safety and joy for children and families, LifeChoice Hospice creates a compassionate environment where patients and their families find peace and solace. This parallel between a creative, loving space and the compassionate, supportive care provided by LifeChoice underscores the importance of nurturing environments in enhancing the quality of life, whether through a simple, heartfelt project at home or through the comprehensive care for those facing life’s final journey
I recommend at least gluing these three joints together so you’re not having to pack and unpack all those little pieces. Ultimately, the frame should look like. Catio
I would add catio ideas to the list of projects to try out for all lovers of cats and DIY ideas out there! It’s just as fun as bed forts but a bit more sustainable.
Hi there! This is such a cute project! I’d love to make it, but I’m not clear on how many (f) pieces are needed. Can you clarify? Thank you!
From the directions, it looks like piece f is inside the joints for b and c; otherwise, there would be no other way to connect them. Hope that helps! 🙂
Hmm. I misread that. My apologies. Actually, it’s connecting joints between an and b as well as b and c? If we get around to doing this ourselves, I’ll share how many we ended up using. Sorry for the confusion.
My guess between 8 or 12. There are 4 spots in the diagram that have multiple joints connecting. I think we have 2-3 f pieces per the 4 multi connection spots.
Ok, I think I found it. There is (g) in the list of pieces, but no g in the diagram nor direction. I think g is supposed to be f because the list goes from e right to g and skips f.
g. (8) 1.5″ length
8 f pieces is my final answer. lol sorry!
The math ain’t mathing. These measurements don’t work. Don’t create the right angles for 45 or 90. Such a frustrating time and waste of money.