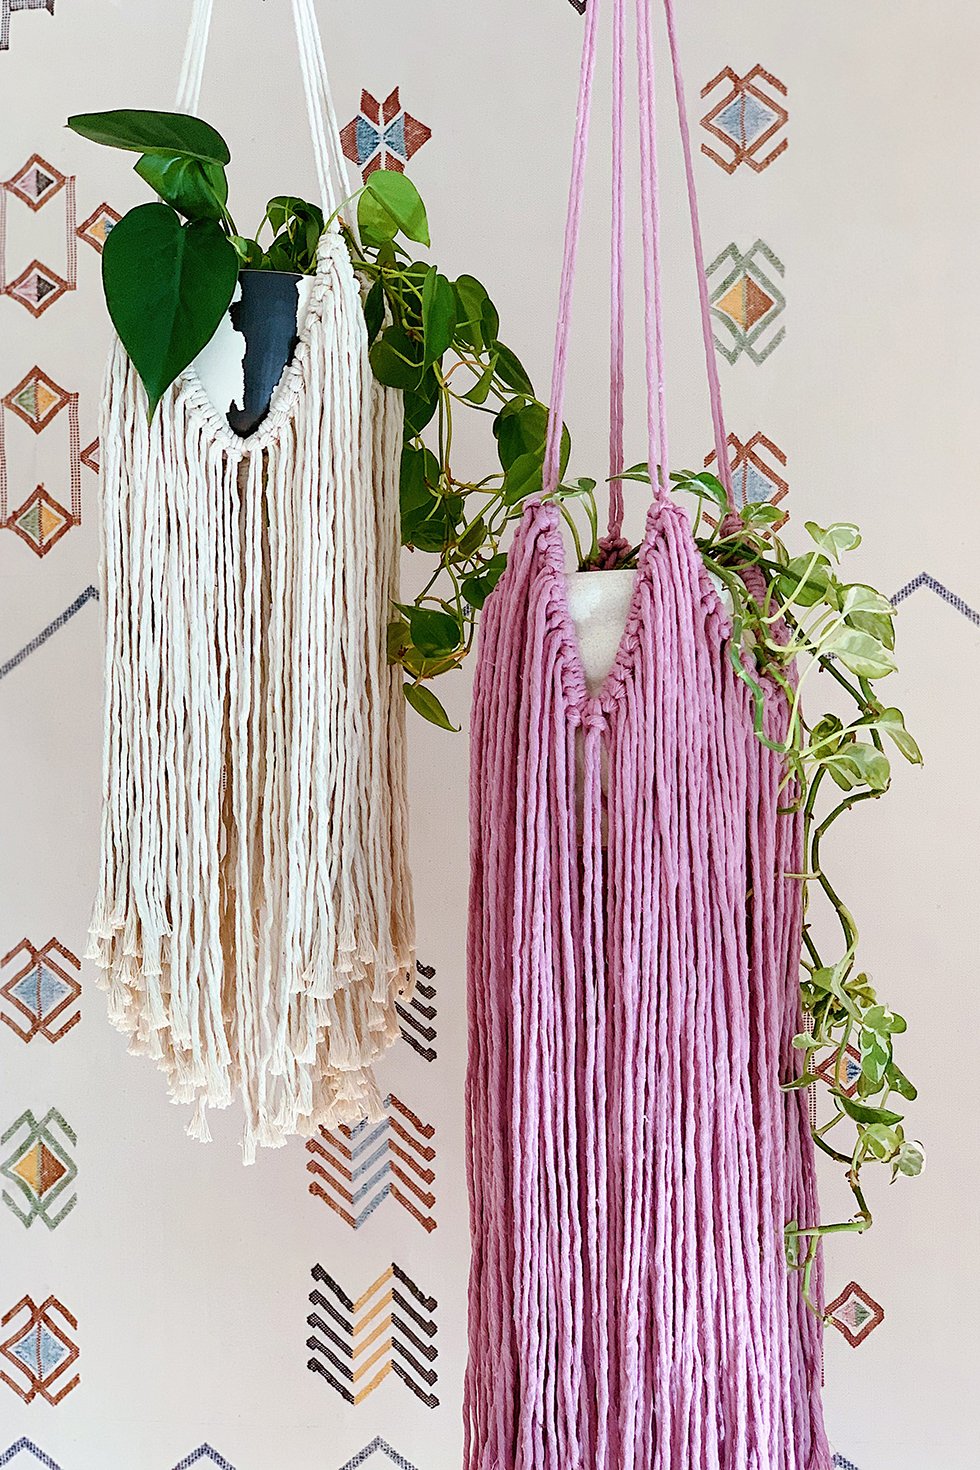
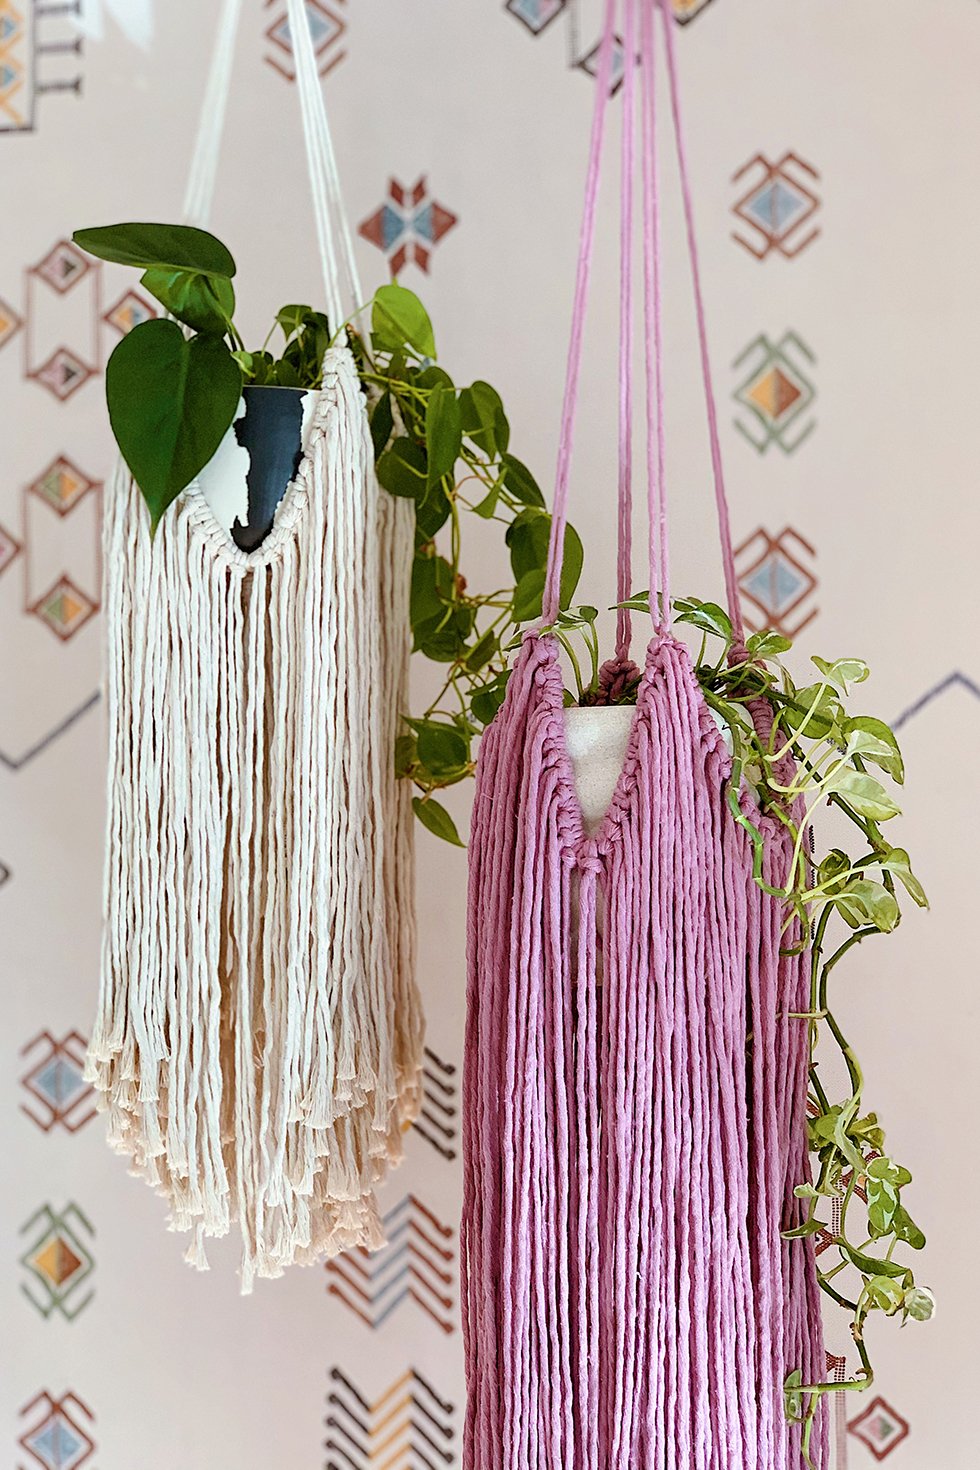
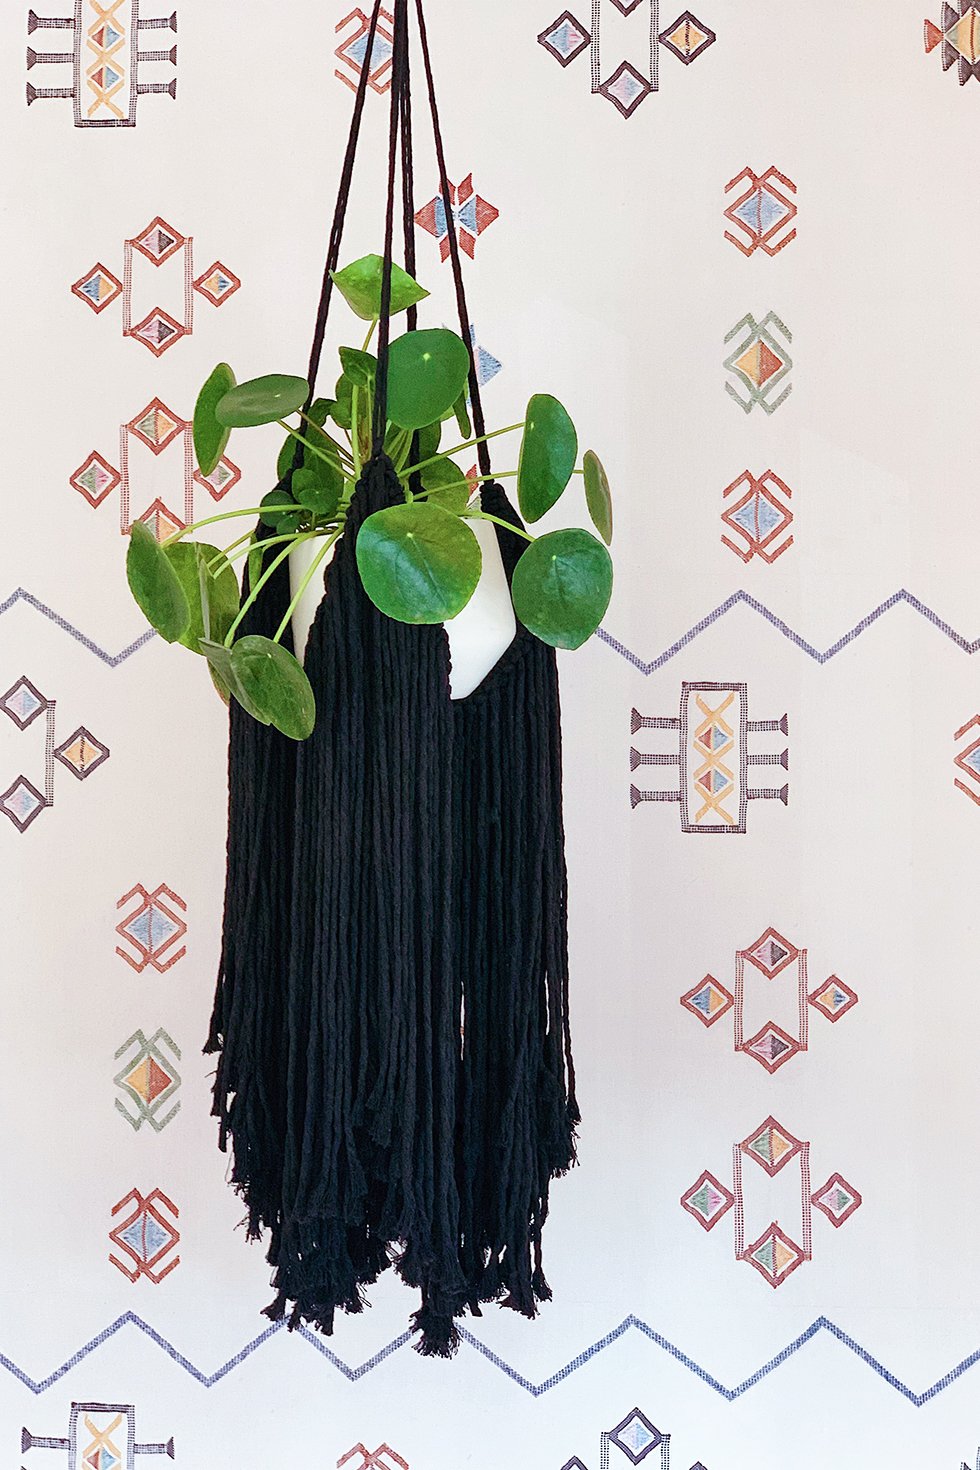
Believe it or not, this is the first and only macrame plant hanger I've ever made. After their recent comeback, I backed away from the trend: partially due to the fact that there were so many other people better equipped to master the bohemian plant hanger. Another reason was I've been notorious for my black thumb for as long as I can remember. However, in the last year or so, I've miraculously turned that black thumb green! Who knew all it took was setting a reminder on my phone to water my plants?! So it wasn't until after a visit to Lauren's amazing new boutique in Southern California, Right Tribe, I was inspired by a stunning plant hanger she had made for her shop. I loved the fringe effect so much, I was motivated to make it. Here it is, my very first macrame plant hanger, made for a group of plants that I've kept alive for at least 6 months. Things are looking up . . . or, green.
You'll Need:
- 5mm single twist cotton string (I used "white, dusty rose, and black")
- 2.2" wooden rings
- scissors
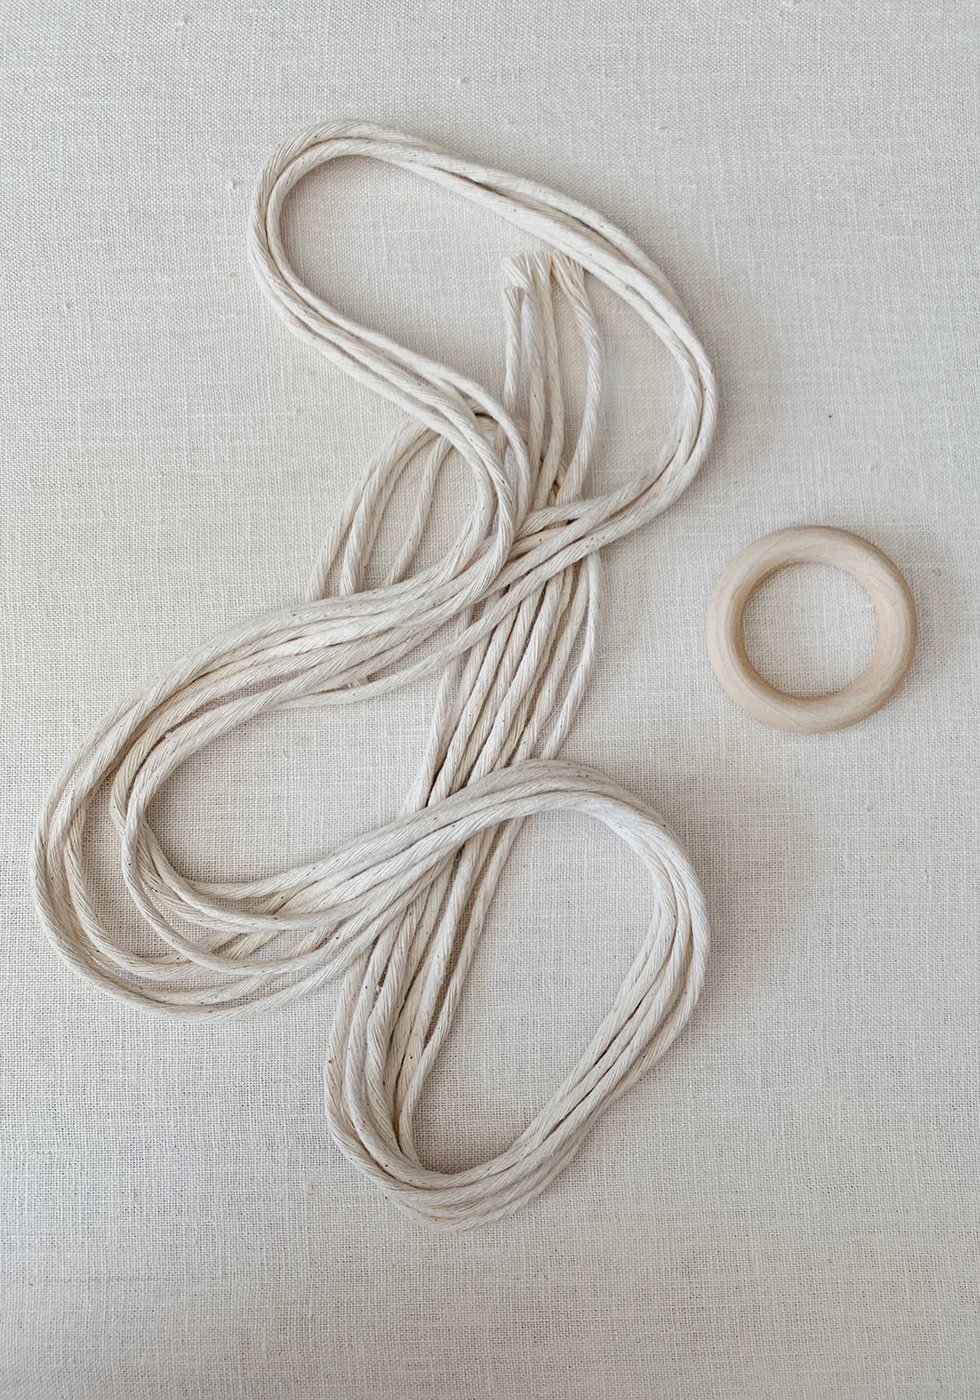
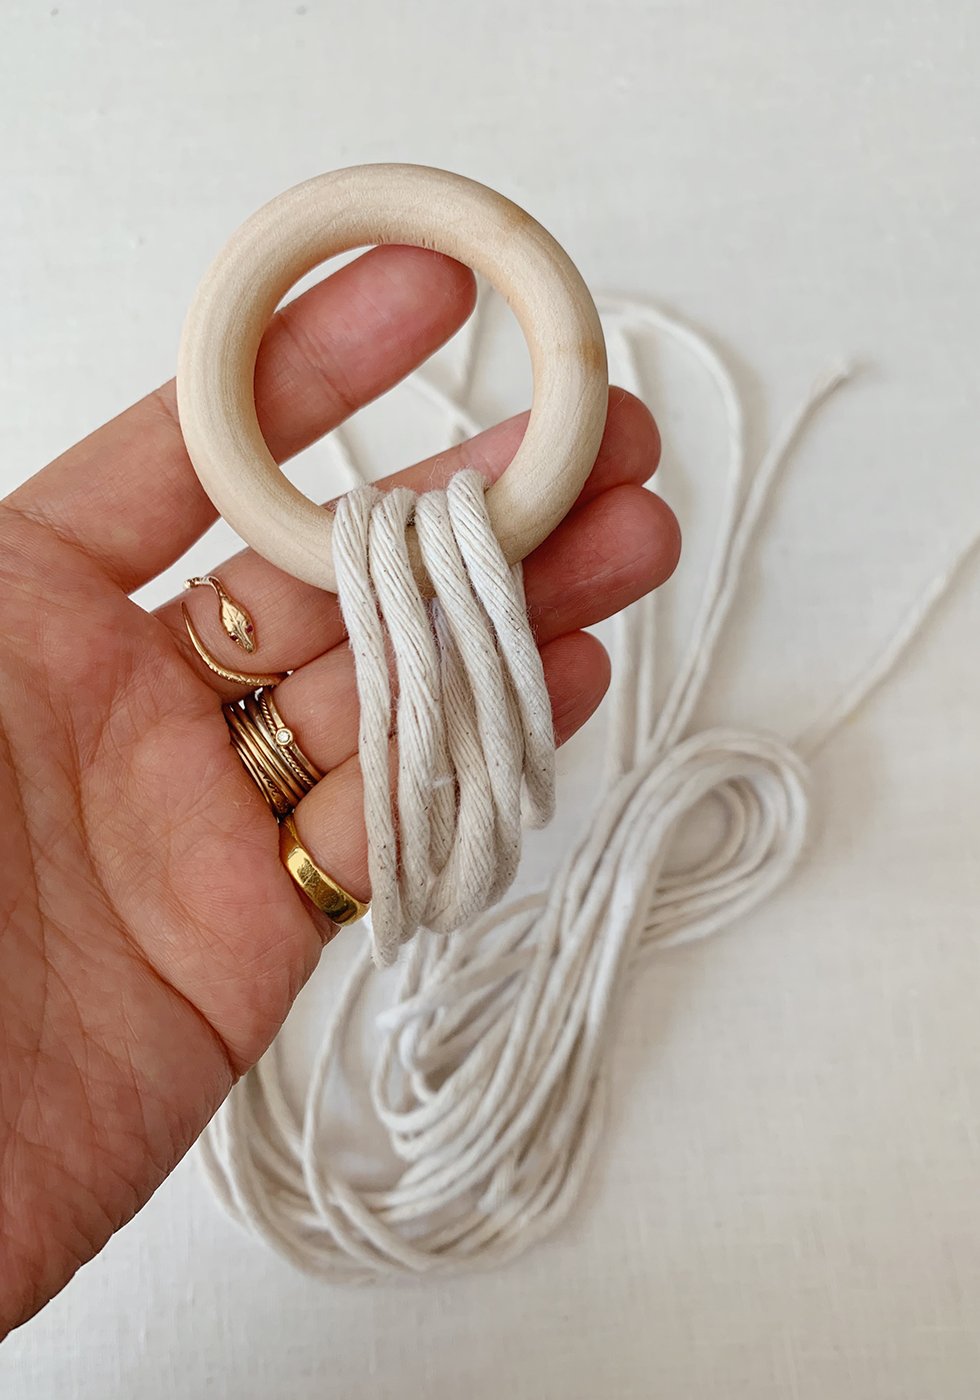
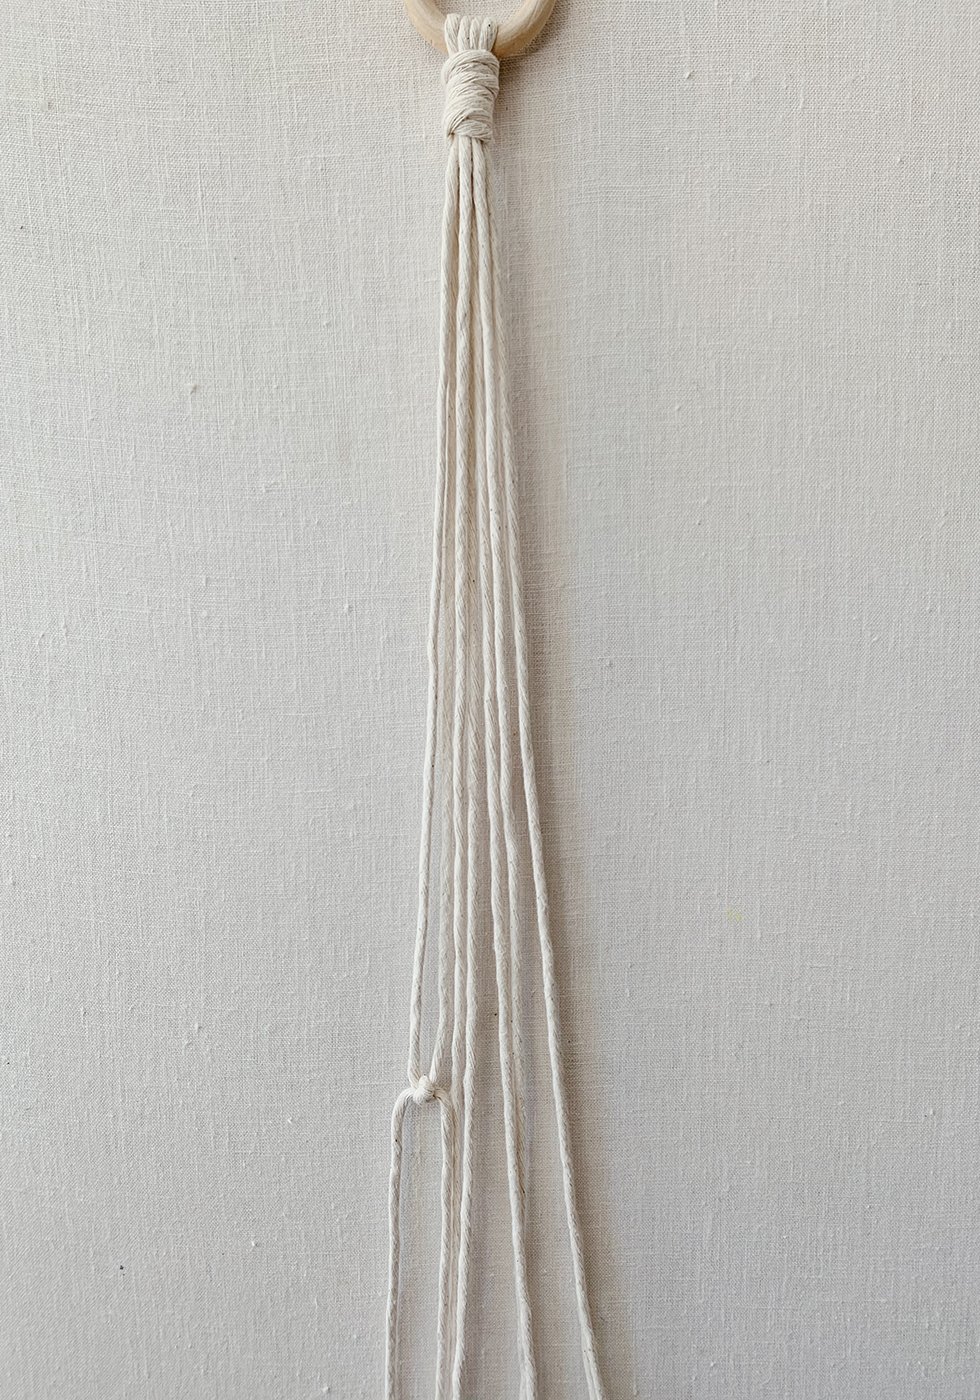
Start by cutting 4 long strands 72" inches long. With that, you'll get a plant hanger about 36" long. If you want it shorter or longer, you can cut shorter or longer pieces - just remember the total length will be half of the lengths. Fold the strands in half over your wooden ring. Then cut a 8" piece. Fold 1/4 of it and lay it on the top of the strands.
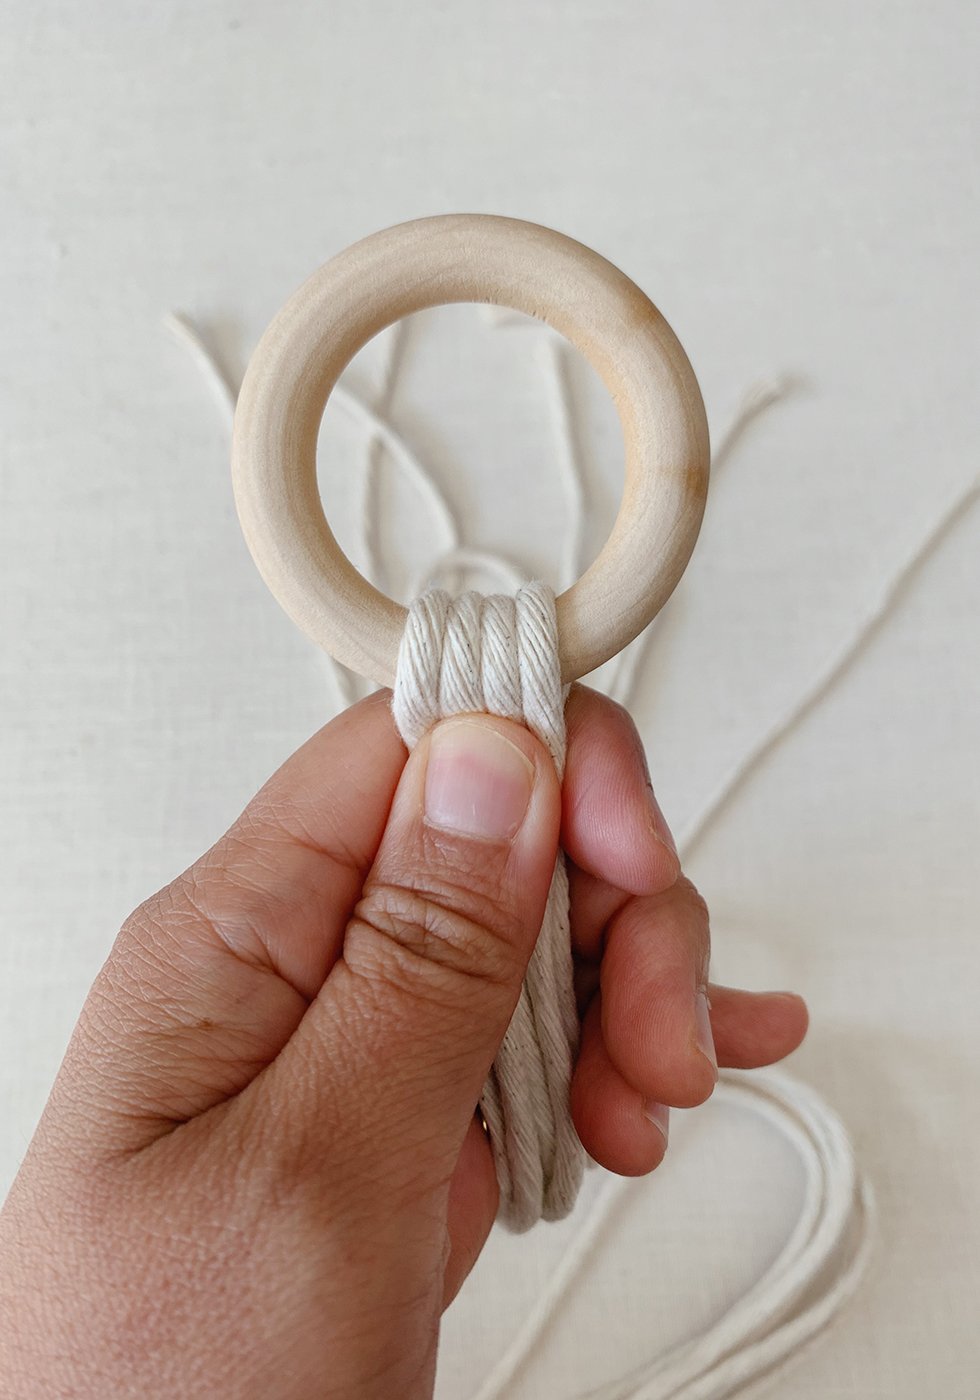
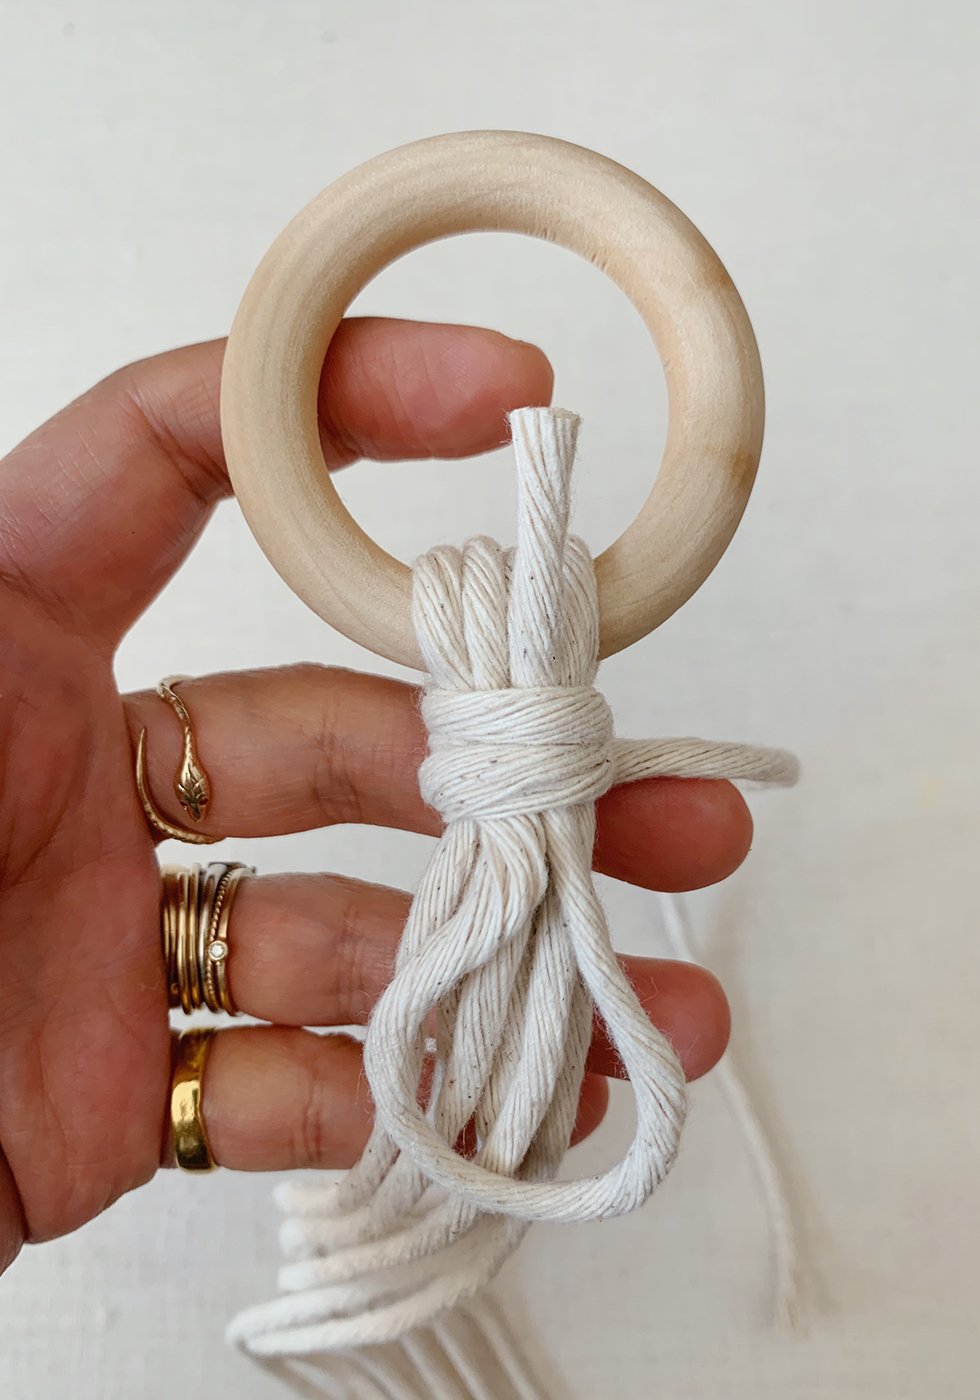
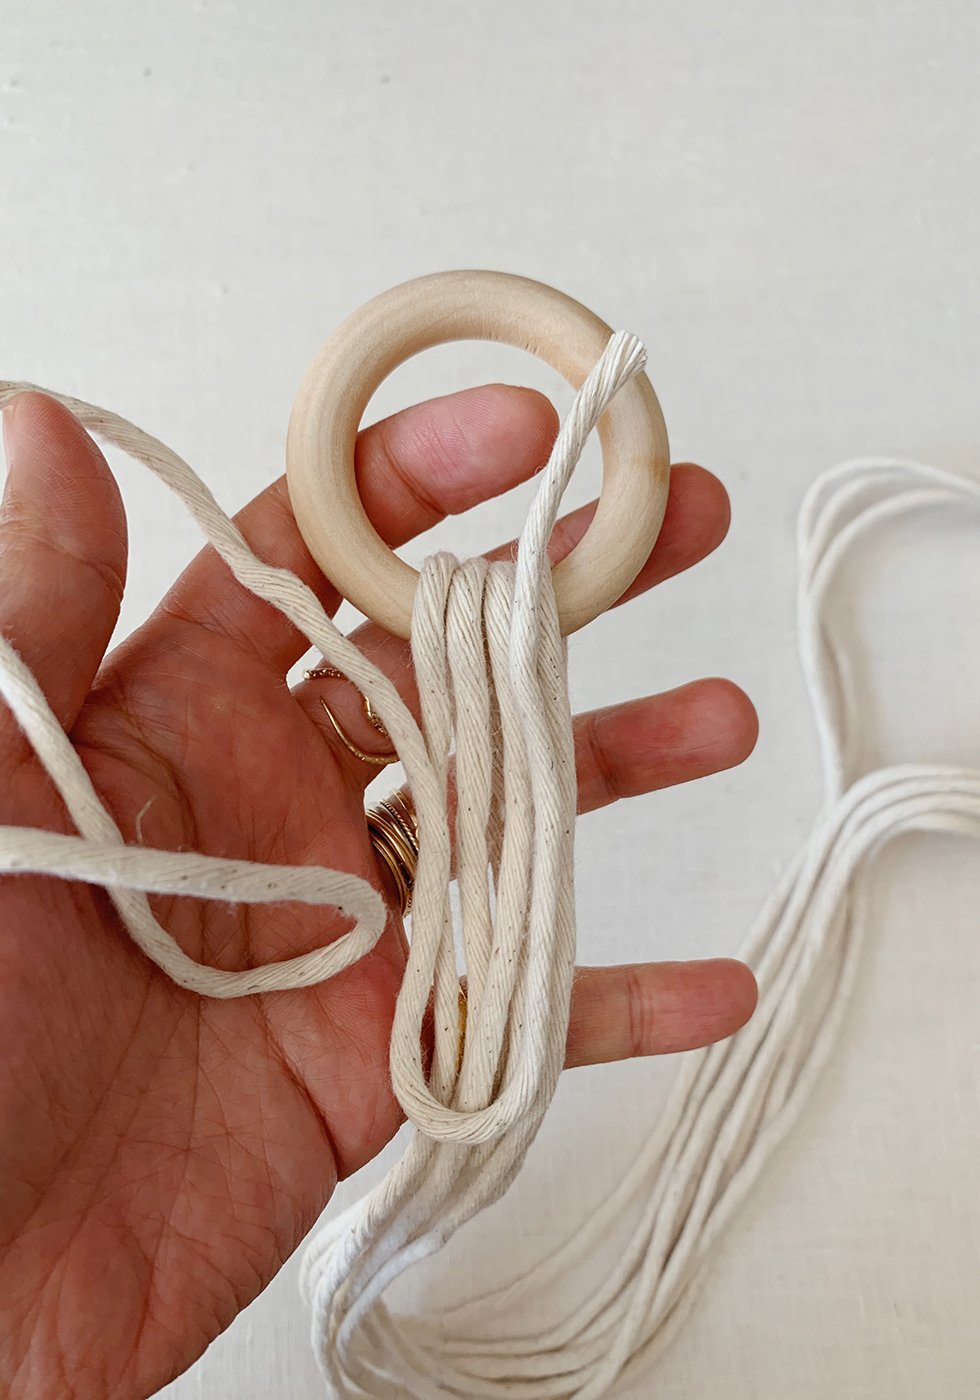
Hold the short piece of cotton string over the strands, right below the wooden ring. The loop should be at the bottom. Start wrapping from the top down. After about 6-7 wraps, tuck the tail of the short piece of string and thread it through the loop.

Text goes here
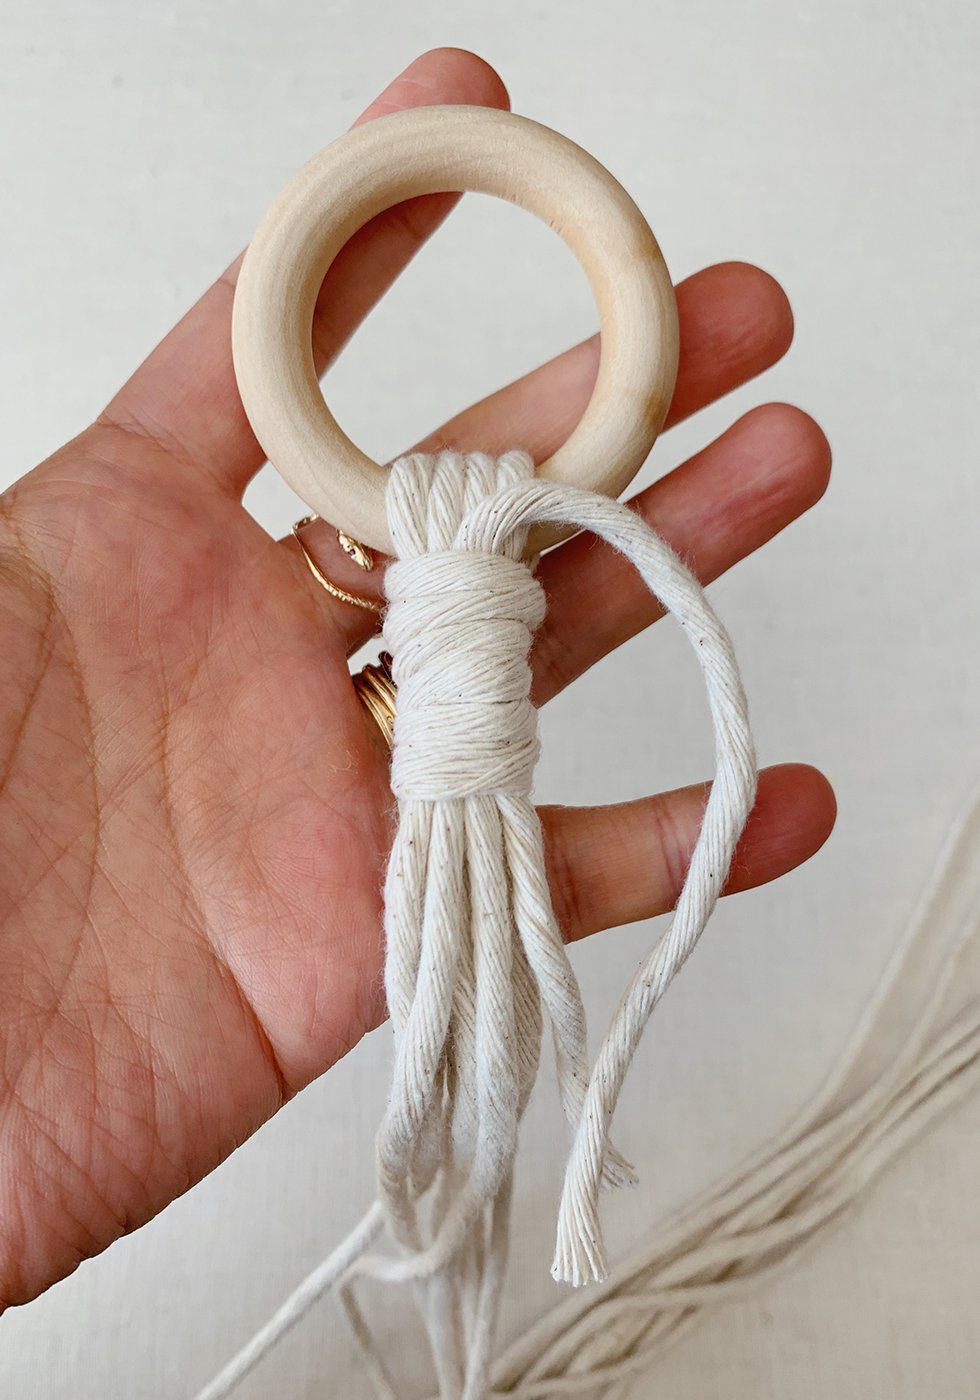
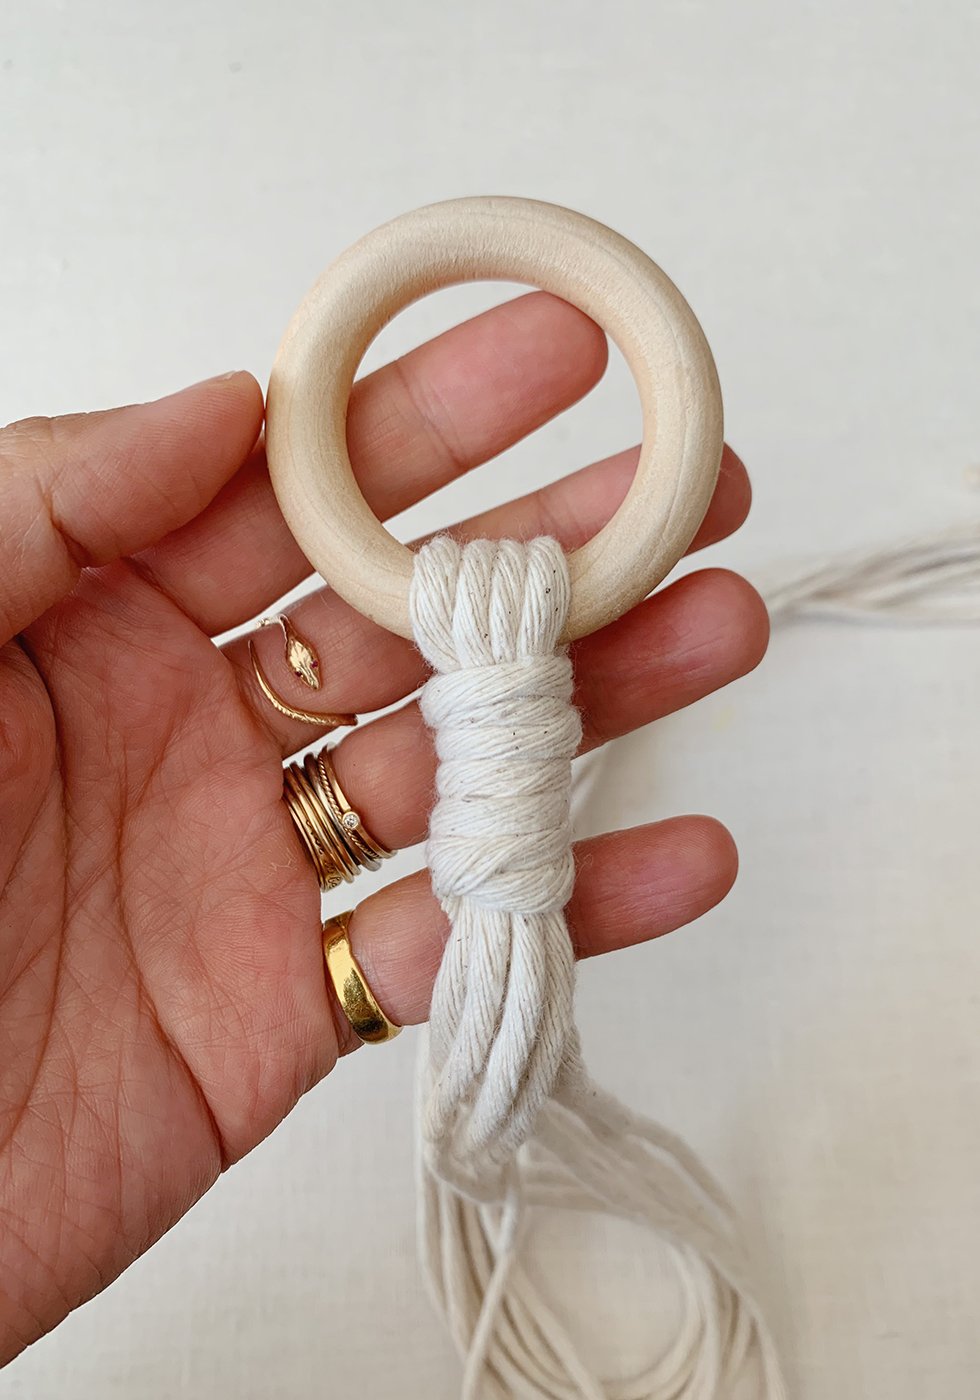
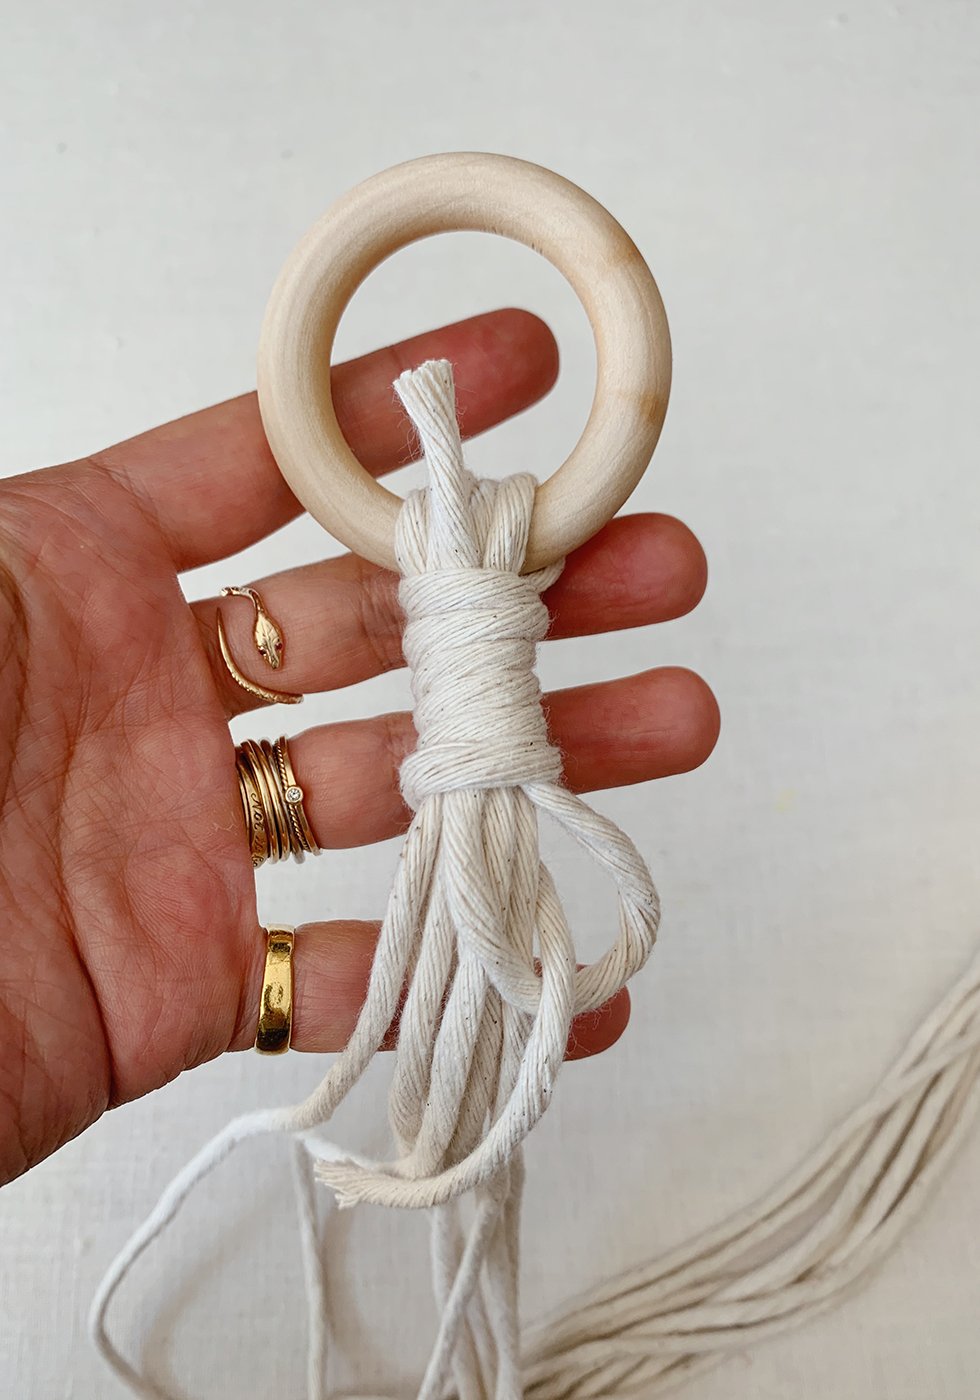
Take the top tail and pull until the loop disappears into the wrapped section. Trim the tail. This will help secure your plant hanger!
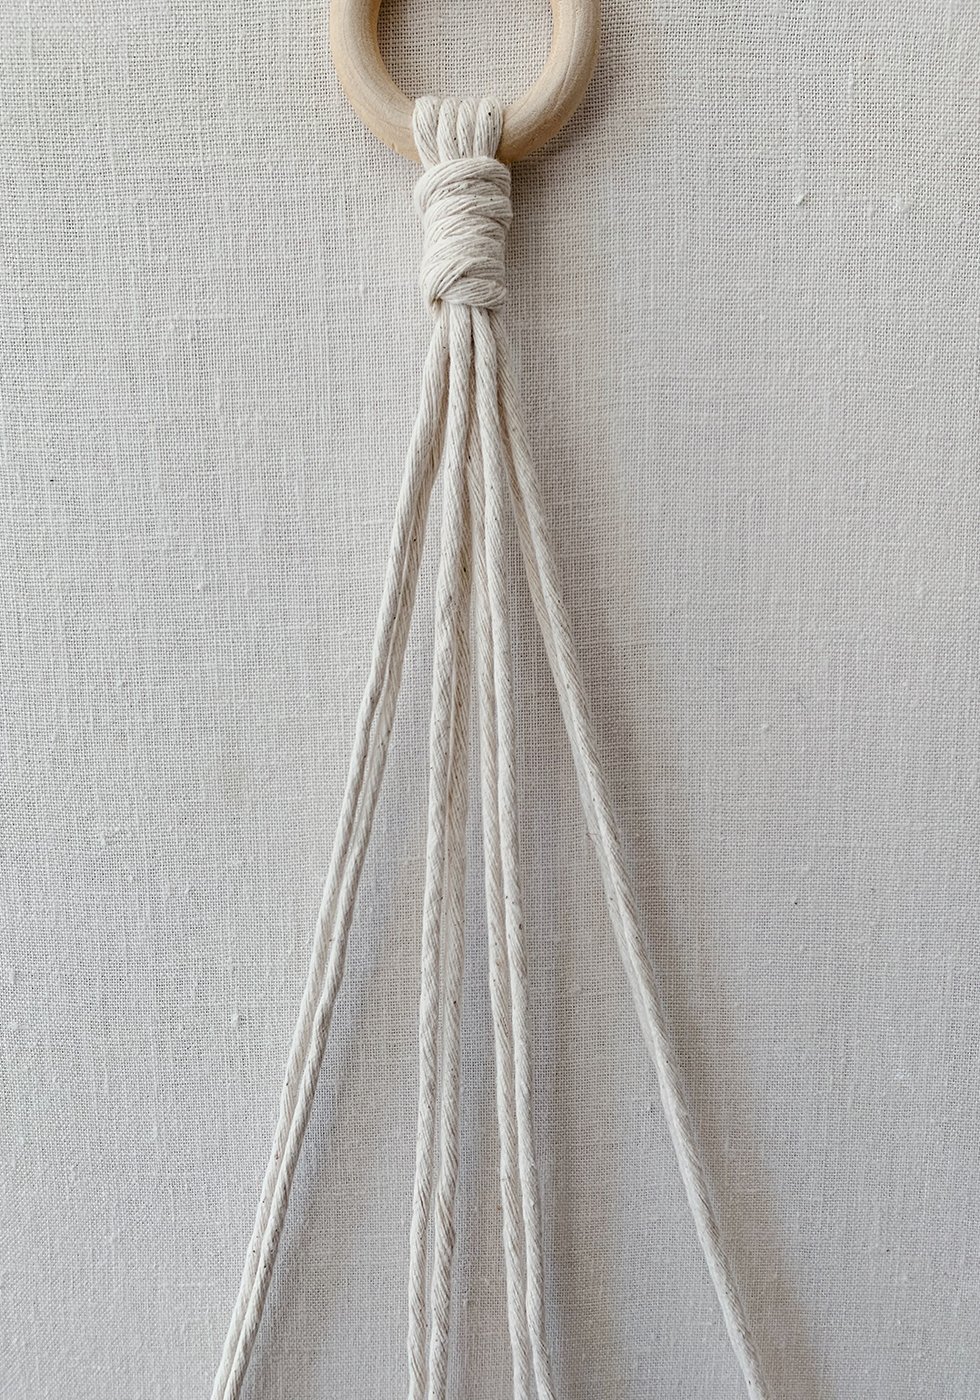
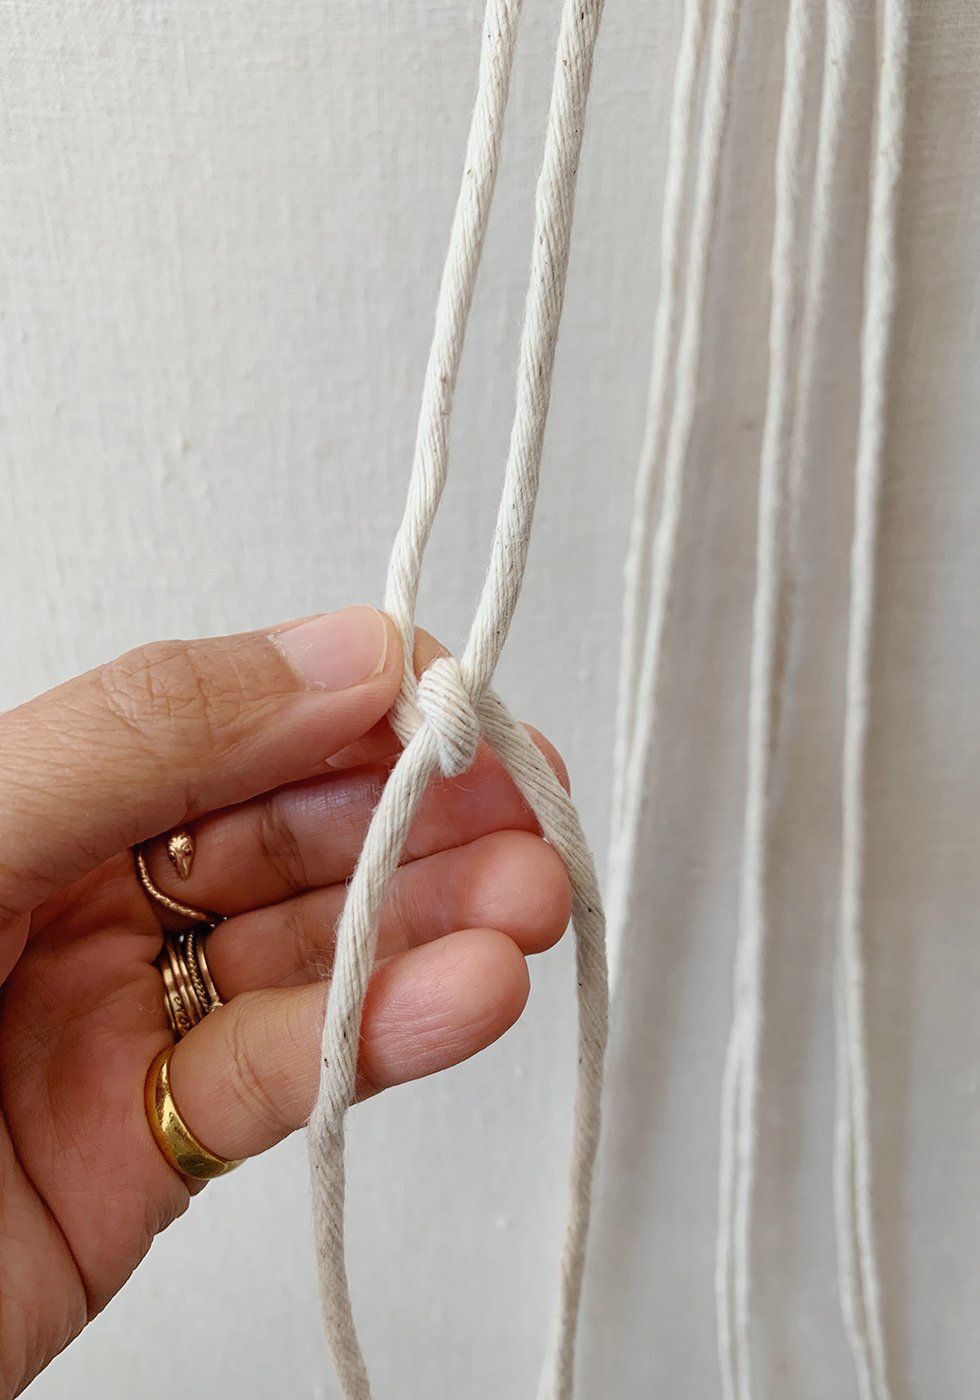
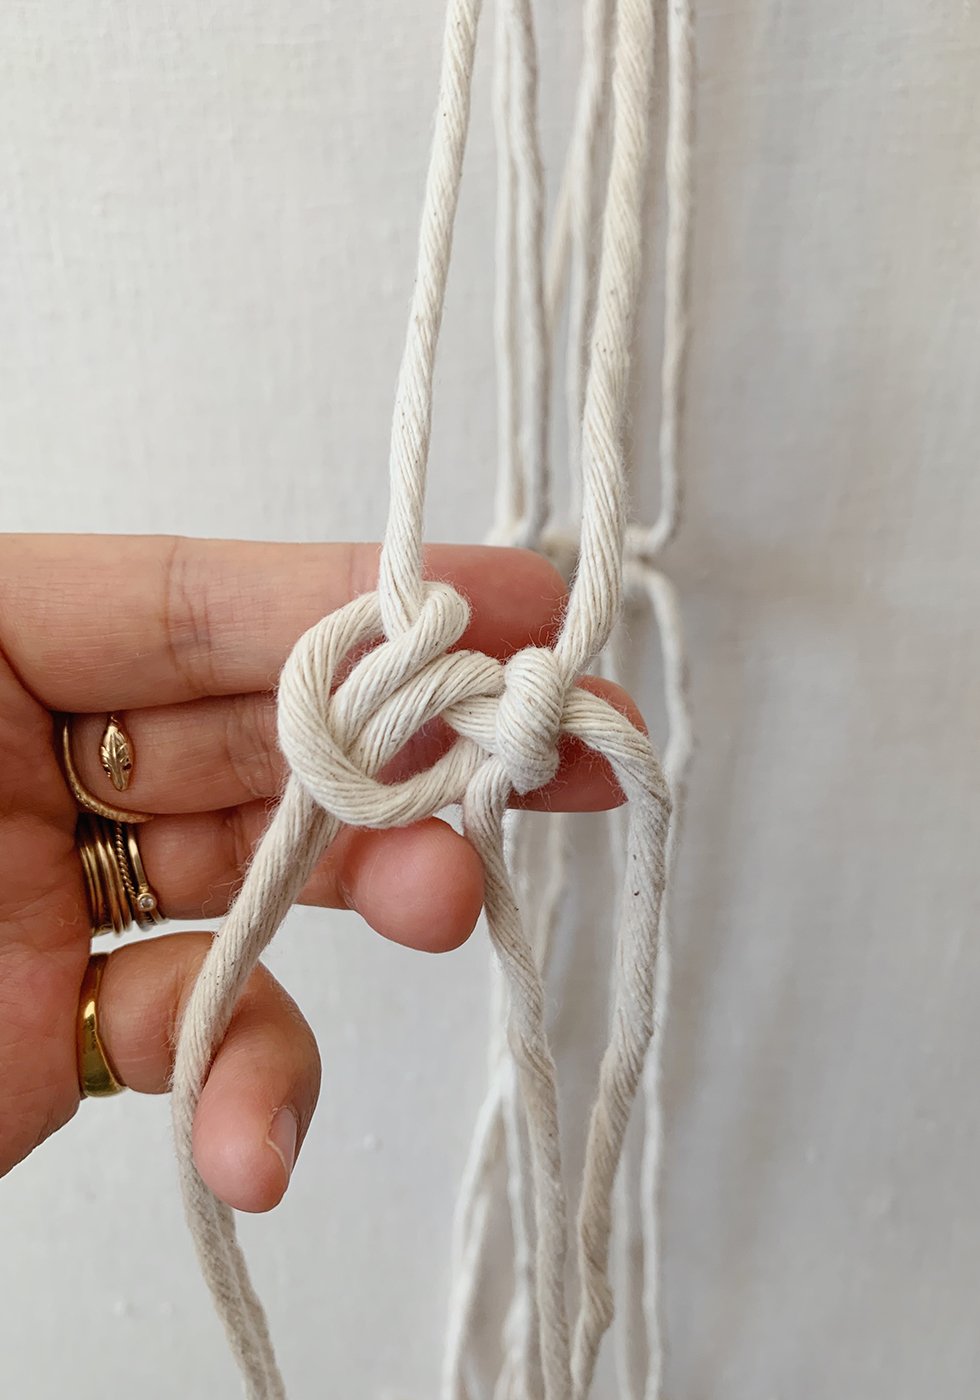
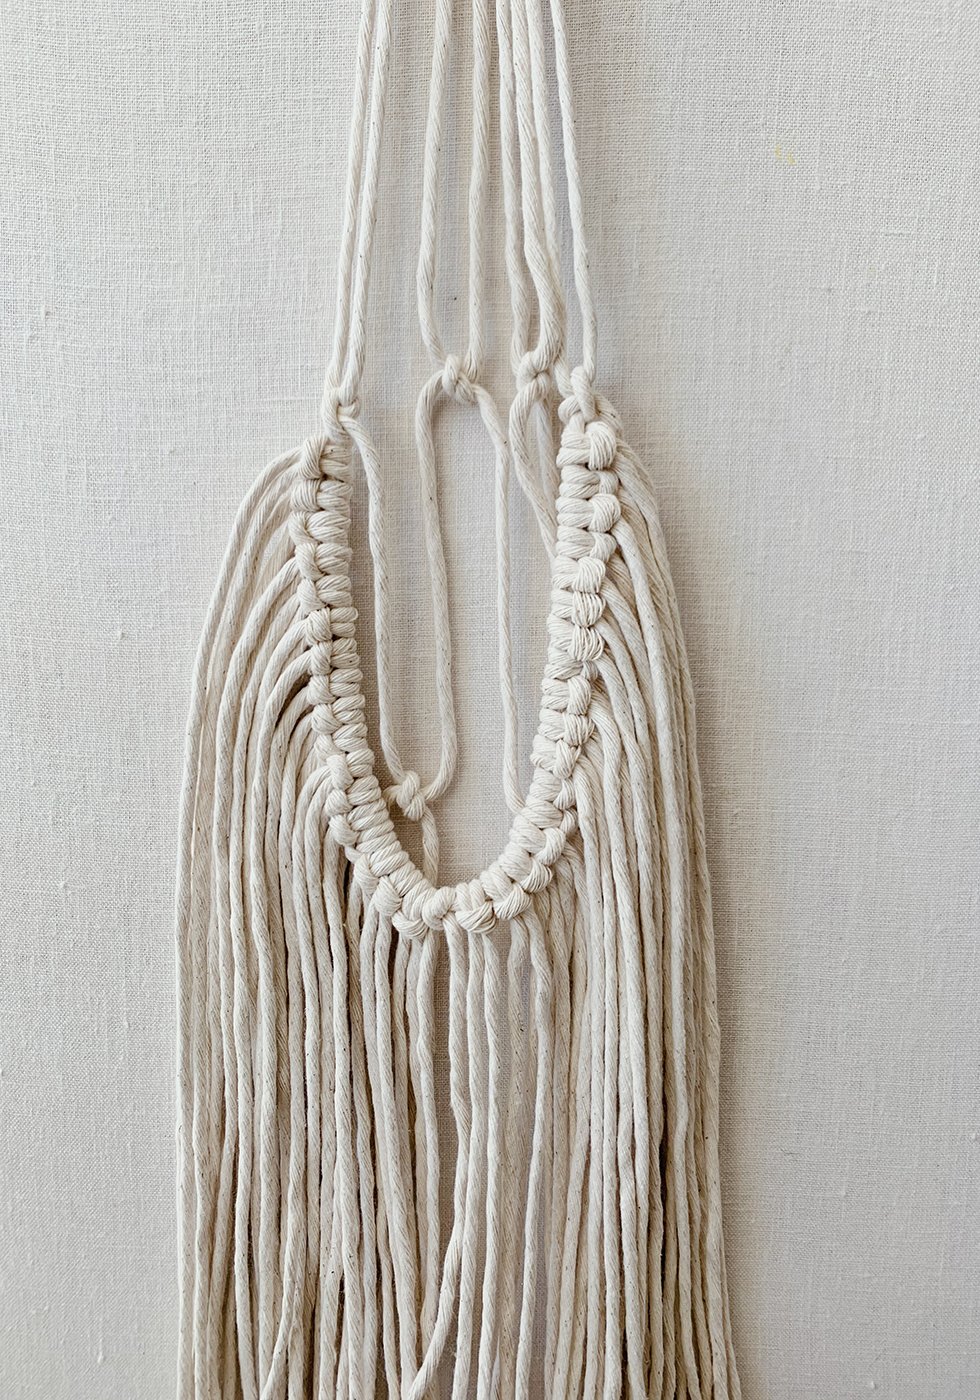
Depending on the size of your pot, you'll find a starting point somewhere along the strands. Because my pot is rather large, I started about 3/5 of the way down. If you have a smaller pot, you can start higher up. Grab two strands and tie them into a square knot.
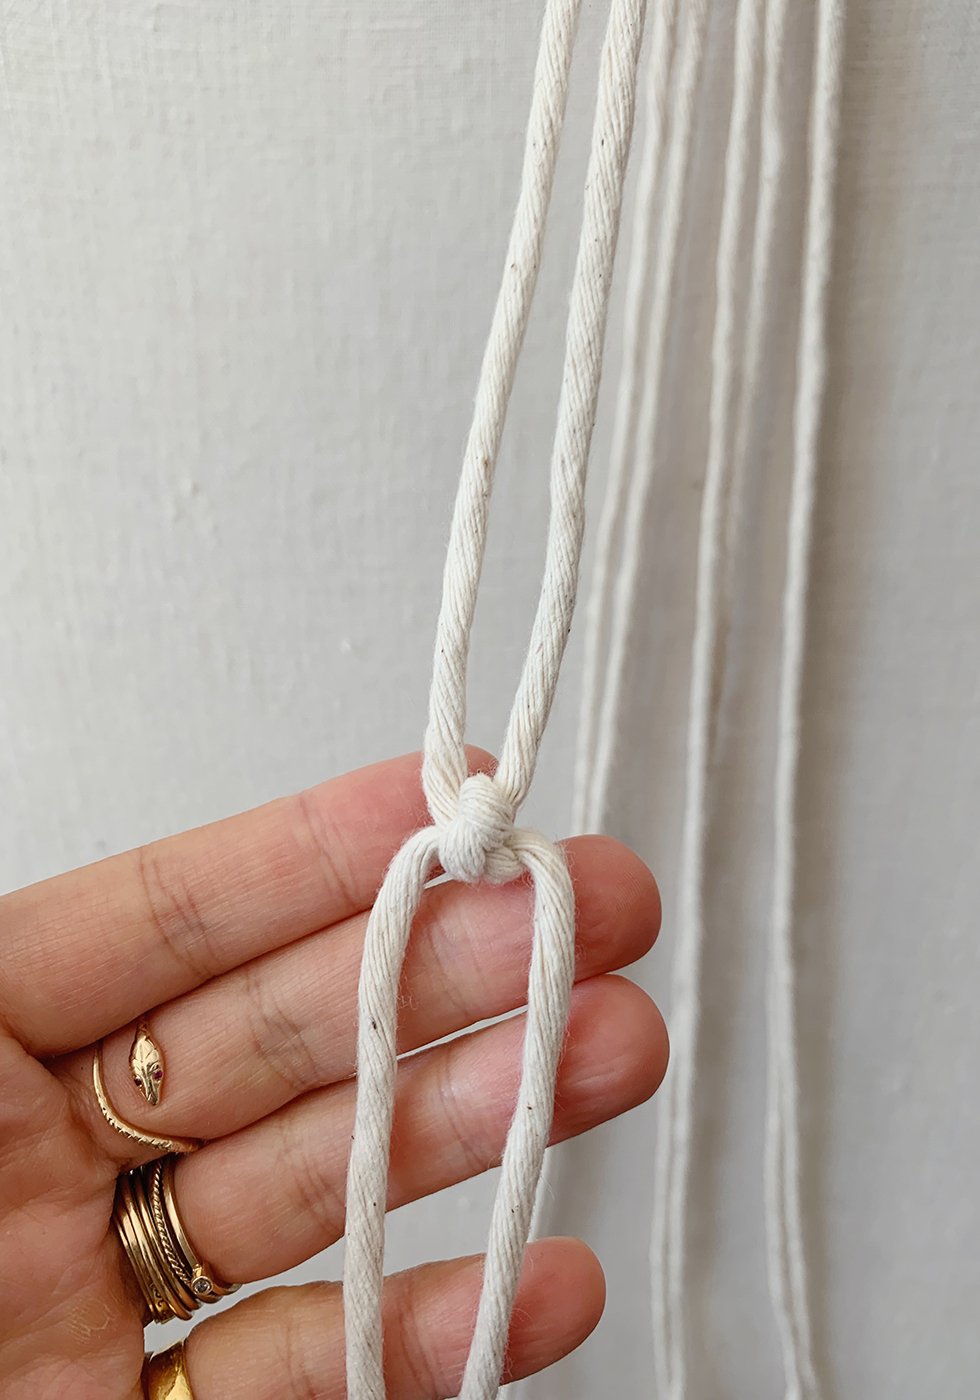
A square knot is when you tie a knot with the right string in front and then tie the next knot with the left string in front, in reverse order.

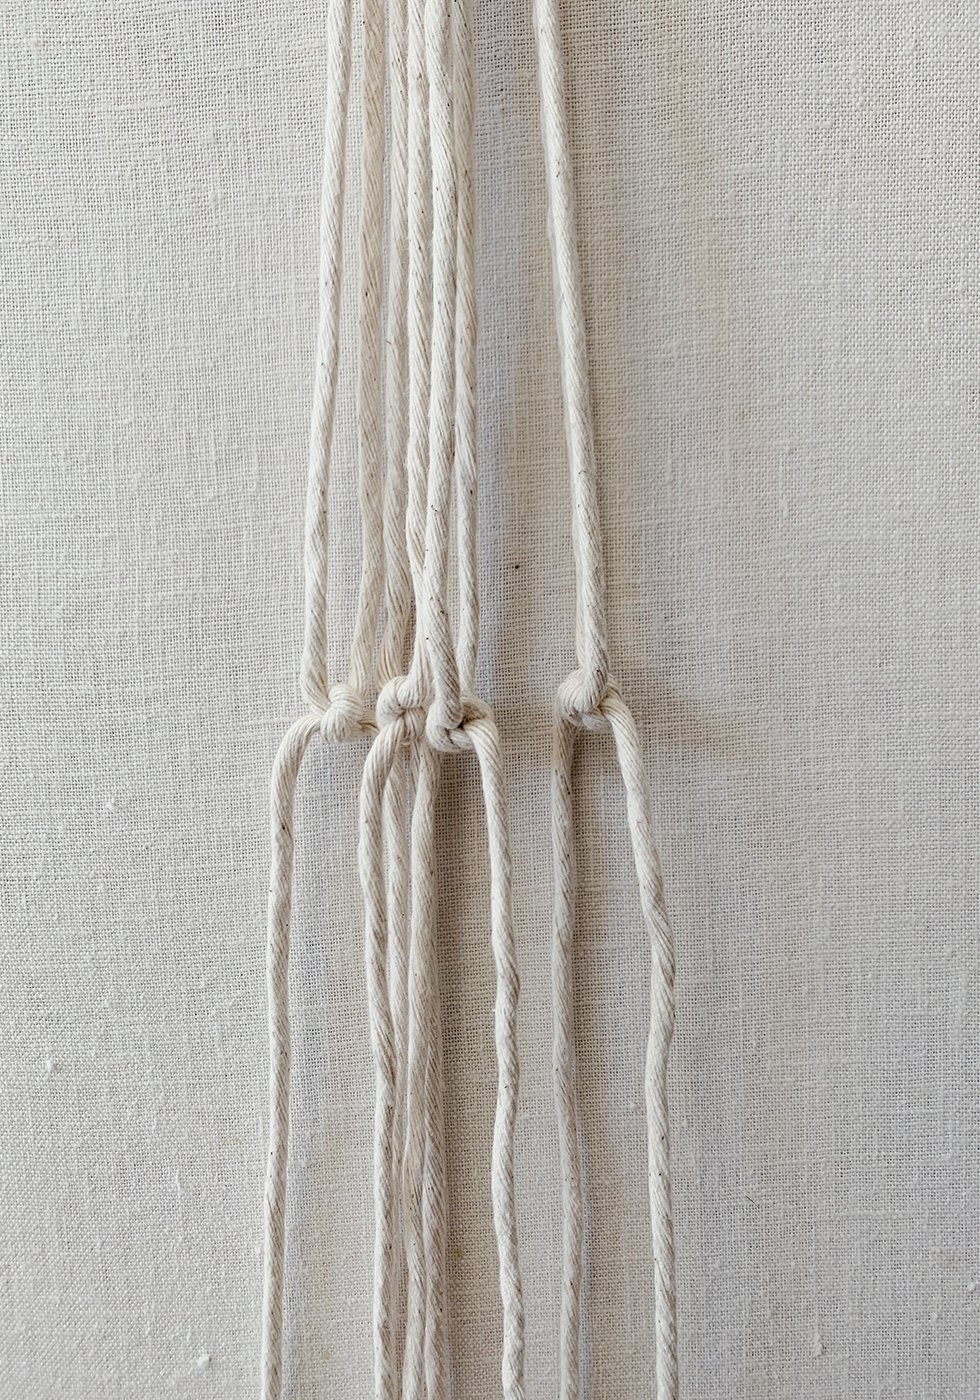
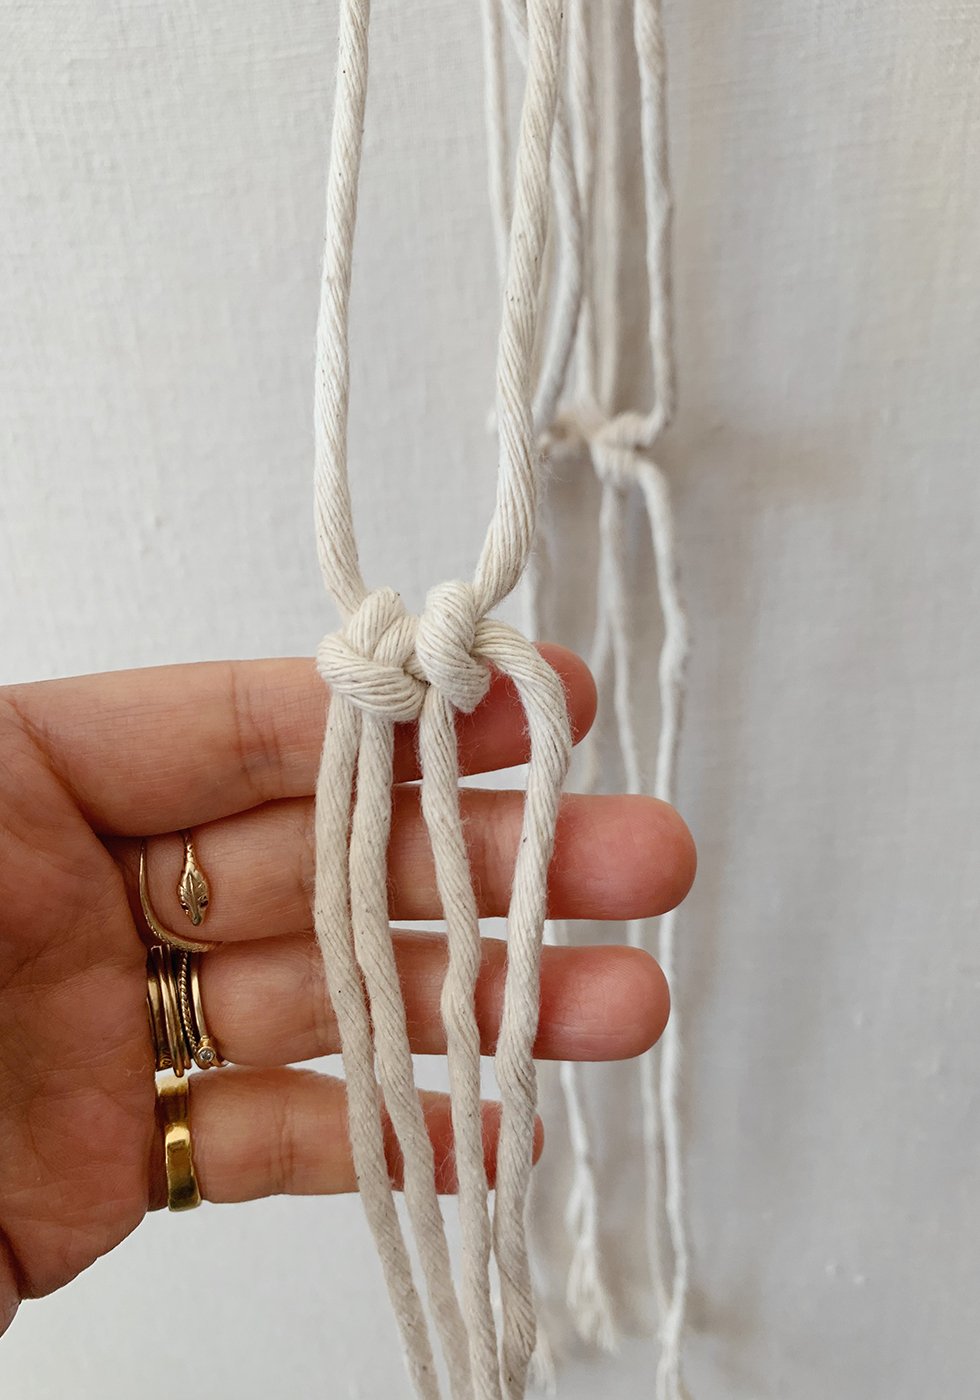
Continue pairing up the strands and tying them into square knots at the same level.
Then, about 4-8 inches down, depending on the size of your pot, you'll tie a square knot with two strings from adjacent bundles. So, take the right strand from one bundle and tie it with the left strand from the adjacent bundle.
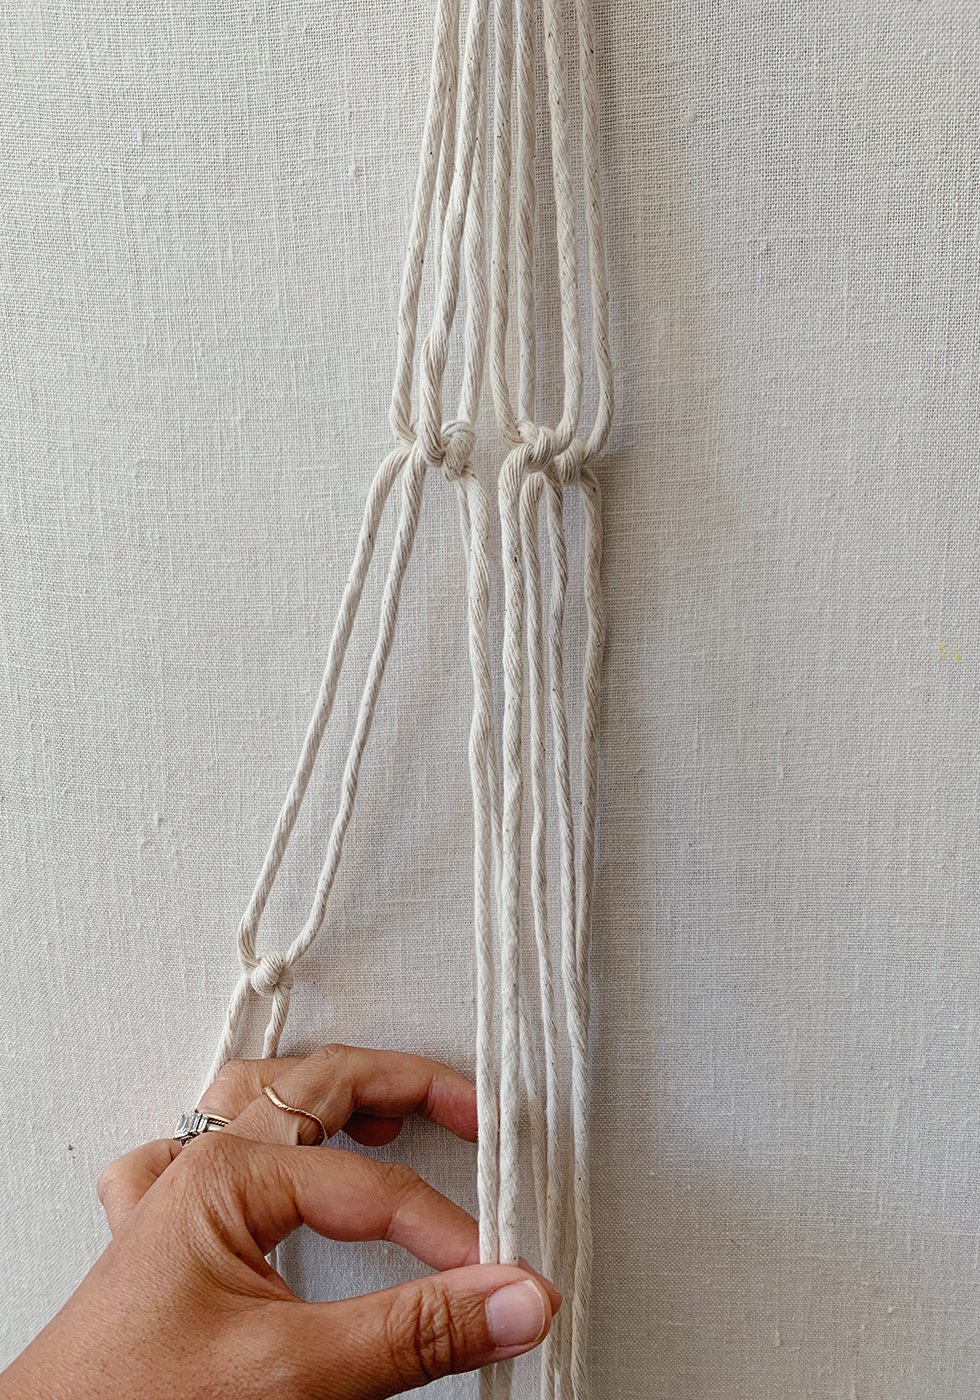
Continue tying until you have 4 knots at the same height.
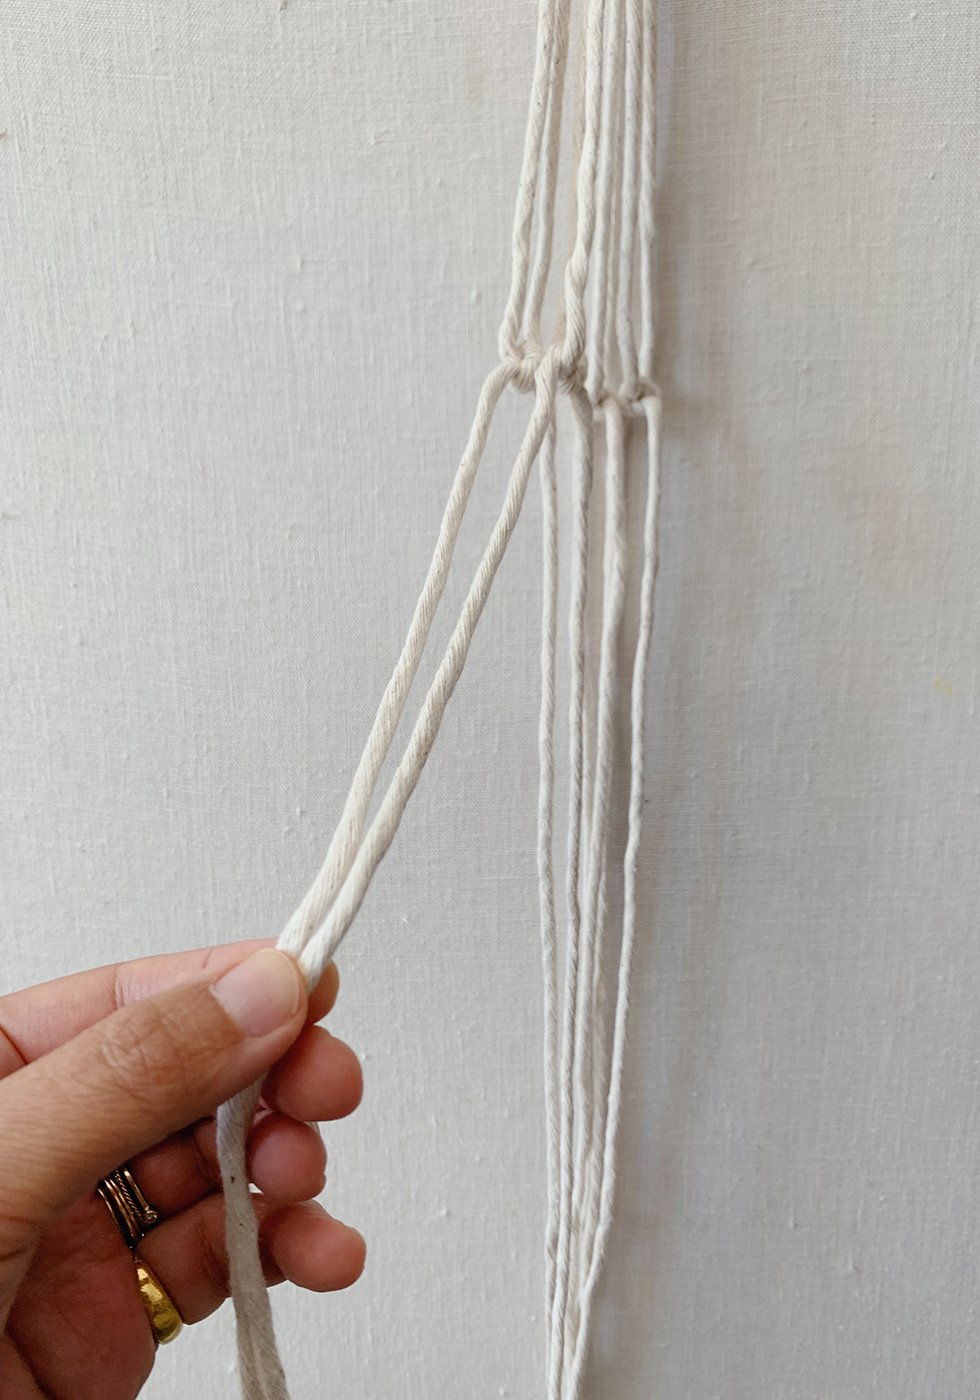
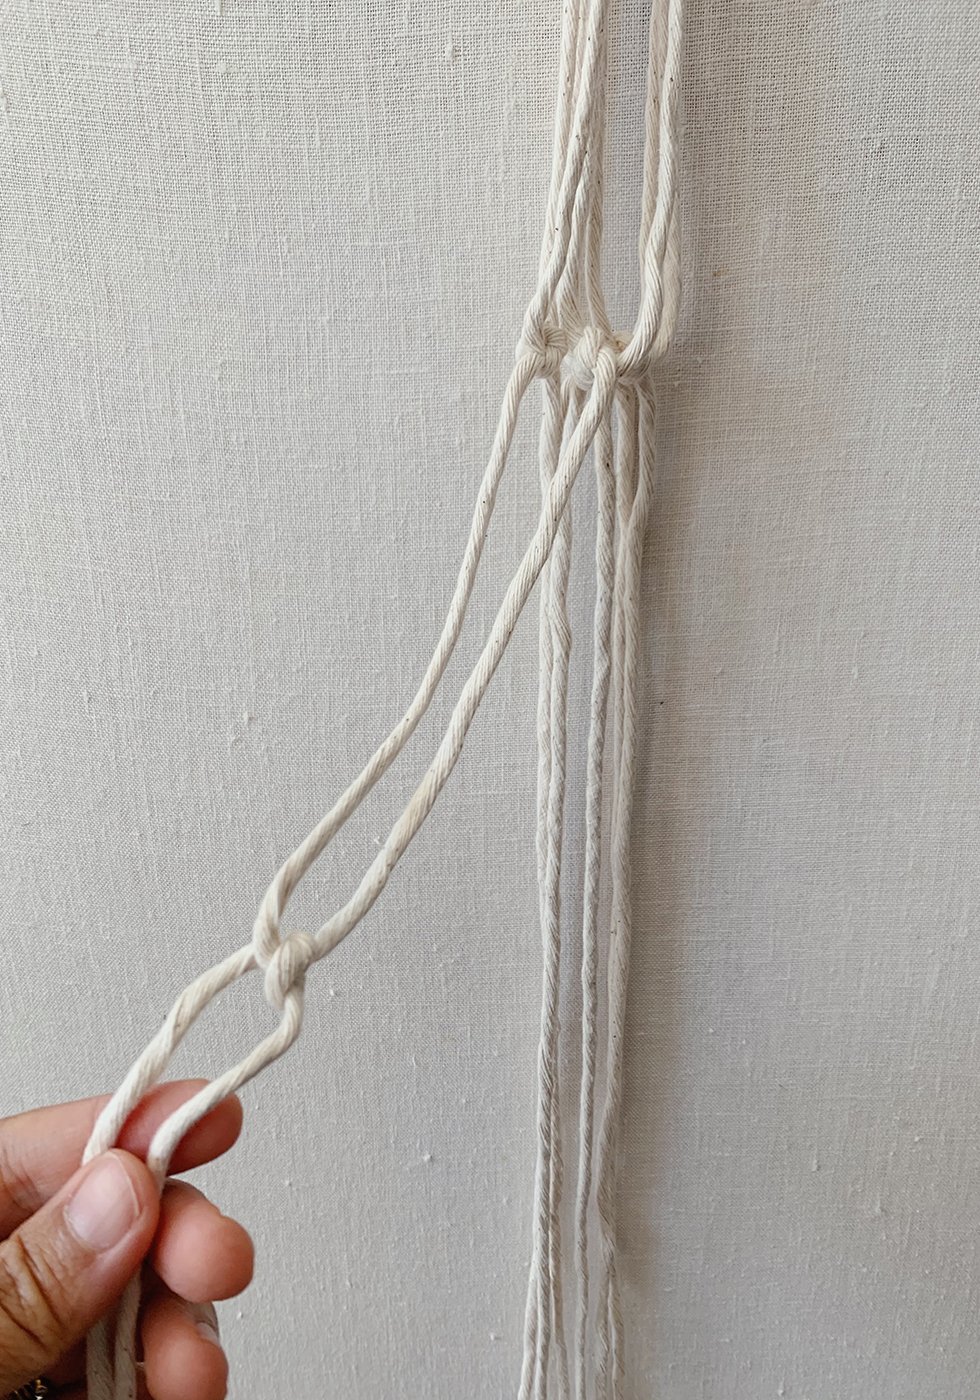
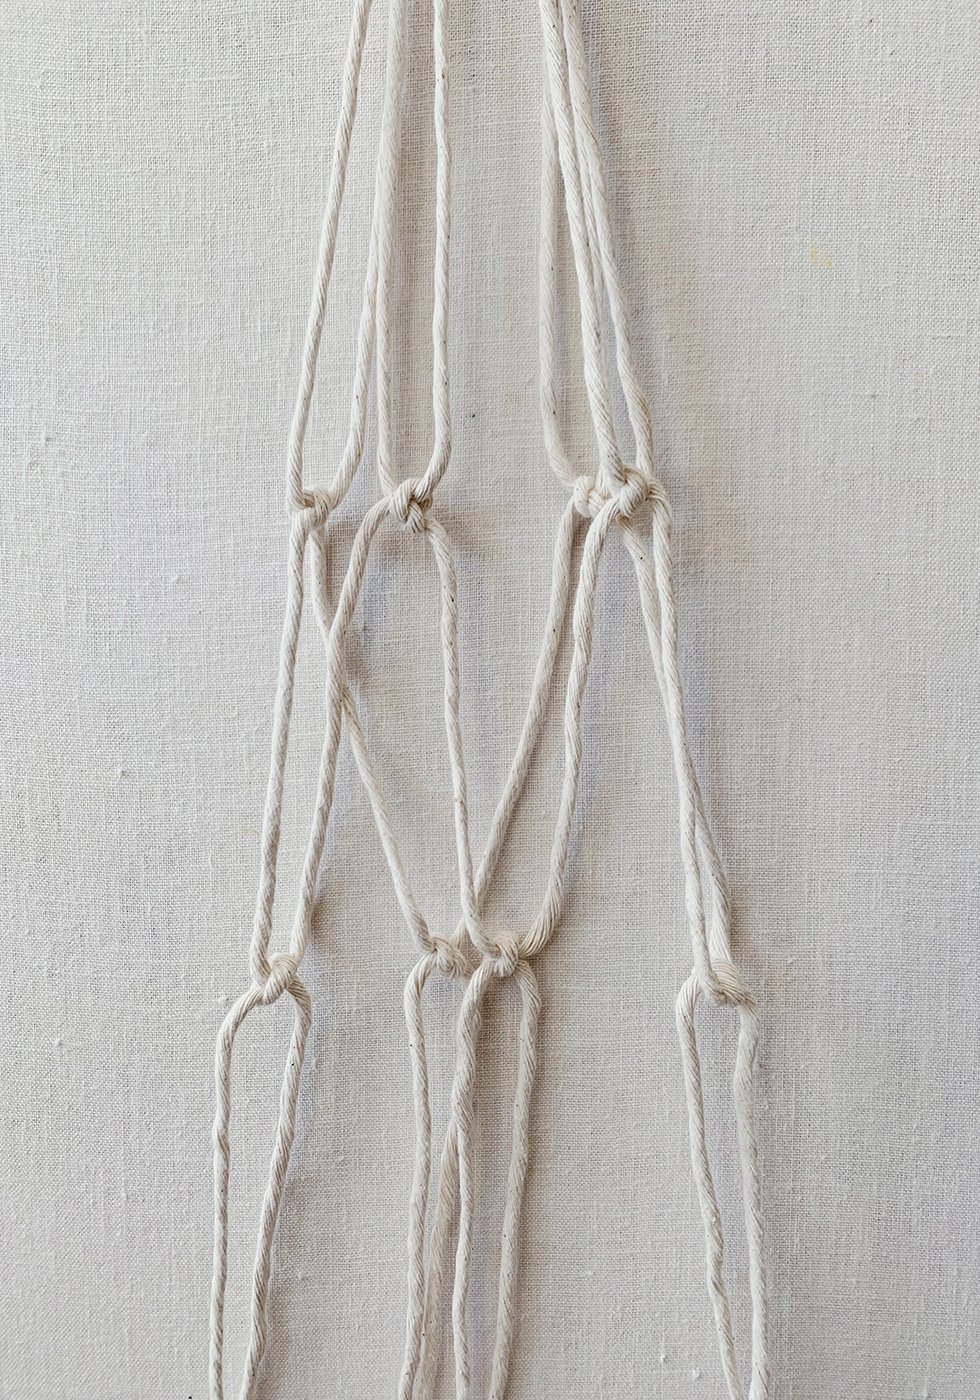
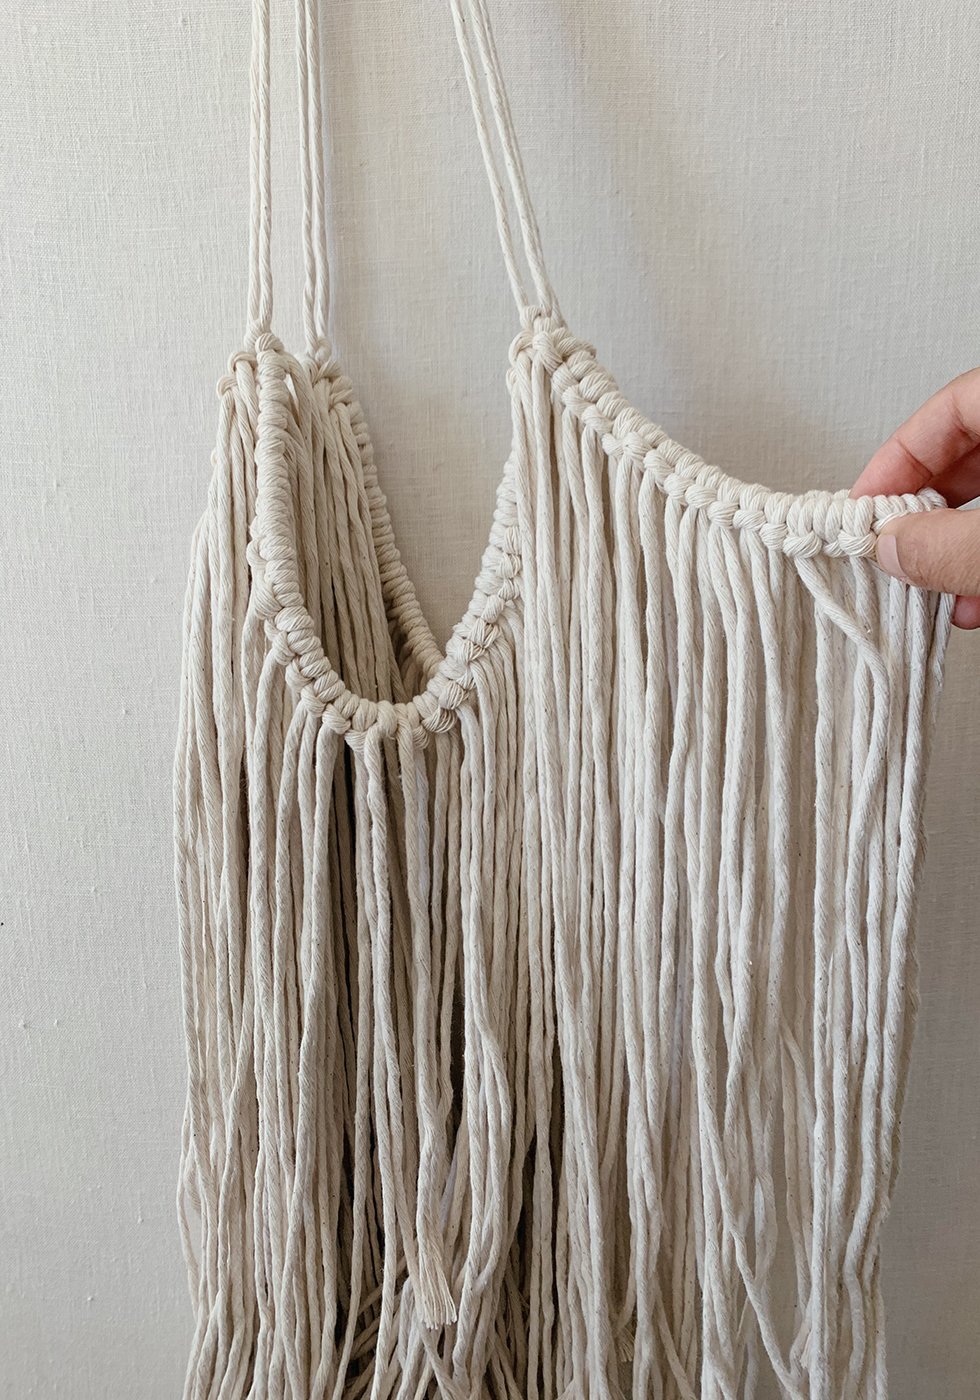
Now, you'll start cutting string, double the length of the length of your fringe. You can decide how long this will be. Warning: you'll need LOTS of string cut for this so don't go overboard on the length. Also, the longer the fringe, the heavier your plant hanger!
I cut my strands at 36" so the fringe length would be 18". I'll usually cut about 20 at a time and gauge how many will go on each section. Fold the strand in half and then fold the loop over the section between the two knots. Thread the tail ends into the loop and tighten. I folded the loop over the front of the strand but you can fold the loop from the backside - it really just depends on what you prefer aesthetically.
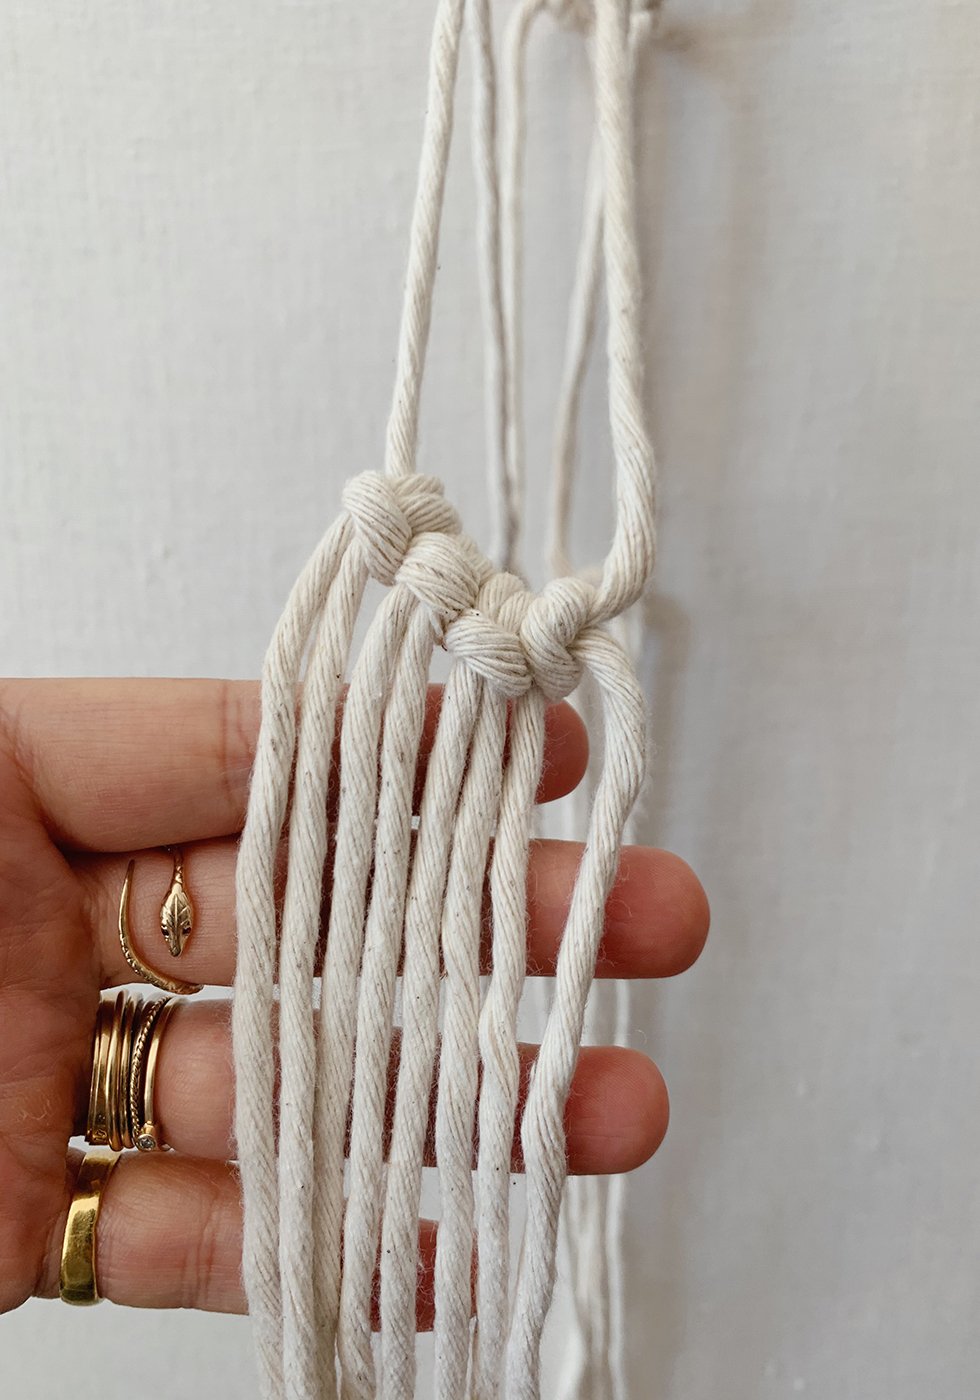

Continue adding fringe until you reach the top. Then, count the amount of strands you've added. You'll want to keep the number of fringe consistent on each section.
If you end up with more or less room for fringe on a section, you can always untie your bottom knot to accommodate for more or less space.
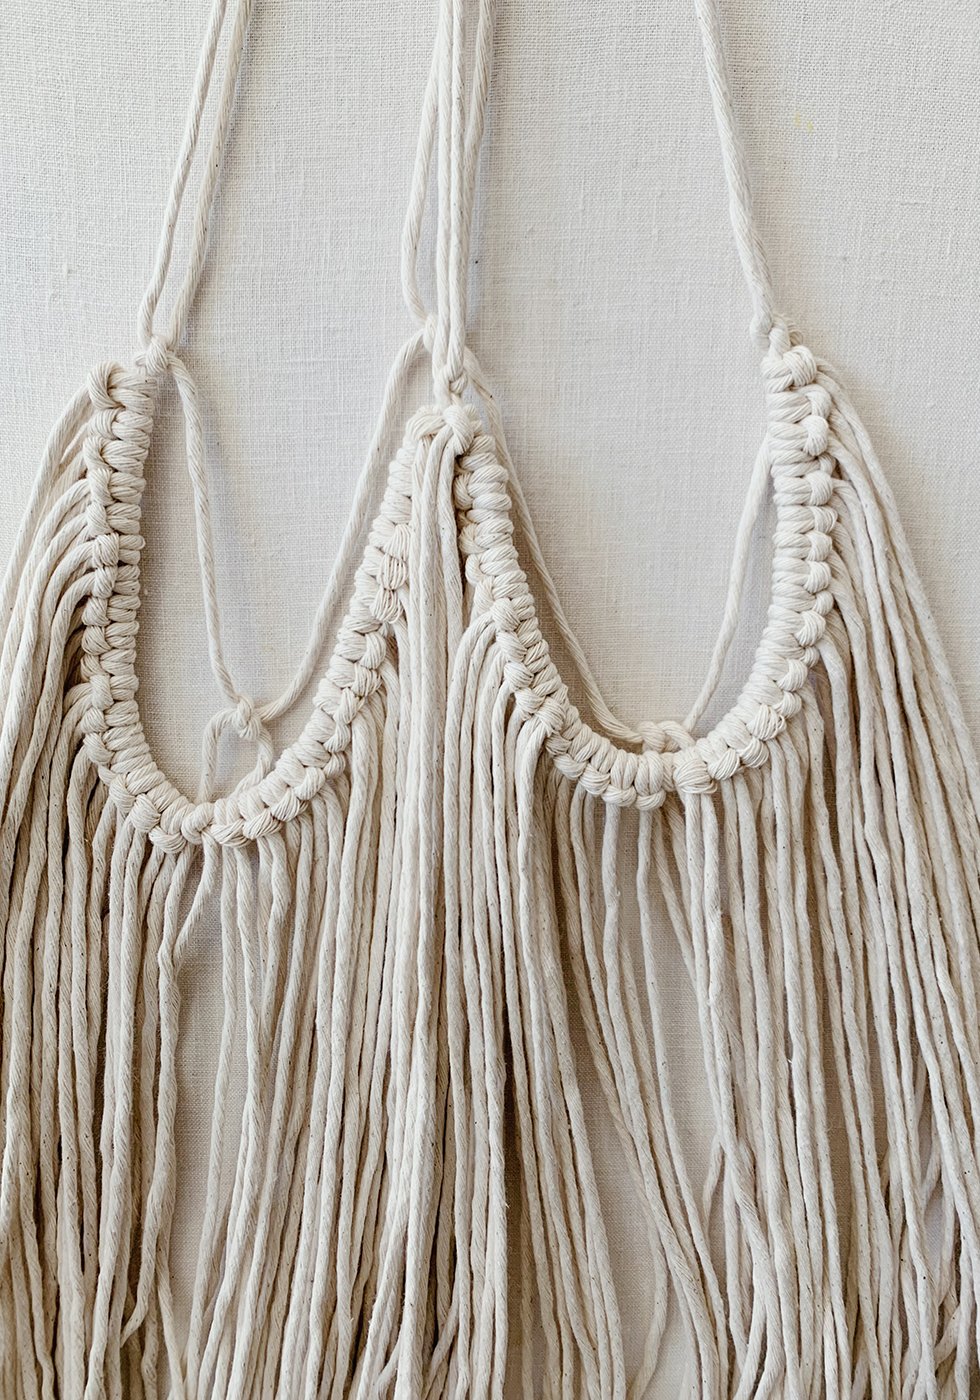
Continue adding fringe . . .
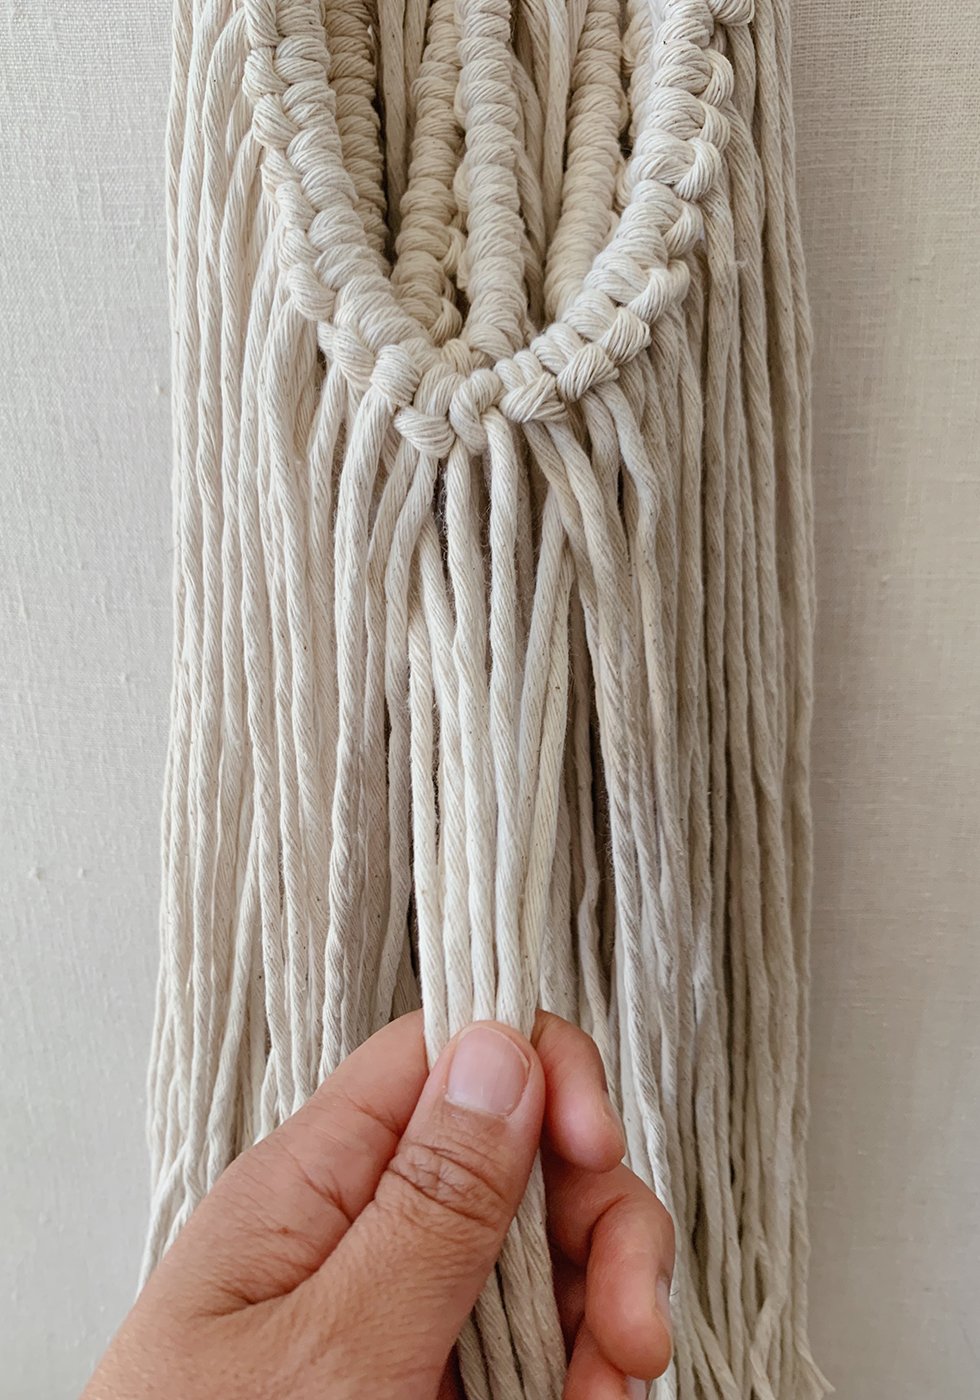
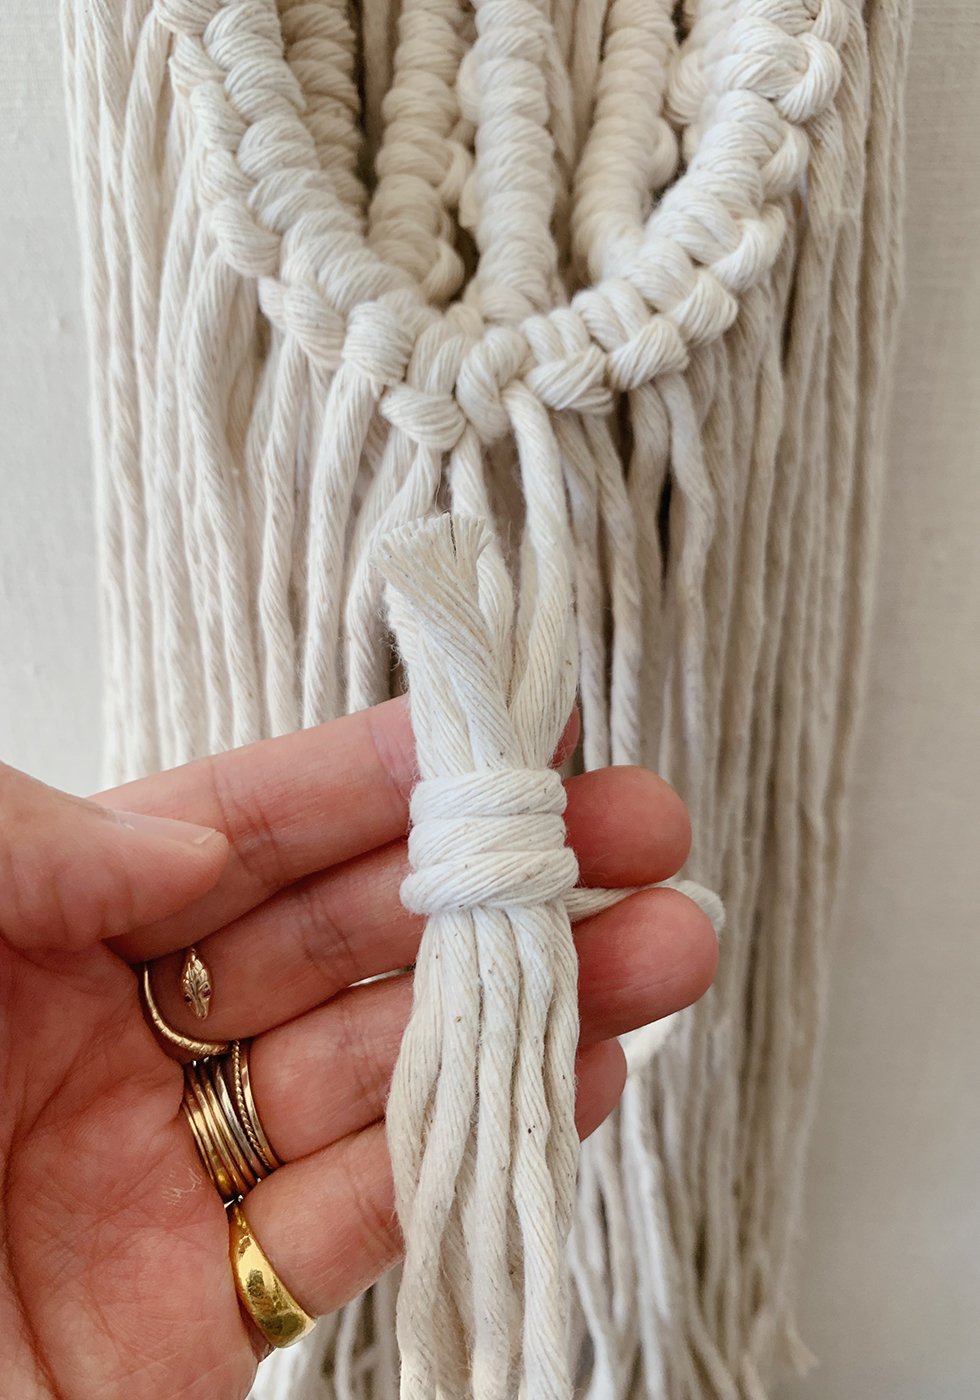
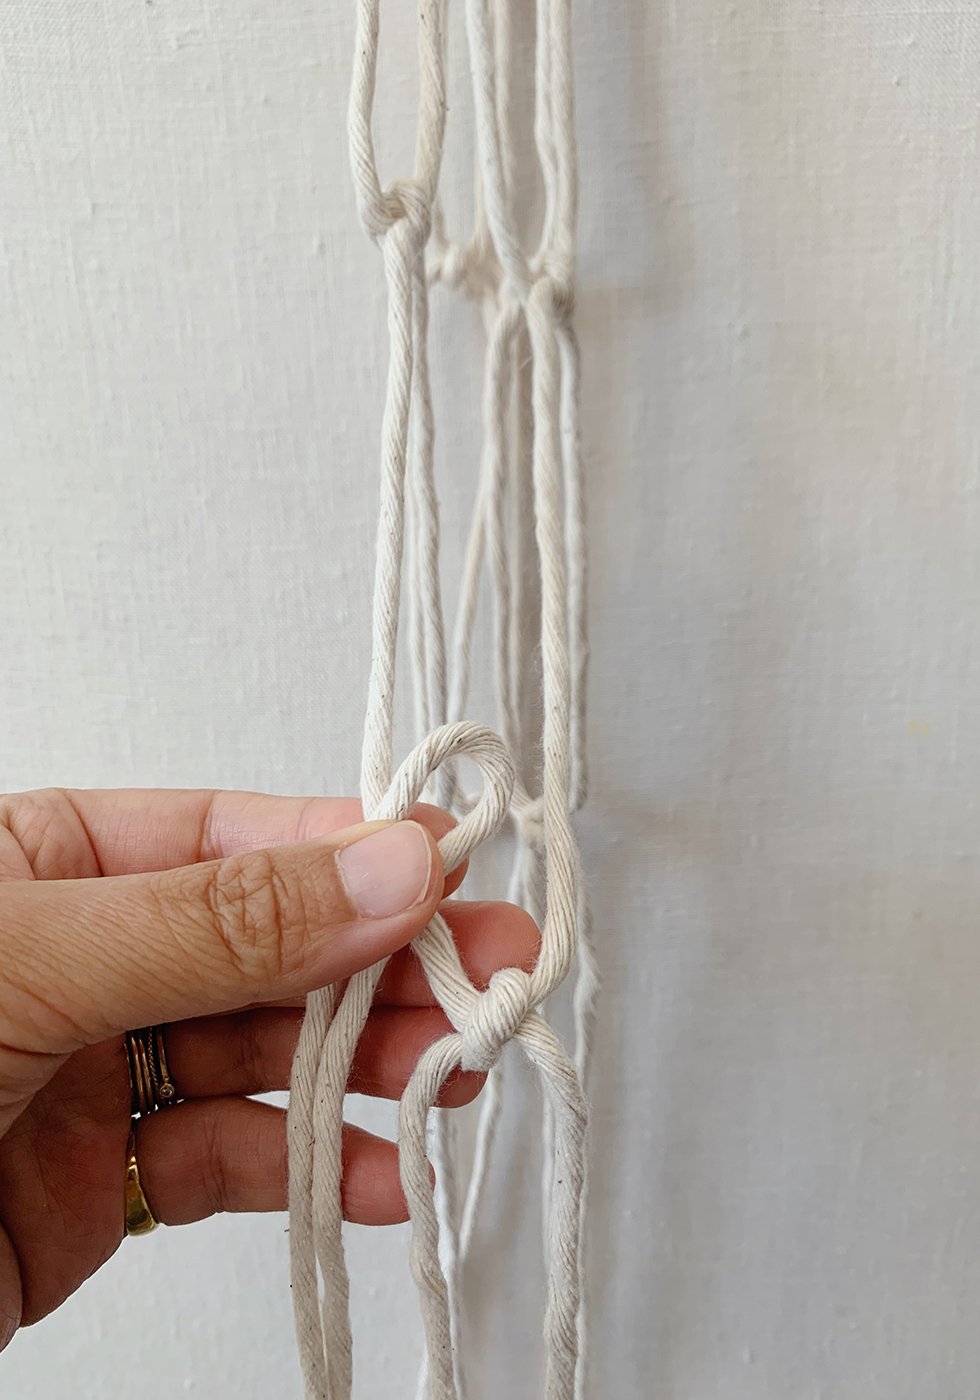
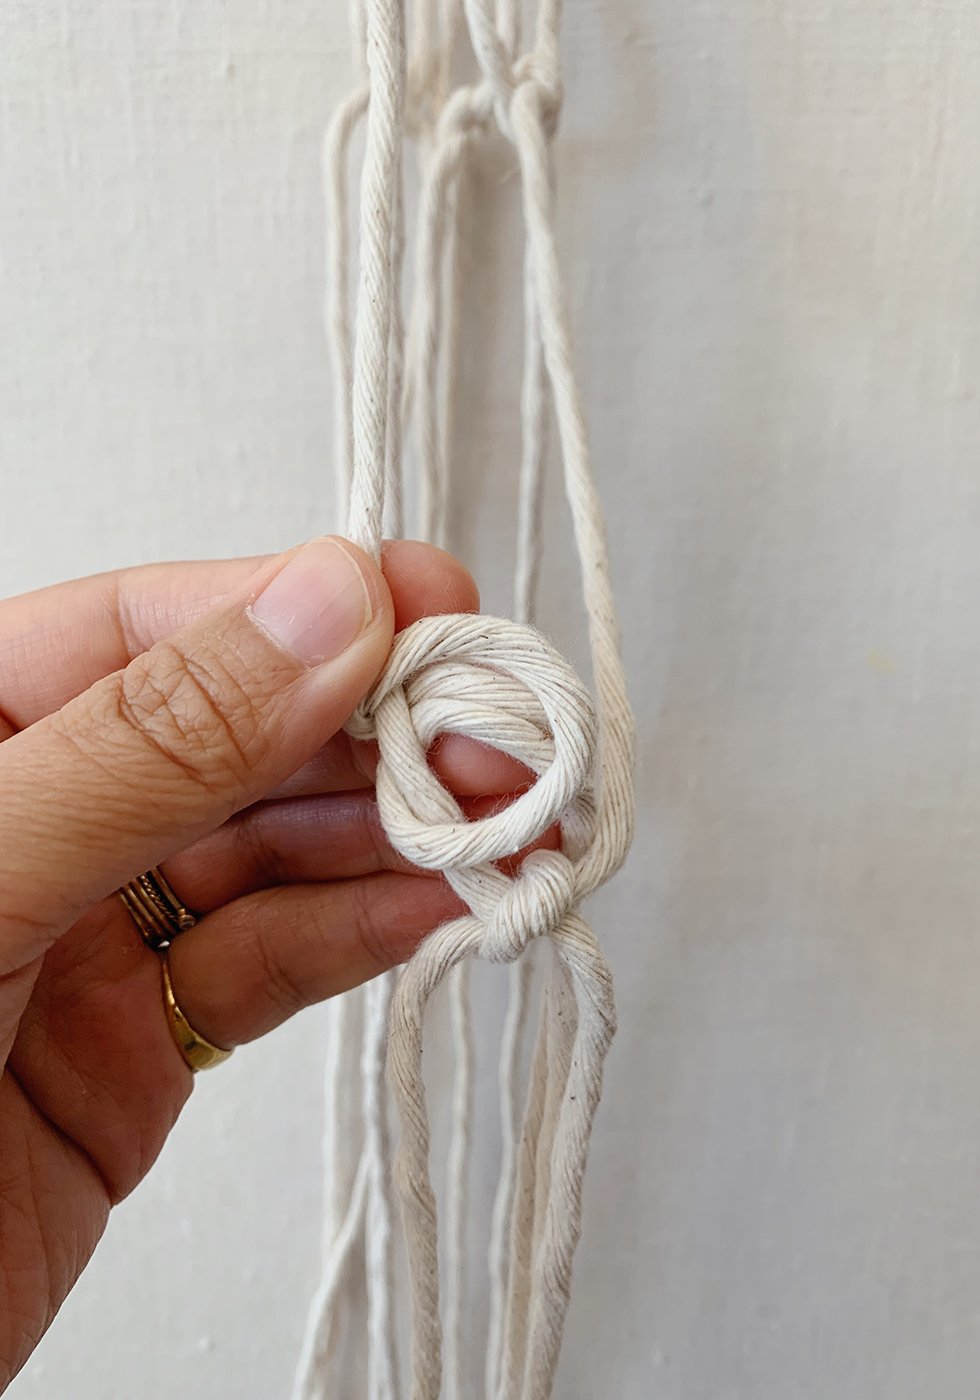
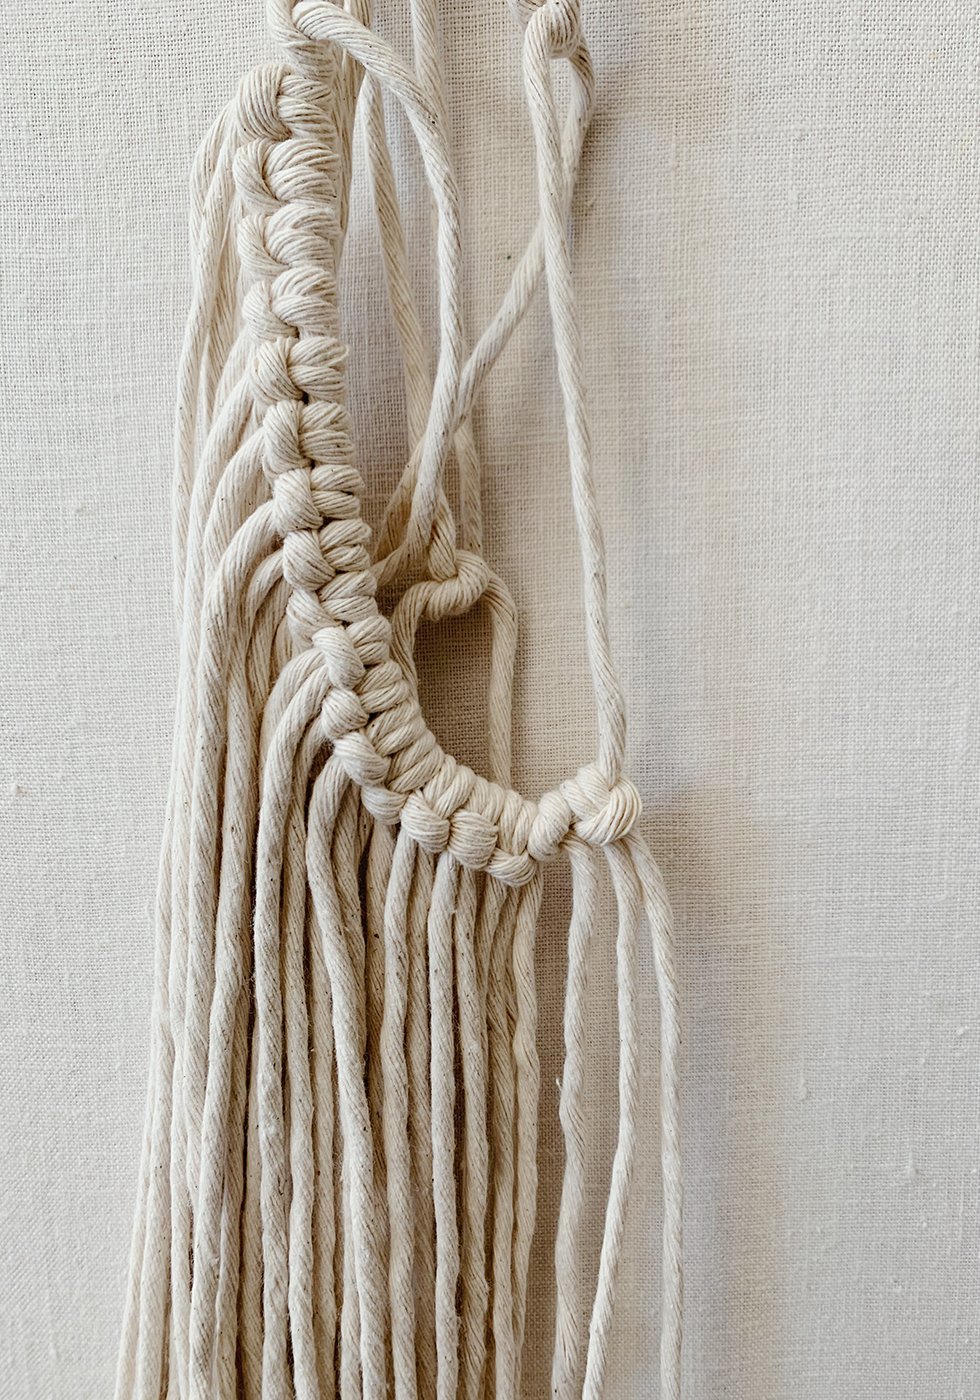
When you're finished, you'll need to wrap the bottom at the bottom of plant hanger to keep your pot in place. Cut an 8 inch strand and repeat what you did at the very beginning of the plant hanger. Gather the bottom 8 strands from the plant hanger base. Fold your string about a quarter of the way and lay that section over the 8 strands. Start wrapping from the top down.
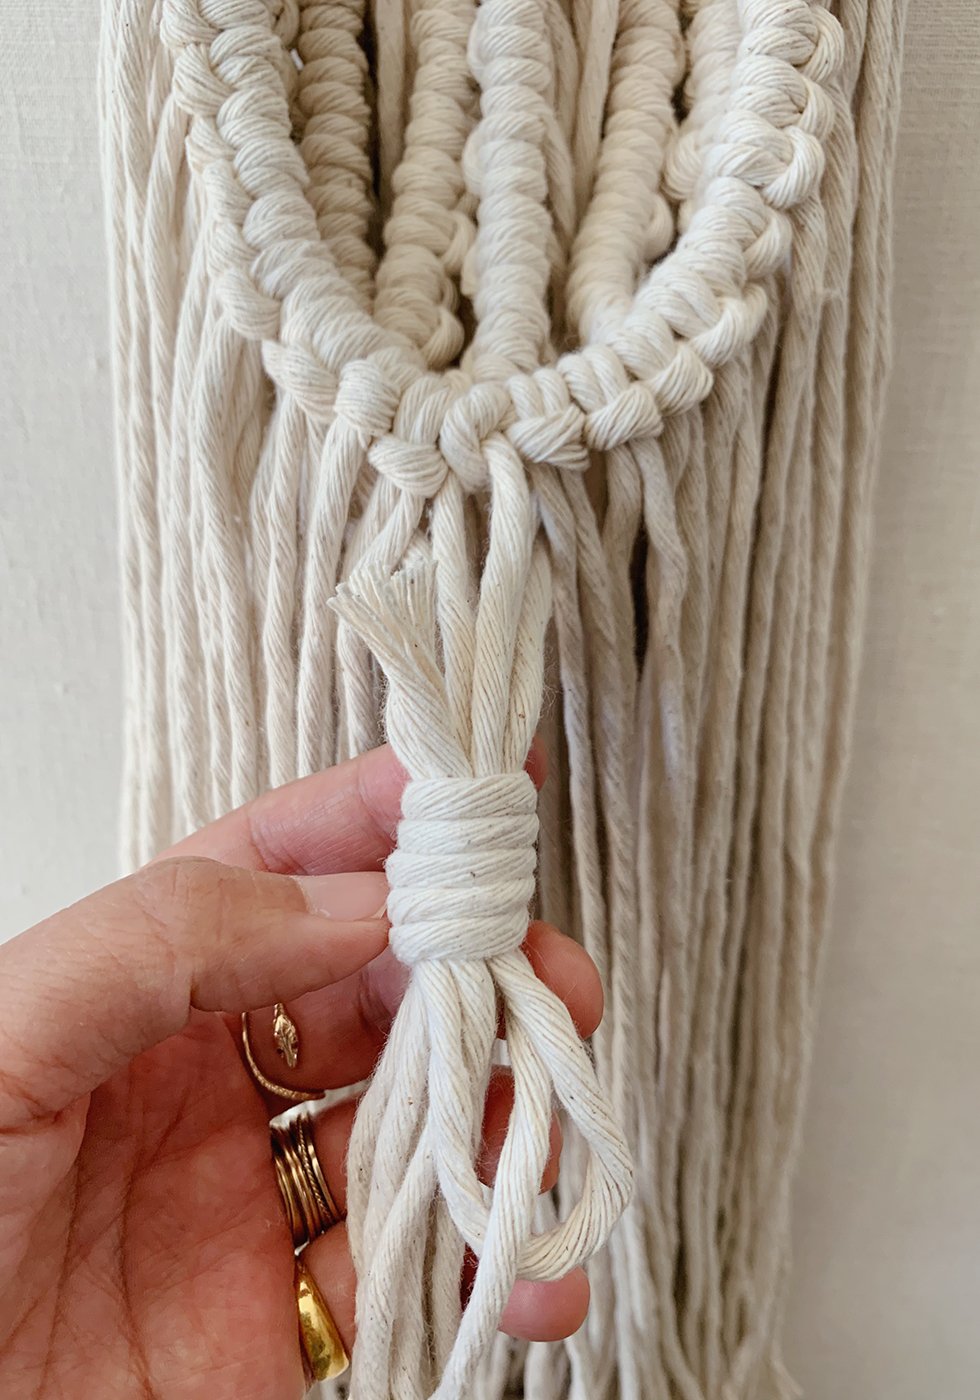
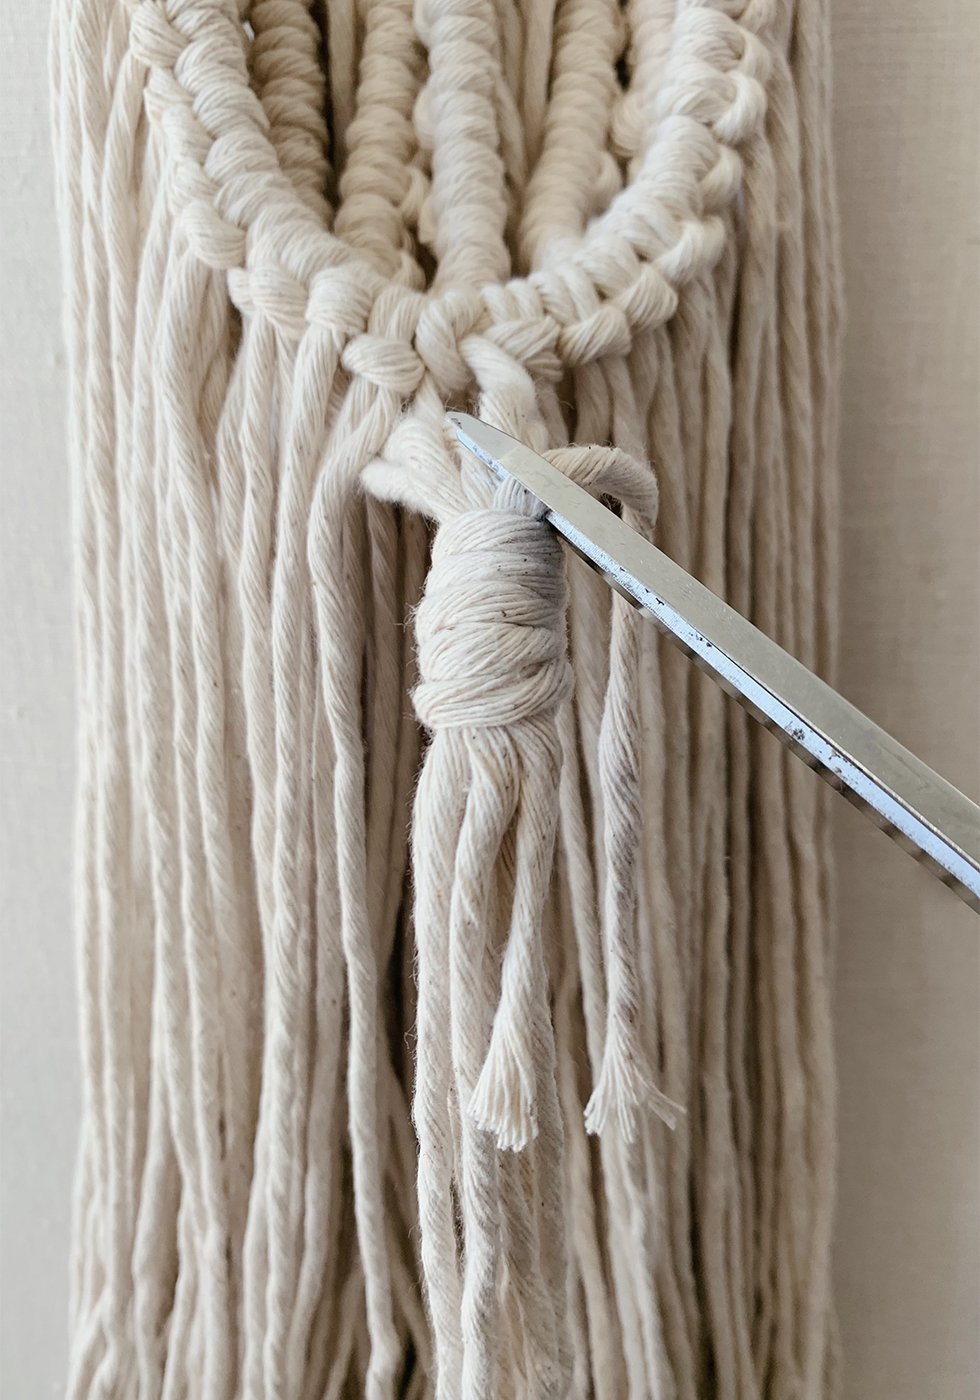
After about 6-7 wraps, tuck the tail of the short piece of string and thread it through the loop. Pull the top tail until the loop disappears into the wrapped section. Trim away any excess. Your plant hanger is finished! You can adjust the depth of your plant hanger by sliding the wrapped section up and down depending on the size of your pot.


images & tutorial by HonestlyWTF
Ooh, I love the black and pink ones! I’ve always felt this trend was a little too boho for my liking, but the colors make the hangers way more my style. I may have to try one out!
xoKaelen | https://darlingmarcelle.com
Watch Online Today Shows Online on Our Website Pinoy Tambayan, Pinoy Ako, Pinoy1TV, Pinoy Channel, Pinoy Teleserye, Pinoy Replay HD Episode.
Would you know the exact yardage that each hanger uses?
I would say it’s about 180 – 200 yards per hanger.
Where do you find the string in colors? I can only find natural. Thanks
The colored string can be found HERE!
great ideas and you can watch dirilis osman all eposides online
http://www.authorstream.com/vojdani/
I would like info on ordering the colored string. Mauve and other colors. I made a mini one from twine to practice making one for a friend. It turned out really cute! Thank you so much for sharing your instructions.
I absolutely loved all of your DIYs. I have become a big fan of you.
Lovely