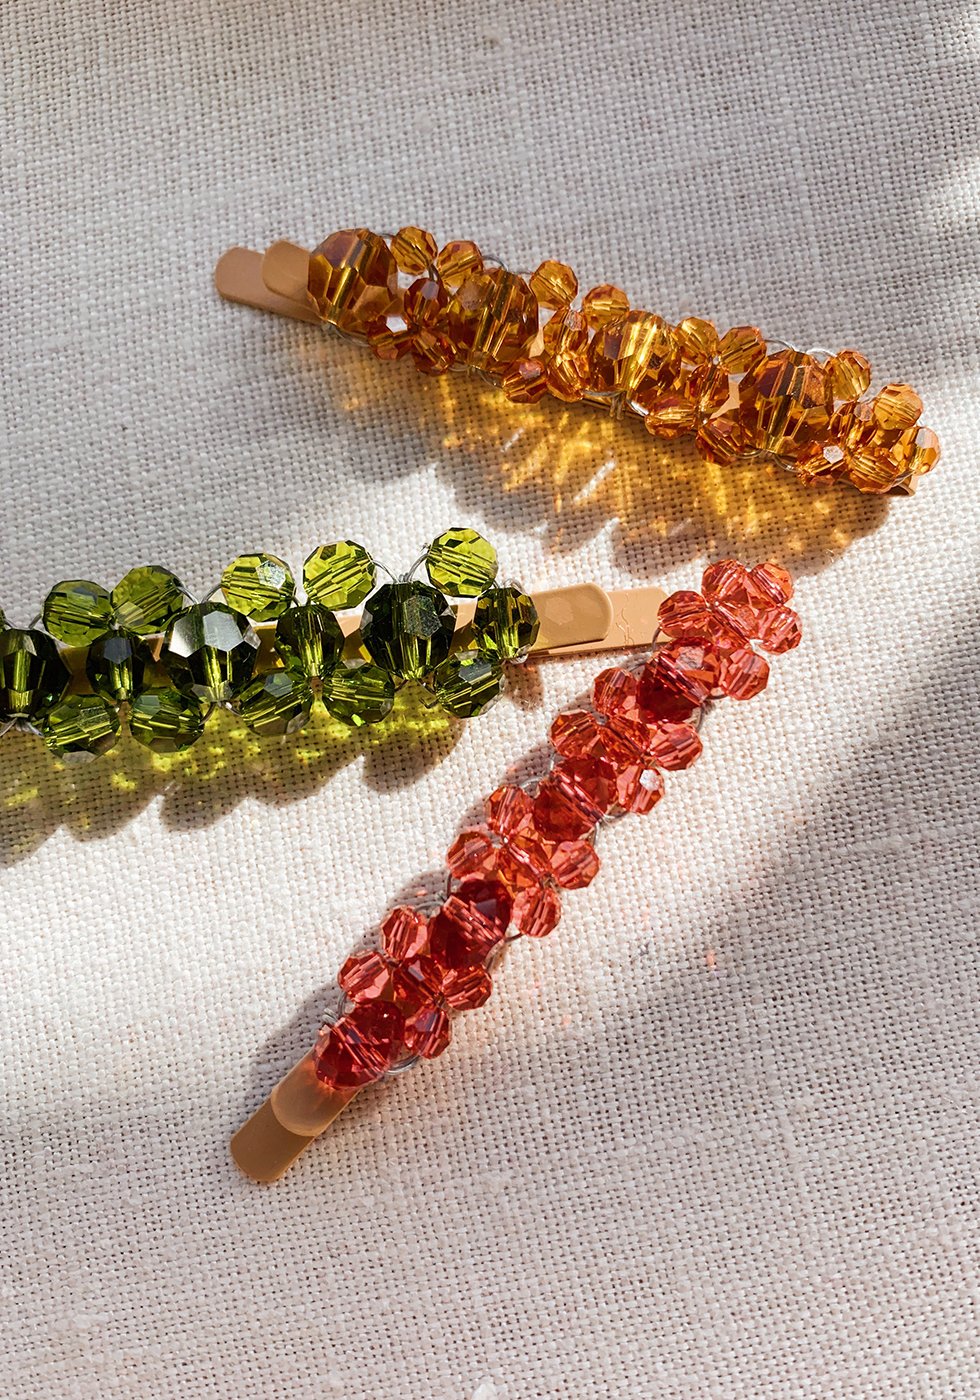
Barrettes are having a moment and it was only a matter of time before I would try my hand at making my own beaded barrettes. I've been crushing on Pantone's color of the year: Living Coral and so naturally, I chose Swarovski's Padparadscha, a most perfect coral hue with golden undertones. So, all you need is a handful of colorful Swarovski beads and some flexible beading wire and I dare you not to make just one. Also, be sure to head over to Swarovski's Create Your Style to discover many more projects!
You'll Need:
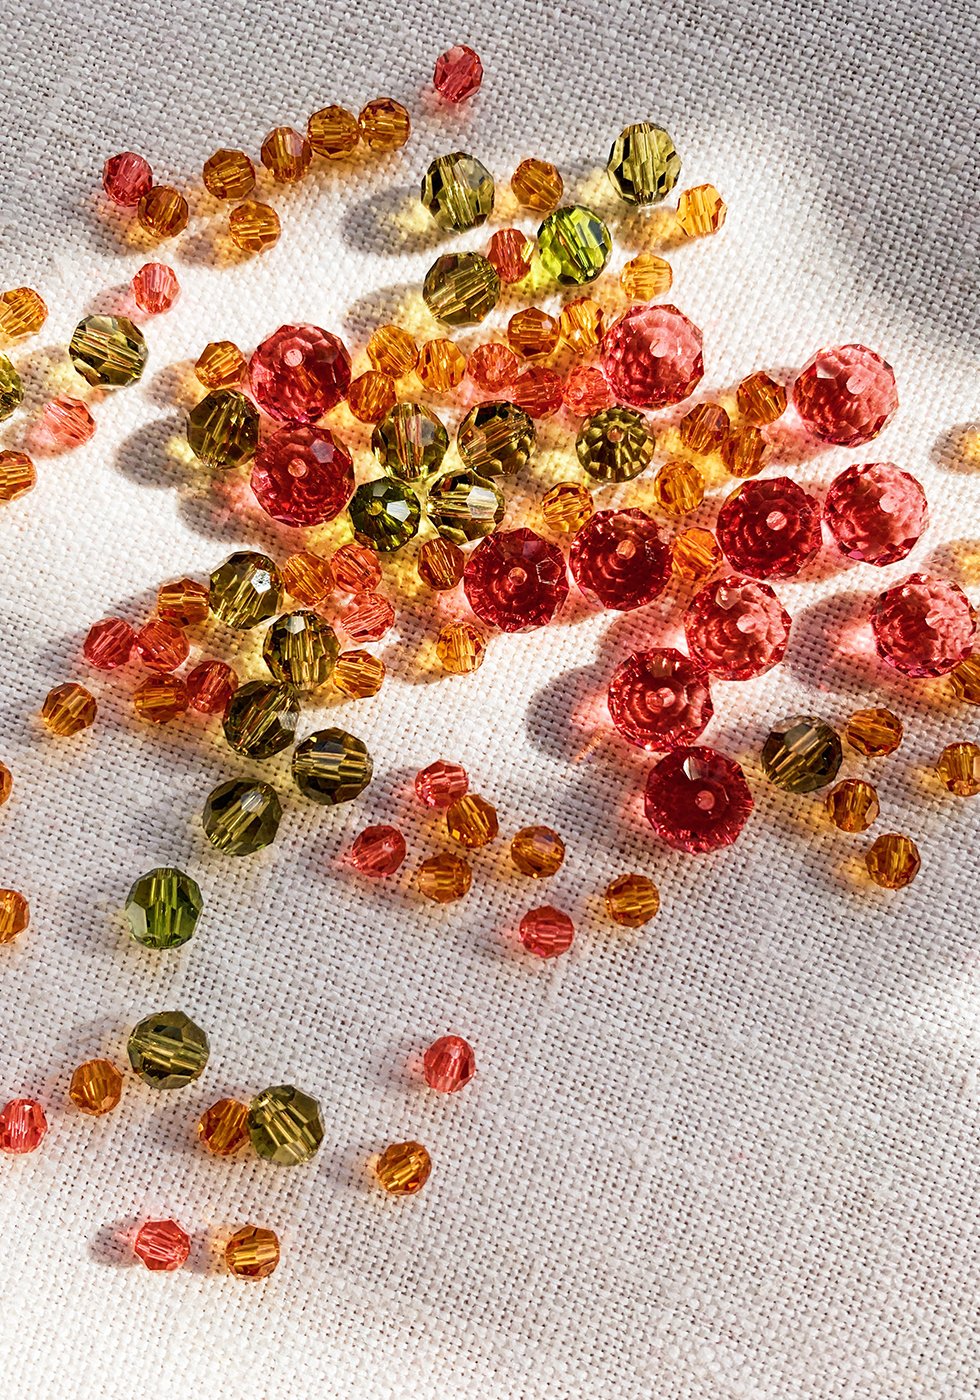
- Swarovski 5000 & 5040 in Padparadscha (6mm & 8mm)
- 24k Gold Soft Flex Fine (.014in diameter)
- gold bobby pins
- scissors
- tweezers


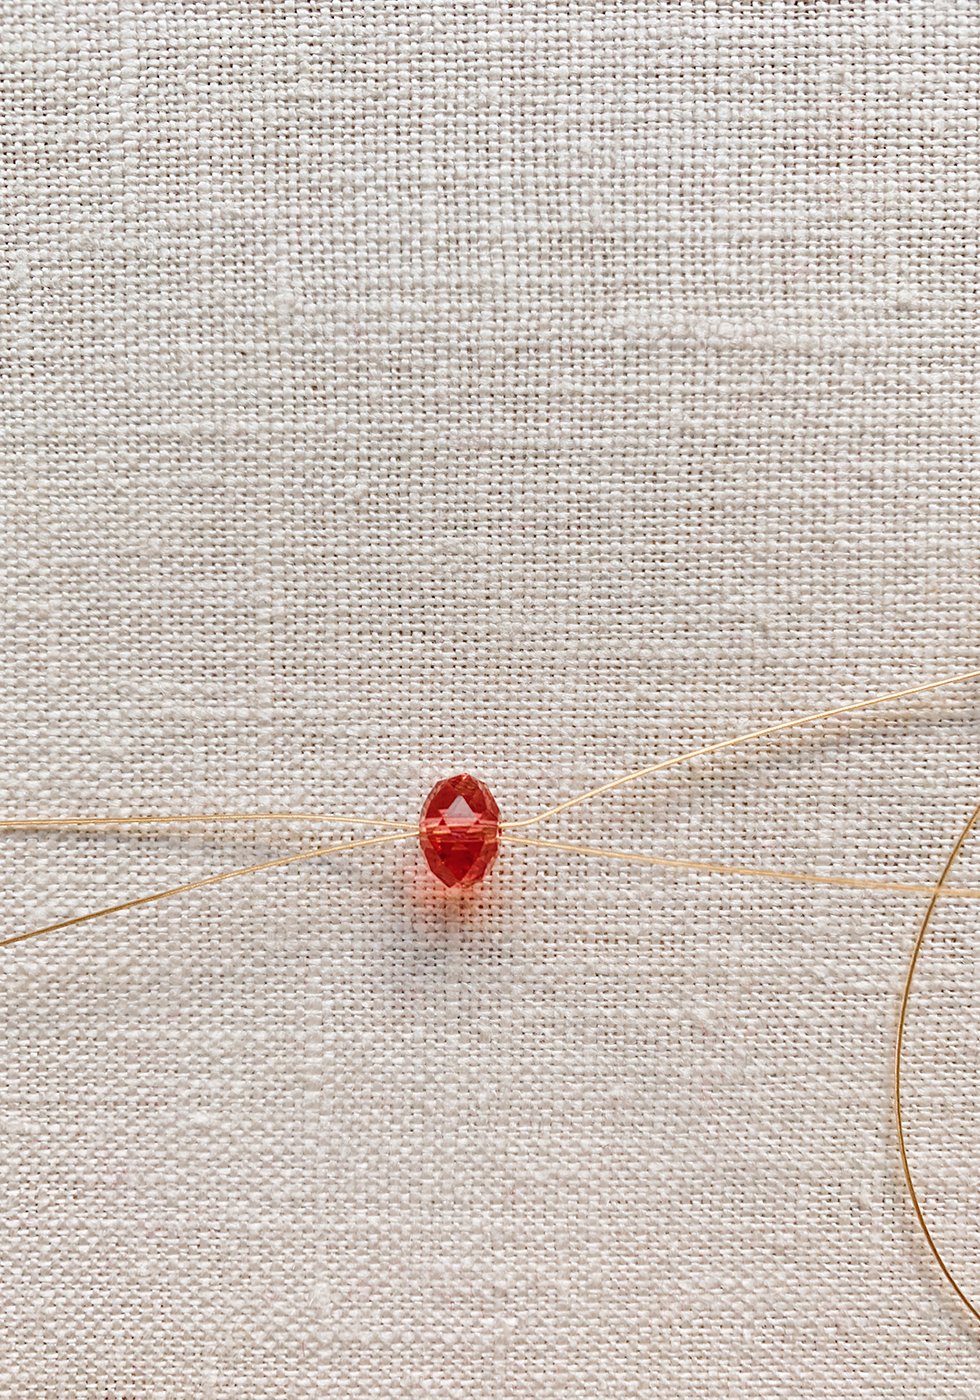
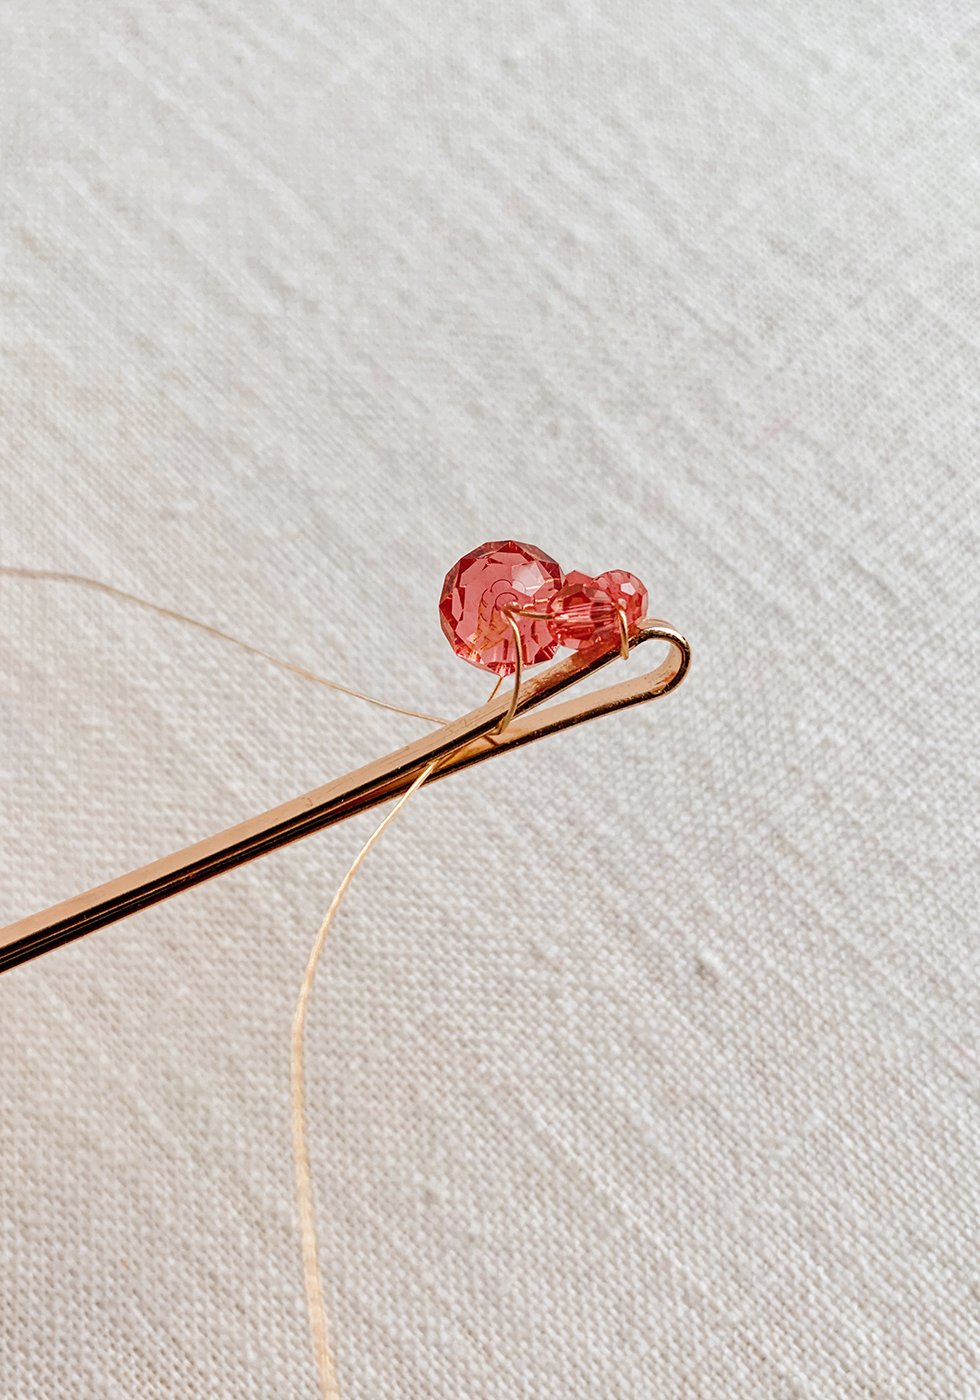
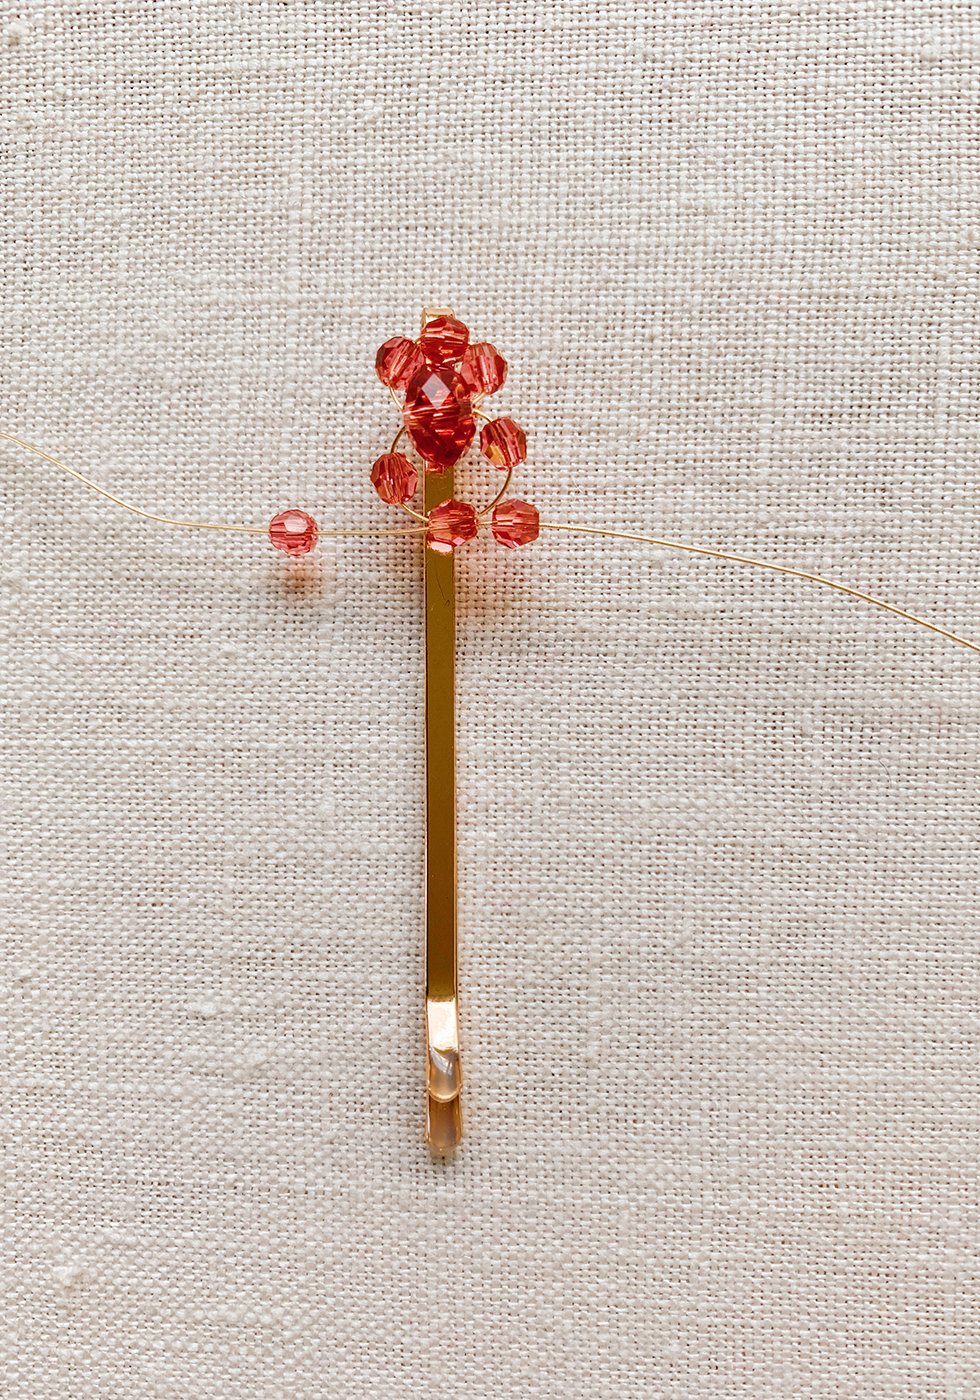
I recommend using Soft Flex beading wire for this project. It's extremely flexible and strong and perfect for tightly beaded project. It comes in various diameters, as well as in silver and gold. The "fine" what you'll need. Start by cutting a 24 inch piece of beading wire. Thread it through the end of your bobby pin and center it.
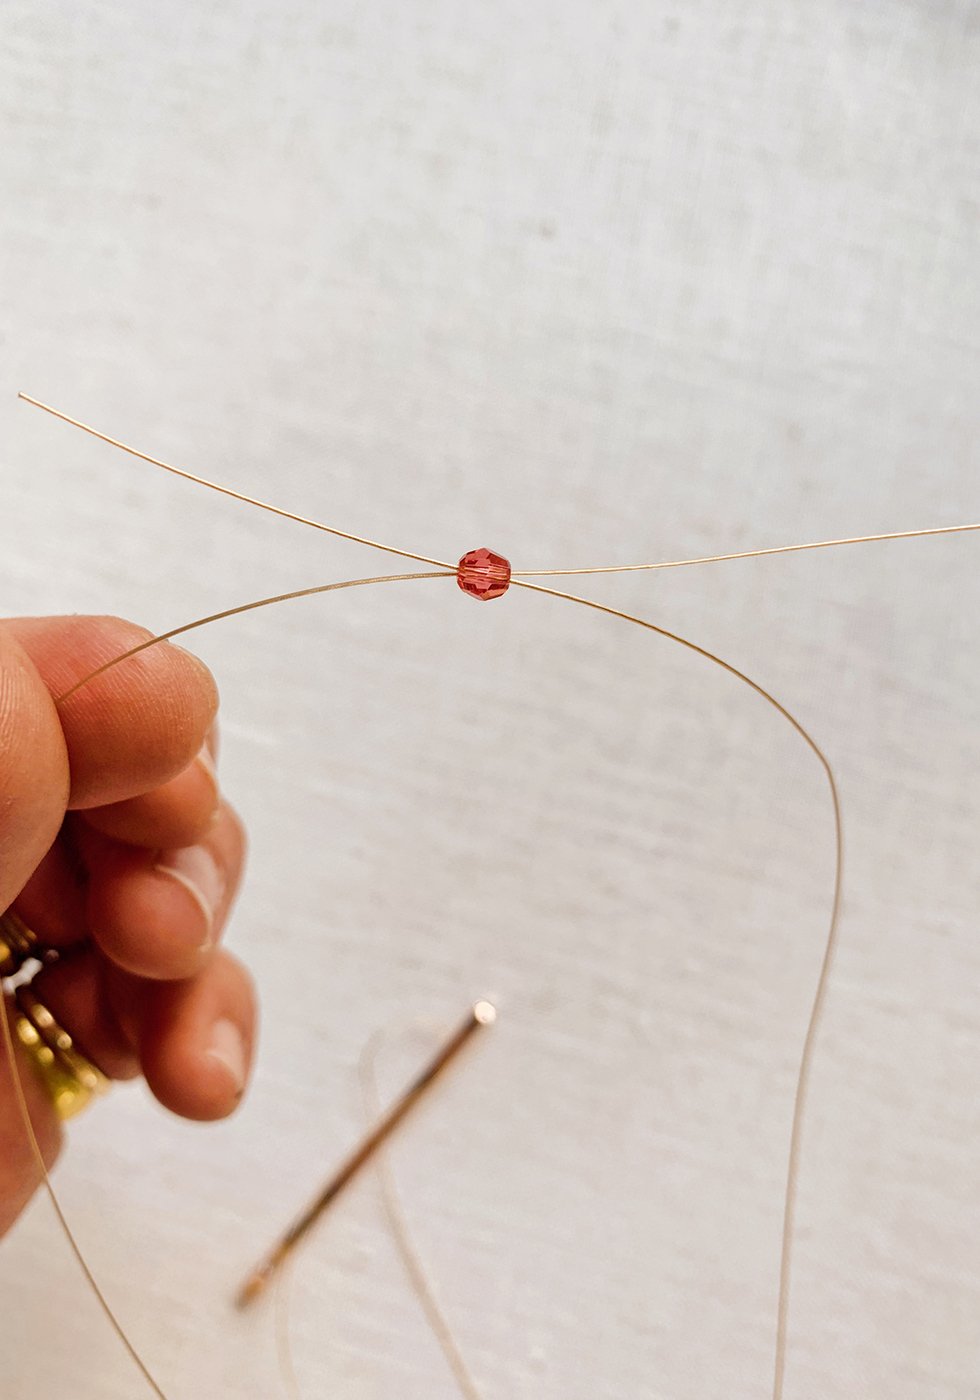
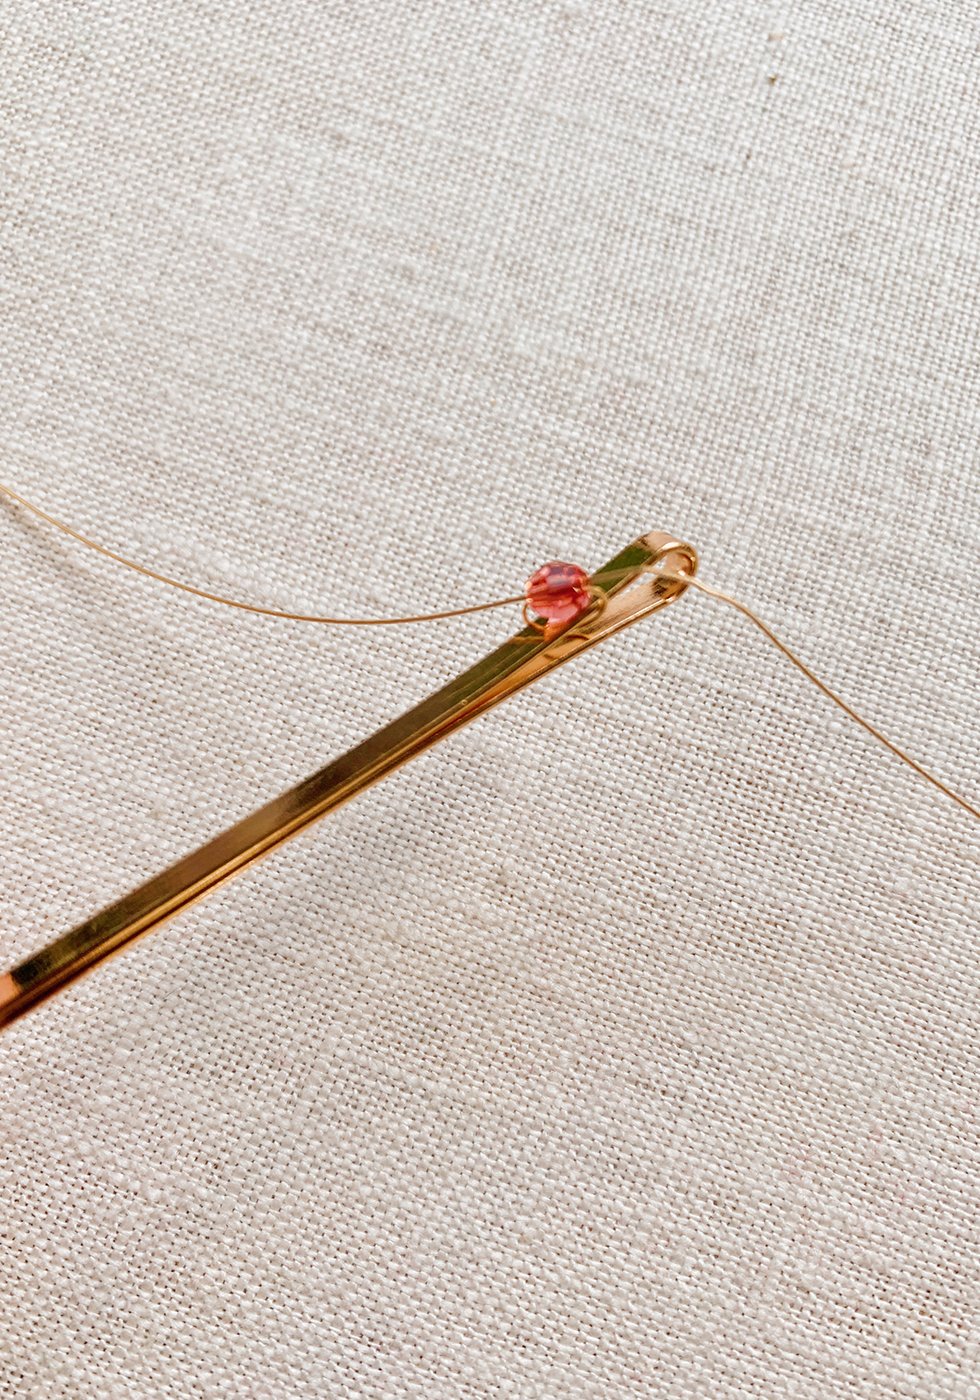
Thread a 4mm bead with each end of the wire, in opposite directions. Pull it tight over the bobby pin.
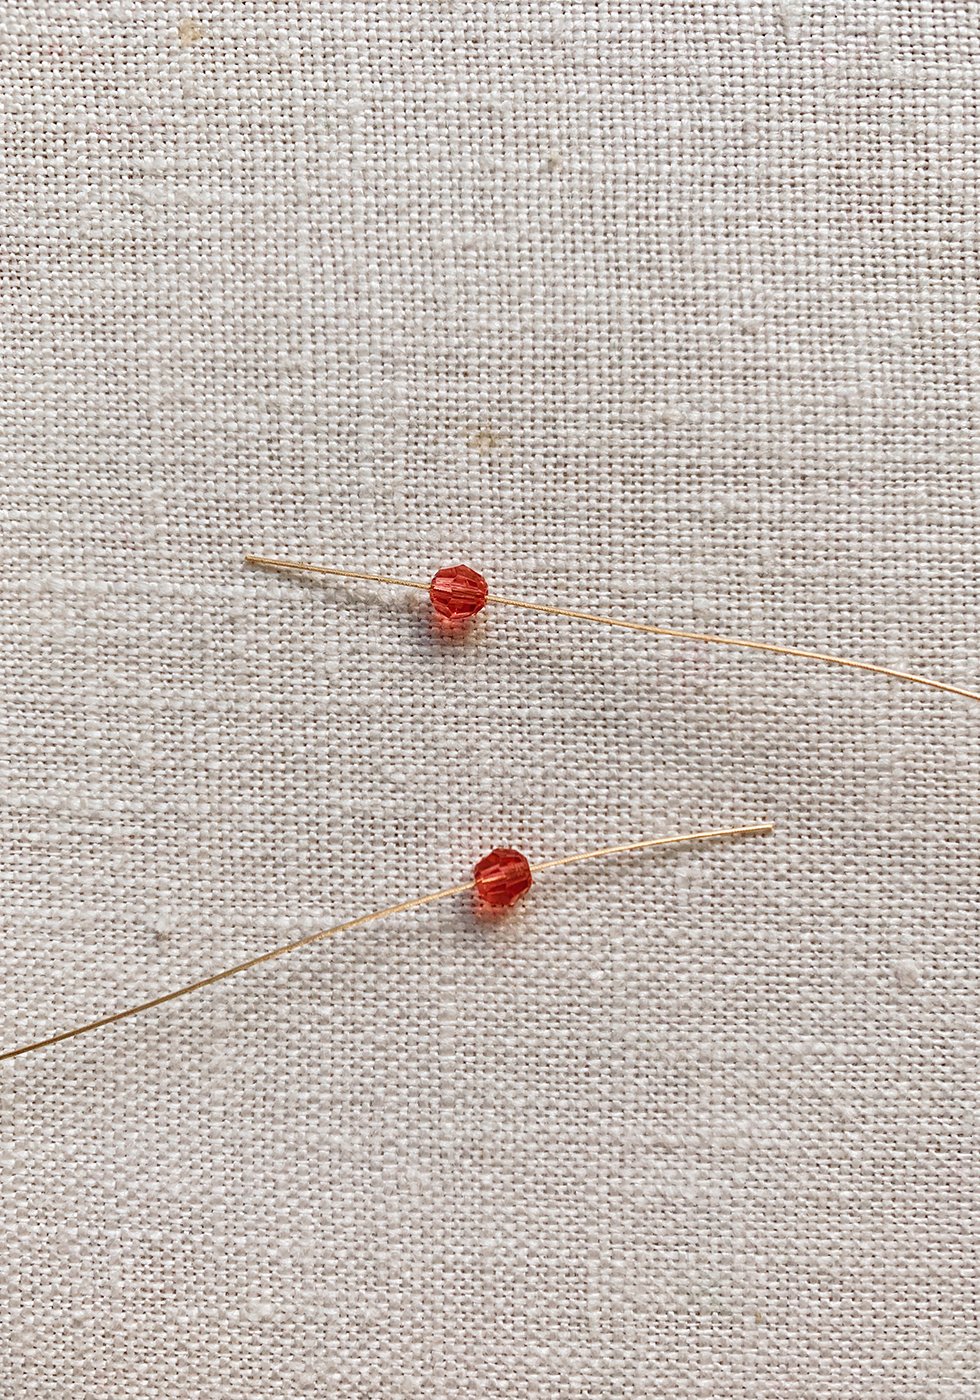
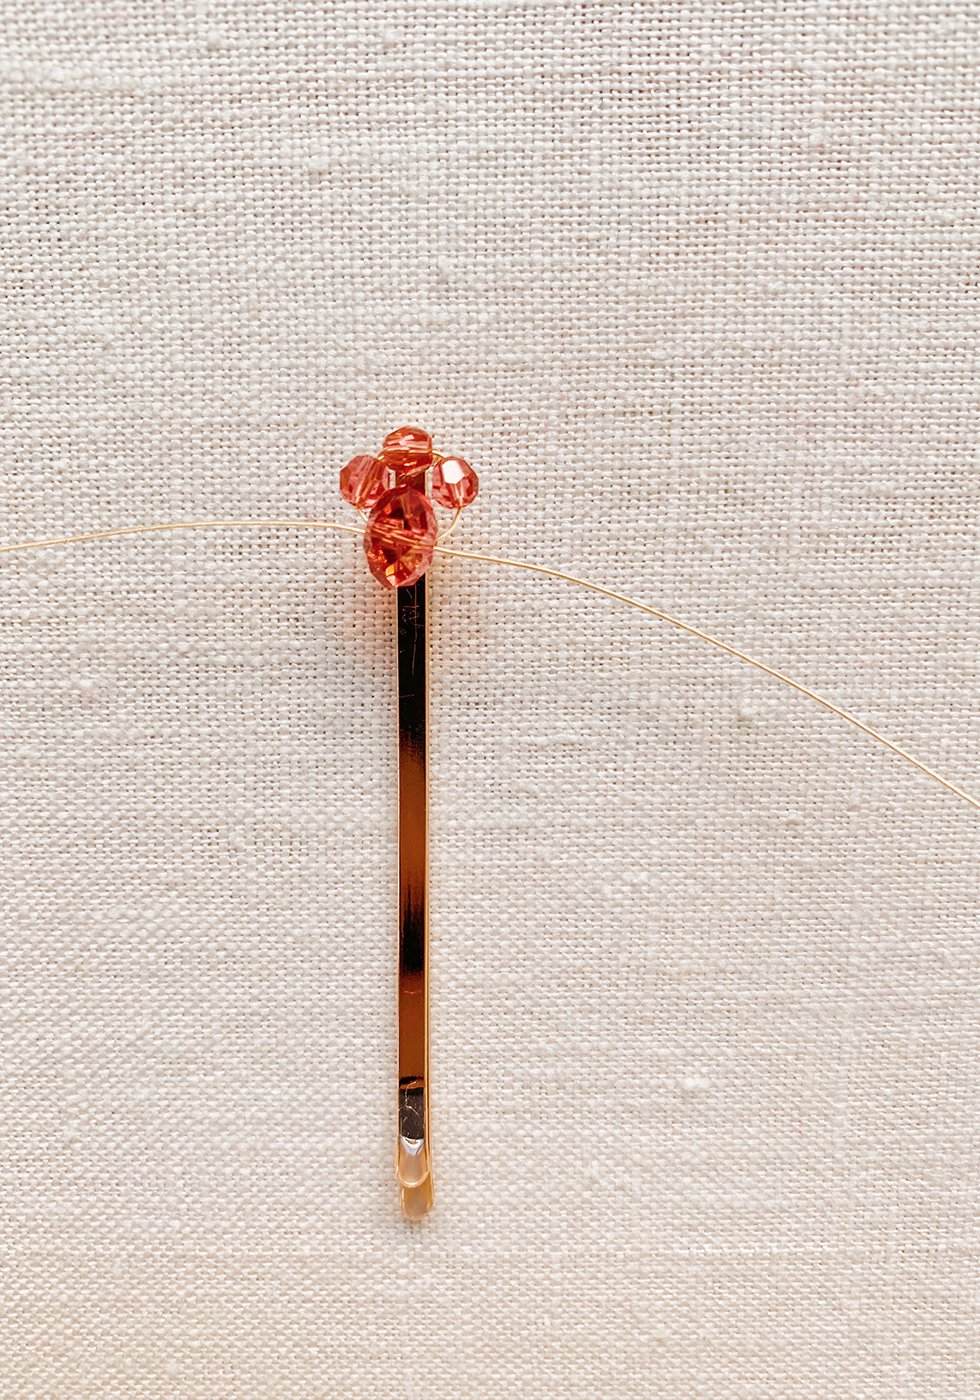
Thread 2 more 4mm beads, one at each end of the wire.
Take a larger, 8mm briolette and thread both ends of the wire through it, again, in opposite directions.
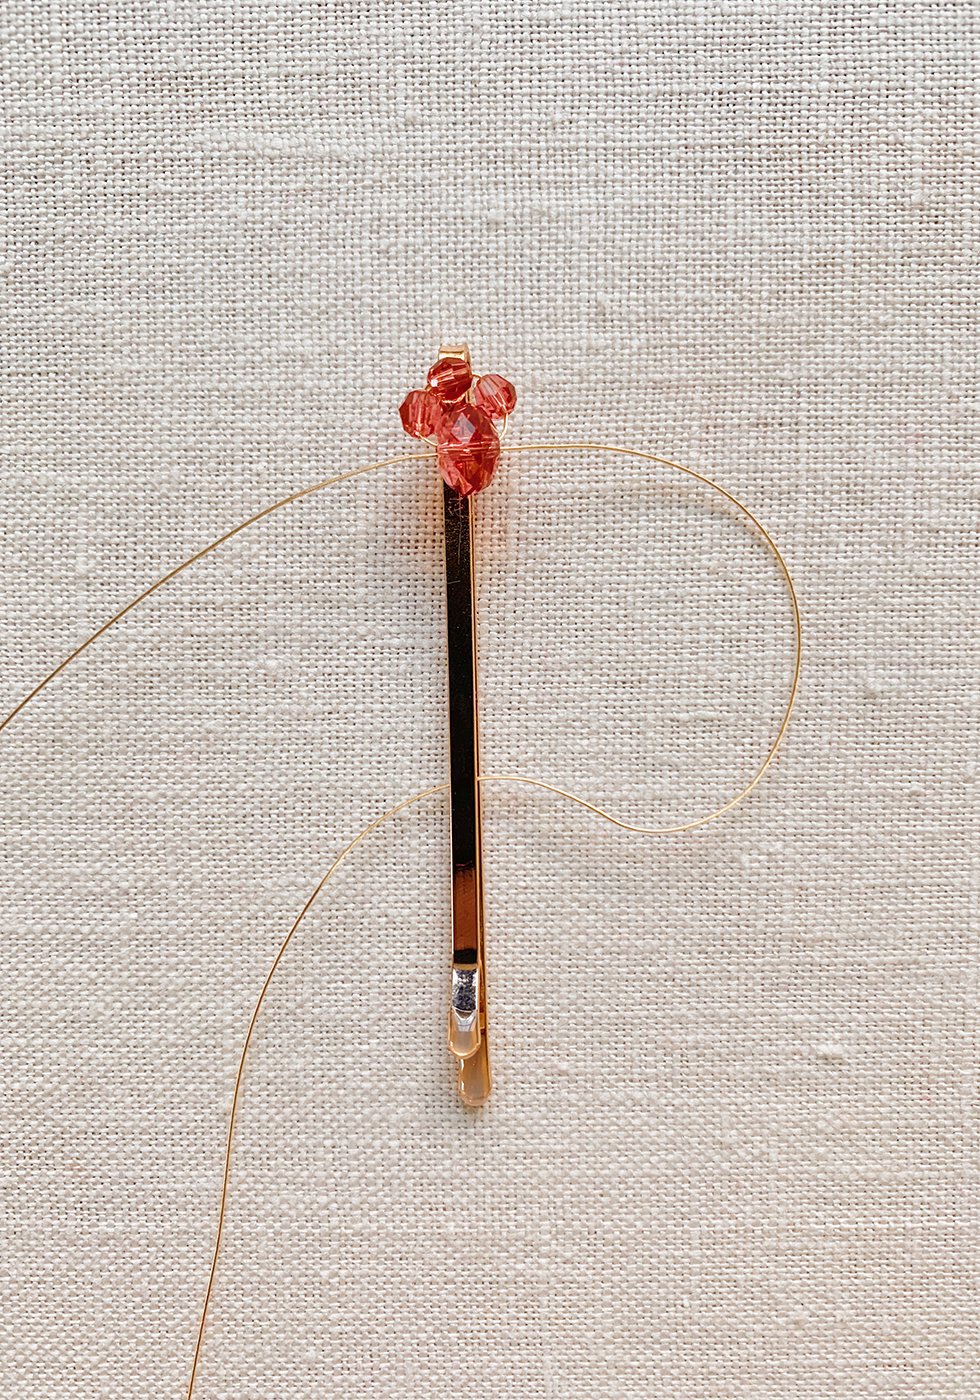
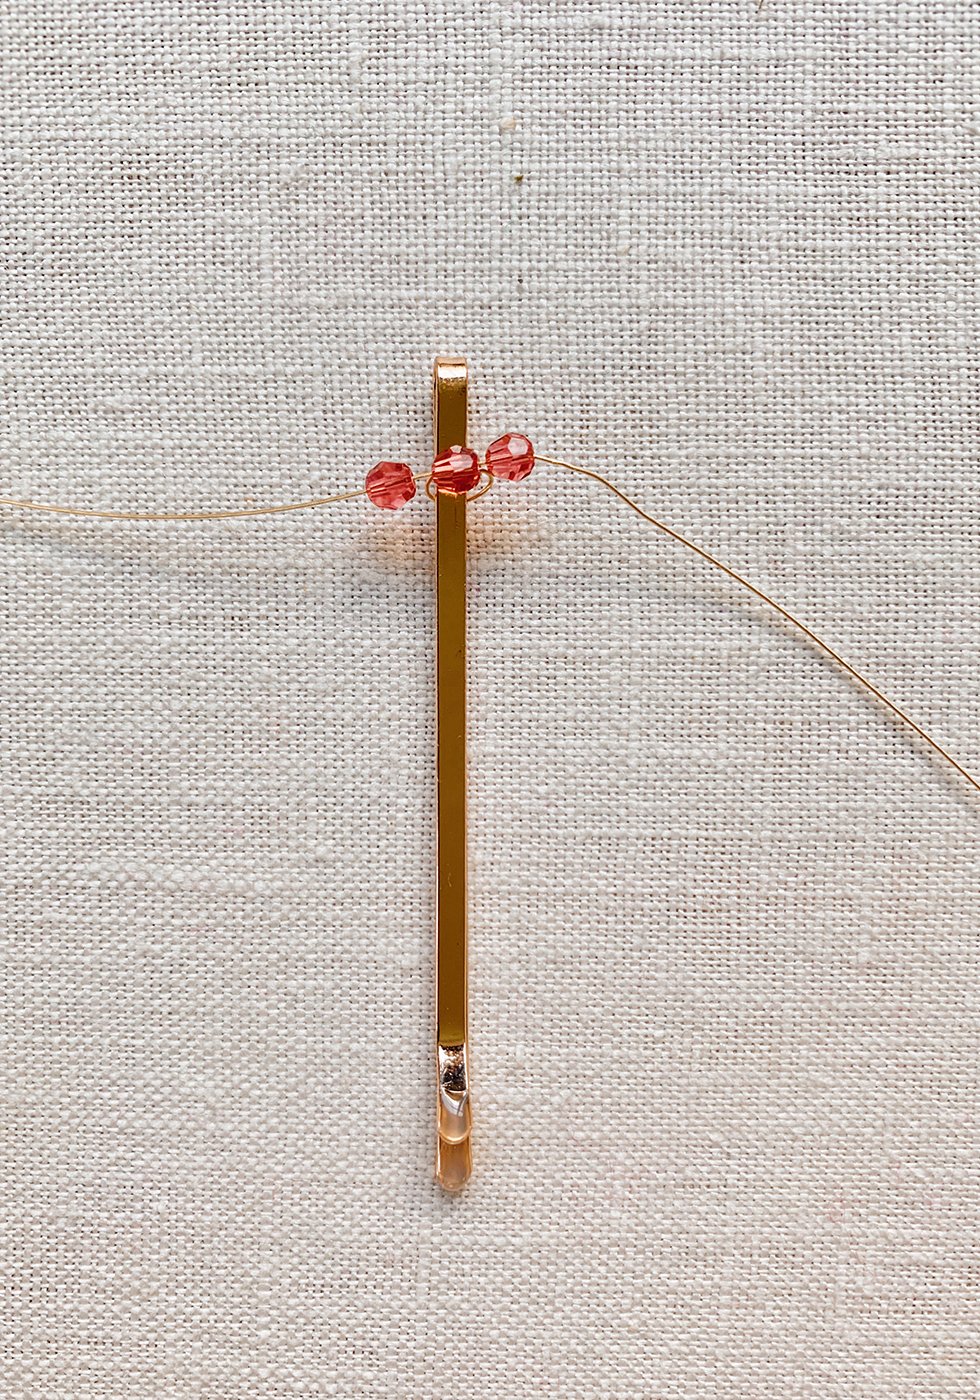
Pull the wires tightly. To secure the bead, you'll need to wrap it around the bobby pin. Pull one side of the wire between the bobby pin.
So the same to the other side. Now both sides of the wire are passing through the center of the bobby pin.
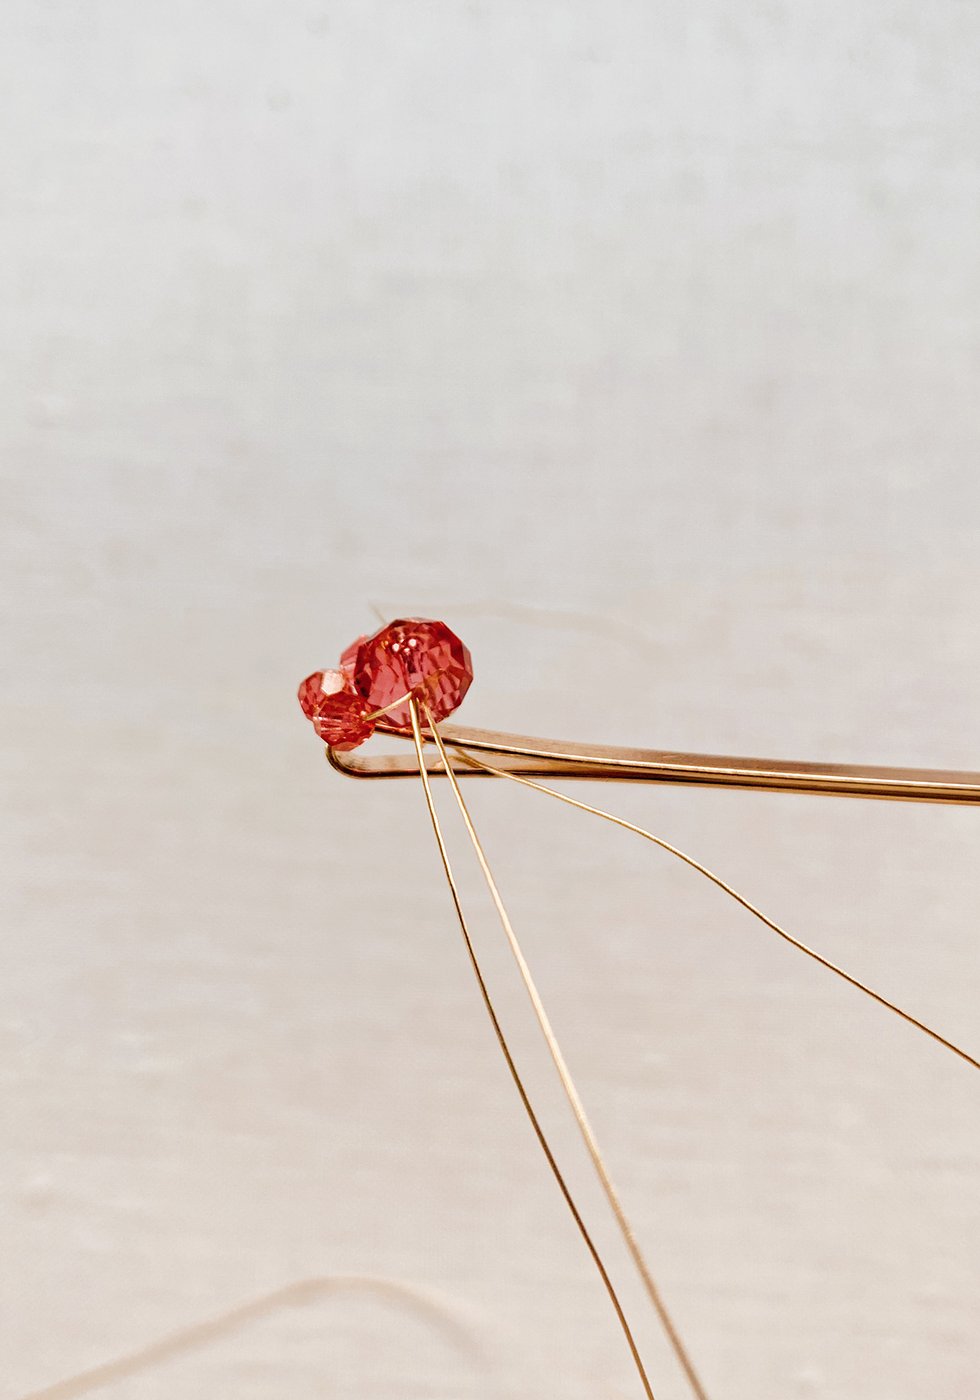
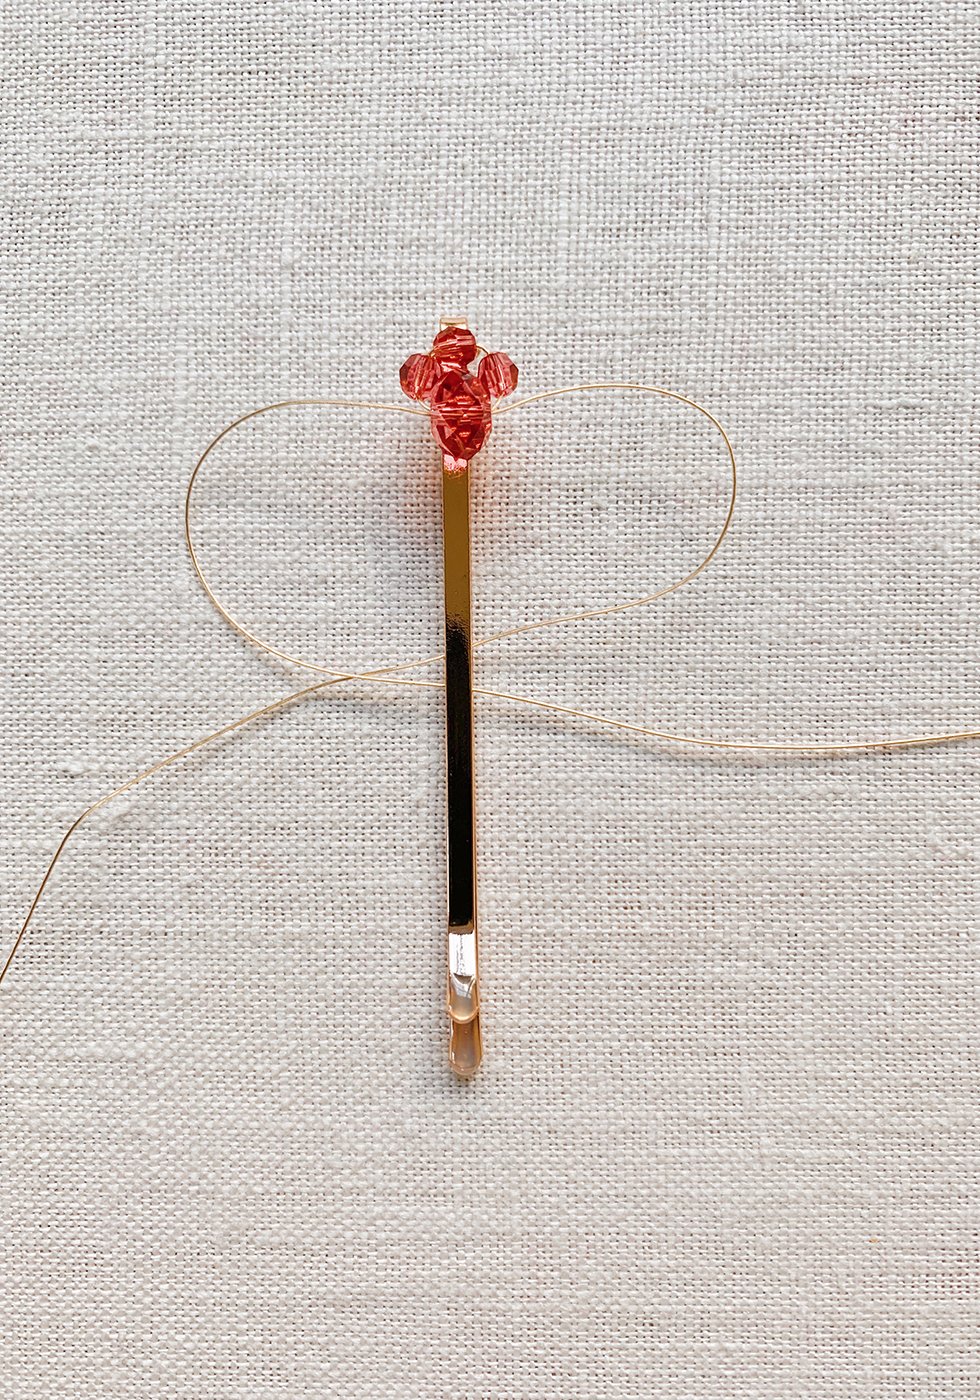
Now, take one end of the wire and thread it through the briolette on the same side. Repeat on the other side. Now, the bead is tightly attached to the bobby pin.

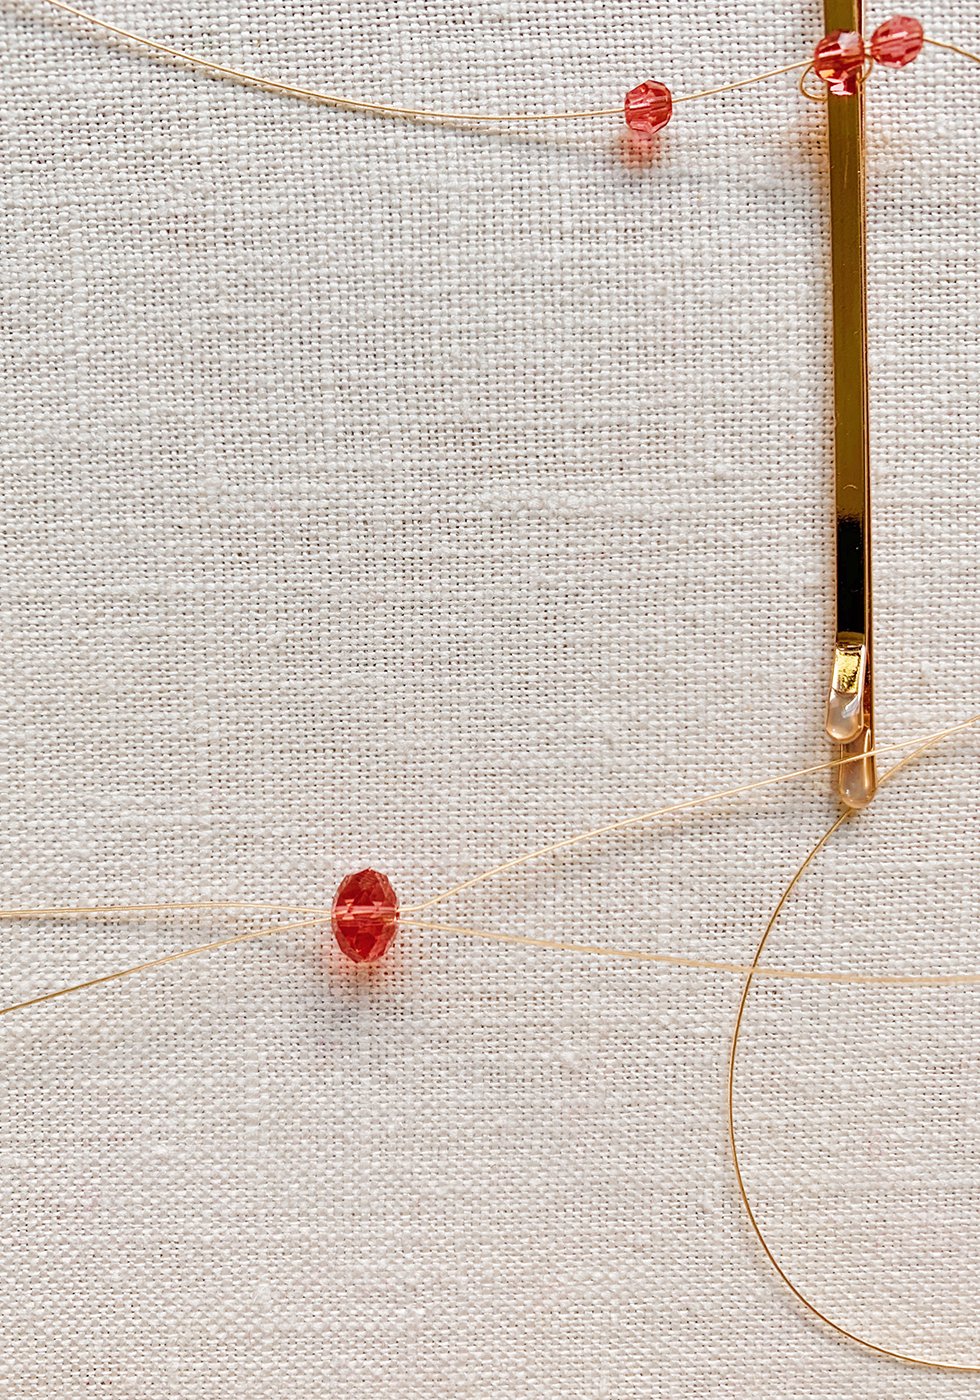
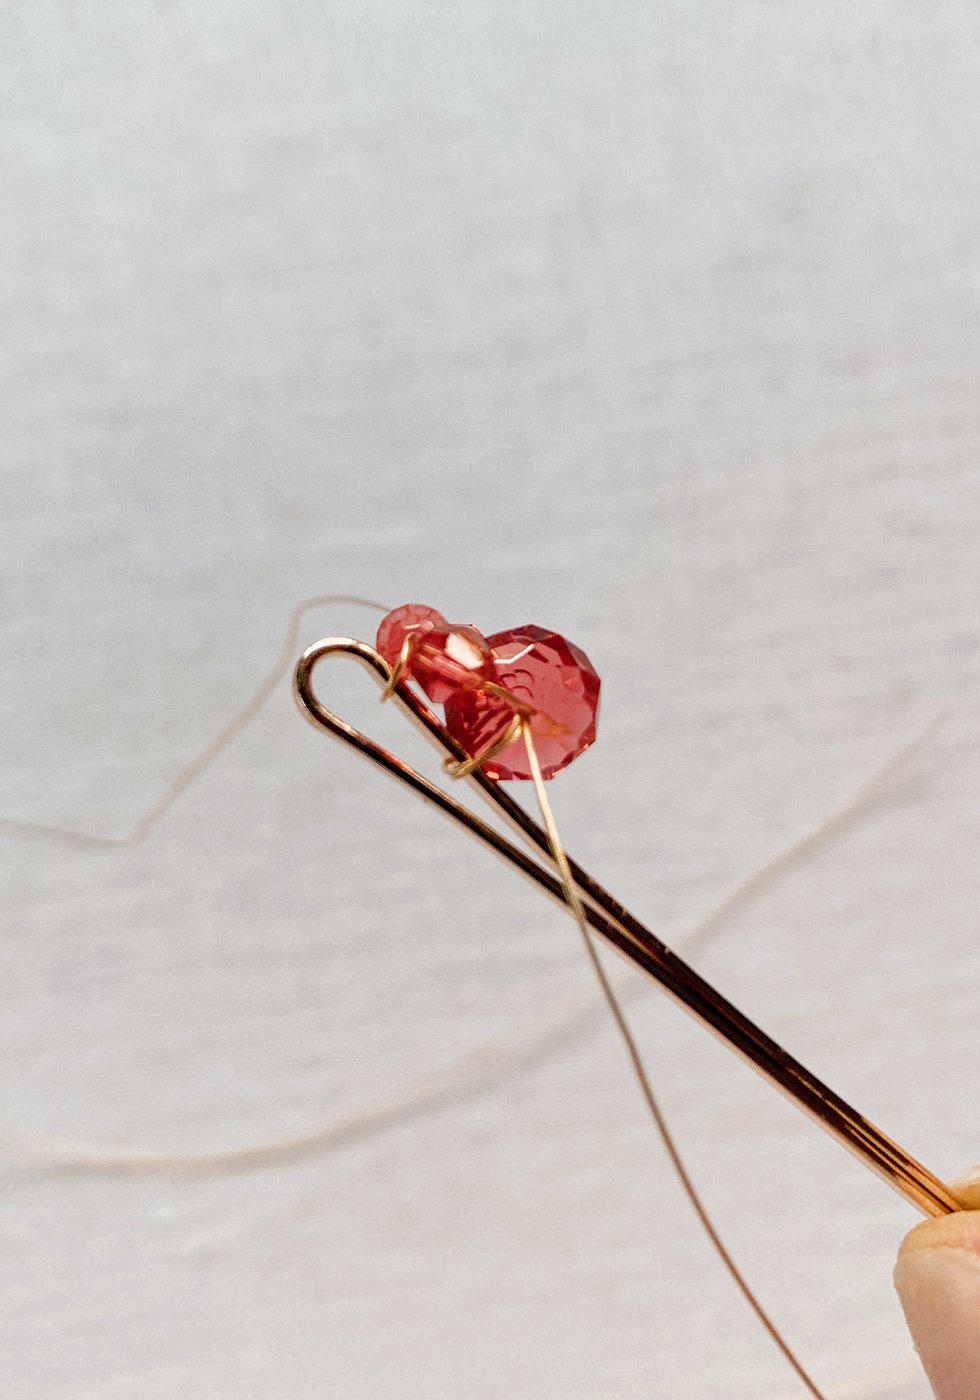
Continue adding more 4mm round beads, repeating the pattern.

Each time you get to a larger briolette or bead, wrap it around the bobby pin to secure it.
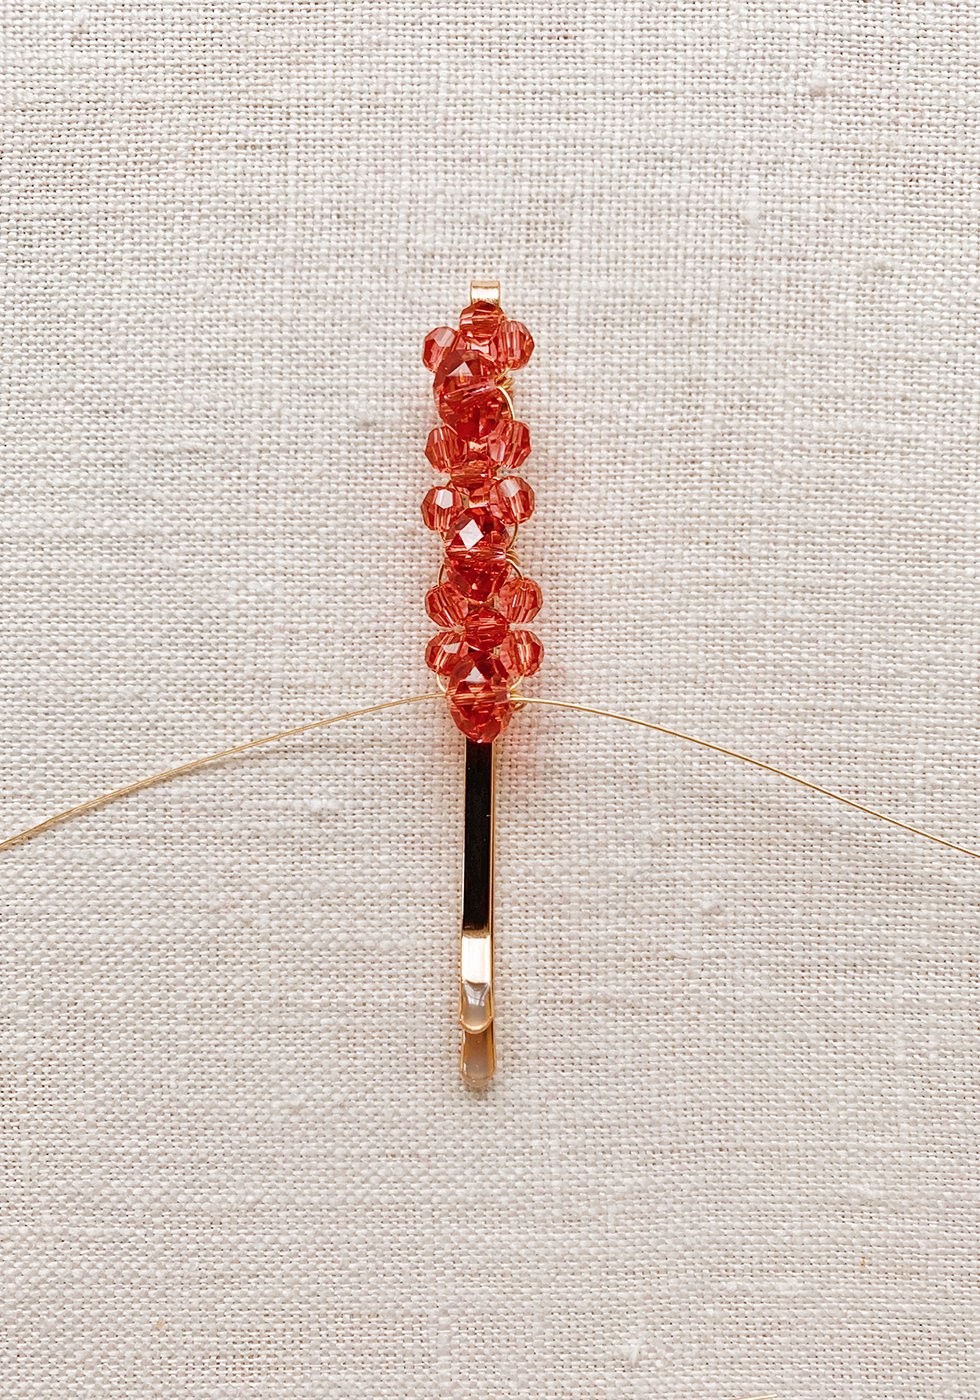
End with a larger bead and you'll need to pass through the bead twice, with both ends of the wire.
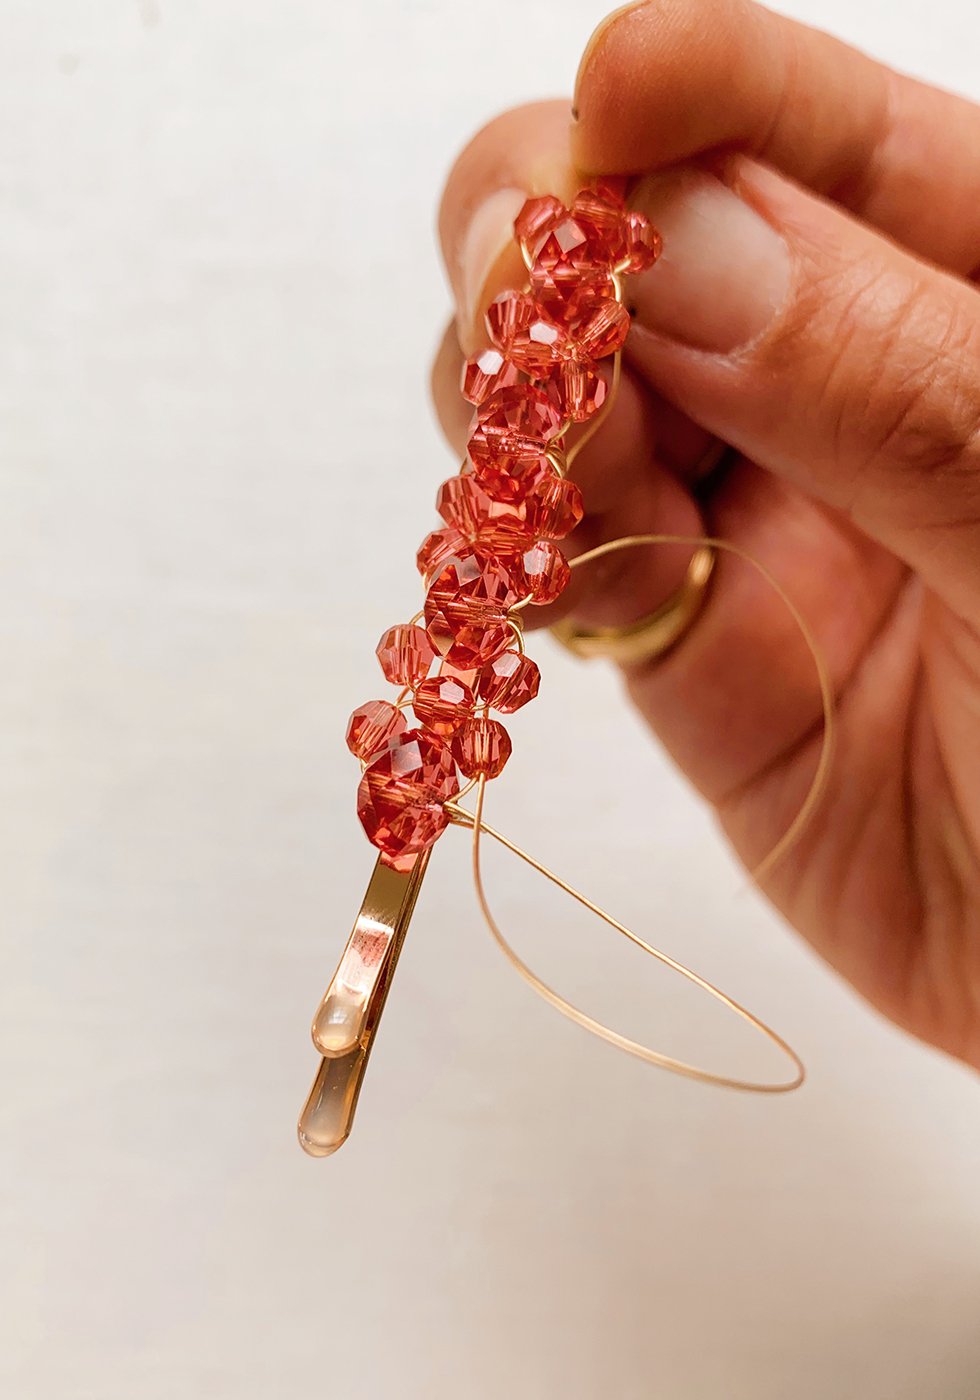
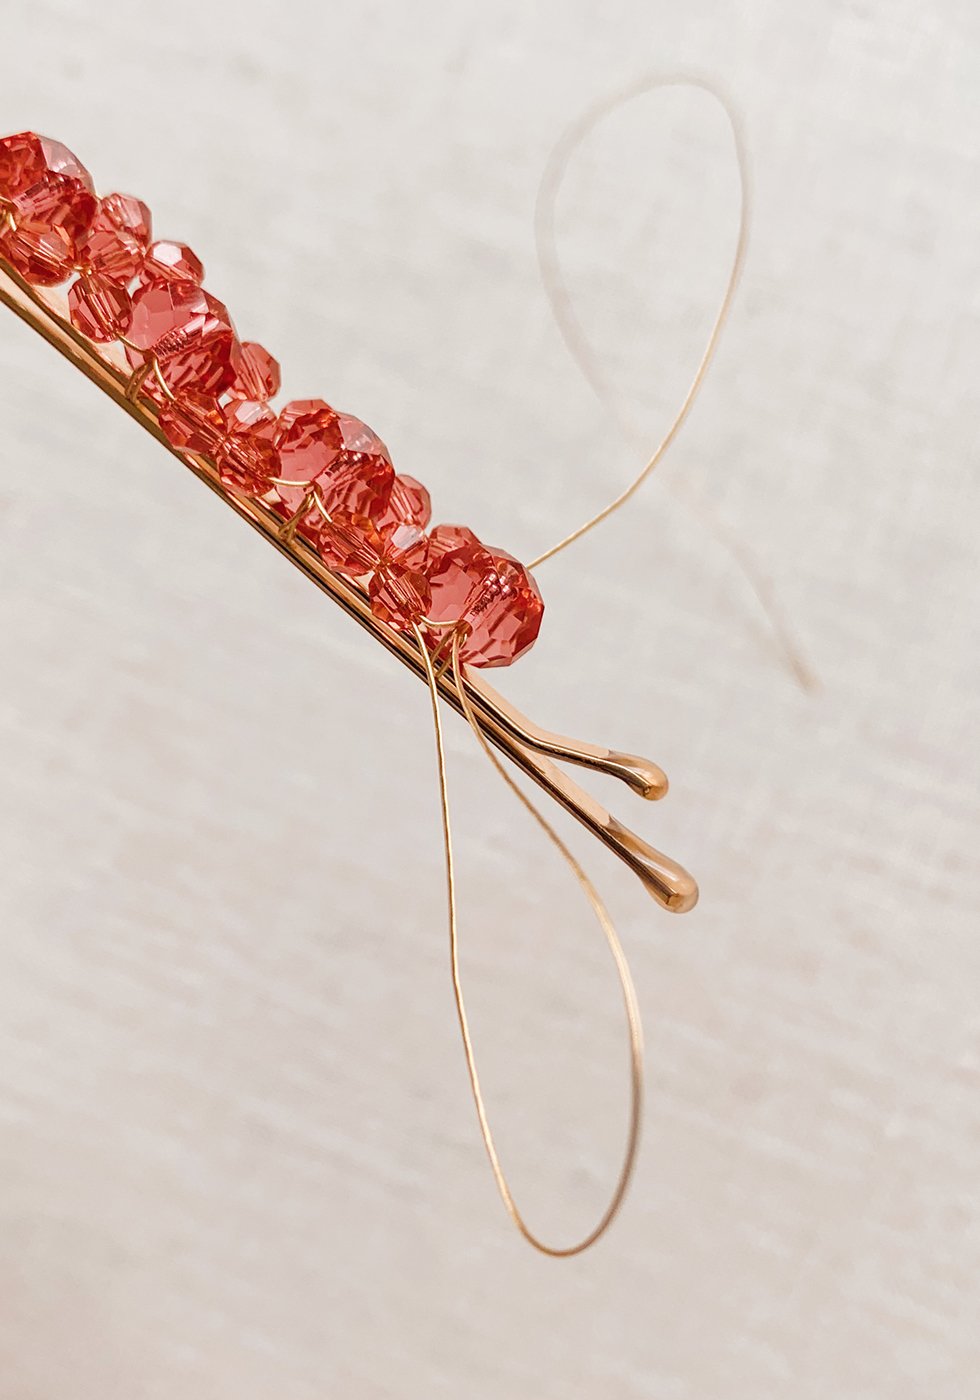
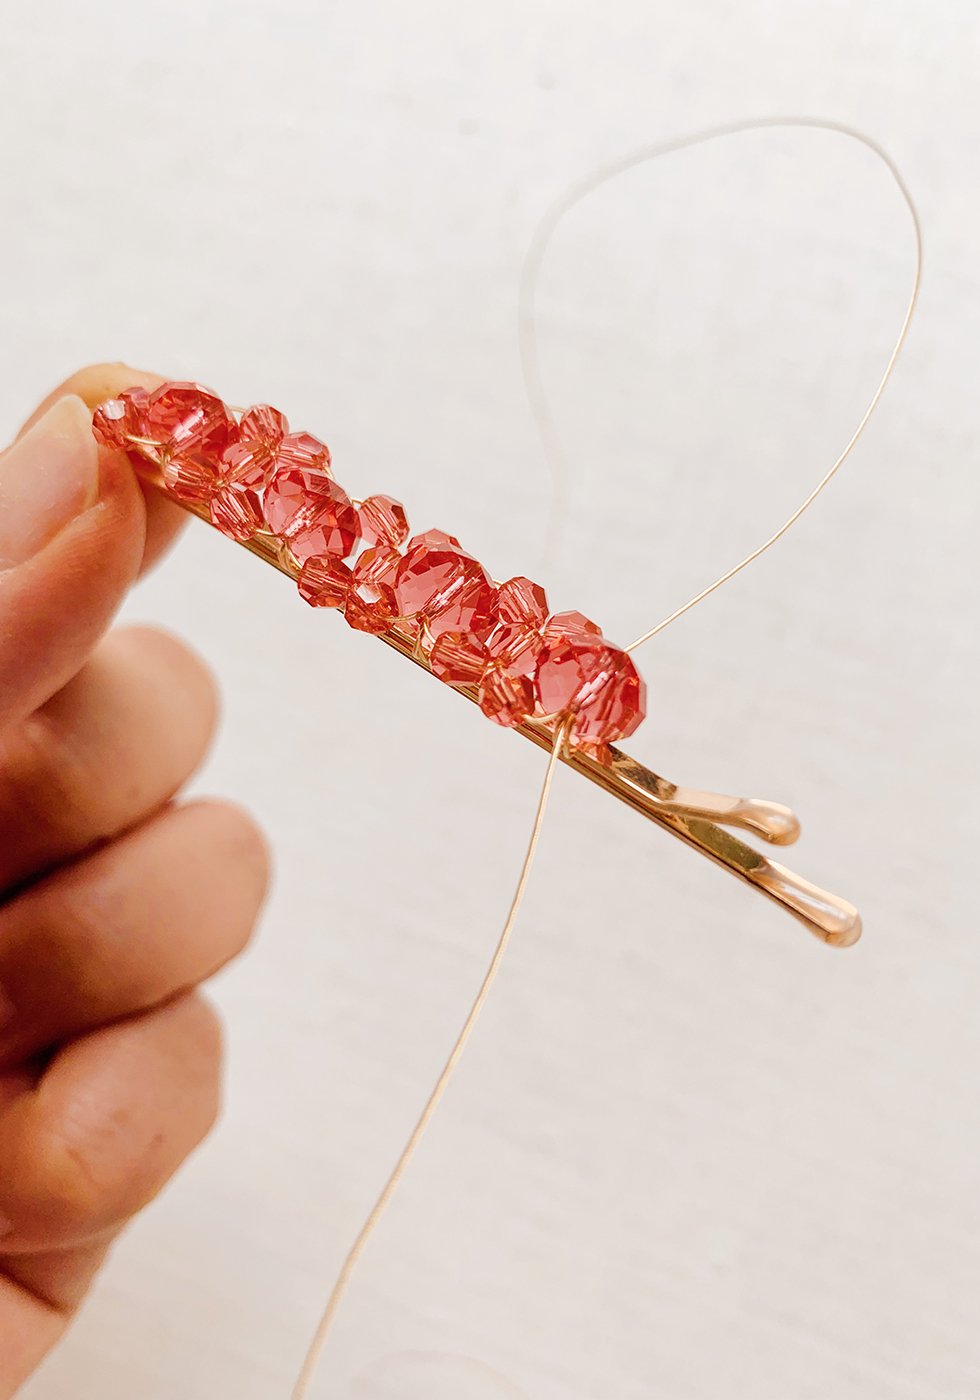
Pull tight before re-entering the wire through the second to last bead on the right. Do the same on the left side. You might need tweezers to help you pull the wires through.
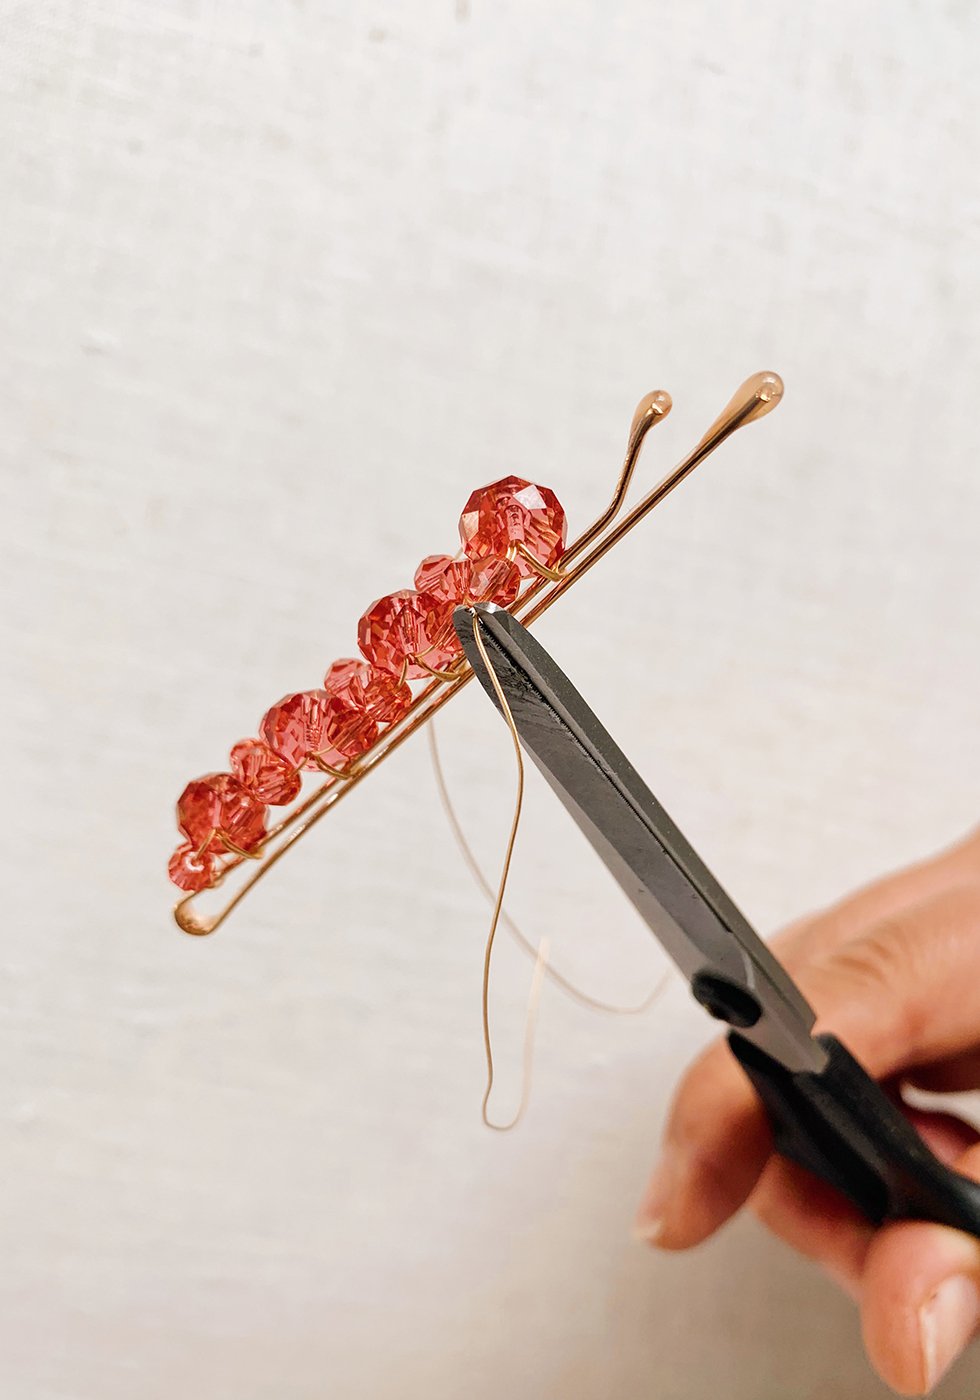
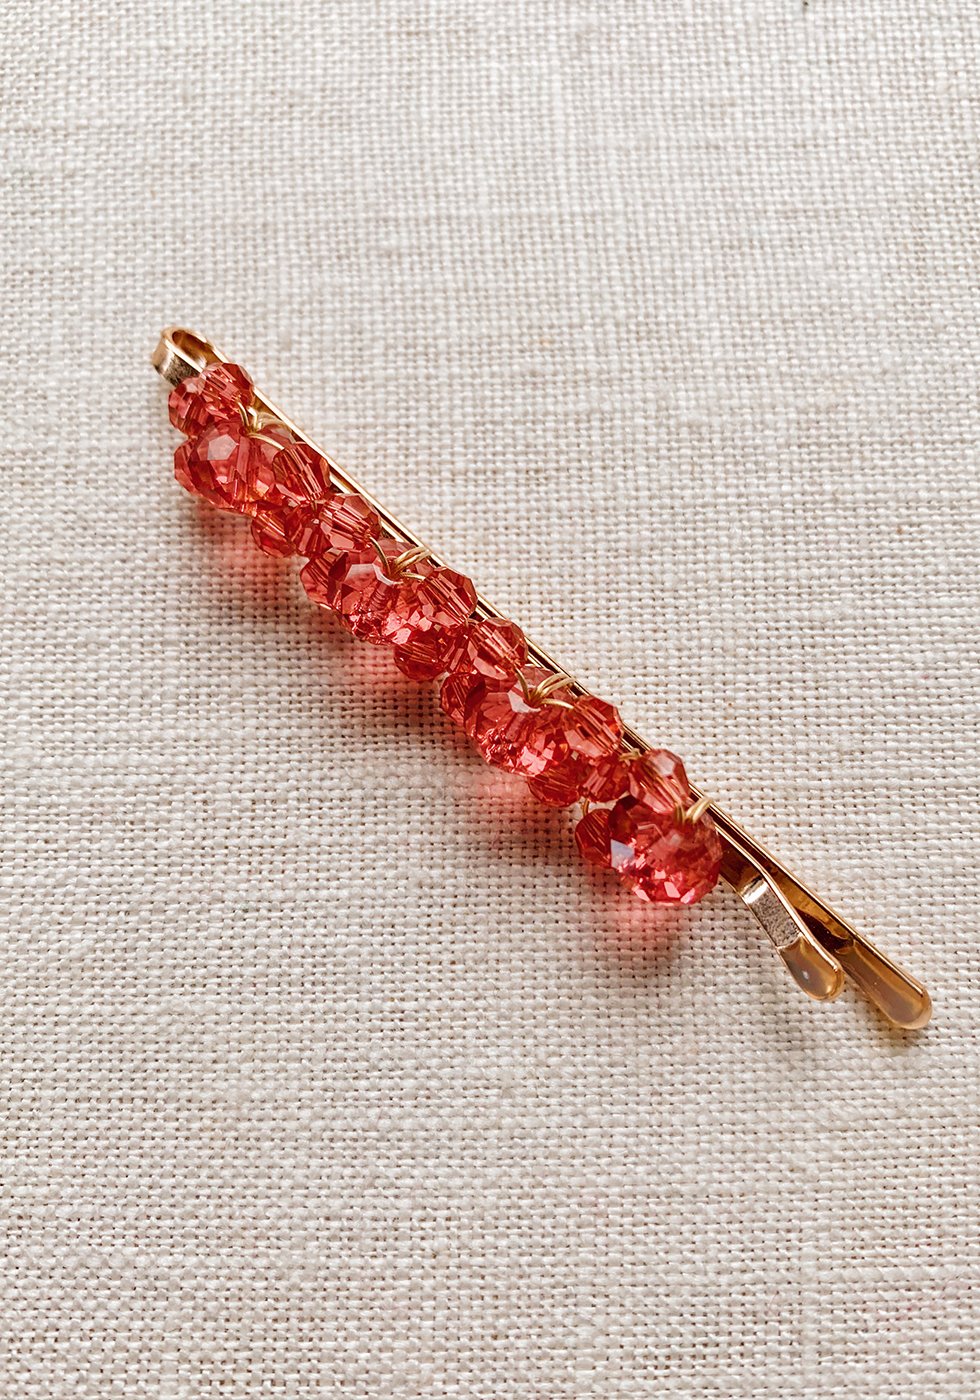
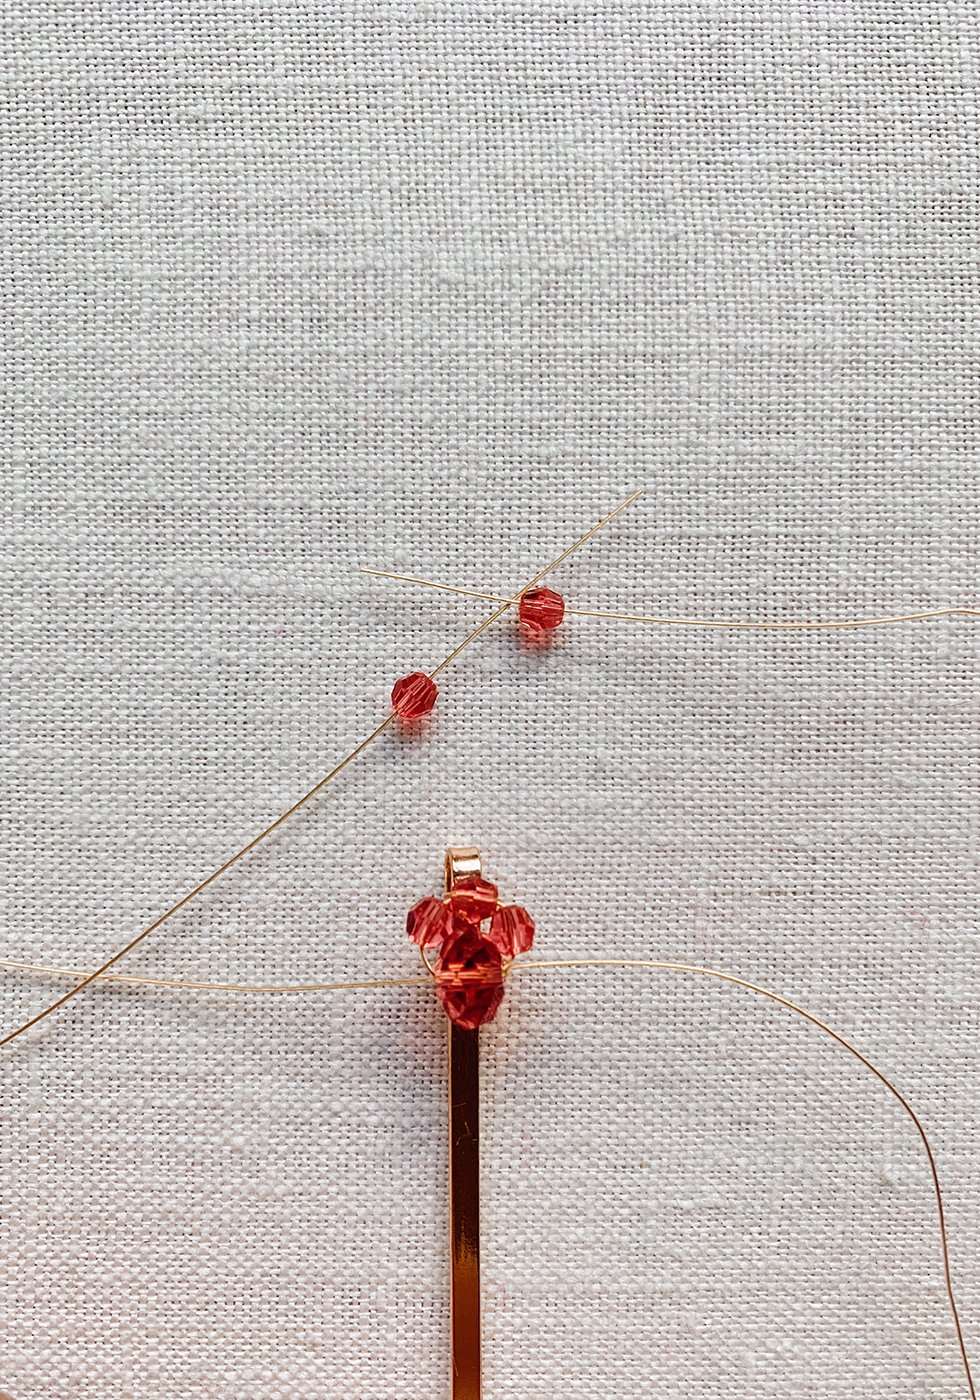
Make sure the wire is pulled through taut before trimming. This should allow the beads to stay in place without any glue or knots!
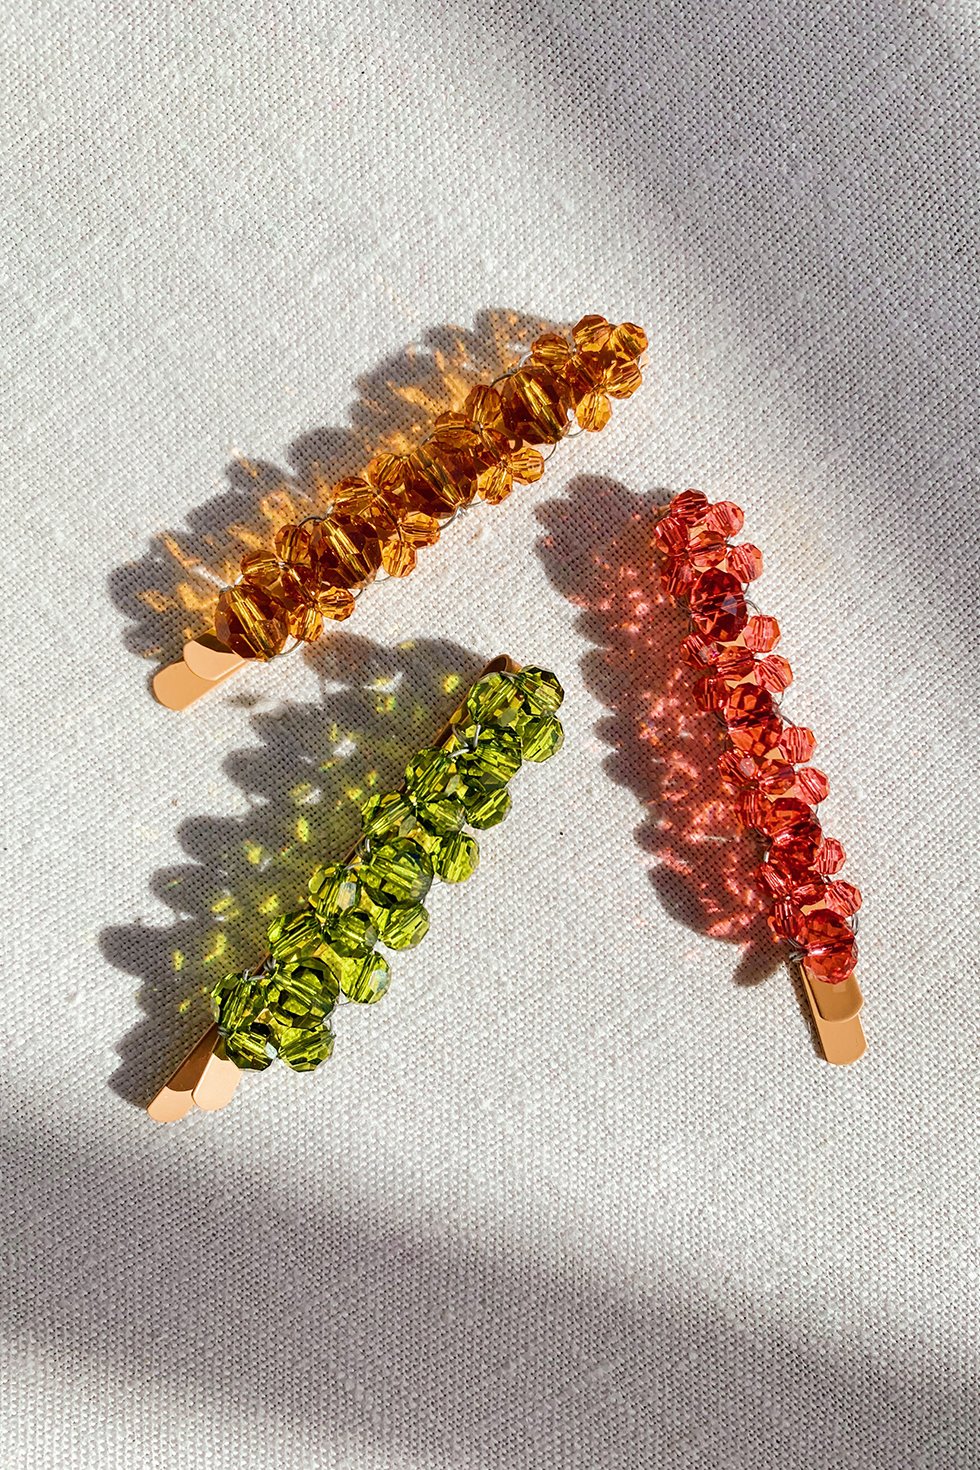
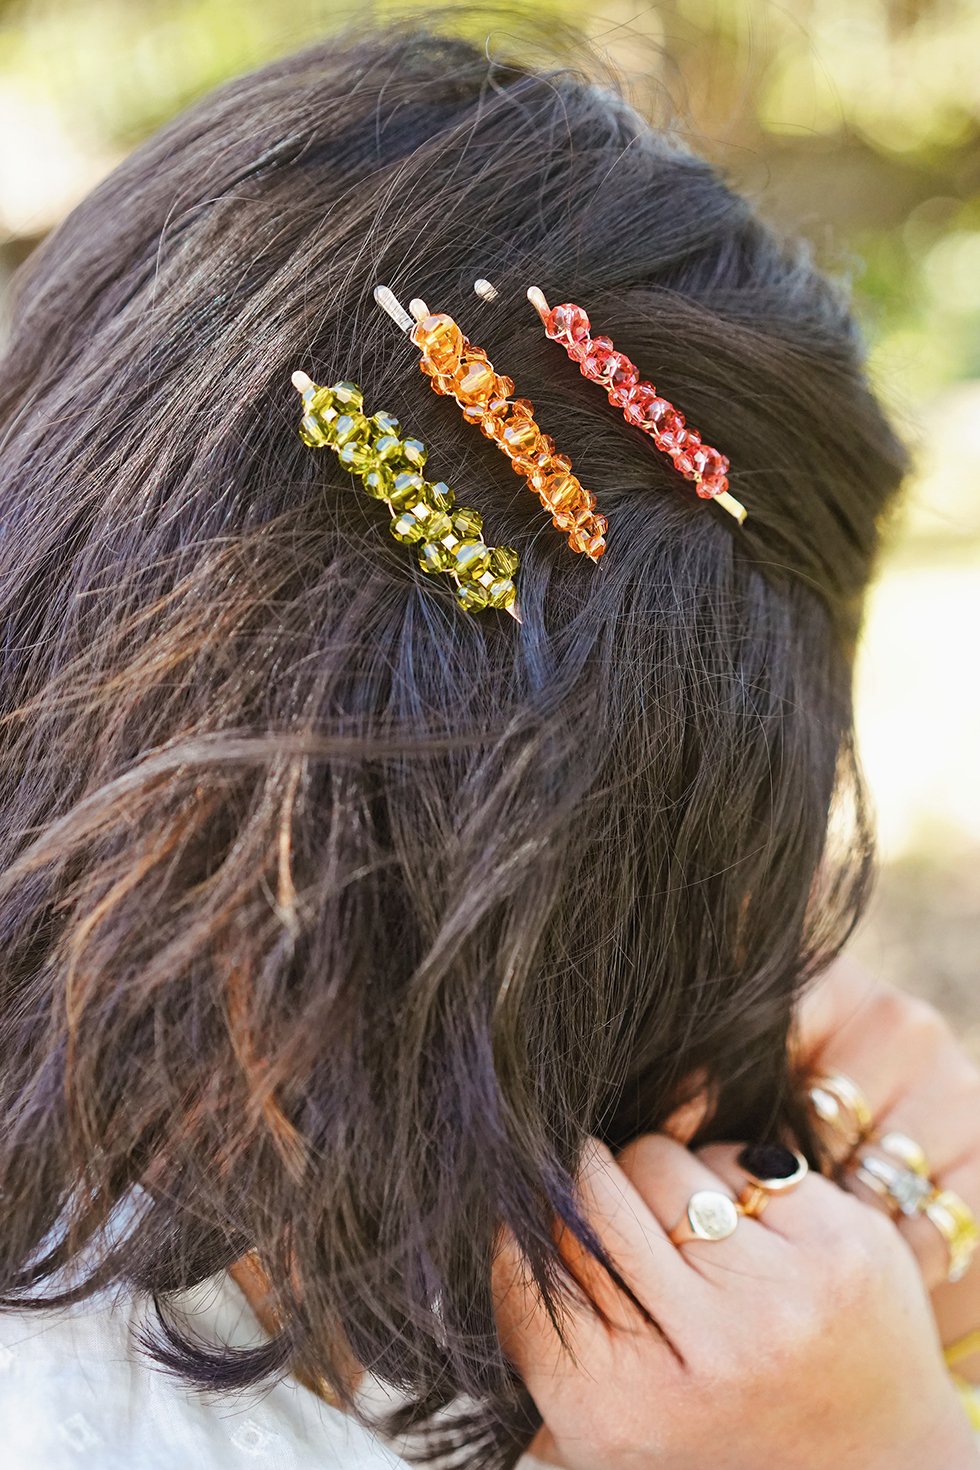
Make them in multiple colors (here, I've used Tangerine and Olivine)!
This post was created in partnership with Swarovski Create Your Style.
They look absolutely gorgeous and cute!
https://www.makeandmess.com/
really nice! but I think you should do a video to demonstrate this or an existing video link to let peeps who are more visual to do this!
They’re pretty! Thank you for sharing your DIY tips.
xx
Beautiful
Beautiful product
so beautiful
Hi there! (How did I not see you til now!?) “Pritty:), shiny
things” don’t usually catch my eye — these barrettes did:)
They’re simple (=immediate gratification:), and your colour choice was beautiful — “pantone”, or not! — so, “simple” works!!!
I really like your pics and notes…’crazy-clear, and w/o (here I go again:) “fluff”! Thank you!…I look forward to mmmmmore? :)…
(‘off, to check out the rest of (you)/WTF:)
These are sooo super cute!!!!
Wow, they are stunning. They are very creative
Ohhh I love these, Erica!
Nice
Absolutely beautiful, and well done on the tutorial! ⭐️❤️