Summer is all about ease and so when it comes to my hair during these hot months, the least amount of time spent fussing over it – the better. Enter the hair wrap. It has saved many straight-out-of-the-pool dos, camping-without-a-hairdryer coifs, and just about everything in between. We’ve always been smitten with Stella Jean‘s headwraps, knotted and sticking up so dramatically in bold African wax prints. And the all white headwraps at Giambattista Valli‘s couture presentation this week?! Amazing. With just some fabric, some trusty wire and some very basic sewing skills, I promise you’ll be living in these all season long!
You’ll need:
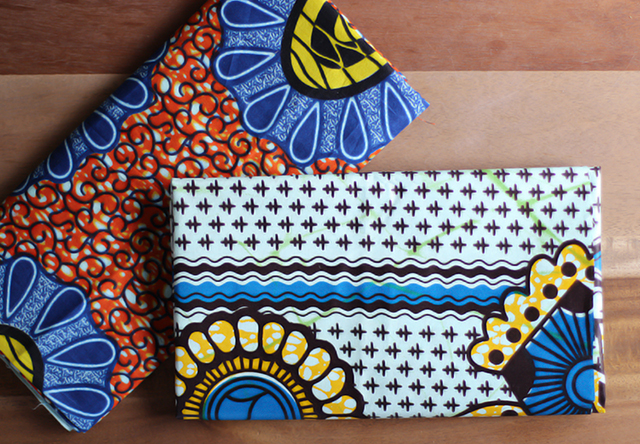
- 1/4 yard of fabric (I used African wax print fabric)
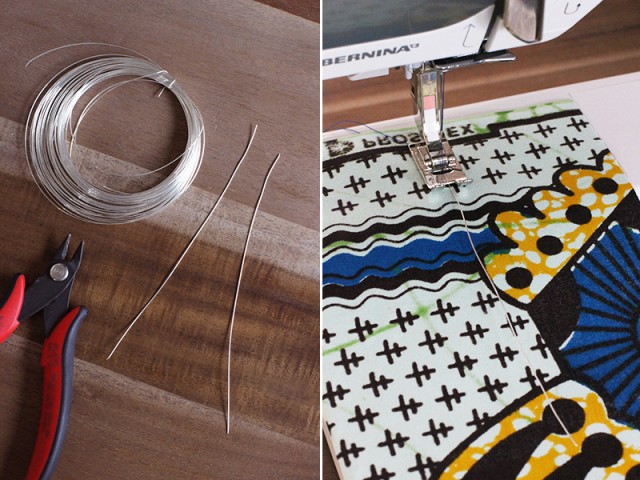
- 20 gauge wire
- wire clippers
- fabric shears
- pins
Start by cutting two pieces of fabric at 5 inches wide and 45 inches long, the width of a standard bolt of fabric. Then cut two pieces of wire between 5-6 inches each. Place one of the wire pieces along the middle of one of the strips of fabric, lengthwise and towards the very top.
With a tight zig zag stitch, sew the wire onto the fabric. Repeat on the other end of the fabric strip.
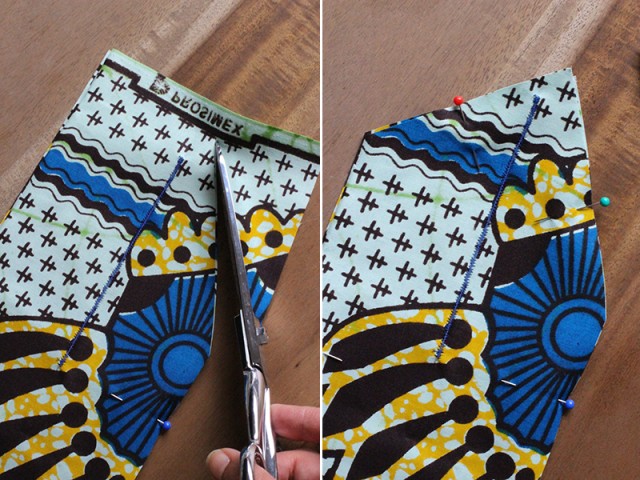
Layer the wired strip on top of the second strip, with the wired side facing down. Cut a point at each end. Don’t worry about getting them perfectly symmetrical – the more lopsided, the better! Pin the two strips together.
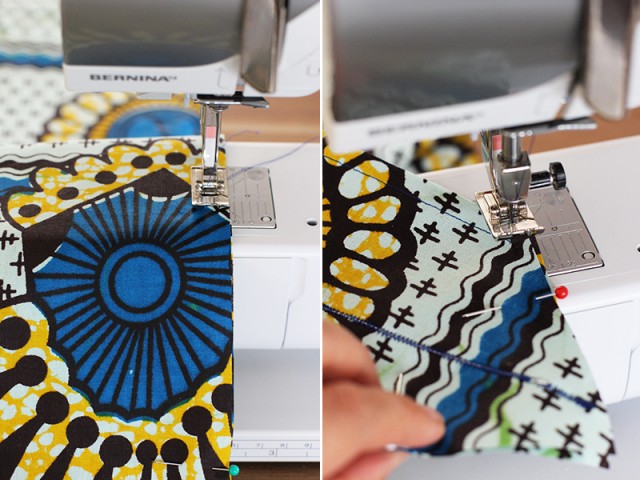
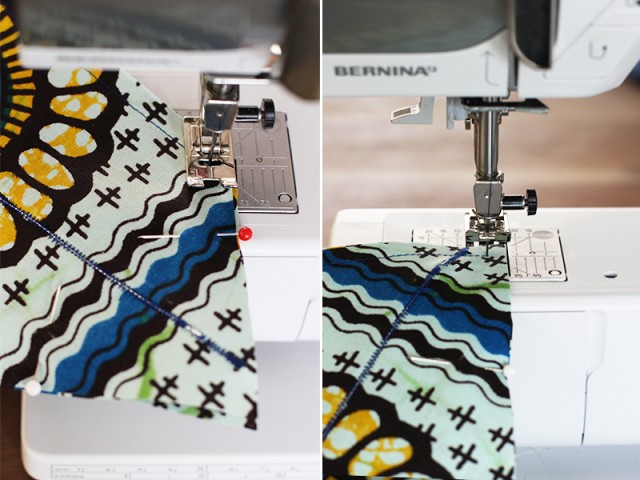
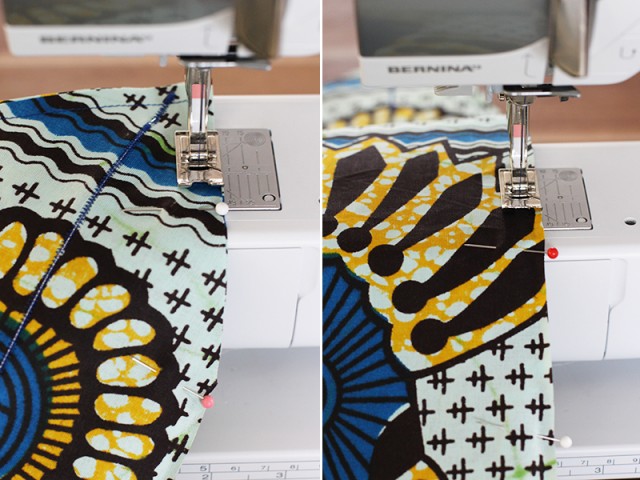
Fold the strips in half and find the middle point. Measure 2 inches out and start sewing a straight stitch with a 1/4″ inseam. Once you get to a corner, make sure the needle in the down position and rotate the fabric so that edge is parallel to the foot.
Press the foot down and continue to sew. Lift again to rotate at a corner.
Press the foot down and continue to sew. Sew all the way around the strips until you reach 2 inches before the middle point – or 4 inches before the starting point.
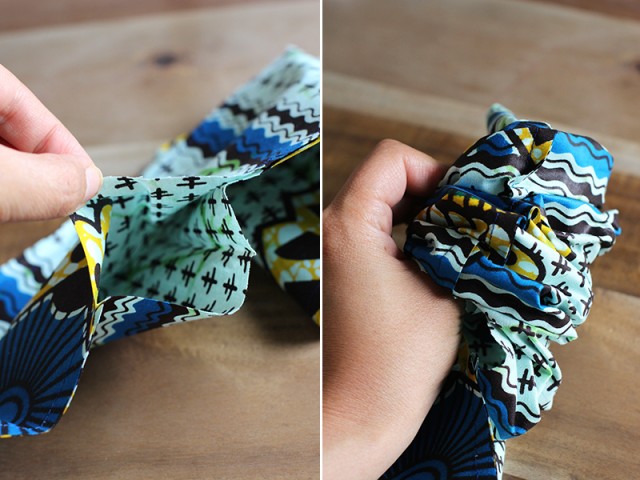
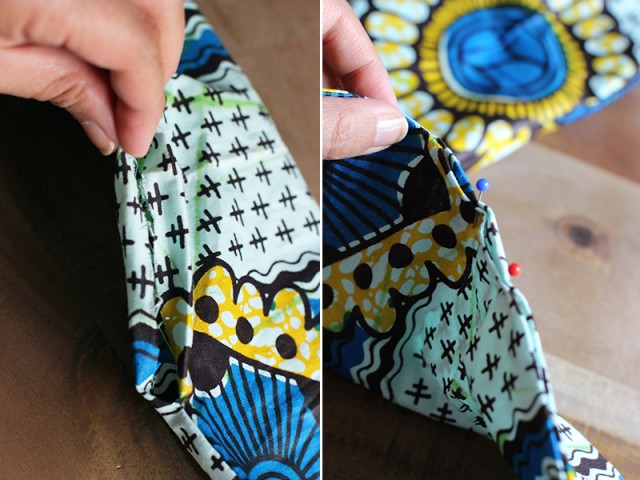
You’re left with a 4 inch opening. Reach inside and scrunch one side of the fabric down to the middle.
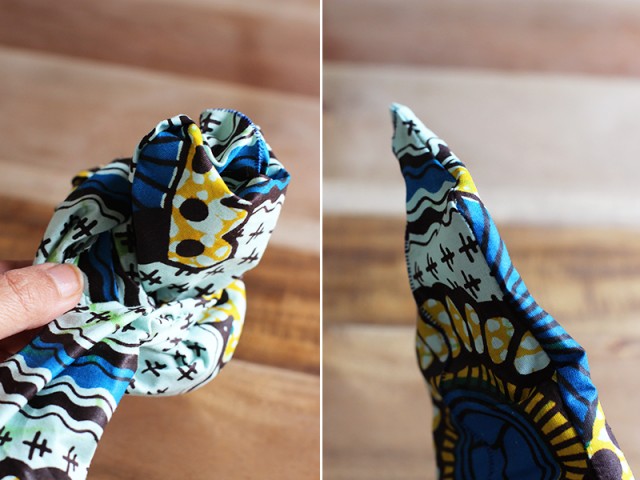
Turn it inside out. Reach inside and pop out the corners with the tips of your fingers. Repeat on the other side.
To close the gap, fold the edges in and pin them shut. Either sew them closed by hand or run it through the sewing machine with a 1/8″ inseam.
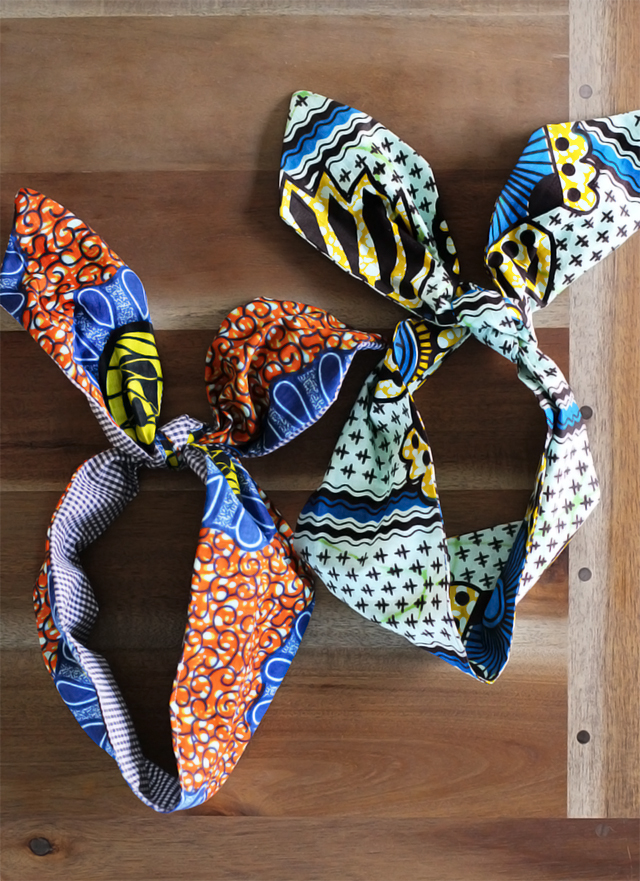
Iron the entire strip flat. And your headwrap is ready to tie!
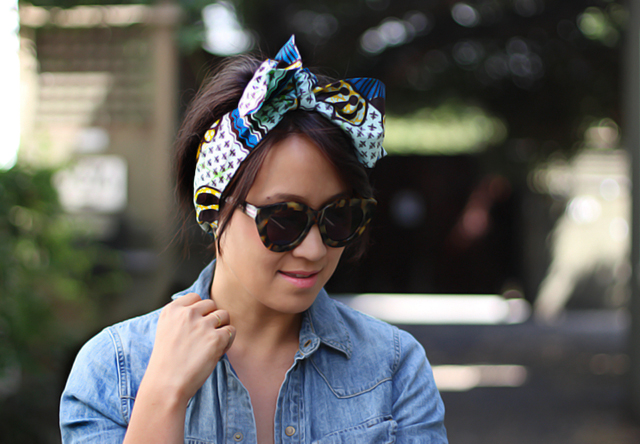
Wear it with the knot on top . . .
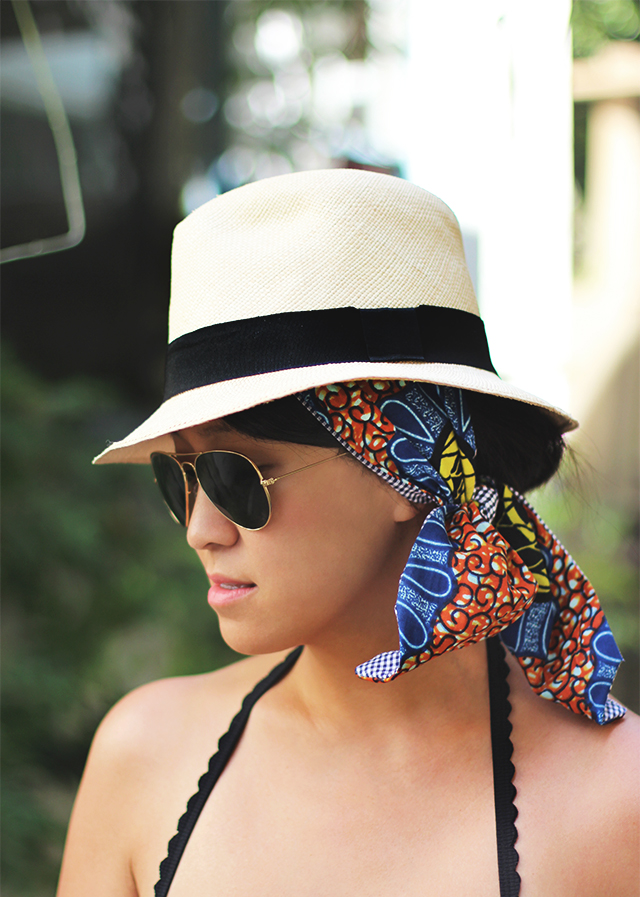
Or on the bottom! Try mixing patterns like African wax prints with gingham or plaid – à la Stella Jean.
(images by HonestlyWTF)






Beautiful! I love the fabric, very West African. http://www.thepaarblog.com/
These are so cute. I saw one on someone the other day and thought- I should make one. Thanks for the DIY instructions. I also really like how you’re wearing it under the hat.
xoxo
http://www.thewrittenrunway.com
LOVE wire head wraps. These are stunning!
http://juliettelaura.blogspot.com
Thanks for posting this. I’ve been wanting to do this for a long time.
You rock!
http://www.pearlsandpeacocks.com
This looks so bohemian! Adore.
Namrata
http://seasoncheck.blogspot.com
so pretty!
xxx
http://www.dominiquecandido.com
brilliant!
http://monkeyshines-monkeyshines.blogspot.com
genius x
http://www.vicariousLA.com
Love this tutorial!
This is so cool, great DIY.
xo
PinkSole
Love this! It’s so cute!
This is so perfect – would look super cute in a red fabric with white polkadots! Def making myself one of these.
Such a cute detail! Well done!
http://jeansandroses.blogspot.com/
I love the wire in it. Makes it so much easier to position perfectly.
https://www.etsy.com/shop/EarthChildArt?ref=si_shop
This is so cute! Love the african print as well!!
Great DIY I want try this, thanks for shared! I saw the link on the blog of Kenny 🙂
http://www.urbanikamoda.blogspot.com
Love it but didn’t really understood the instructions… You could make a video of it!
I battled to understand the instructions, too. I agree with the video idea. Also, metric conversions would be awesome! Xx
Love it but didn’t really understood the instructions… You could make a video of it!
This is a wonderful idea, thank you for sharing it.
It looks so cool!
XO CHAMAFASHION
http://www.chamafashion.com/
Swoon! I can not WAIT to do this!
who are those tortoise shell sunglasses by? SO cute.
@Kelly, they are Karen Walker!
@Erica haha how did i know they were going to be Karen? She is amazing. Just confirms even more that I need to get a pair!!
Great idea!
http://madisonboehm.weebly.com
I Love
Magnifique, ça fait plaisir de voir le wax dans tout ces états
Merci
Célia Pale
Designer
http://www.tombasana.com/boutique
Love the boho look! Hence all the Isabel Marant DIY tutorials I post on my blog 😛
You are an angel of all creative goodness, thank you for sharing, I am so happy I found you. In Appreciation, (School Marm to 160 twelve year olds everyday)
Thanks for sharing such useful information! This head scarf wrap is designed to be versatile – wear as a scarf, top, head wrap, belt, or accessory on your handbag. The fabric is 100% silk, and it is printed and rolled in china.