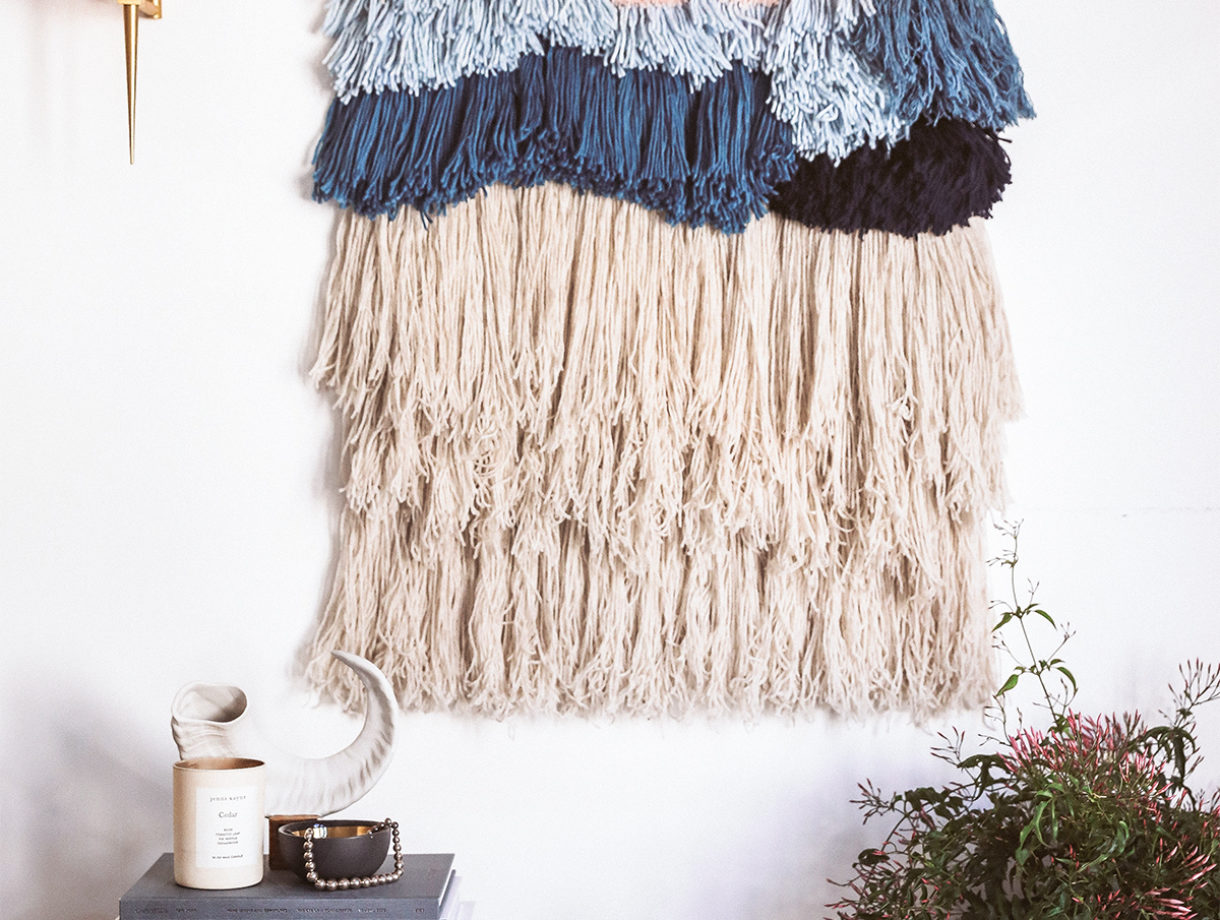
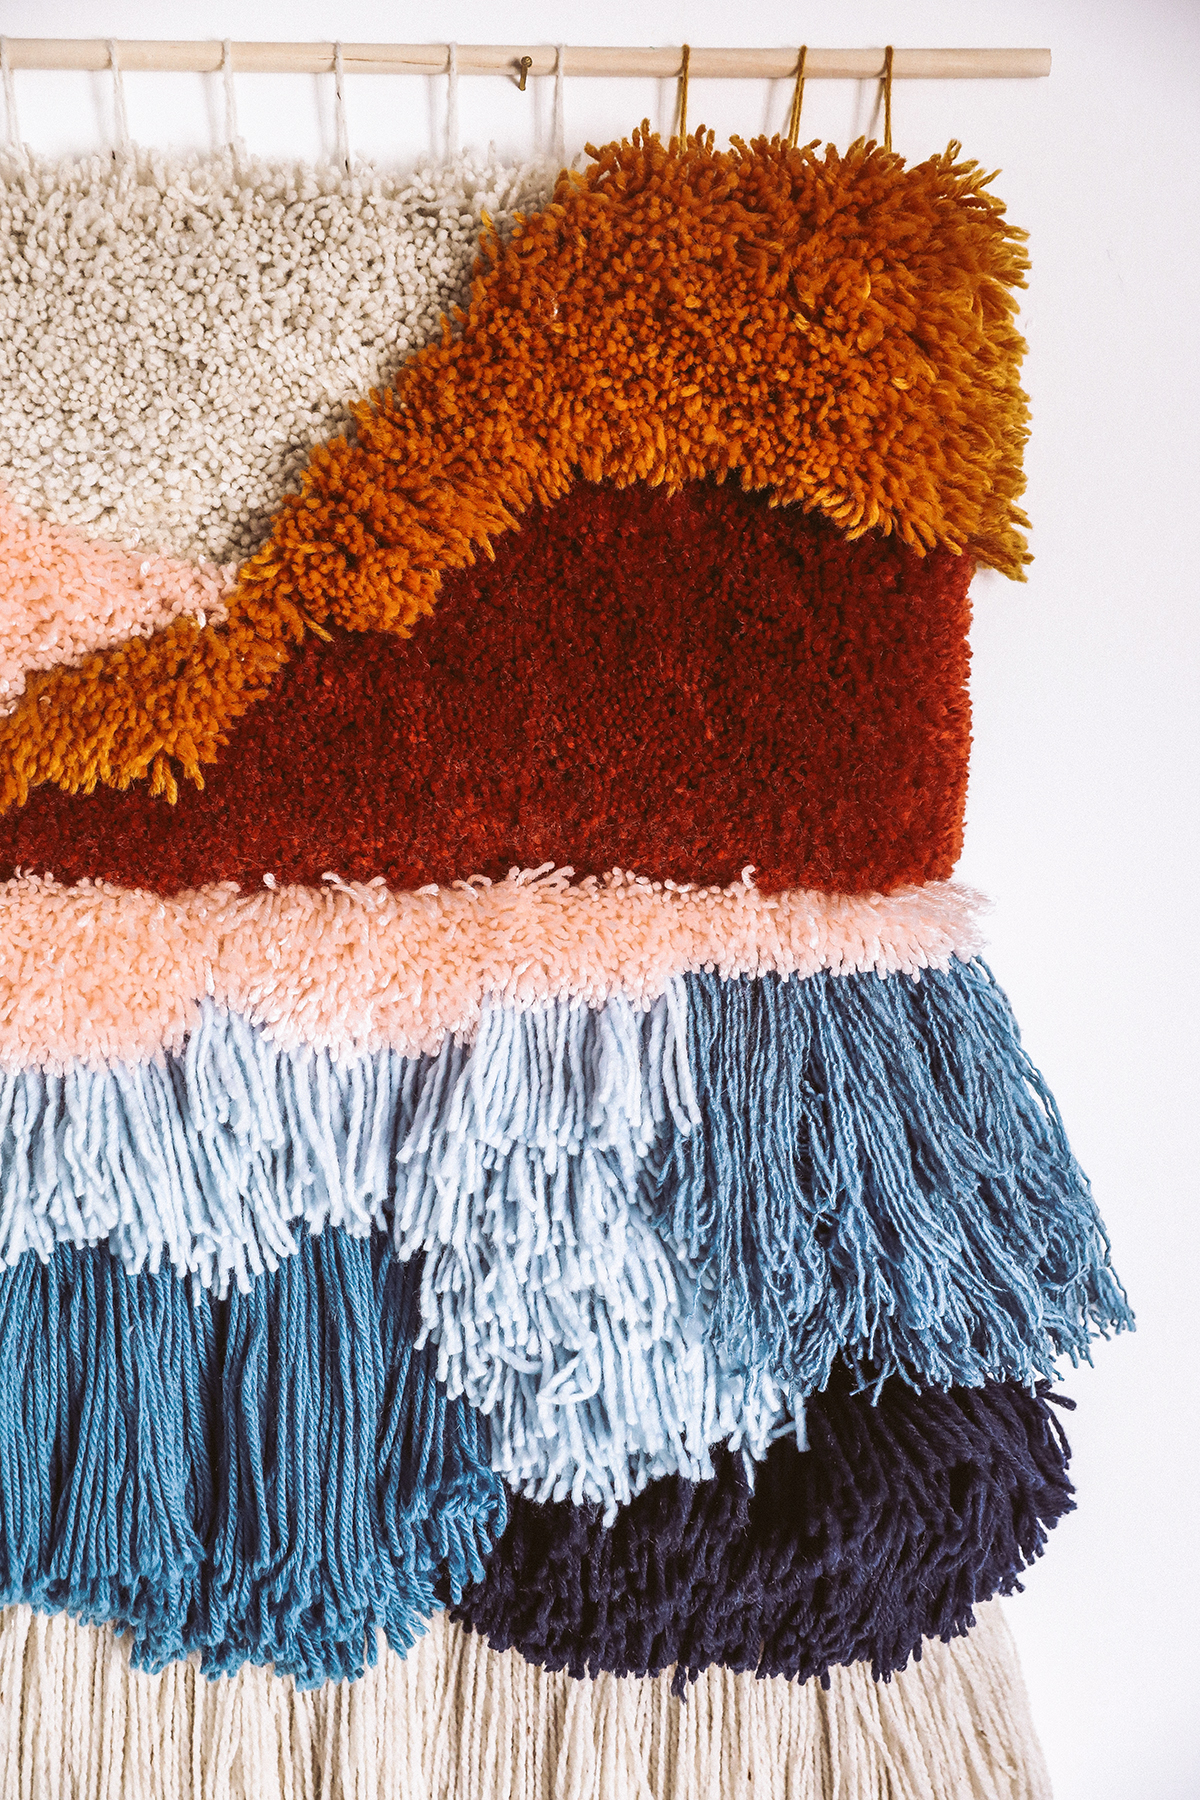
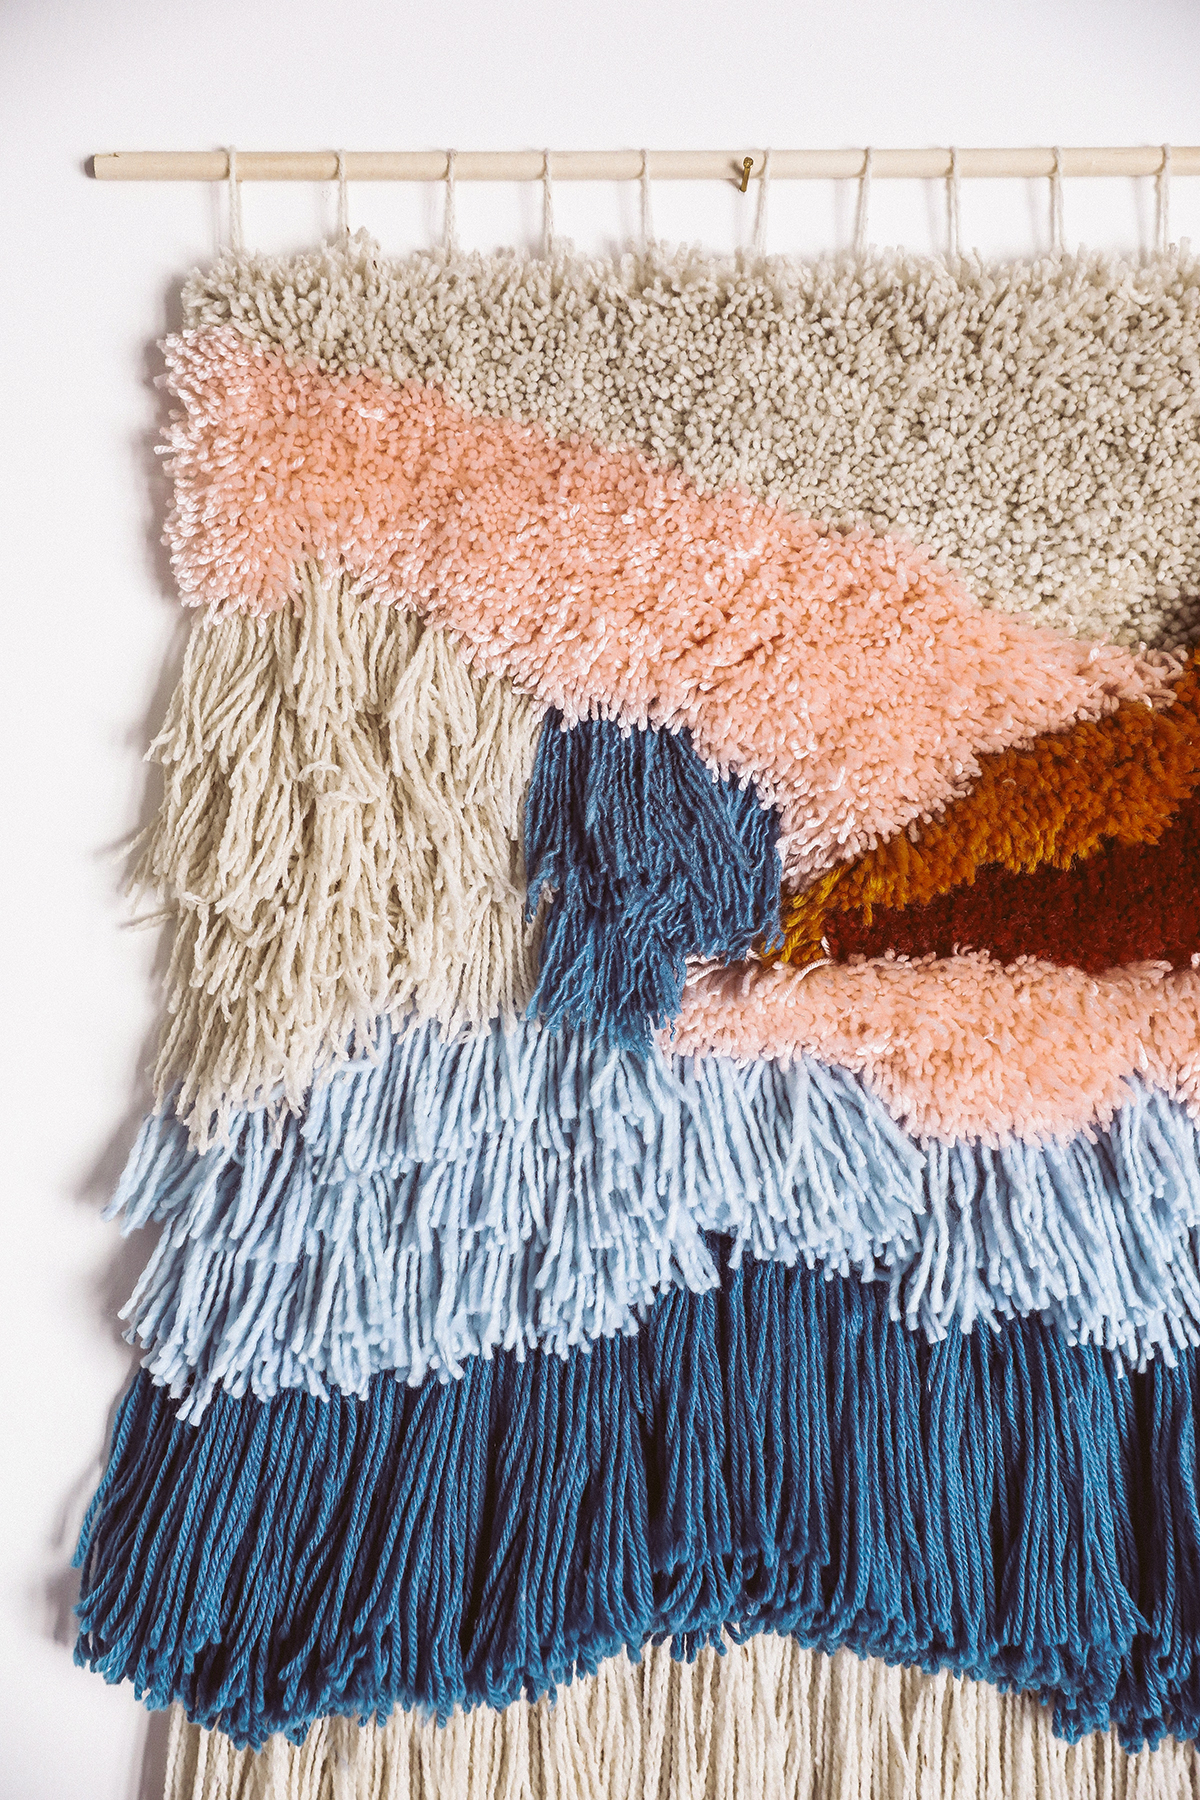
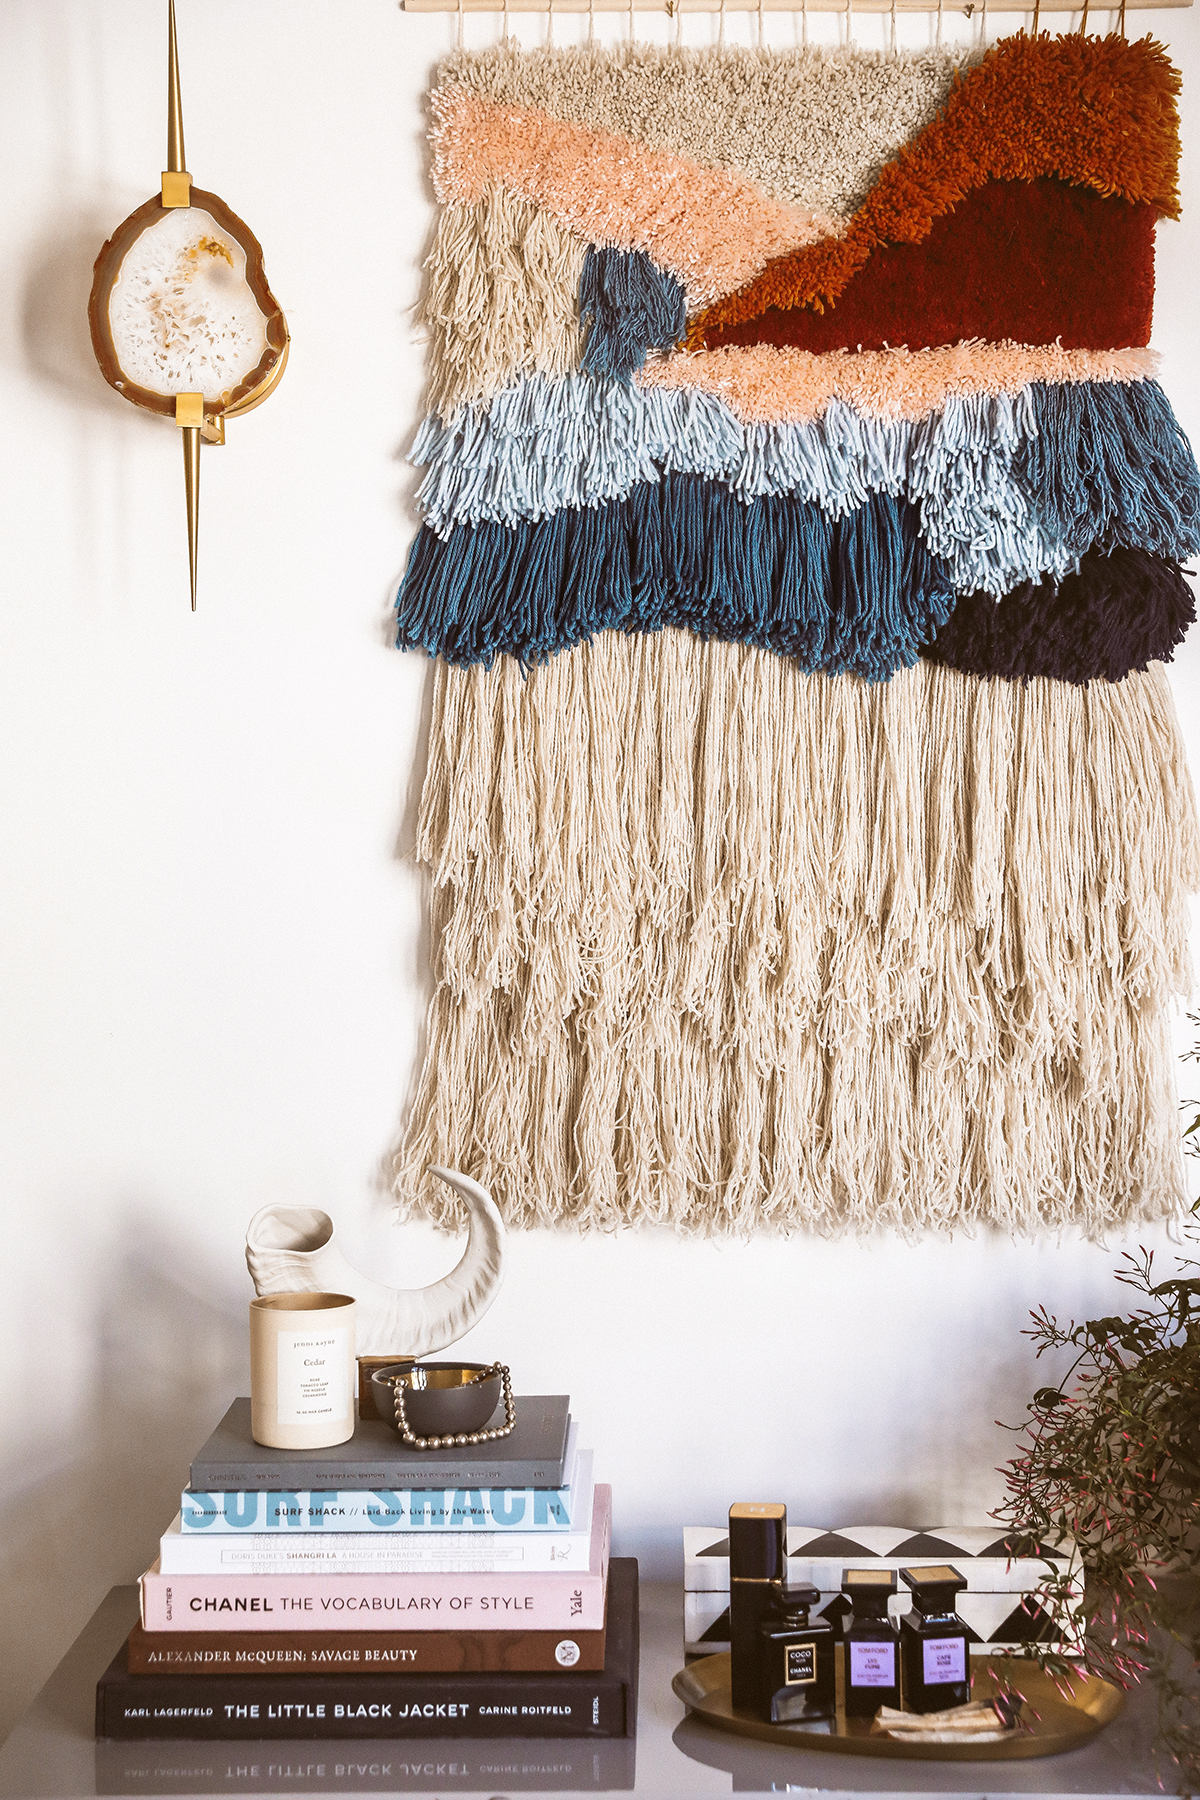
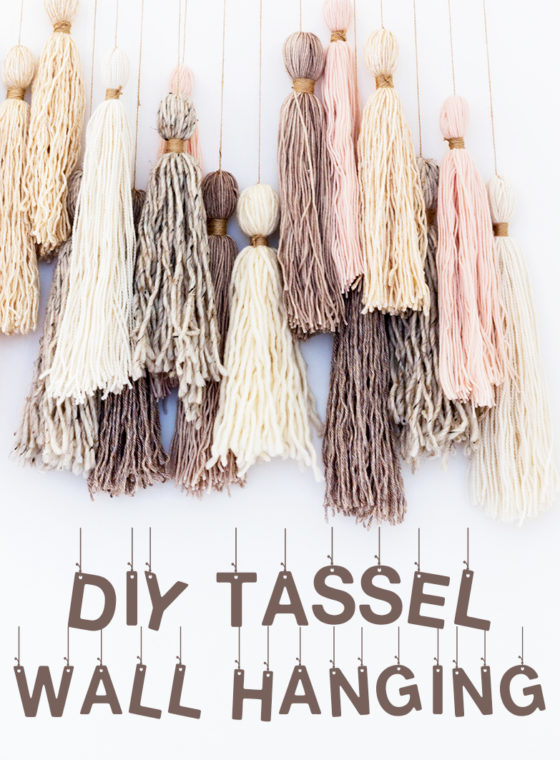
You guys, I have a newfound obsession. Latch hooking! It all started with a beautiful palette I had saved to my desktop while pinning inspiring color combinations – another new addiction as of late. I wanted to actualize it into a three dimensional piece of art for our bedroom and what better way than to turn it into a wall hanging! Latch hooking is something I’ve been dying to teach myself for awhile now, thanks in part to the incredible weavings from tapestry artist Judit Just. So this stunning palette of blues, blush, rust and ochre finally motivated me to sit through a slew of YouTube tutorials on latch hooking 101. I was surprised to learn how easy the process is and even better, how few tools and supplies are needed! I will be honest, it can get pretty tedious but the results are so worth it. Pro tip: the time flies even faster when you Netflix and chill.

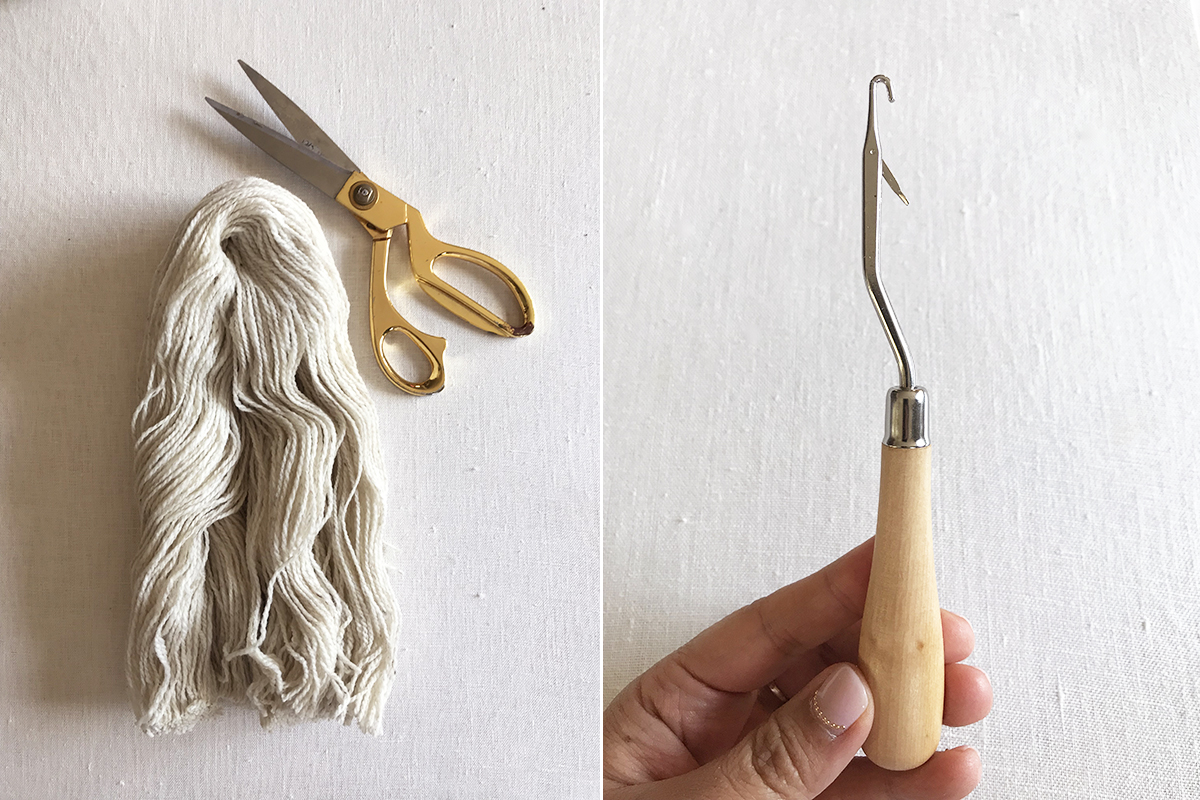
You’ll need:
- mesh rug canvas (cut to desired size)
- latch hook tool
- fabric shears
- assorted yarn (I like to use a mixture of acrylic and wool in varying textures and colors)
- 3/8″ wooden dowel (cut 1-2 inches longer than the width of your canvas)
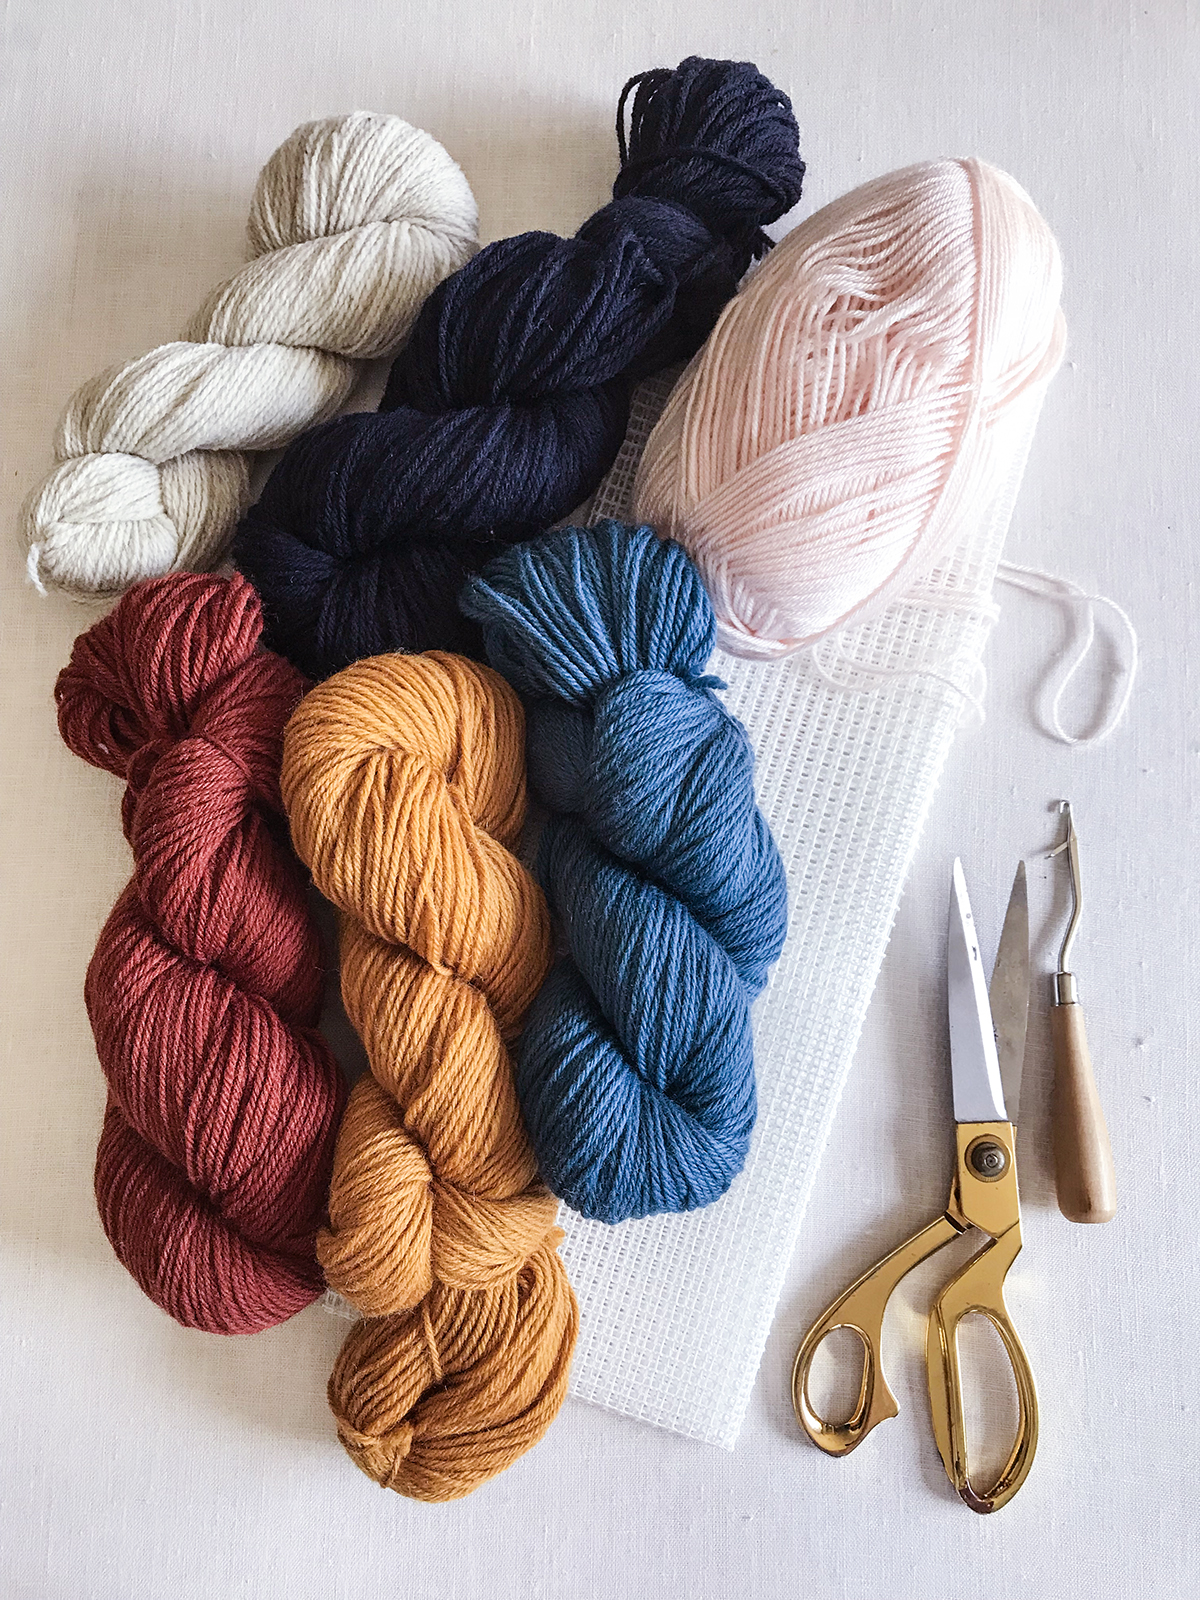
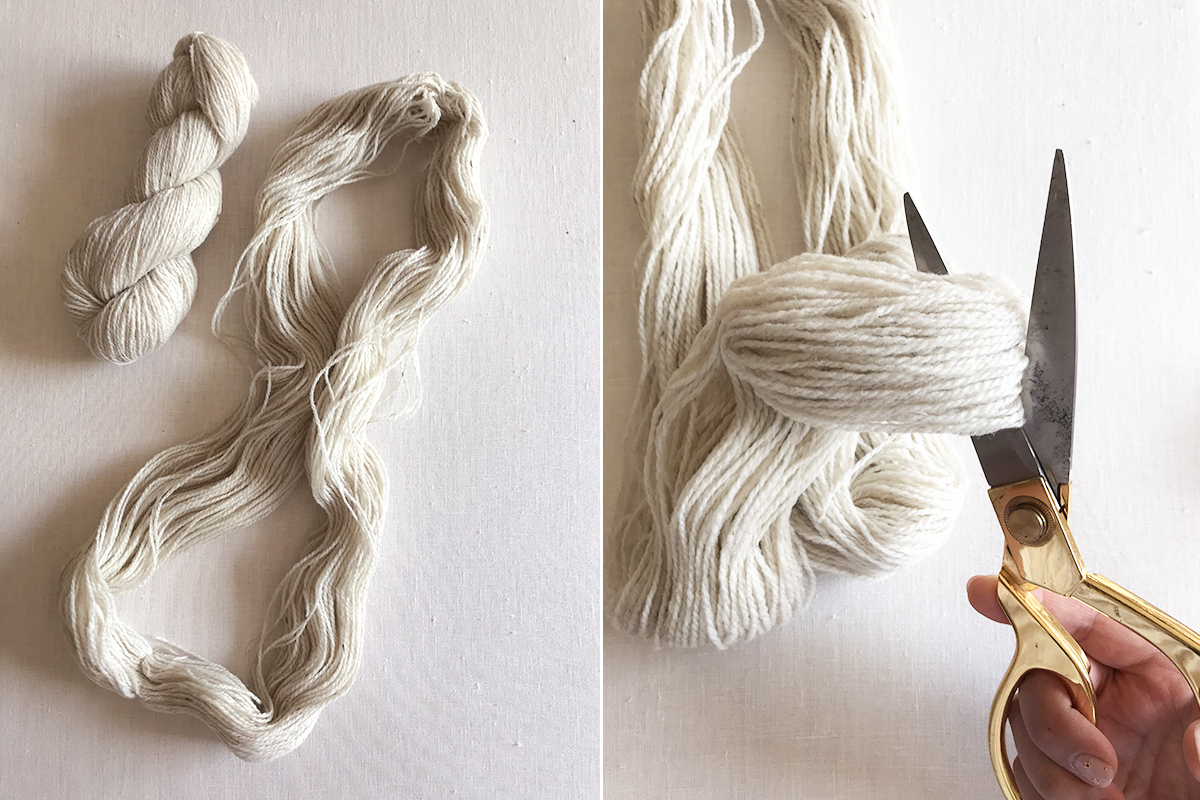
I love buying hanks of yarn, versus a skein, for this project. Really, it’s only because it cuts the process down tremendously! You’ll be working with even lengths of yarn. Lots of it. So with a hank of yarn, all you need to do is untwist it into and cut the circle in halves. For the bottom part of the weaving, I like to leave the length long. But for the sections farther up, I’ll eventually divide the halves into quarters or eighths. Also, it’s key to cut only what you think you need. You can always cut more. I like to start with just a single hank and go from there.
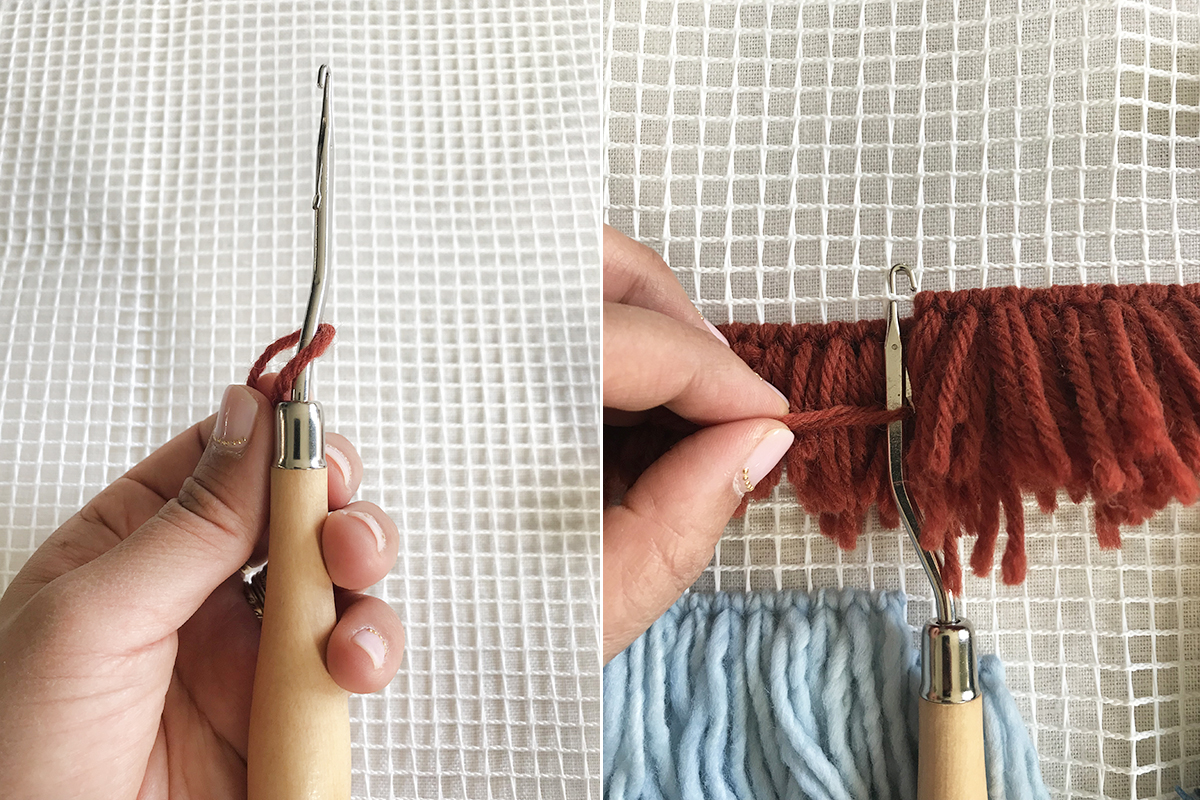
The key to latch hooking is the latch hook. Duh. This nifty little tool uses a hinged hook to create a knot in a matter of seconds.
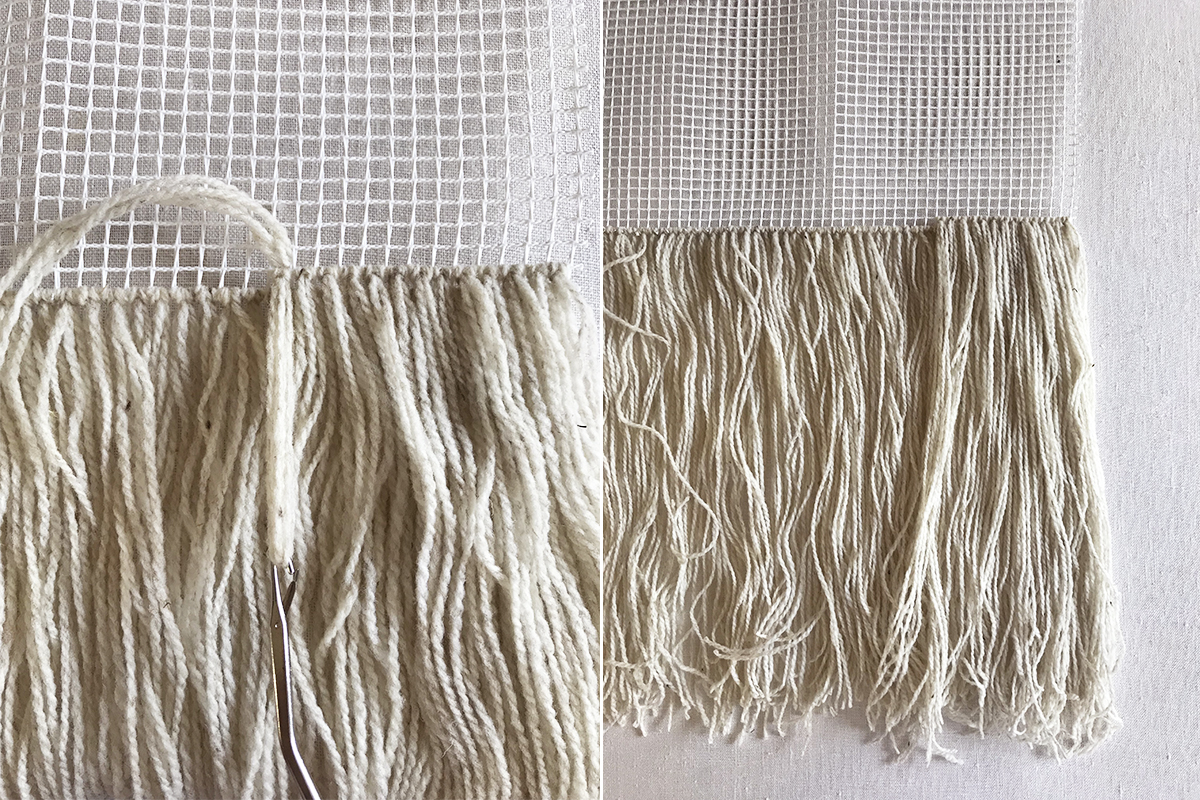
Start by folding a piece of yarn (I like using 2 at a time for a thicker, fuller look) in half. Slip the hook through the middle, pulling the folded yarn over the base of the latch hook.
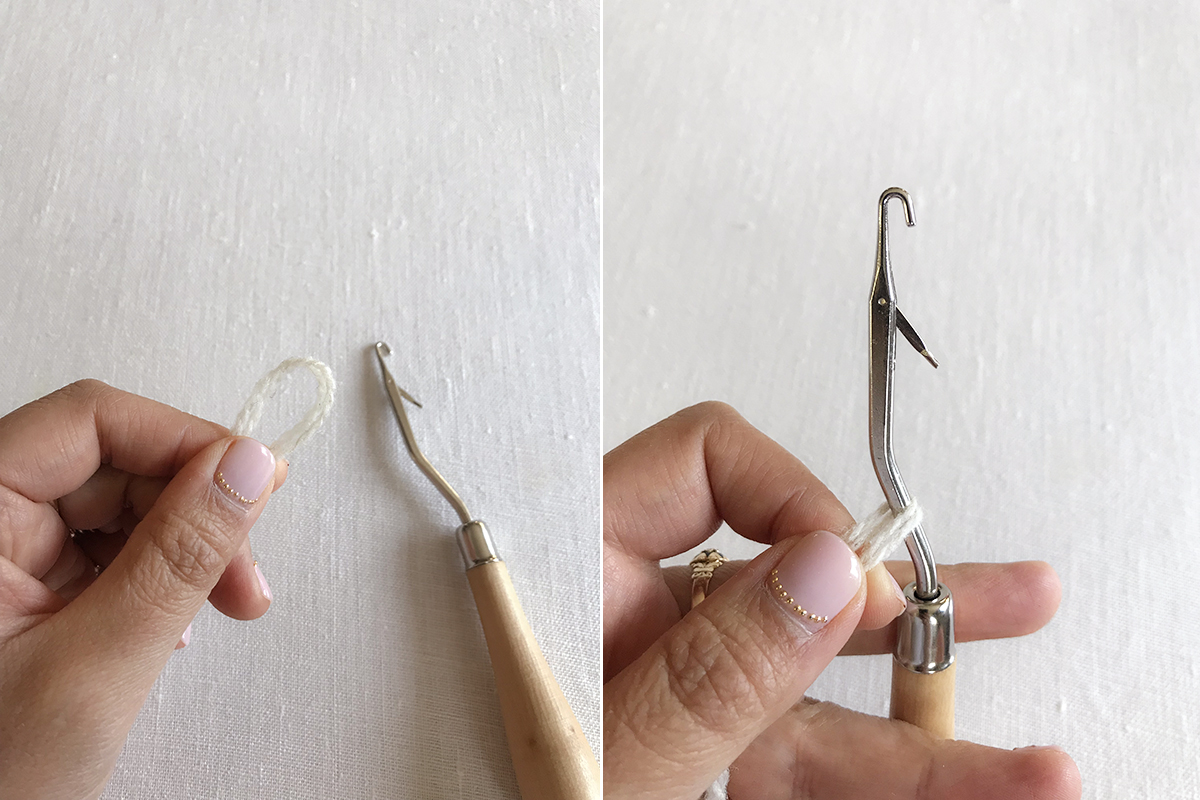
Push your latch hook up underneath the first square where you want to place your yarn. Keep pushing the hook until the latch sits above the bottom line of the square. Pull the yarn up and to the left – keeping the yarn under the latch.
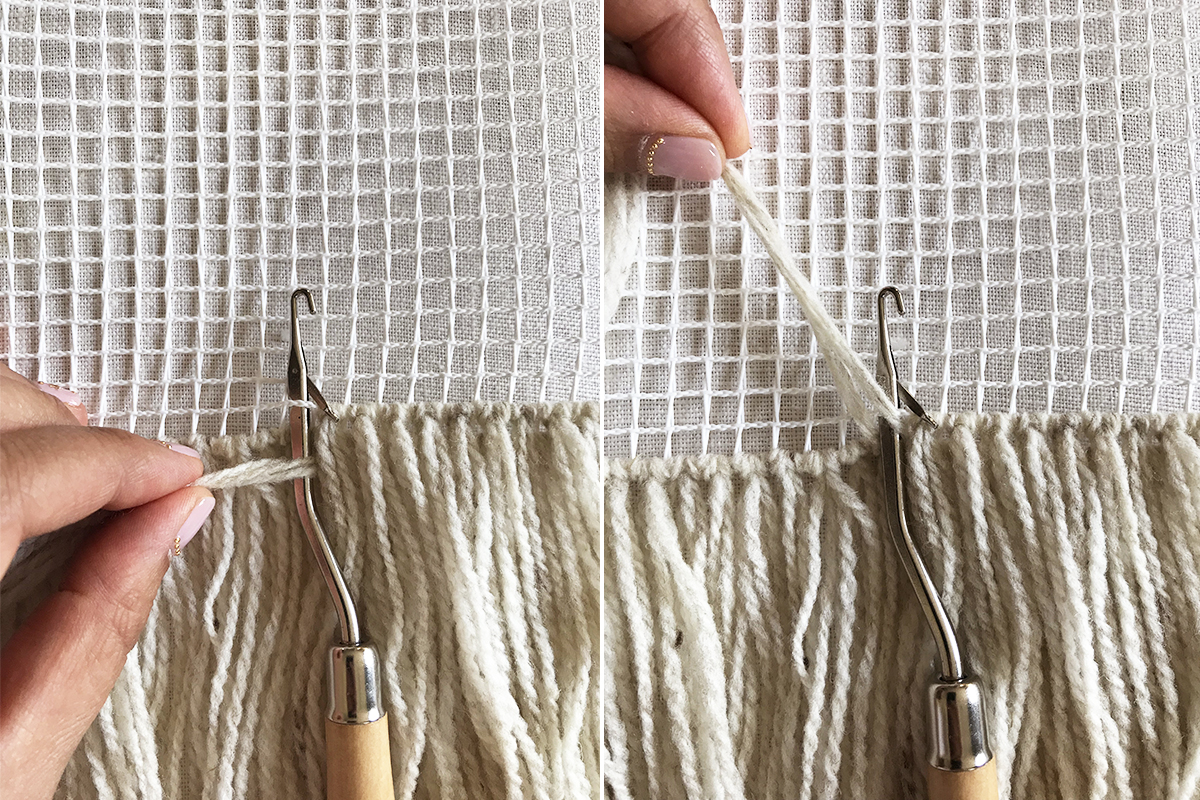
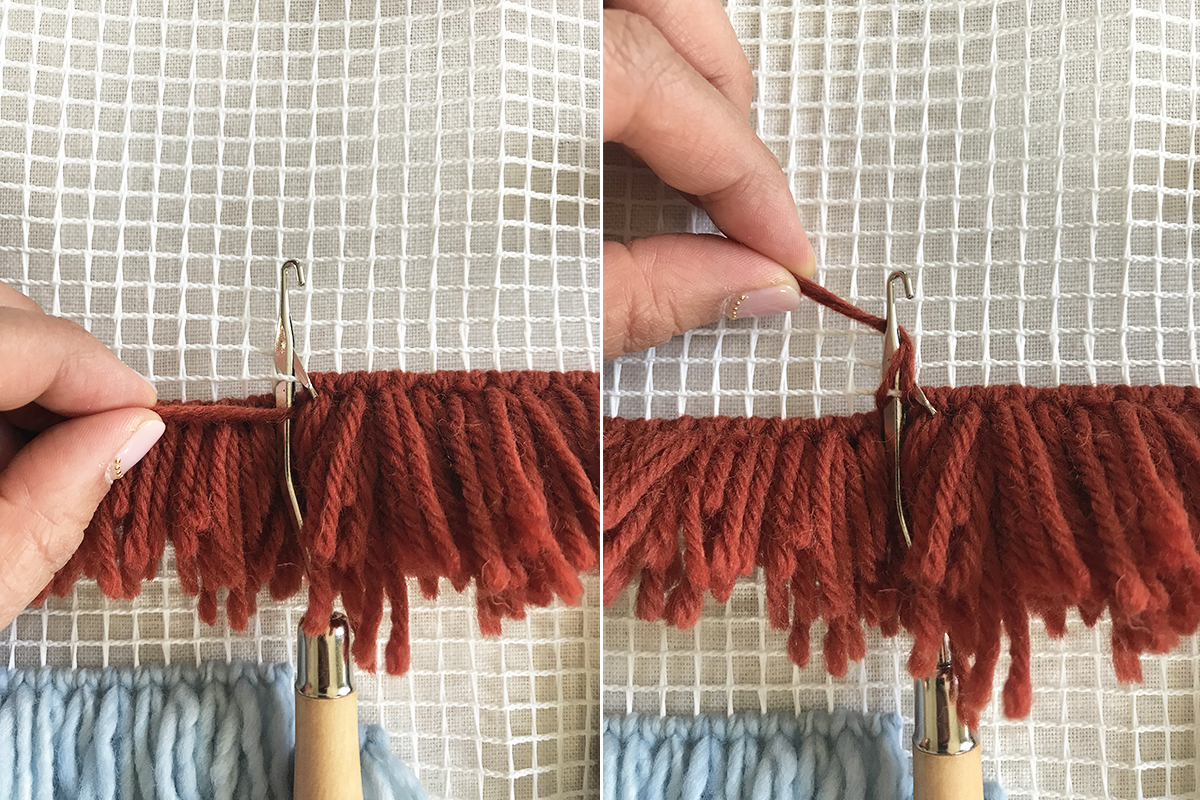
Pull the yarn to the right, between the latch and the hook, and then wrap it around the back of the hook.

Gently pull the latch hook tool down and the mechanism will close. Keep pulling, while still keeping the yarn somewhat taut in the other hand.
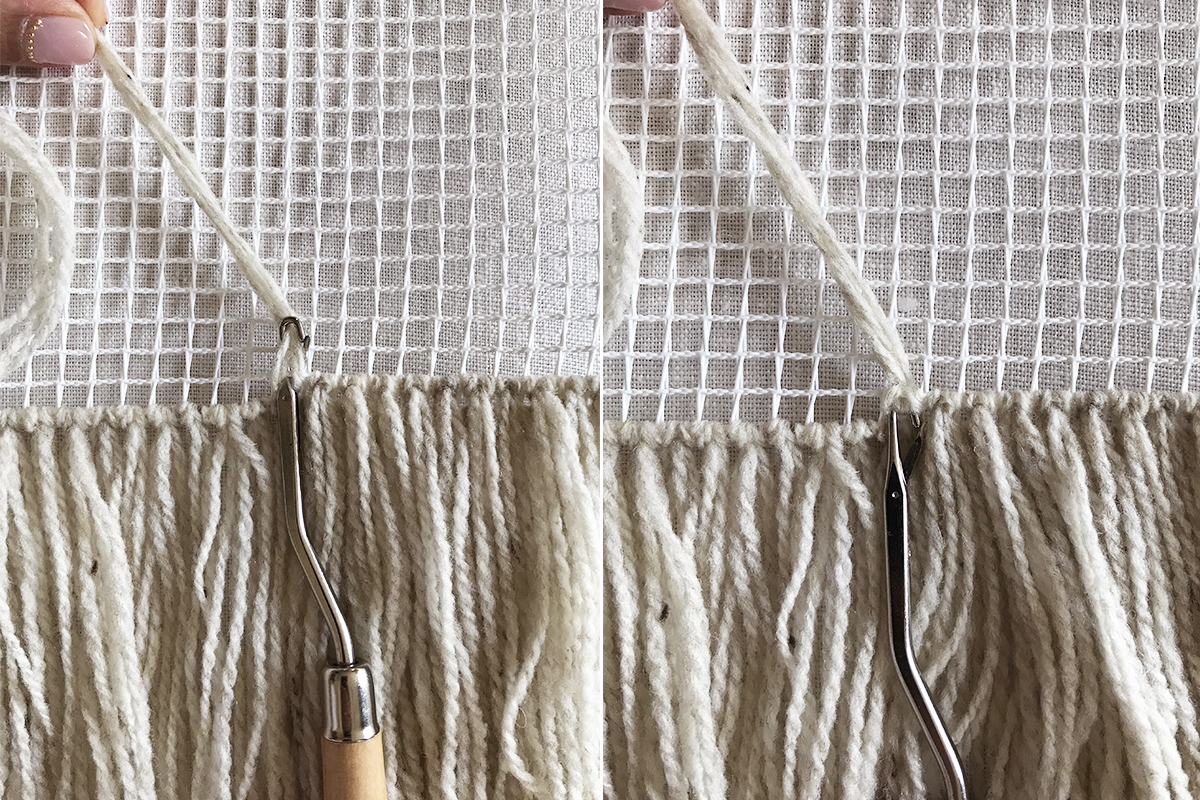
Continue pulling and the latch will simple slip through the square and your knot is created. It can take a few tries to get the hang of it but trust me, once it clicks, the movements become quicker and easier!
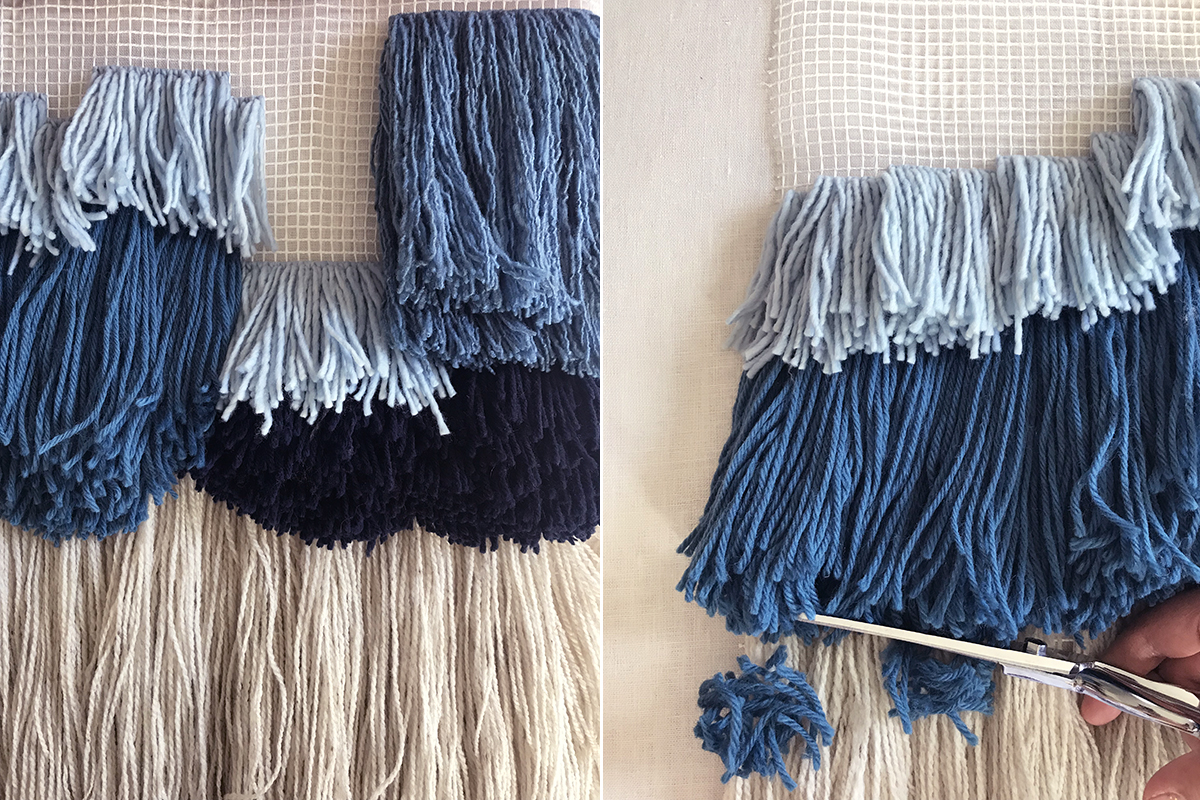
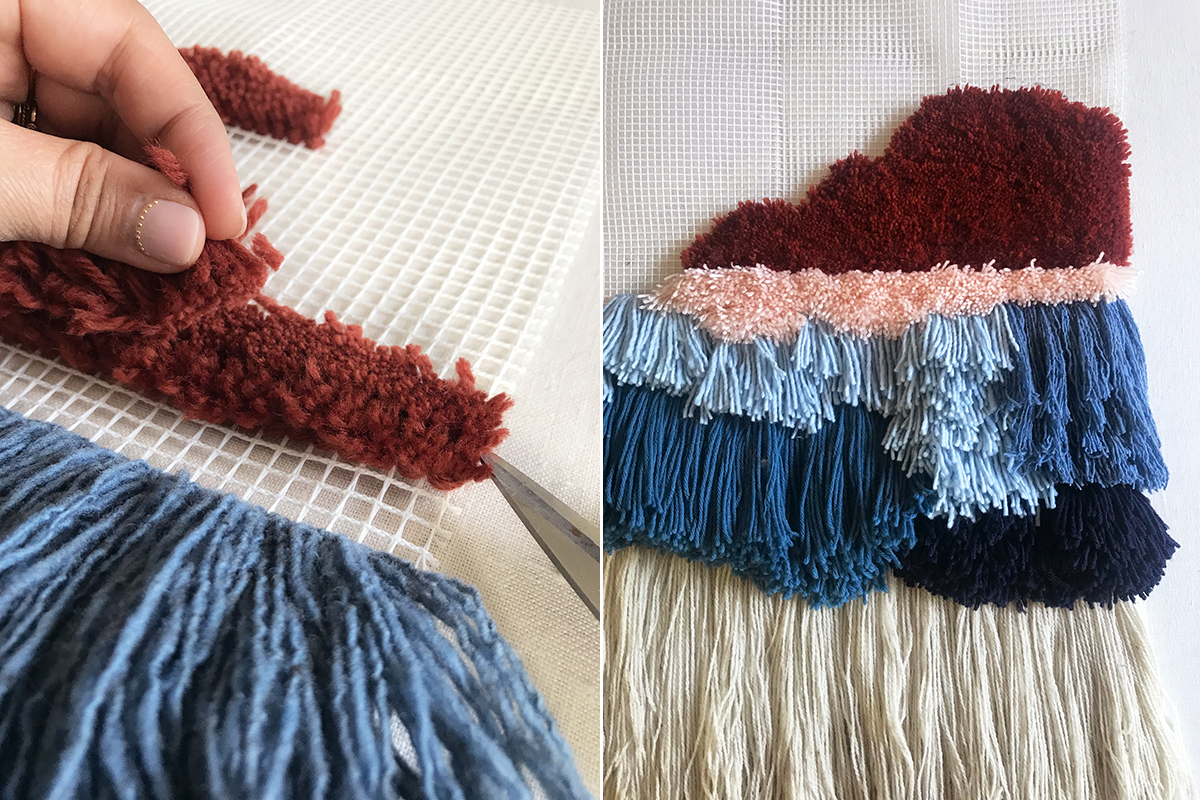
I like to create an even base, where every square along the bottom edge is filled. Then, since I’m still working with longer pieces, I like to add sections randomly. It gives it a nice piece-y look and frankly, it saves money on yarn! You can use far less by skipping rows and nobody would be able to tell.
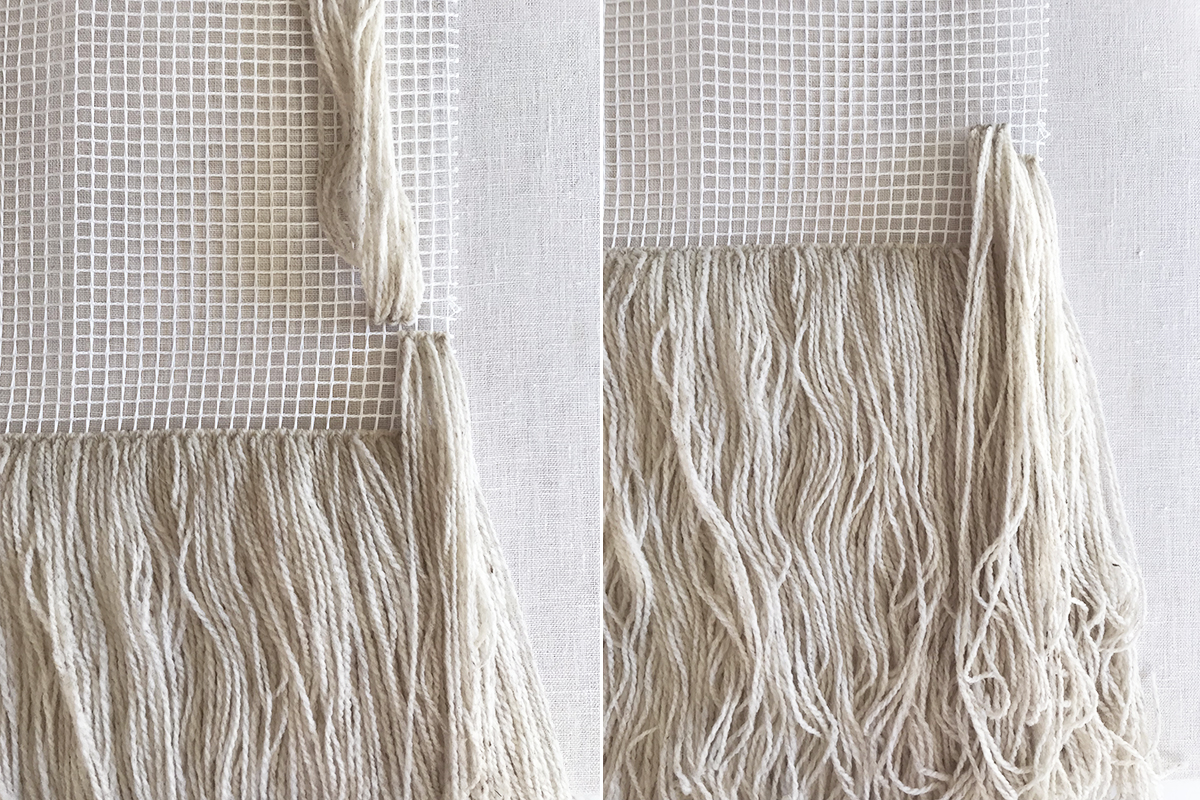
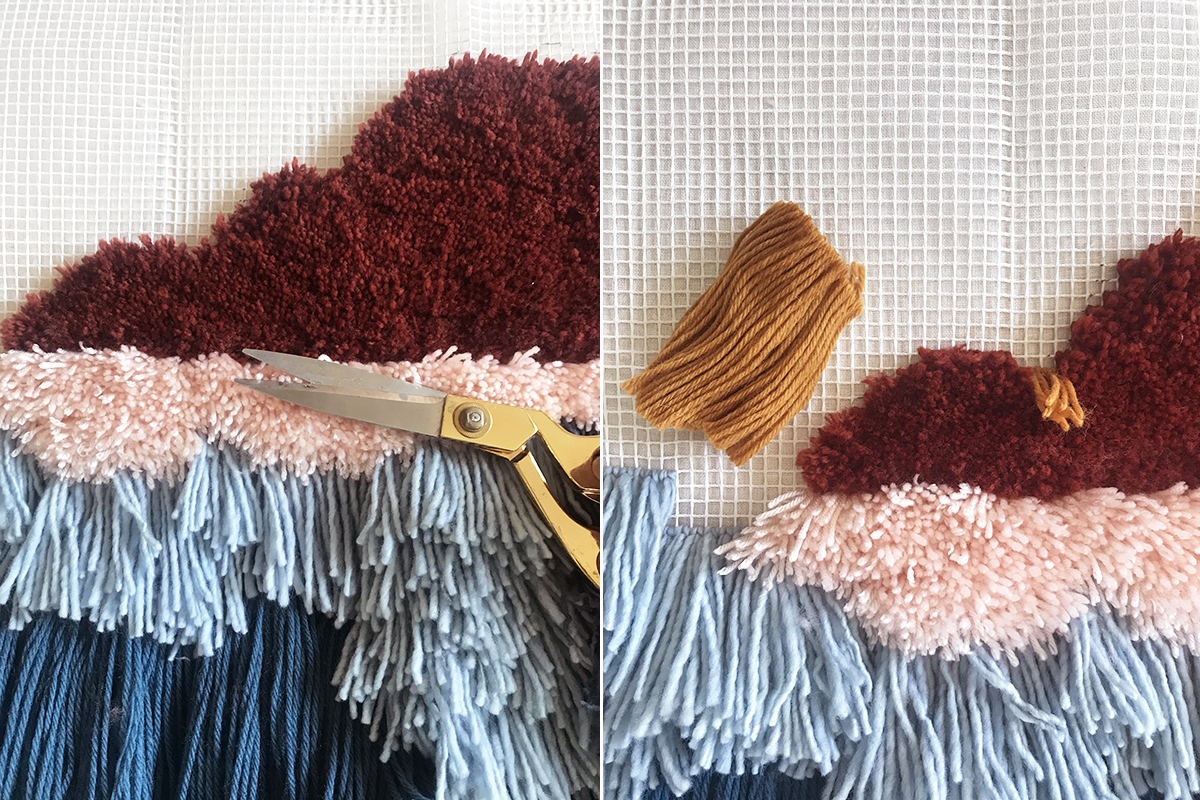
After a few sections are done, you can trim the ends. I like to trim each section flat across the bottom – again, it accentuates it that piece-y look!
When, and if, you move onto shorter segments, just be sure you start at a row where the yarn will cover any empty spaces.
Since I didn’t map out the design beforehand, I like to jump back and forth from the left and right side to feel out the composition. I also like to trim the sections as I go!
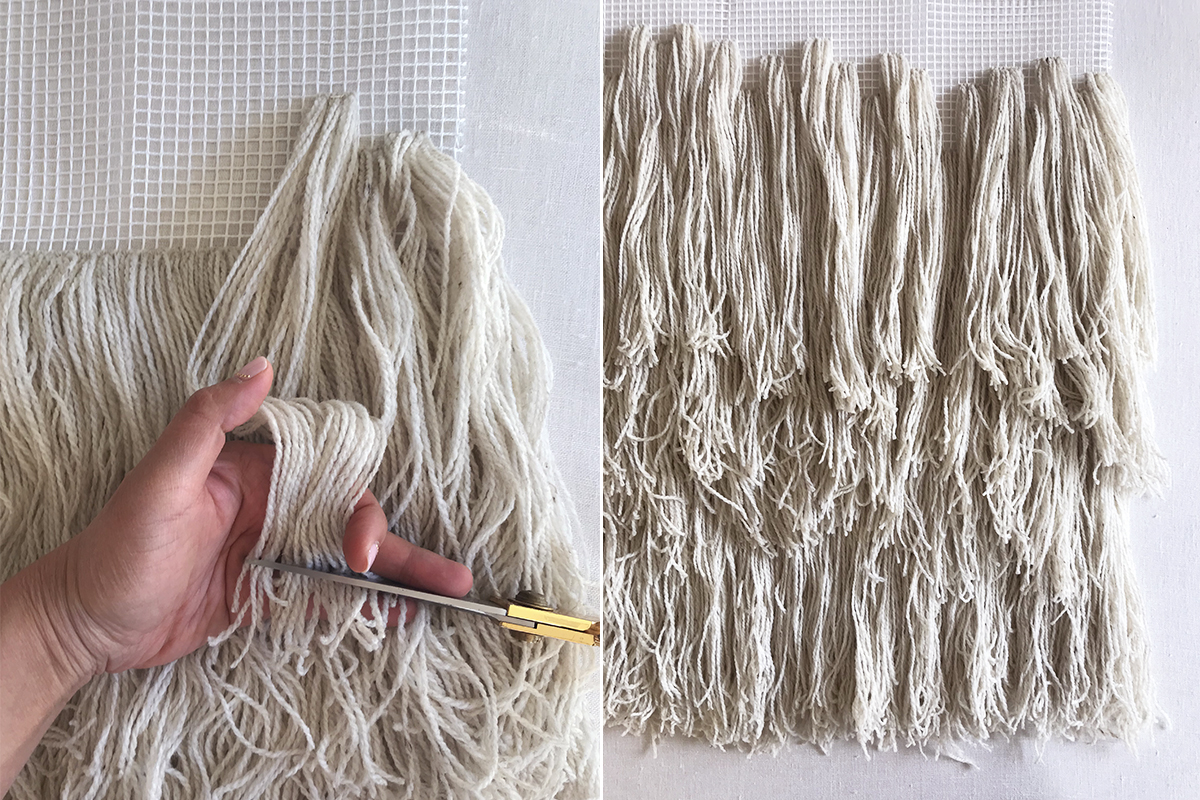
If you’re interested in making a super short pile, you’ll need to fill every square. You also don’t need a very long cut of yarn – a 2 1/2″ piece is sufficient. And in fact, you can even buy pre-cut pieces of yarn online, which makes it all that much easier.
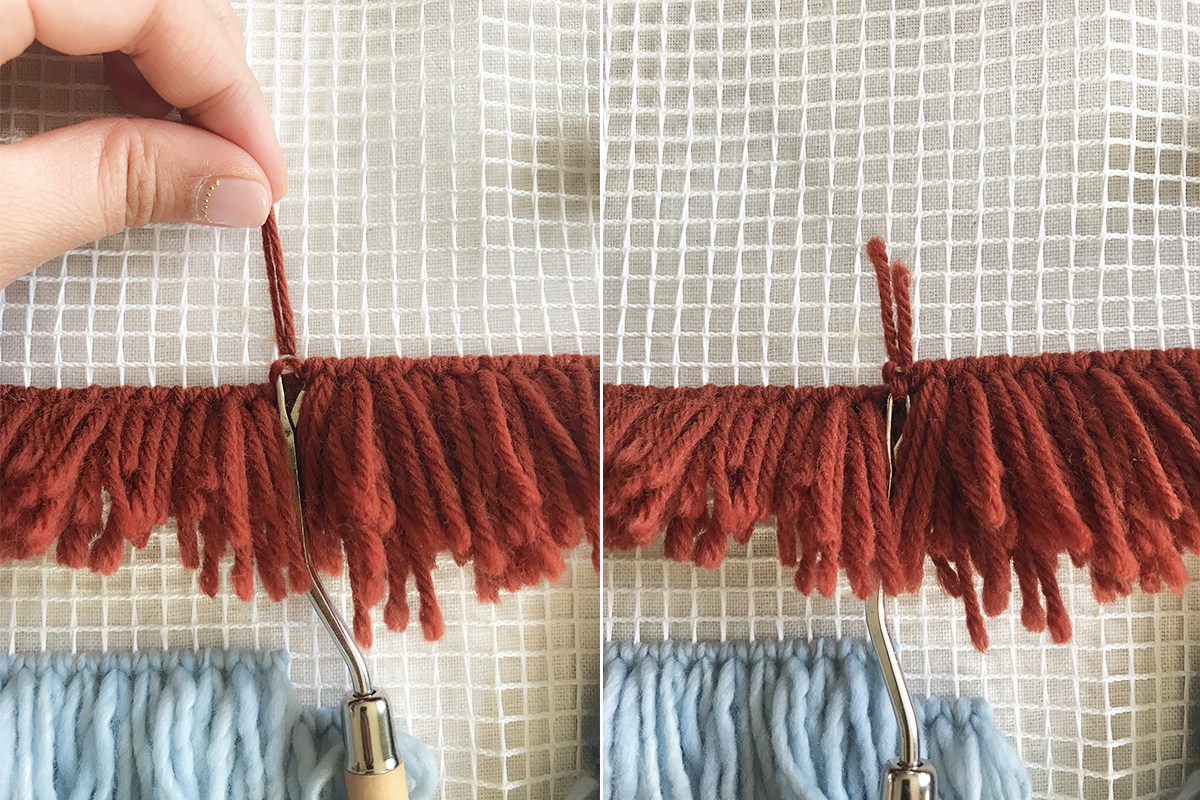
Push your latch hook up underneath the first square where you want to place your yarn. Keep pushing the hook until the latch sits above the bottom line of the square. Pull the yarn up and to the left, keeping the yarn under the latch. Pull the yarn to the right, between the latch and the hook, and then wrap it around the back of the hook.
Gently pull the latch hook tool down until the latch closes. Keep pulling, while still keeping the yarn taut in the other hand, until the latch slides through completely and the yarn is knotted.
Then, take a sharp pair of shears and trim along the top until there’s a short and even pile.
Continue adding yarn until you’ve reached the top.
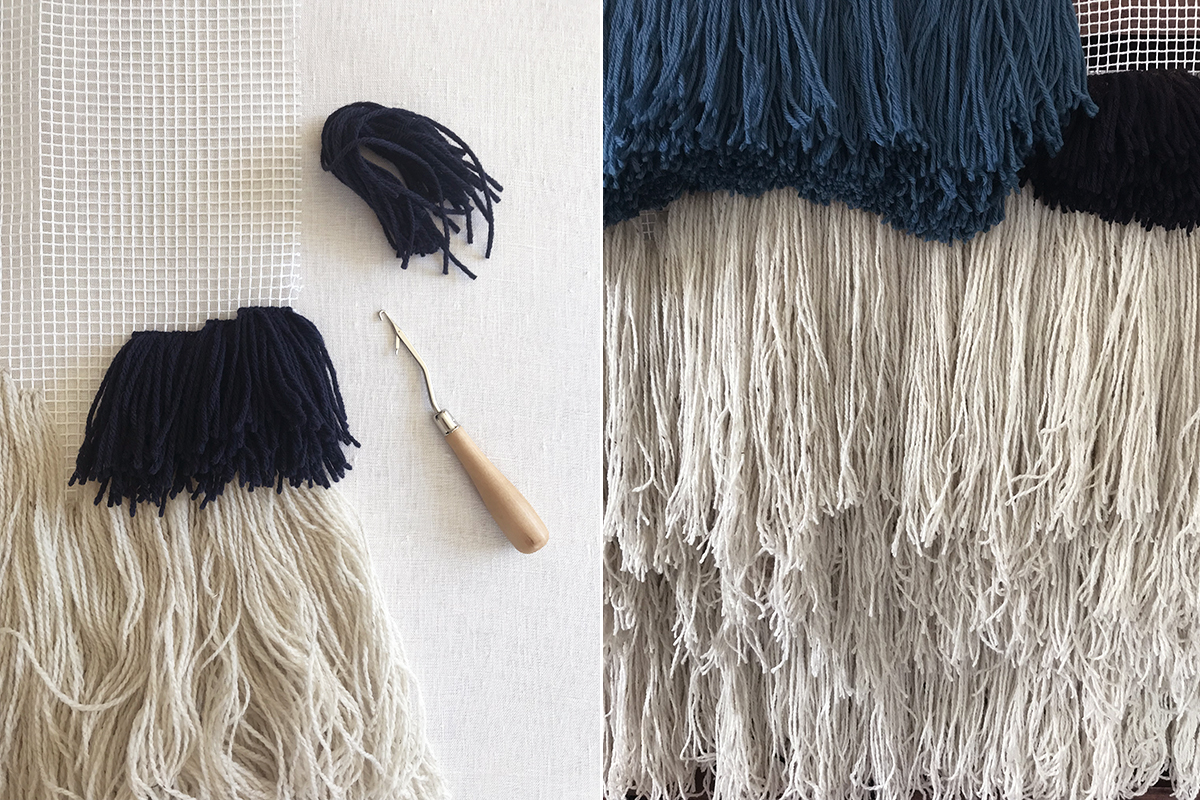
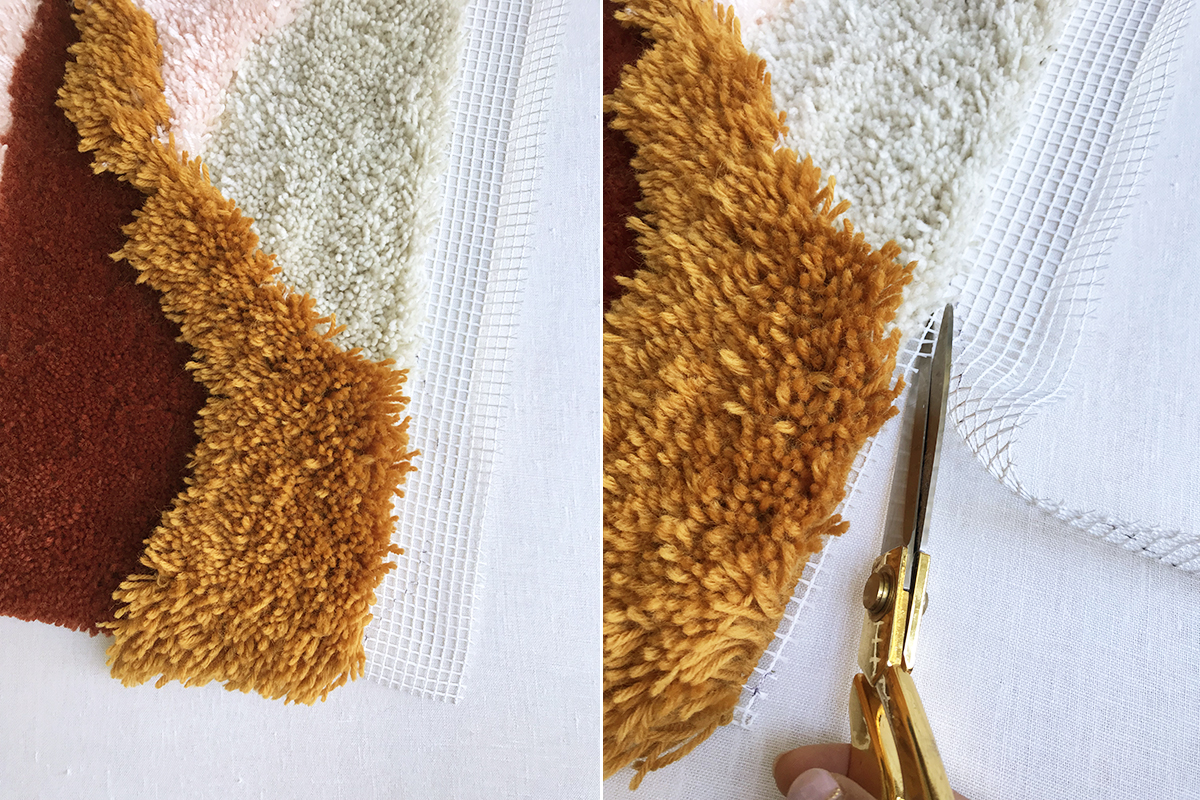
Be sure to leave at least an extra row of canvas to finish your piece. If you’re finished before you reach the top, simply trim away any excess canvas, leaving one empty row attached.
Fold that row over to the backside. Cut 10-12 4″ pieces of yarn. Thread a piece through a square on the top row of the front of your weaving, through the folded back and back through a adjacent square.
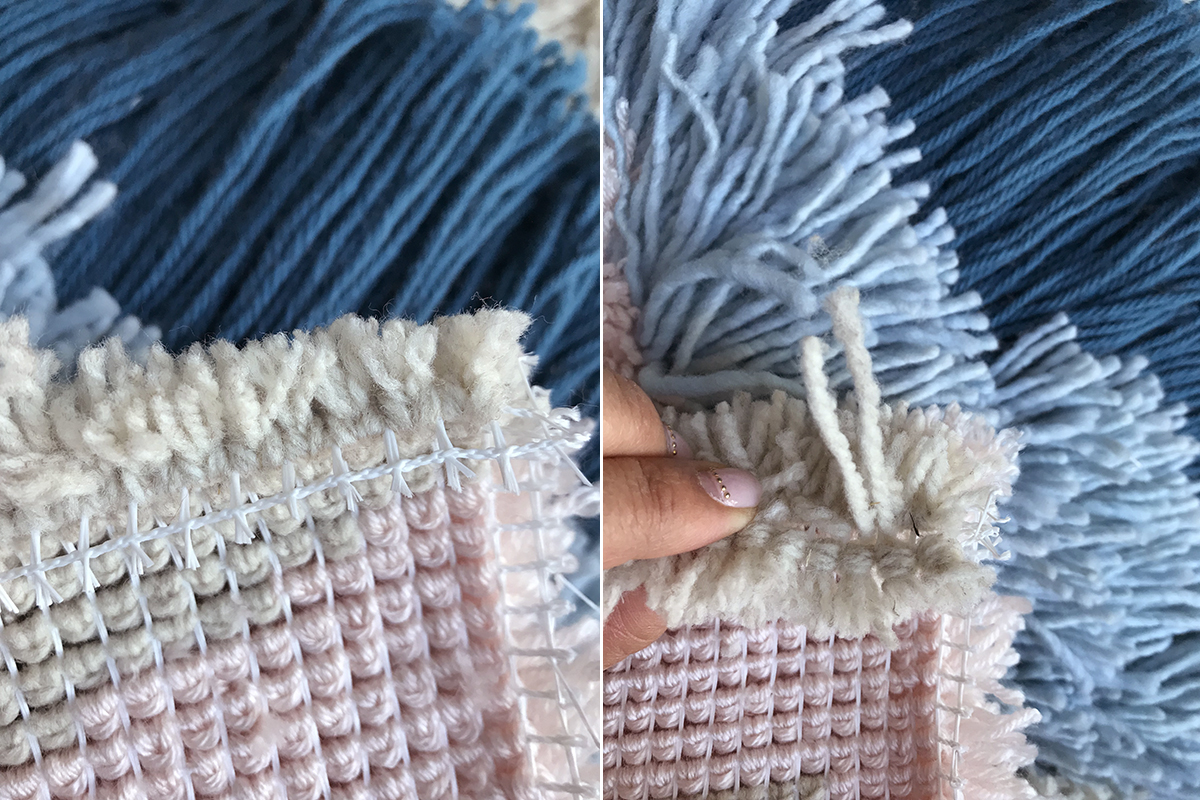
Tie the ends into a knot and pull the tie back from the backside. Continue adding ties, making sure to evenly space them.
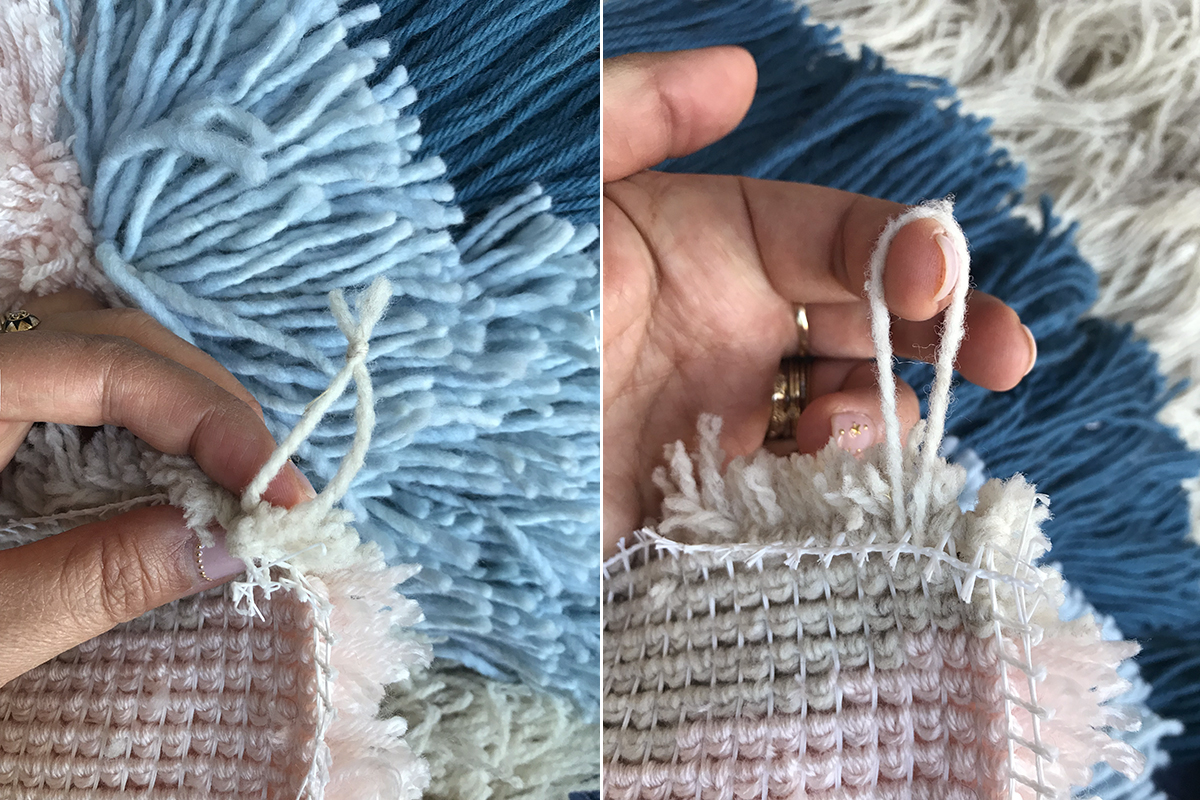
Thread your wooden dowel through the ties and your weaving is ready to hang!

(images by HonestlyWTF & Andrea Posadas)
Wauw this actually looks super cute. And very customizable. Would love to give it a try if I ever find the time.
– https://www.bloglovin.com/blogs/maja-harder-18257183
It looks so decorative!
xx from Bavaria/Germany, Rena
http://www.dressedwithsoul.com
How amazing this looks! Now I want to learn this as well!
https://www.makeandmess.com/
Oh, this very nice! I was surprised to learn how easy the process is and even better, how few tools and supplies are needed!
OMG I used to do this as a kid with kits from the craft store. Now I want to try it! It looks great!
Its Great
Carpet and modern thing in one time
Its a lot of work…(
Wow what a great work you have done! I will try it at home 🙂 Really great to learn how to do it easily
How many total hanks of yarn did you use and are you able to provide links to the brands/ styles purchased?
What goes around comes around. My mom did latch hook wall hangings and rugs in the 70s!
Great work! 🙂 Its really something new, and would pep any room up.
It looks impressive but how much work it costs…
I think I’m going to have a go at this! Looks so fun. How long did it end up taking you to make this?
This is fabulous, thank you!! I followed your woven wall hanging tutorial a long time back and became obsessed with doing that… This might just be my new thing! 🙂
OMG. This is genius. why bother with a loom when you can latch hook the yarn on? I am so excited about this! I love weaving, but it’s a pain in the butt!
YES!! And much more forgiving 🙂
Wow, what a great work you have done! This is awesome.
http://brightstuffs.com/diy-penny-projects-and-crafts/
Its really Great..Carpet and modern thing in one time so beautiful.
I have always admired your site, Thanks for the great tips and work .
Web Development services in Oman
WOW, great job you really nice fashion blogger i love this post.
http://krmangalam.com/faridabad/
Time flies faster when you Netflix and chill!!!
Amazing hook wall hanging ideas
Thanks for sharing
http://dailyhealthtipsweb.com/best-diy-eye-cream-recipes-for-dark-circles-wrinkles-and-lines/
This work is beautiful. I can’t tell you how happy I am to see it. I’ve been looking for something like this but so far everything I’ve found is so awful. Your work is wonderfully creative!
WOW… Such an amazing idea!
https://speakingapple.com/31-diy-phone-case-ideas/
Hi! I wanna try this so bad but I can’t find hanks of yarn!!! Where do you buy them? It looks so cute!
did you find out where to get hanks of yarn inexpensively?
Beautiful piece! Also, Netflix and chill means have sex with the TV on.
Thank you! I do latch hooking and you have taught me how I can hang them on a budget! I appreciate it so much and I love your work here 🙂
I have saved this page!
I just received a piece that looks like maybe A throw someone had started no pattern book or instructions but it does not have a backing you just go in and out to make a straight line what it that called?
I absolutely love your WORK!!!!
I am on my very first piece, and I wish, I saw your tutorial before I started. Surprisingly I got similar mesh rug canvas but I need to get the latch hook. Thank you!!!