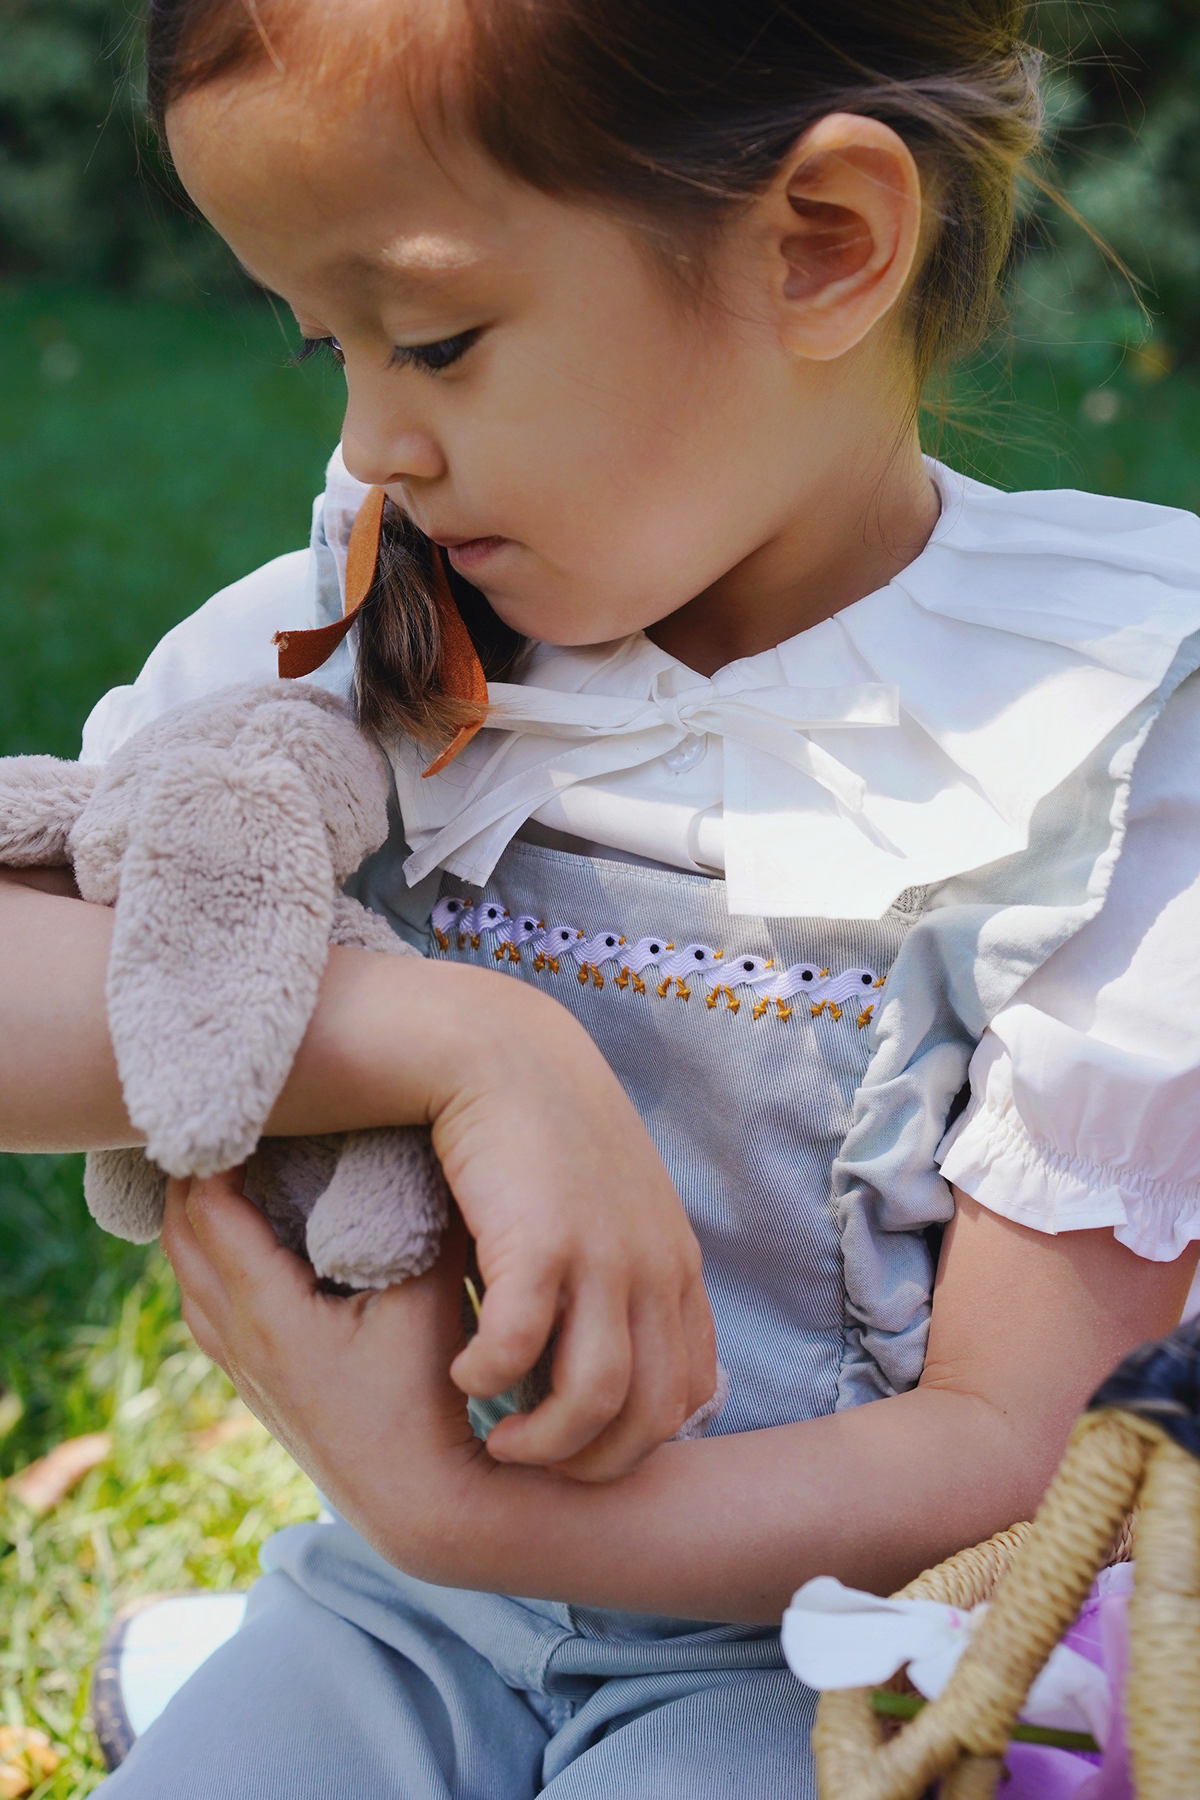
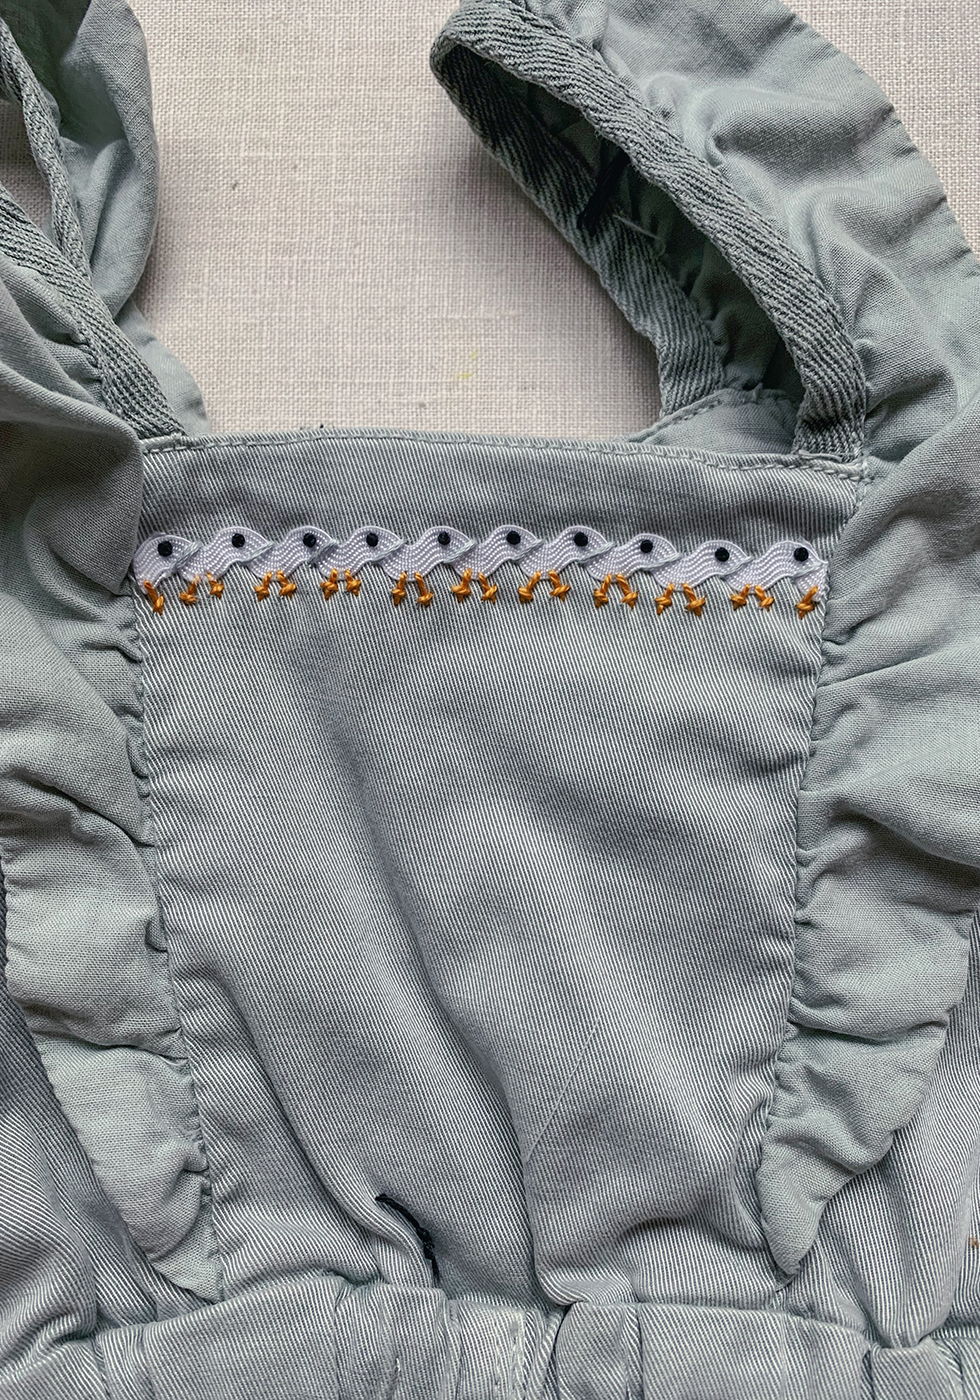
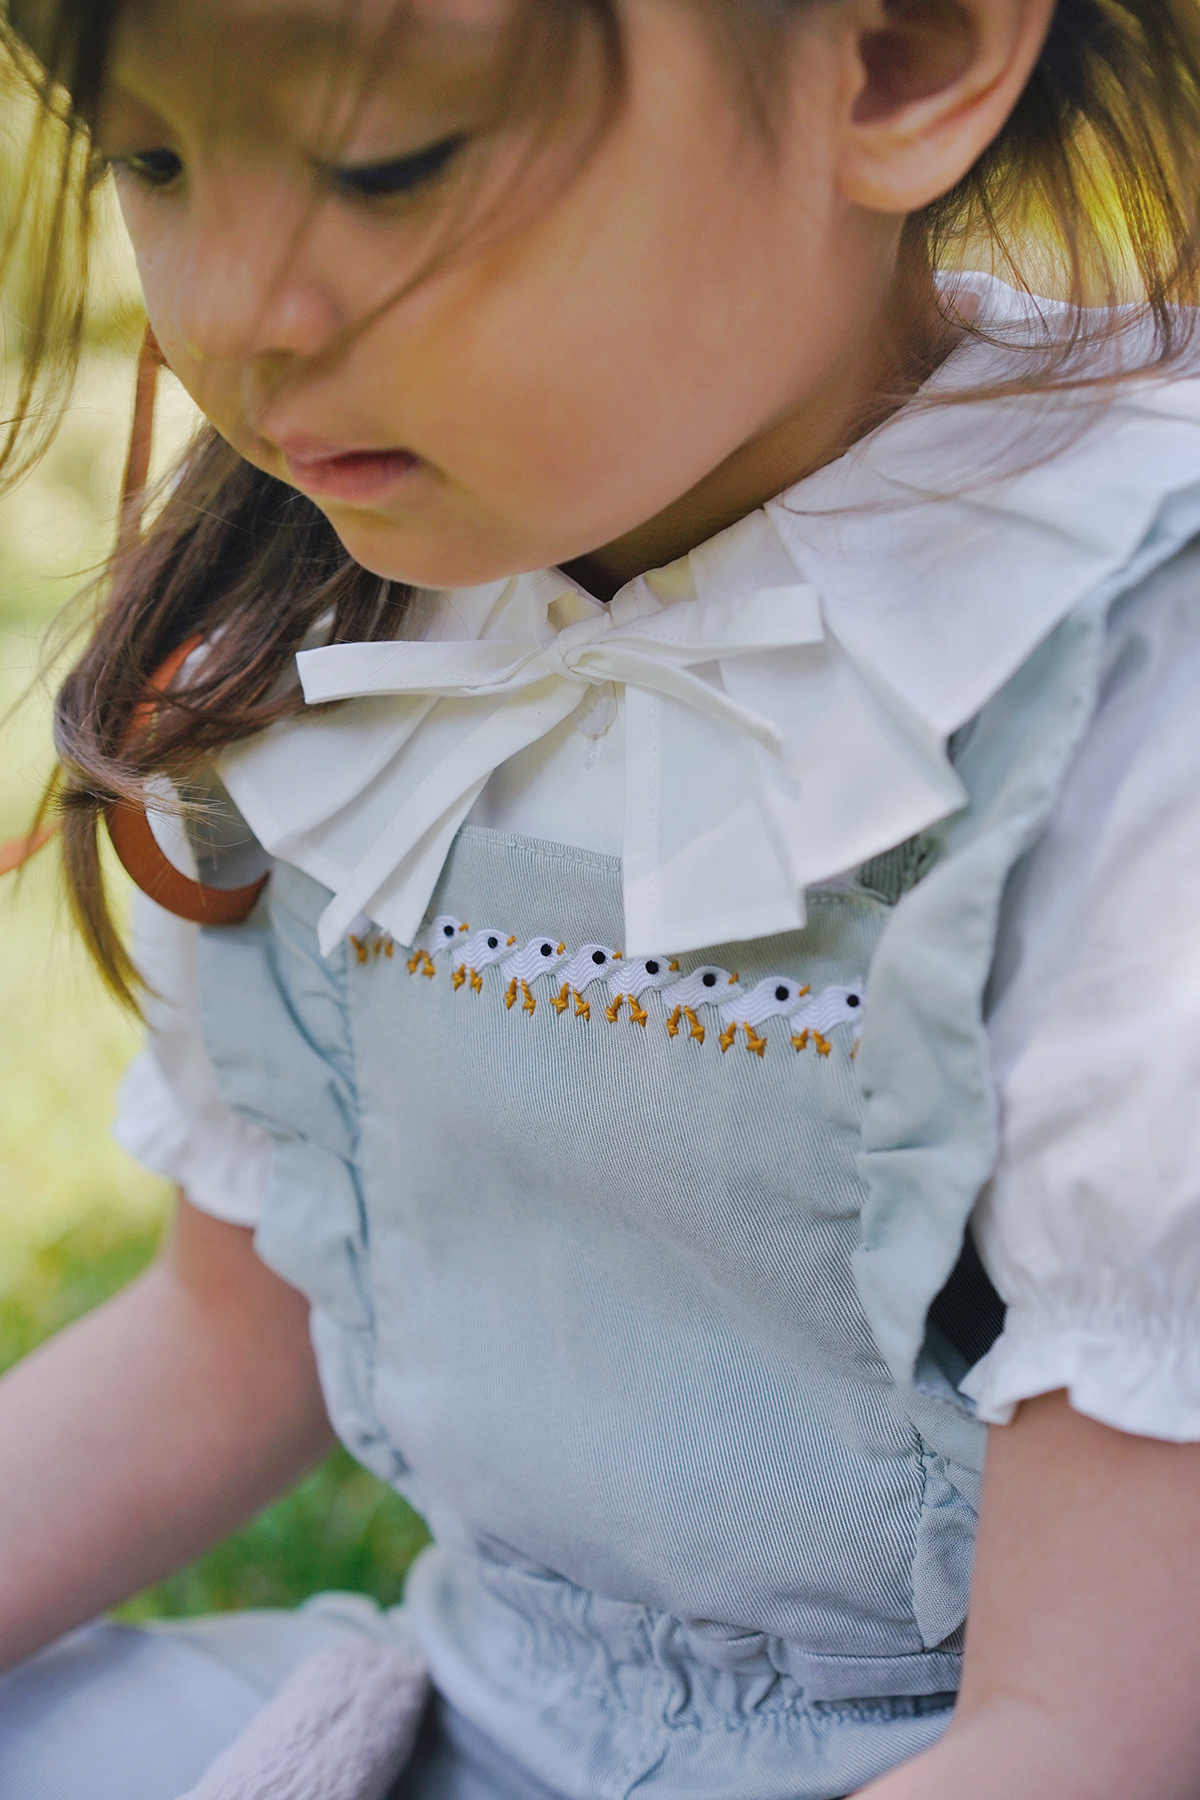
Like most all of you, our Easter plans won't be moving forward as traditionally planned this year. But in a wonderfully touching gesture, our neighbors have planned a virtual egg hunt for the littles in our community this weekend! It's truly amazing to witness the generosity and creativity abound during these times. After stumbling upon the most adorable chick embroidery using a single piece of white rickrack, while perusing Pinterest, I knew I had to recreate it on one of Coco's favorite overalls in time for the festivities, albiet virtually. I also just so happened to have discovered an unusually large and untouched amount of braided zigzag trim in my craft closet and am finally realizing that rickrack should indeed be a craft staple. This stuff is amazing! Embroidering little chicks was surprisingly easy and clever. Just the idea of bringing some new life into a piece of old clothing brought me so much joy. It's all about the silver linings, isn't it?
You'll Need:
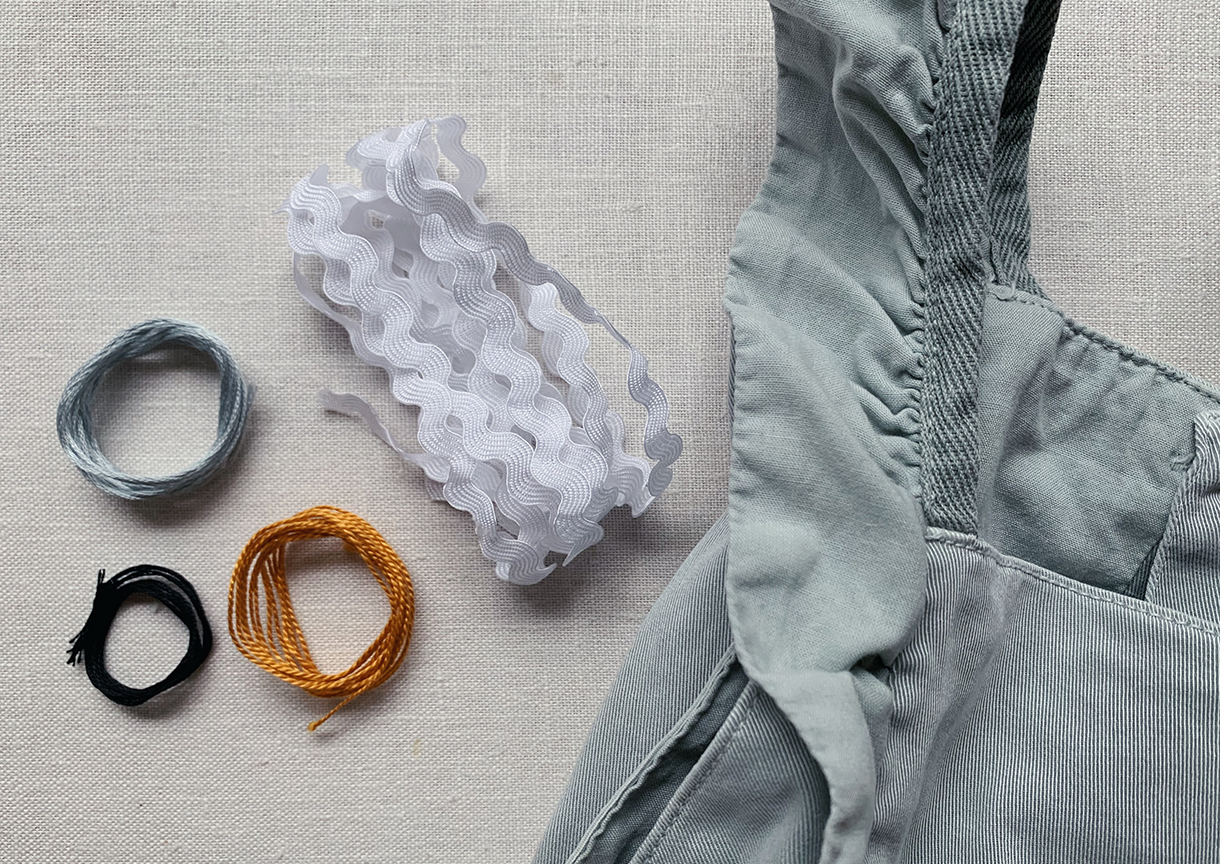
- embroidery floss (color of your clothing, black and yellow)
- embroidery needle
- white rickrack
- pin needles
- scissors
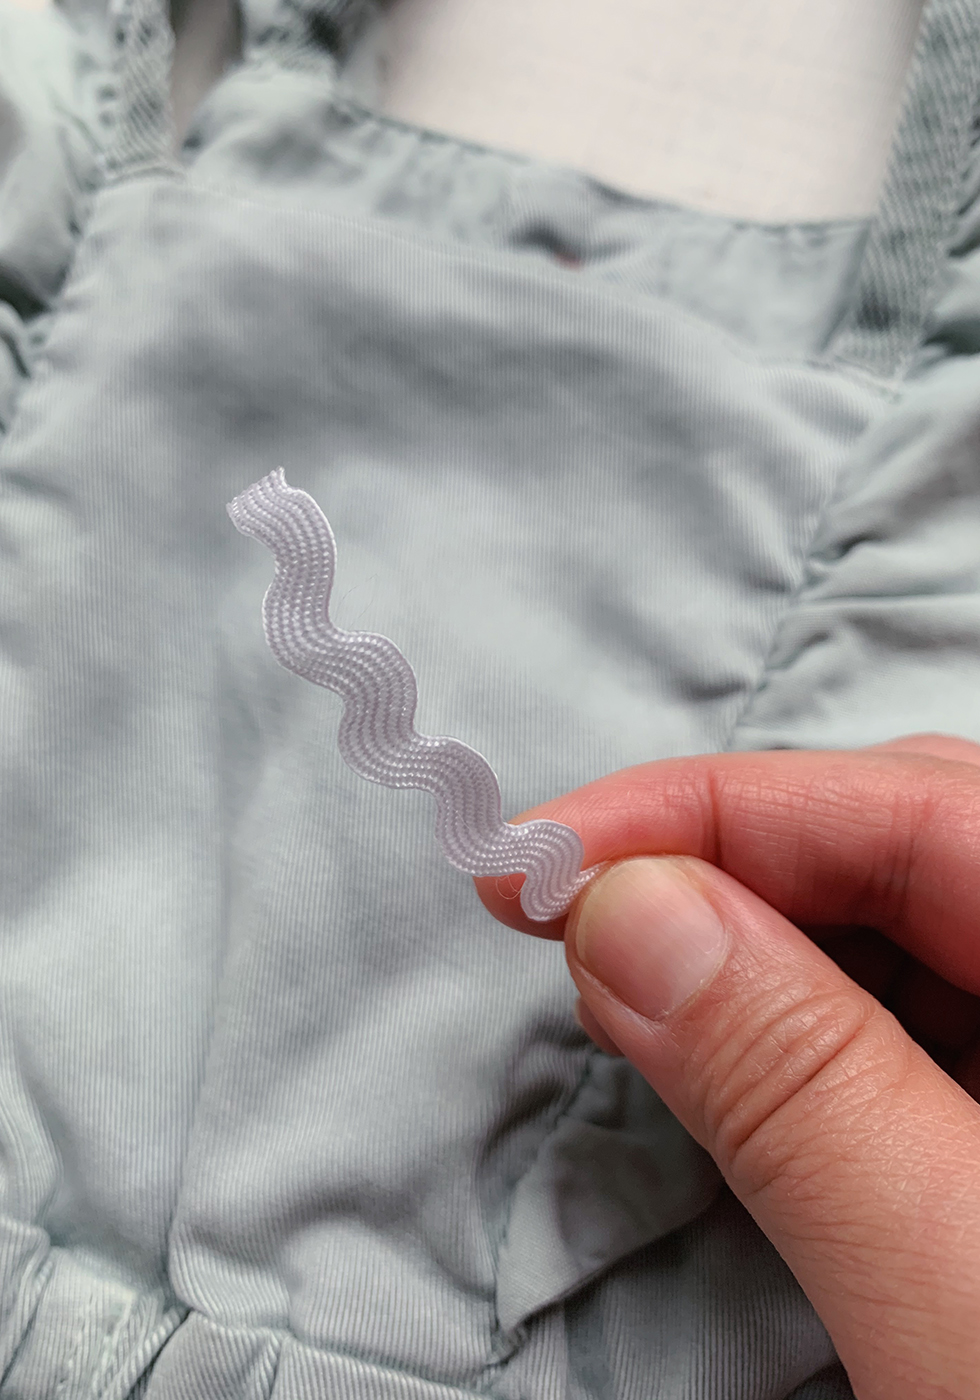
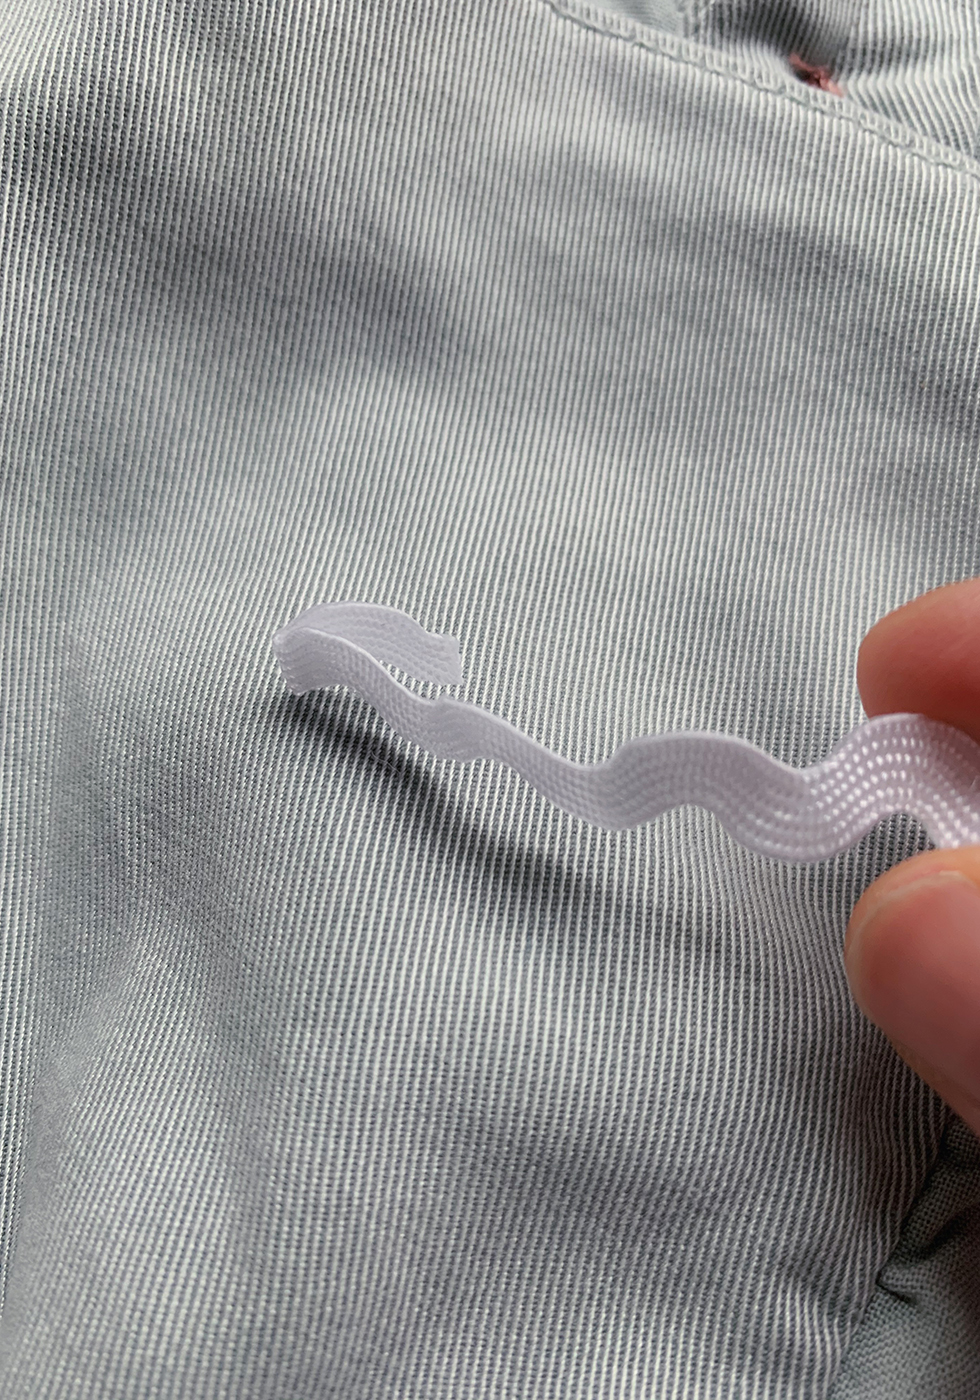
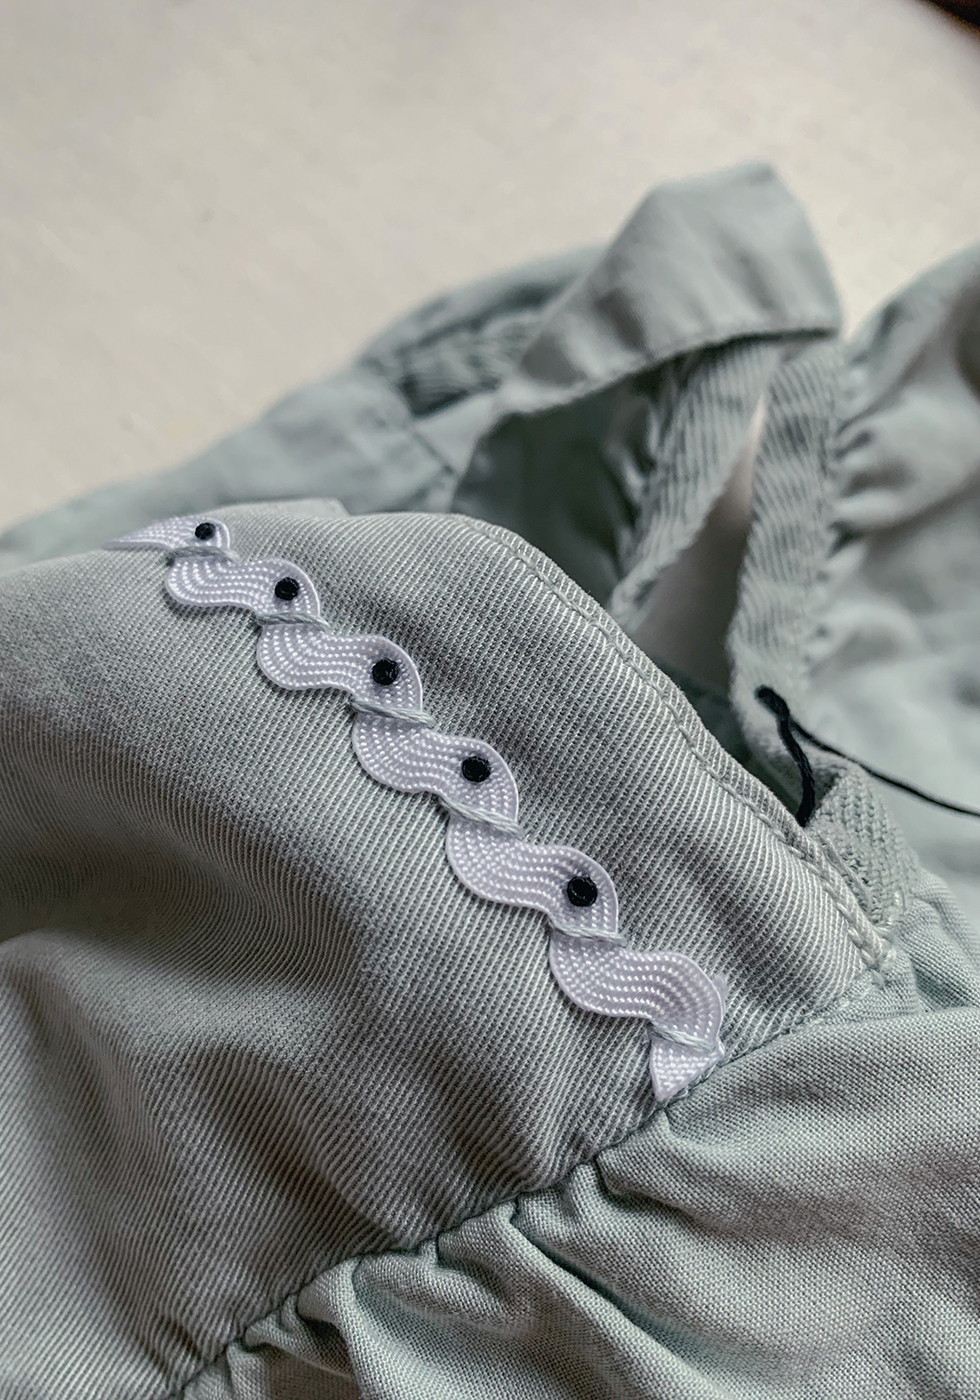
Measure your rickrack against your fabric. Add an additional 1/2 inch to each end and cut to size. Fold in about 1/4" under the ends of the rickrack. Make sure it's aligned.
**Note: Not all rickrack is made equally so test a piece before you ever take an iron to it. Some of the cheaper rickracks will melt and others won't!
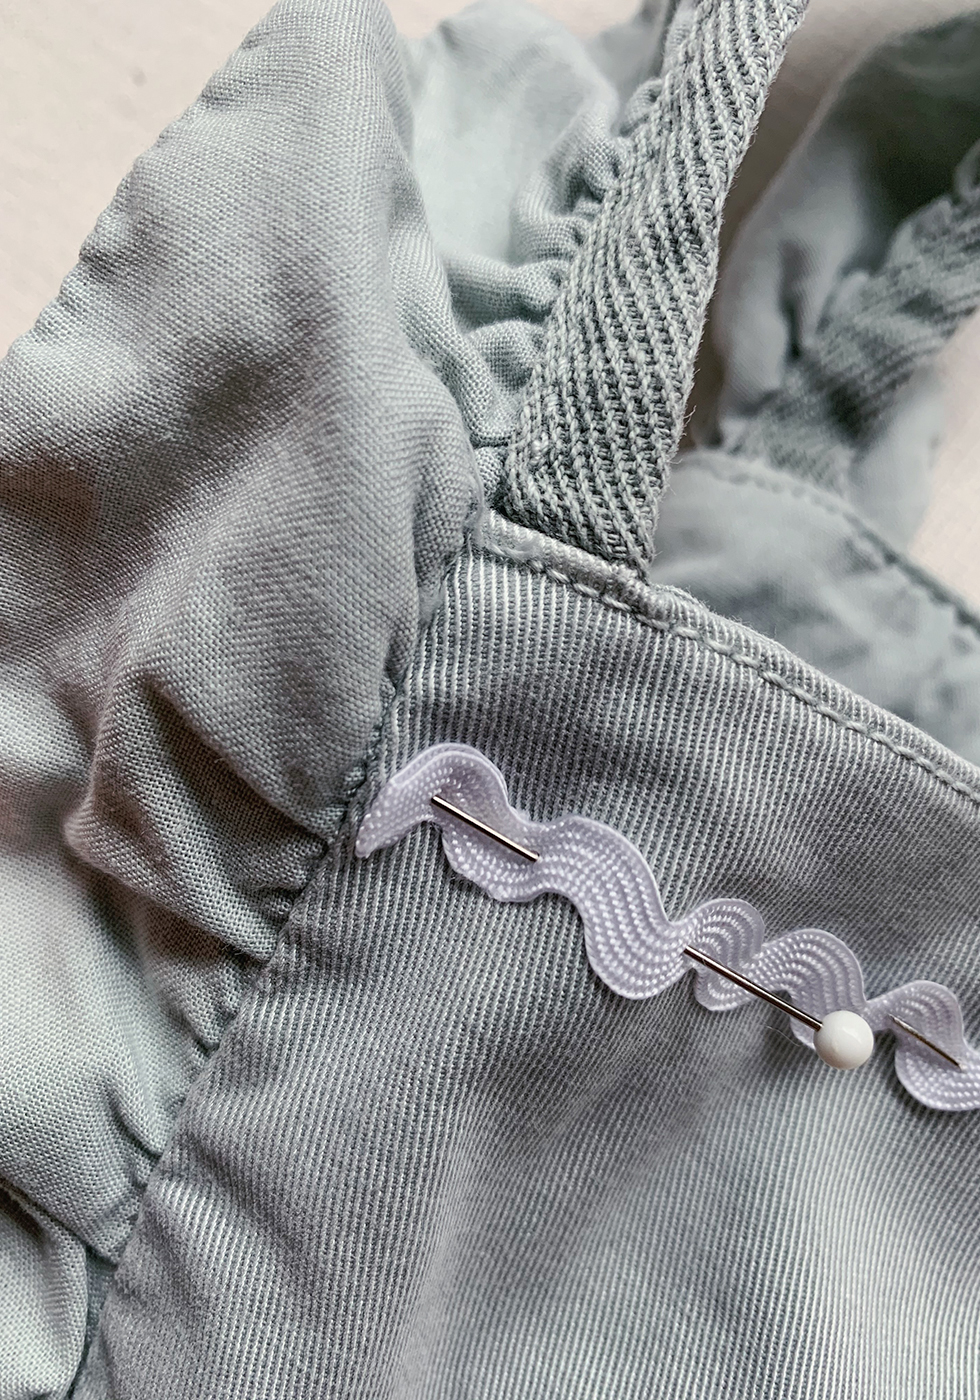
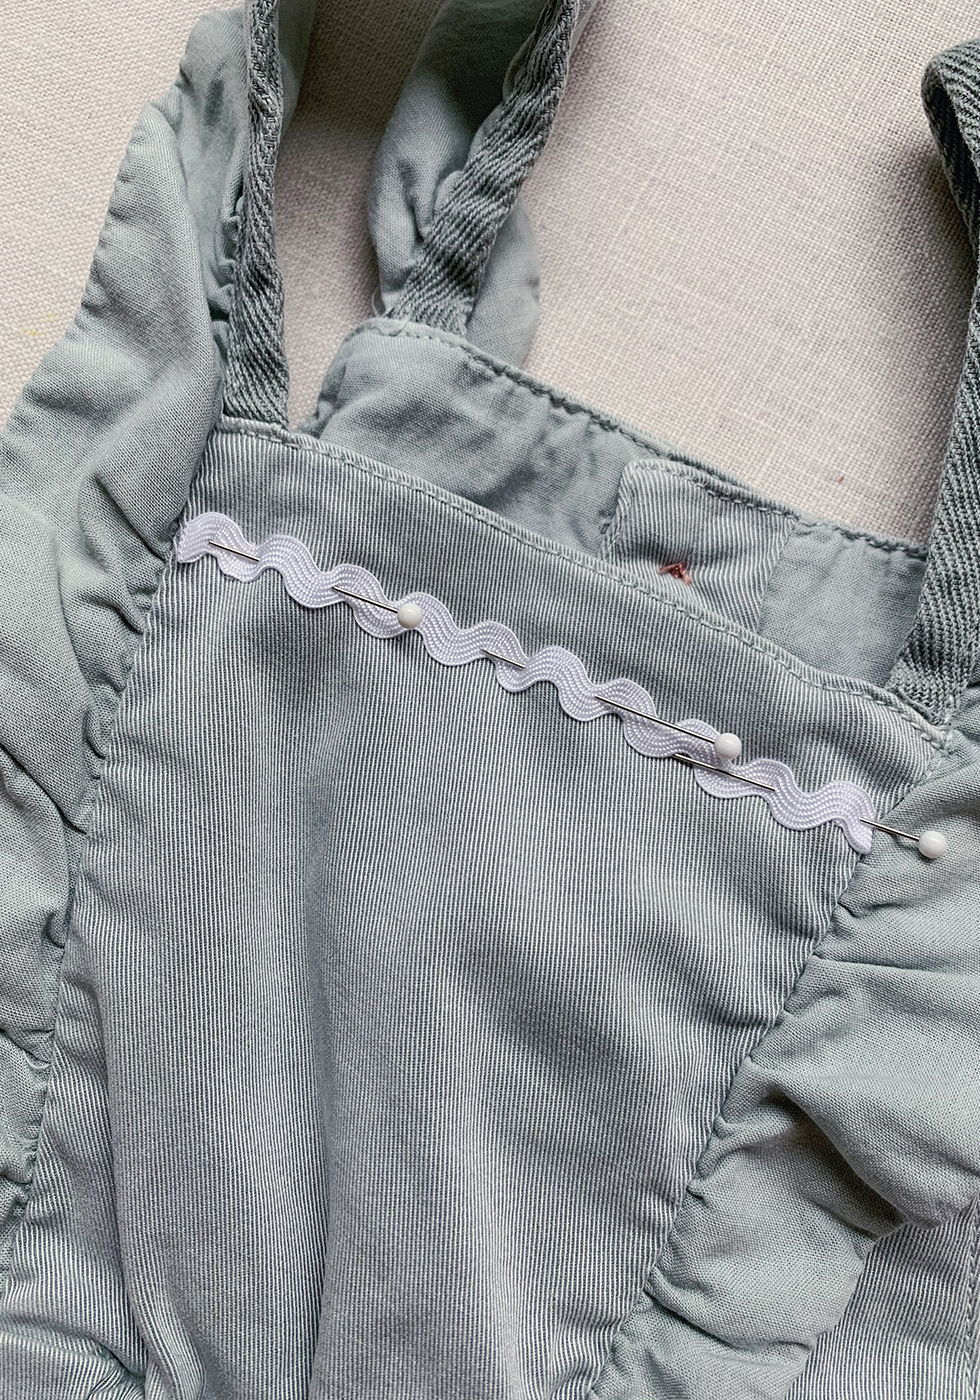
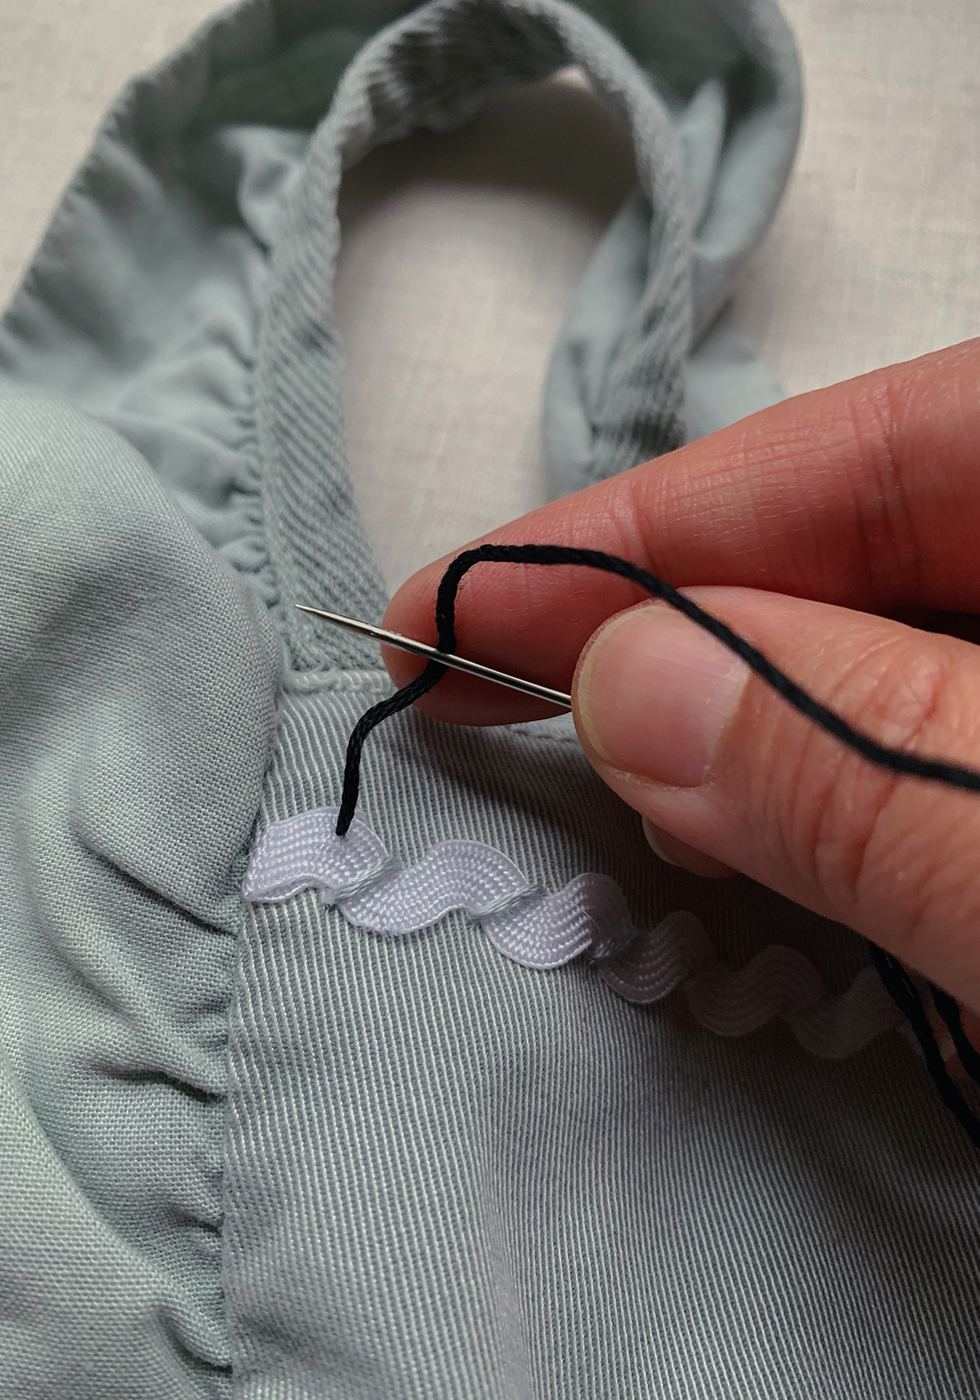
Pin the rickrack into place.
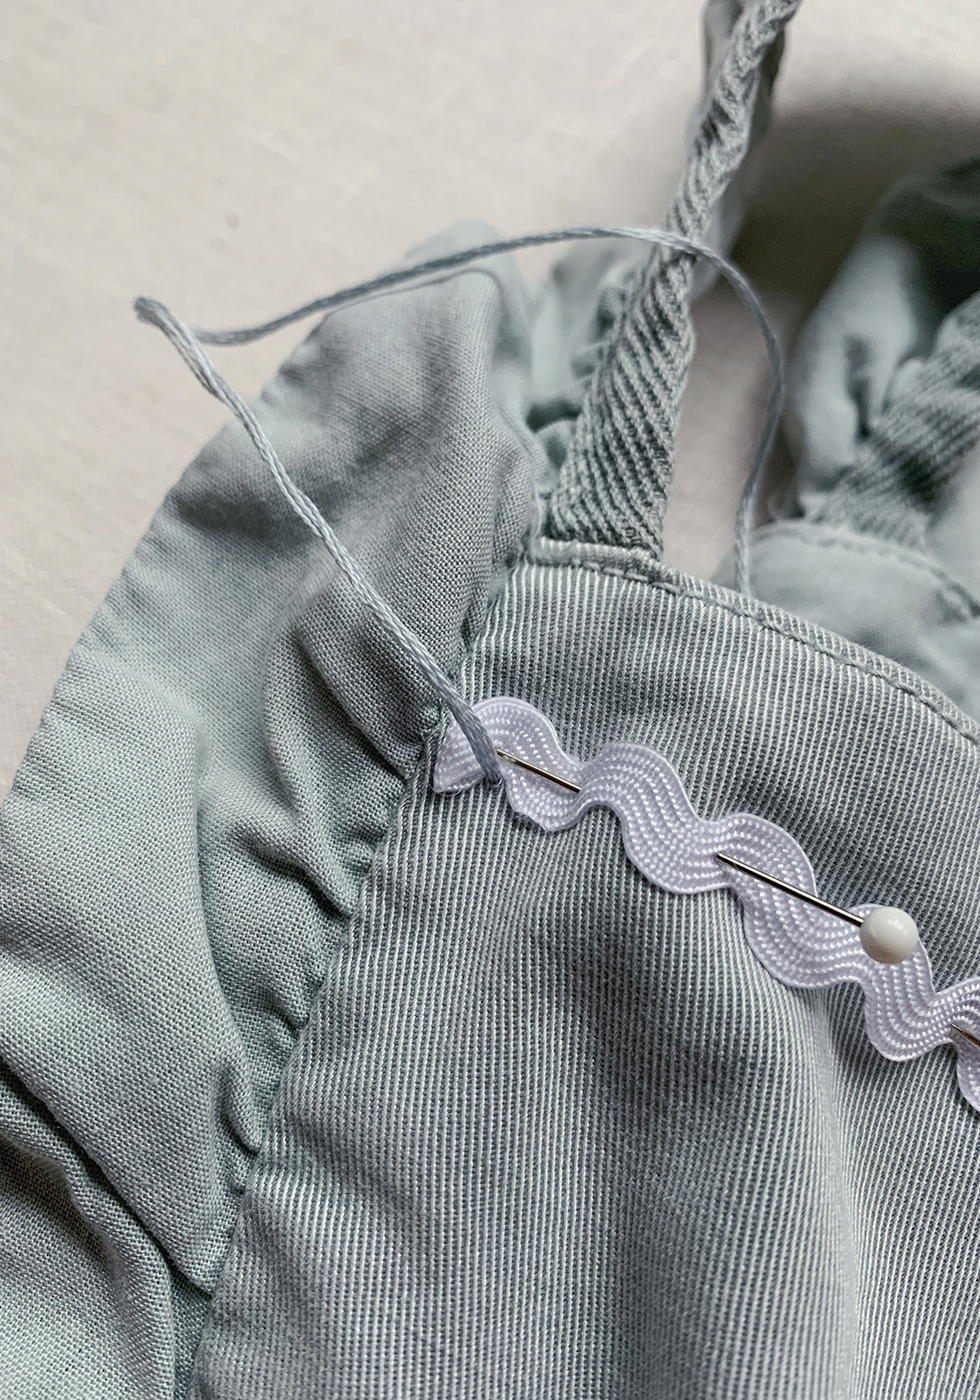
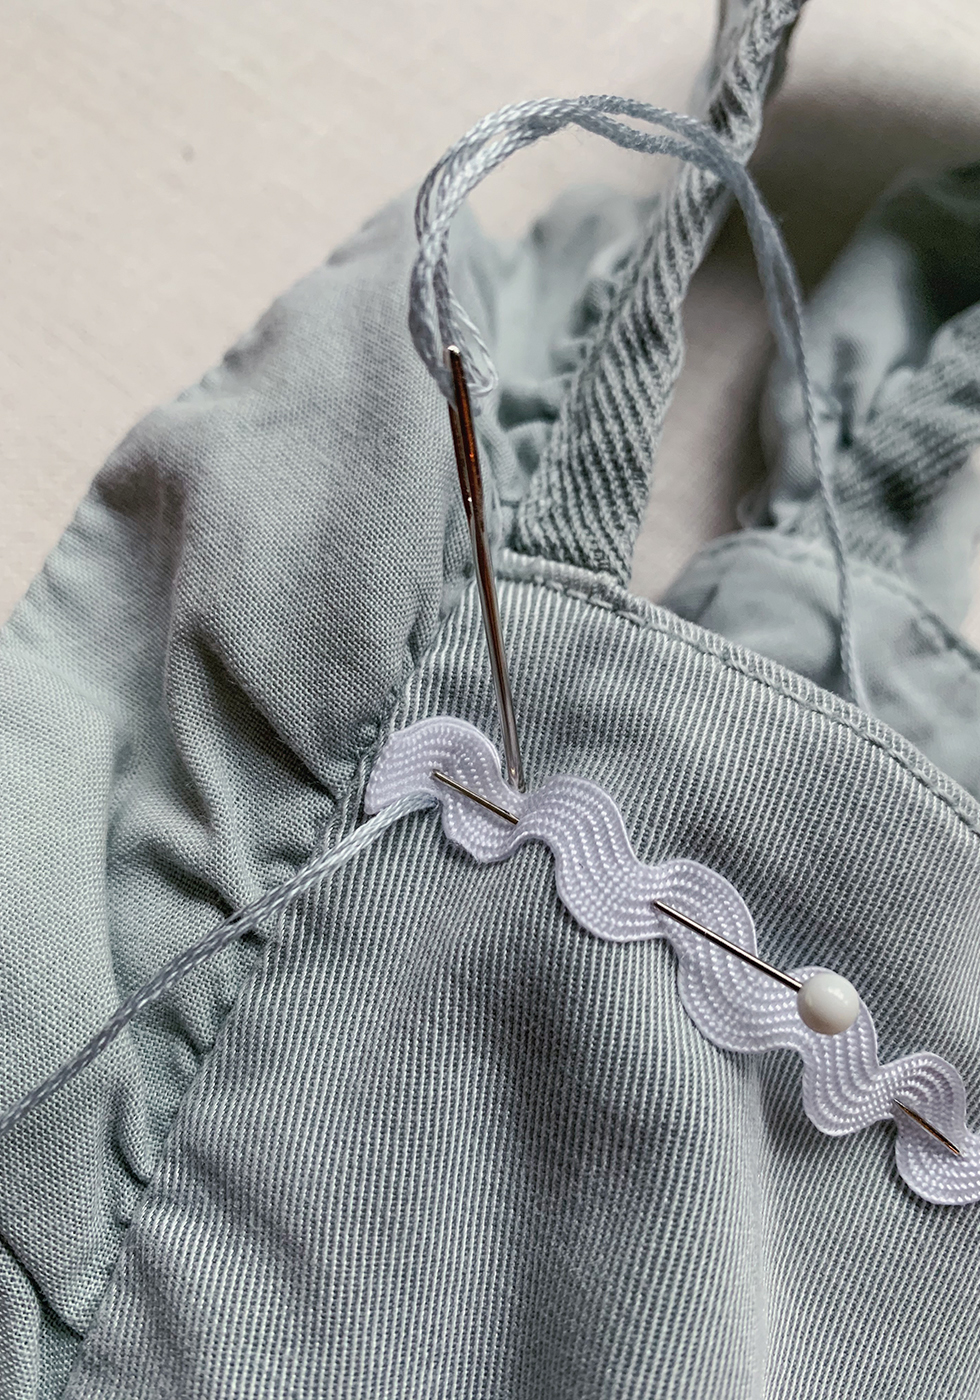
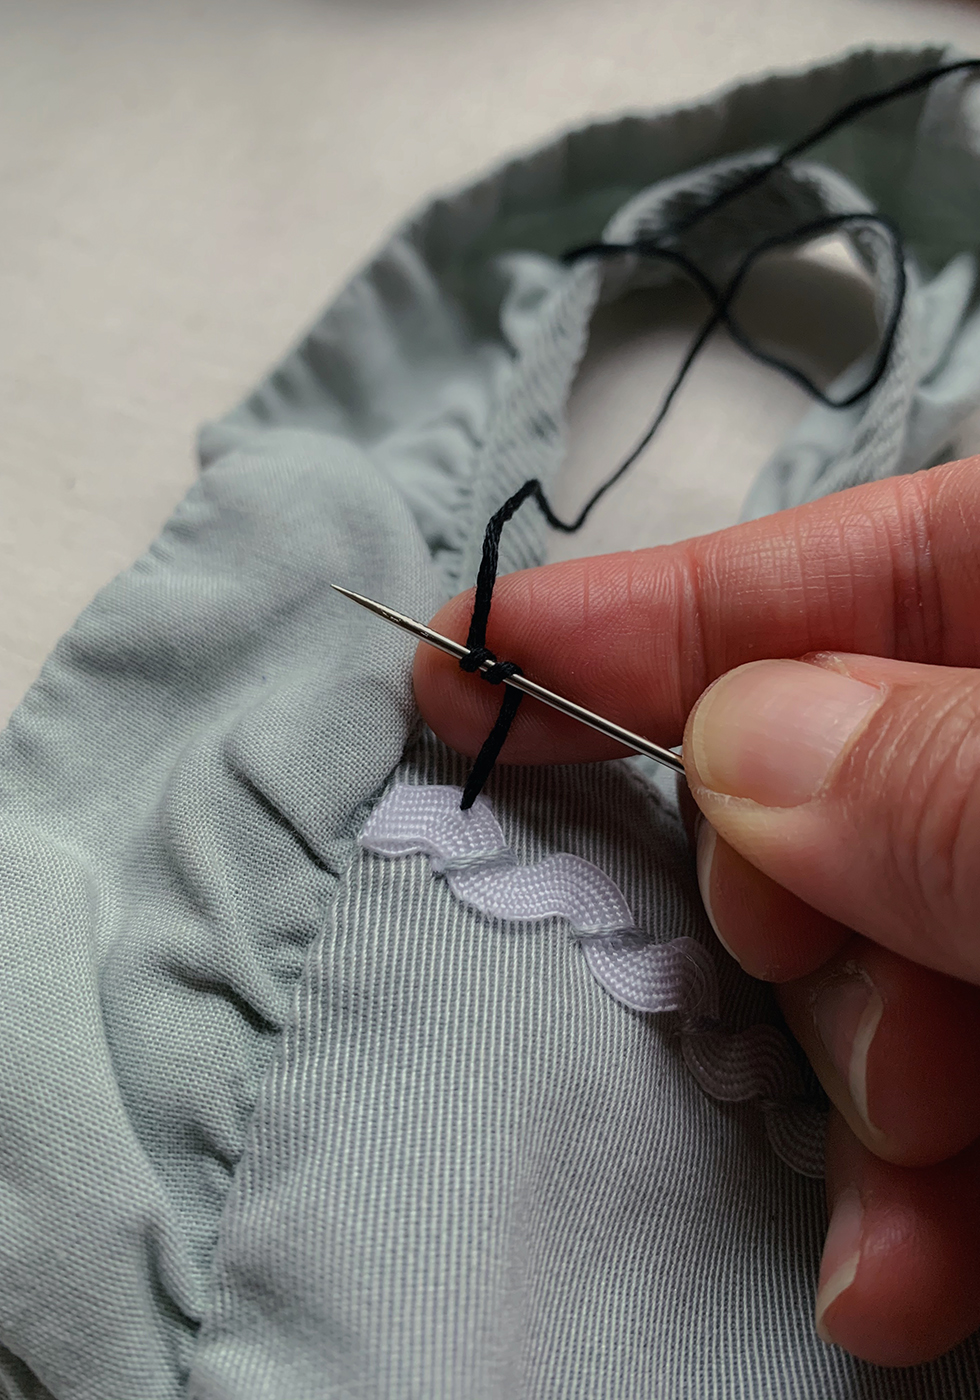
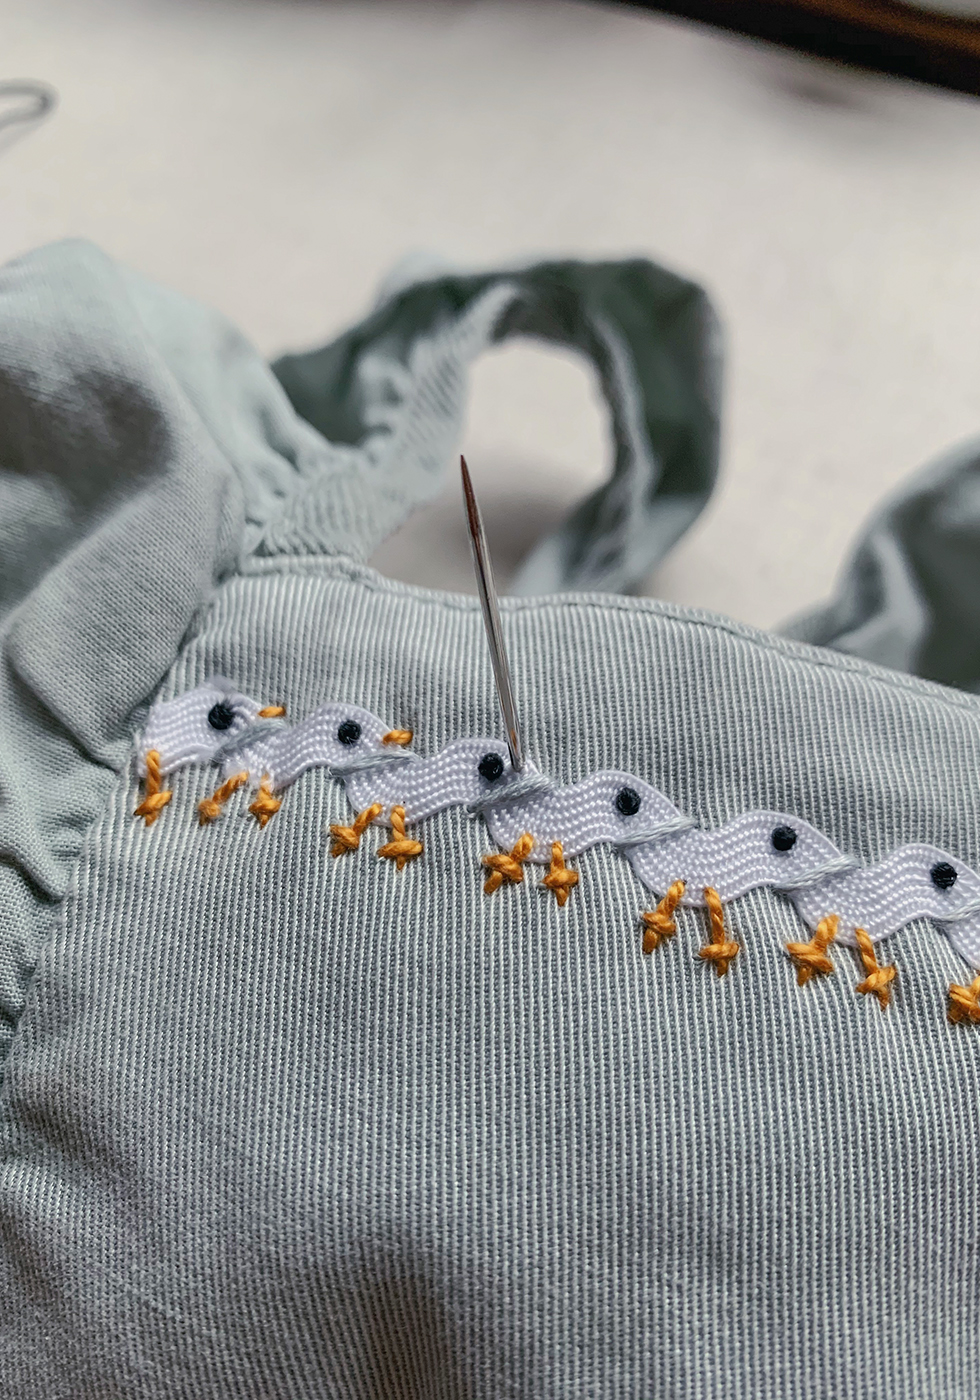
Start by tacking on the rickrack with the same colored floss as your fabric. This will help define the shape of the chicks. Thread your needle and tie the end into a double knot. Bring the needle up at the middle of bottom concave. Push the needle down at the opposite concave.
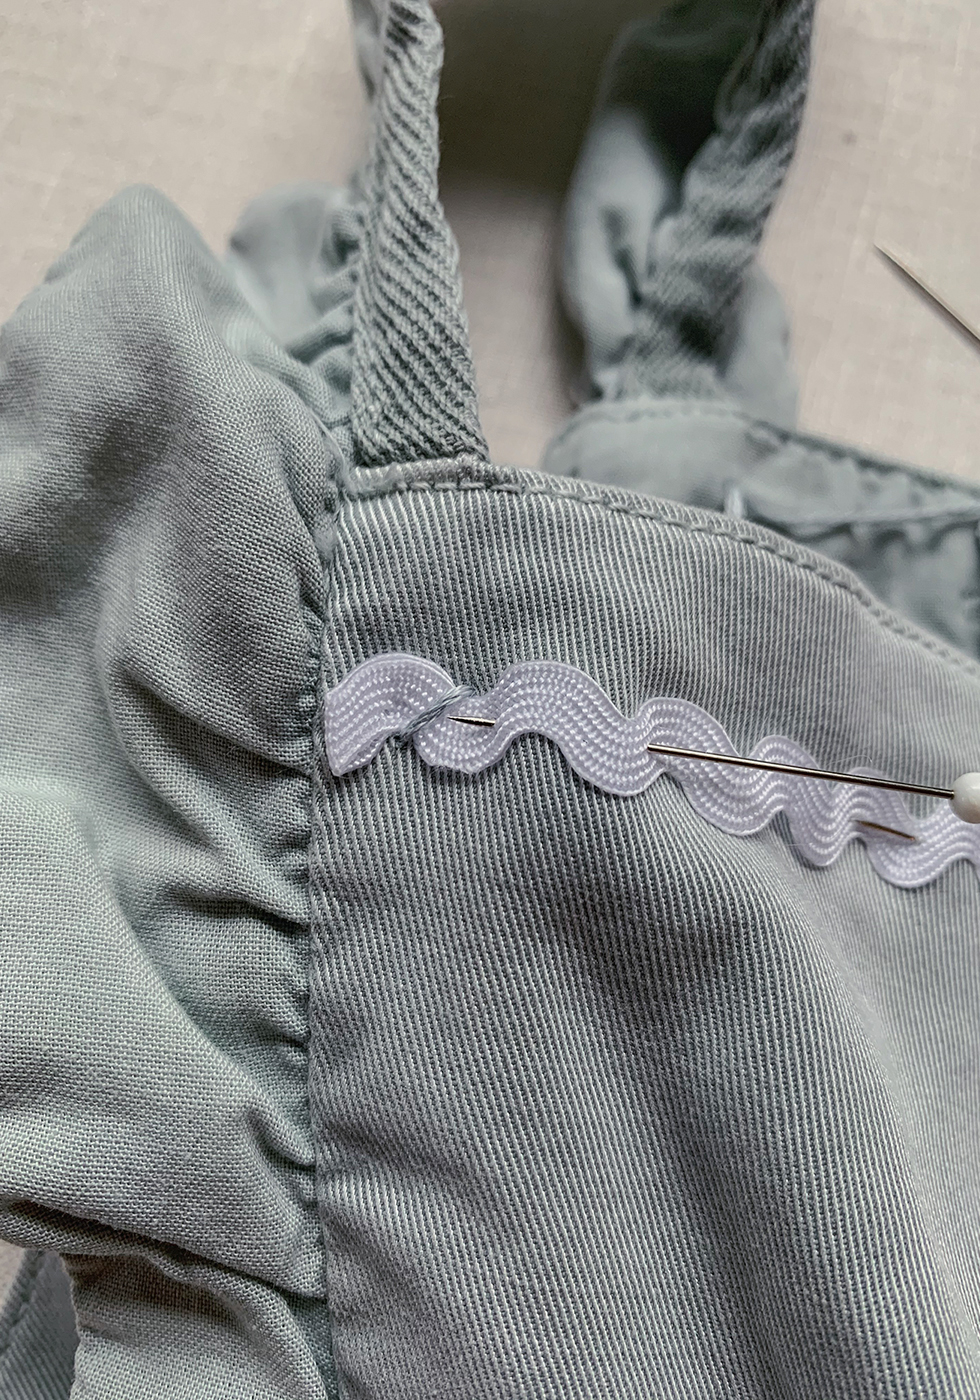
Continue stitching until you've reached the end. Remove the pins as you go so that you can get the right tension along each stitch. Tie into a double knot on the inside of the garment when you're done.
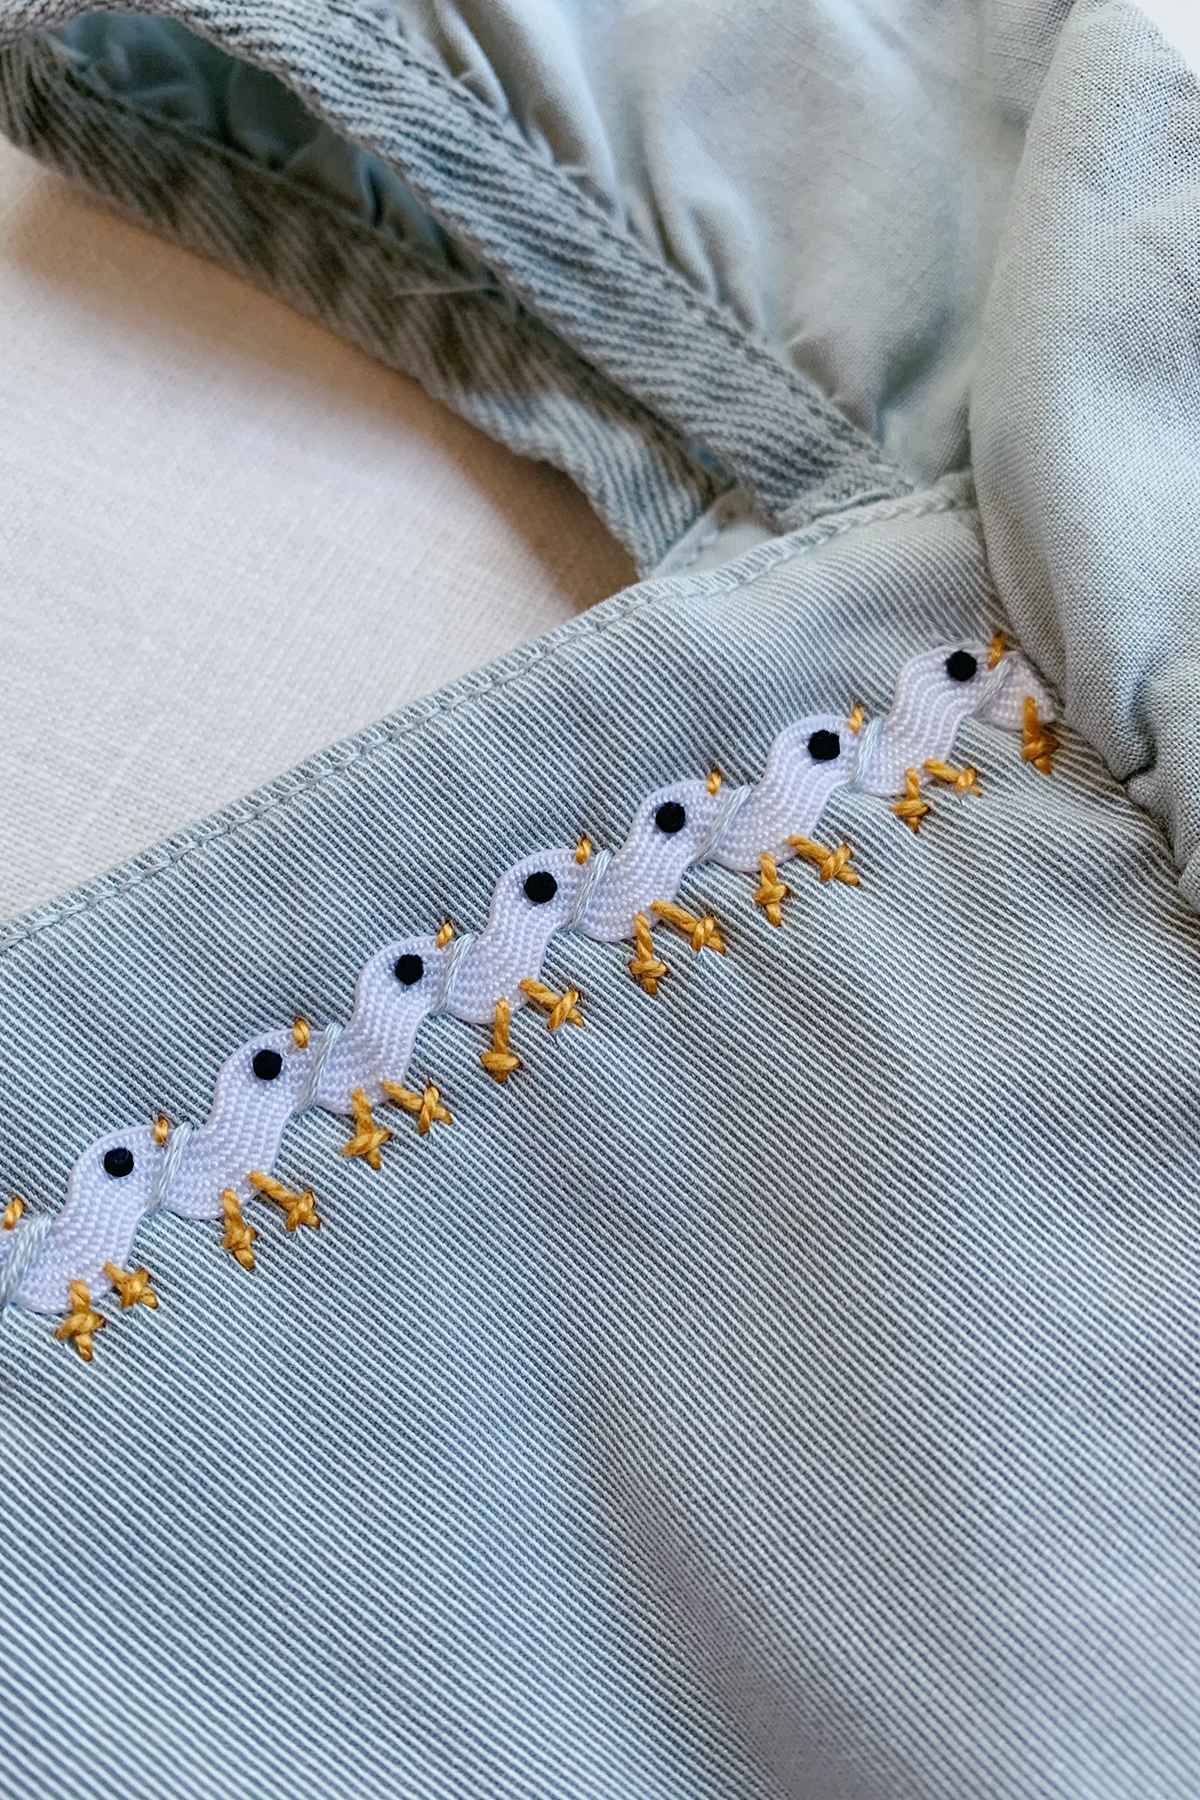
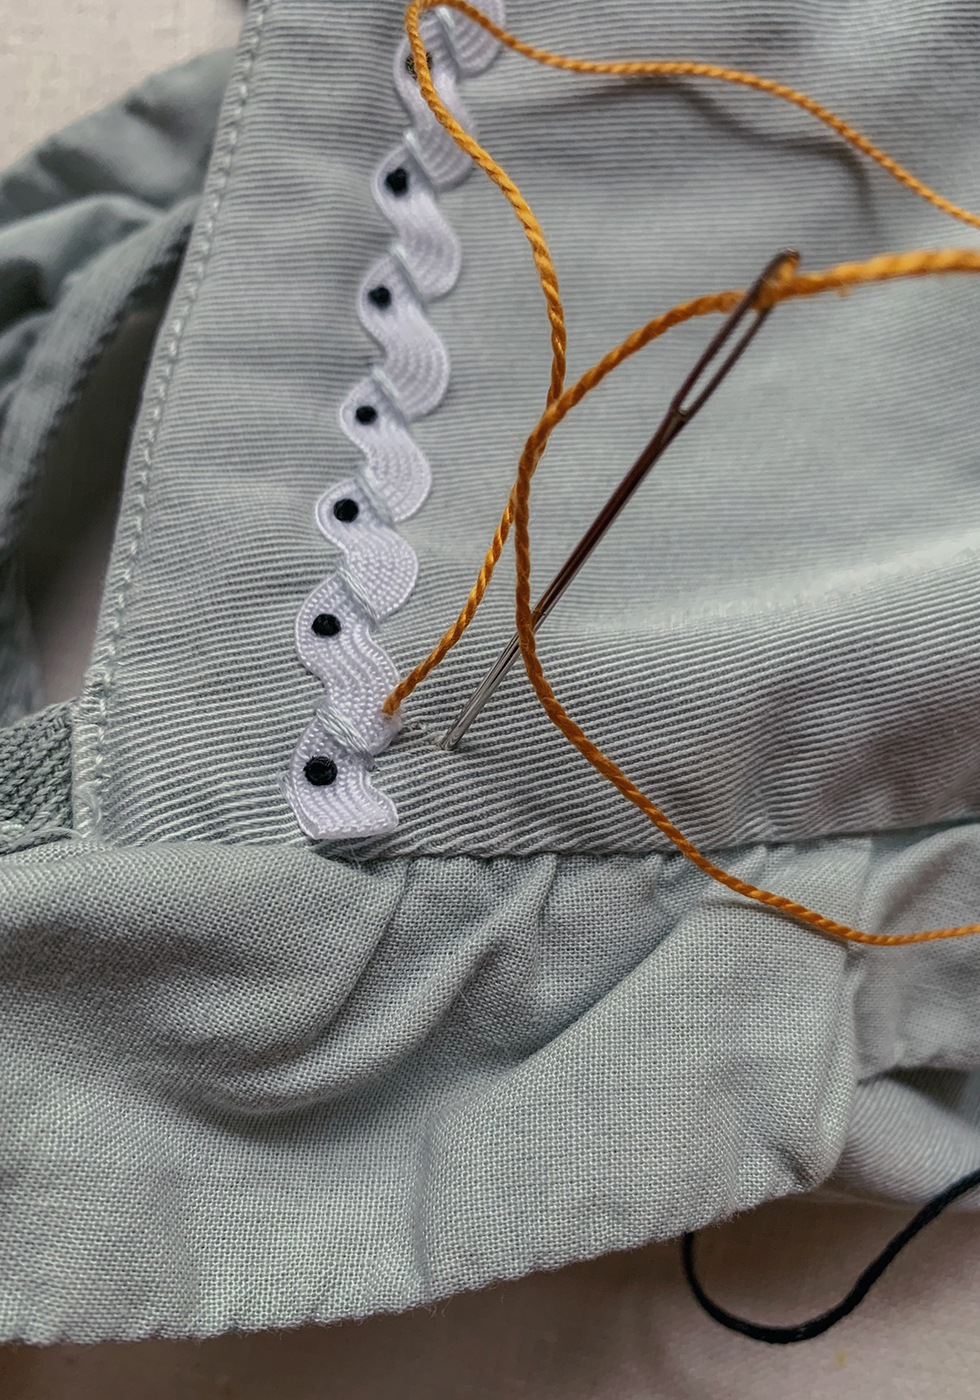
Next up is the eyes. Here, we'll be making a French knot. Thread your needle with black embroidery thread and tie a double knot at the end. Bring your needle up through the fabric. Pull the thread all the way through.
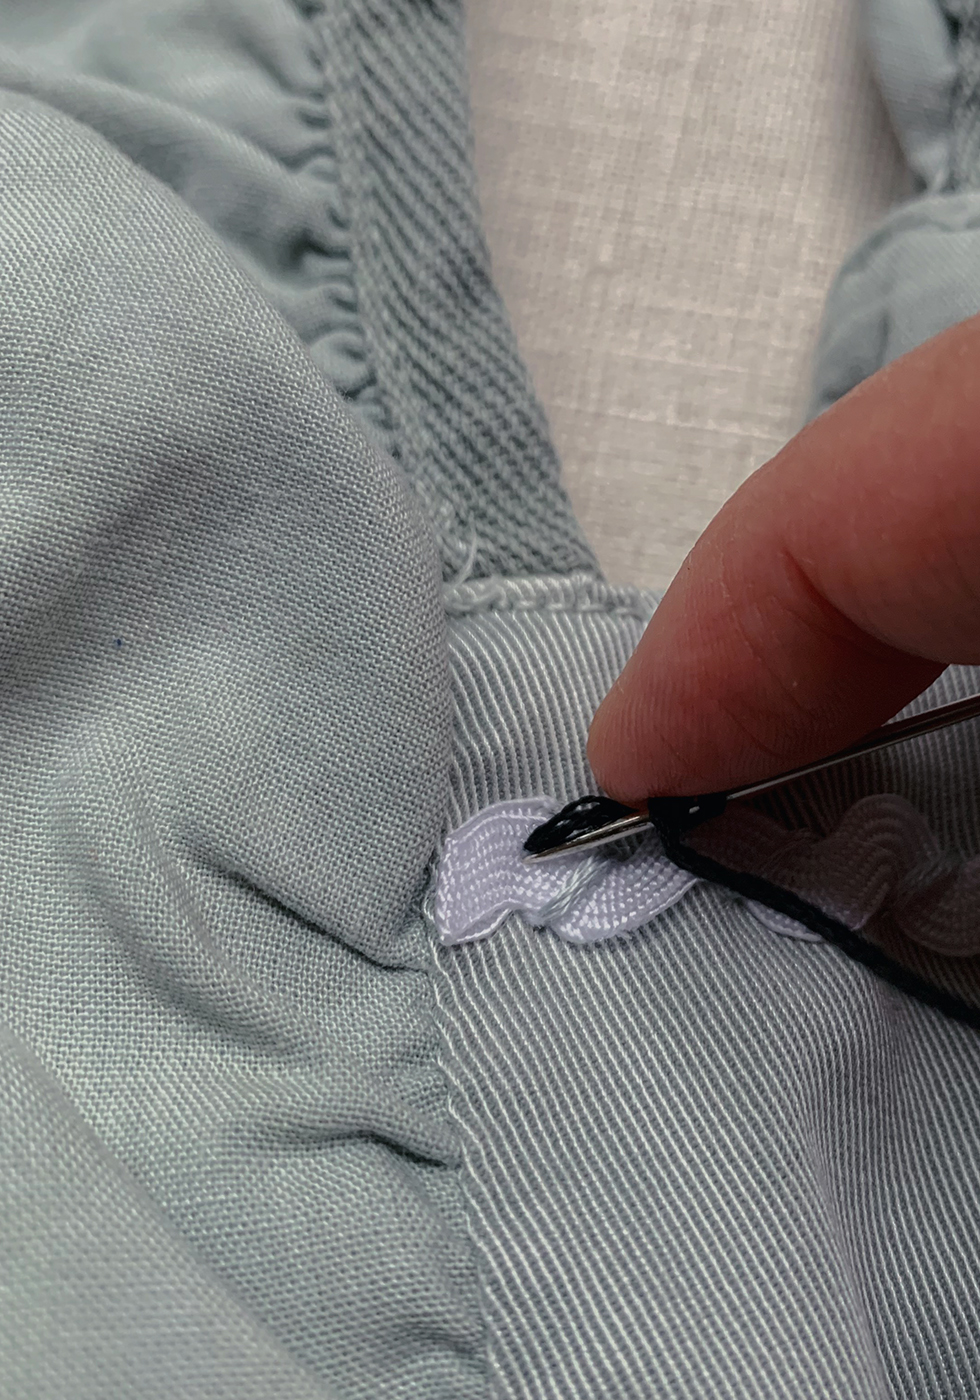
Wrap the thread around the fabric once for a small knot or twice for a larger knot. I like to keep my index finger behind the needle while doing this. It keep the needle stable while wrapping. Keeping the wraps against your finger, insert the needle back into the fabric very close to the hole you came out of. Do not put it through the same hole - it will just undo the knot.
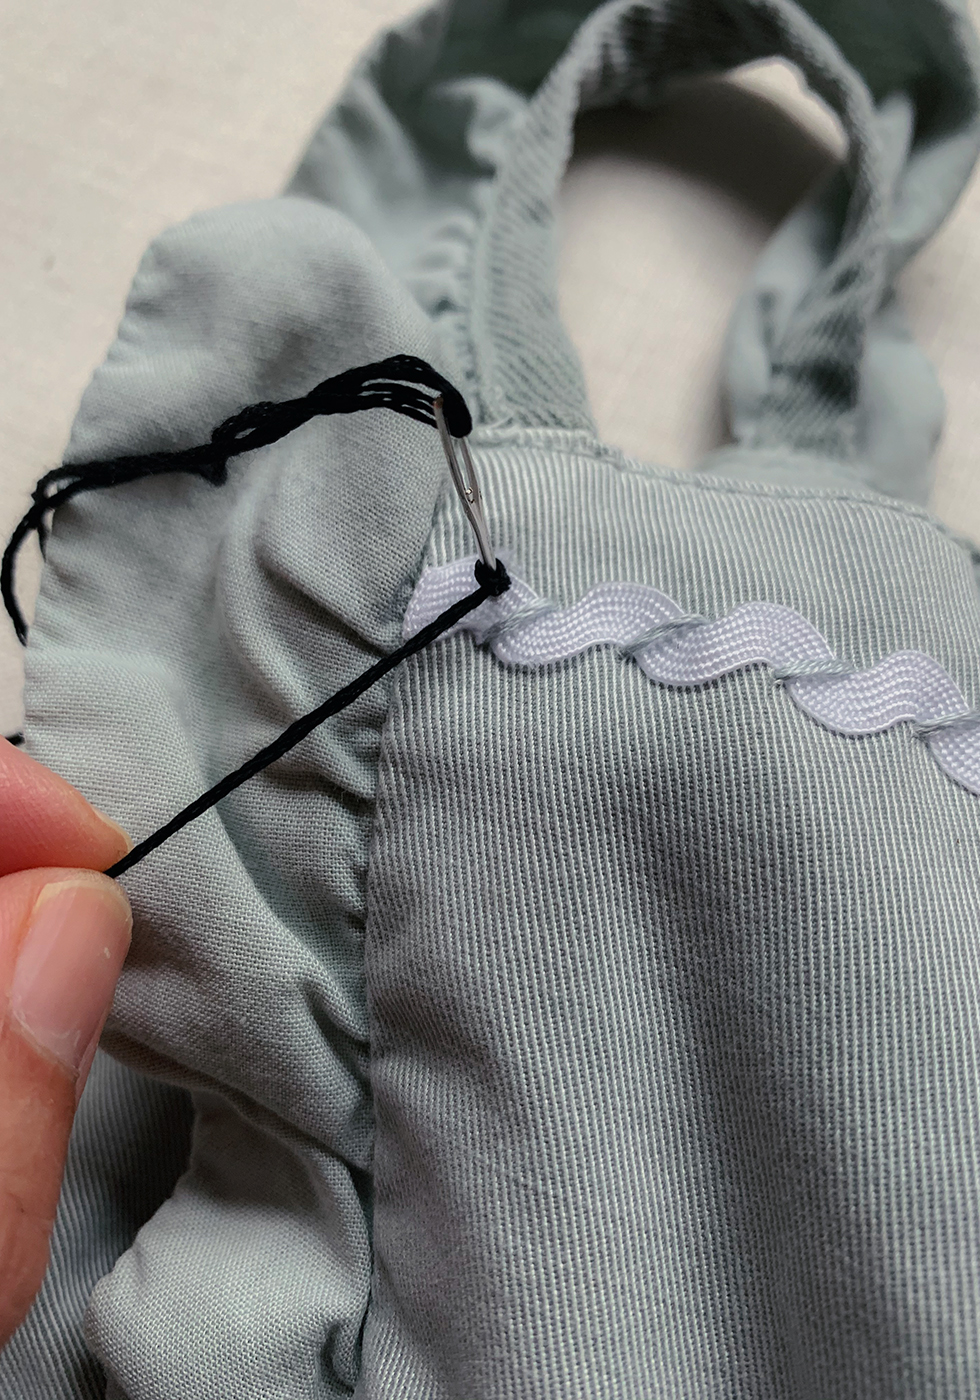
With the wraps at the base of the needle, hold the working thread taut as you pull the needle and thread through. Keeping the tension on the knot as you pull the needle through the fabric helps create a consistent knot each time. As your working thread slowly goes completely through the fabric, you can let go of the tension on the working thread and let the thread go all the way through. And voila, there's your knot! Move onto the next eye and continue making French knots until you've reached the end. Tie a double knot on the inside of the garment.
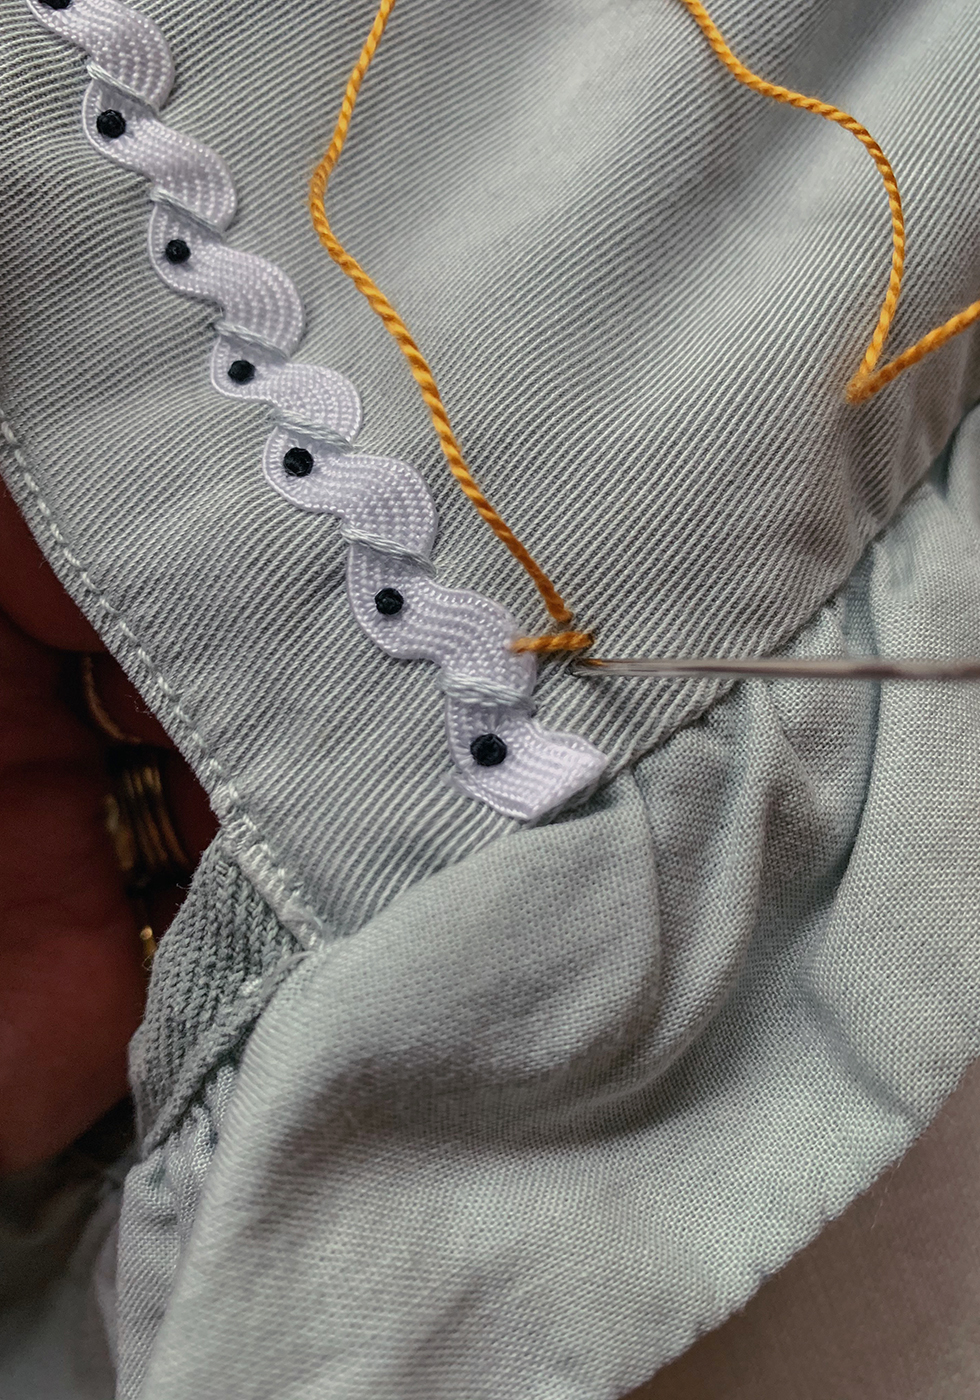
Next is the feet! Thread the needle with your golden yellow thread. Bring the needle through the middle of the convex of your trim. Bring it down at a slight angle to the left about a stitch length. Bring it back up, 3/4" down the bottom of the stitch, from the right to the left. Make this stitch much smaller.
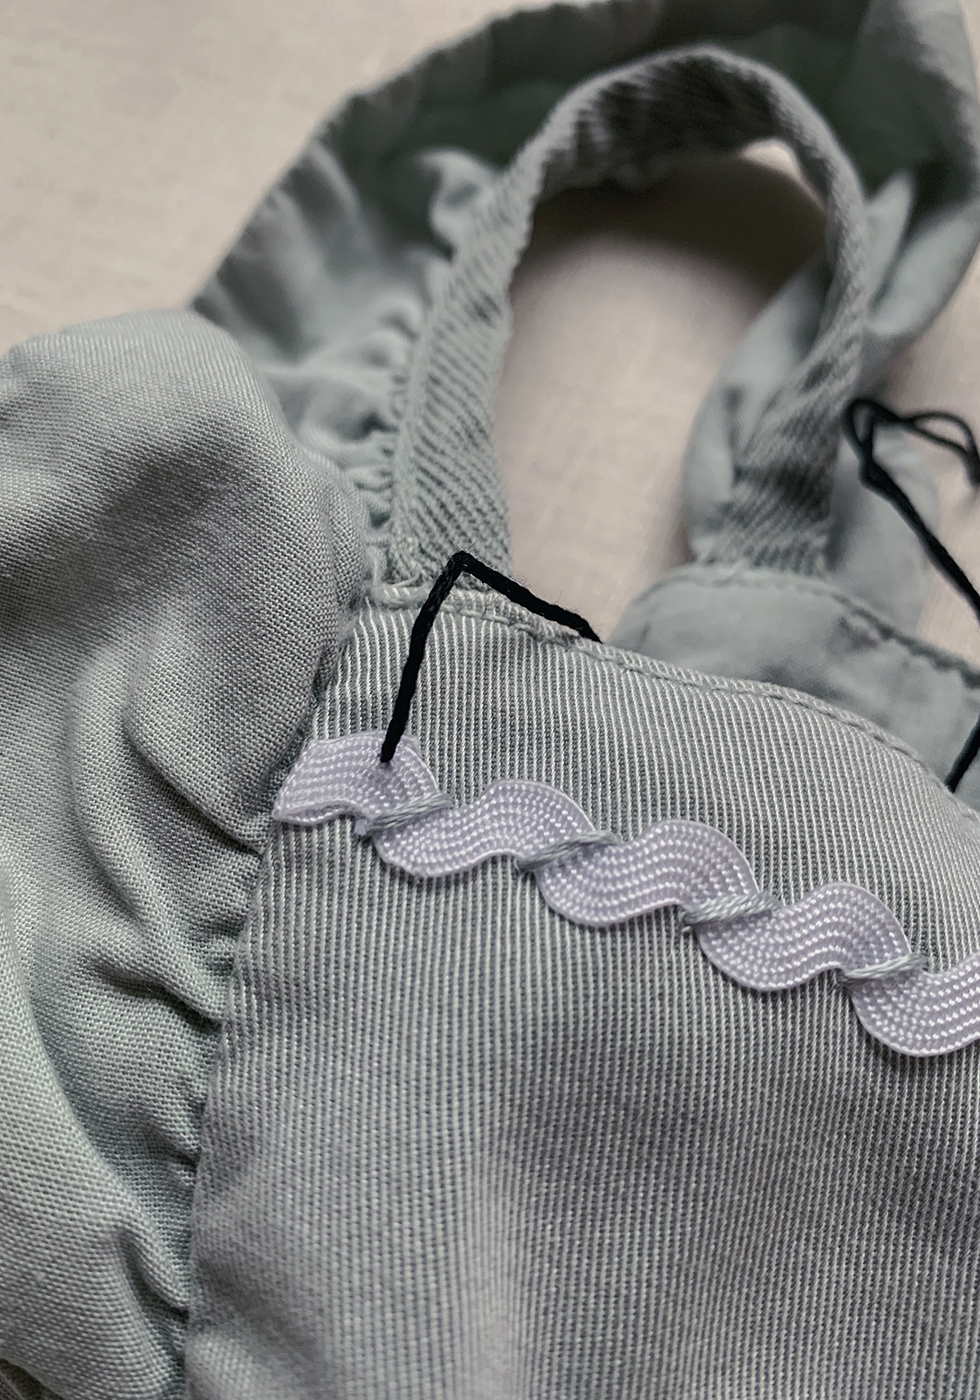
** Note: Not shown here but be sure to tack the ends of the rickrack down with these stitches, even though they may not necessarily form a full chick. It will help keep the ends tacked down.
Repeat the step from the same convex but this time, at a slight angle to the right. Voila, chicken feet!
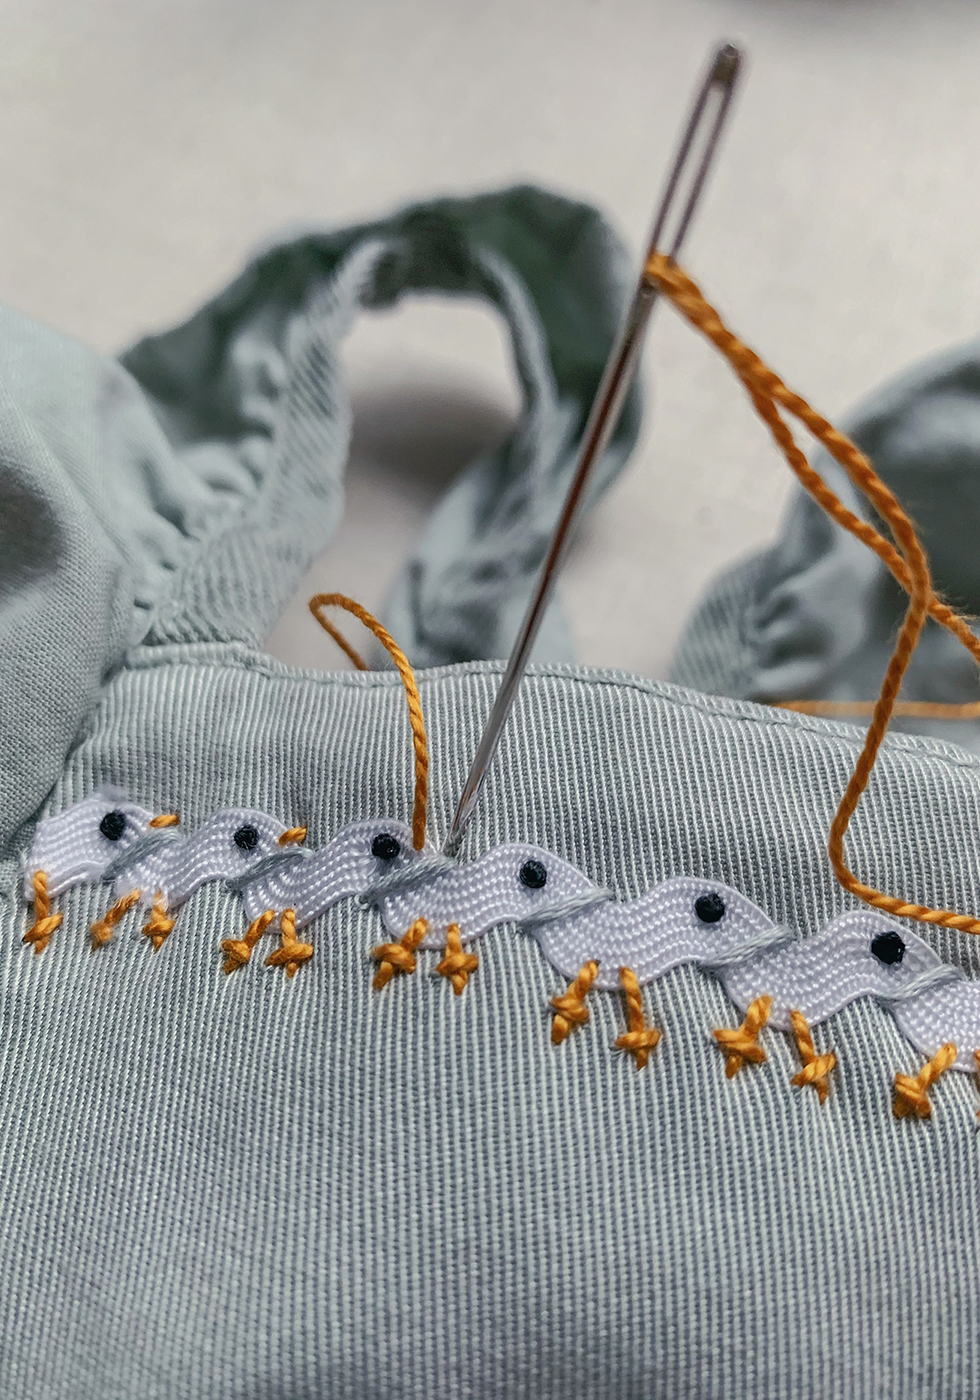
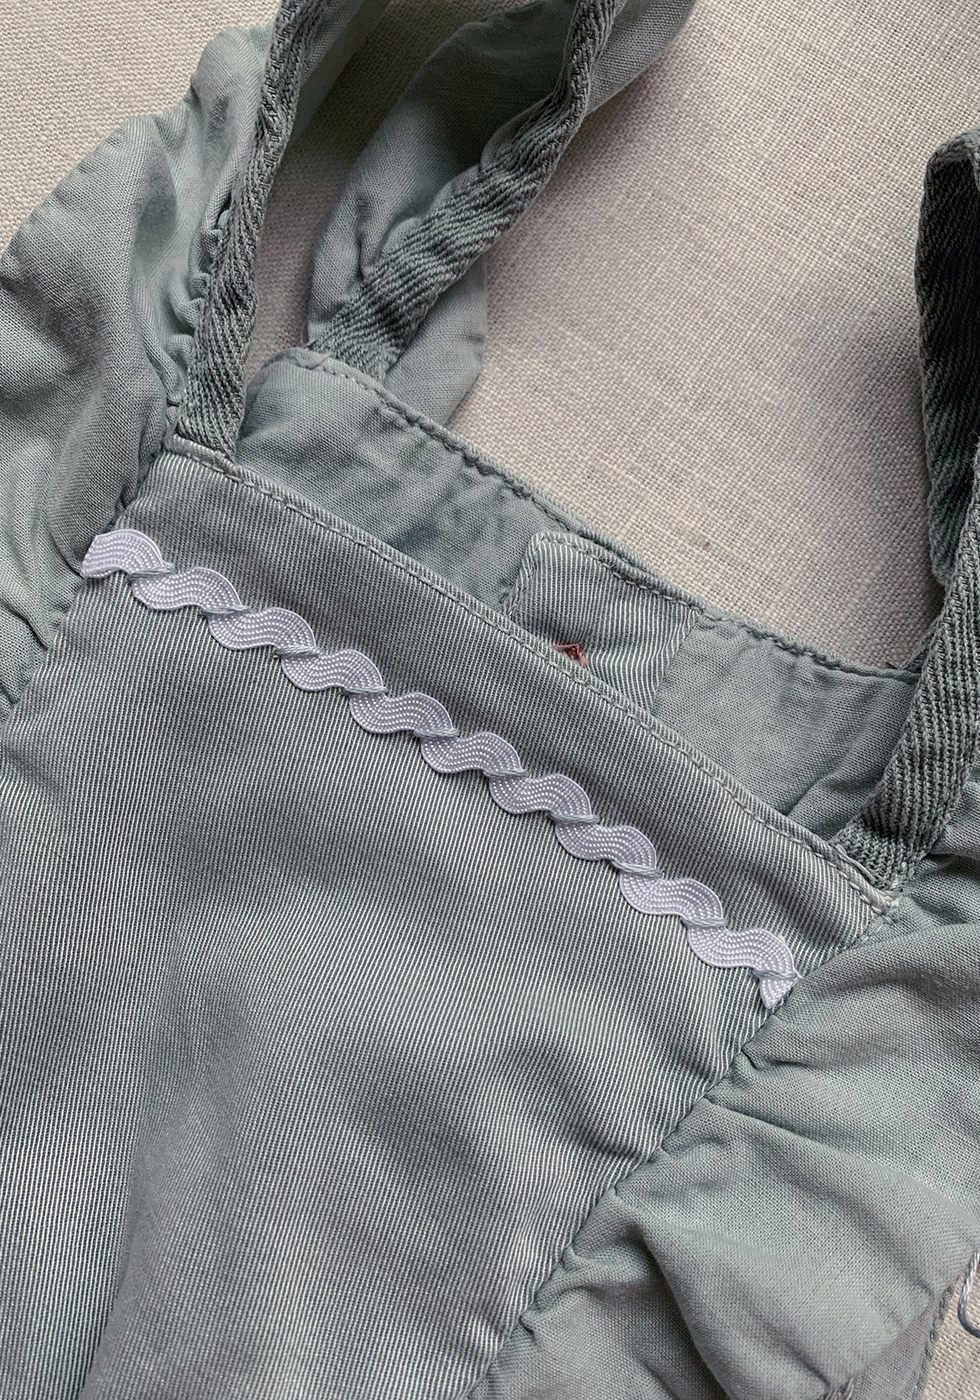
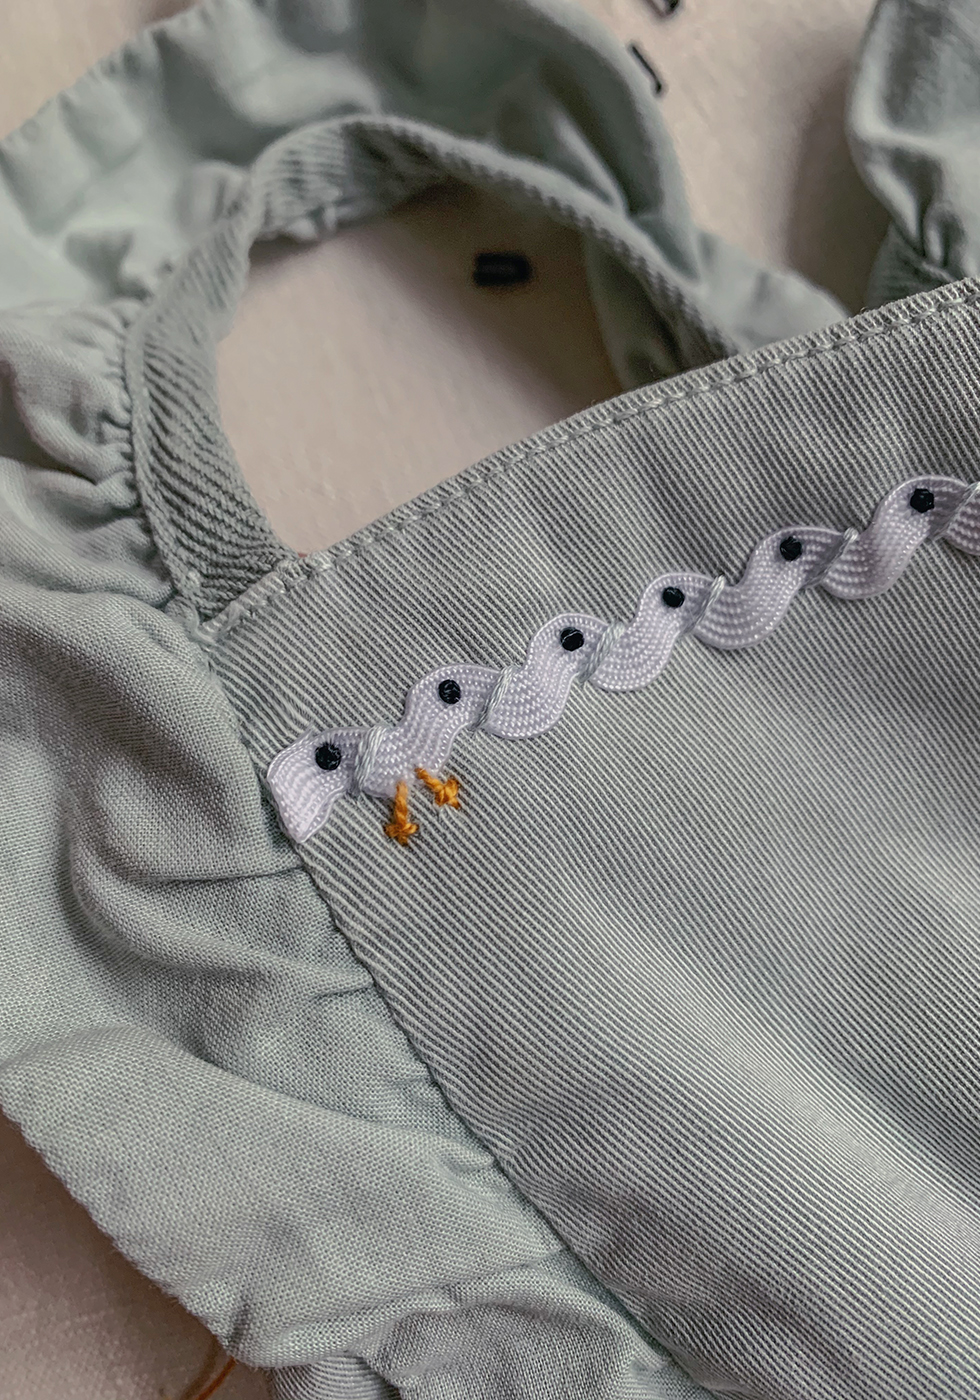
Next is the beak. This is a very simple, small and single stitch. Bring it up to the right side of the eye and back down again, just outside of the trim. Repeat and knot when you've reached the end.
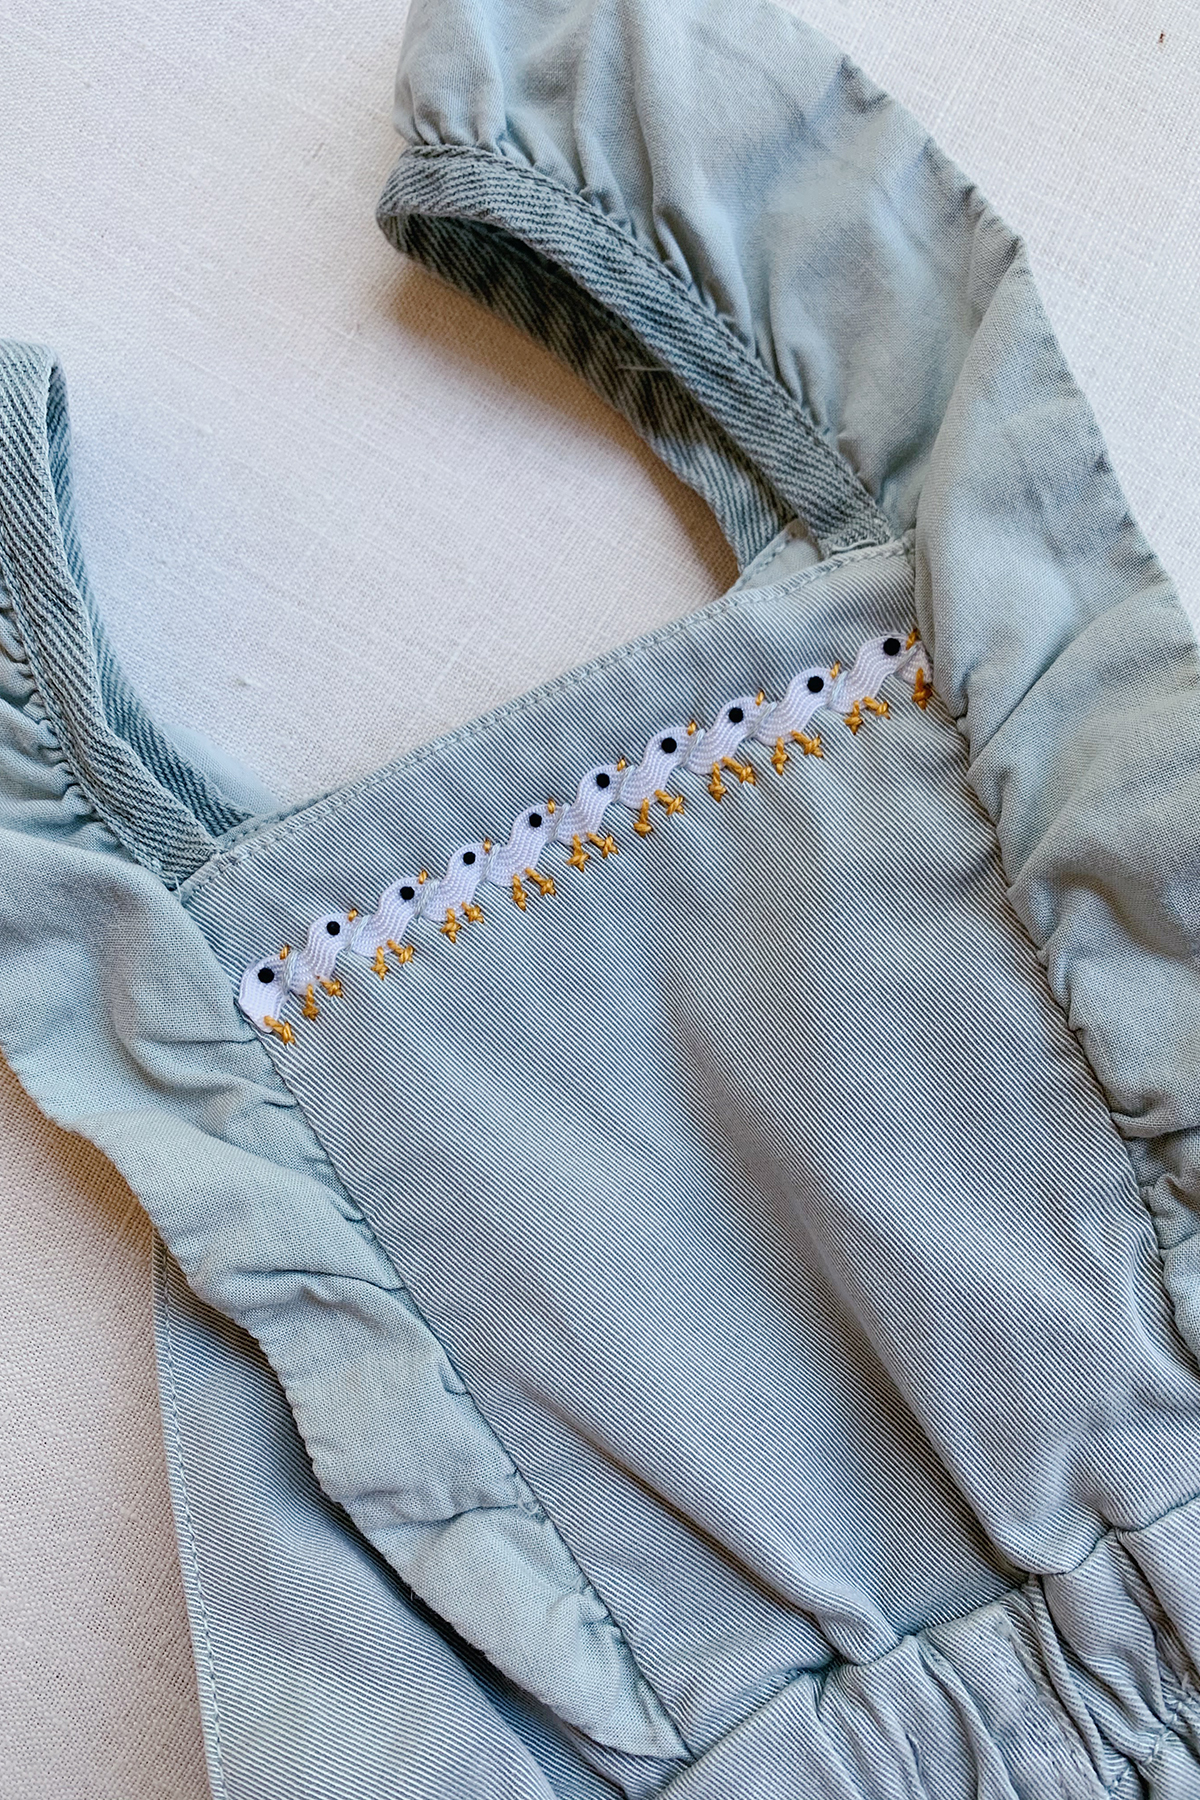
Done and done! This would be really cute on a multitude of kids clothing but also sweet on dish towels or napkins! Hope you give it a try and Happy Easter!
images by HonestlyWTF


This is so clever and cute. Nicely done!
Cute, nice idea for girls
It’s charming, beautiful, tender and lovely!
So clever and adorable, yet again! Thank you !
Genius! Can’t wait to try this!
Thank you
Adorable!!