Did you know that chainmail was the earliest form of metal armor and was invented as early as 300BC by the ancient Celts? Used as protective armor for centuries by multiple cultures, it’s still being made today – often in the form of jewelry. It’s a method I was determined to teach myself years ago as a jewelry designer and I’m so excited to share the most simple chainmail necklace tutorial. Don’t let the process intimidate you, it’s actually quite easy! So grab your pliers and let’s get medieval . . .

You’ll need:
- 2 pairs of flat nose pliers
- 350 brass or silver 8mm jump rings (for a 26″ necklace)

Start by separating the jump rings into two halves: 175 open and 175 closed.

Thread three closed jump rings onto an open jump ring. Close the ring. Spread the three rings apart, with the rings looking exactly as shown below. The bottom ring will be the end of the necklace and the top two rings, which are spread open over the middle ring, will be where the chain mail begins.

Keeping the rings in place with your forefinger and thumb, take an open jump ring and hook it through the front side of the two rings.

Add 2 closed rings to the open ring and close.

Spread the two rings apart in the same way as the first set of rings. Take another open jump ring and hook it through the front side of the top two closed rings.

Add 2 closed rings and close. Continue the same steps until you’ve reached the desired length.

To add an optional fourth row, lay the necklace flat and hook an open ring through first and second closed rings on the right side. Close the ring. Add another open ring through the second and third ring. Close. Add another through the third and fourth ring and so on. Can you notice a pattern forming?

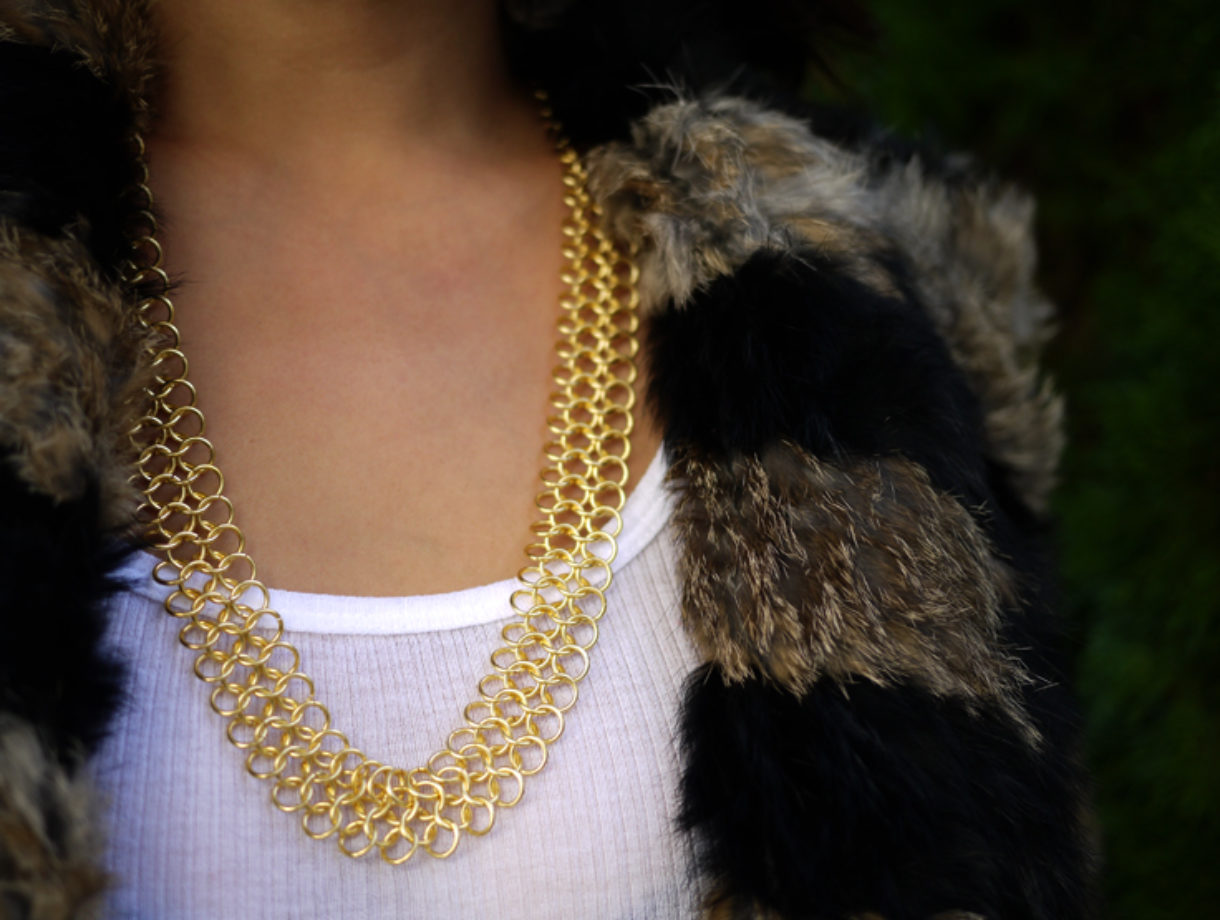
I stopped at 4 rows but you can continue adding rows for a more bib-like necklace.

Connect the two ends with a single jump ring or clasp.

Fini!

(top image from here, rest of images by HonestlyWTF)
this looks amazing, would love to do it with silver chains! xoxo
great !!
I think it needs a lot of patience to do it but I’m gonna try it, looks great =)
nicely done 🙂
wow what a great DIY! That is a simple but total statement maker!
http://www.indramaticfashion.com
This will take me some time but I will get there! Thanks again girls!
XXX
Cool! 🙂
Wow. That was awesome.
This is some serious DIY business… Will take forever, but the result is absolutely cool!!
Charlotte
http://www.thefashionguitar.com
Sooo keen to make this great piece just dont think i have patience.
wow what an incredibly detailed piece. It came out beautifully.
Adia Kibur Necklace Giveaway
I absolutely love your DIY’s and this one, in particular, is amazing! The fact that you gave a little history lesson before the tutorial is really cool as I am a huge history buff! I can’t wait to try this one —- you make it look so simple! The necklace turned out beautifully!
http://www.cositabella.com
that looks amazing! too bad I’d never have the patience to do this : D
I tried this with 6mm rings, the rings were too small and they clustered
I love this look, so feminine yet so strong.
Thanks for sharing.
Xo
http://wildthingsrunfaster.blogspot.com
Wow it’s great!
http://rueoh.blogspot.com/
Ya’lls DIY posts are so legit. Always.
Holy cow, that looks amazing!!! The steps seem simple enough…I don’t think I have the patience for that though.
Wow!! Great DIY!! Going to have to make myself one, where can I get those jump rings?
These is one of the things on my to-buy lost, but i never see one i like. So this is a good option!
Thanks for sharing, xox http://www.xSunkissed.nl
Oh wow. This is DIY perfection. My mind is racing with all the chainmail possibilities!
acleanercloset.blogspot.com
I love this idea!! Thanks for posting!!
I have to do this. I was at the craft store for 2 hours pacing around this past weekend trying to find the supplies I wanted to make a few DIY pieces and nothing looked “right”. I kept passing by these rings over and over and couldn’t think of anything to do with them. I’m now going back and getting them!
xoxo
http://www.thewrittenrunway.com
**Enter my Oakley Giveaway on my blog!**
Loooove this necklace!! Only $14 for the jump rings and a beautiful result! Thanks for posting the tut!!
Is beautiful!!! I loved it!! =)
Love this – what a fun idea!!
GORGEOUS! I’m not sure I have the patience (or time) for this, though.
I just made a breast plate featuring waaaay too many jumprings as it is; don’t think my little hands could take it. Still, super amazing ladies.
Amazing! I would love to make a mini dress using this technique!
http://www.dottoddot.com
You did a great job, it doesn’t look big clunky, but light and delicate! I must say you guys always have the best DIY posts with the clearest instructions, thanks so much!!
wow this is super cool! really great and fun idea.
http://www.dragonnfruit.com
AMAZEBALLS!
love it
L
http://www.thesphinxandthemilkyway.com
just perfect
What’s the top pic from? Your piece and the necklace you link to appear to be European, but that top pic looks like a loose roundmaille, and I’d love to get a better look at it.
oh, never mind
woah – super nice! gotta try that. looks great.
wow it looks great and seems like a super affordable project! great idea!!
http://www.absurdlypeculiar.blogspot.com
I’m so doing this tonight!!!!
Gorgeous!
fab DIY!
Very doable!!
Unique design. SiMpLe application
dc2nyconfessions.blogspot.com
It would be cool to try to do it in a triangular shape. Or with smaller link pieces.
That looks so good!
http://cestlavieophelia.blogspot.com/
cool,i can make one at home!!!!
http://www.coniefoxdress.com wholesale wedding dresses
That is amazing. I cannot imagine having the patience, but maybe one of these grey rainy wintry days I’ll just have a movie marathon and get to business… Absolutely love it though, even if I never do get off my lazy butt and try it myself.
http://nomadic-d.blogspot.com/
WOW, precioso!!! Fantástico DIY!!!
Wauw, I really love it – I think it will be my next DIY-project!
Love this! I’m totally going to make one!
This is awesome!
Wanting to make a harness-like piece now (or even a top),
it might take me a few years though :p
x
Oh’
blogbymissoh.blogspot.com
omg this is so cool!!!!!
but i do not have enough patience to do this!!!! 🙂
It’s great!!! I go to make…
This necklace (the original chainmail version) reminds me of the necklace from an old, not so good movie called “The Polar Bear King.” which I happened to watch on Netflix instant play last night. In the movie, a king (of Summerland) was turned into a polar bear but happened to have a similar necklace that once he gave to a woman (from Winterland) was to be his wife for life, but apparently the necklace didn’t overpower the magic of the witch who turned him into a polar bear. Anyways, that’s what the necklace reminds me of, I made it through the end of the movie, but the necklace was honestly the best part of the movie, in my opinion.
This is so FAB!! I do want to try and make one. Thank you for the tutorial!! xoxo
http://hellofridaybypaik.blogspot.com/
WOW! Great DIY! Thanks for sharing 🙂
Kaye
http://thestyleflux.blogspot.com
I love this DIY! Will try it out asap!
honestyl WTF! It’s super cool!
Thats amazing! I think I might have to start right away!
Umm so Gorgeous!! I bet your fingers burned by the time you were done with all those jump rings! It’s looks wonderful though!!
P.S. I am having a little DIY giveaway on my blog, I’d love for you to stop by 🙂 Thanks
http://www.mythriftychic.com
Holy crap, you guys are amazing! Bookmarked!
http://www.wangsfactory.blogspot.com
How great is this definitely gonna try some time
Ok everyone, take it from someone that has been making chainmail for over 7 years, if you dont have alot of time and patience this craft will never be for you. However if you are willing to take the time to actually learn this and other patterns and keep doing the same motion over and over and over again you will be amazed at what you can create.
Wow, your version looks much better than the inspiration picture!
So inspired that I made a bracelet using much larger jump rings. Mine didn’t stay flat however. Could that be caused by the large size of the rings? Anyway, mine still looks awesome and got lots of compliments today. Thank you Erica. You are awesome!
I just tried this today! It looks quite complicated but its actually easy once you get started. Thank you for the tutorial dear.
I added a silver row and it adds a subtle but interesting element : ]
Maravilha…
love the look of this necklace but mine doesn’t sit flat like this one and wants to twist all the time but is also not as long as this one is, so can anyone tell me why? do i have to make mine longer to fix this or is there another trick I need to know? This is my first necklace please help me>>>
Alison – do you have a way of taking a photo of your piece? I am a chainmaille designer and might be able to help (or some of our “fans” might, on our page on facebook – http://www.facebook.com/BlueBuddhaBoutique) figure out why it is twisting.
So glad to see so many of you are excited about making chainmaille! 🙂
It’s awesome!! I enjoy making jewelry and want to learn more on how to use chains, etc. Also, I would like to learn to make three or four strand bracelets and earings. God bless you for sharing your talent!! What does URL mean?
wow! This is awesome. You have have some serious patience because I dont think I could do it!!!!
Take a peek at my place, borntobeblonde.com
Have been looking for a tutorial for so long, many thanks
i prefer in silver but its very nice
The plus side of having an SCA boyfriend. He can me me all sorts of chainmaile shiny goodness.
I gotta try this! Fabulous xx
I don’t know if I have the patience’s to do this, but I love this necklace.
Jewelry Rage
Just made one! Took me about 4 hours, but I’m in love with the results! I also think it looks better with a fourth row!! Definitely going to make a bracelet like that!! Thanks for this DIY!! =)
This tutorial is awful. Necklace is beautiful.
That’s amazing it must be very time consuming tho
http://www.kimberlylove.net/
Was excited to do this but couldn’t get it to work, they kept not layout out flat 🙁 anyone else have this problem and have any suggestions as how to overcome it?? thanks! 🙂
Made something like this with different kind of wire. I used a soft wire but it was easy to flex. I’m going to try with a different kind of wire. But with 2 different colors.
I love how all the circles connect to each other. I want to make this so people ask me where I got it and I can stay I made it myself from a guide on honestly.
Wow this is beatifull, i’ve been beading for a while, but deffinately going to try this one !!!
Can you tell me is the 8mm measure the inside of the ring or to the outside? Also, what gauge is the wire. I just did my first piece of chainmaille jewelry after going to a jewelry design show and the chain maille designers said if you have the wrong size of ring and/or gauge(thickness) the piece won’t look right.
I did it today! it looks great!!!.
Well, and vintage buttoms necklace!!! ahaha I’m fan of this website!
Love Necklace
Tried making the necklace but it is not flat is it that my rings are to small?
The tutorial does not match the necklace on the model. Is the model wearing a double wide version that has been linked to form the rope style?
It’s great but Kimberely is right this task is time consuming. I am looking for pattern with beads; hopefully I’ll get that soon.
Thank you, thank you, thank you!!! Have been trying for ages to figure out the pattern for chain mail and your tutorial is the best ever. It took me maybe three minutes to figure it out. It took almost ten minutes to get addicted.
Wow! I made something similar- but cheated by buying the chain lol can’t imagine how long u spent on this 😉 uber impressed!
If that wasn’t ‘cool enough’ for you, you can wrap the whole thing length-wise around something the right diameter(like a slurpee straw) and connect the ends for a hollow ‘tube’ -yes! I have done it! Awhole new thing. Great tutorial,too. It gets faster and easier as you repeat it. Mixing in colored copper wire adds a new level to it.
I buy all my chainmail at American Chain Mail. Great color and sizes.
could you email me this method please . looks nice
I finally made this a couple months ago, and I’ve been wearing it constantly. Thanks for the tutorial!!!
Perfect, very cool.
Great details about Pendants Perfection.
thanks for sharing this really the contant is
informative,interesting which was i am looking for . please keep updating step by step
buy 250+ silver and gold earring designs for wedding
Just found your website and i am in love with the pearl crafts as i have done a few myself. just happen to have a bunch of jump rings and will make the chain mail necklace. Your awesome!!
I adore history and crafting so thank you for sharing this 🙂 I sell jewelry and once in a while I also make it. here’s to Feeling Inspired 😉