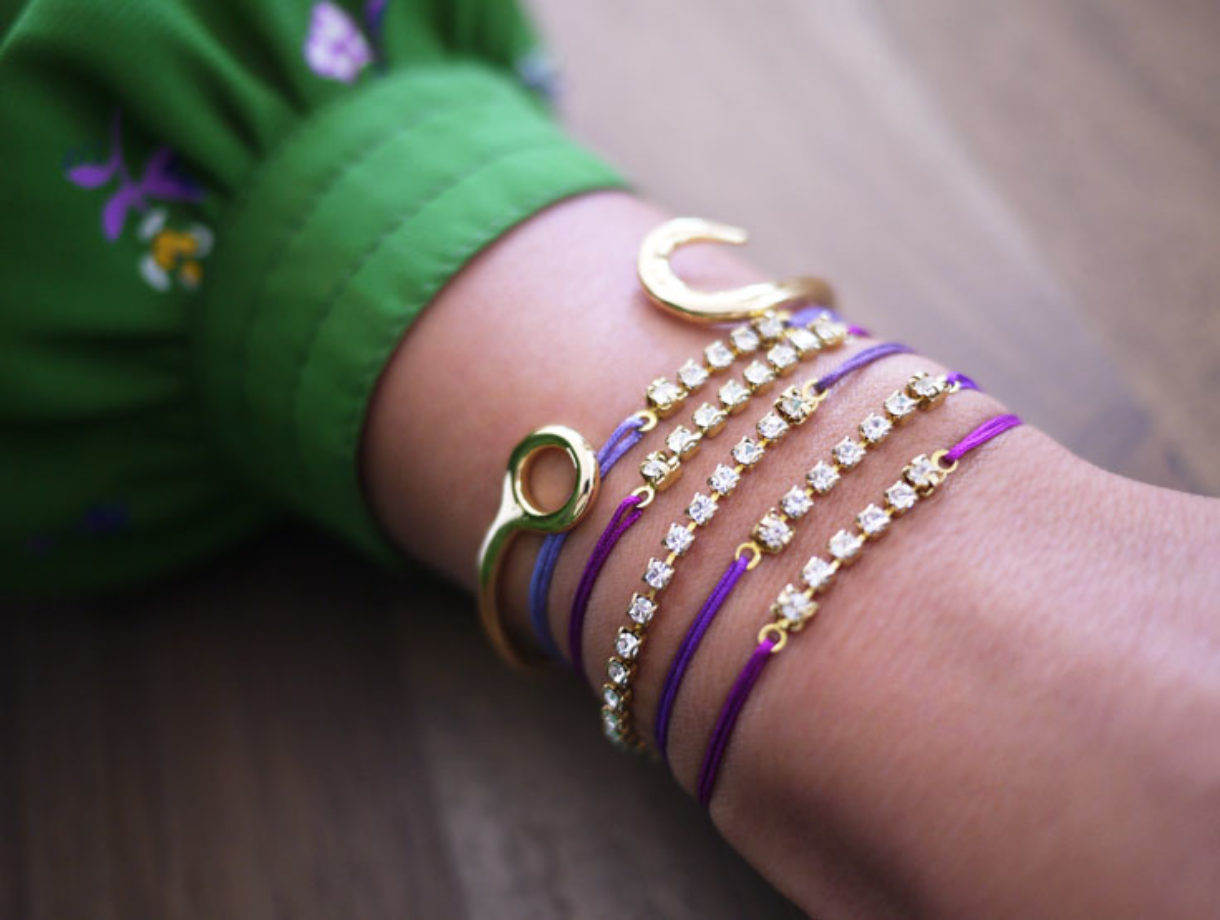
I suppose we can call this week’s tutorial somewhat of a refresher course on how to master the perfect sliding knot. But the real reason why I had to recreate this familiar DIY with you is to share a little thing I recently discovered called a crimp end, that’s especially made for rhinestone chain. It’s a nifty finding that attaches to the ends, allowing you to finally put some use to all those few leftover inches of sparkle. Pay close attention and I’ll show you how to add to your growing and ever changing stack!

You’ll need:
- a few inches of 2.5mm rhinestone chain
- a pair of brass crimp ends
- 10-12 inches of 0.8mm chinese knotting cord
- wire clippers
- flat nose pliers
- scissors
- lighter

Start by cutting the rhinestone chain to any length. Place the last link of the chain into the crimp end. Use the flat nose pliers to fold each of the prongs over the rhinestone. Repeat on the other side.

Thread 4 inches of cord through one side of the charm. Fold 2 inches of cord back on itself and then again to create a zig zag. Fold an inch of the tip down over the parallel cords.

Coil the cord three times around, towards the the loop. Thread the tip through the opening of the loop.

Push the coil to the right, while pulling the tip at the same time until the knot is tight. Test the adjustable knot by sliding it towards the base of the chain.

Trim any excess cord and melt the tip to secure the knot. Repeat the same steps on the other side.

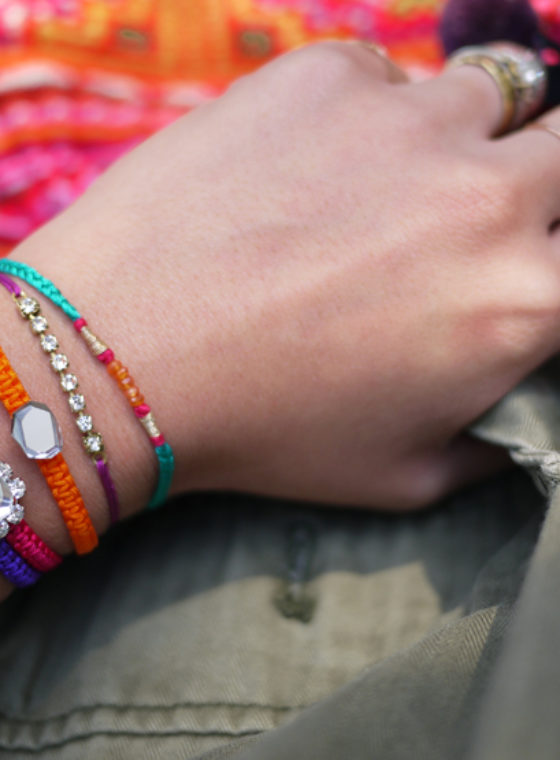
Your rhinestone adjustable bracelet is finished. And honestly, why not make more in a multitude of colors?

Happy knotting!

(Giles & Brother Cuff & DIY Bracelets; all images by HonestlyWTF)
The bracelets look so awesome!!! Thanks for sharing. I´ll try that 😀
xo
GIVEAWAY ON MY BLOG
glamDevils
So delicate and beautiful!
KISSES
My white idea
Wow, those bracelets are amazing! Very delicate and chic!
Always love your DIY posts!
xoxo
Fashion Agony blog
Super cute! I might have to try and make some! http://www.moiminnie.blogspot.com xx
So cute! I’m going to have to try this!
xo Olivia
ThisLooksGoodOnYou.com
Need to try! Love it!
My daily outfits in http://cravingforbarneys.com
Cute DIY! I’m doing something similar today, might be a post soon on my blog 🙂
New post on SEARCH IN FASHION – September wishlist
great DIY! the bracelet look so delicate and cute! 🙂
Love this! So great to stack all together.
Collections
VERY CUTE AND PRETTY:)
CHECK OUT MY PERSONAL STYLE BLOG:
http://www.facebook.com/diamondsandspikes
http://diamondsandspikes.com/
wow!! it’s so cute and simple (: thanks!!
http://israblog.nana10.co.il/blogread.asp?blog=67425
Those crimp ends are genius! Definitely think it’s necessary to make more than one–they look so pretty stacked against one another.
http://www.whenwewander.blogspot.com
so beautiful!!
xxx Alessandra
Love the result and it seems really easy!!! 🙂
http://www.emerjadesign.com
http://www.emerjadesign.com
LOVE THIS!
So pretty. As usual, I really want to make your bracelets. All your diy’s are always so great.
Satisfy Your Cravings For Celebrity Style and All Things Stylish and Sweet
I like it!!!
http://thestelstyle.com/
amazing..so simple and beautiful*
love your DIY projects, congrats
–
http://ritafashiondays.blogspot.com
http://ritafashiondays.tumblr.com
Love this! I am a big fan of all of your DIYs 🙂
My jewelry blog: joliejouel.blogspot.com
So lovely!
Lovely Idea
haha, gonna try that for sure :)))) but I have cross bead, gonna do that with it :3
http://www.aztecsilver.blogspot.com
http://www.aztecsilver.blogspot.com
http://www.aztecsilver.blogspot.com
Lovely DIY!
http://aurelieandangelo.com/
So cute and seems easy enough to follow. Thanks for the tutorial! xoxo
http://www.hellohellofriday.com/
Erica, you just won first place in the lottery of life. Thanks for the solution to a beading problem.
brilliant!
Bises,
monkeyshines
http://monkeyshines-monkeyshines.blogspot.com/
Super cute!!
Gorgeous! Your bracelet DIY posts are so inspiring!
I looved it, really beautiful !!
I’m posting accessories from Beverly Hills on my blog!
Take a look!
http://www.thegavlaks.com
Love it!!! 🙂
http://bonnieclydemarni.blogspot.gr/
doin this later! so dang cute!
Wowwww ! Very nice bracelets ! I love them !
I’ve been wondering what I could do with all those little pieces of rhinestones!! Very useful tutorial-I just have to find the brass crimps somewhere!
Nice hint of bling with the lovely shades of purple!
I have chain and was wondering what to do with it, thanks!
Love the contrast between the gold and purple! I can’t wait to try this out 🙂 Thanks for the tutorial and introducing me to those crimp ends!
LOOOOOOOOOOOVE IT
the crimp ends are great!! love the giles + brother cuff too 😉
These look so delicate and pretty! A stack of these even better. Hope my DIY gets as good soon enough!
N
http://seasoncheck.blogspot.in
How pretty!! A bunch of these would be good as presents 🙂
http://thiscache.blogspot.com
Very nice!! I liked them!!Best regards from Greece!!
very cute and so simple. love it! thanks!
http://www.violetlfeur.com
Absolutely great DIY! I like it!
From http://www.xeanafashion.com
Great tutorial! love the result!
http://myfashionfoodstyle.blogspot.co.il/
wonderful
it’s very nice
I haven’t got enough place to wear all your models of bracelets on my arm !
thanks a lot 🙂
Its a little trickey to slide the knots to get the braclet on and off by yourself. any tips?
Love them!
These are the posts I love about your site! Keep it up!!! 😀
Oh these look like a ghetto-er version of the ones from ‘pieces and Chloe’. http://www.etsy.com/listing/105314406/winston-swarovski-crystal-rhinestone
my DIYs ——-> http://www.facebook.com/doneGK
like plz:)
So cute & easy!
Thanks for sharing.
Nika
Wow, beautiful! You are very inspiring.
We just had our first bracelet diy post ourselves.
Do you like it?:
http://acouplesgallery.blogspot.de/2012/10/diy-nail-bracelet.html#more
Greetings
Deborah&Gabriel
gr8, stunning. I have created this. Thanks for sharing!!!
Very good post. I will be going through some of these issues as well.
.
where can you buy these brass crimp ends with aloop. use for making bracelet’s.
……
amazing…. I love it!
love em 🙂 thx!
Hey! I love this idea. Could someone help me with the part where you begin to thread through the charm and start the knot process? The picture is confusing me! Where’s the charm during that first knot? Under the fingers? Appreciate any help! Time to get my Christmas gifts made!
Love all your tutorials, never thought about doing these.
nicole go to youtube and look all about macrame
What a great idea to use the leftover cup chain. I love making this style of bracelet. Thank you for the tips.
So pretty!!! Unfortunately they’re IMPOSSIBLE to get on by yourself so I never really wear the ones I made :/
prettyyyyyyyyyyyyyyyyyyyyy
I really like your DIY tutorials! Big compliment on those! But I’m from Switzerland and I wondered where I can buy the material? Is it available on the internet? Where do you get it?
I have been looking for these bracelets and now you have made the instructions available thank you. I will now try to make them.