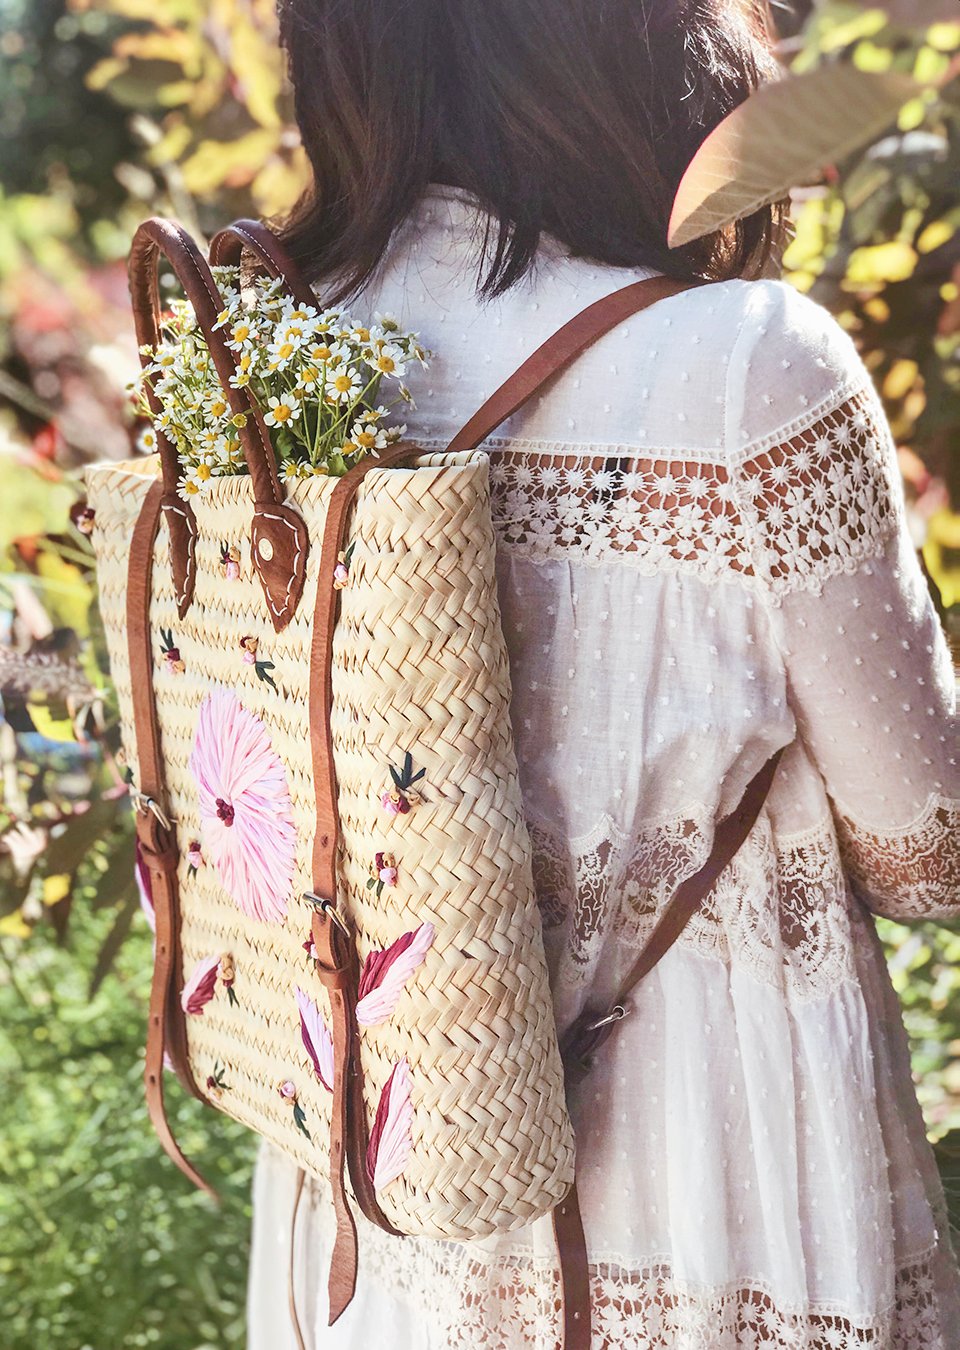
Remember my obsession with vintage souvenir bags last year? Well, the fixation hasn't subsided and I suddenly had the crazy idea of DIYing my own this summer. To be honest, this spontaneous decision with met with the slightest bit of regret once I realized how tedious stitching a straw bag with layers and layers of raffia ribbon could be. Alas, I was knee deep into the project and once I've started something, it's pretty much impossible for me to quit. In hindsight, buying one on Etsy would have been cheaper and so, so much easier. And so would I recommend trying this? Absolutely, yes. It was actually worth the sore fingertips, occasional meditative moments and hours spent watching the entire season of The Sinner on Netflix.
You'll Need:
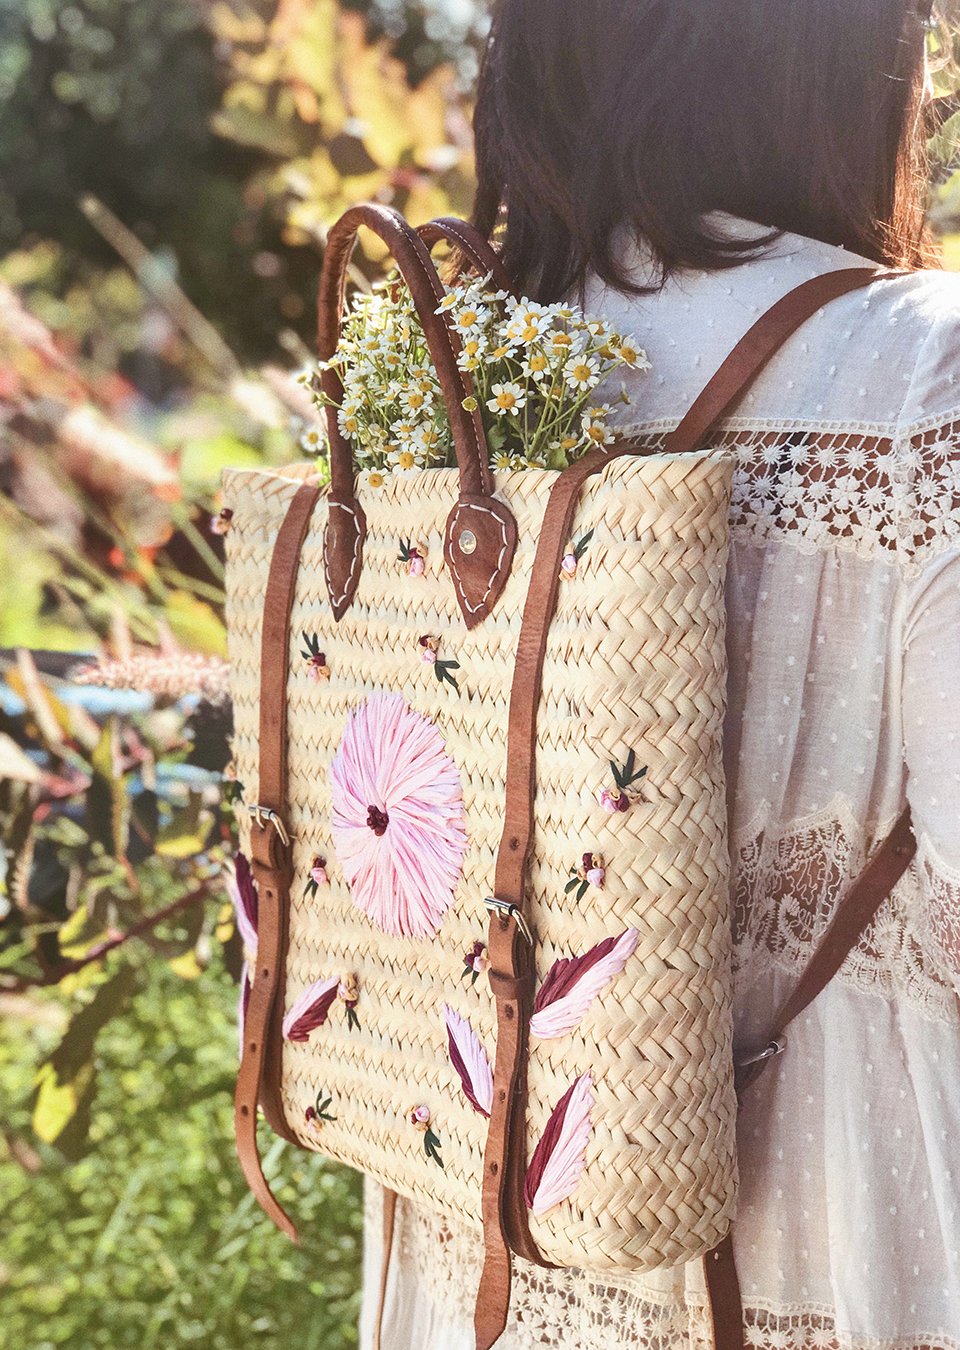
- straw bag (straw backpack found here)
- paper raffia and/or rayon raffia
- large eye, blunt needle
- scissors
- pen


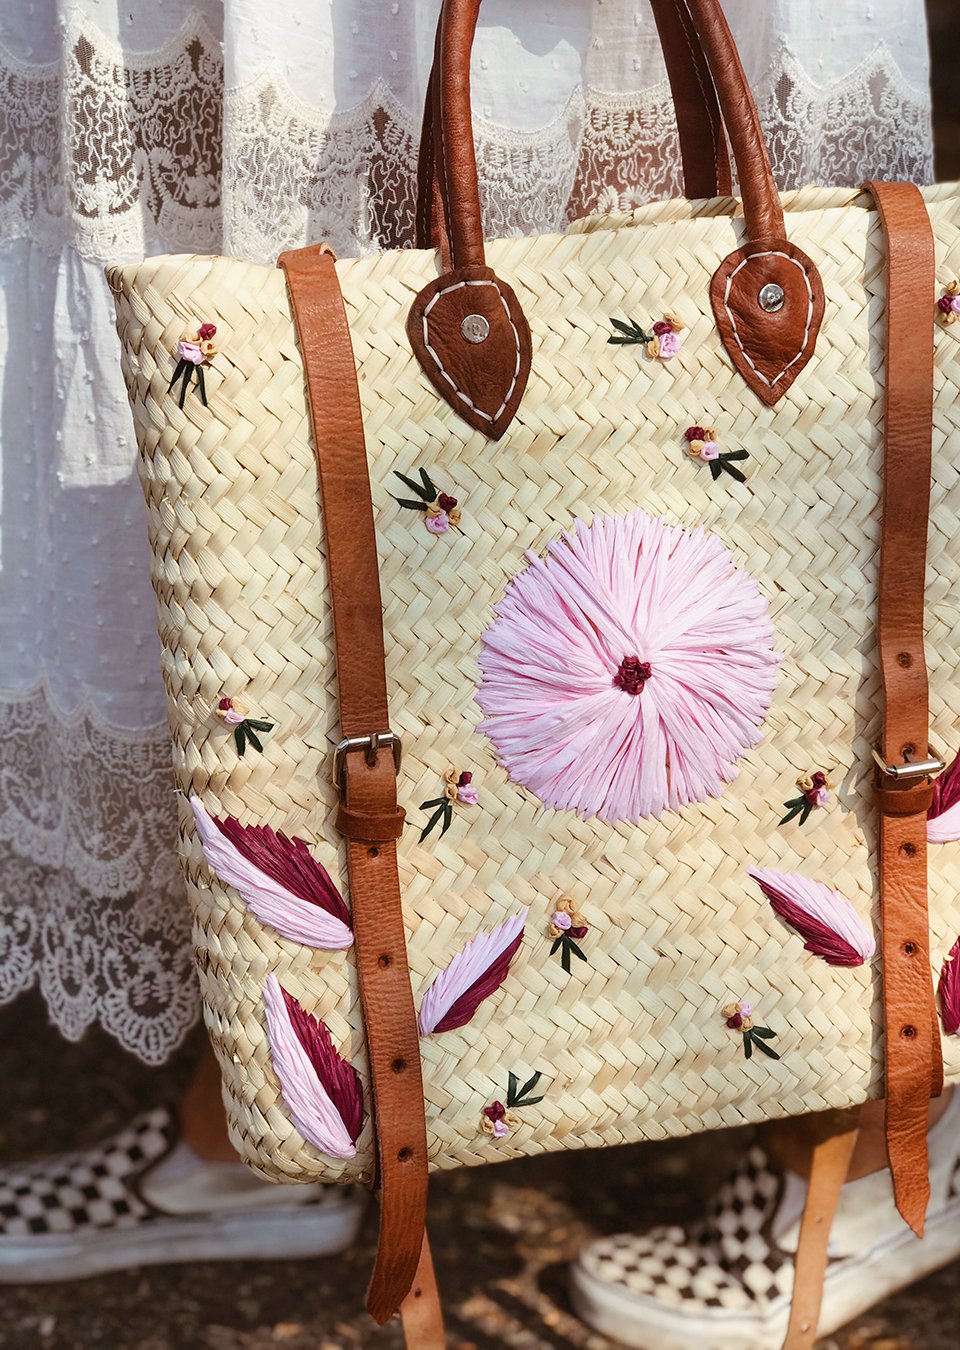
To make a large flower, draw a circle using a bowl or plate as a stencil. Mark the middle with a dot, using a pen. Thread a large eye, blunt needle with a yard or so of raffia. Thread it through the middle from the inside and pierce it through a point on the circumference of the circle.


Bring the raffia back through the middle and then into a point as close to the previous point as possible. I personally like to stagger the outer circle a bit to give it bit more dimension.
A note about the raffia: I used a mix of paper and rayon raffia here. It's harder to find quality raffia in a wide range of colors but I think it's a lot sturdier than rayon. The rayon can shred easily, especially when threading through straw. But if that's all the you can find, you'll just have to muster up some patience working with it.


Continue threading the raffia back and forth, from the middle to the outline of the circle. When you're finished tie a double knot from the inside of the bag.


To make the leaves, thread raffia through the needle and thread it through the bag from the inside.


Insert the needle 2-3 inches away, at a diagonal. This is the longest, center part of the leaf.


Bring the needle back to the starting point and then back up next to the previous point - this time, shorter by a couple of millimeters. Continue going back and forth until you have something resembling half of a leaf. Either continue the other half with the same color or switch the color up for some contrast!


I made the little rosettes using the colonial knot. Bring the thread up through the bag and let the working thread forms an upside down C. Bring the needle into the C so the thread is over the needle near the point and under the needle closer to the eye.


Bring the thread around the tip of the needle, making a figure 8 as you wrap. Insert the needle into the bag, right next to your original starting point.


Gently pull the working thread taut, tightening the knot around the needle. Hold the working thread and keep the knot taut as you pull the needle and thread through, forming the knot tight against the fabric.


Continue making a cluster of knots and then add little leaves using green raffia.
Keep embroidering until you feel your bag is finished. I, of course, am of the mantra: more is more is better!

images by HonestlyWTF
Wow, the bag turned out super lovely!
xx from Bavaria/Germany, Rena
http://www.dressedwithsoul.com
Thanks, Rena!
Wow! Amazing job! I definitely want to try this. Would it work with yarn?
It could work with yarn but I wouldn’t recommend it. I assume it would easily fray from pulling in and out of the straw bag. It would be worth testing a small corner of the bag though!
This is so beautiful and adorable, and I’ve never seen a straw backpack before! So cool!
They’re surprisingly sturdy and comfortable. I recently took mine on the plane and had my laptop in it!
You have inspired me to make this. Where did you get the straw back pack?
I linked to it in the supply list!
As always Cool !??
Modern en praktic
Would be great if you had local artisans make the bags and then sell them!
The bag is beautiful and very special, I like it very much
Your own handmade straw bag is very beautiful and sure. I like the patterns you embroider.
Thank you, I’m going to make this for my niece.
So beautiful! I can’t wait to try this.
So happy I found your blog 🙂
Oh wow what a marvellous job you have done here –
Your post is very good and meaningful. How long will it take you to write and post? thank you for sharing
Me encanta lo que haces !!
Gracias por compartir !!!