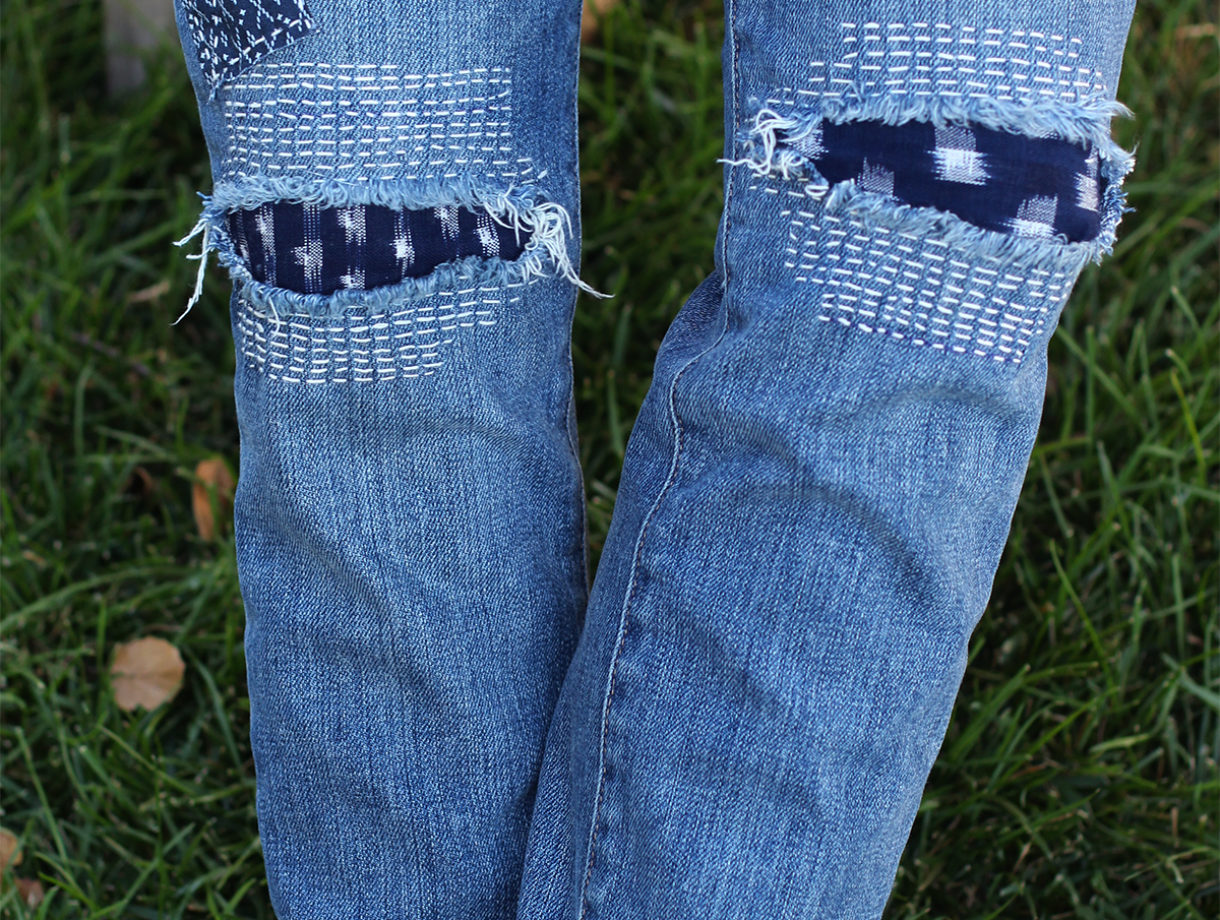
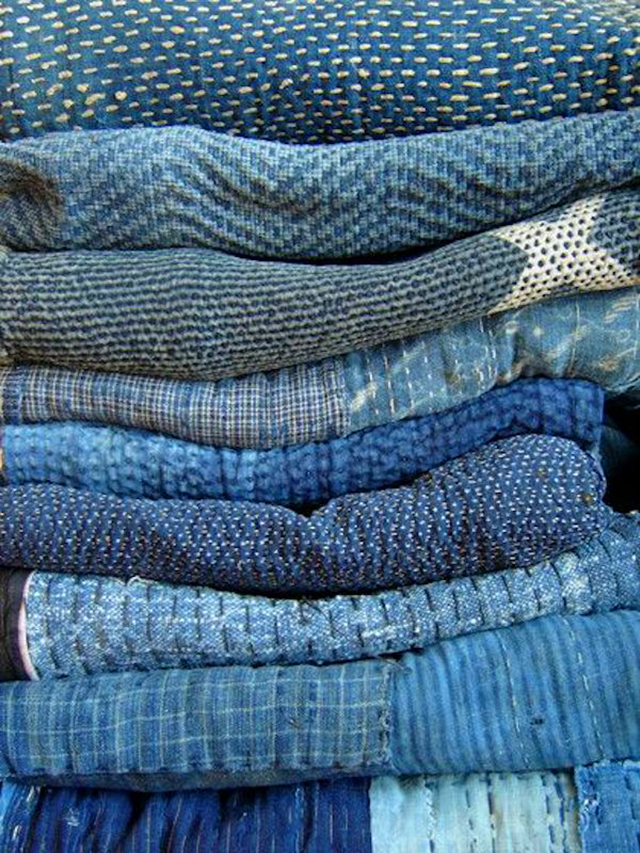
Boro is the age old Japanese art of mending textiles and is literally translated as rags or scraps of cloth. As far back as the 17th century, peasants, merchants and artisans would patch up clothing and quilts using scraps of old kimonos or hemp fabric, making the garment last long enough to be passed down through generations. Sashiko is a form of embroidery, usually a running stitch, and is literally translated to little stabs. It’s sturdy method makes is ideal for boro and perfect for mending denim. I love the exposed stitching and idea of using various patches to play with pattern and various shades of indigo. Needless to say, ever since I mended my first pair of denim using sashiko embroidery, I’ve been hooked. Not a single pair of ripped denim is safe. I’m coming after you!
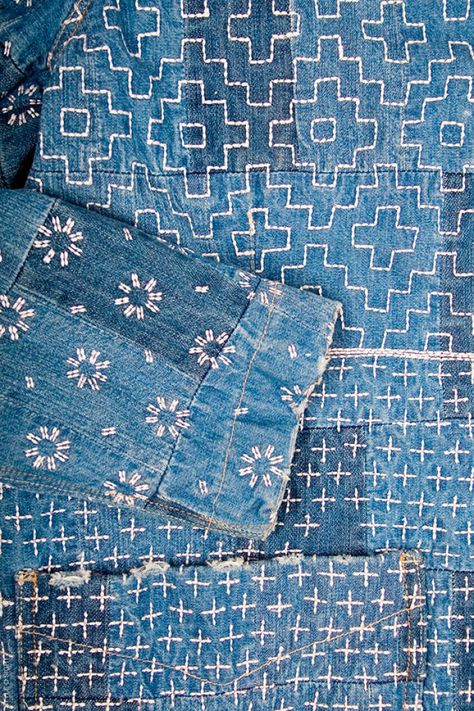
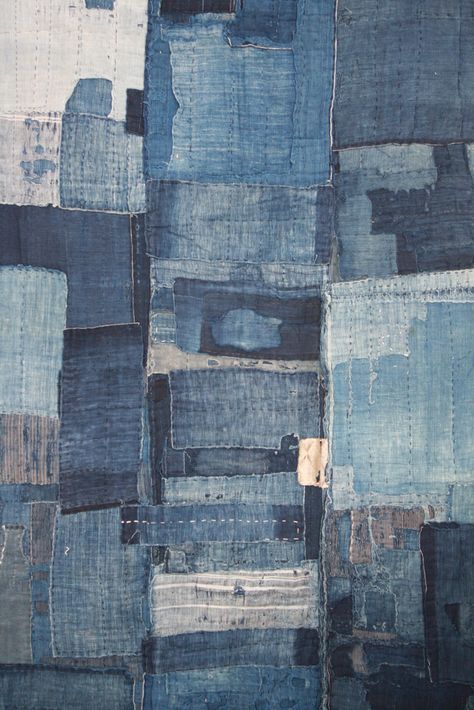
How dreamy are these vintage boro quilts?
You’ll need:
- sashiko thread
- sashiko needles
- knuckle ring thimble (optional)
- small pieces of fabric (linen, thick cotton, or denim)
- fabric pins
- fabric marker or chalk
- ruler (optional)
- scissors
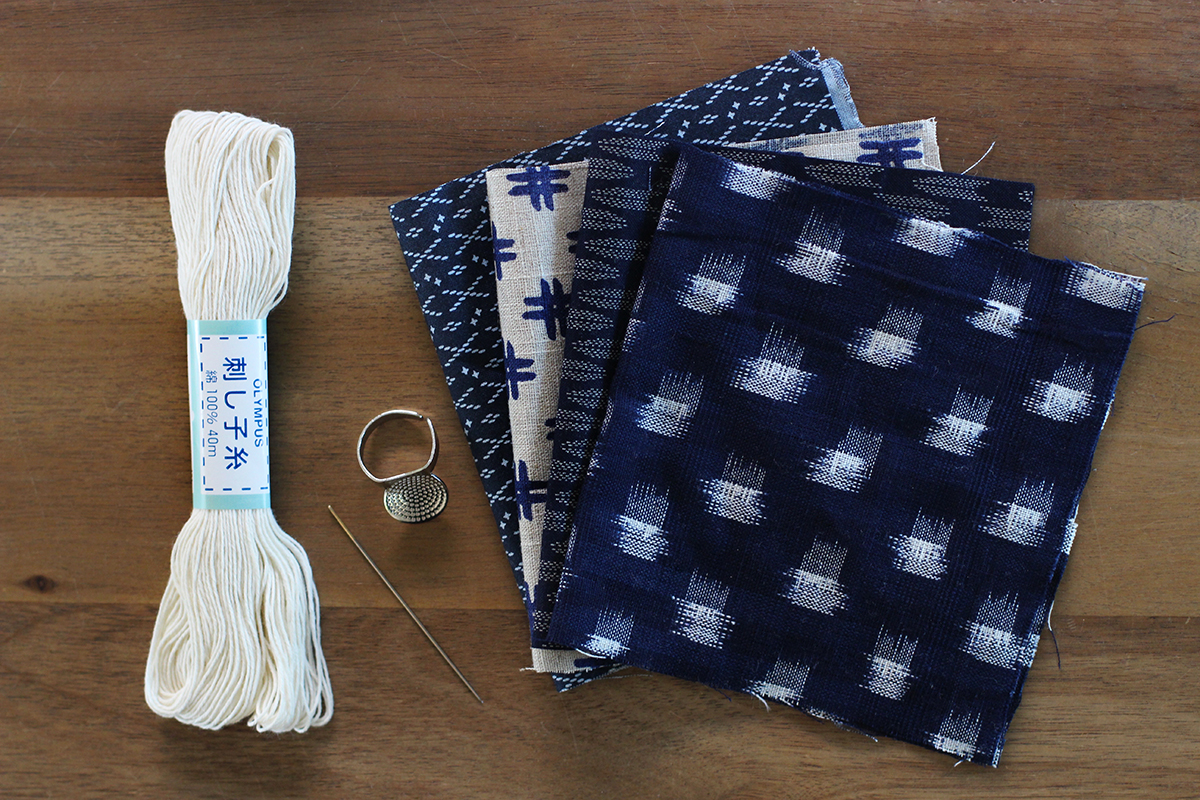
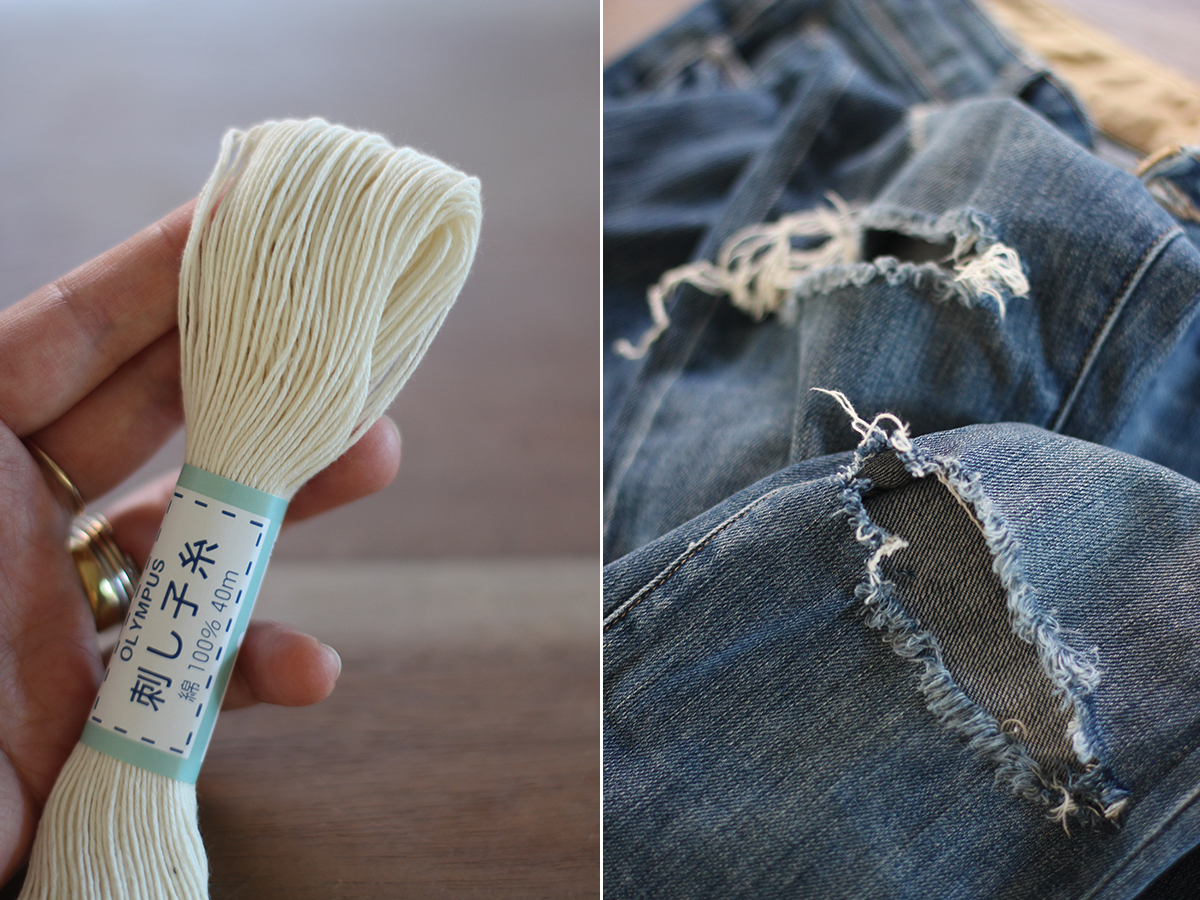
I should first introduce you to sashiko thread. Sashiko thread is just a tad thinner than embroidery thread. It has less sheen and it’s also bound tighter so that it doesn’t fray or split as easily. For that reason, it’s extremely easy to embroider with so I highly suggest tracking it down – especially for this project, where you’ll be stitching through thick fabric like denim. I’ve even started substituting it for embroidery thread for other projects, including these earrings. It’s good stuff!
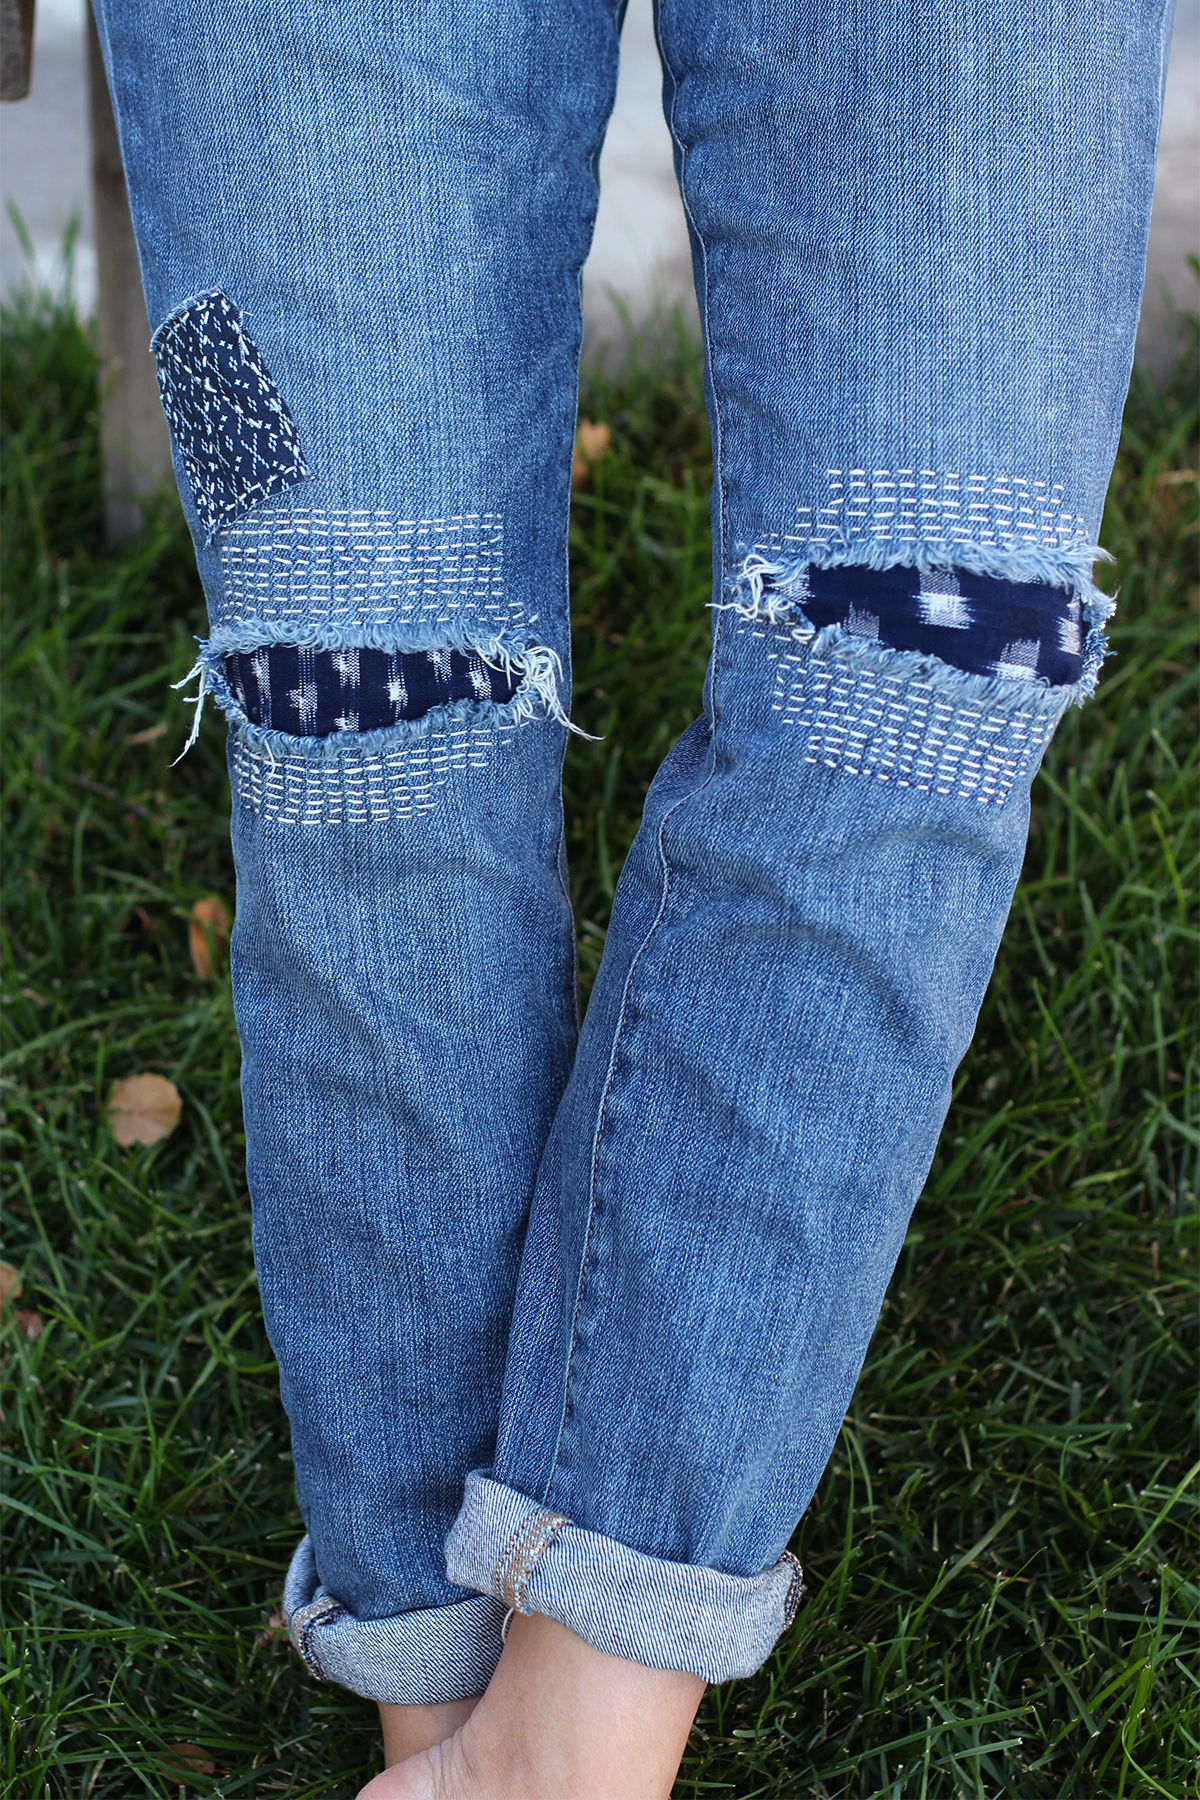
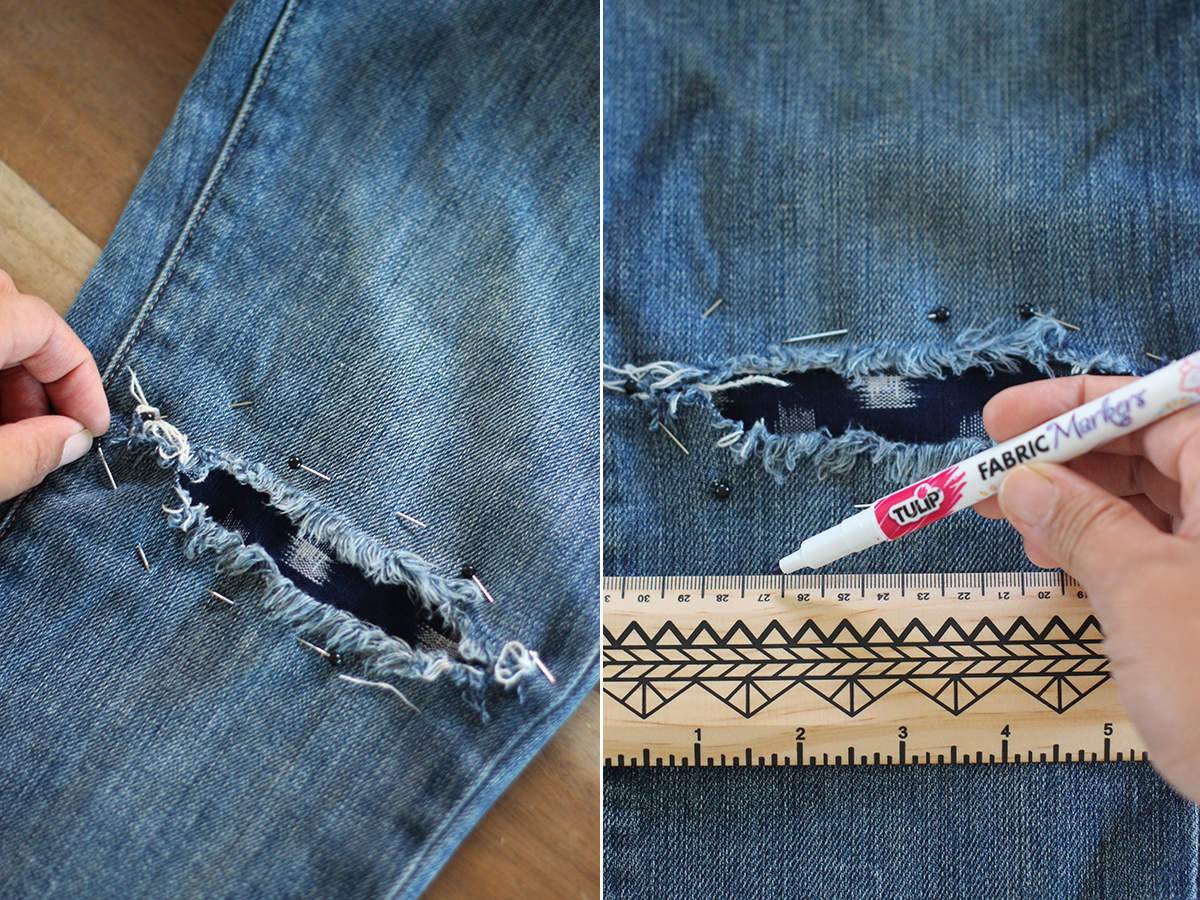
Before you get started, pick out your fabrics. Cut them in a shape that is at least an inch larger, than the opening in the denim, on all sides. Insert the piece of fabric into the leg of the jeans.
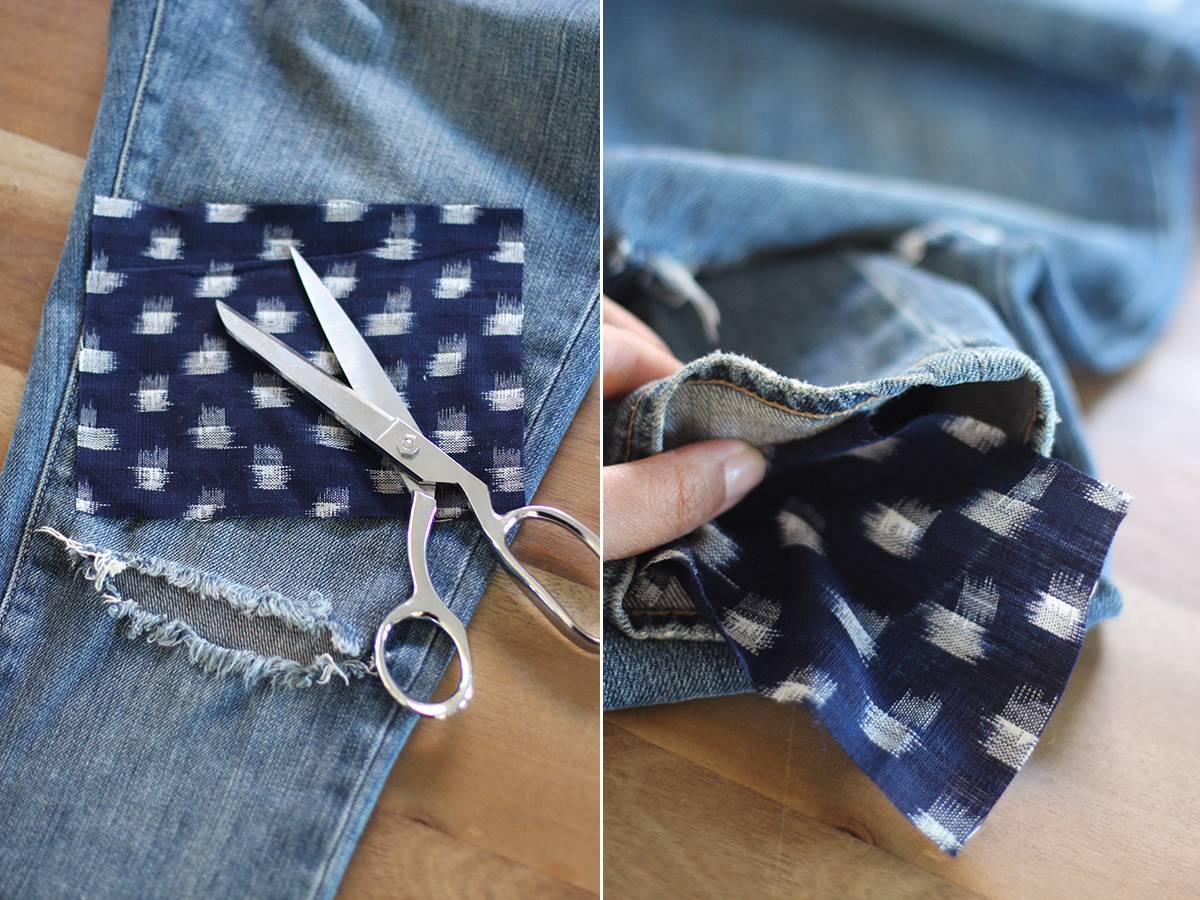
Align the fabric under the opening, again, making sure there is at least an inch extra on all sides. If you’re patching denim around the knees, give the center of the fabric some slack so when you bend your leg, the fabric won’t be pulled so taut that it will tear. Pin the fabric into place. You can start stitching in any pattern or direction. I’ve chosen to stitch horizontally – so a ruler and a disappearing fabric marker helps guide that first line of stitching.
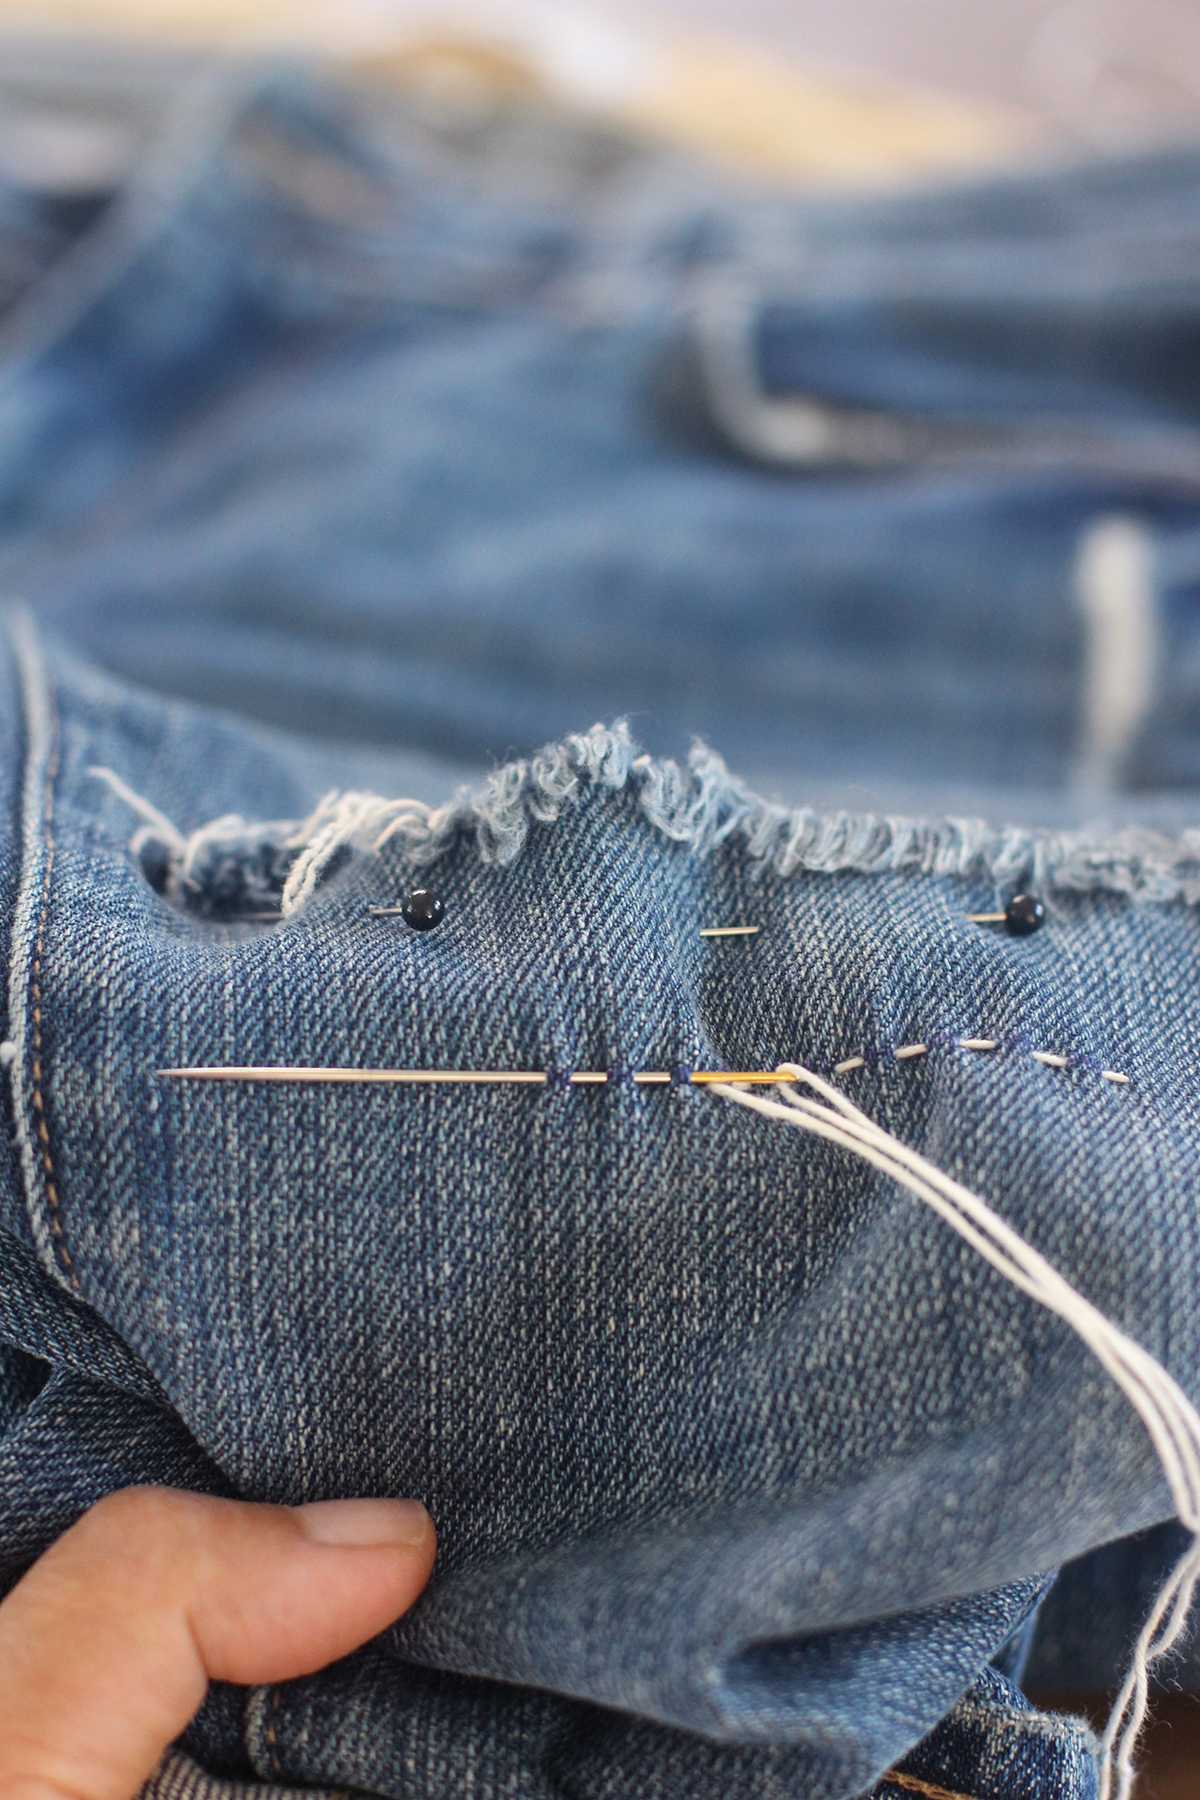
Sashiko needles have an even thickness, a large eye and more importantly, length. As you’ll see, a long needle is necessary for sashiko embroidery. Thread the needle with about a yard of the sashiko thread and tie into a double knot at the end of the single thread.
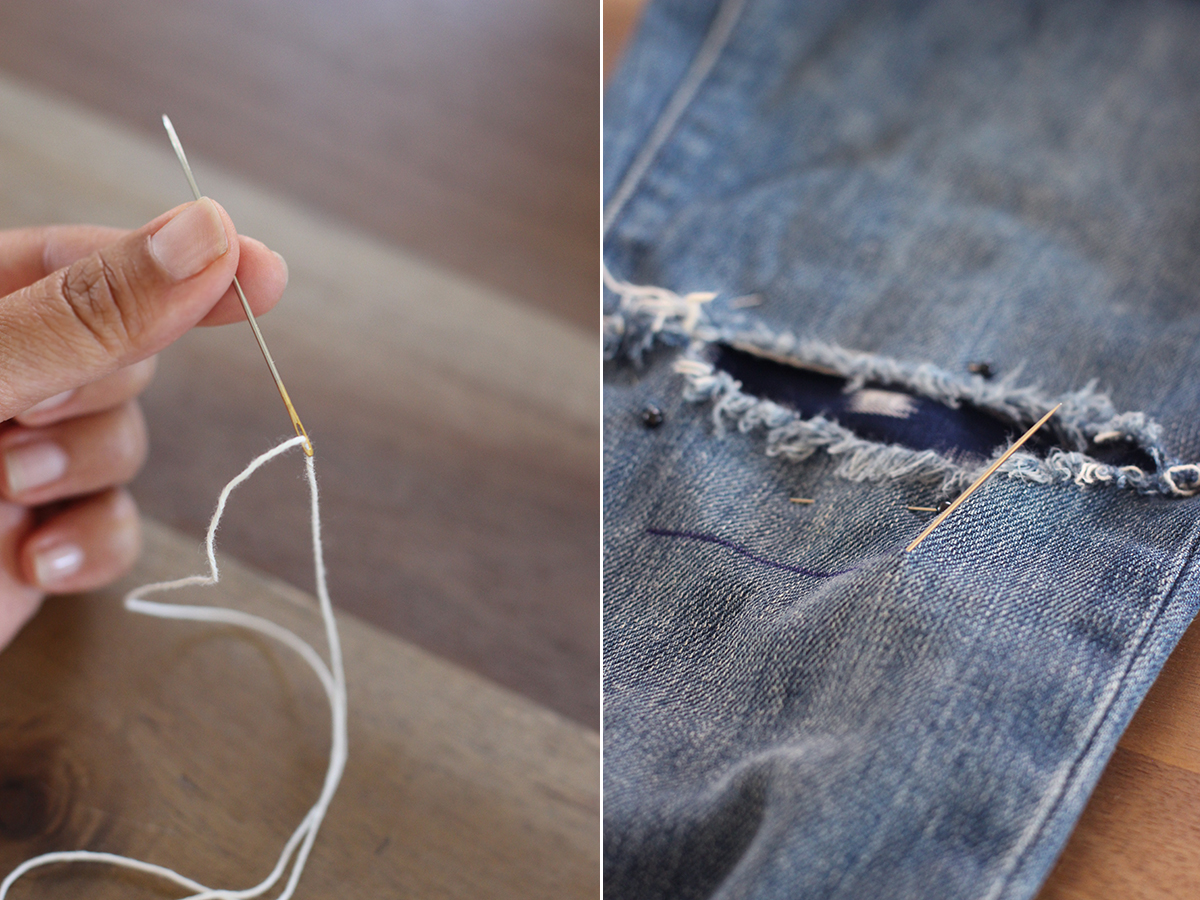
Insert the needle through the denim without pulling the thread all the way through. While holding the denim and fabric together, continue running the needle through the denim. The proportion of a standard sashiko stitch is 3:2 – the longer stitch being on the outside of the denim.
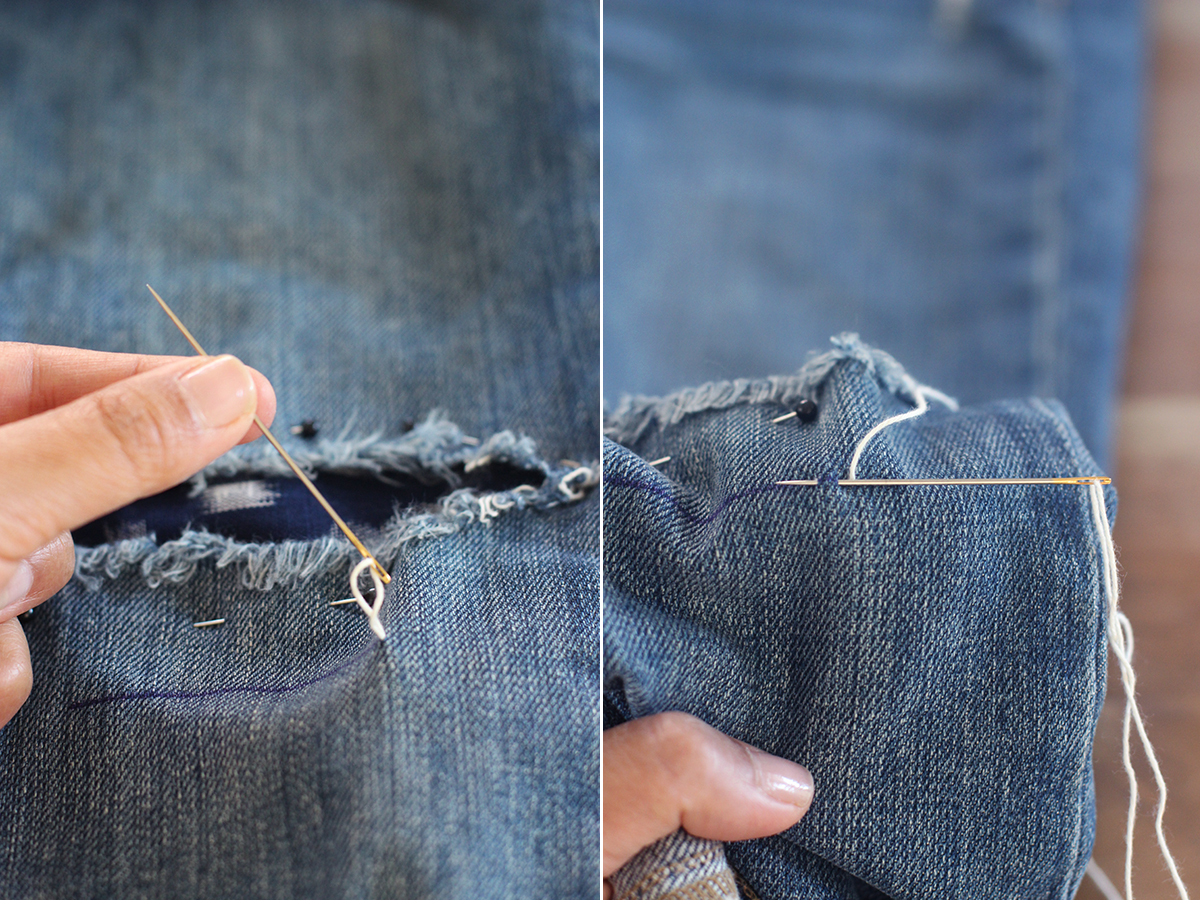
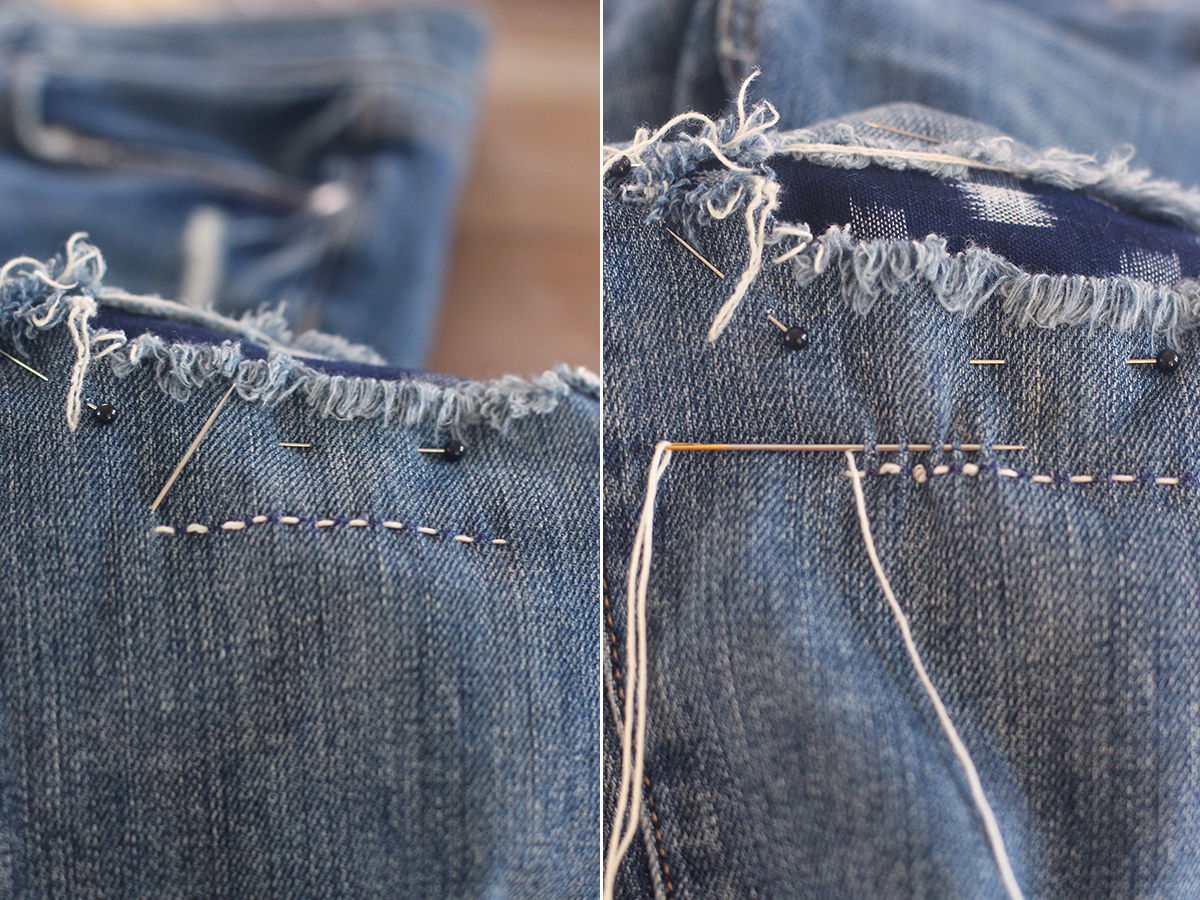
Pull the thread all the way through once you have multiple stitches on the needle. Pull the fabric taut.
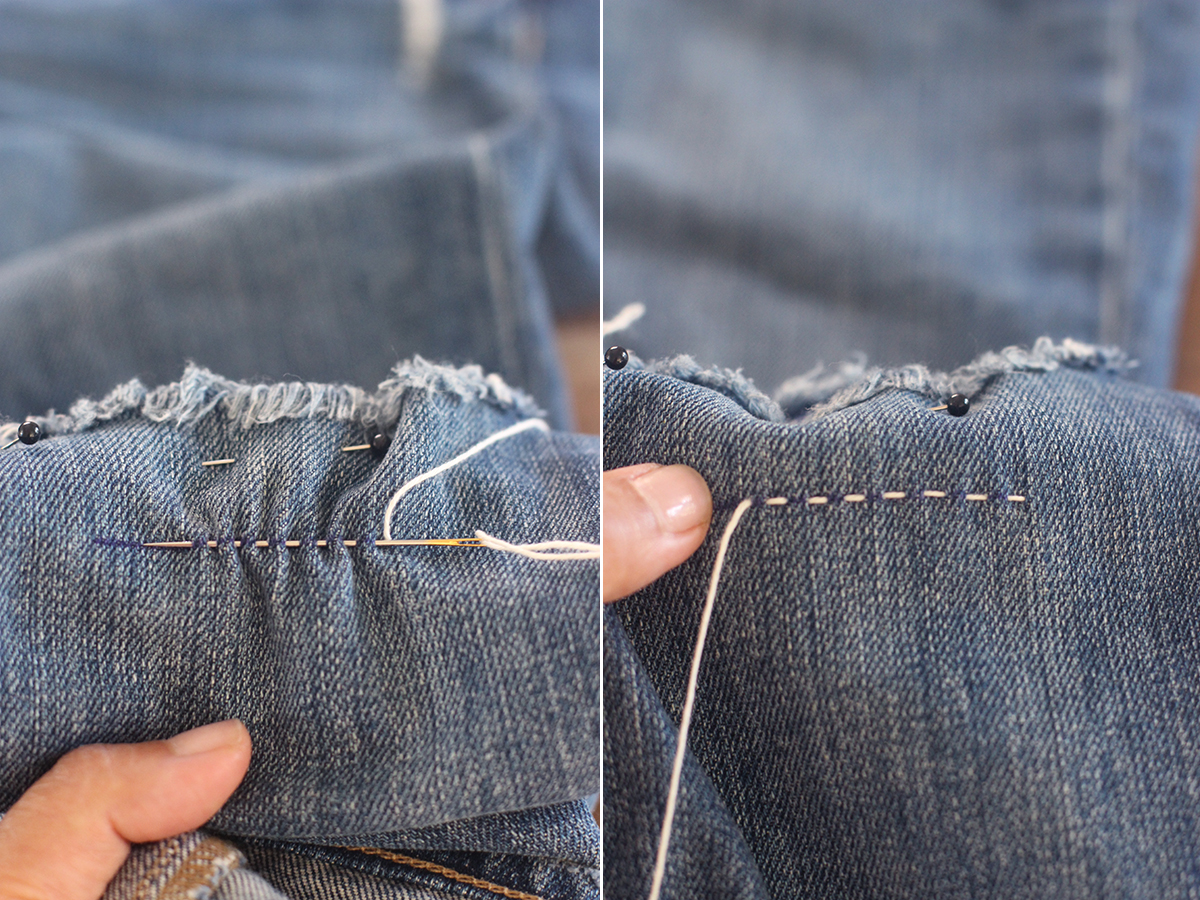
Continue until you have reached the end of the row.
Start another row, going in the opposite direction and continue that zig zagging your way up.
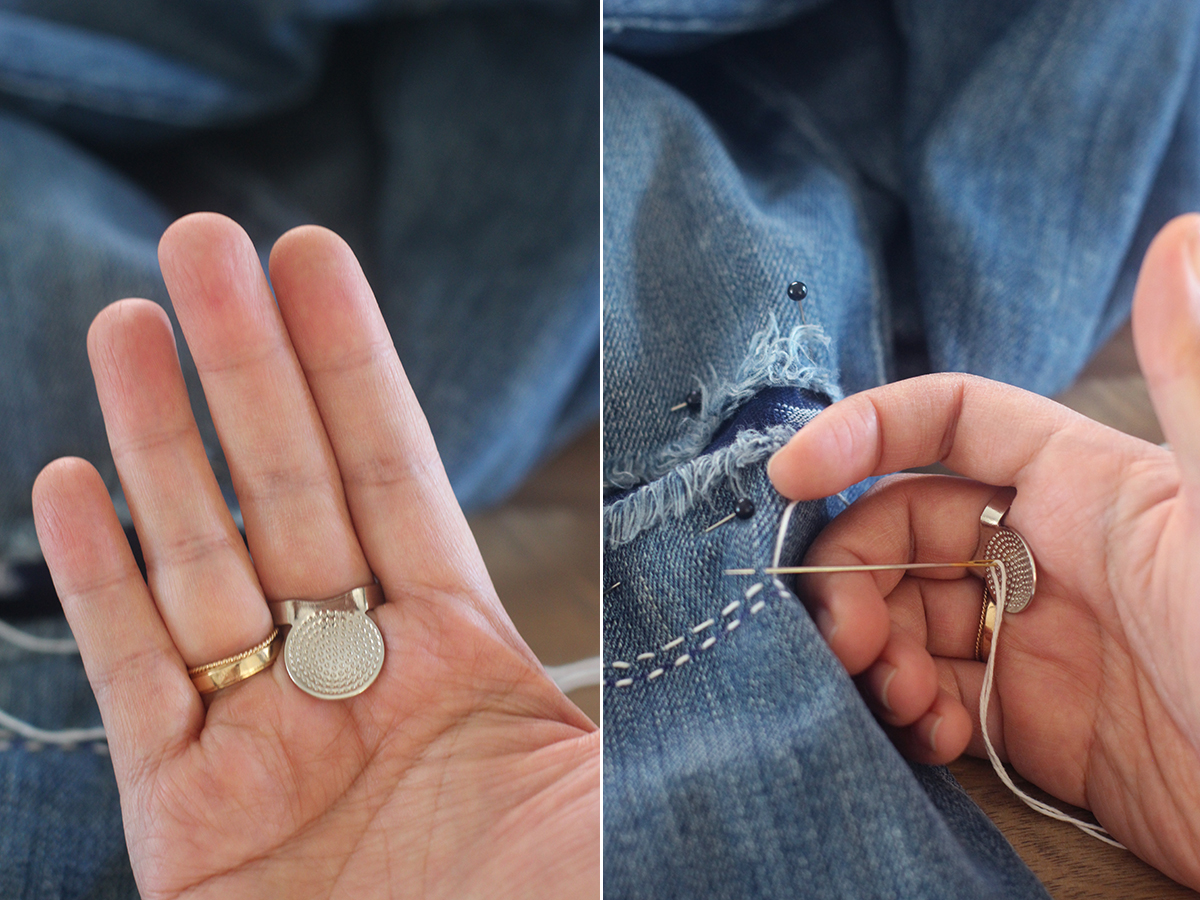
A tip: a thimble can be really helpful. You’ll notice the pads of your fingers will start to get sore, after repeatedly pushing it through thick denim. To use a sashiko thimble, put it over your middle finer with the thimble rested against the palm of your hand. Press the top of the needle against the thimble and use your fingers to simply guide the needle. The pressure of the needle against the thimble helps push the needle through your line easily.
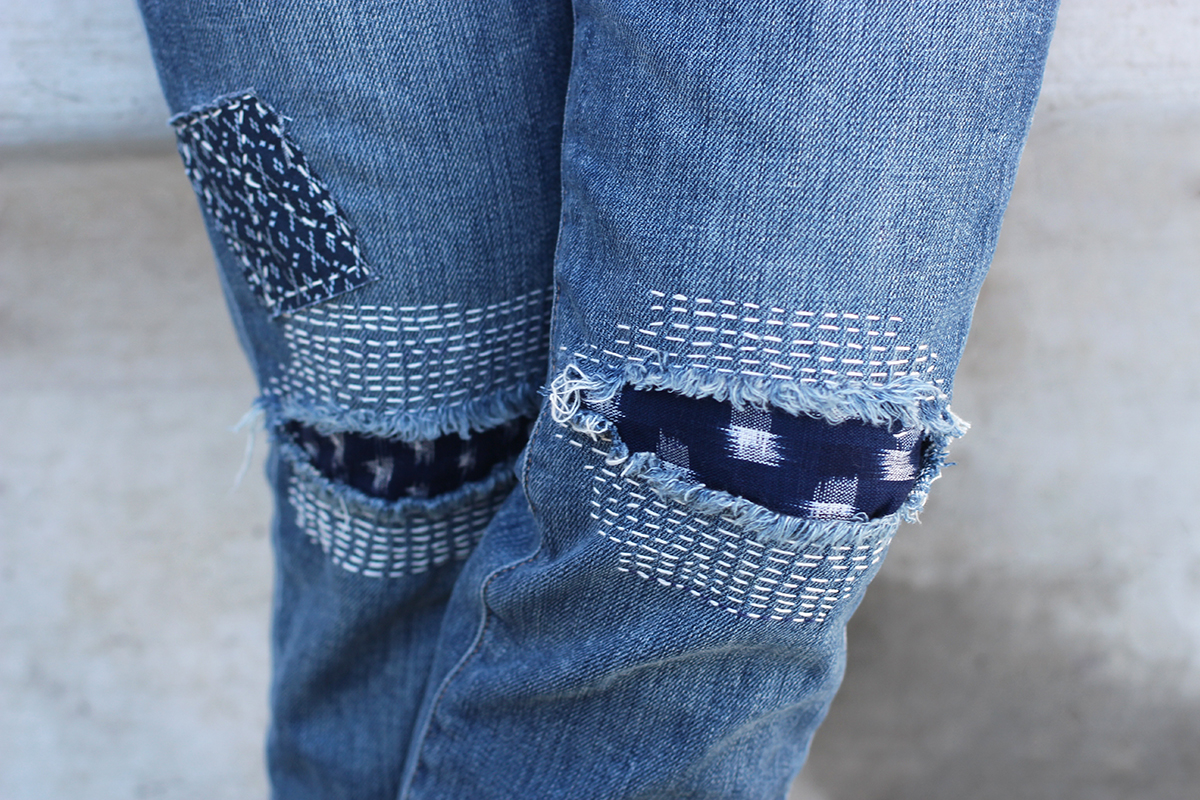
I personally like to tie off the thread when I reach the bottom of the ripped opening and then start again at the top, working downwards. You can either stitch over the fabric or stitch around it.
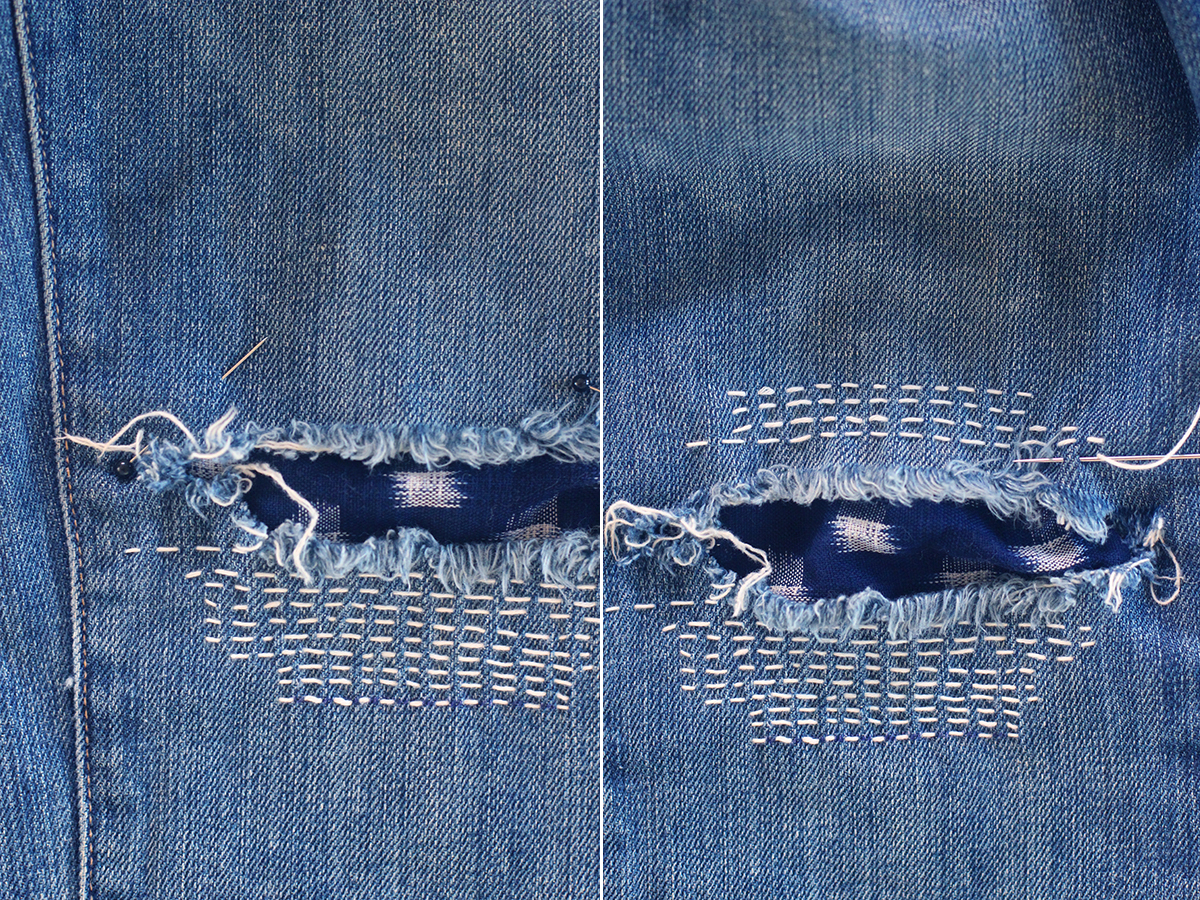
You can also stitch patches over the rips and openings. Play around with the positions and stitching!
And that’s it . . .
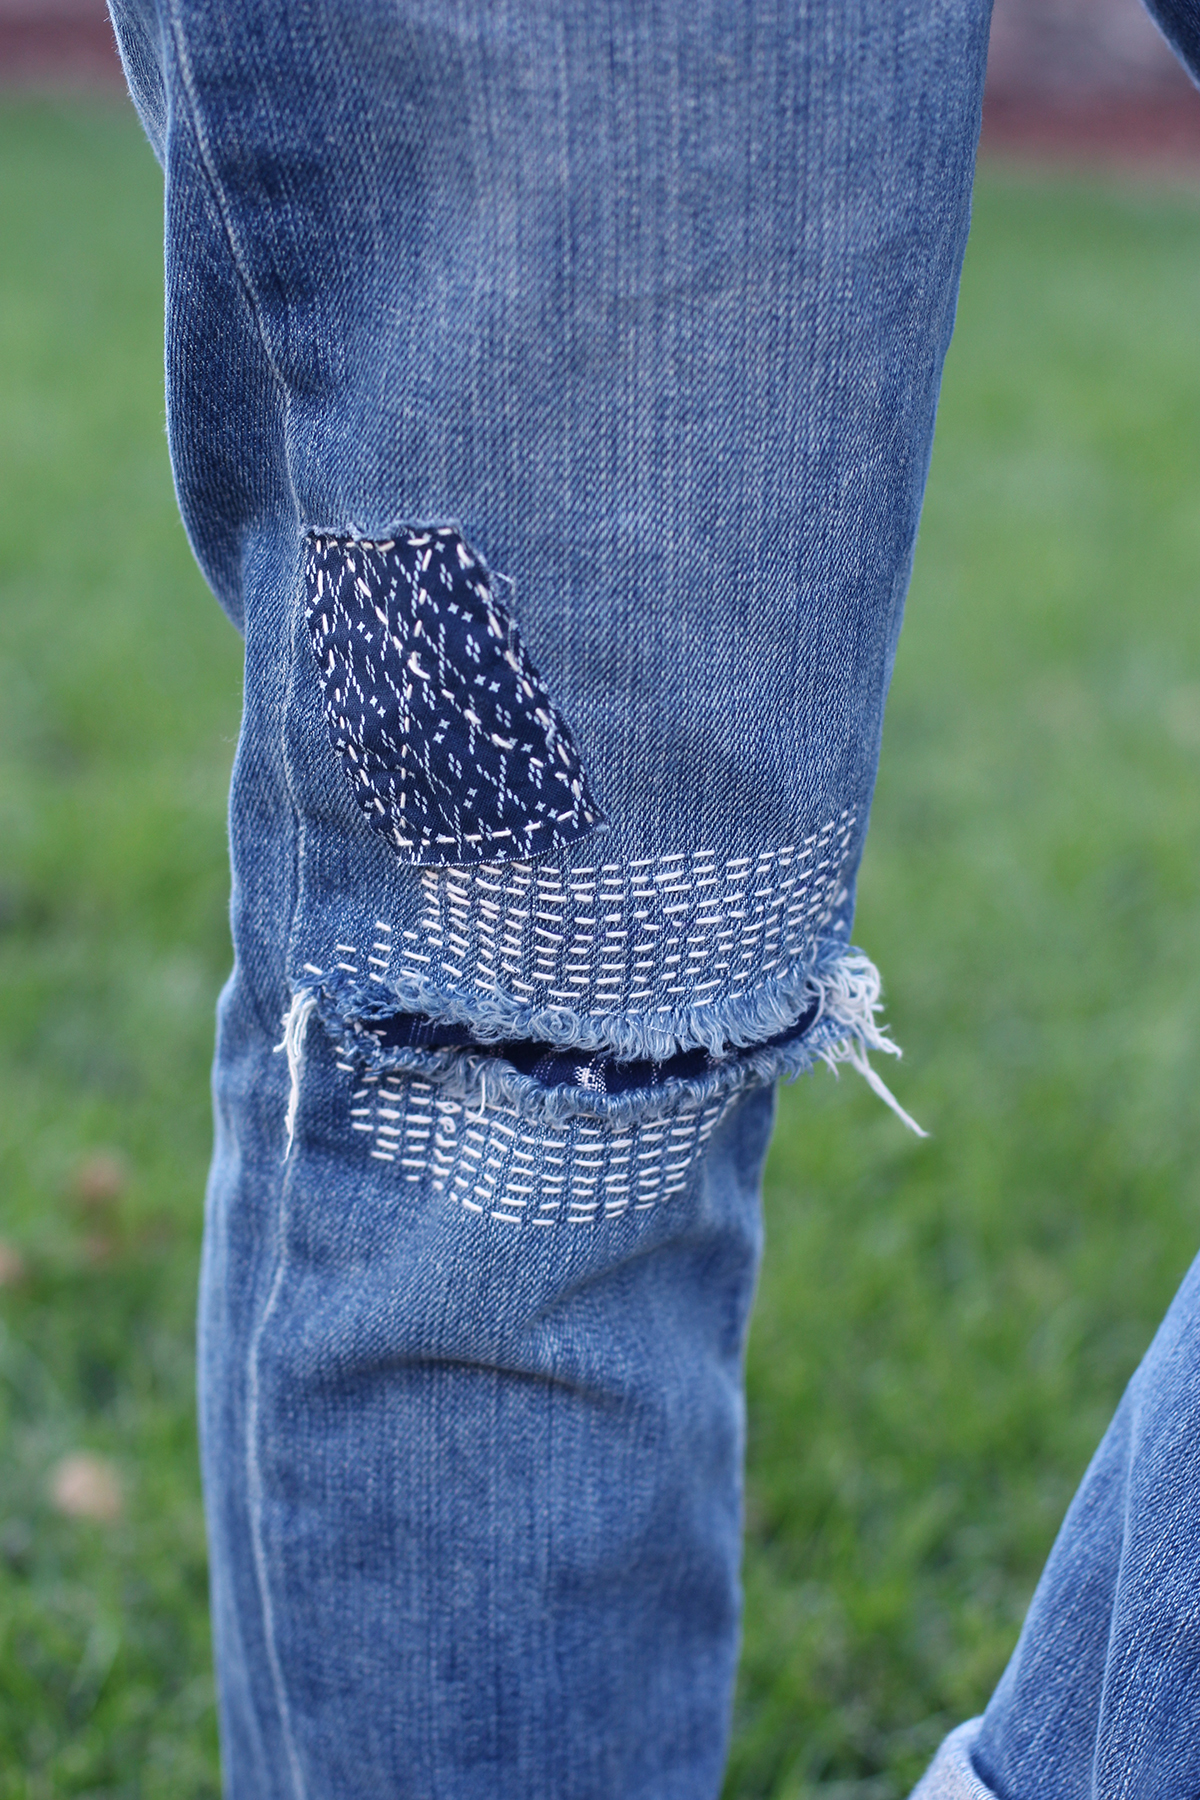
Happy denim mending!
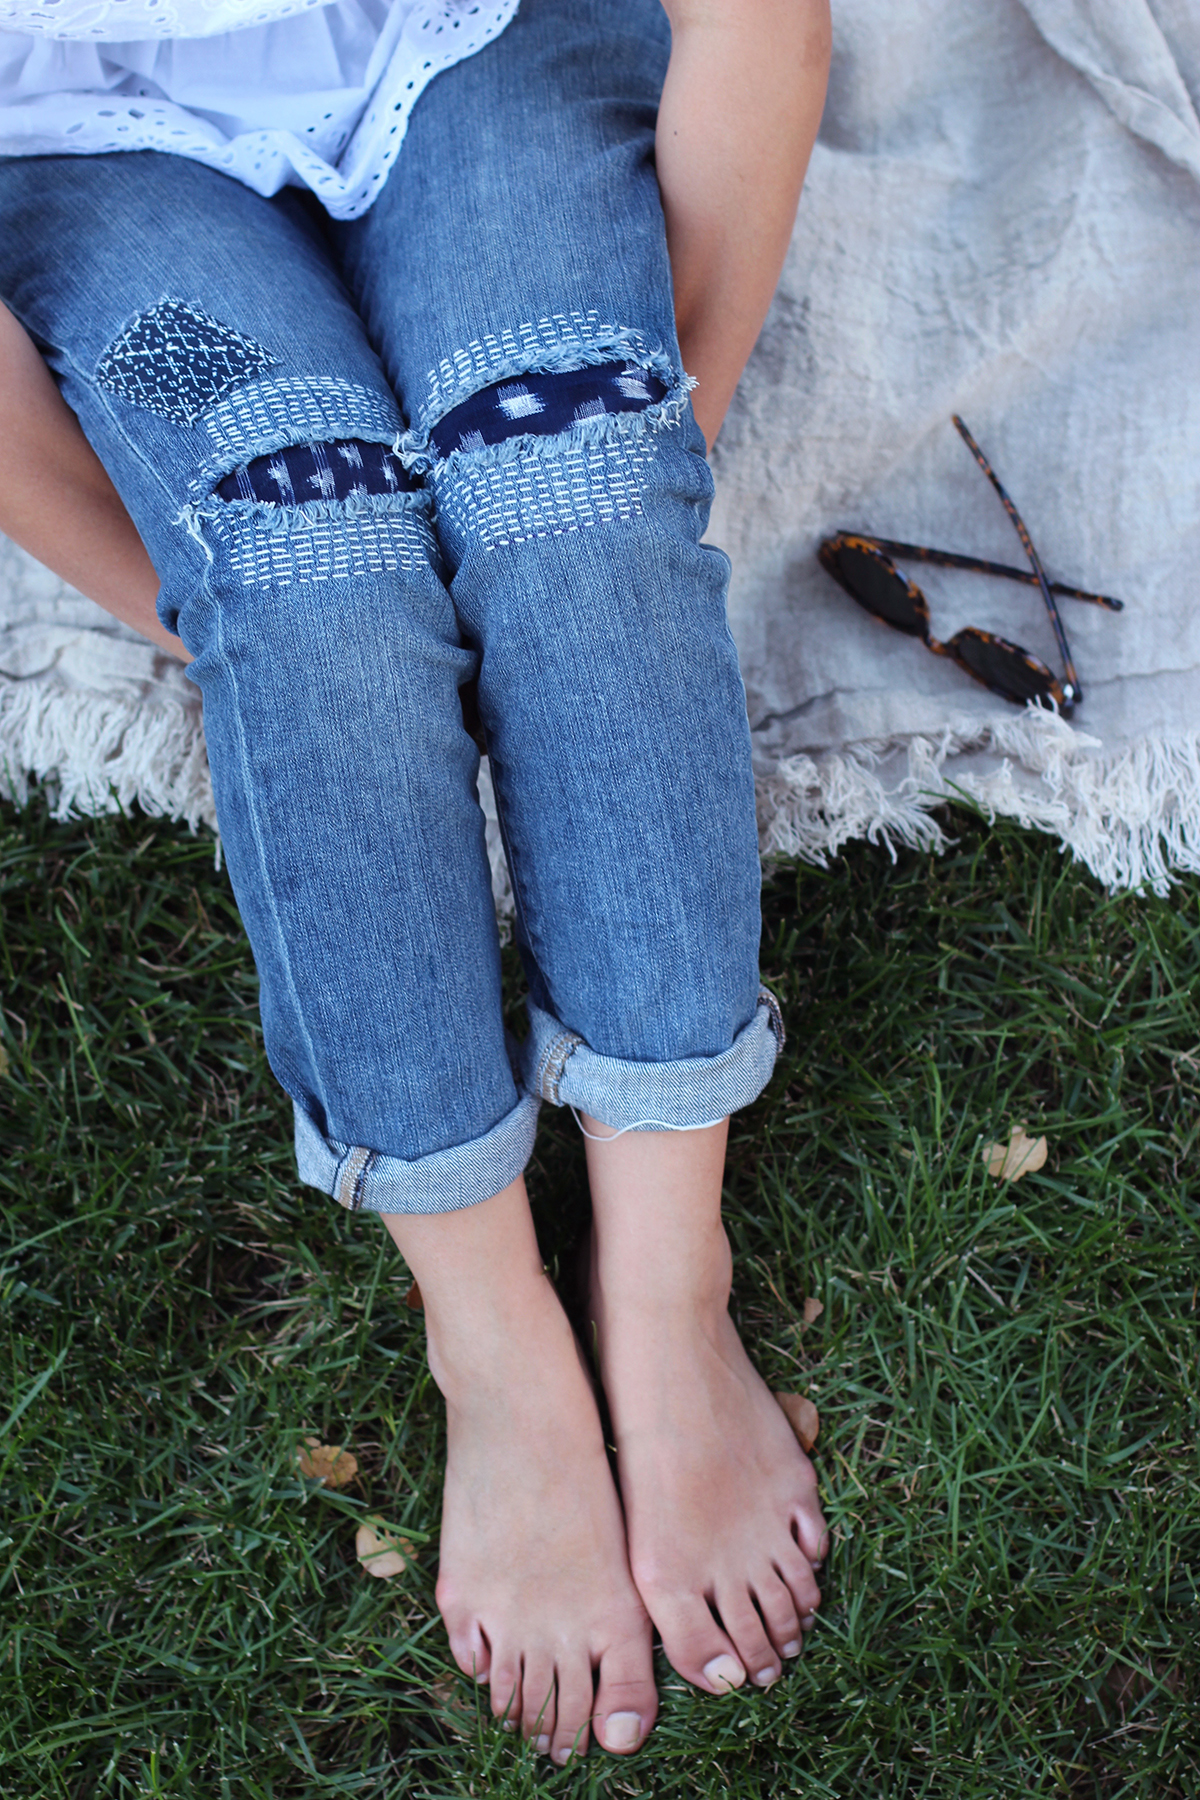
(images by HonestlyWTF)
This looks like fun. I didn’t know fixing stuff could be this cool 🙂
That looks like a lot of fun! <3
http://www.thatnewyorkgirl.com
This is pretty cool! Nice DIY c:
Xx Ice Pandora
NICE
wooW
Donde se consigue el hilo, la aguja y el dedal en la CDMX?
Se ve una terapia interesante para cuando estás en cama enferma.
Love this! A super easy way to update pants, can’t wait to try.
XO, Destiny
destinysdailydose.com
Such a cute DIY to reinvent a pair of distressed jeans! Thanks for sharing!
Prudence
http://www.prudencepetitestyle.com
Nice! Love the stitching.
http://www.lelopez.com
That’s a pretty nice DIY project! Thanks for sharing!
Alexandra ~ ArtMandy.ro
Hi the embroidery ring can you make your self.
I have learned this trick when i had a lesson of a japanese teaher about quilting , You must take a small stoke of fabric and a coin.
then you fold in the coin, and make some stiches to make it on his place and the ends you must knot on your finger.
I have this simple tool still.
I hope it willl help;-=D
I loive this kind of mending thank you for the greate tute and sharing;-D
Thanks for the tip, Jet!
These look fab, this is a great way for fixing ripped jeans you don’t want to throw out
Lauren
livinginaboxx | bloglovin
You do quite a few Japanese DIYs, which is really cool! I should do a Chinese DIY for hapinesswherever.com 🙂
Nice! What a great way to upcycle a pair of old jeans into something fabulous. Love the white stitching especially.
https://www.etsy.com/shop/EarthChildArt?ref=hdr_shop_menu
Great DYI! I wonder where you got the various indigo dye fabrics that are featured here?
Hi ! Such a cool DIY , japanse crafts never stop to amaze me , thank you. Those blue fabrics you picked are gorgeous, do you know where I could find something similar ? xx
Big Like … <3
Yes, thanks for that Jet.
Lily,
I’ve actually seen some similar fabrics at this fabric vendor I buying suiting from –
http://www.ebay.com/itm/Vintage-Mid-Century-Japanese-Kimono-Wool-Ikat-Kasuri-Fabric-Black-Red-Check-/191863921301?ssPageName=STRK:MESE:IT
http://www.ebay.com/itm/Vintage-Mid-Century-Kimono-WOOL-Kasuri-Ikat-Fabric-Navy-White-Yellow-Red-/201577192970?ssPageName=STRK:MESE:IT
..inspired
Such a gorgeous repair! So much better than plain jeans! 🙂 Lisa
Where can you purchase a thimble like this?
You can make your own thimble. I posted instructions here: https://www.stitchesontherun.com/how-to-make-a-palm-thimble/
I’ve also posted instructions on how to use the thimble.
champion! i’m a major fan of patching and darning so this would be perfect for my own clothing repairs. i even have leather to make the thimble. cheers!
http://xnxxkk.net
nice tip to restore your pants
Fabulous way to reinvent denim. Can’t wait to put these to good use. Thanks so much for sharing.
Hi!
your work is beautiful! I love it! What does the inside/wrong side look like? Thank you for a great tutorial!
This is gorgeous!! So much better than the holes held together by tiny strips of denim masquerading as fashion!! Thank you for posting this-even though years old is still wonderful.
Hello. Loved the post. I was wondering if maybe a butterfly shape for the fabric patch would be better, since it is for the knee?
I love this DIY! How cool is that?! I love how it still creates the texture and vibe of a distressed jean… but I also won’t freeze my ass off when it’s 15 degrees outside.
I love this look. Thank you.
I grew up in the era of when jeans had a rip you fixed it. Definitely not as beautifully as the SASHIKO. Thanks for sharing.
Very good tutorial. Thank you! Donna
Boro meets patch meets machine embroidery but all done with love for the jeans and the person who wears them. See @lucyjonesrider #weartearrepair
Thank you so much for showing how to fix my jeans. Most appreciated
Very helpful! Thank you!
my Boro patches are fraying after being washed. What do you suggest when using a patch on top of pants as a decorative patch so it doesn’t fray.
wow… Love your style , very inspire me
Honestly WHO tf would name a blog they want to be a mainstream success with the vulgar “WTF”?!
Todays people would.
Going to try, looks great…..
Very clear instructions. Thank-you
Bonjour , où trouver les pièces de tissus par exemple pour le pantalon déchiré ?
Merci
The fabric is called kurumegasuri. I’m sure you can find some online.