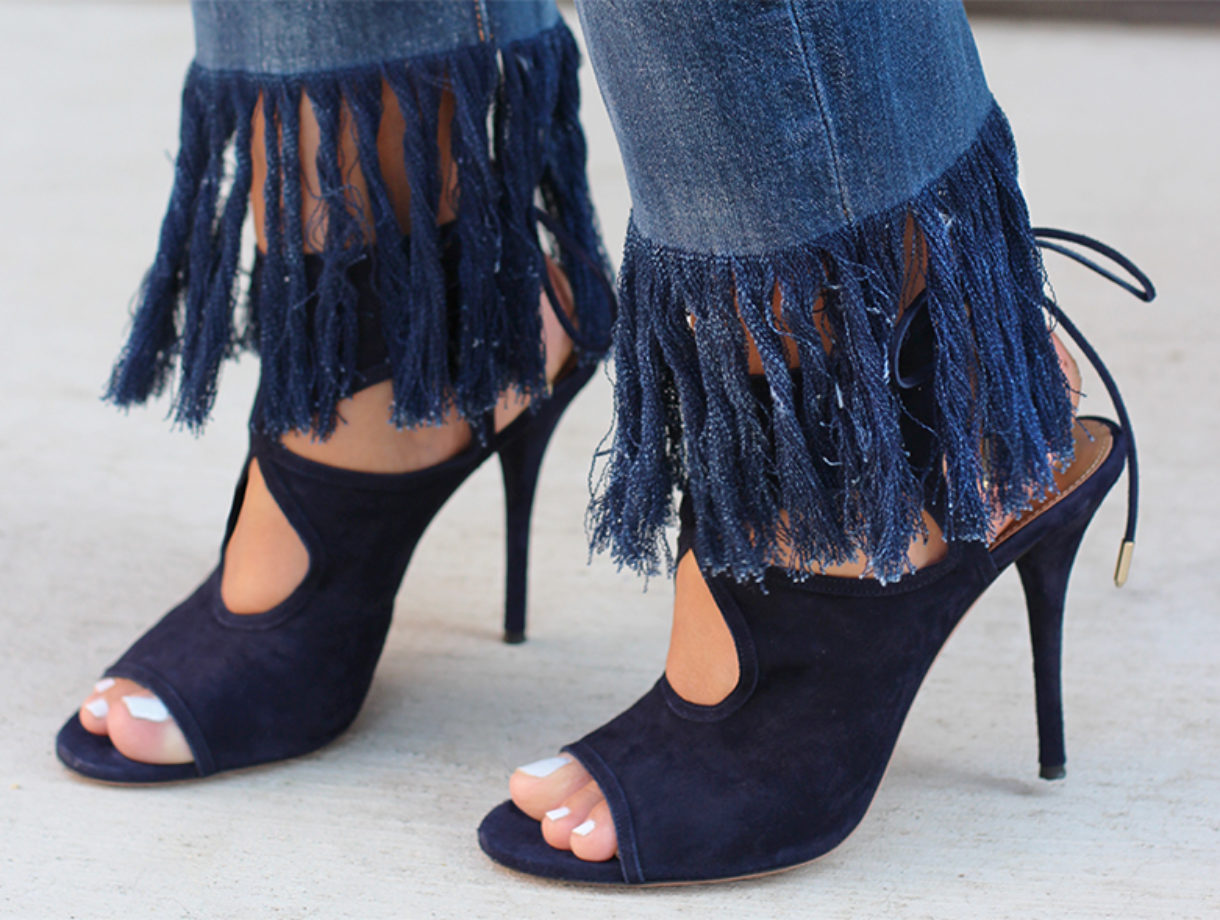
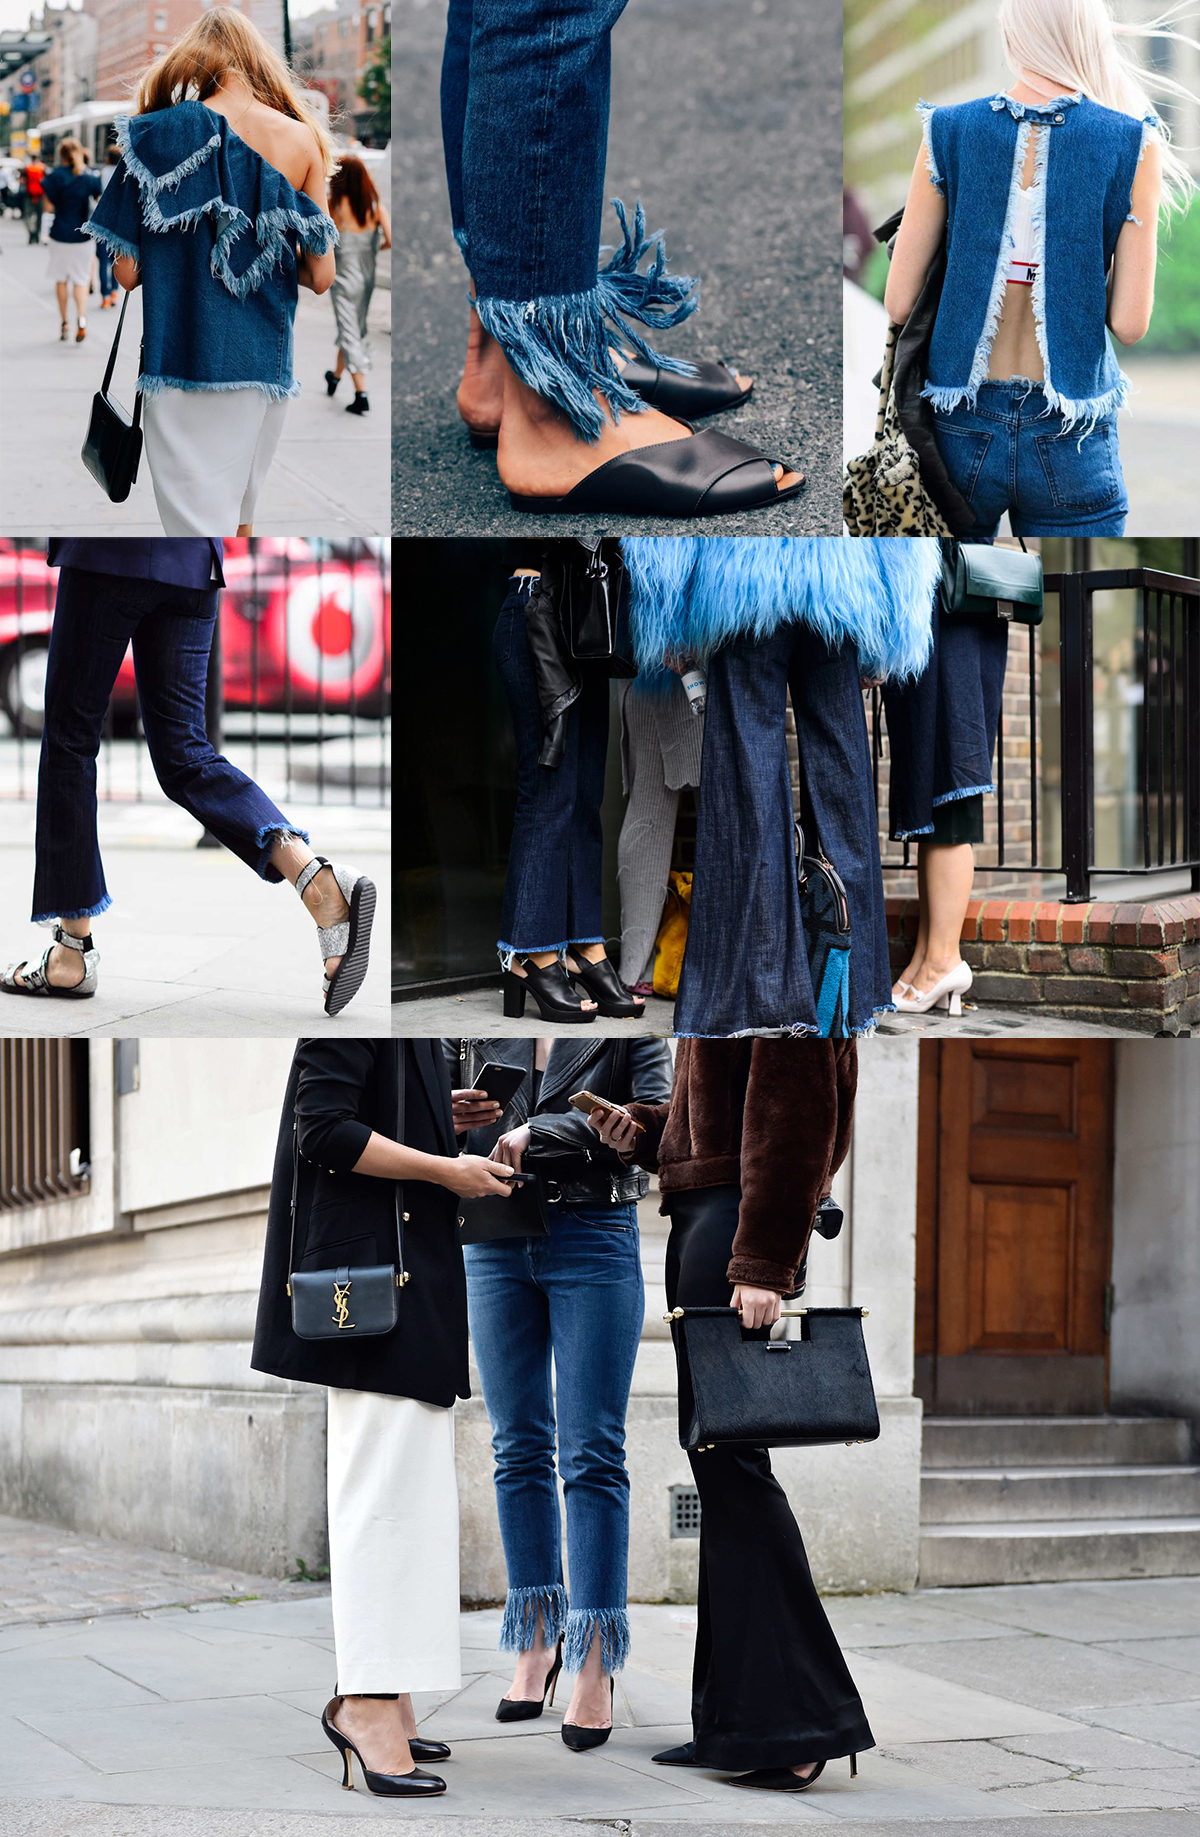
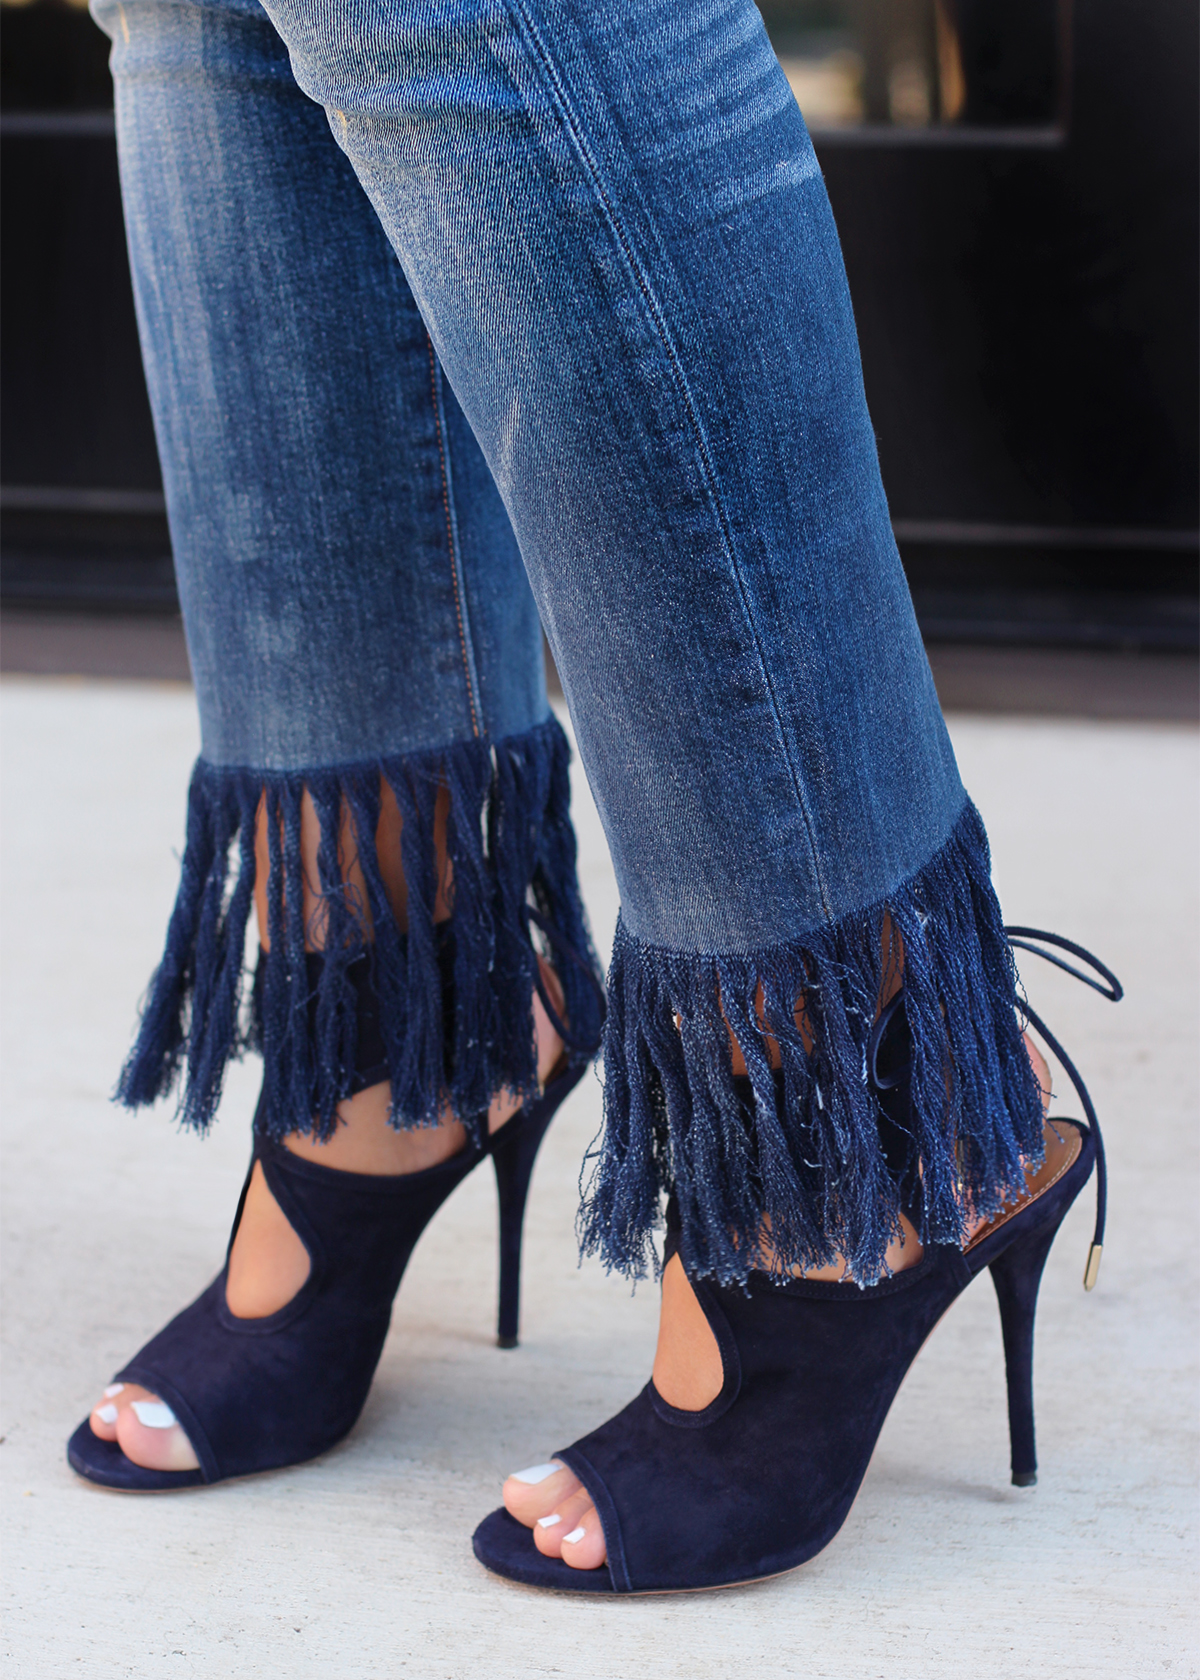
Worn, torn, fringed, patched, frayed . . . denim is, hands down, my favorite medium to destroy, mend, dye, embellish, and reconstruct. And what better way to scout inspiration than out on the streets. Better yet, the streets of fashion week! While standing outside of Tibi‘s runway show las tweek, I spotted the most glorious pair of frayed denim. (Update: looks like they were made by 3×1!) The fringe extended past the ankles, like a pair of Marques’Almeida jeans on crack. Honestly, yes. Let me at ’em!
Any denim fit or wash will work for this project. I experimented on a pair of skinny jeans, however I’m excited to try them on a pair of flared denim, maybe this time with a shorter fringe. And did I mention the best part is that all you really need is a seam ripper?
You’ll need:
- a pair of jeans
- a seam ripper
- a pair of fabric shears
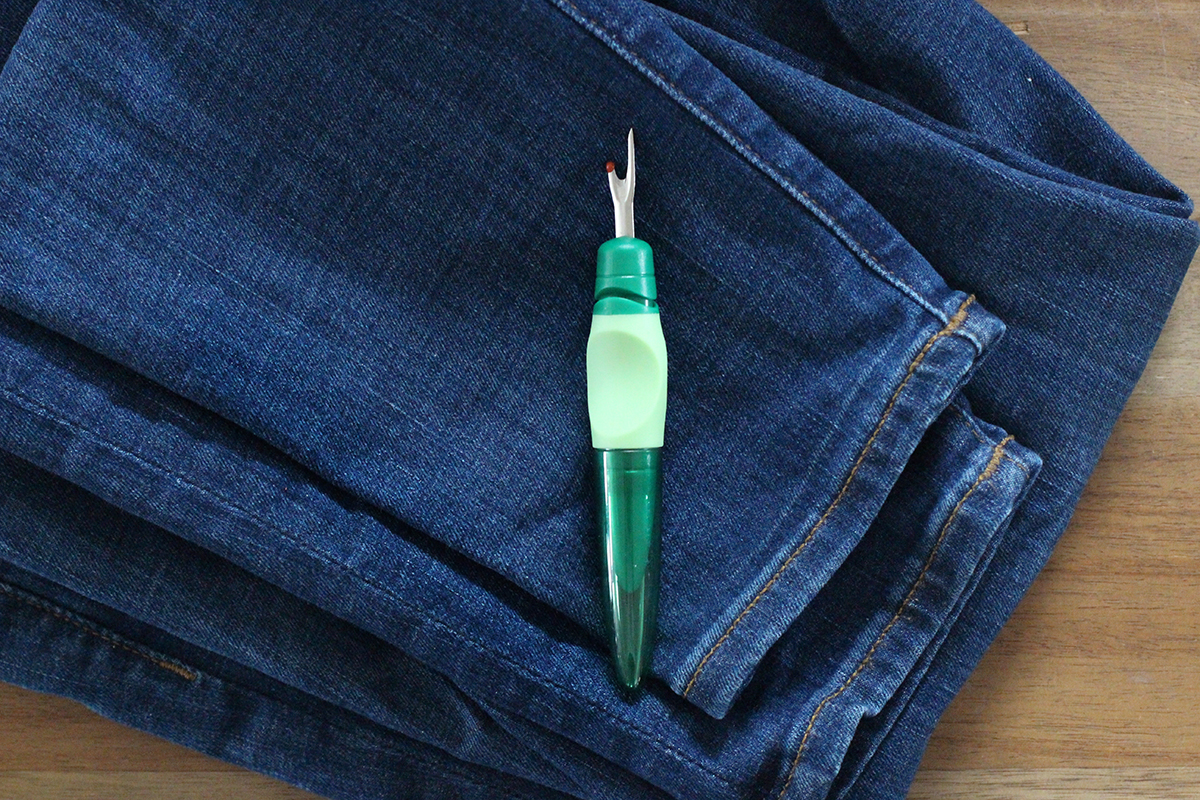
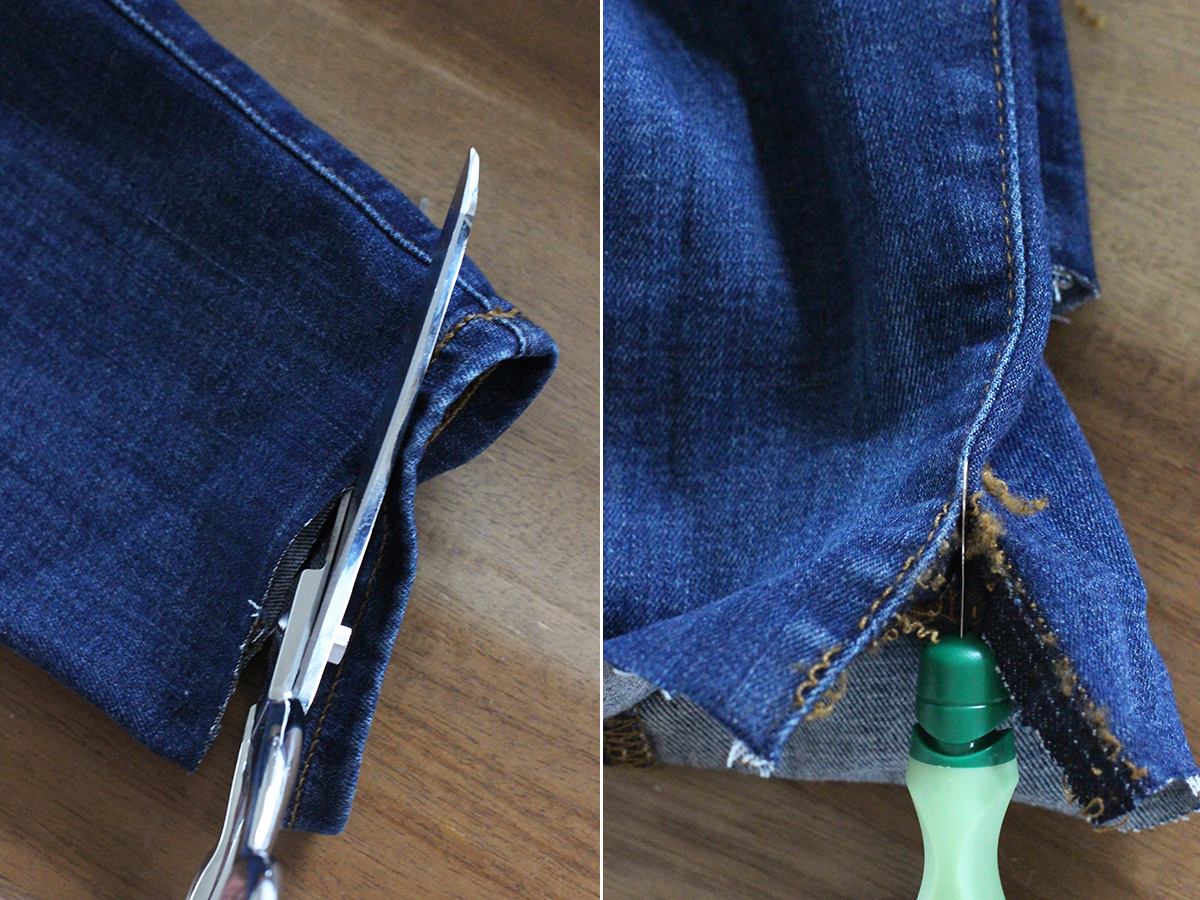
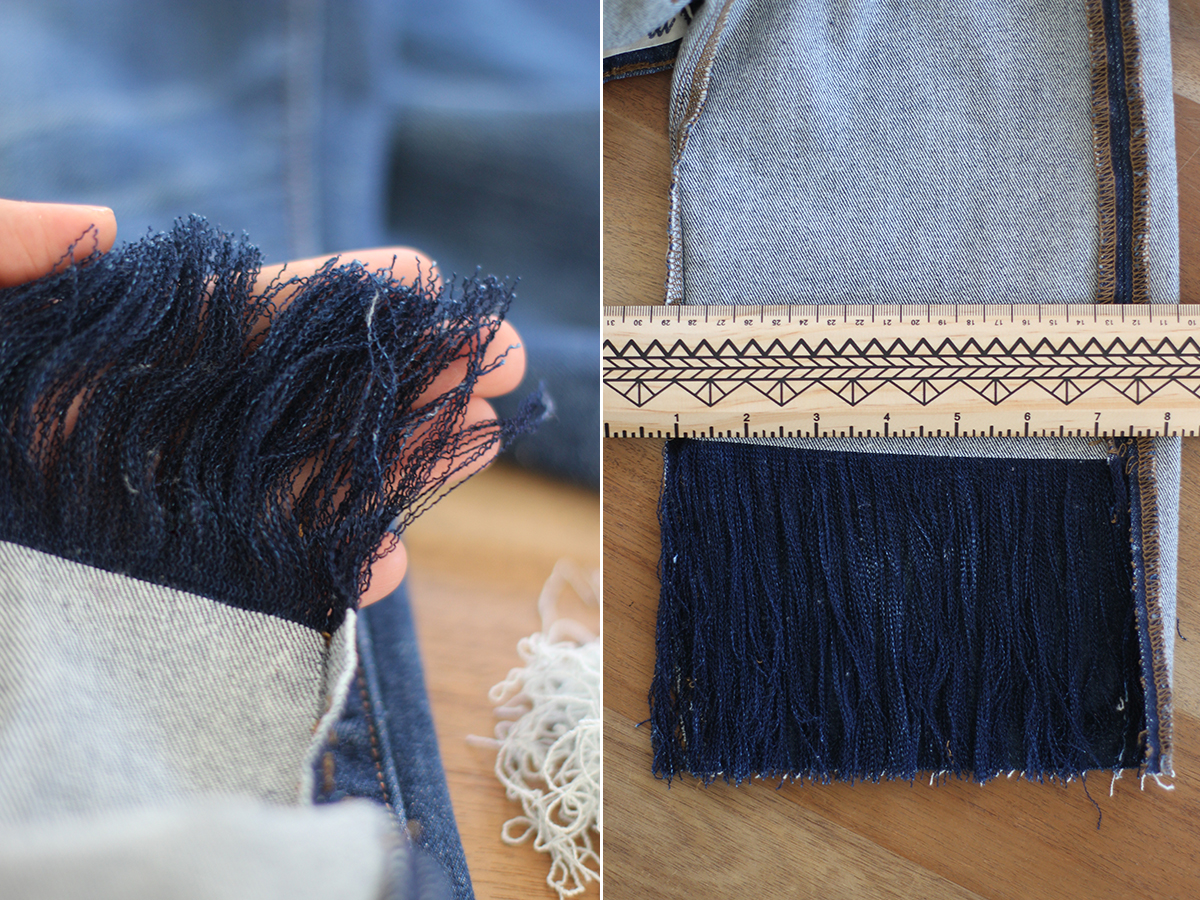
Cut the hem off the bottom of your jeans with a pair of fabric shears. Use your seam ripper to open up the vertical seams on both sides of each leg. The length is up to you but you might want to keep a ruler handy to measure the first rip.
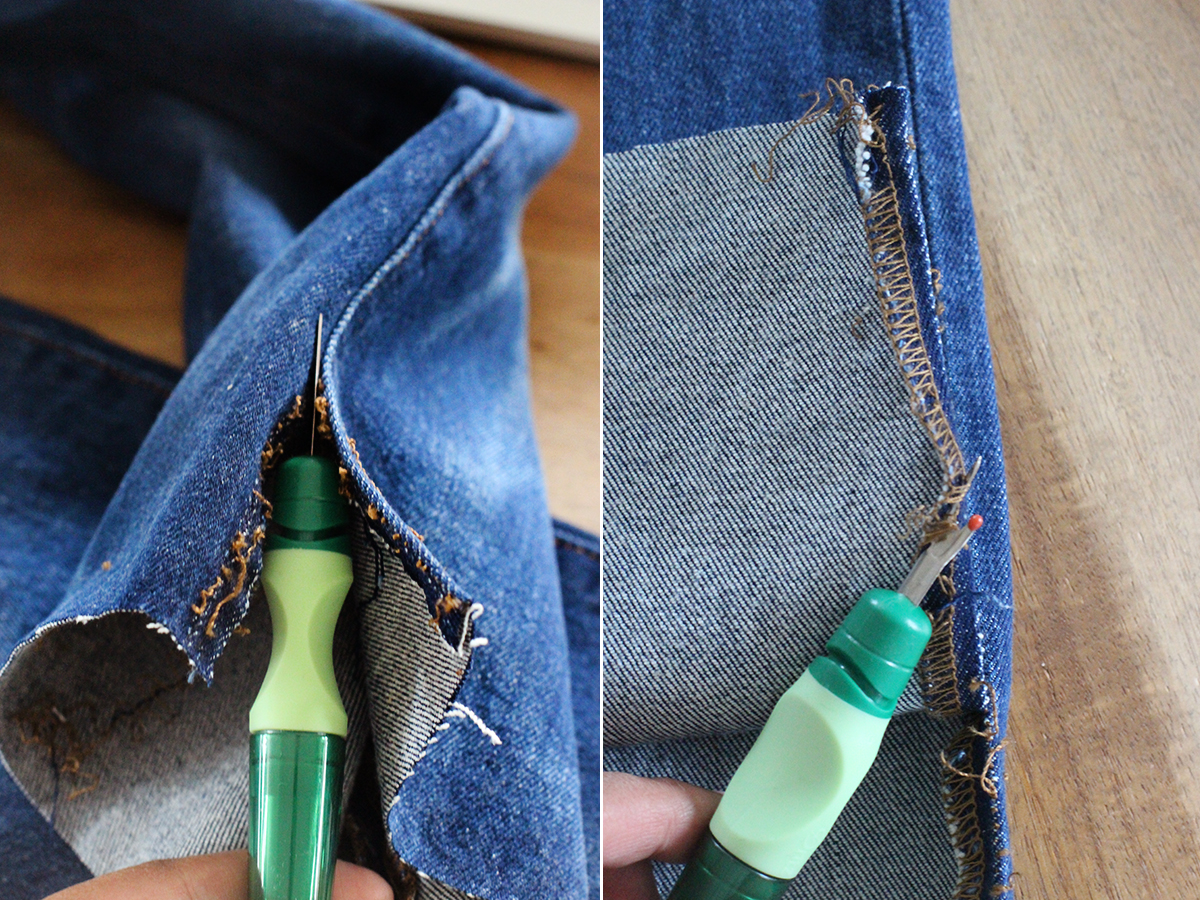
Remove all the threads from the binding seams.
Now that all your seams are removed, you can start fraying! You’ll be removing the horizontal white threads, working from the inside of the denim. They run at a slight angle which is why the threads don’t just easily fall out by simply removing the seams. You will, however, find it easy to remove the first few loose threads.
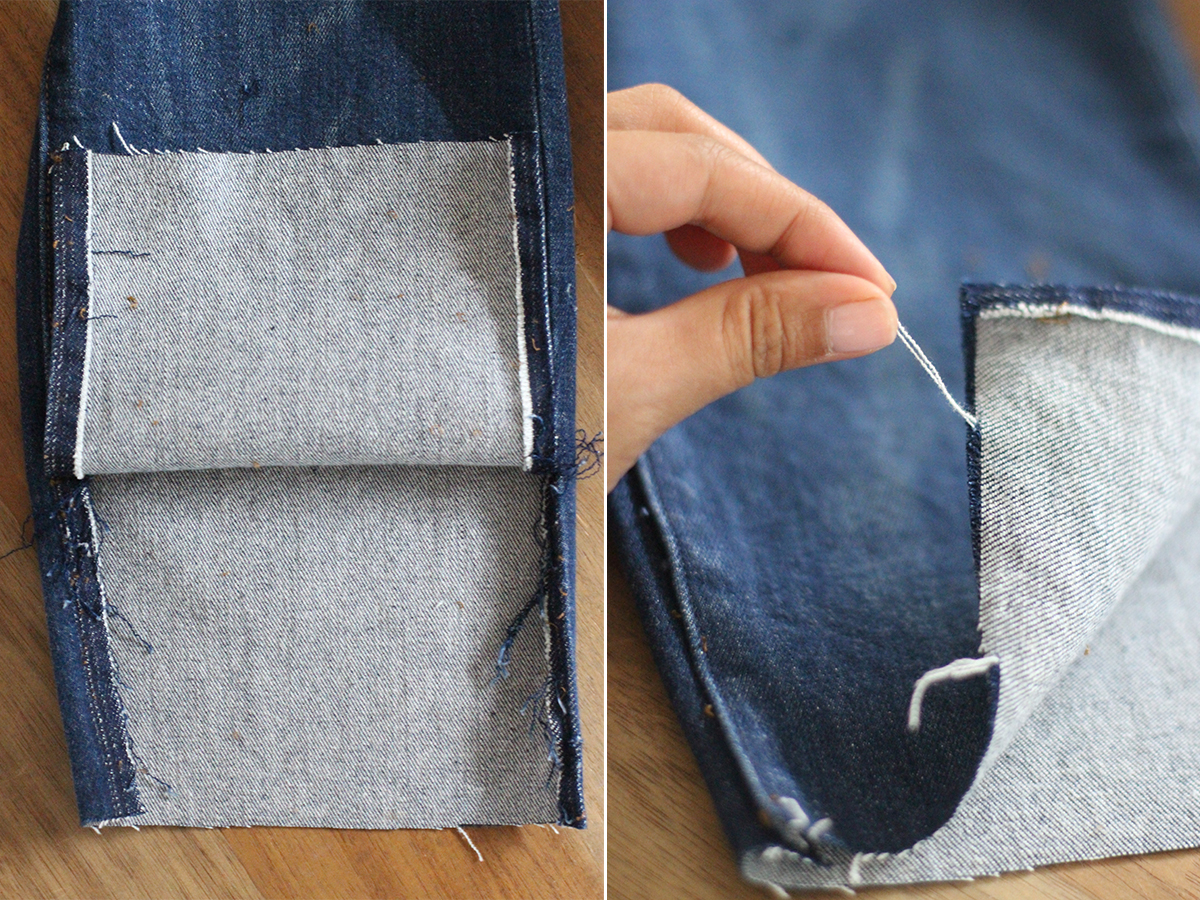
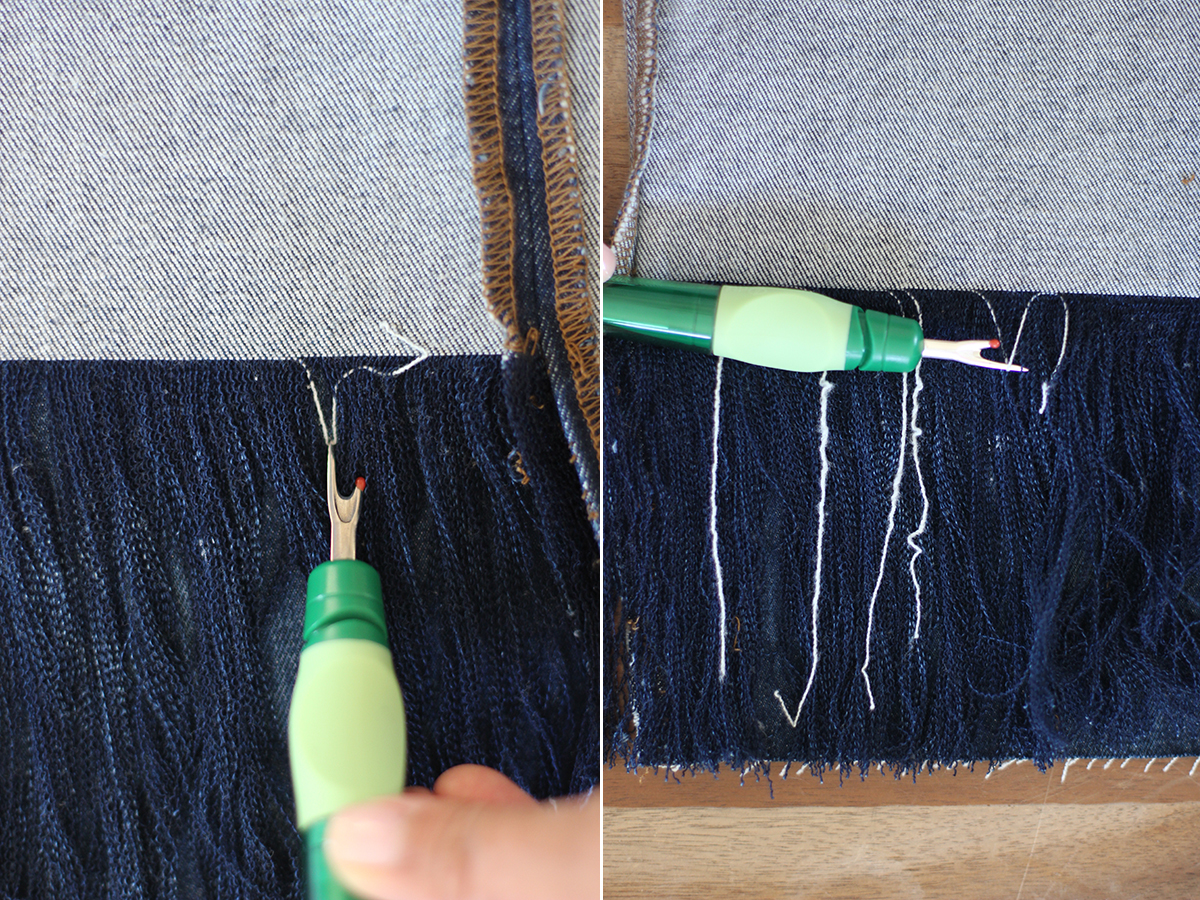
Now here is the trick. If you use the seam ripper to pick out a strand from the far left or right edge and then pull it horizontally, you’ll notice it’ll just slide right out! I say left or right because it just depends on how your jeans were constructed. If it doesn’t work on the left side, it should on the right.
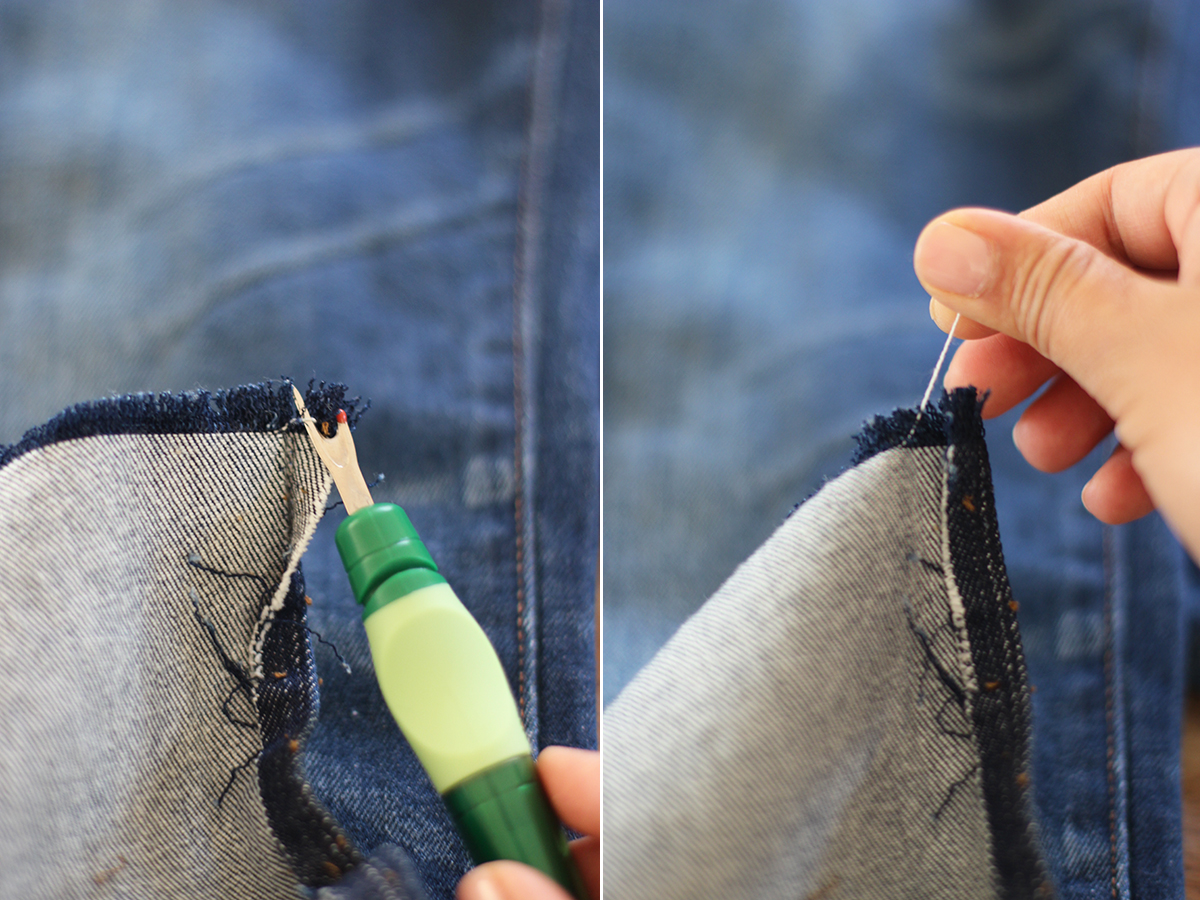
Continue pulling the threads out, using the seam ripper to give you a little head start each time.

Because the white threads are at an angle, you’ll end up with a slight angle when you’ve reached the end of your rip on one side of the leg. Don’t worry, we can adjust that easily.
Pull the threads from the shorter side down (here on the right) and drop them gradually (so that fall from left to right). You can either keep the white threads or remove them by carefully trimming them at the top.
Repeat on all sides. Wash and dry as normal!
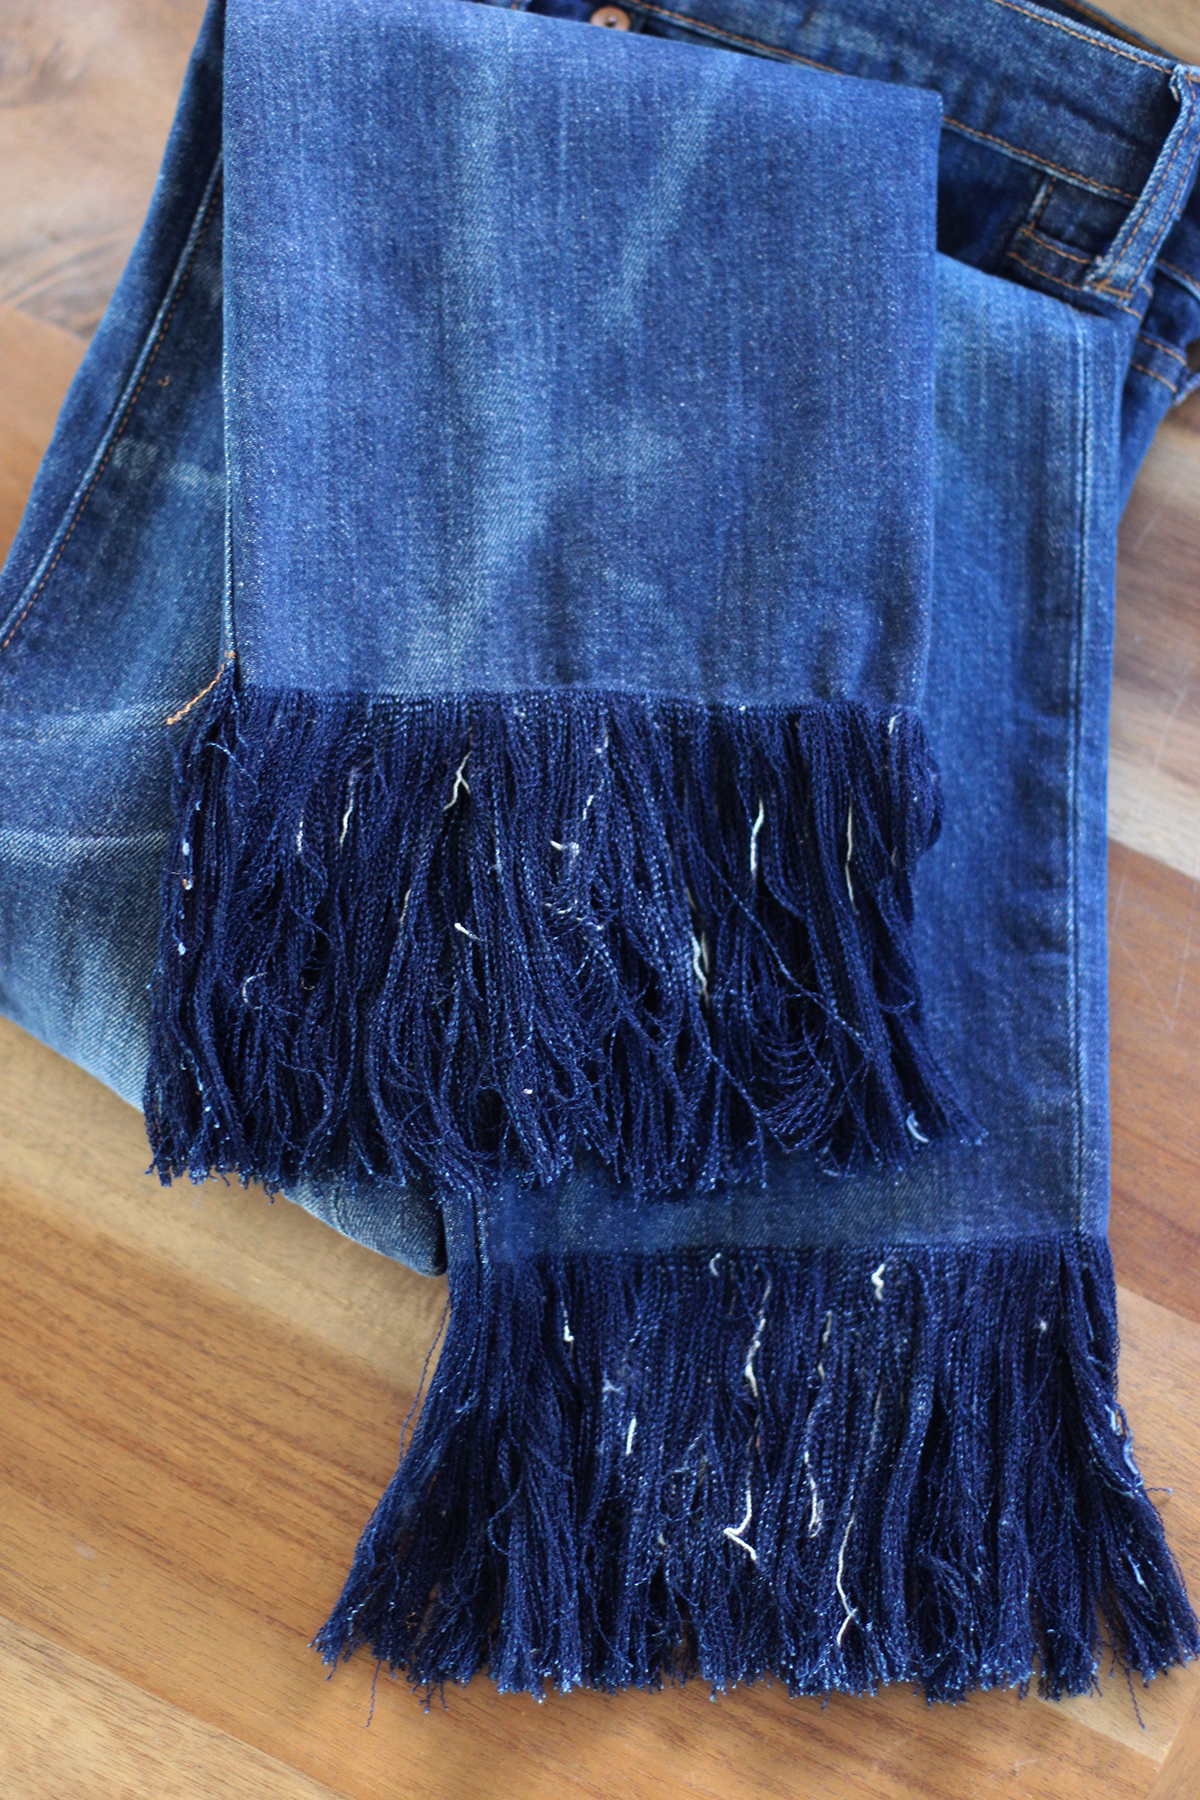
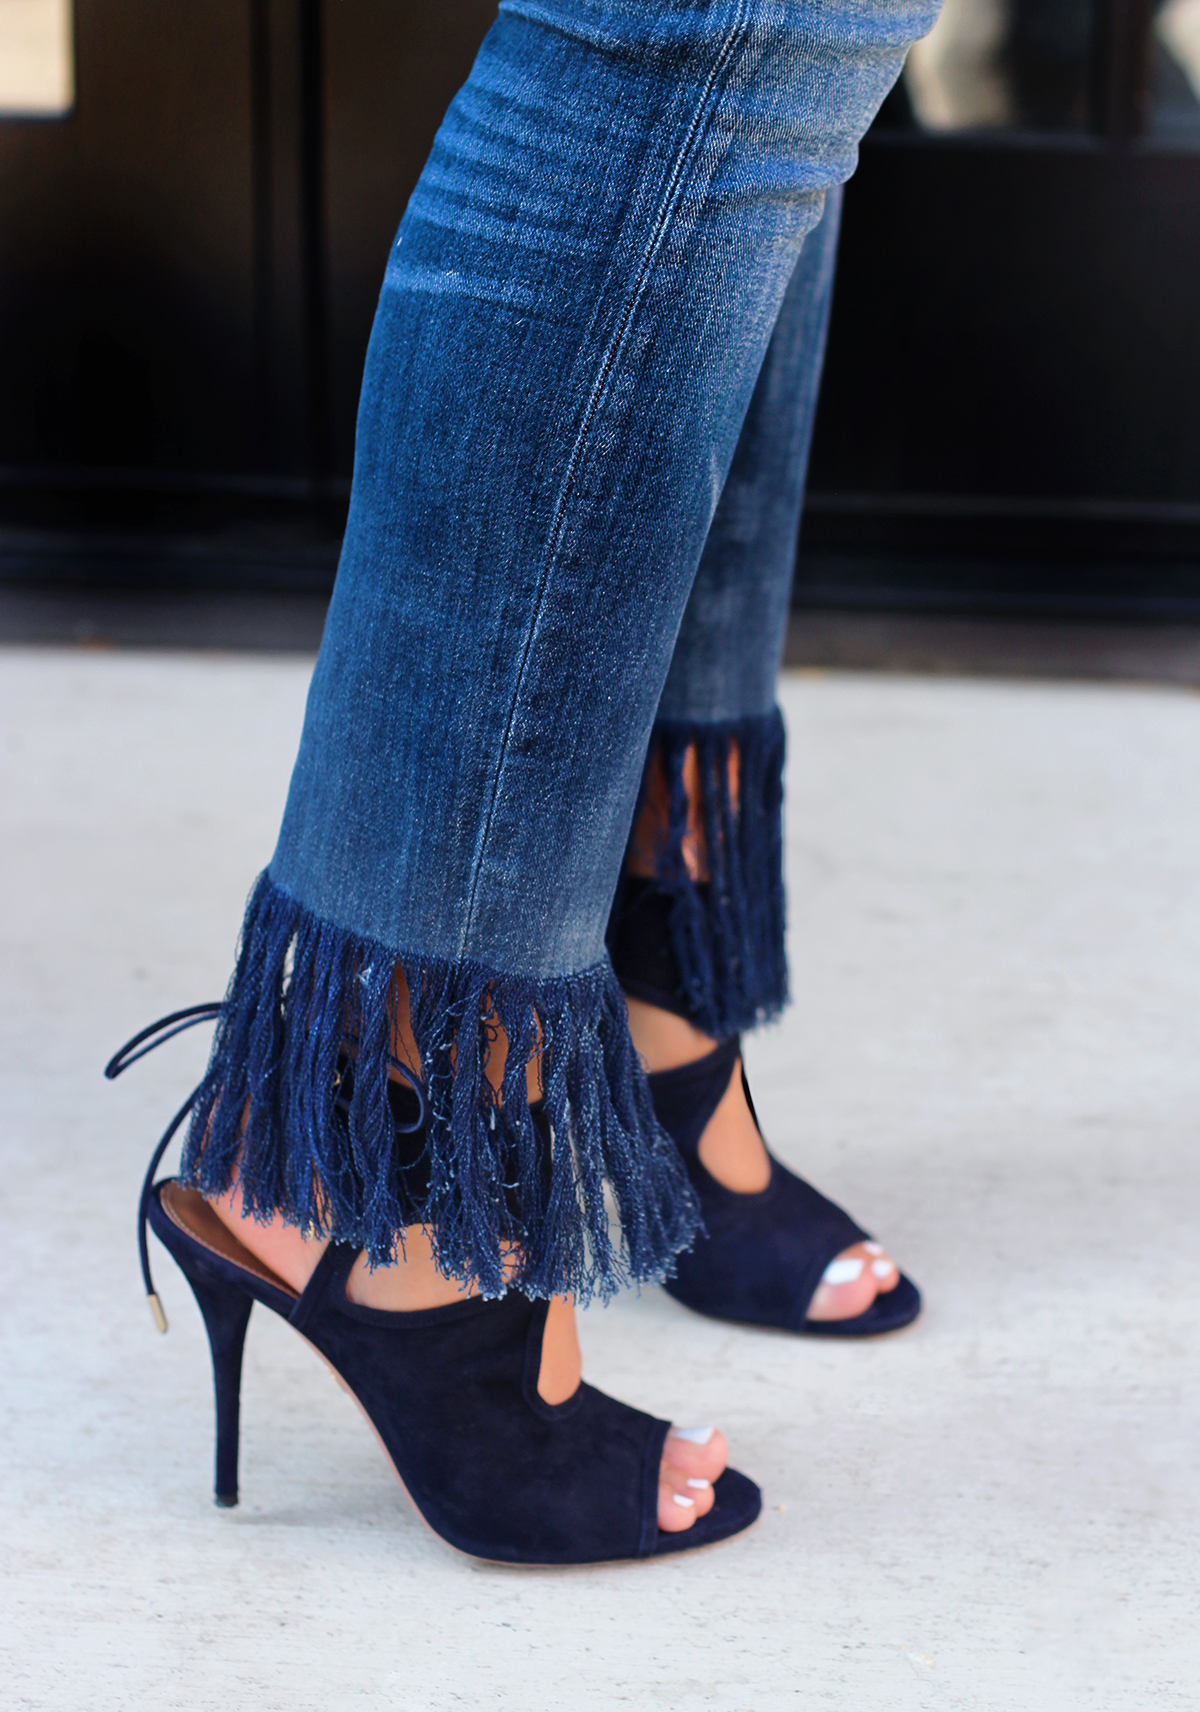
I love the look of the strands of indigo clumped together after they get out of the dryer, but you can always separate them by running your fingers through them. Happy fraying!
(top images via Le 21ème, Vogue & Tommy Ton; rest of images by HonestlyWTF; denim by Madewell, shoes by Aquazzura; 3×1 cropped frayed denim available for purchase here)
Oh, this is a fantastic DIY – especially because I own tons of denims (I don’t wear so far) which would be perfect for this DIY 🙂 Thank you!
xx from Bavaria/Germany, Rena
http://www.dressedwithsoul.com
Love this!!! Frayed denim never goes out of style in my book..but I love that it is back in style.
Fringe is everywhere. Love this idea!
http://www.bluelabelsboutique.com
Ahhhhhh! Bless ye for this DIY. Ankles tingled while reading it!
This is a great DIY!
Alexandra ~ ArtMandy.ro
I LOVE WHEN YOU GET CREATIVE AND NOTHING IS BETTER THAN WORK YOUR JEANS..
WITH LOVE
YAEL GUETTA
http://www.ftwwl.com
I fell in love with frayed denim thanks to Rachel Comey and this is such a wonderful idea to experiment on not so expensive pieces!
Love how fringe details add a fun element to denim! Great DIY, thanks for sharing!
Prudence
http://www.prudencepetitestyle.com
Great idea!
http://beautyfollower.blogspot.gr/
What a special way to upgrade your jeans! I like it, but it kind of reminds me of the 90s…
love this!!
Always love your DIYs, so creative.
Fraying your jeans this way is a brilliant idea, love the edgy look! 🙂
http://fashion-agony.com/
スーパーコピーブランド激安ショッピングモール!ブランドスーパーコピー品ごとにぱっと見て全然違わないほどの外観を持ち、手触りも同じである。当店スーパーコピーブランド商品とともに、高品質と安心をお届けいたします!スーパーコピー 代引きN品をご 購入の方は、こちらへ.弊社は正規品と同等品質のコピー品を低価で お客様に提供します!すべての商品は品質2年無料保証です。100%実物写真ですし、品質が完璧です!”ブランド財布偽物財布コピー ルイヴィトン財布偽物良質なスーパーコピー品を創造します!当社のスーパーコピー代引き、スーコピー腕時計は他社のものより品質がよくて、価格も安いです http://www.eevance.com/tokei/ap
ガス針表「夜光一流、耐震抜群、幸運で正確で、長持ちして丈夫”の品質の特徴になる原因スイスの有名な専門军表旧家。1892年にガス針表から製造専門軍用腕時計、军表製造史百年を超える。ドイツ、イギリス、インドなど多くの国の軍隊は大量に使用したガス針表。戦の間に、イギリスのラクダ特殊兵、イギリス空軍とインド軍は使い捨て http://www.brandiwc.com/brand-super-18-copy-0.html
これは北京の札を2008オリンピック記念で創作の1項のエナメル陀のはずみ車の腕時計、限定30匹。パネライ時計コピーエナメル文字板の上半分は直径0 . 04ミリ黄金素子制のオリンピックスタジアム――鳥の巢、鳥の巢の上に2匹のリュウキュウツバメを振るうように立て、ささやく、鳥の巢の下部の両側の各何枝芽が初の春柳の風に揺れて。柳に陀はずみ車の中華霊燕羽ばたく、腕時計を添えた多くの情趣。全体の時計はデザインの調和、生き生きして、エナメル文字盤のような一
ガガミラノスーパーコピー時計販売、はスーパーコピーガガミラノ時計販売店です . 0.167677356 Gagaコピーの別のアプローチで、この伝統を運ぶ新しい作品は、SIHH 2015 でデビューを作る: Roger デュブイ エクスカリバー自動、スケルトン トゥールビヨンとは、トゥールビヨンの屈強な価格プレミアムなしこの前衛的な美学は、この種の最初の時計 . 主な経営:ガガミラノ スーパーコピーガガミラノ時計、ガガミラノ高品質コピー.2015年人気貴族ガガミラノ コピー安心専門店、一流ガガミラノ時計コピー、ベルト信用第一、良い品質 . レプリカガガミラノ時計Blog: http://www.ooobrand.com/about/index.html
「復古」は腕時計の永遠のテーマは、ポール表今年の設計の中で大量のレトロなデザインを採用したし、設計により濃厚な军表スタイル。そのFiremanシリーズのアップグレード版は完全に参考にしたブランド世紀半ばのアメリカ鉄道標準設計を復刻した時計、その最も経典のデザインを提供したり、多種の文字盤色のオプションに若者の消費者の選択。スーパーコピーエルメス 時計そしてEngineerマスターⅡシリーズの2項の腕時計はいずれも誠意を維持し、偉大な飛行家にライト兄弟をそのOfficer表も金は優雅な将官表遺風、ステンレス後半期式をかぶせステンレス耐磁底を透過サファイアクリスタル透視ガラス、精緻を磨の手動チェーンはムーブメントに輝いて、細かい磨きの蓝刚ネジ軸とルビー目を引き戻すよう人々の思い過去。 http://www.newkakaku.com/chz1.htm
スーパーコピー 代引きN品をご 購入の方は、こちらへ.弊社は正規品と同等品質のコピー品を低価で お客様に提供します!すべての商品は品質2年無料保証です。100%実物写真ですし、品質が完璧です!”ブランド財布偽物財布コピー ルイヴィトン財布偽物良質なスーパーコピー品を創造します!当社のスーパーコピー代引き、スーコピー腕時計は他社のものより品質がよくて、価格も安いです http://www.fujisanbrand.com/pack/shf/index.html
积家堅持日進月歩の革新的な精神を、同時に伝奇潜水表にPolarisの優れた伝統を新しい潜水表シリーズ発売。三種類の異なるスタイル抜群の斬新な内包はそれぞれ、オメガスーパーコピーその中の1項の防水性能1000メートルのケースデザインやコンセプトの斬新な機械式水深計、いずれも出て积家優良な伝統の傑作。本シリーズは画期的なマスターCompressor Diving Proジオグラフィックを搭載し、機械式水深計;そしてマスターCompressor DivingGMTとは時間時計と直径44ミリのマスターCompressor Diving Chronographクロノ腕時計。 http://www.wtobrand.com/prada-bag1.html
ルイヴィトンコピー 偽物激安ヴィトンコピー 販売階のほらを輸入する資格があって、全国の第一項のナイロンのふろしき包みは傲慢なシリーズの女性を配合して包んで、高級で派手で、私達はただふろしき包みの中のハイエンドのブランドだけをしま。ハイエンドのファスナー、私達の採用の高級なファスナーは大工場のOEMからで、ファスナーが順調で滑るのは丈夫で、高品質と高享受。 http://www.bagkakaku.com/RAYBAN_sunglasses.html
ウブロ2のオープニングを祝うために、イベントは大成功だった。ブランドは、貴賓客、時計の高官の300上の友人と、そして、出席しているジャーナリストは、日の光の心が、非常に熱心な事件。 オーデマ・ピゲ時計コピー ジャン・クロード・ビバー、ウブロの最高経営責任者、群衆はジーをステージに向かいました。人々はウブロ宗教とはまだサポートブランドにもかかわらず、彼らを生産している時間がわかることができないのを見て彼らに続くことを冗談として(すべてのブラックビッグバンを見つけ、ビバー評判を読むことは不可能を参照)において、群衆の百日の歓呼で応えました。 http://www.brandiwc.com/brand-super-29-copy-0.html
継初北京後、今回のTIMEX(タイメックス)大型展開は洛陽、東莞、連雲港、深セン、武漢、上海の多数の都市が行われ、TIMEX(タイメックス)「時て進む」新ブランドイメージ各地の消費者に渡す。シャネルスーパーコピー150年の発展の過程の中で、TIMEX(タイメックス)を溶け込んで伝統工芸科学技術創造表、絶えず製品開発を突破し、開発した様々な特許制品で、消費者が求めるニーズについていく、時代の歩み。今回の新ブランドポジショニングを継承してTIMEX(タイメックス)の持論の進取、執着して、前進のブランドの精神、同時にと三項を組み合わせて大明星表。「時に行く」の全体的な位置で、活動現場の全体設計はファッションシリーズSLバラ金全自動機械表の強靭力強く、アウトドアシリーズ潮汐温度羅針盤表の実用的な機能、ファッションシリーズTシリーズ多機能クロノパンパンの靑春を表現する自信に遺憾なく。 http://www.ooowatch.com/tokei/vuitton/index.html
I love this! Thanks for the DIY, I used this method to fray a pair of longer denim shorts. They were my favorite for summer!
I’ve been looking for a pair of jeans like this for weeks; who knew they were just hiding in my closet! Thank you for this DIY, I’m so excited to transform some denim!
This is a great idea!
( https://www.thetaylorsauce.com/health-beauty-tips/ )
Wow thank you very much, I’ve learned a lot from you dear.
It takes a long time to fray even 1 inch