
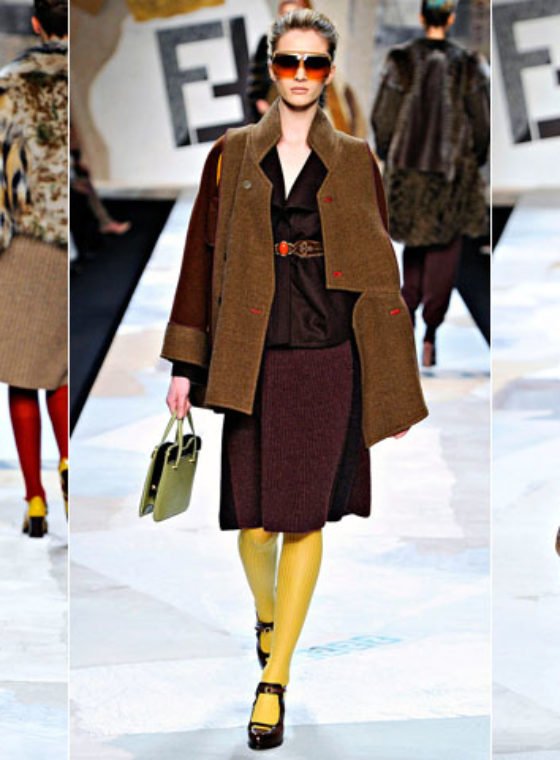
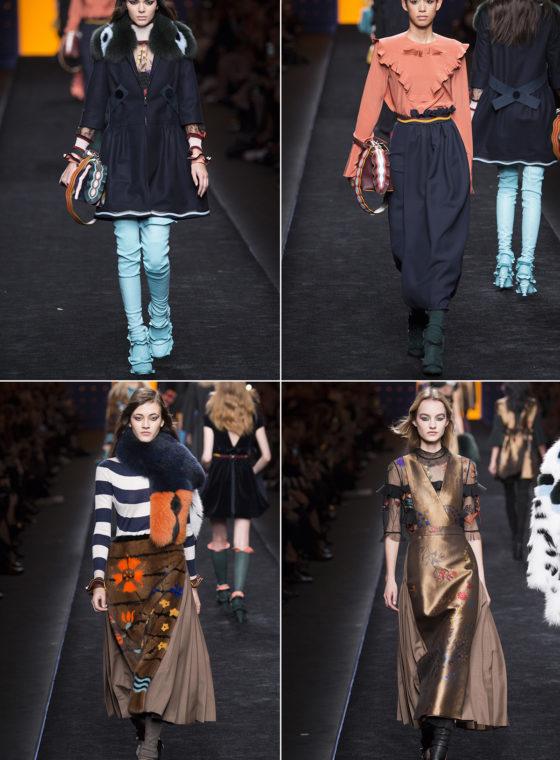
It was love at first sight when we laid eyes on the amazing oversized, billowy, ruffled frills adorning the Fall 2010 runway looks at Fendi. We immediately wanted one and just couldn’t imagine having to wait another several months to actually see these frills materialize. With some research, persistence, and umpteen botched attempts, we finally figured out a fail-proof pattern. And obviously, we’re sharing it with you!

You’ll need:
- 2 pieces of wool felt
- 2 pin backs
- a few buttons
- a few pins
- a hot glue gun
- a sewing machine
- a pair of fabric shears
- an iron
- our frill pattern

For a fuller and longer frill, print the pattern as it is on 11″ x 17″ paper at 100%. For a smaller frill, reduce the size of the pattern and print on normal 8.5″ x 11″ paper. Carefully cut out the volute-shaped pattern, stack, and pin onto the two pieces of stacked felt. Using the pattern as a guide, cut out the felt. While keeping the two pieces of felt stacked, pull the two pointed ends taut. A ruffle will be created on one side and a straight line on the other. (Click images to enlarge)

Sew the felt together along the straight side, with a 1/4″ inseam, down to the end. Trim any extra threads. Open the frill. Spread the seam apart on the backside and press it open using the tip of a hot iron.

Run a zig zag stitch down the center of the front side of the frill. This will keep the back seam open and flat, giving the frill structure and shape. Glue or sew buttons along the front stitch. Flip the frill over and glue or sew a pin back at the top and another at the bottom.

Your Fendi-inspired frill is finito!

Pin the frill to any blouse, shirt or dress. Make it smaller, make it larger, add less buttons, add more buttons . . . make it to your liking and have fun!

(all images by Honestly…WTF)
oooh, VERY nice!!
january, x
jessicajanuary.com
love the step by step! gives me motivation to actually do a DIY.
http://wordbyjessie.com/
Wow!! That is a really good DIY and it looks so easy AND good!!
Respect
Love this!
xx
maya
mmmhmmm, you guys are super duper clever.
Seriously, what can you girls not do! I love all your DIY tutorial and your posts always introduce something new to me. Love!
Freaking amazing!!
LOVE THIS!!!! Adding it to my TO-DO list…will be perfect for fall….and maybe in a lace for spring!
more ideas plizzzz!!
Omgosh, so easy to do and so CUTE!! I’d totally wear it on a red plaid oxford shirt I own, and then a girly skirt!
very cute and creative.
http://www.fashionablecollections.blogspot.com
Can’t wait to try this!
rebellefleur713.blogspot.com
really fantastic!!! i love wtf….you re doing a great job. the diys are fantastic!
guten tag!
That looks really good, I love seeing a nice DIY. great job. Im new to your blog… will be checking back
this was on my to do list! you just saved me the hours of practice so i can get right in there and make one. i am majorly excited. now i can start saving my pennies for EVERYTHING ELSE on that runway 🙂
that’s realy cool! I’d love to participate to your little diy game next time!!!
http://remplirlesblancs.blogspot.com/
Wow- so creative and fun! Nice work! xo
http://tryitonmegirl.blogspot.com/
Wow! that’s so amazing:)
LOVE IT!
I just made this, thank you so much for the pattern! I can’t wait to wear it 🙂
I dont have a sewing machine, will u make me one of the frills and sell it please? got an etsy shop perhaps?
please let me know
sungirl2727@gmail.com
SO awesome! You translated the inspiration perfectly! Can’t wait to try this out.
I just tried making two of these, thank you so much for the pattern! I love wearing them, I posted pictures of the ones I made:
http://fashionhacks.blogspot.com/
Your frill looks better than Fendi’s, IMHO. <3
Pretty fab recreation! We featured your DIY on our blog for pear-shaped girls, with proper credits, I hope that’s okay. Let us know if not!
The design was absolutely marvelous. I love own design items rather than the common ones. No doubt but gorgeous.
this is so cute! I love when the runway can be DIY, great idea!!
i absolutely love this..! and just made myself one in a matter of minutes… and shared on my blog, crediting this tute!
http://theymaysaythatimadreamer.blogspot.com/2011/12/diy-urban-cowboy-inspired-frill.html
j’adore,
dorothy
I LOVE ALL YOUR DIY!! I’ve mencioned some of your DIY on my blog, (and also your blog) Hope you see it!
http://tillidroveherwild.blogspot.com.es/2012/12/diy.html
I just wanted to let you know, that someone translated your tutorial in Russian and giving it out as her own, take a look here http://www.burdastyle.ru/master-klassy-ot-polzovateley-rukodelie/statya/zhabo-ot-fendi-svoimi-rukami
Love this! After watching 3:10 to Yuma, I’ve been wanting to diy something Western-y. This is the perfect way to make the look a little girly!
lovely, i still couldn’t figure out how to put it on to a shirt. 🙂 do i have to saw it in or wua? 🙂
Fantastic idea and I am going to do this for my favorite shirt
These are truly enormous ideas in concerning blogging.
You have touched some nice things here. Any way keep up wrinting.
Wonderful article! This is the type of info that are supposed to be shared across the web.
Disgrace on Google for no longer positioning this
post higher! Come on over and discuss with my website .
Thanks =)
I love this DIY… Thank you !!
I’m going to share your post on my french blog ! 😉
This site was… how do I say it? Relevant!!
Finally I’ve found something that helped me. Thank you!
Oh my god !! I love it!
Thanks a lot for this wonderful tutorial. I’ve learnt something new. God bless you.
this is seriously gorgeous. thanks for the inspiration and clarity.