
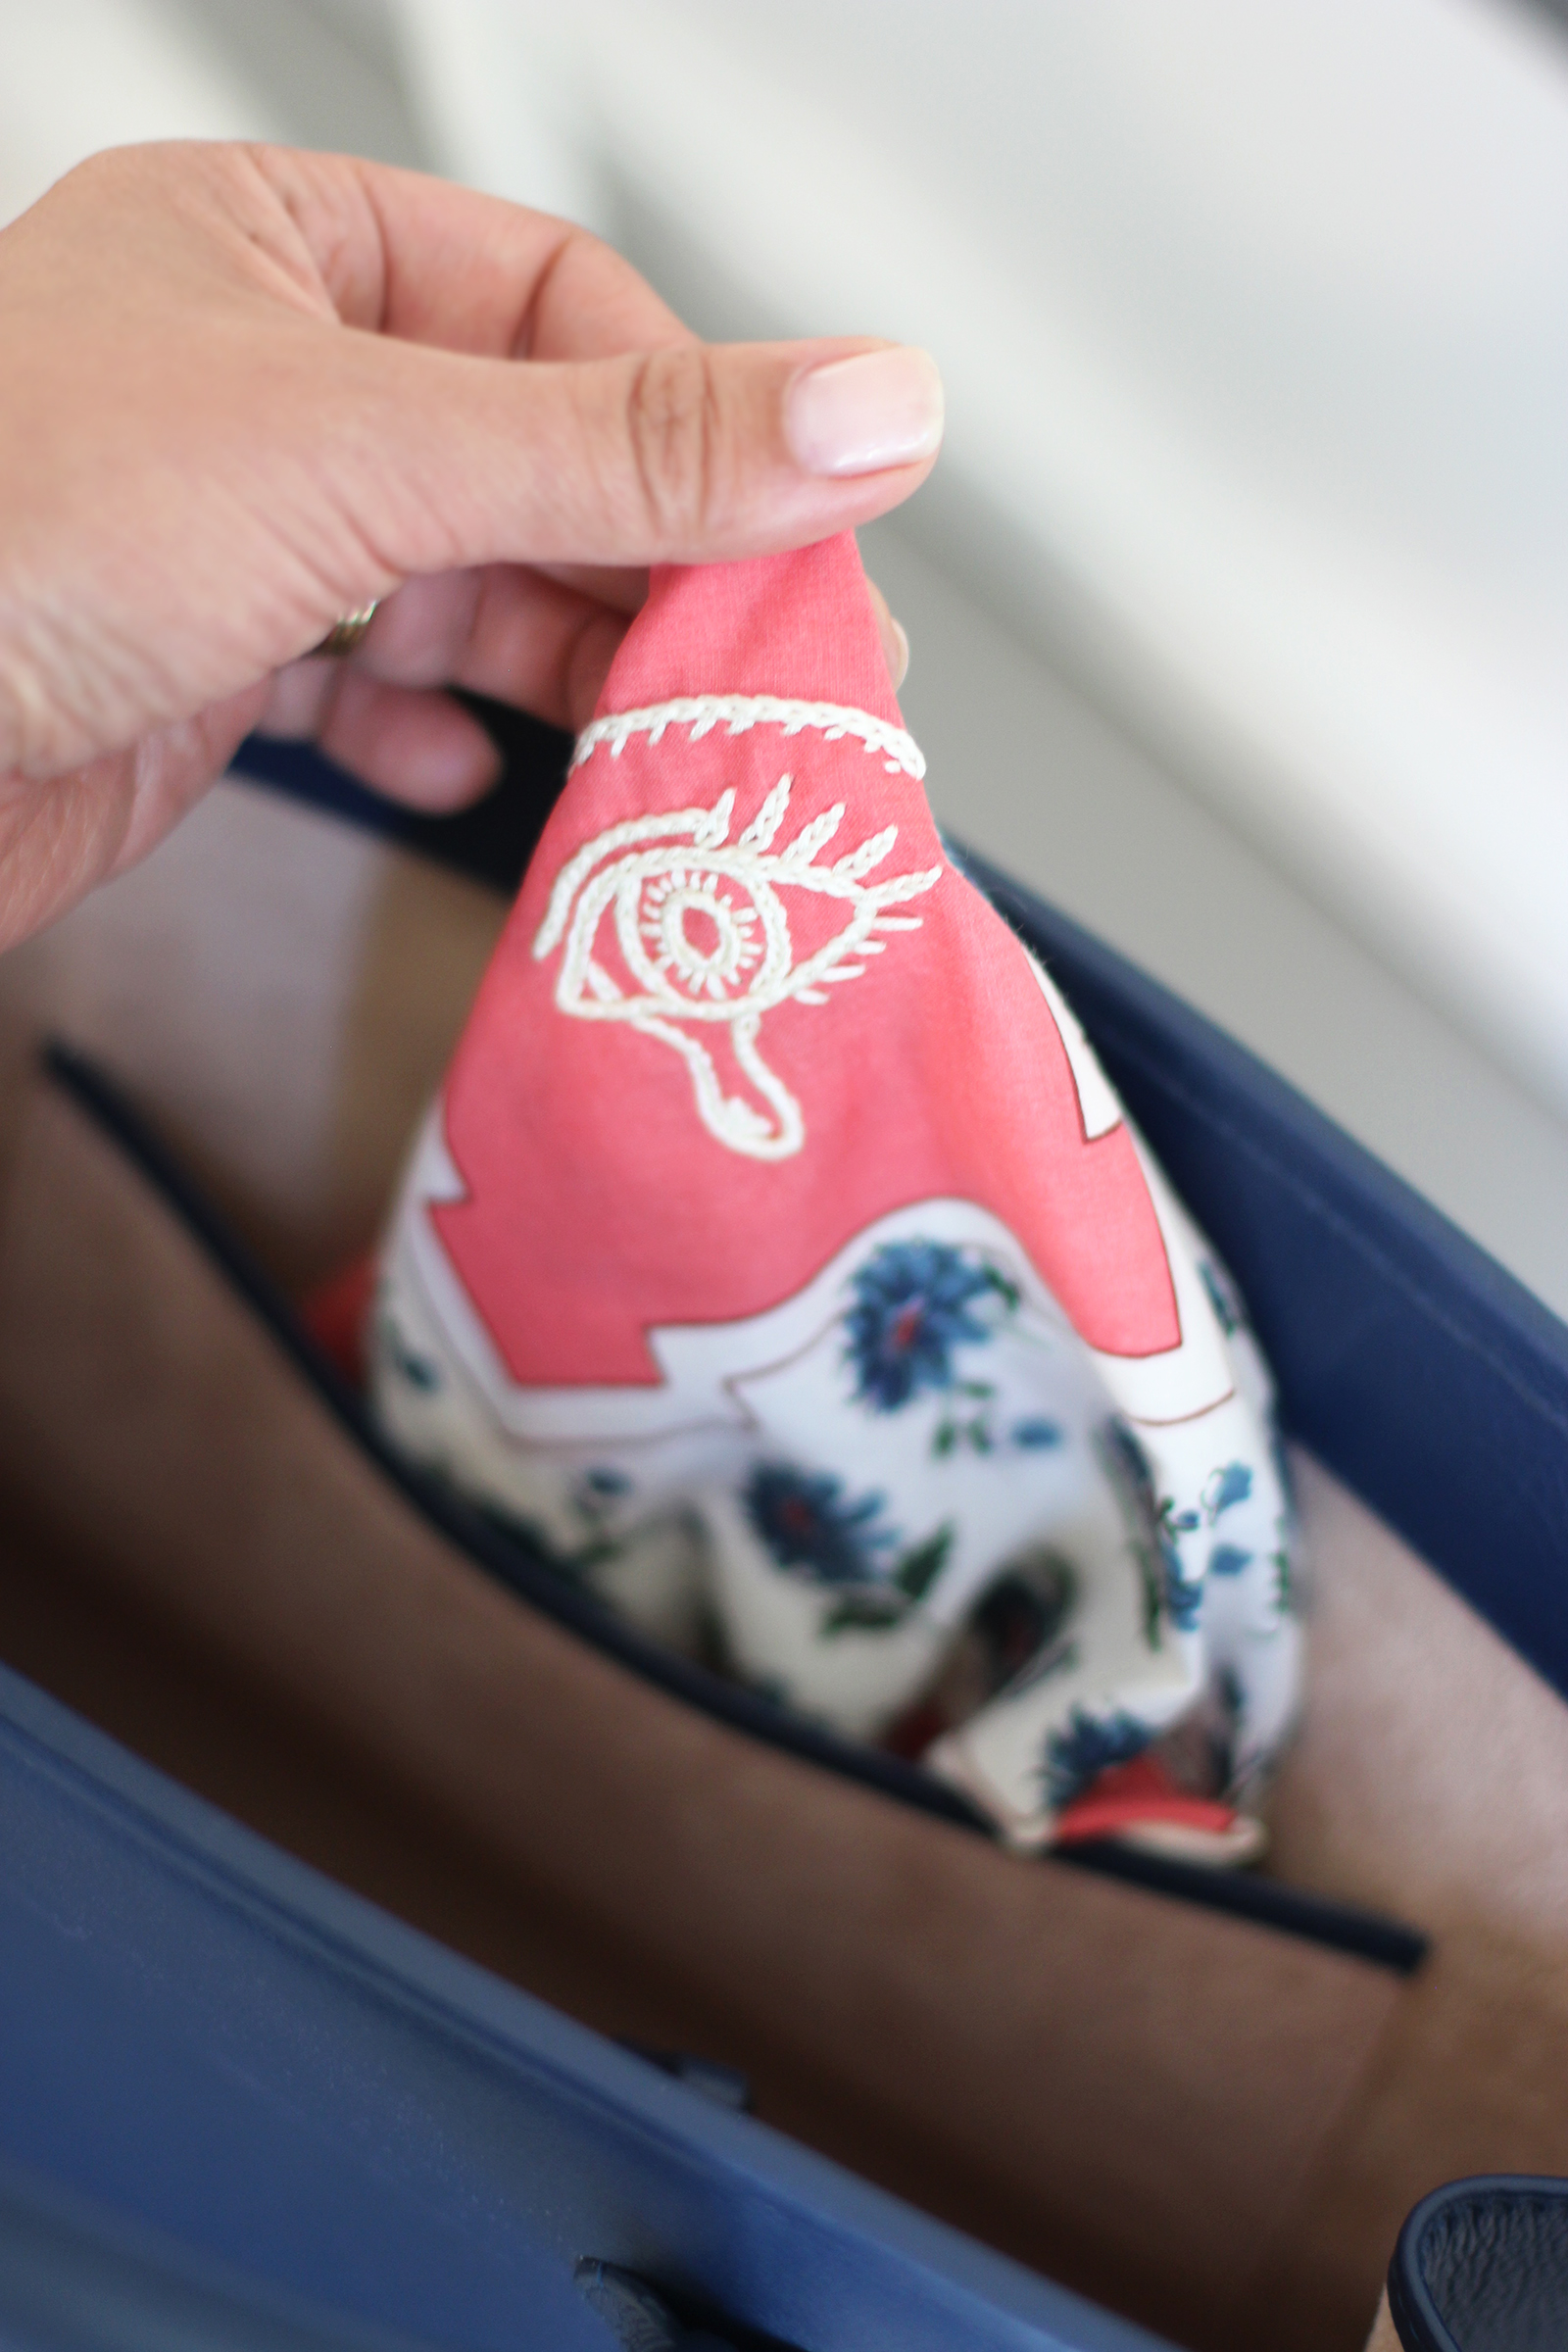
For as long as I can remember, my dad has never been without a handkerchief in his pocket. And I can’t tell you how many times he’s come to my rescue with one – even to this day, when I far too often find myself without a tissue in the most vulnerable situations. Surprisingly enough, I’ve never purchased one until recently, when I came across a lot of adorable handkerchief squares at my local fabric store. They were just begging to be embroidered, so of course I bought 10. Today, I’ll show you how to make a stem stitch, a more versatile cousin to the chain stitch, so that you, too, can be inspired to make and gift you or a friend a chic handkerchief!
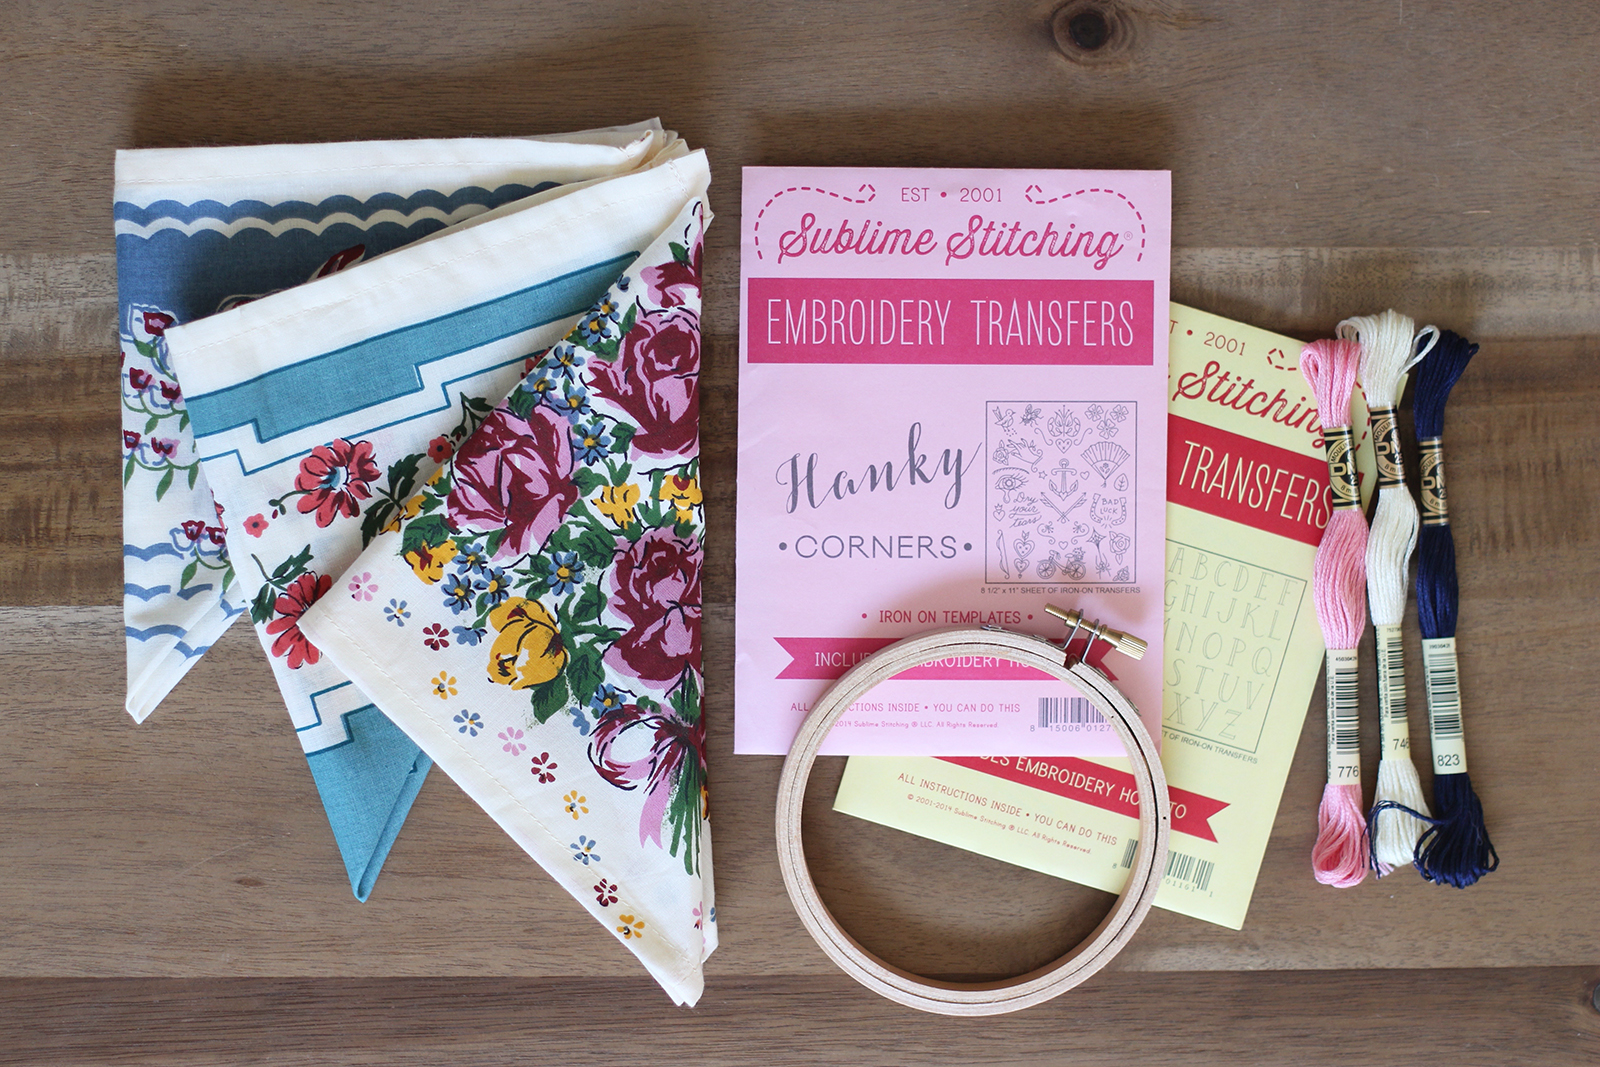
You’ll need:
- handkerchiefs
- embroidery floss
- embroidery transfers
- 4″ embroidery hoop
- embroidery needle
- iron
- scissors
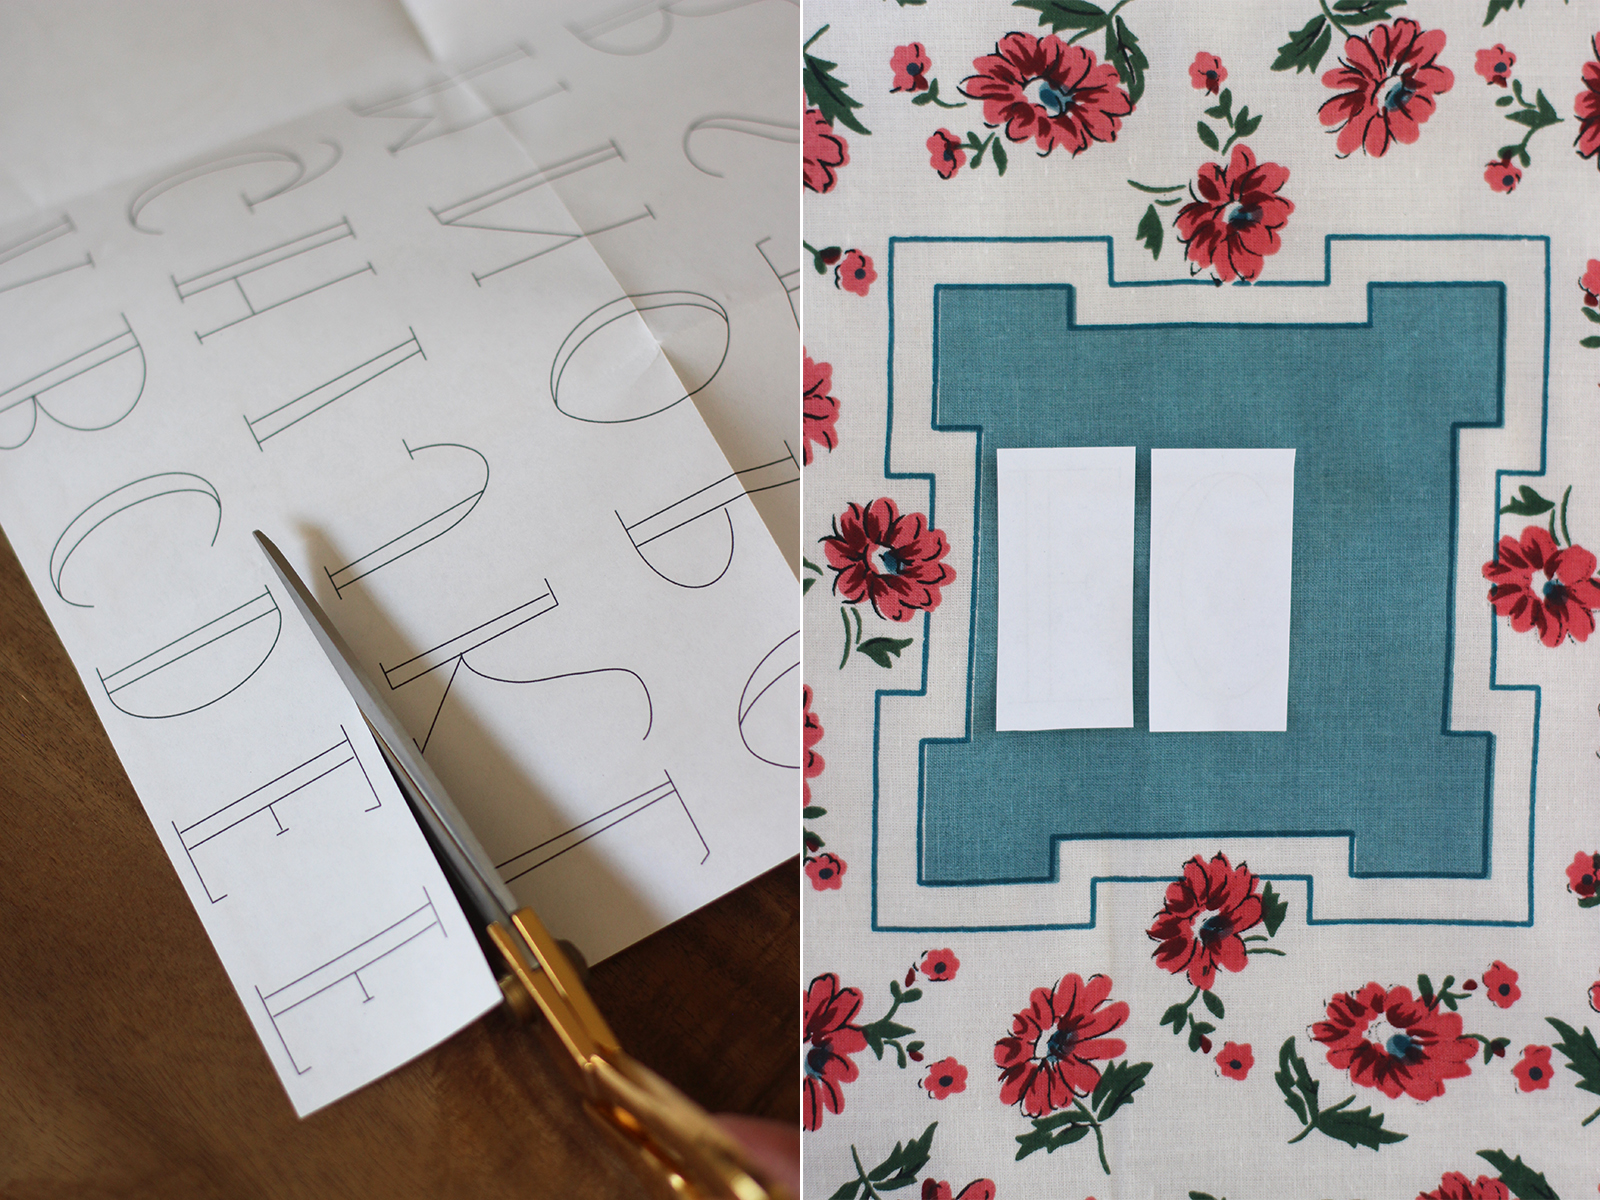
Start by cutting the desired pattern, design or letters from the embroidery transfer pack. Lay the designs face down onto the handkerchief, which should be ironed flat.
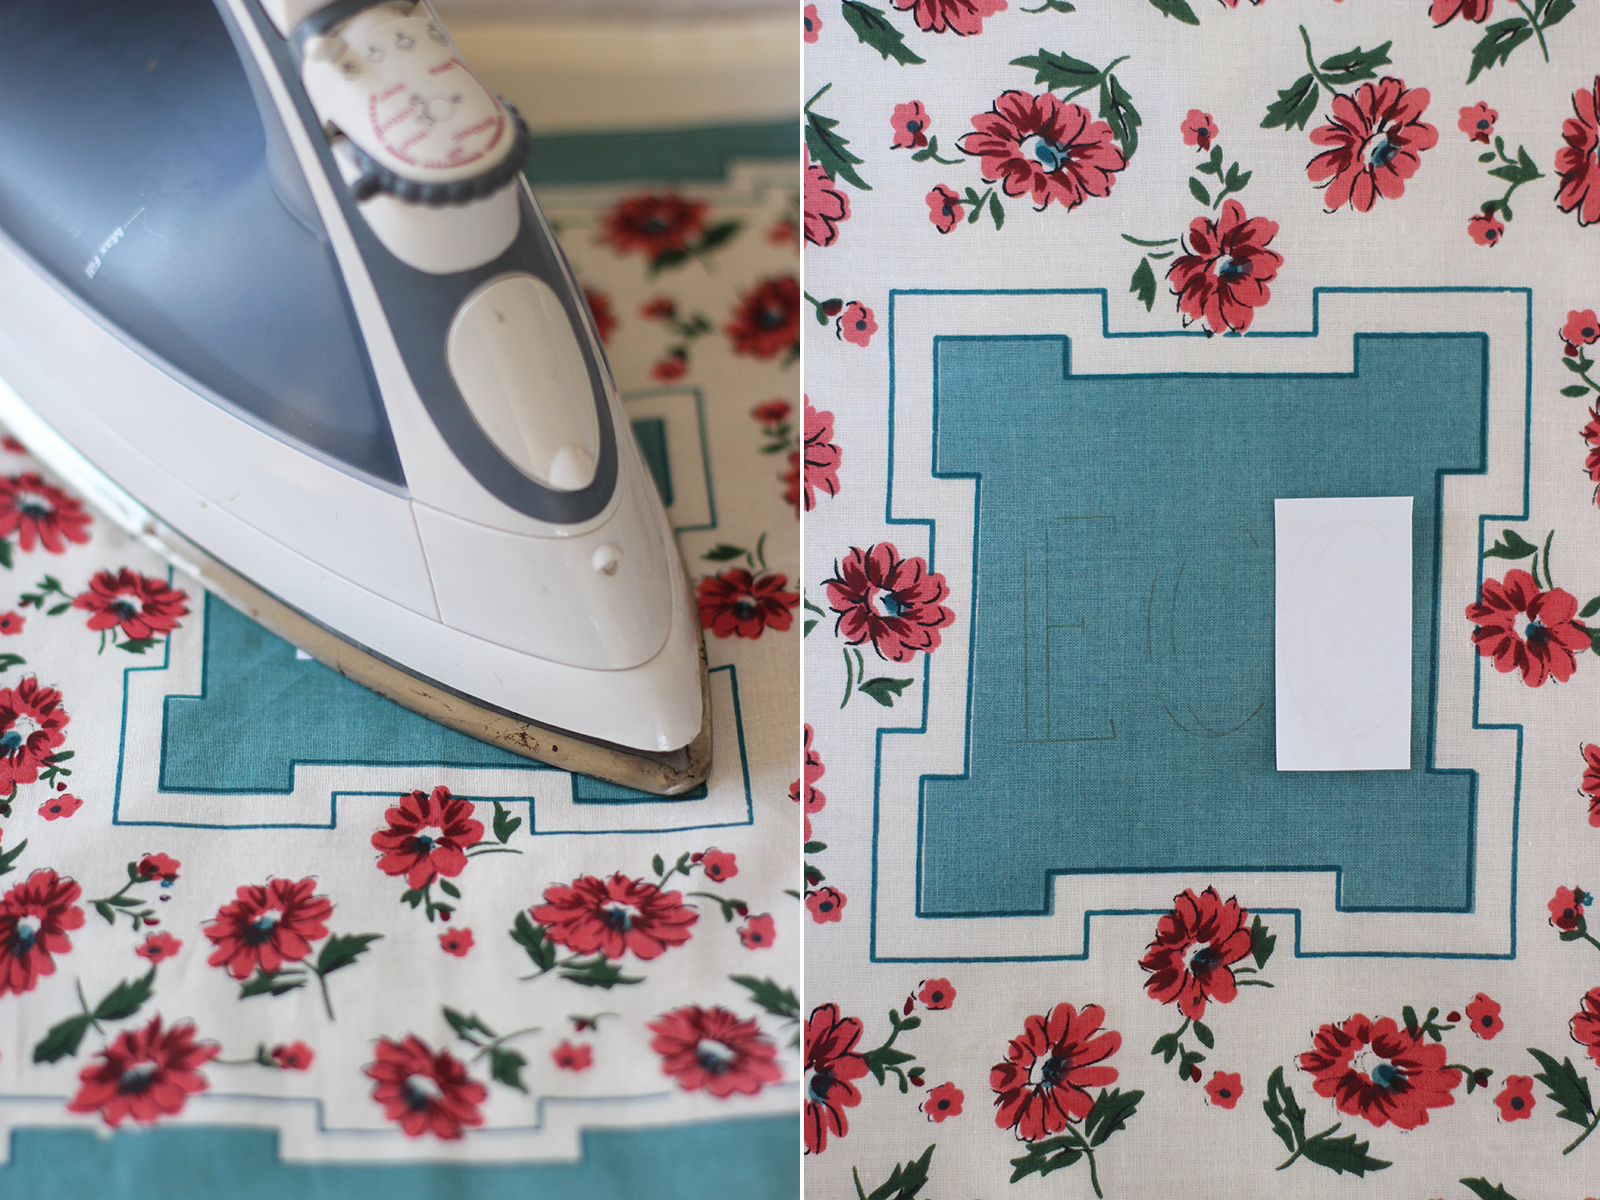
With the iron on high and dry, press the transfer onto the handkerchief. You can move it back and forth gently, just be sure not to shift the pattern. You also pin the pattern down first before ironing to ensure it says in place. Carefully lift one of the corners to make sure the design transferred onto the fabric.
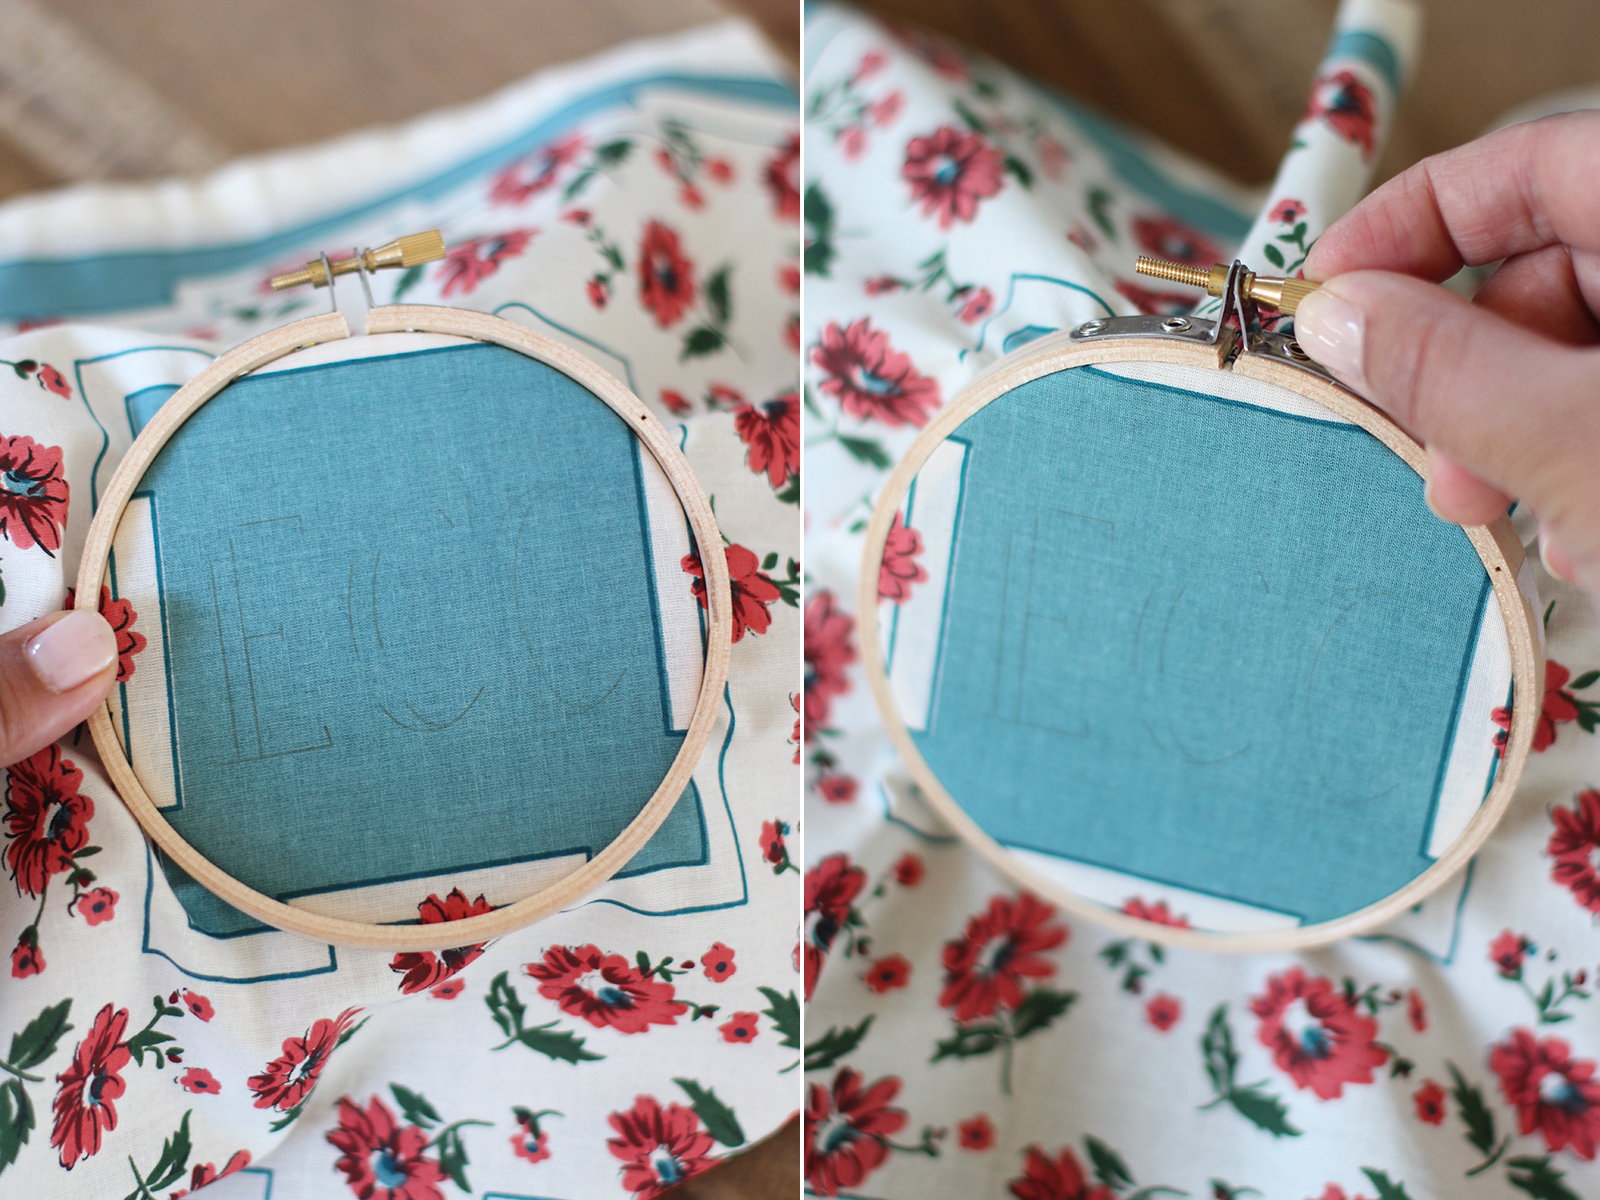
Separate the embroidery hoop. Lay the handkerchief over the inner hoop and lay the outer hoop over it. Tighten hoop until the fabric is taut.
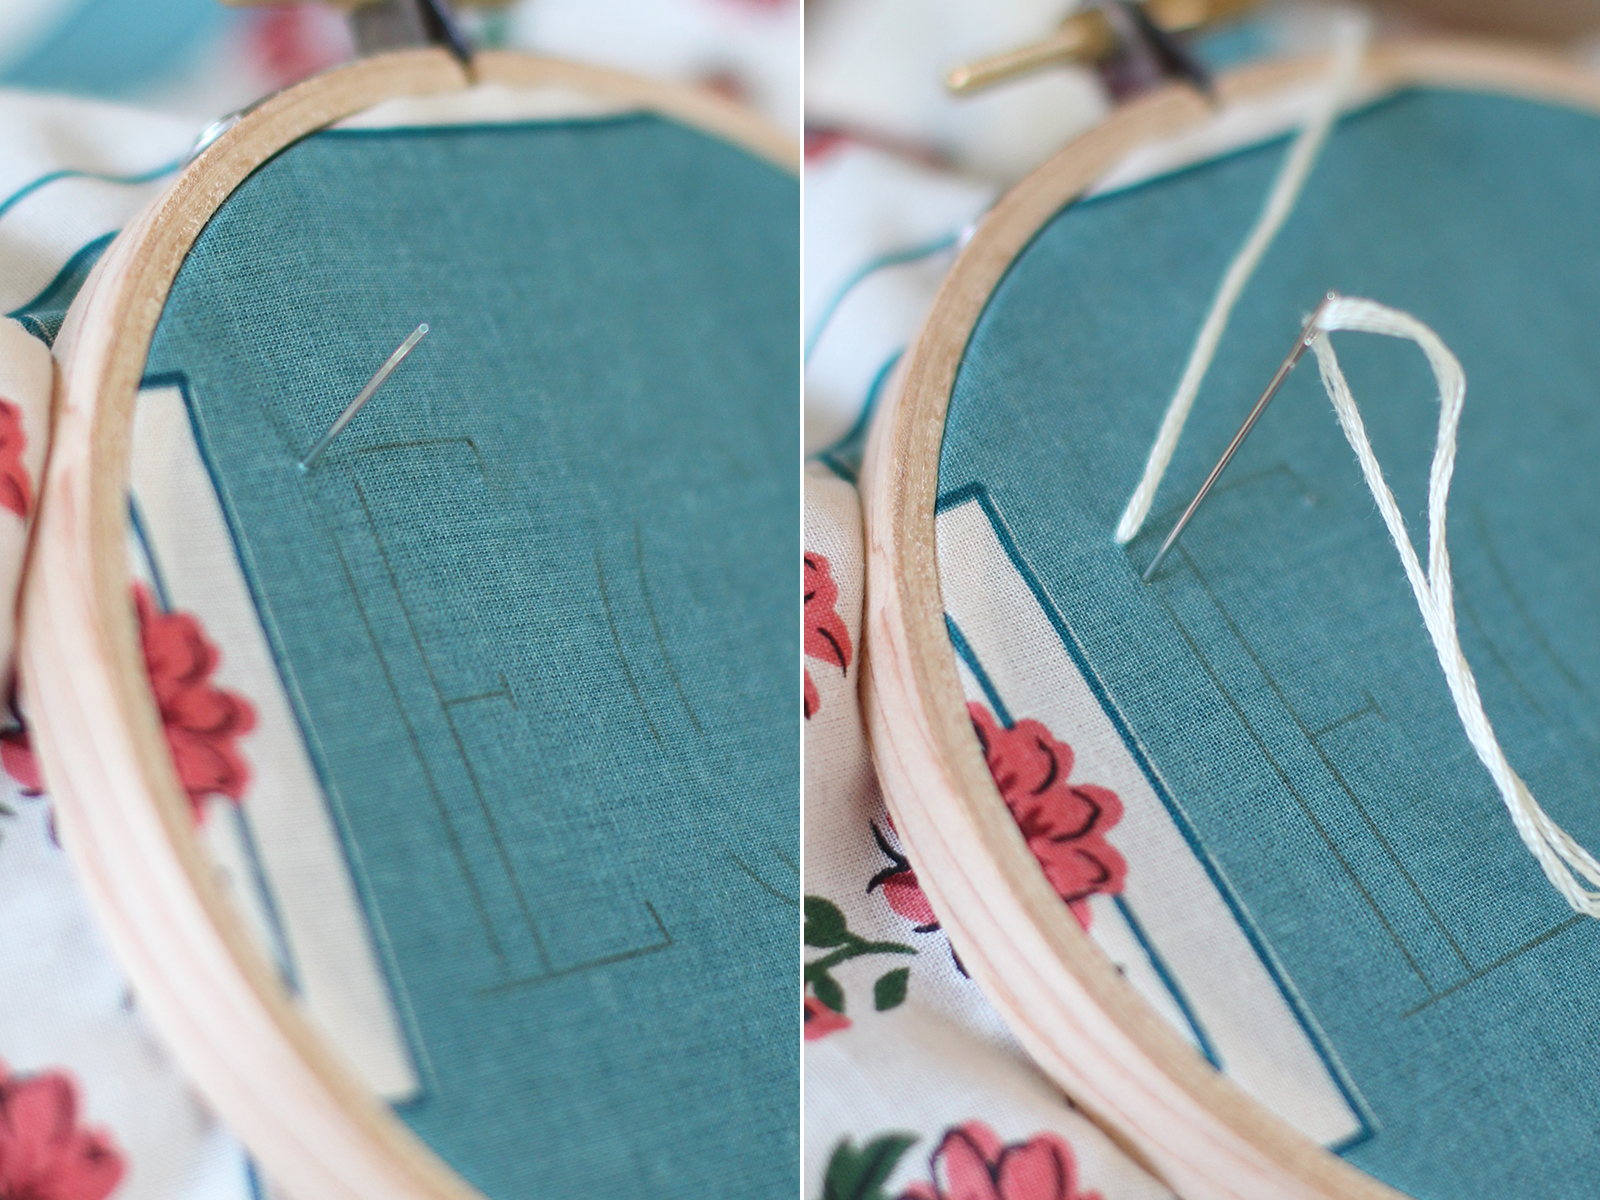
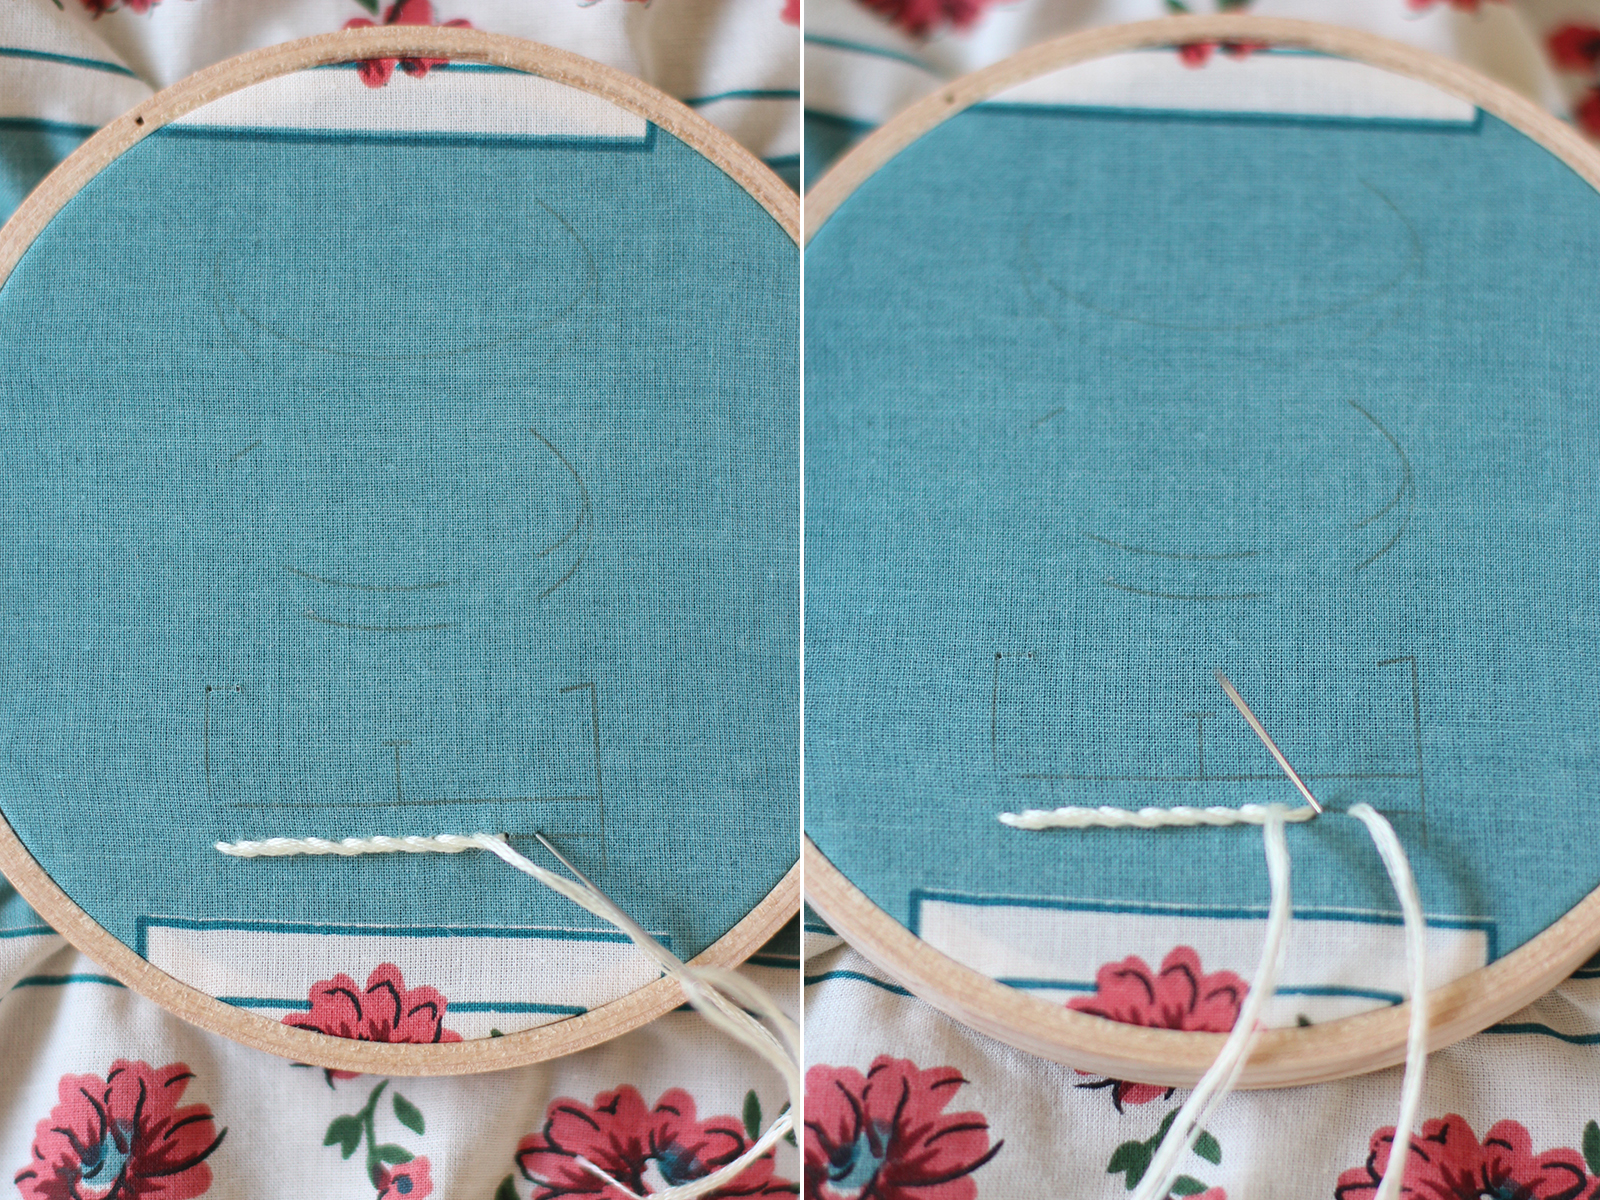
Thread the needle with embroidery floss, tie the end into a double knot and bring it up from the far left corner of the design. Bring it back down a stitch length away but don’t pull it all the way through.
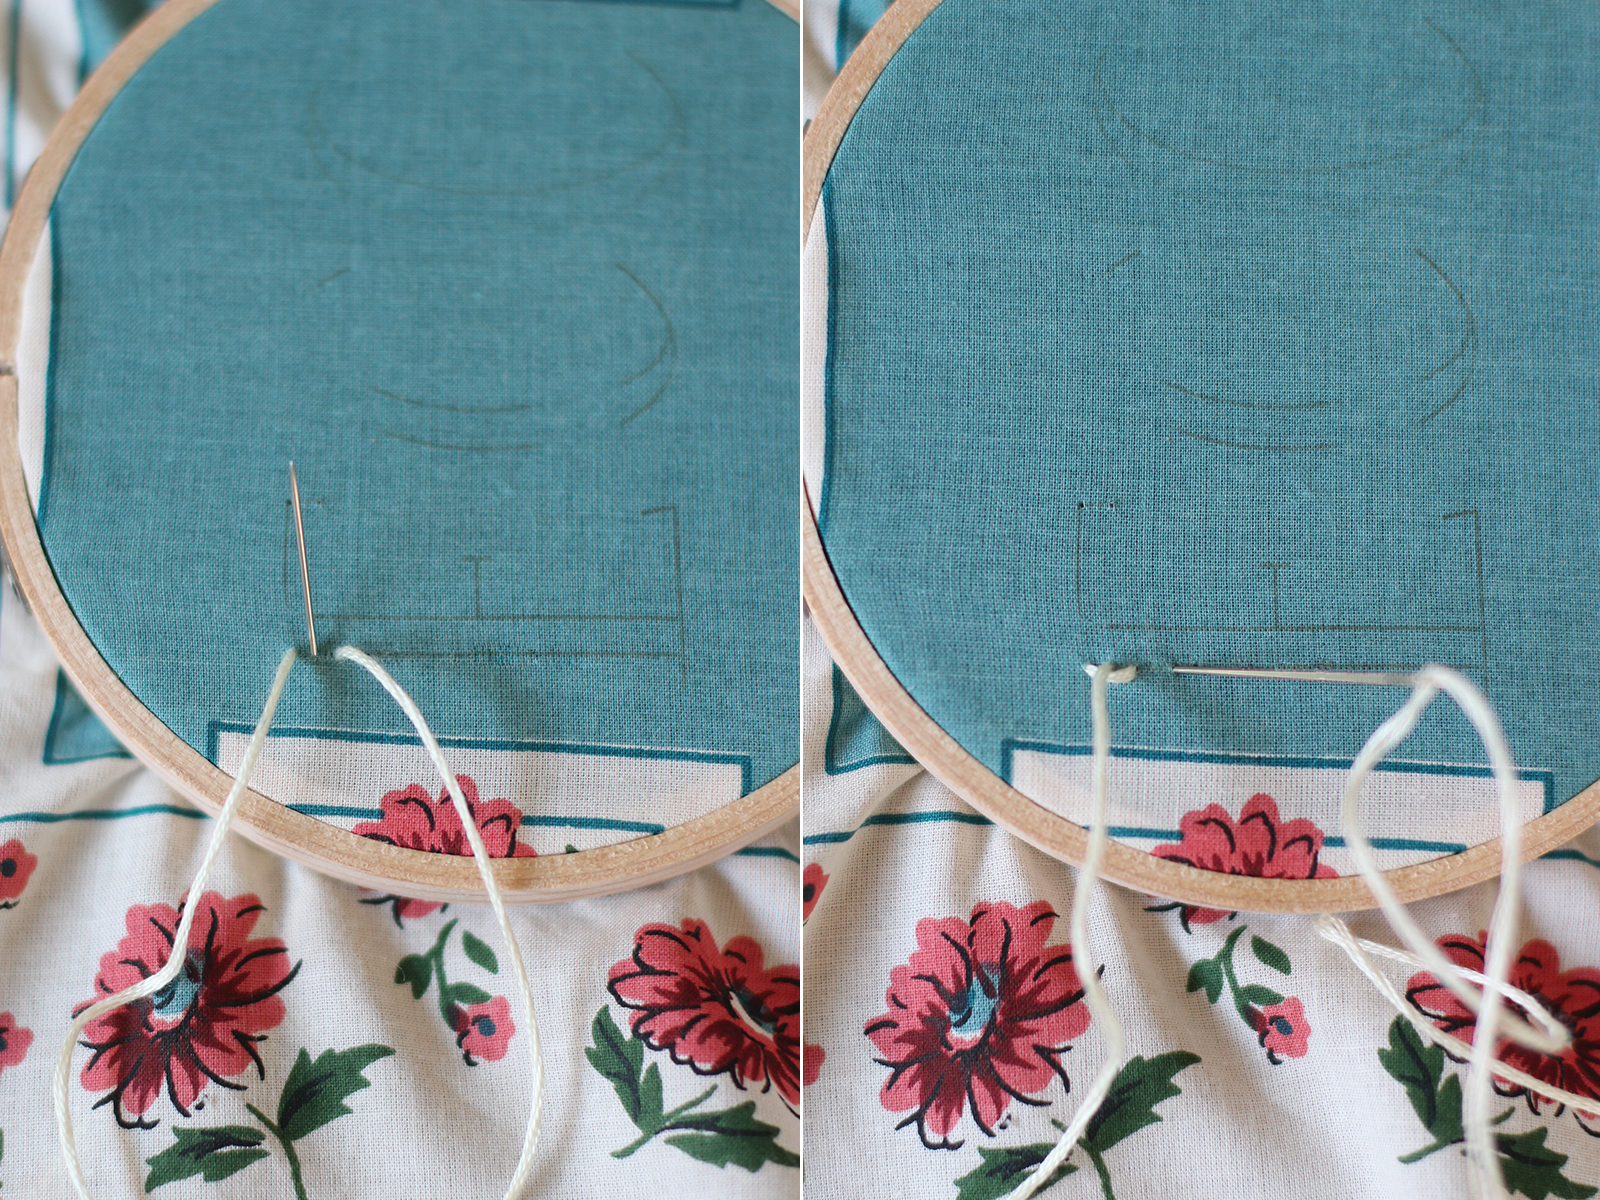
Put the needle back up between the first and second hole and pull tight. Each time you should make sure the working thread – the thread that already on the surface – is BELOW the needle. You’ll notice in the photo below that the looped floss is below the needle. This will ensure that the stitches all face the same direction. I like to rotate the hoop so that the lines I’m embroidering are always parallel to myself so I know to always keep the working thread downwards. Next, push the needle down through another stitch length away . . .
Don’t pull the floss all the way through. Leave a loop and now pull the needle back up – but this time, right below the first stitch. Remember, keep the working thread below the needle!
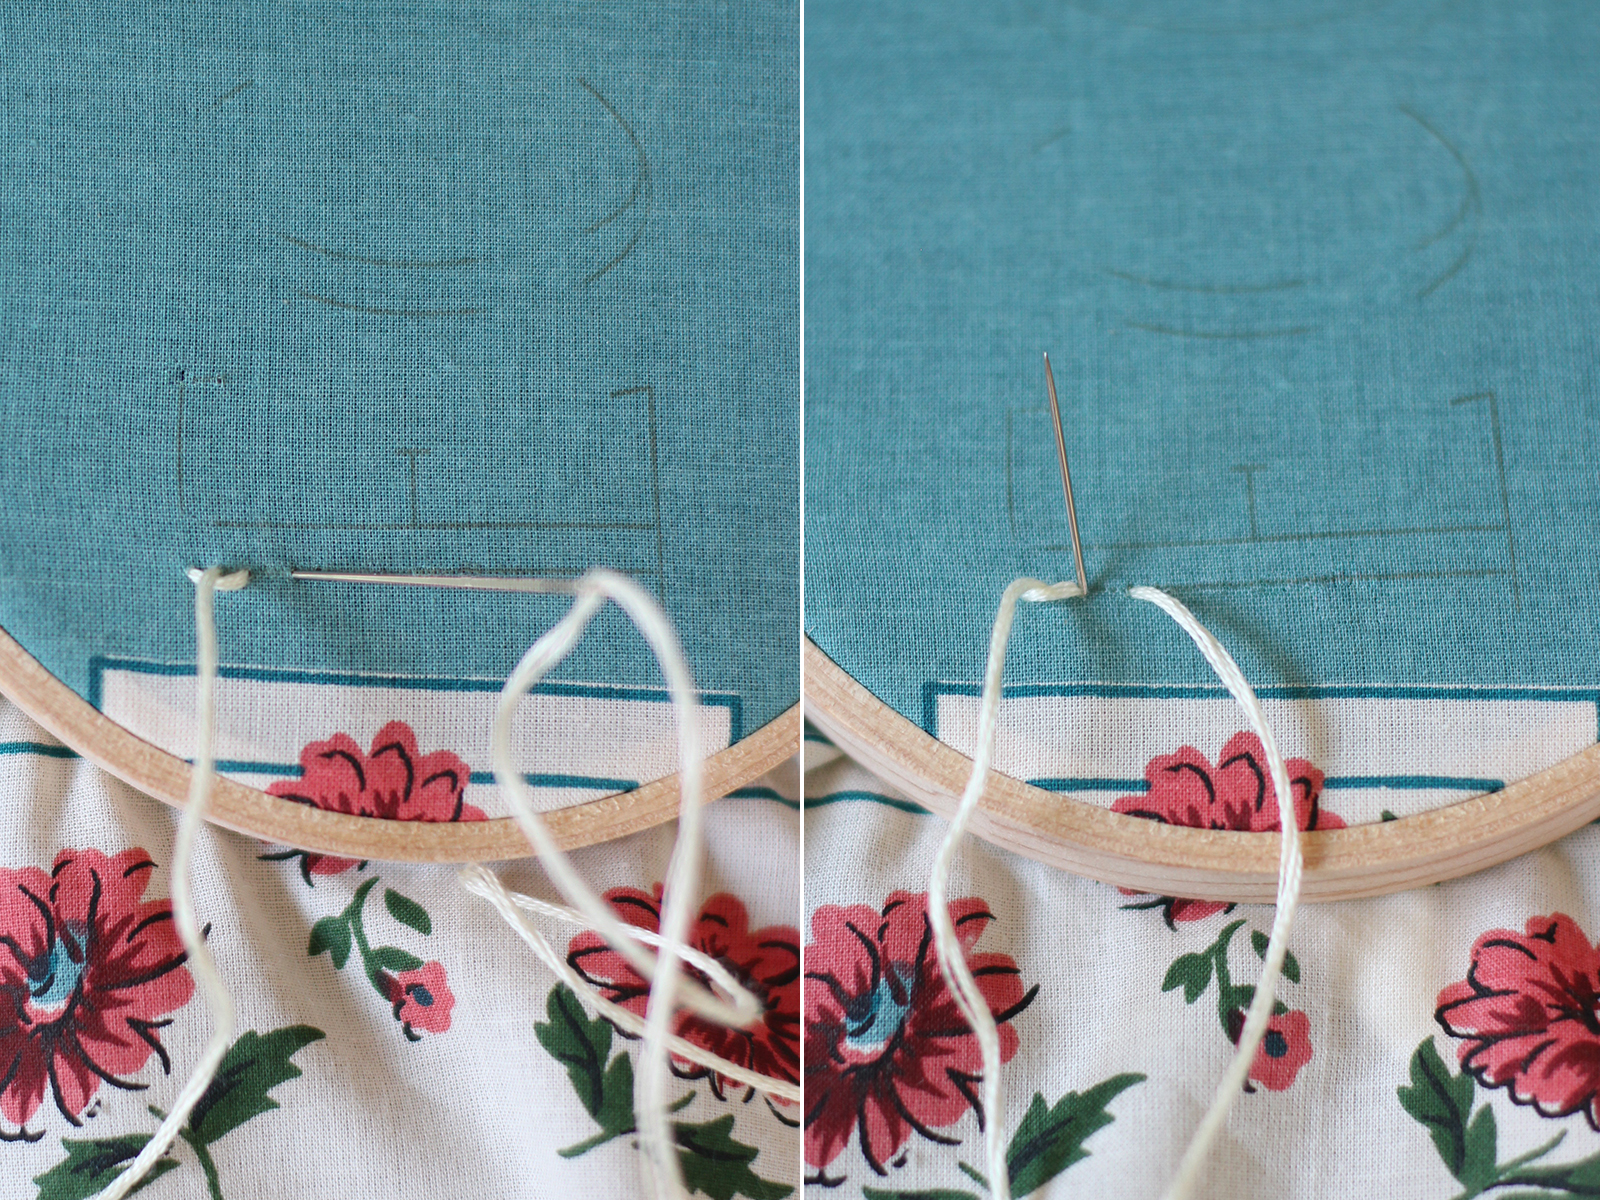
Bring the needle back down a stitch length. Keep a loop, not pulling the floss all the way down and bring the needle up at the bottom of the last stitch. Working thread facing down? Good!

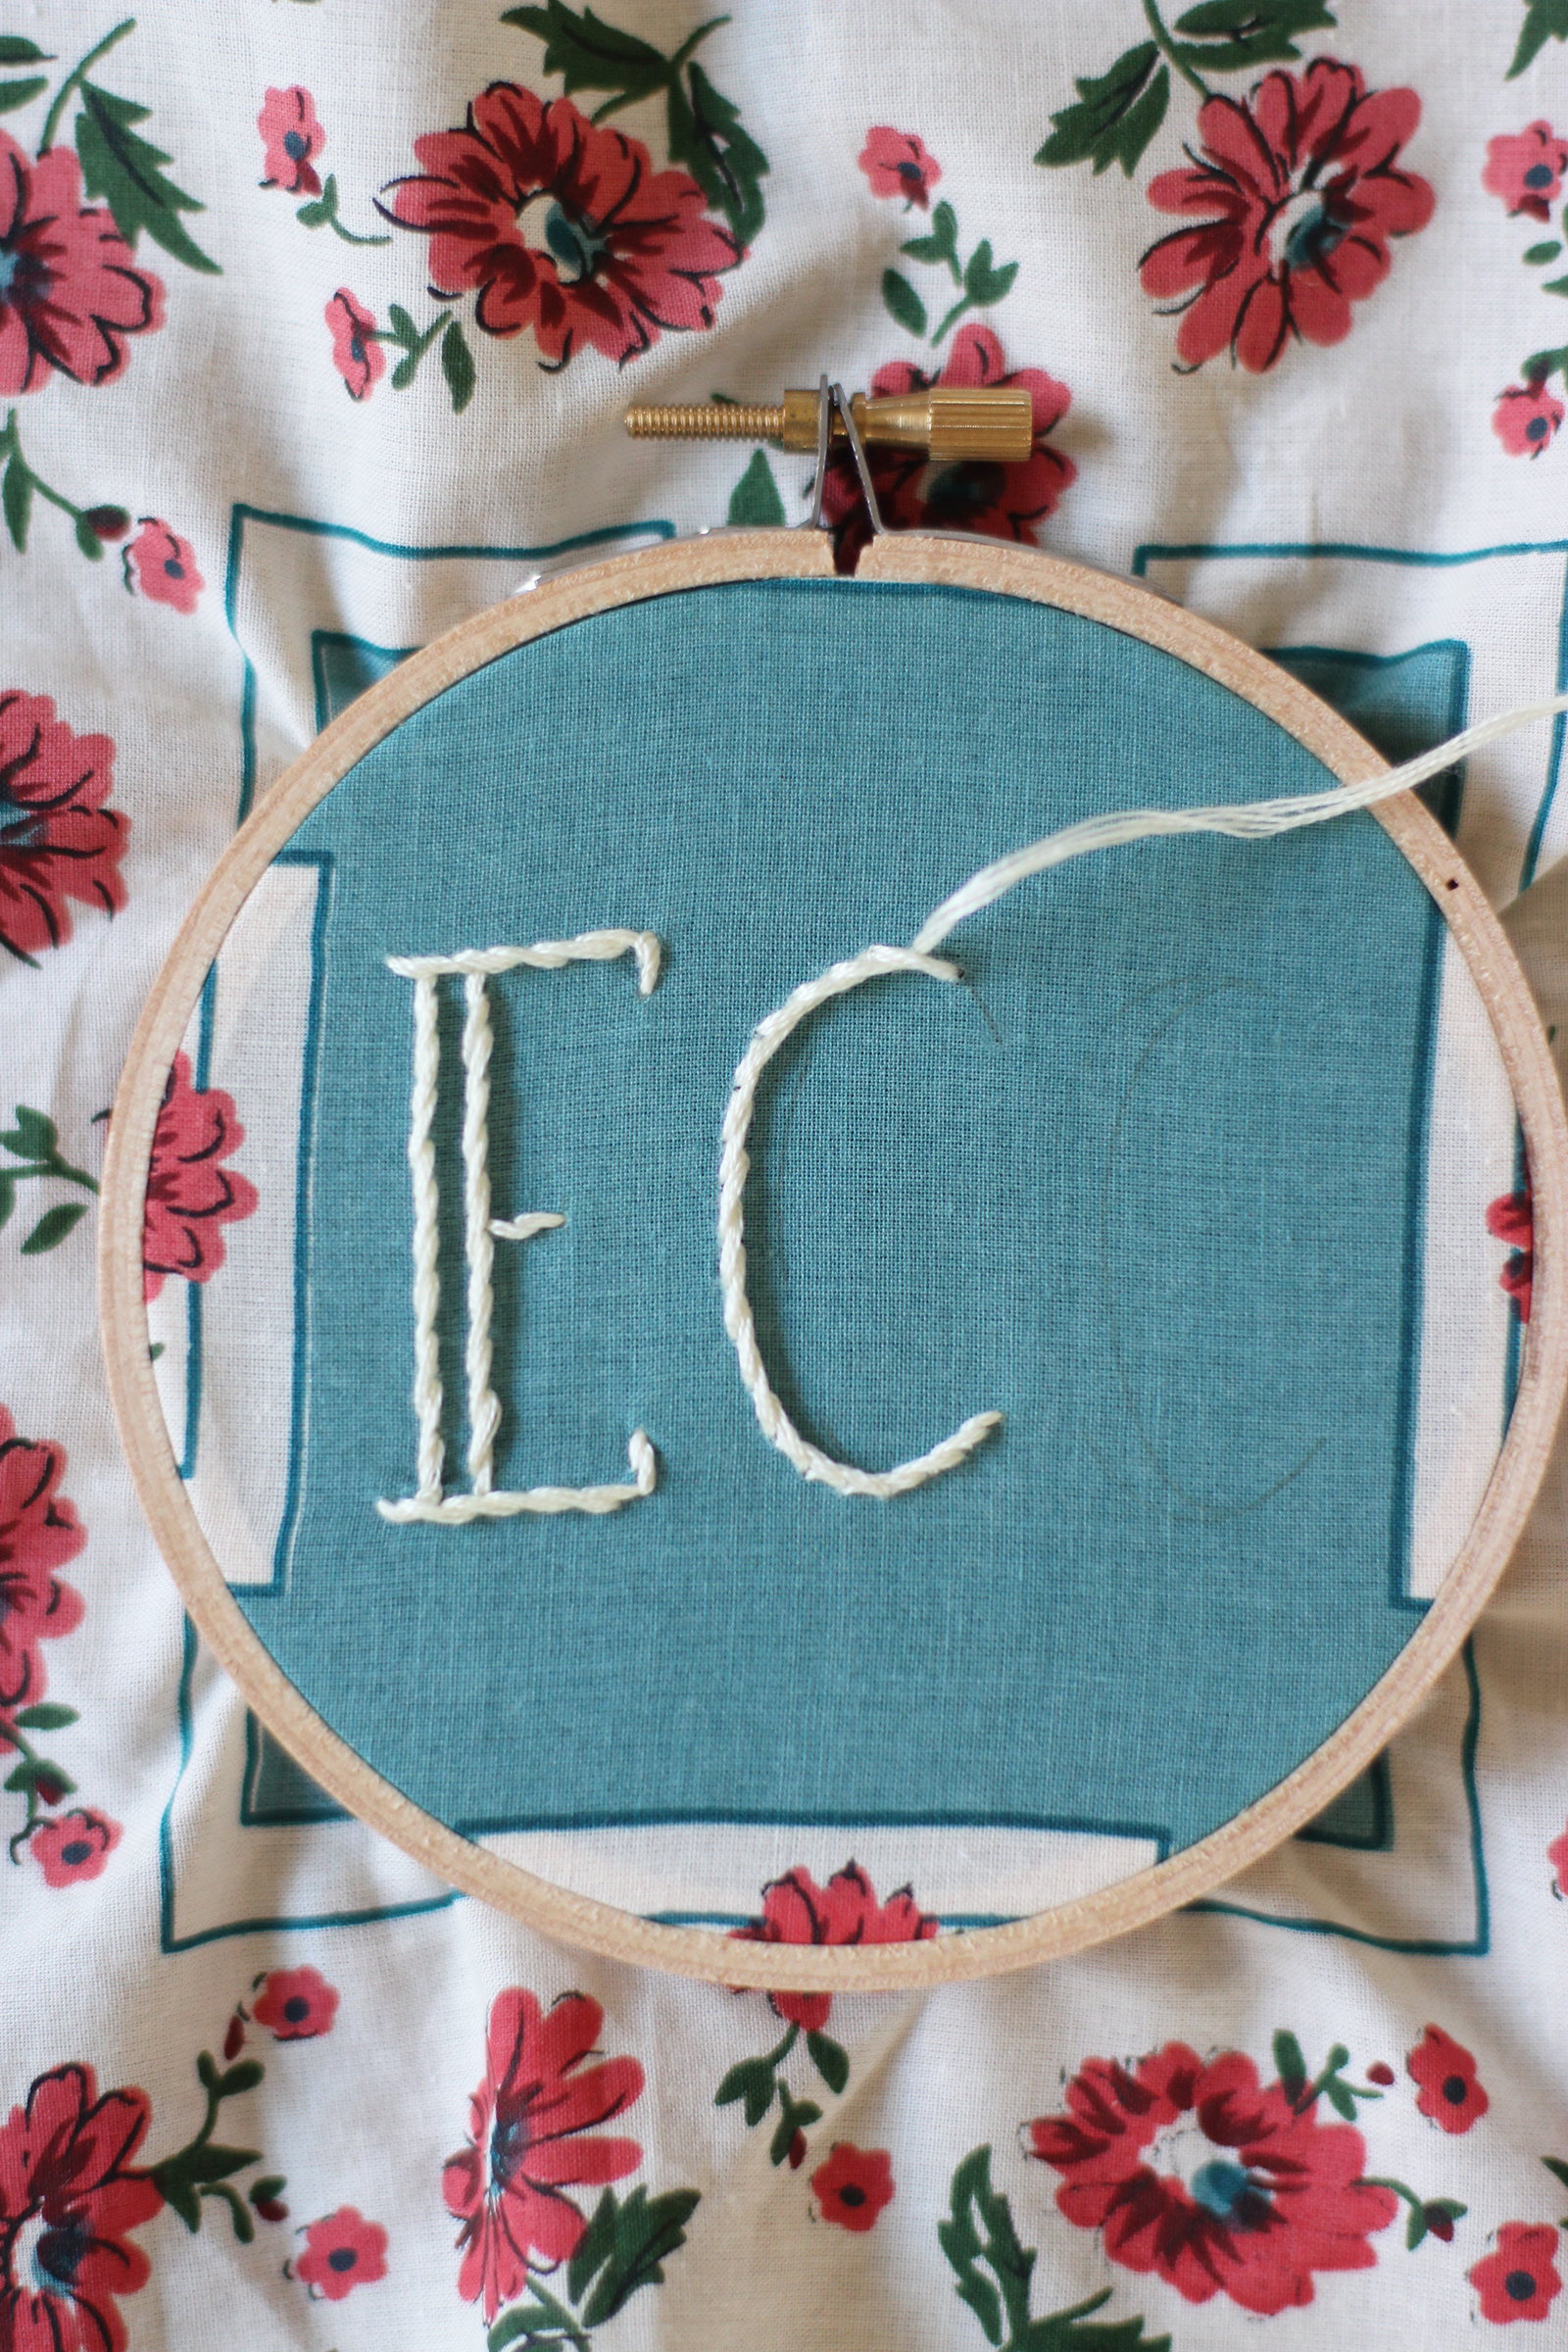
Keep going until you’ve reached the end of a line. I like to just tie it off into a double knot in the back and start fresh with a new line.
When you begin a new line, you’ll need to start again the starter stitch – pulling the needle up, down a stitch length and up again halfway between the first and second holes. And then continue as normal.

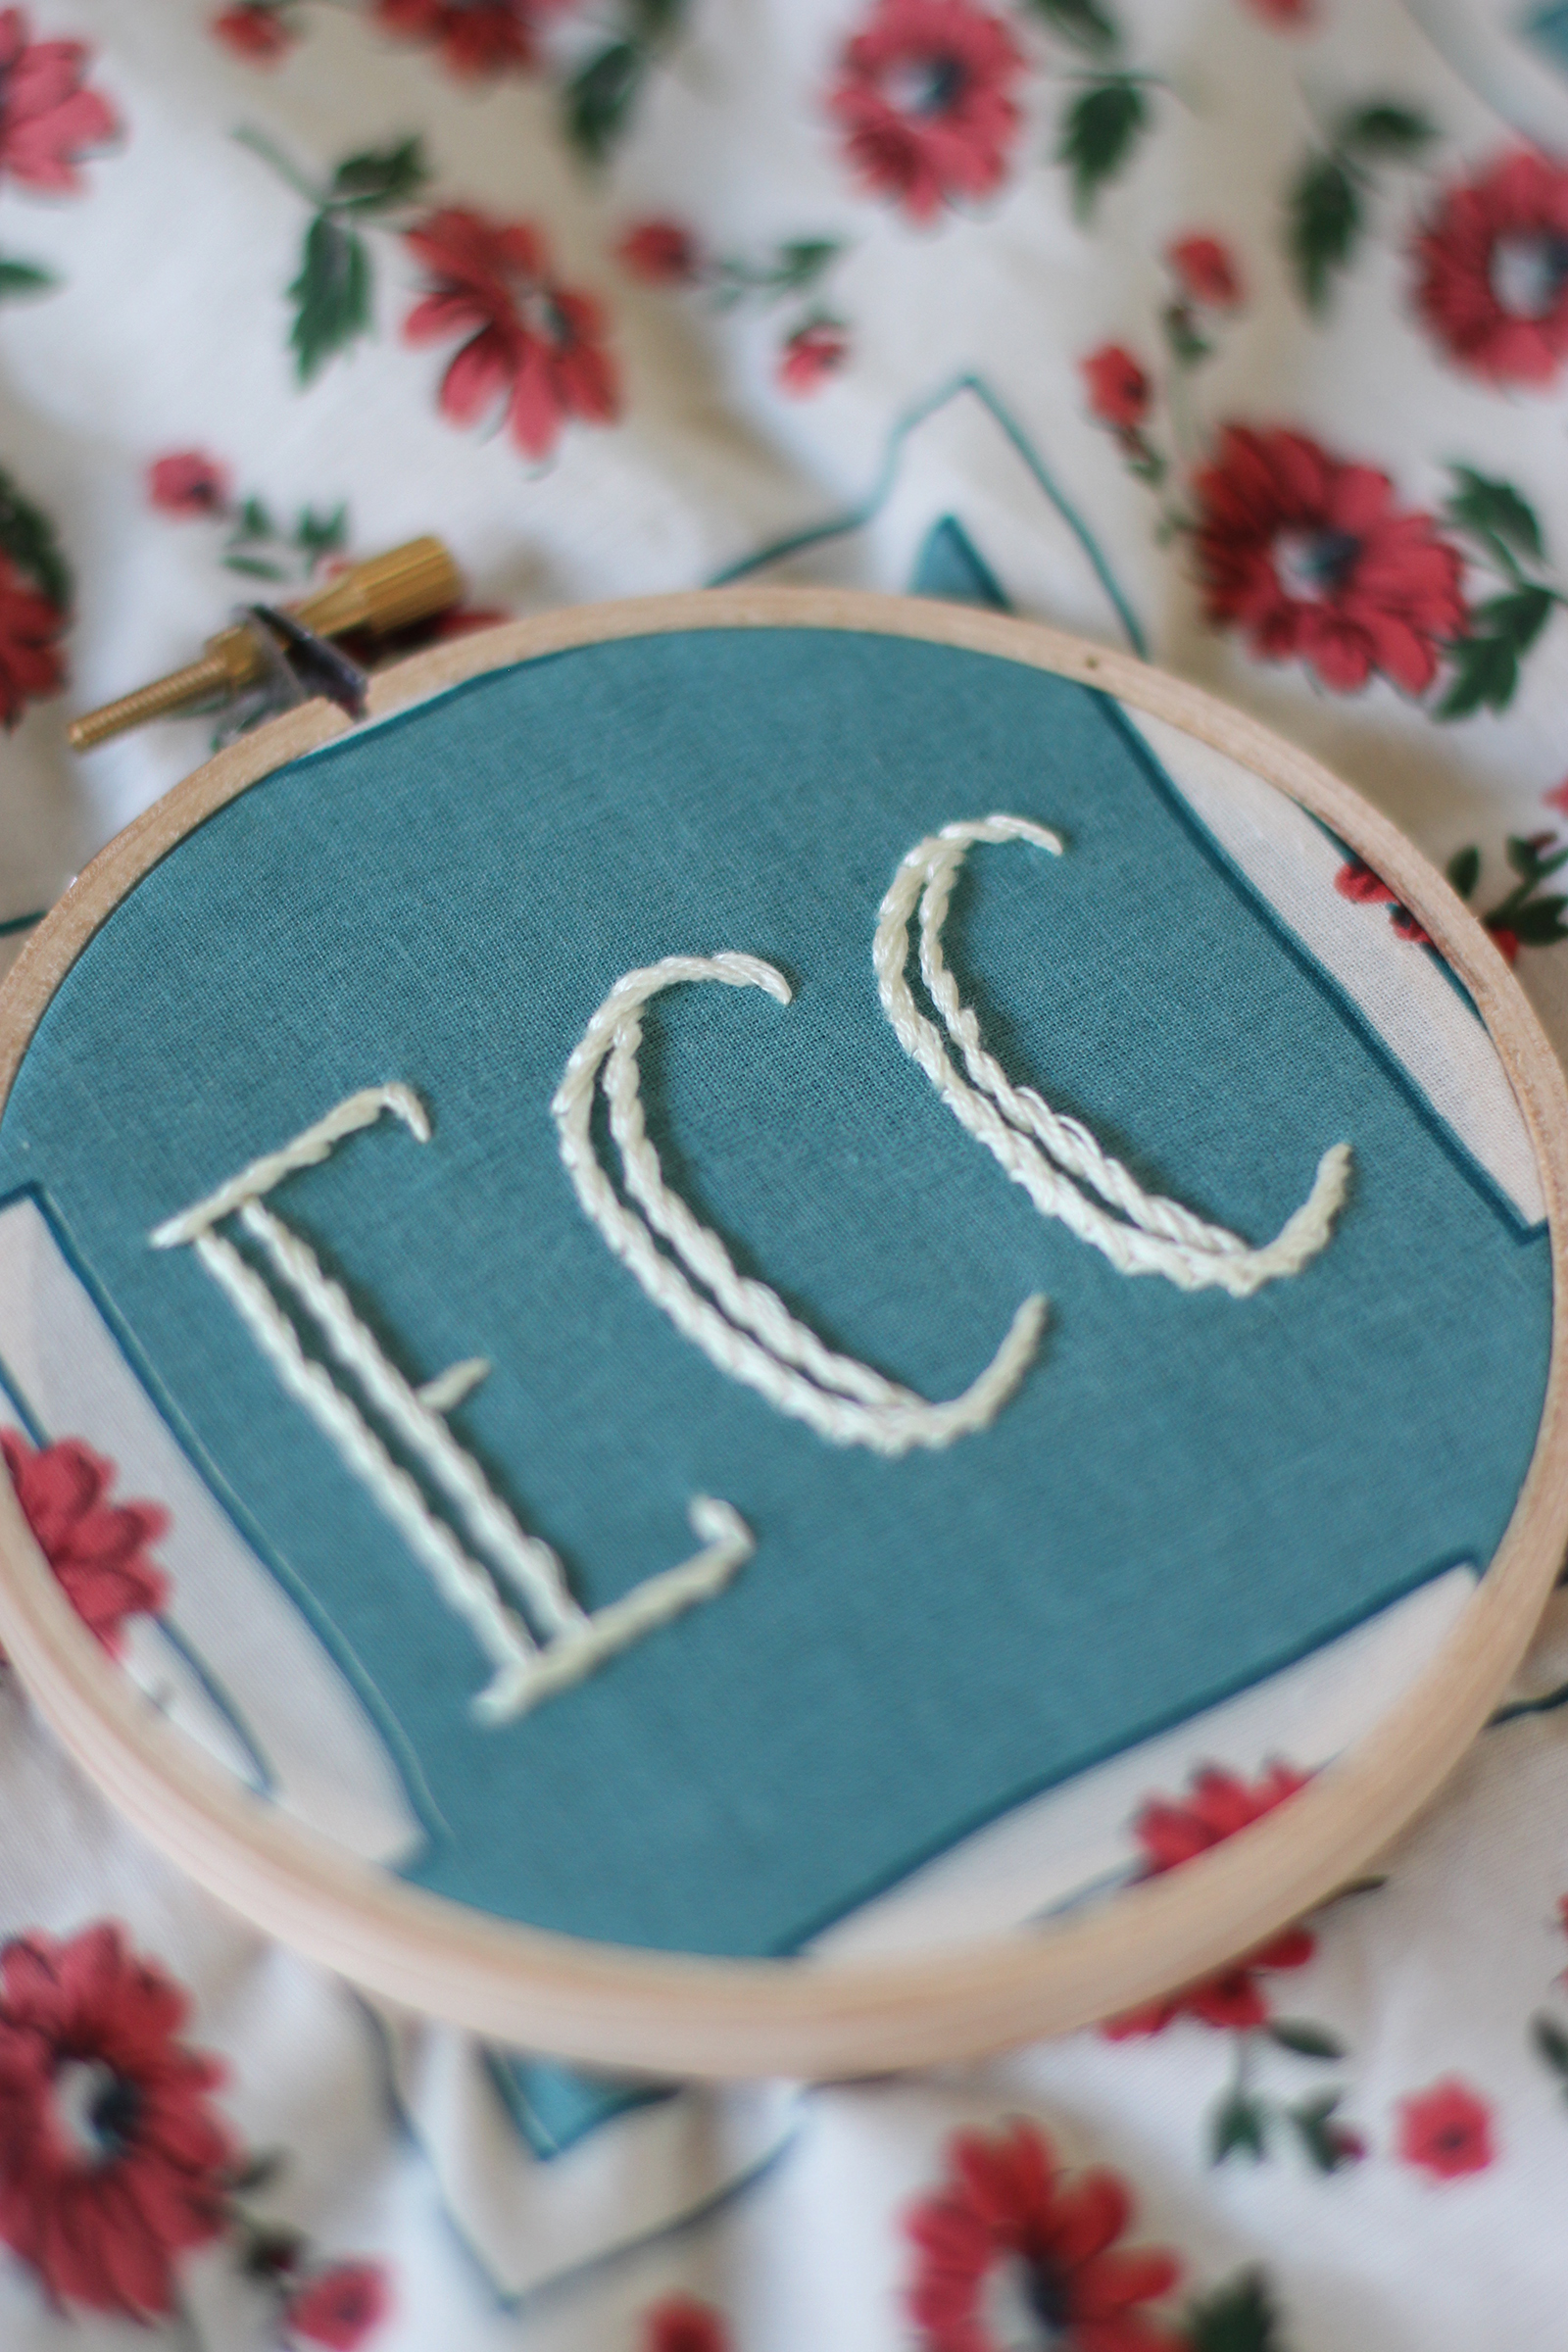
With it comes to curves, just follow the lines.
Once you’re done, remove the embroidery hoop and iron flat!
Store in your purse, or pocket . . . and wipe those tears with grace!

(images by HonestlyWTF)
Looks super cute 😀
xx Mira
http://www.glamdevils.com
Oh my goodness!! I ADORE this!! My great grandfather always had a handkerchief and it’s one of those personal things that really means a lot to me (and definitely came in handy!) And this is such a cute way to incorporate it into todays style. Definitely doing this!!
xo, Brittany
http://www.foxandcoffee.blogspot.com
Yes I can agree with you and it is so easy to make
That’s great work
I want that eye hankie!
I love this DIY! Handkerchiefs are a lovely way to deal with not so flattering moments in the heat!
I’m a fashion blogger in NYC. To follow my adventures featuring the best of New York’s fashion and food, check out sustenanceandstyle.com! Always looking to collaborate with new bloggers, so feel free to contact me! See you there xx
– Stephanie
Such a great idea. Plan on doing this in kerchief size to tie around my neck!
AH love!
OMG! That embroidered eye is unbelievably good! It looks amazing.
these turned out awesome what a great idea 🙂
http://floatingthrufields.blogspot.com/
Can you provide a link to the eye transfer? I couldn’t find that transfer kit on Etsy.
yes this is the the best place where all the dragon city hack gems available here free of cost.
Your skills are so diverse! What a fantastic and personal gift indeed. X bex
http://www.siamgempalaceblog.com
Not a handkerchief girl myself but these are too cute to resist!
What does the back look like?
Stay in the good paintings! You realize, many people are searching around in this information, you could aid all of them greatly.
It looks so cute!
Very interesting blog. Alot of blogs I see these days don’t really provide anything that I’m interested in, but I’m most definately interested in this one. Just thought that I would post and let you know.
Thank you very much! Your blog is always full of great idea. They are really helpful
Thank you very much for your great template! i love all your works, they’re amazing. But, i like this one alot.I put your template in my blog, see
Looking at your website day by day makes me wanna work harder T.T because I love these design~~~ I want to bring them home T.T Thank you for sharing. sooo many great design.
The information, In my opinion a lot of people tend to be helpful. Extremely lucky to debate this article on your. Look ahead to ones up-dates.
Which is why we keep on exploring things for us to know what we should be doing.
For this information, you can aid them greatly.
Wow! Thank you! I constantly wanted to write
on my site something like that. Can I include a fragment of
your post to my blog?
Thanks so very much for taking your time to create this very useful and informative site. I have learned a lot from your site.
Thank you for another essential article. Where else could anyone get that kind of information in such a complete.
Really happy to have seen your webpage and look forward to so many more entertaining times reading here. Thanks once more for all the details.
Such a very useful article. Very interesting to read this article.I would like to thank you for the efforts
so cute
Love it!
This is such a rad project. Bringing back the granny crafts like no one’s business I love it.
I must appreciate the way you have expressed your feelings through your blog!
I like your all post. You have done really good work. Thank you for the information you provide, it helped me a lot. I hope to have many more entries or so from you.
Oh yeah! They are so adorable~~ Thank you for sharing!! Love these stuff very much >.< With these I think I will start drawing my own
I really like your DIY embroidered handkerchiefs.It is very interesting and awesome post.I suggest you that using promoocodes you can get a cheapest and latest discount coupon and promo codes.
Not a handkerchief girl myself but these are too cute to resist!
I have read your article. it is very informative and helpful for me.I admire the valuable information you offer in your articles. Thanks for posting it, again!
Great ideas, i love your article. It gives me more ideas on home to organize my room with my shoes and stuff for my children.Keep up the good work
Beautiful pictures….
Yes but where can I find the crying eye pattern??
These would be great to keep dirt out of my mouth when landscaping in the backyard.
Oh these are so cute! Definitely going to try making these!
They ate the best. I agree with you. It’s hard to find such.
These look really fantastic. I’m excited to sit down this weekend for a new craft project! Going to make some for my daughters!
-Courtney,
https://www.littlediamondbaby.com/
I love it❤❣
This is such a sweet idea! I never thought about embroidering handkerchiefs, but it makes so much sense, especially for a thoughtful gift. My dad’s the same way, always prepared. Might even try this while I’m unwinding with a game of Block Blast!