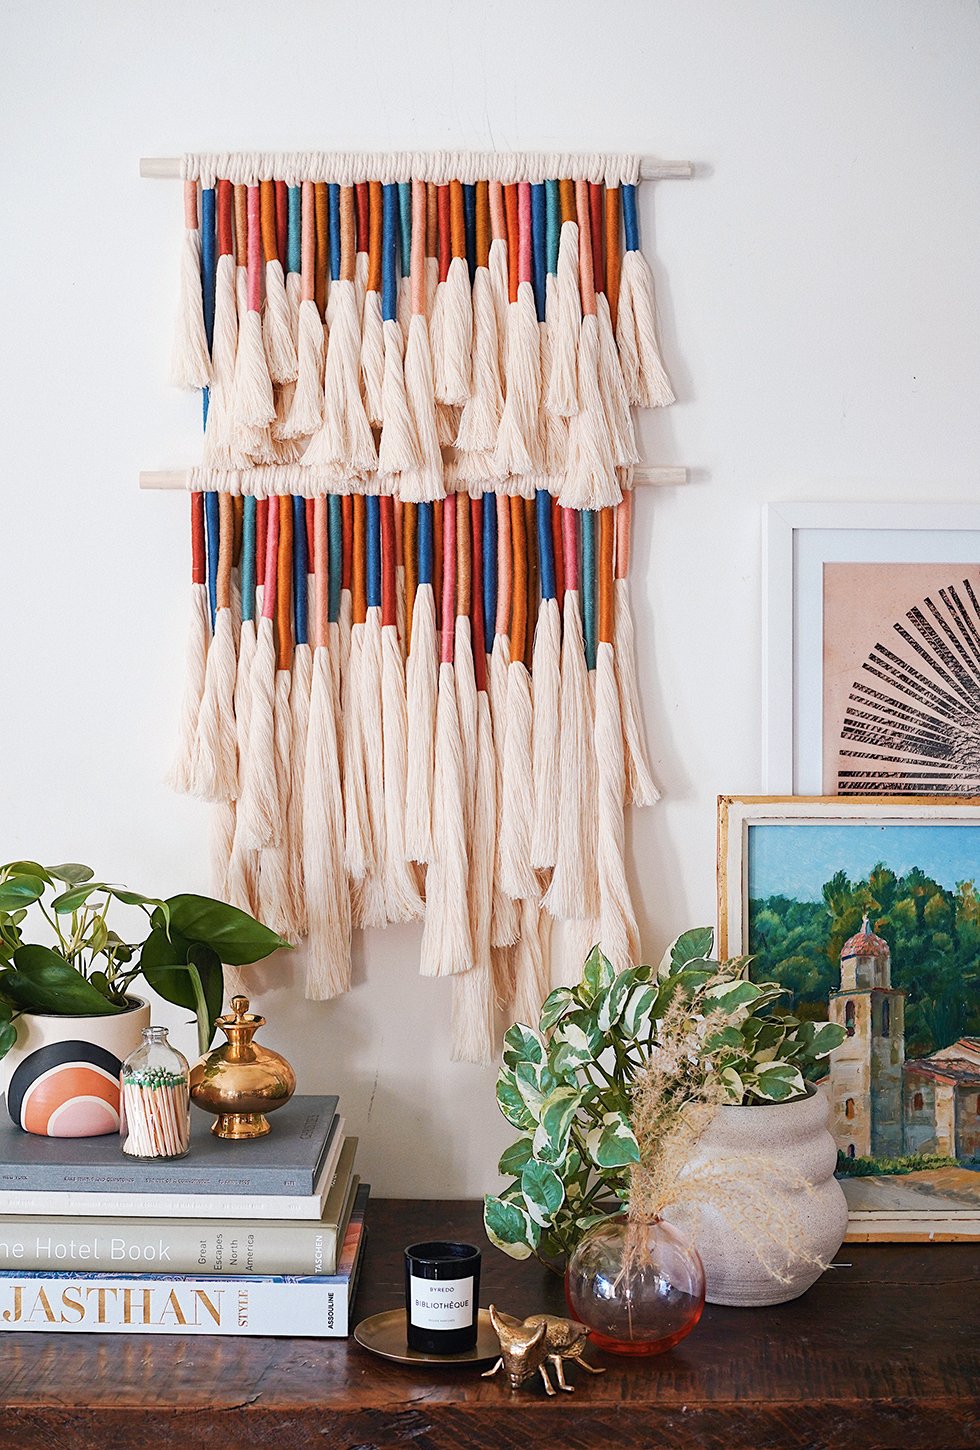
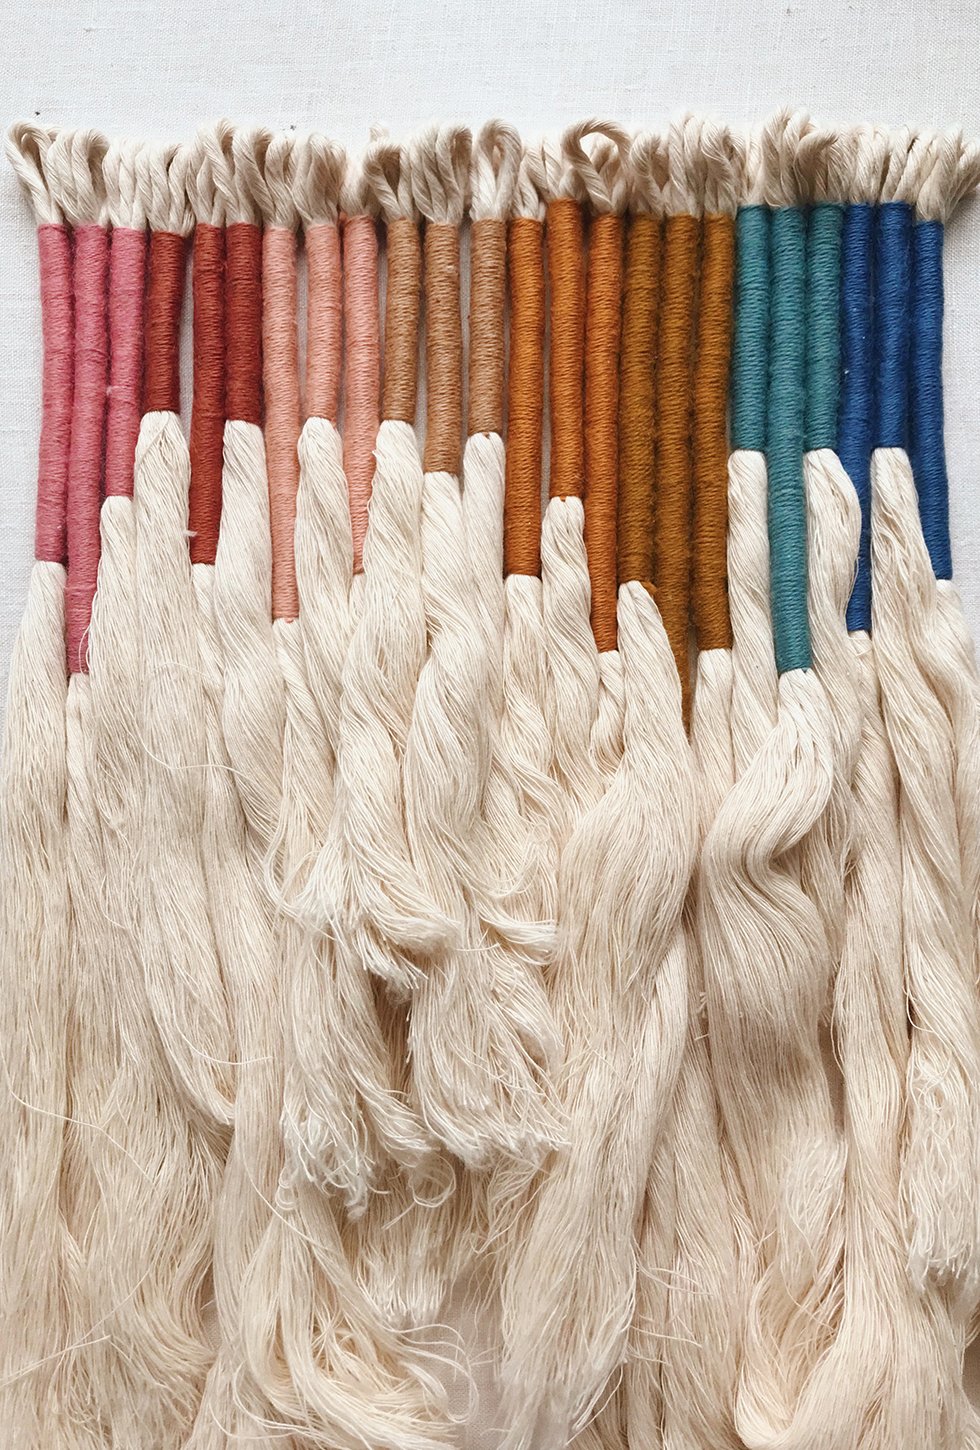
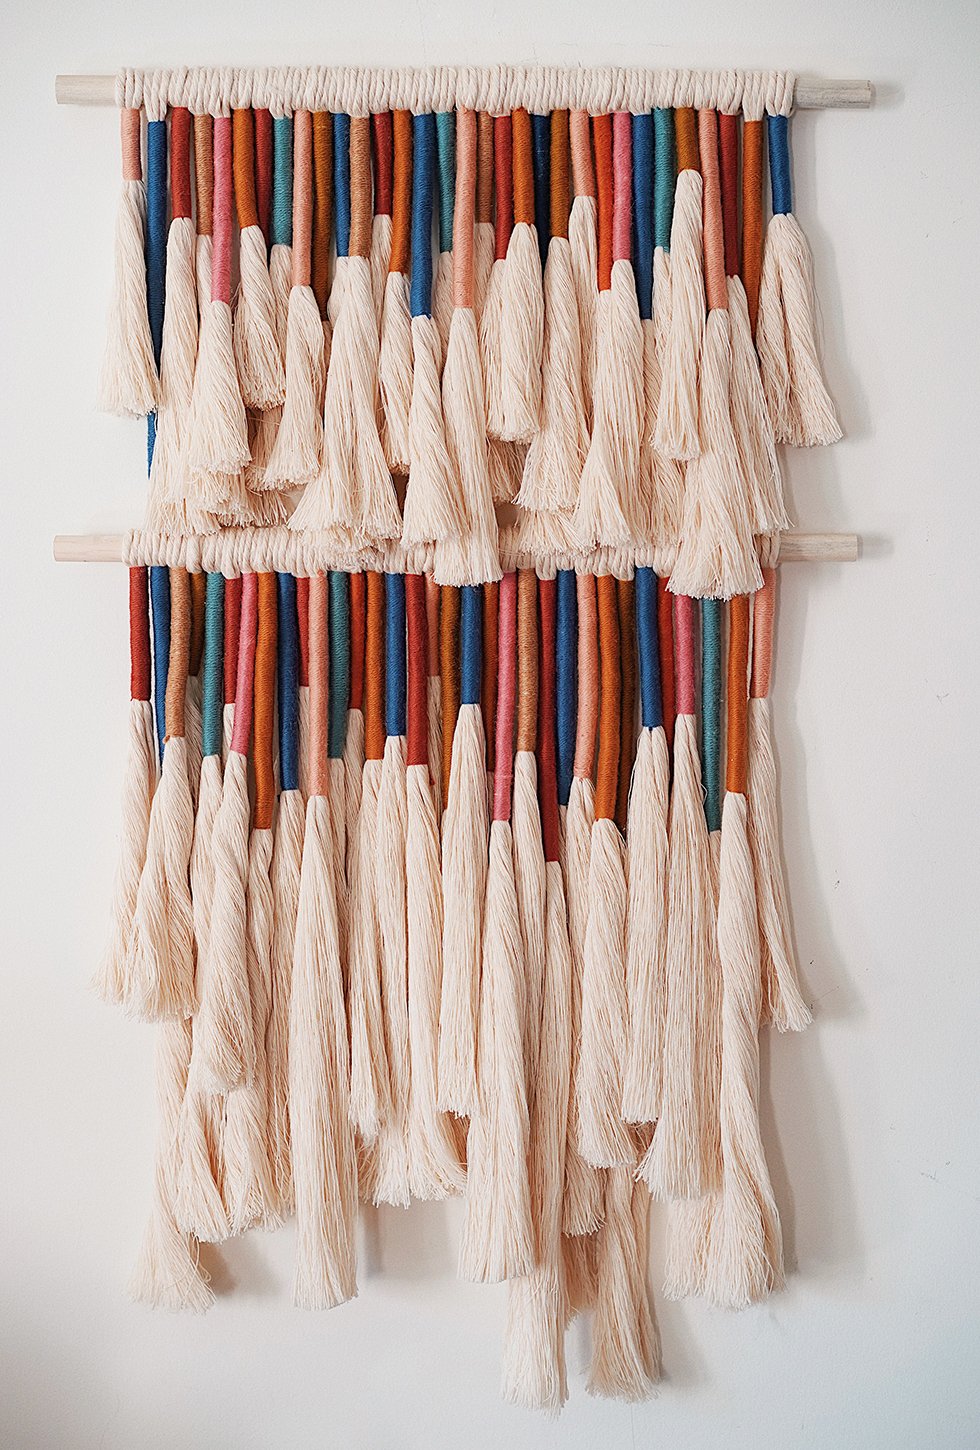
Yes, another wall hanging. I hope you don't mind. I couldn't help myself! But honestly, this piece has to be one of my all time favorites. The idea came about while searching for ways to use up the rest of my massive spool of cotton string from the macrame feather project. I stumbled upon this gorgeous wall hanging on Etsy and just fell in love with the fullness and richness of it, I had to re-create it - but with a Sheila Hicks (the great American fiber artist) twist. Full disclosure: this took me a few months to finish. Mostly because I just couldn't find the time to work on it during the mad rush of the holidays, but also because wrapping and brushing out each and every tassel can be rather tedious. But I will say, finally being able to assemble it was so very rewarding, I would make it all over again.
You'll Need:
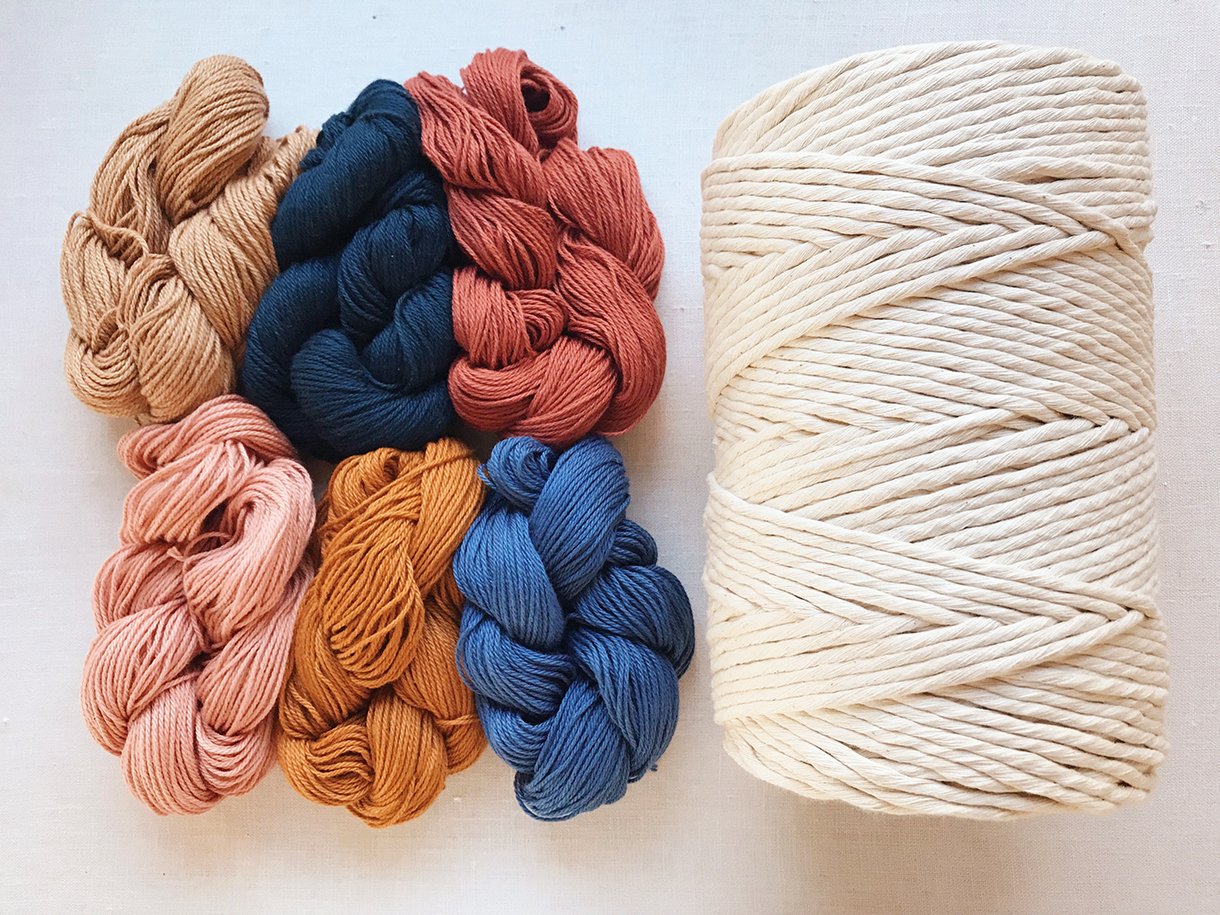
- 5mm single twist cotton string (mine is "white")
- 2 3/4" wooden dowels
- assorted yarn (I like Purl Soho for bright colors + A Verb For Keeping Warm for more neutral tones)
- sharp fabric shears
- self healing cutting mat
- cat brush
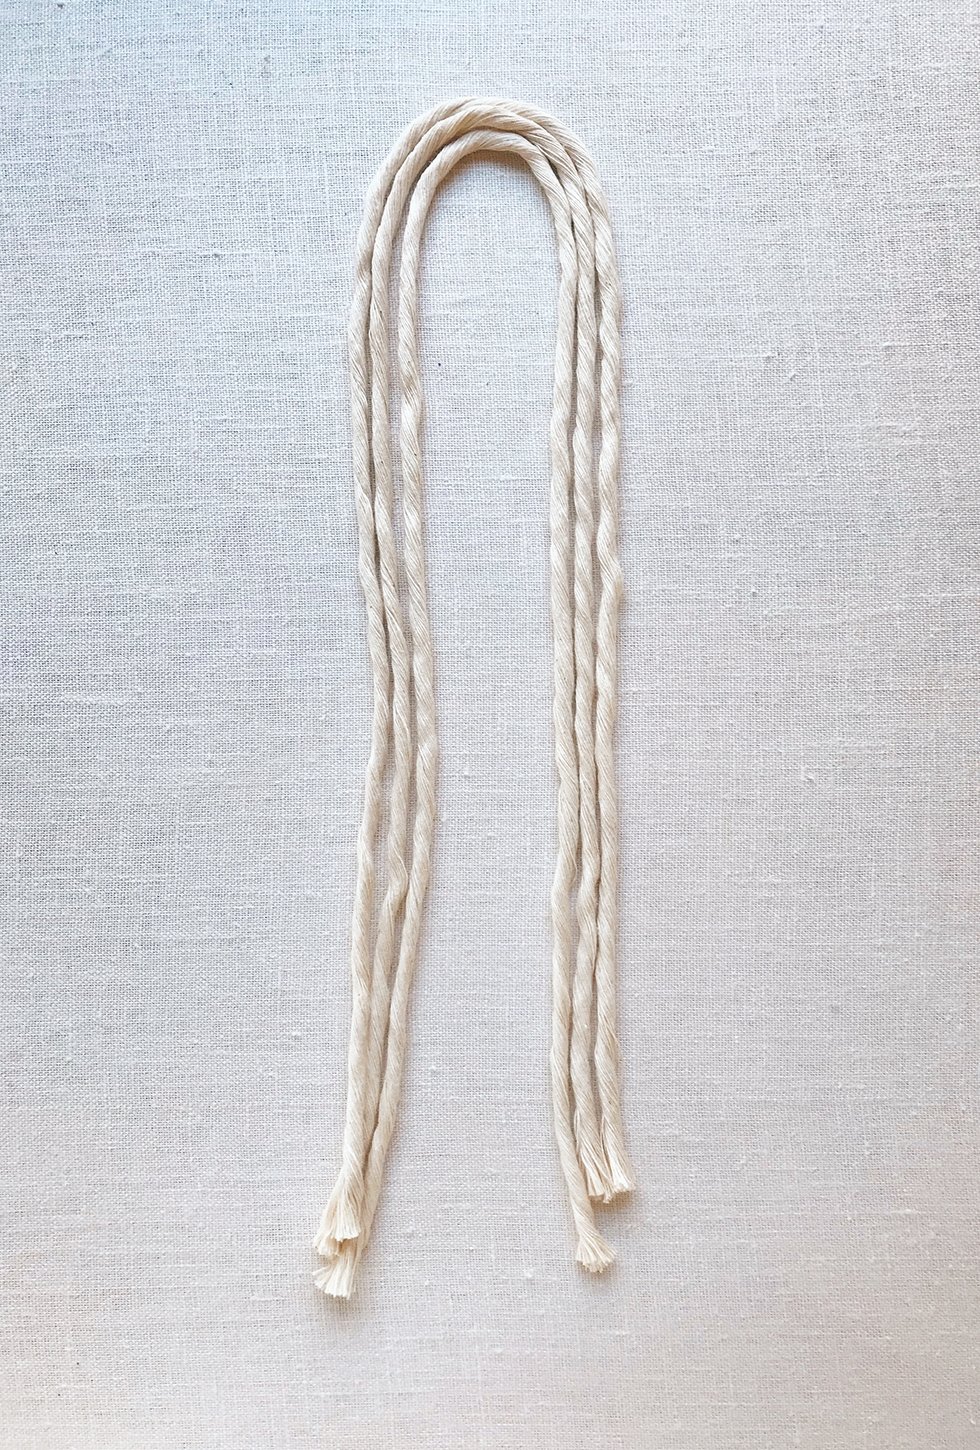
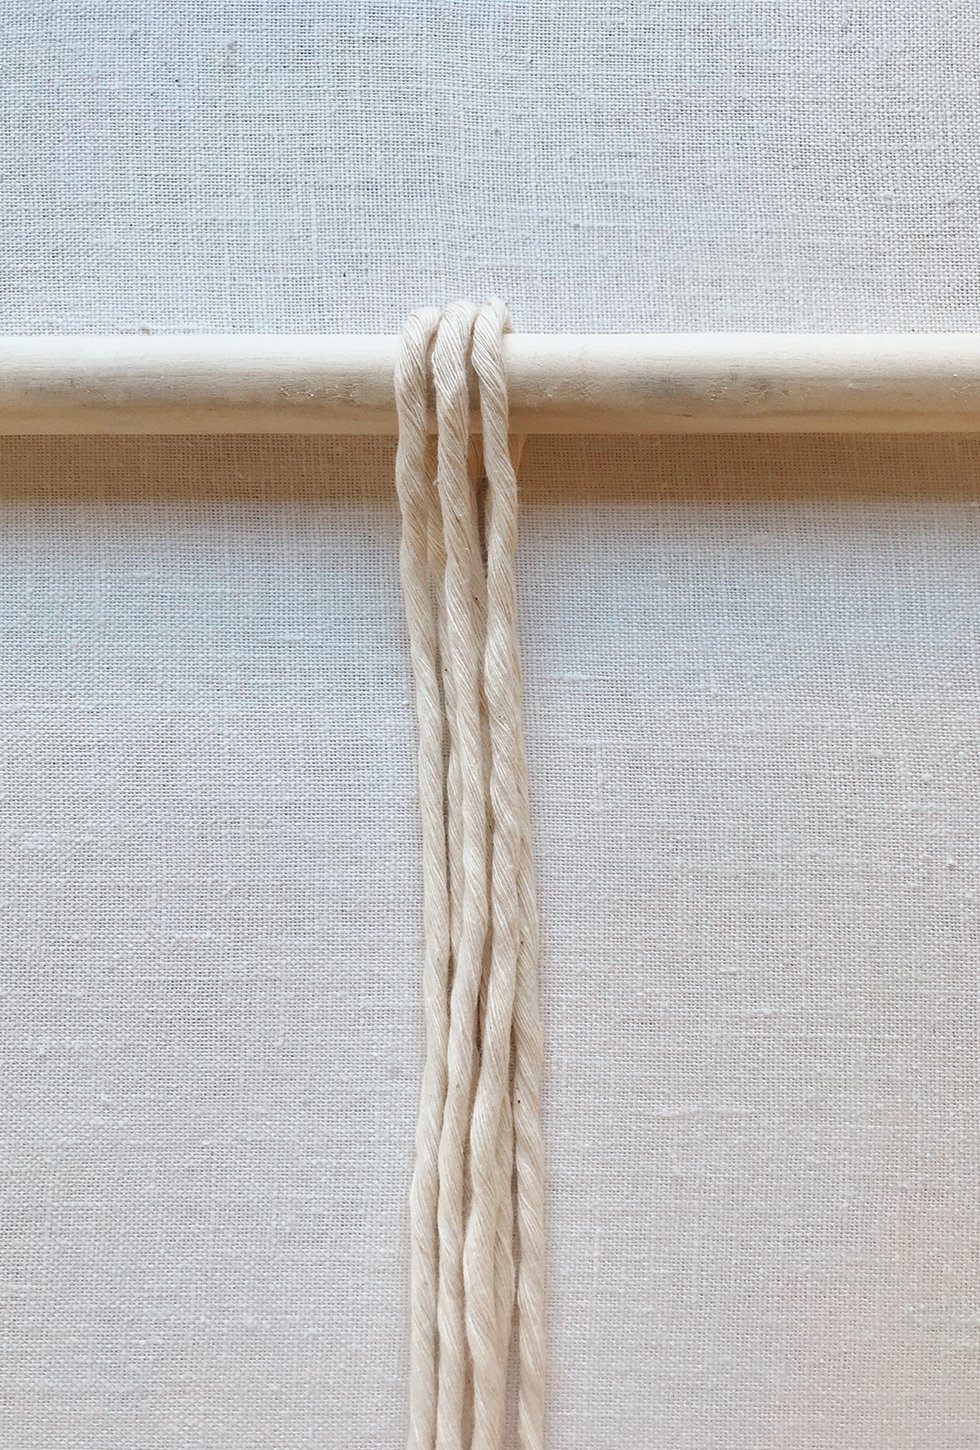
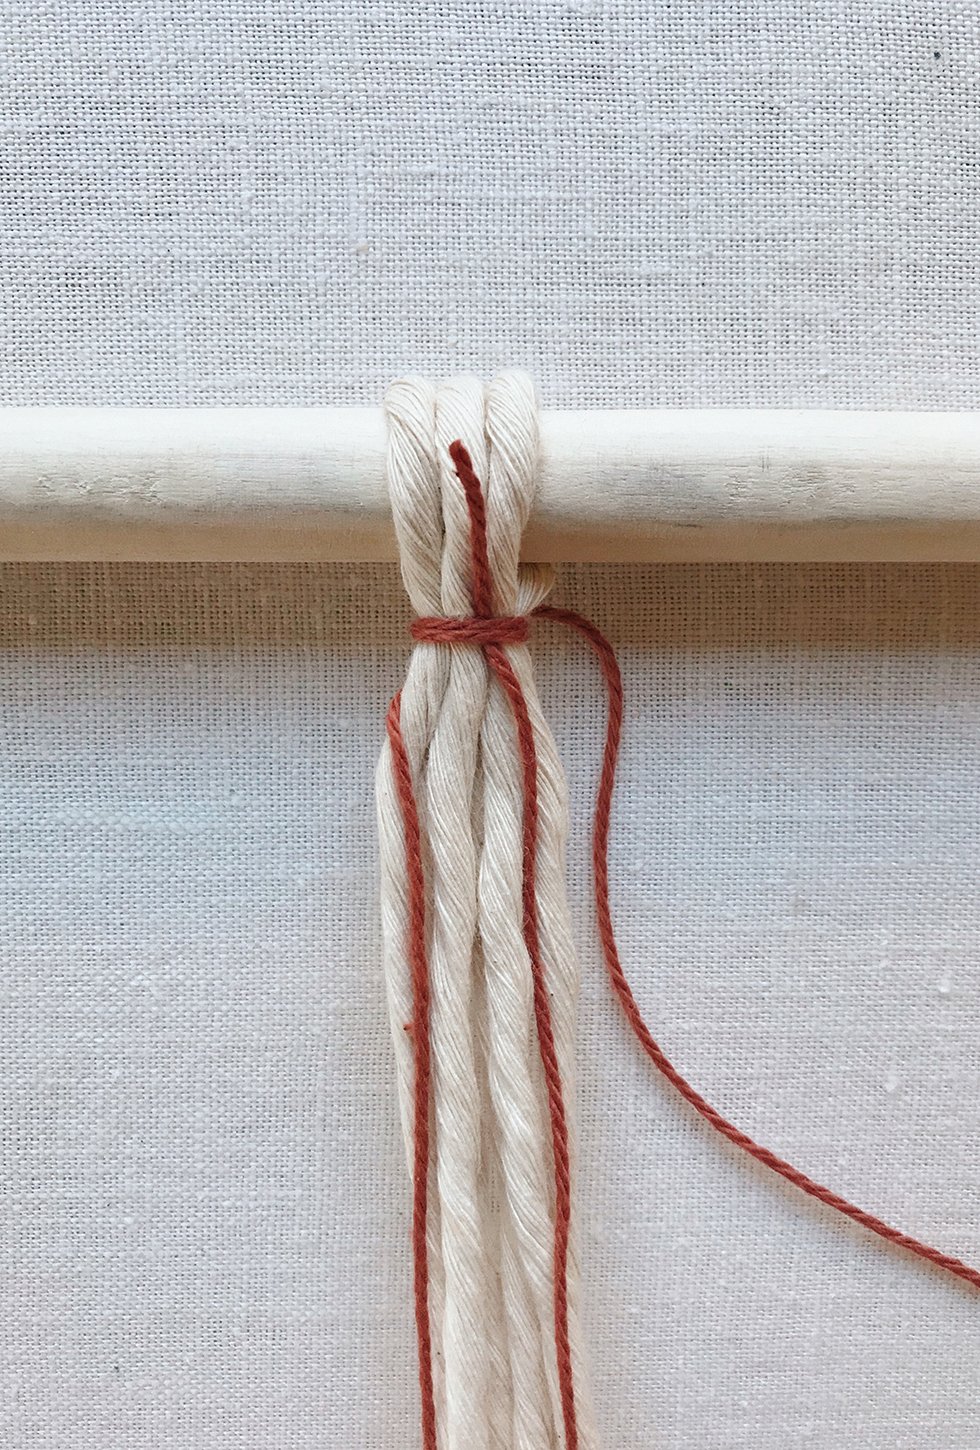
Start by cutting three even strands of cotton string. Fold them in half over a wooden dowel.
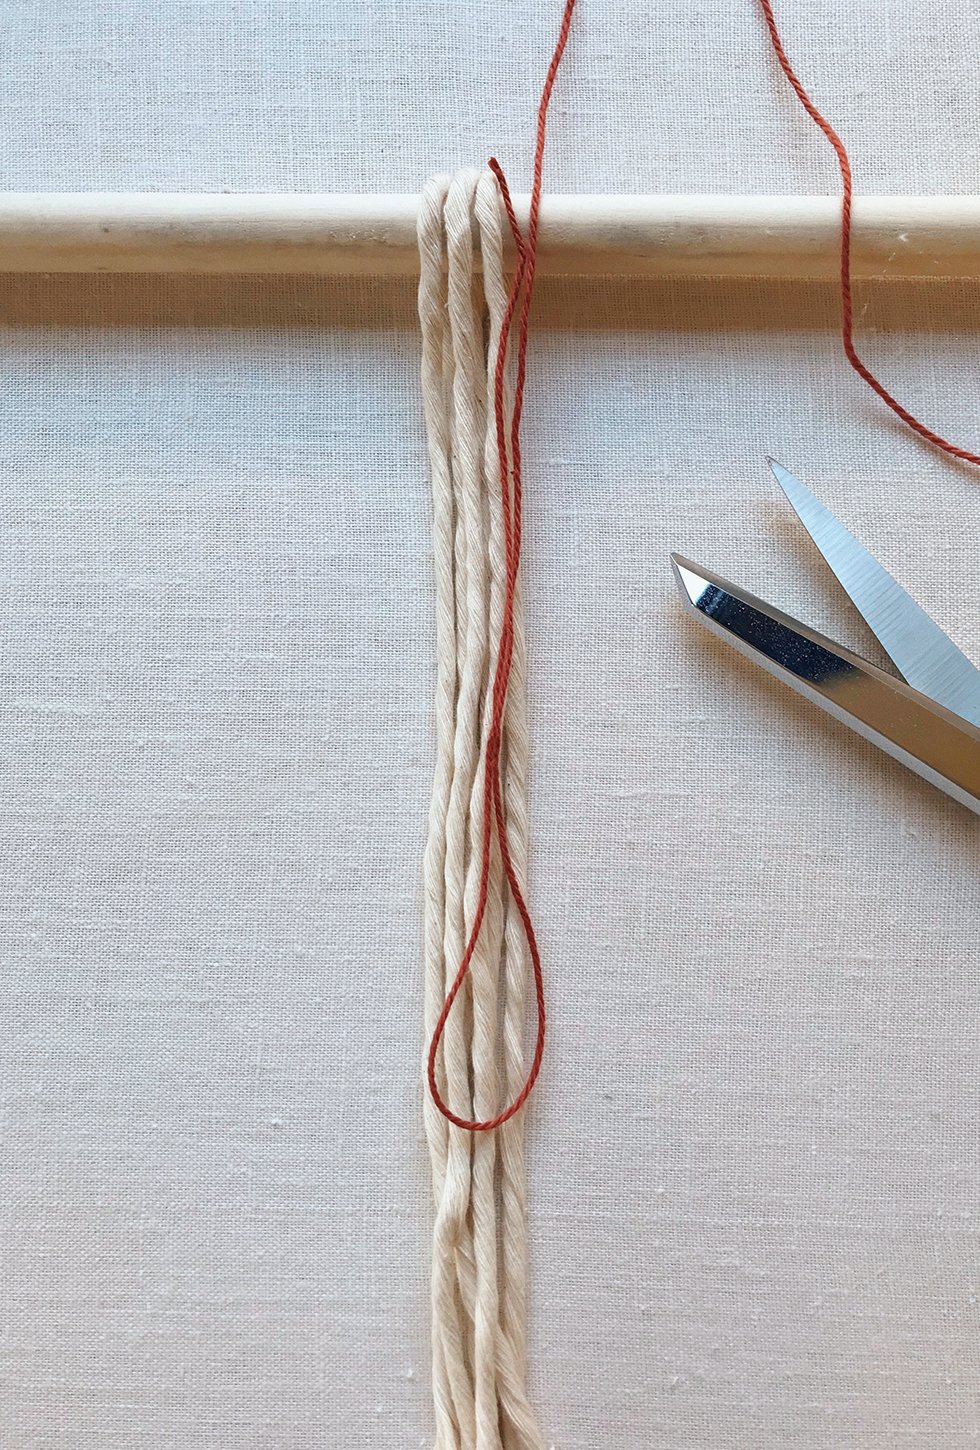
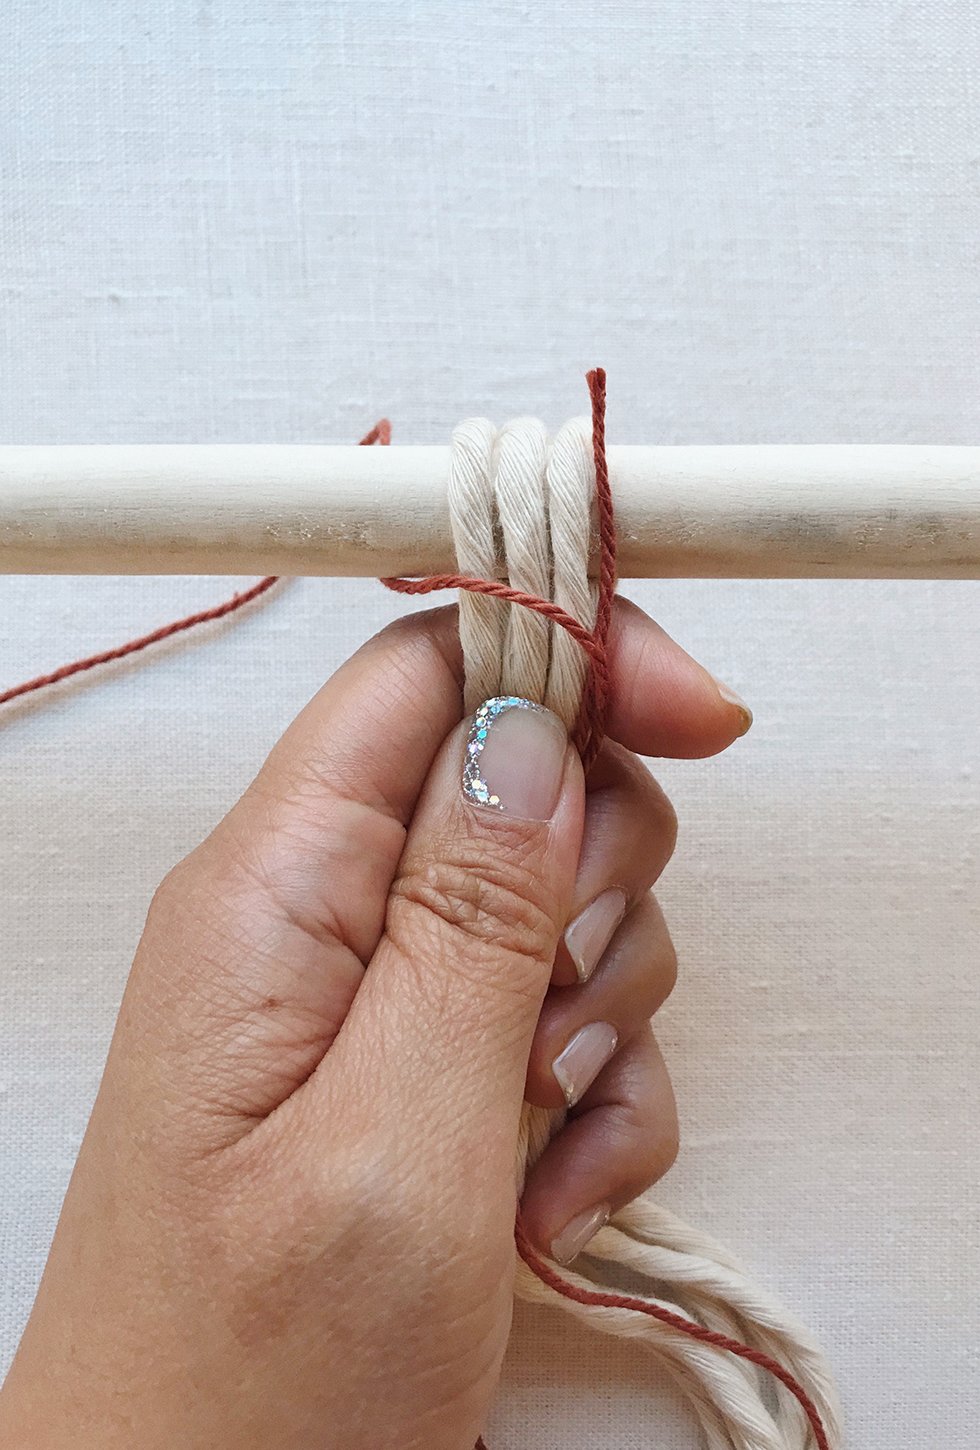
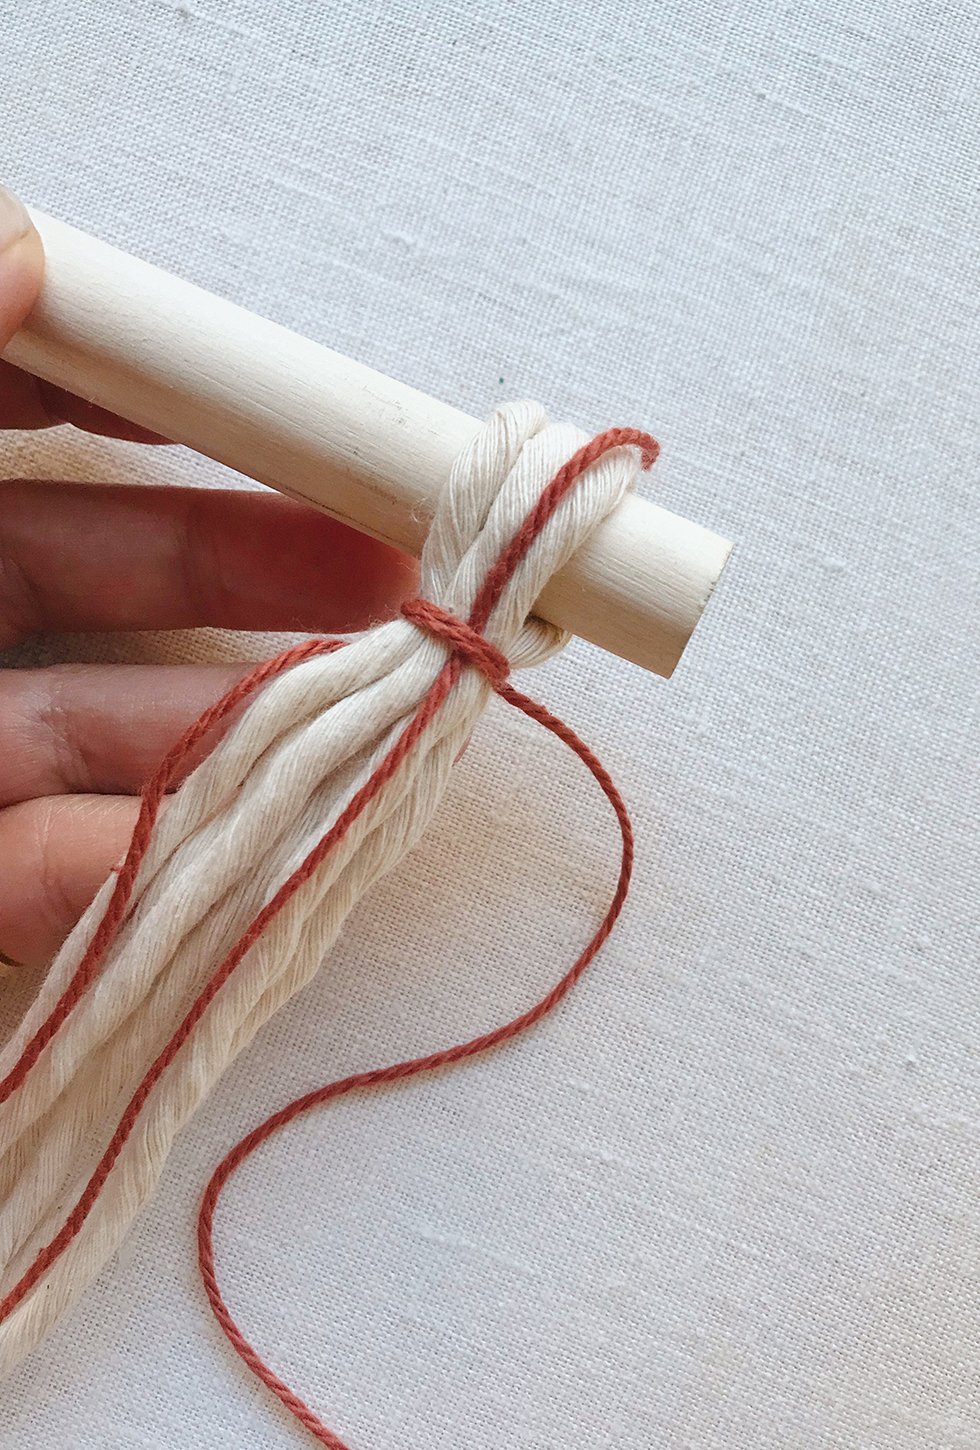
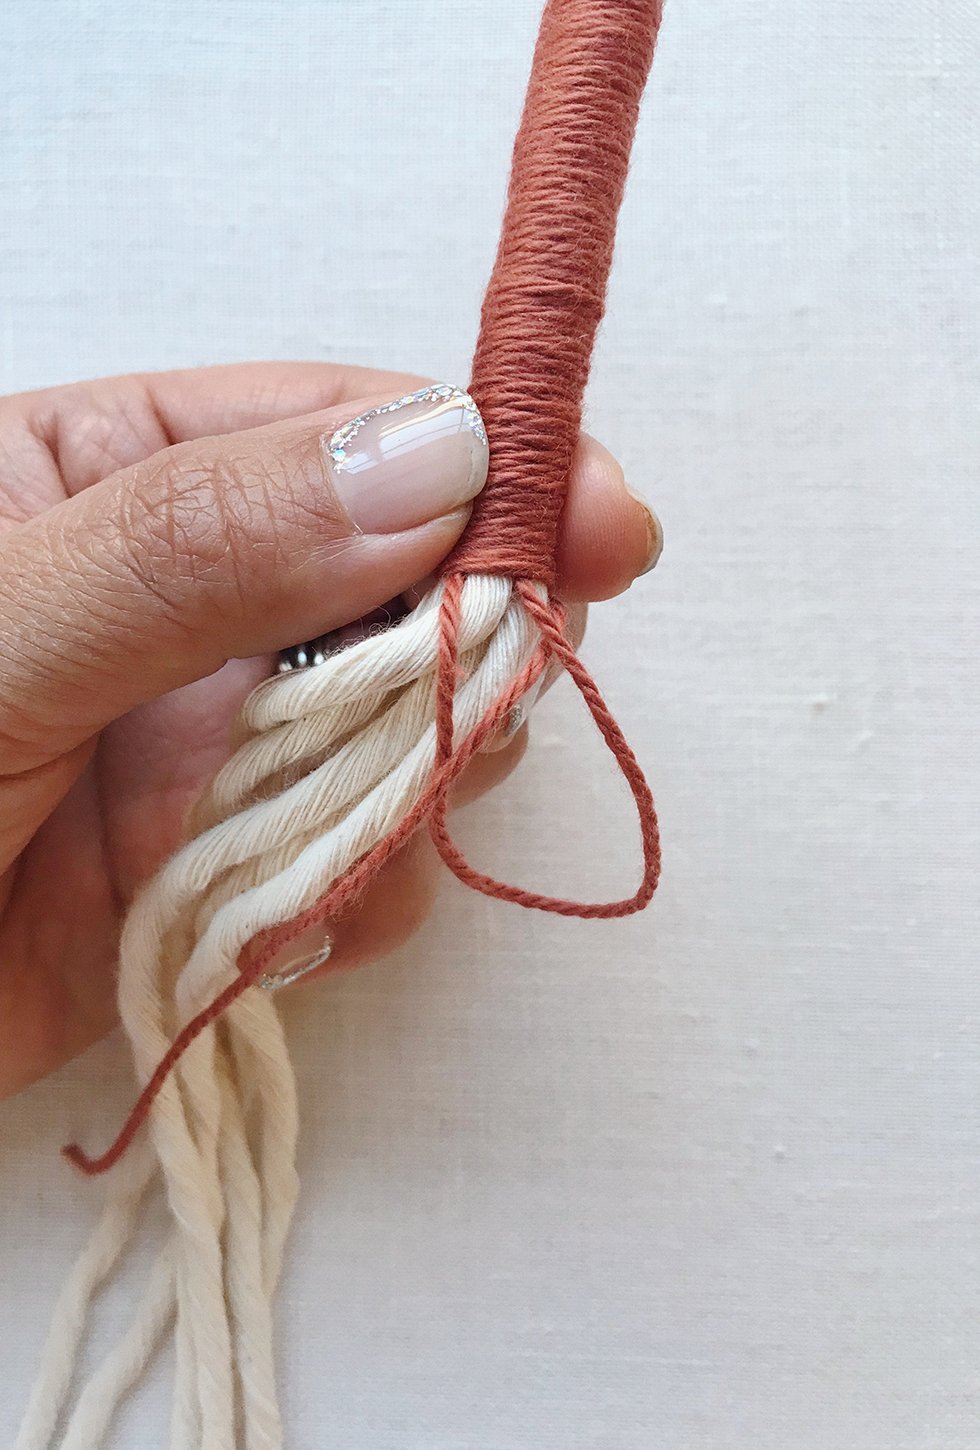
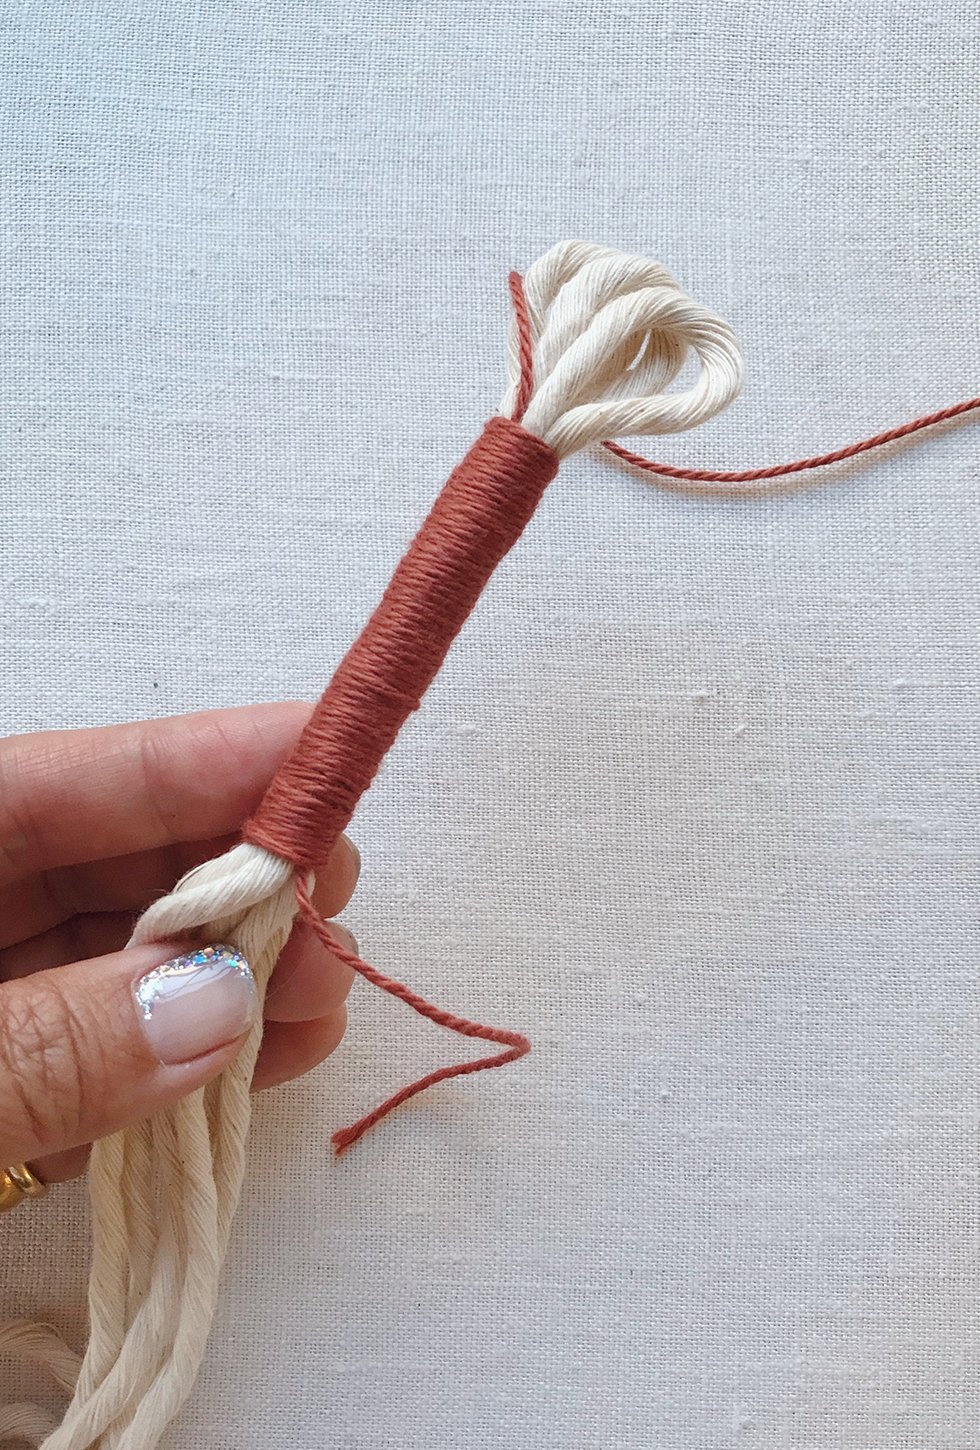
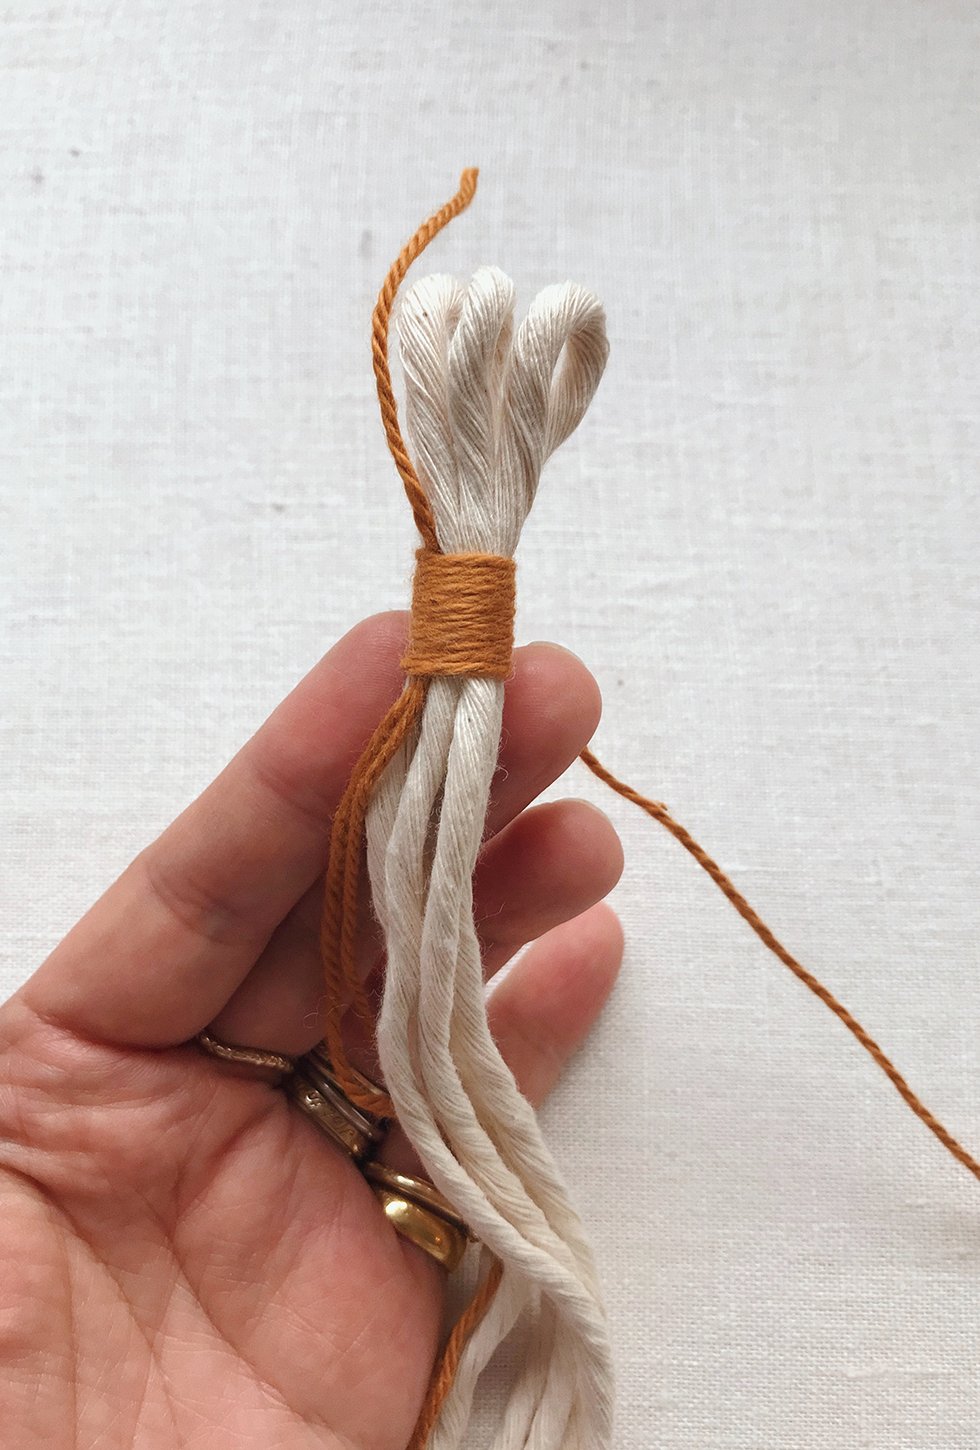
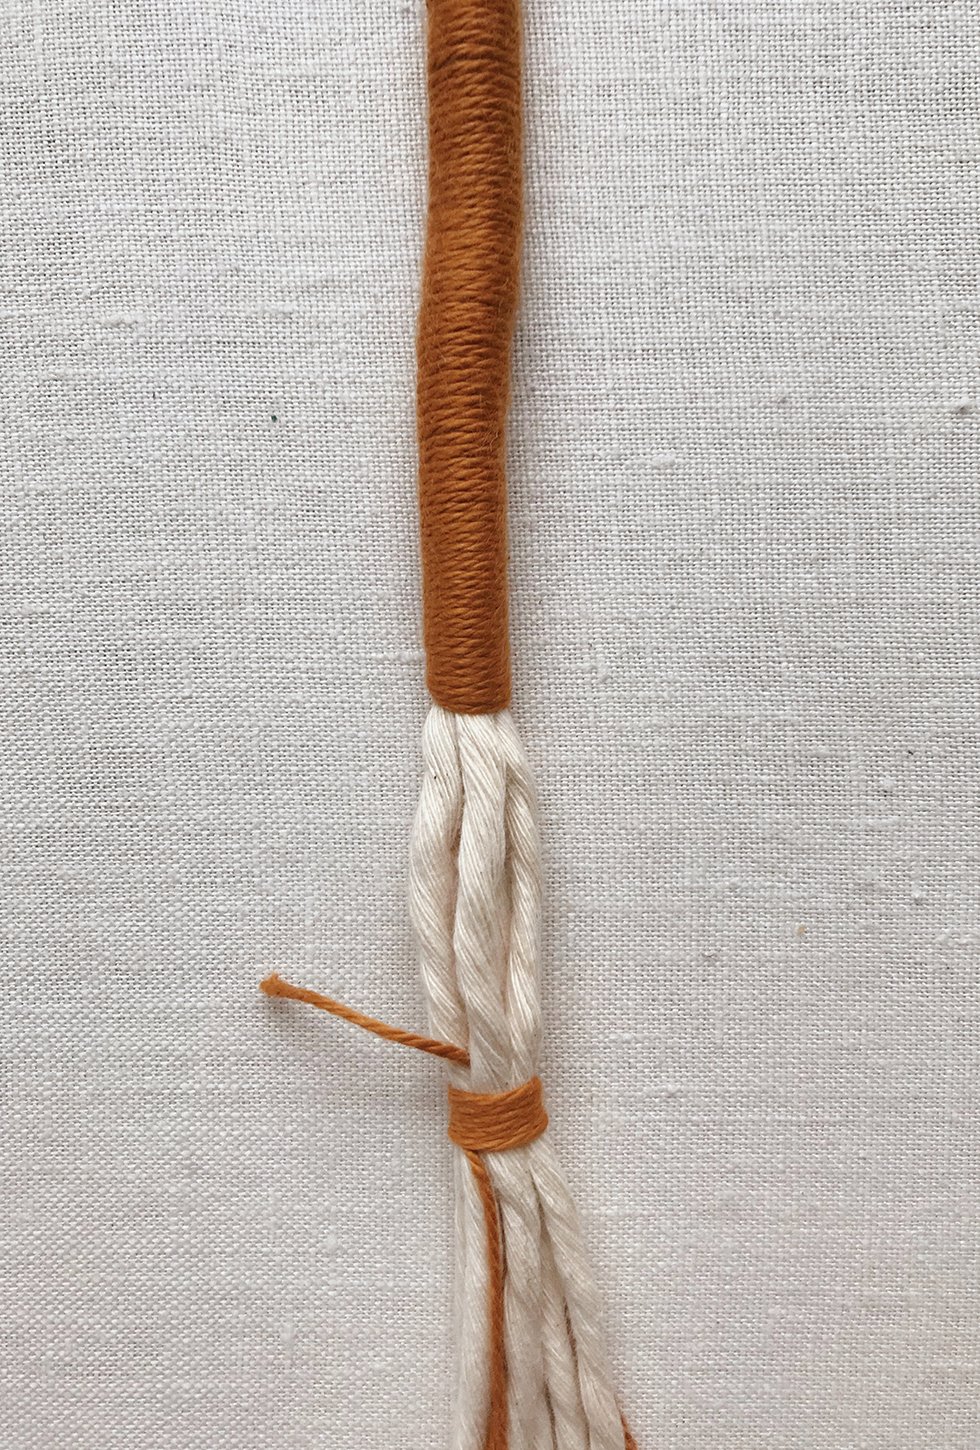
Take one end of yarn and fold the end in half to the desired length of the wrapped section. Align the ends to the very top of your cotton string. Hold the cotton string and yarn in place, right below the wooden dowel. Take the yarn and wrap.
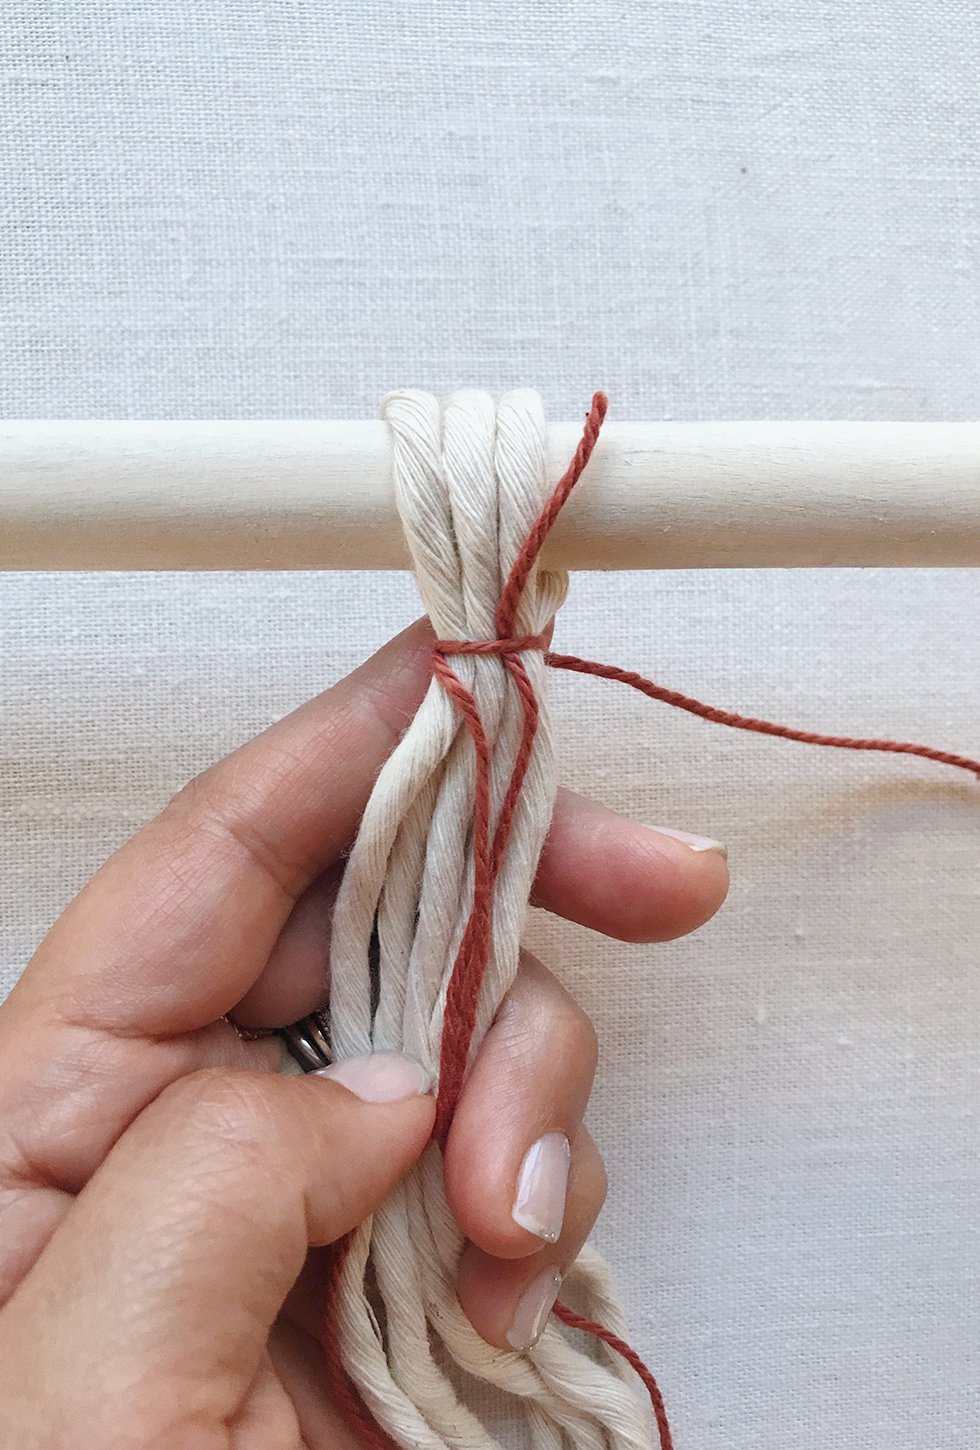
Be sure to leave the tail end sticking out. You'll need that later. Continue wrapping 2-3 times around.
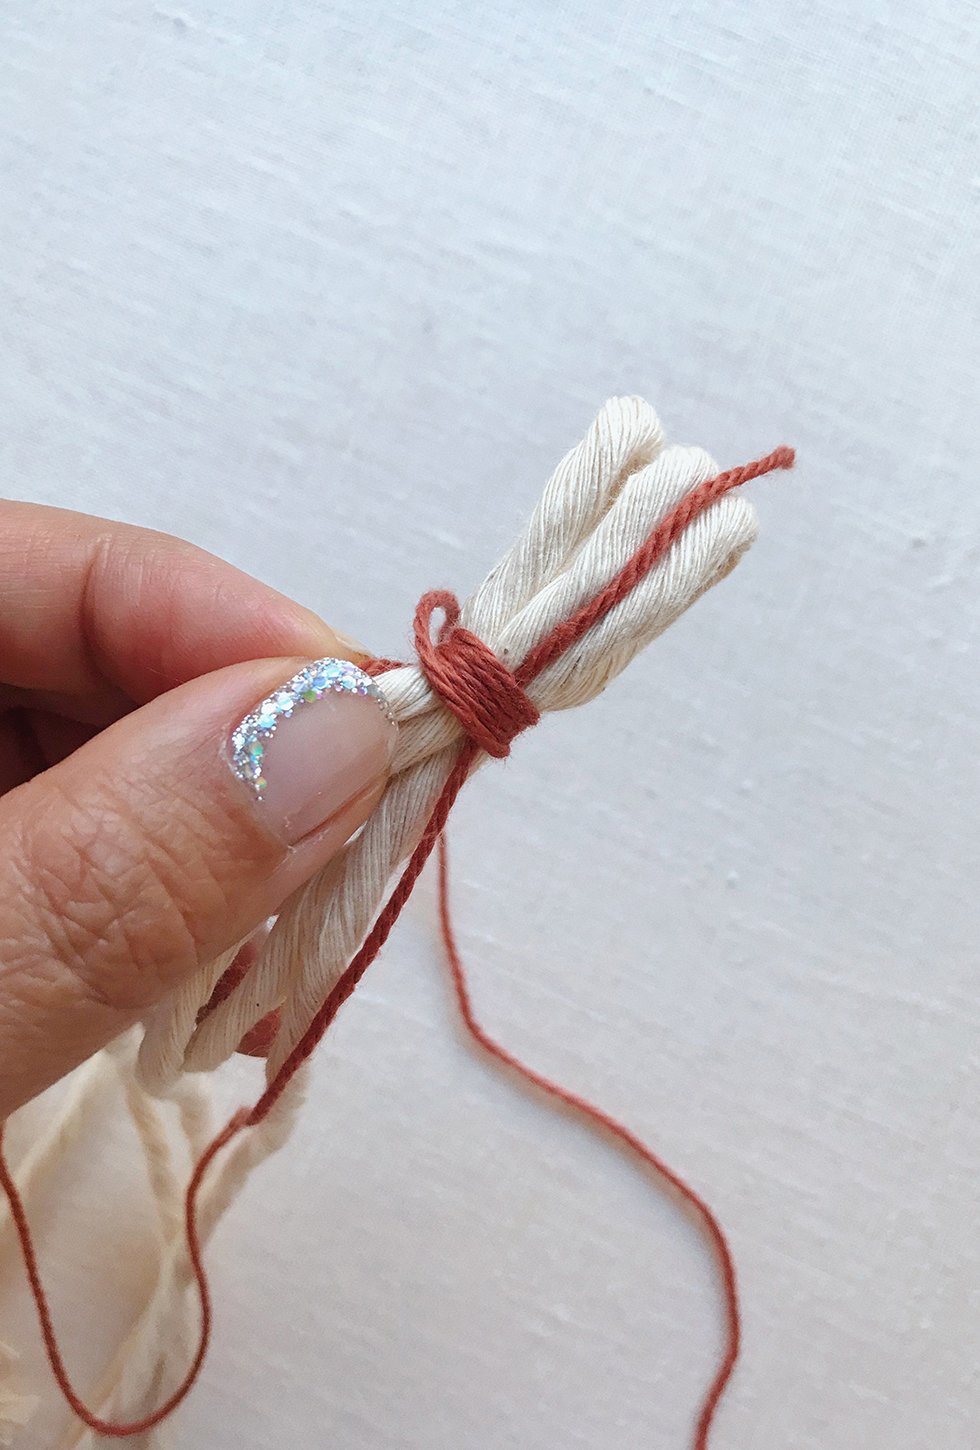
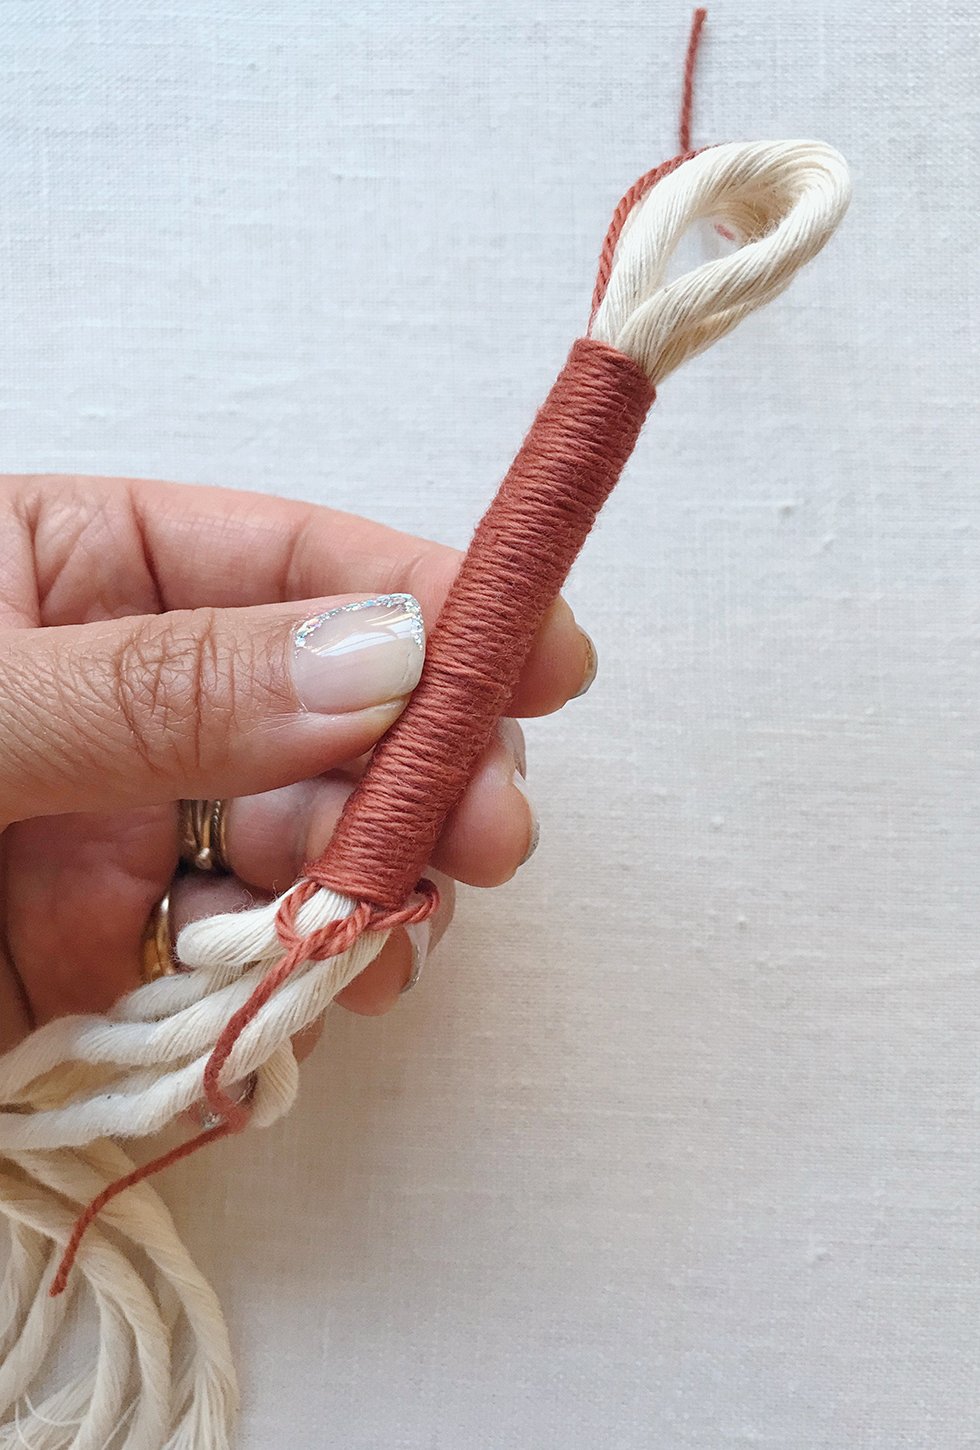
Slide the tassel off the dowel - it's easier to wrap while it's off. And after the first few tassels, hopefully, you'll get a sense of how big of a loop to leave and won't need to wrap on the dowel anymore. Continue wrapping!
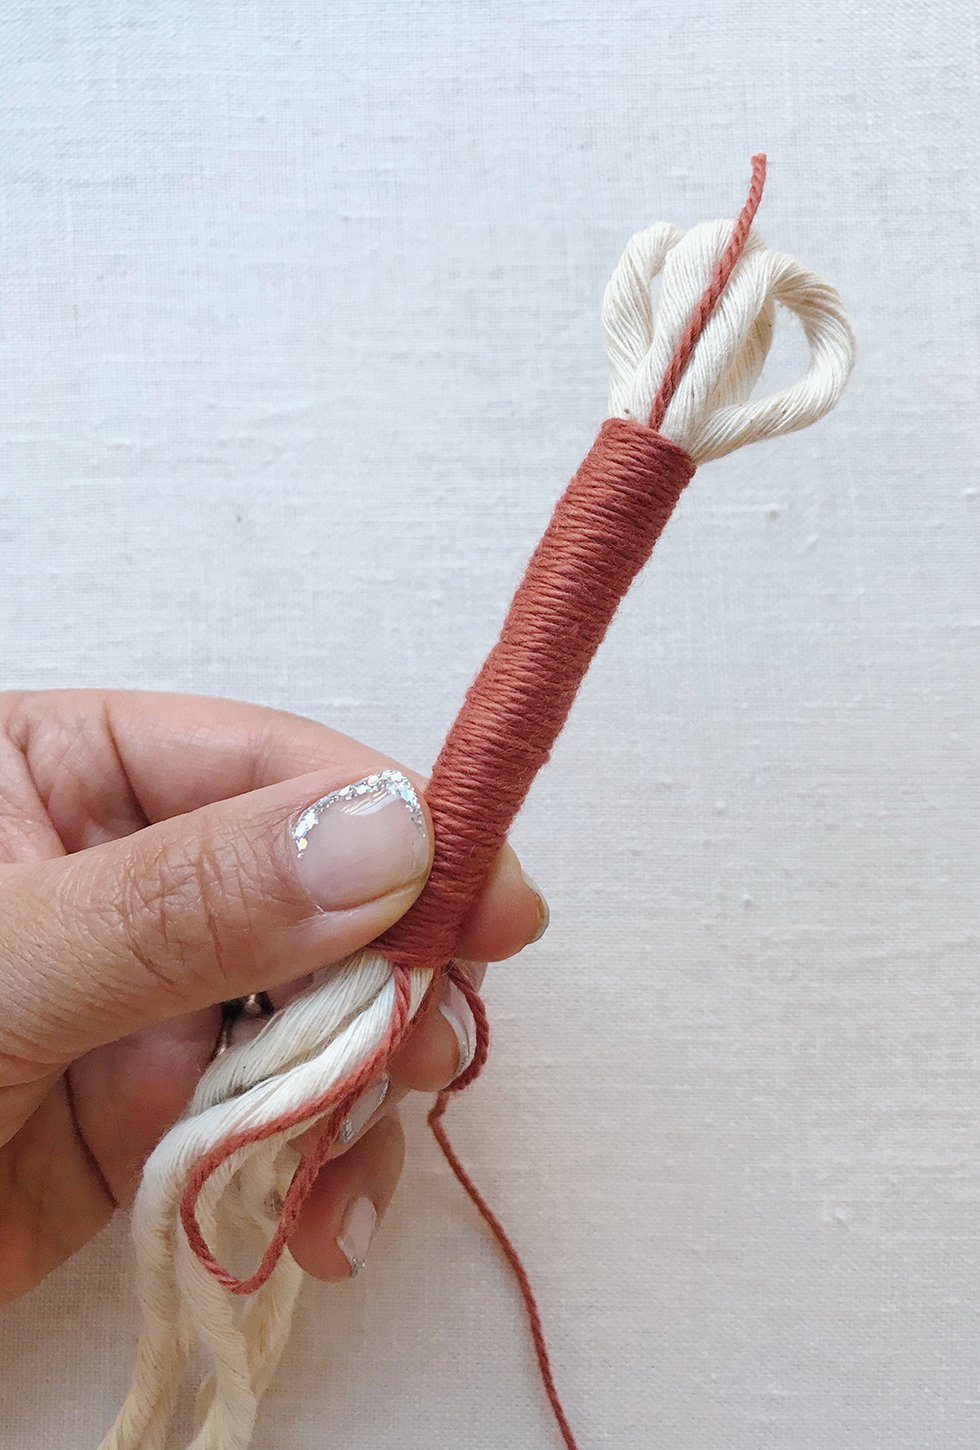
Once you've reached your desired length, without going past the bottom yarn loop, trim the working yarn, leaving about 2 inches. Stick that end through the loop.
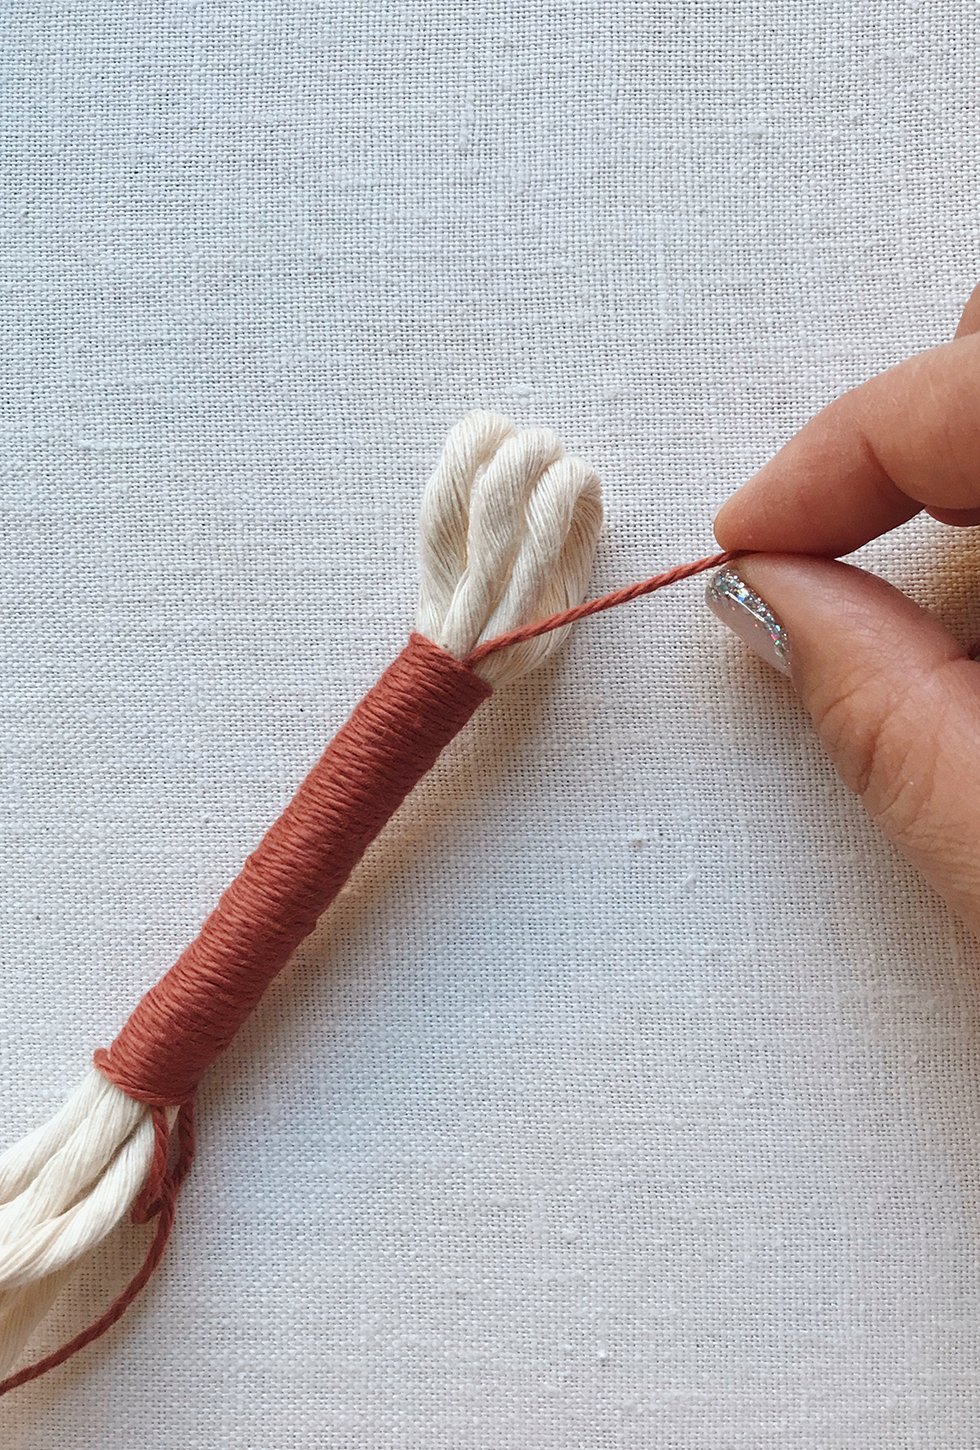
Now, take the end of the yarn at the top of the tassel and start to pull. The loop at the bottom should start to move, along with the other end of the yarn.
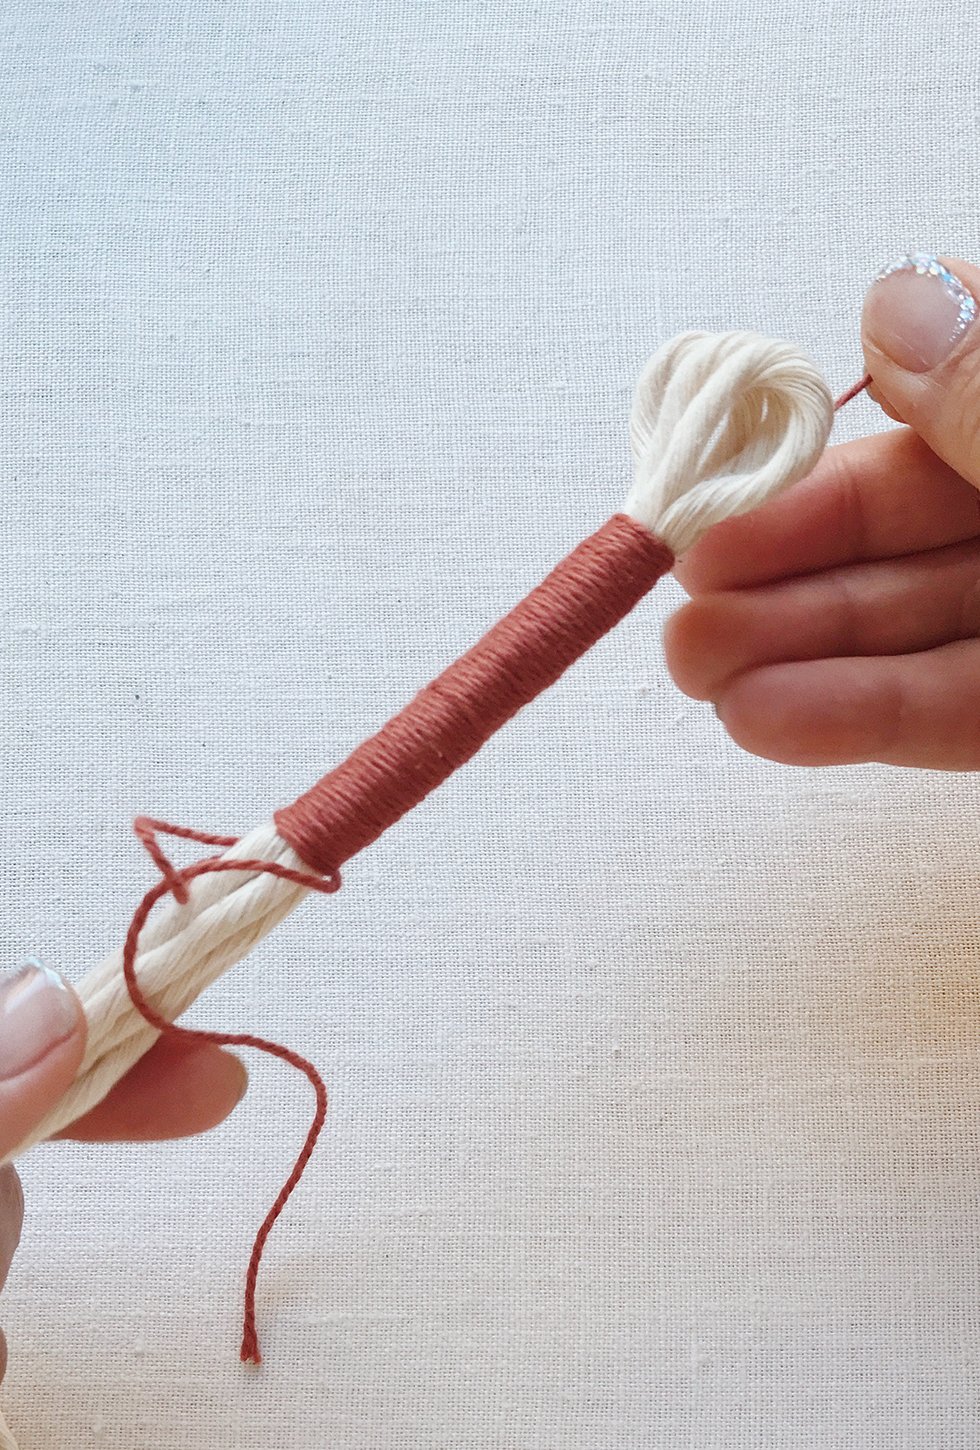
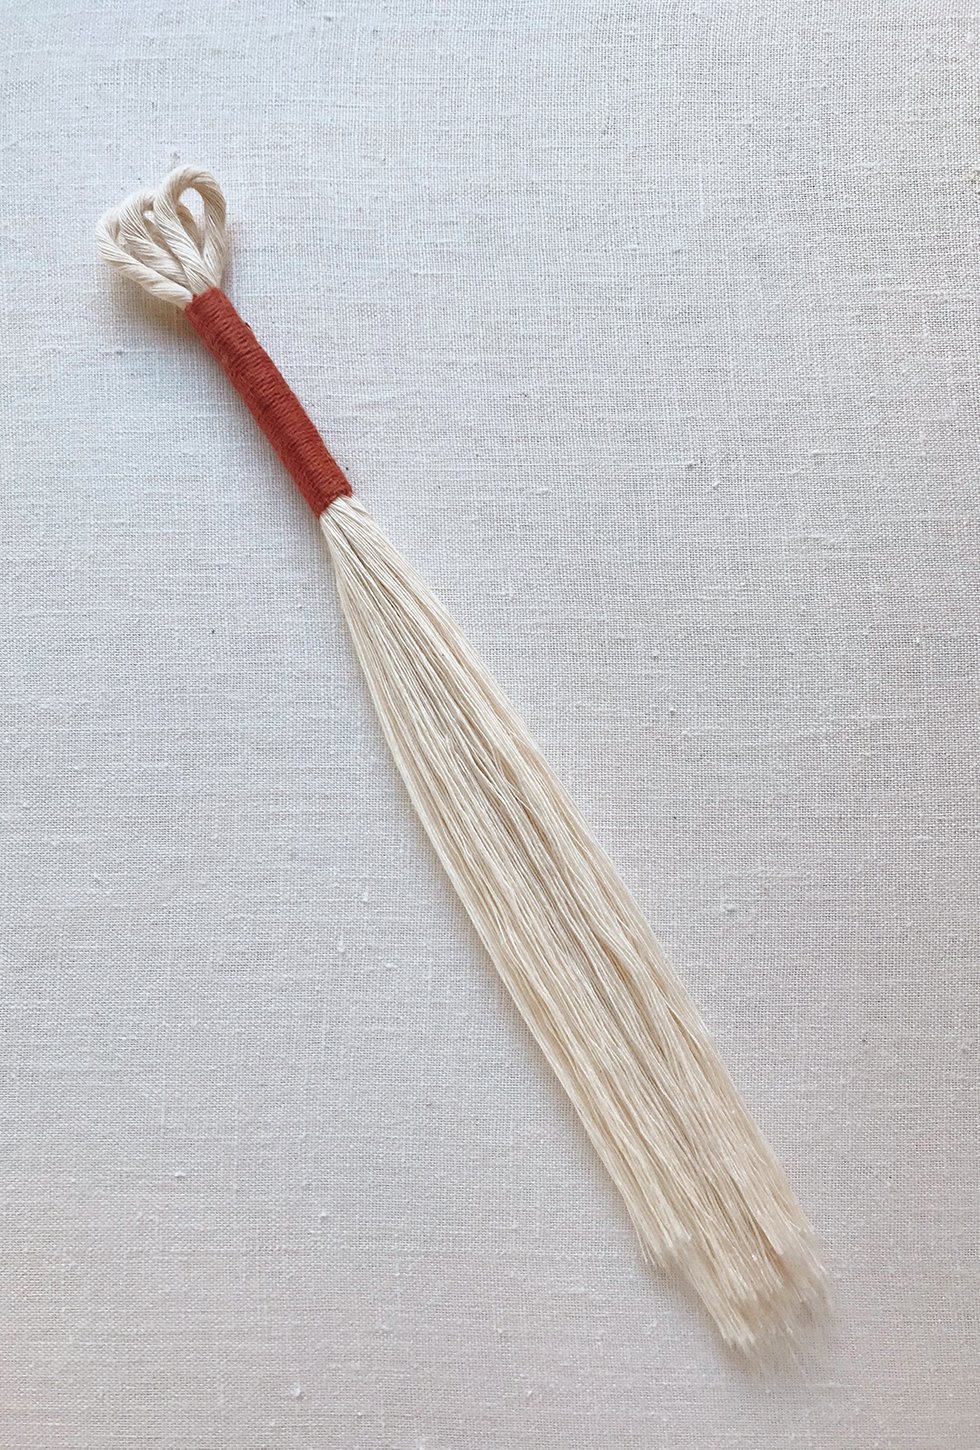
Continue pulling until the loop disappears into the wrapped section.


Trim the ends of the yarn. Continue making more tassels at various lengths and colors.
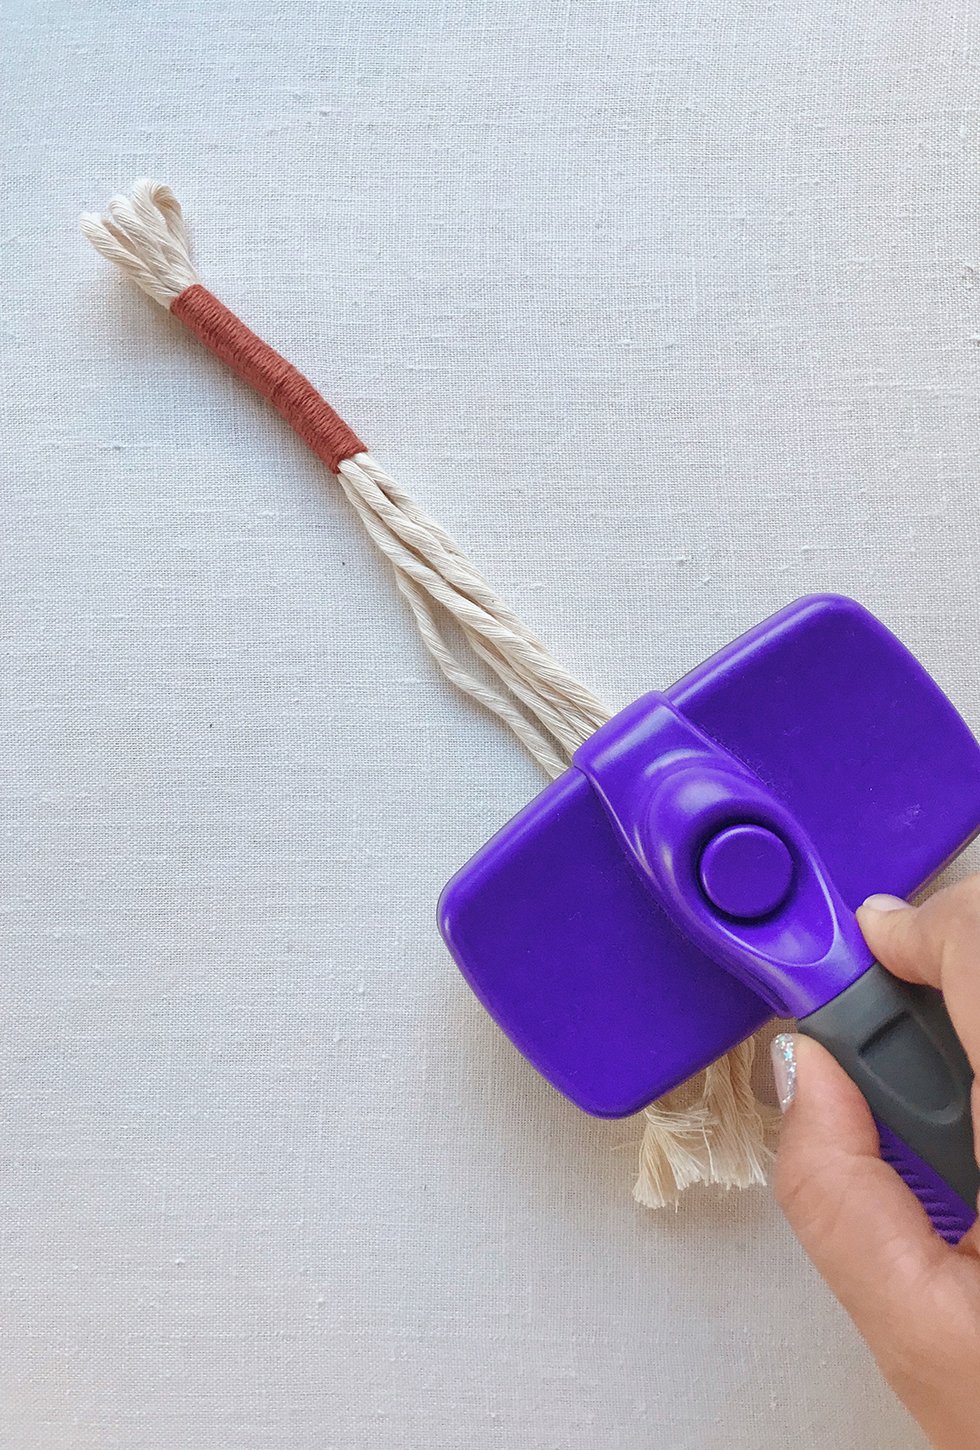
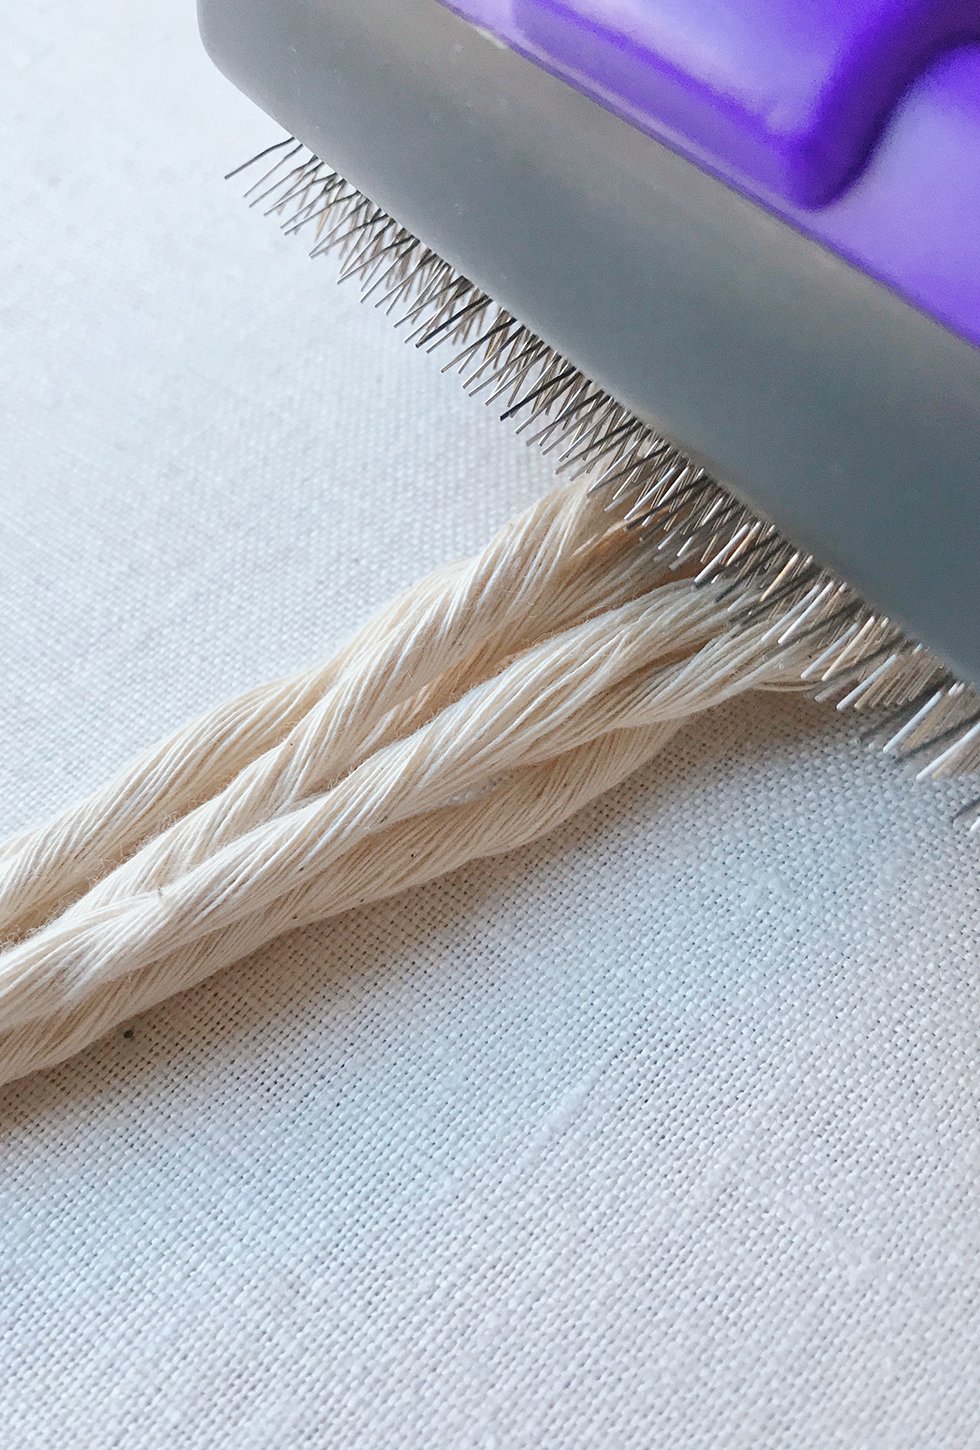
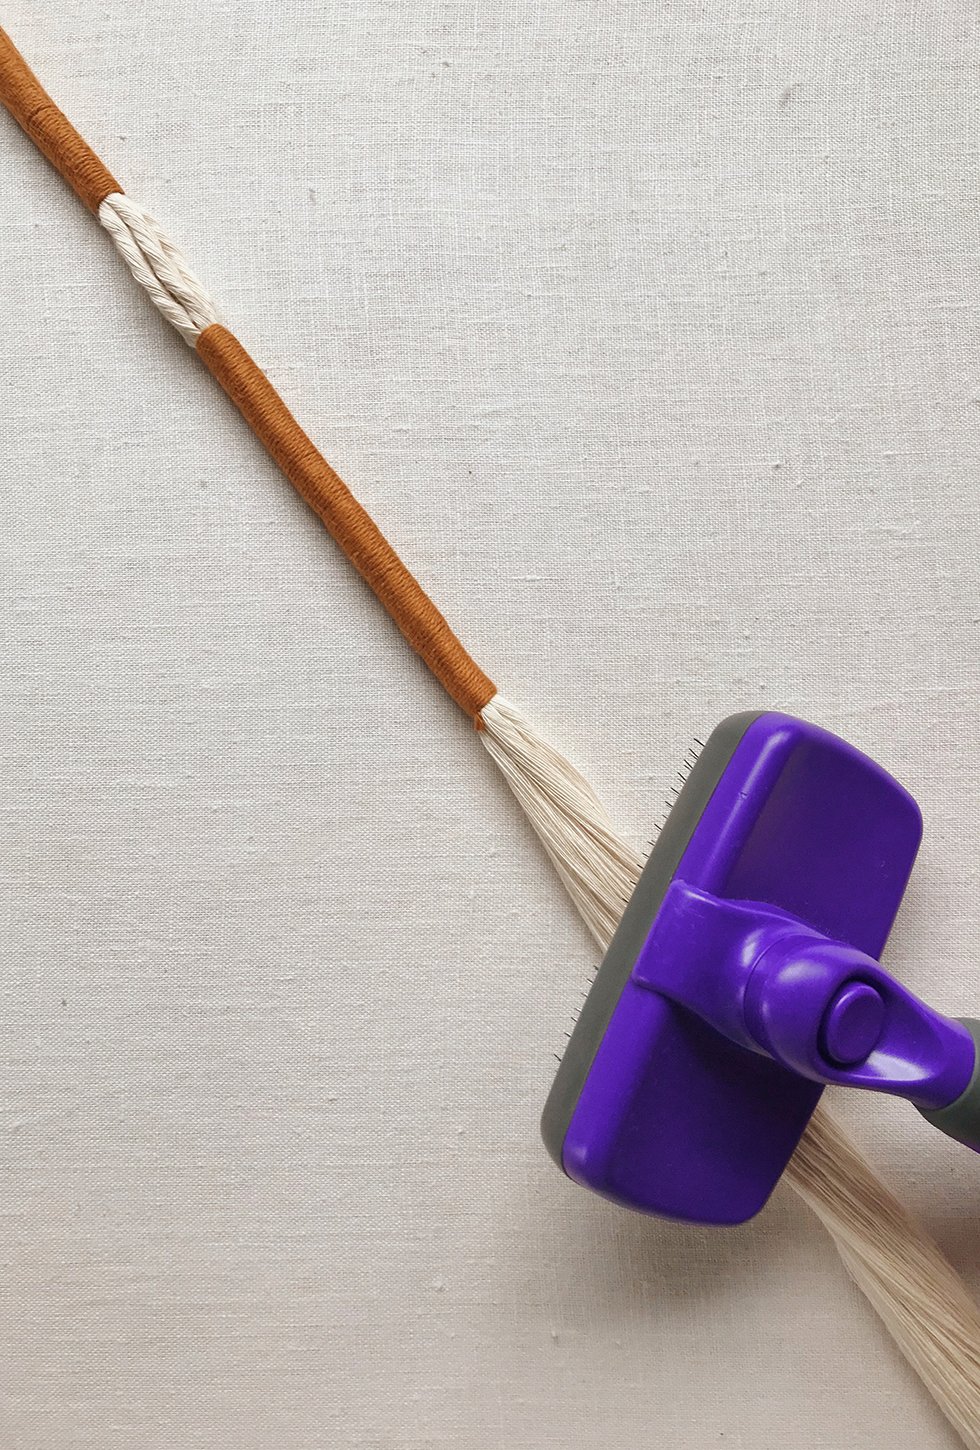
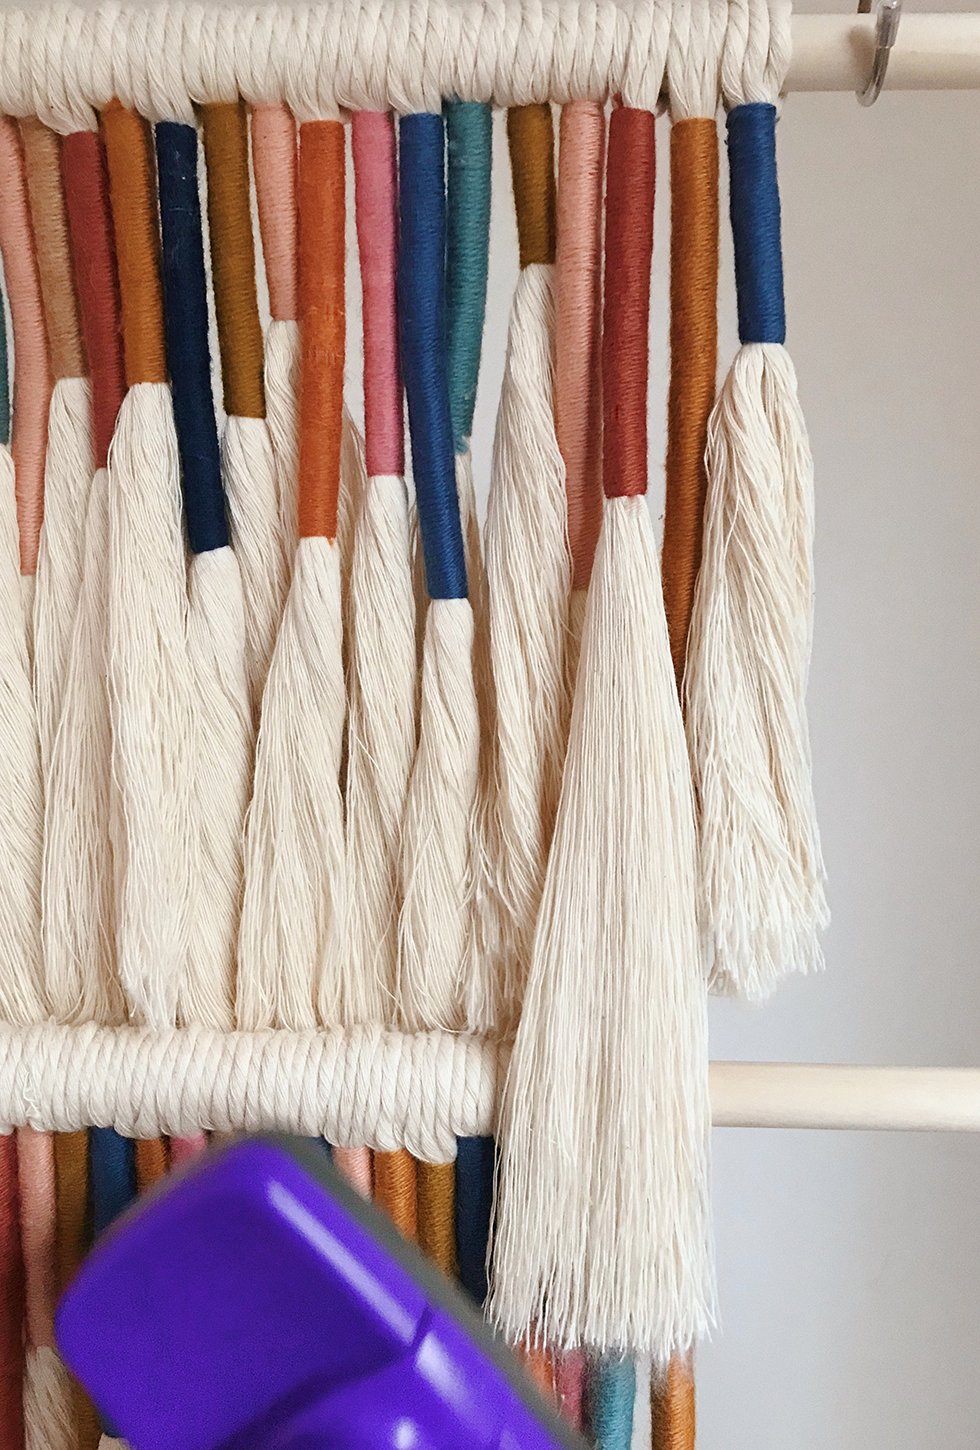
Once all your tassels have been made, you'll need to brush them out with a cat brush. Remember to put the cat brush on a durable surface like a self healing cutting mat - otherwise, the cat brush will scratch any other surface.
When brushing, start at the spine and push hard into the cording when brushing. It'll take several hard strokes to get that beautiful, soft fringe.
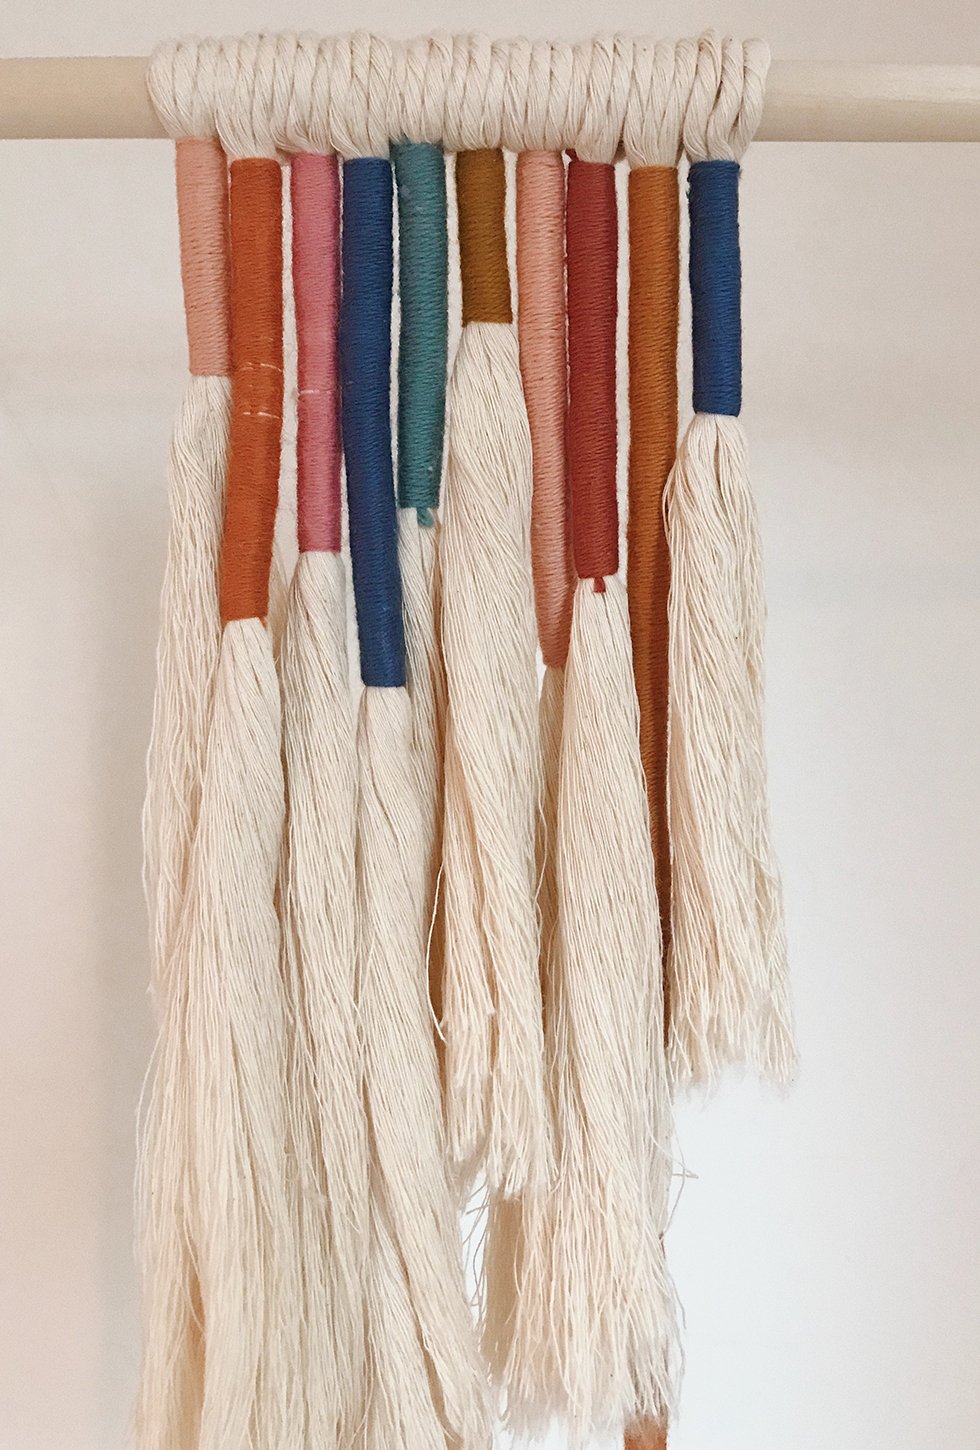

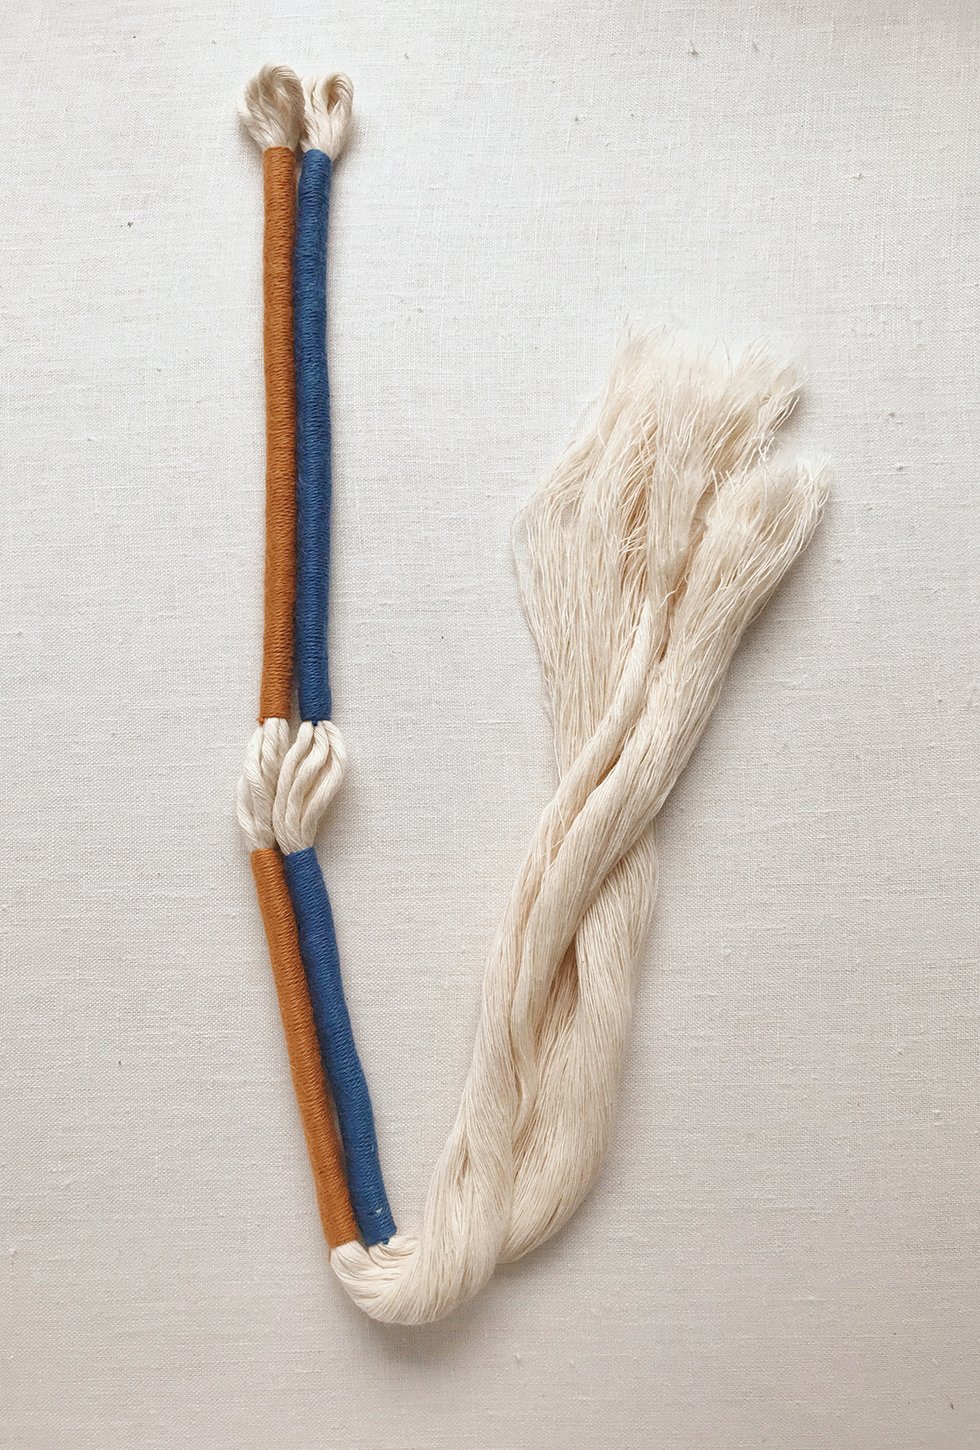
Once all the tassels have been brushed out. You can start assembling them onto your wooden dowel! If you want a single row wall hanging you can skip down to the trimming step. If you would like a two tiered wall hanging, you'll need to make 2 extra long tassels with two sections of wrapped yarn. These will hold the 2nd wooden dowel.
So make the tassel just as you have been doing. Hold up your second dowel to get a sense of where you want that second tier to start. For mine, I used all the shorter tassels for the 1st tier and saved the longer ones for the 2nd tier.
Tie off the first wrap, skip at least a 2-3 section and then wrap again. Brush and then make another one to the exact same measurements.

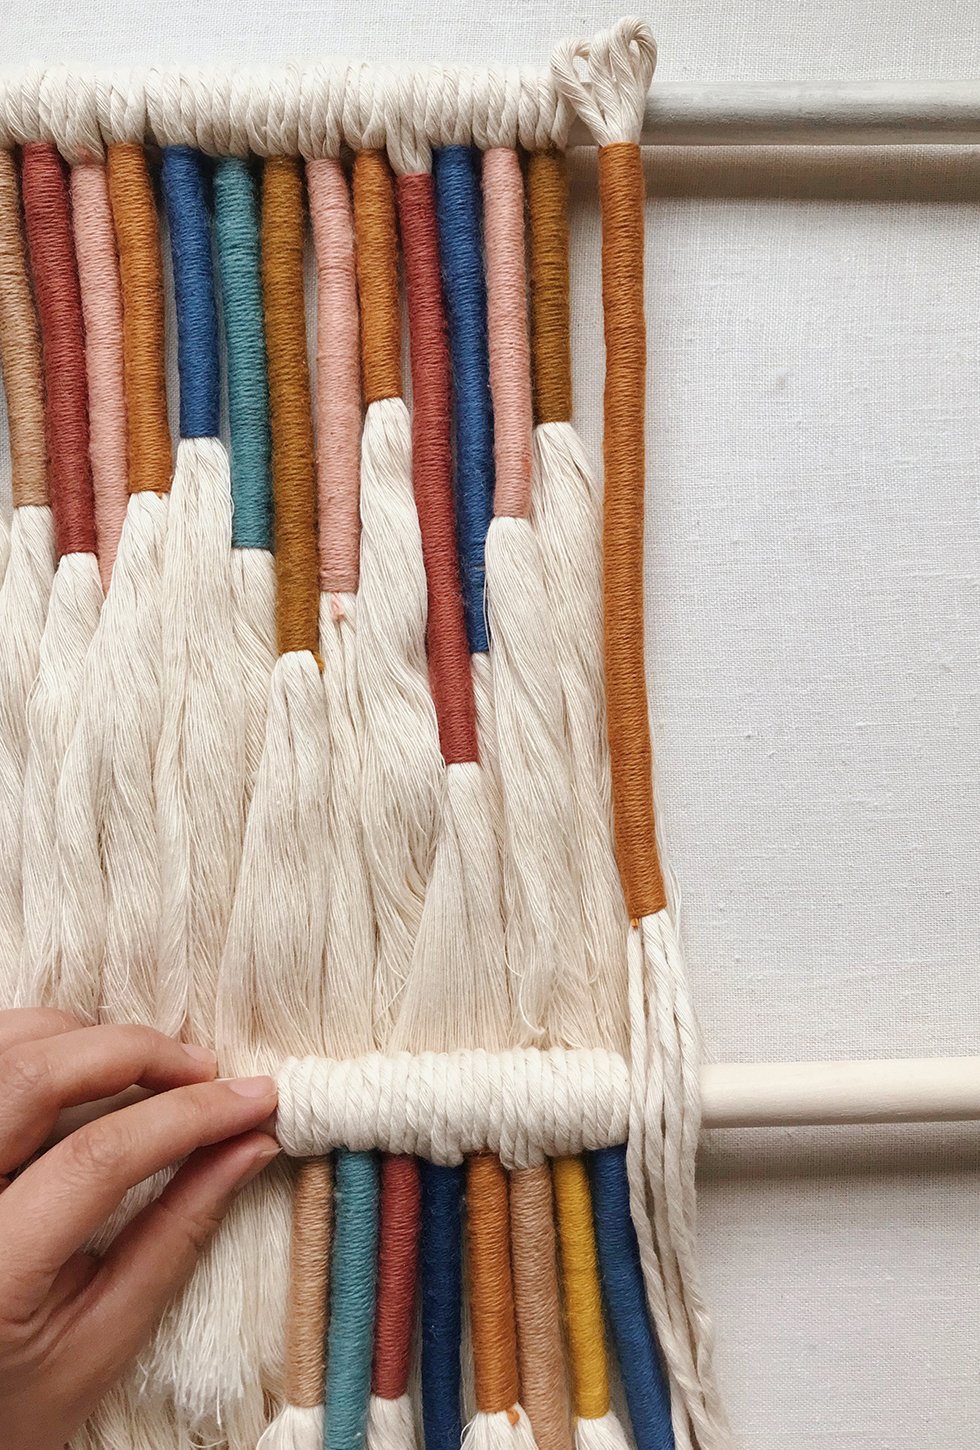
Put the two tassels on the ends of your first dowel. Fill the second dowel with the same amount of tassels. Slide the long tassels to each end of the first dowel. You can even add a couple of extra tassels to those ends.
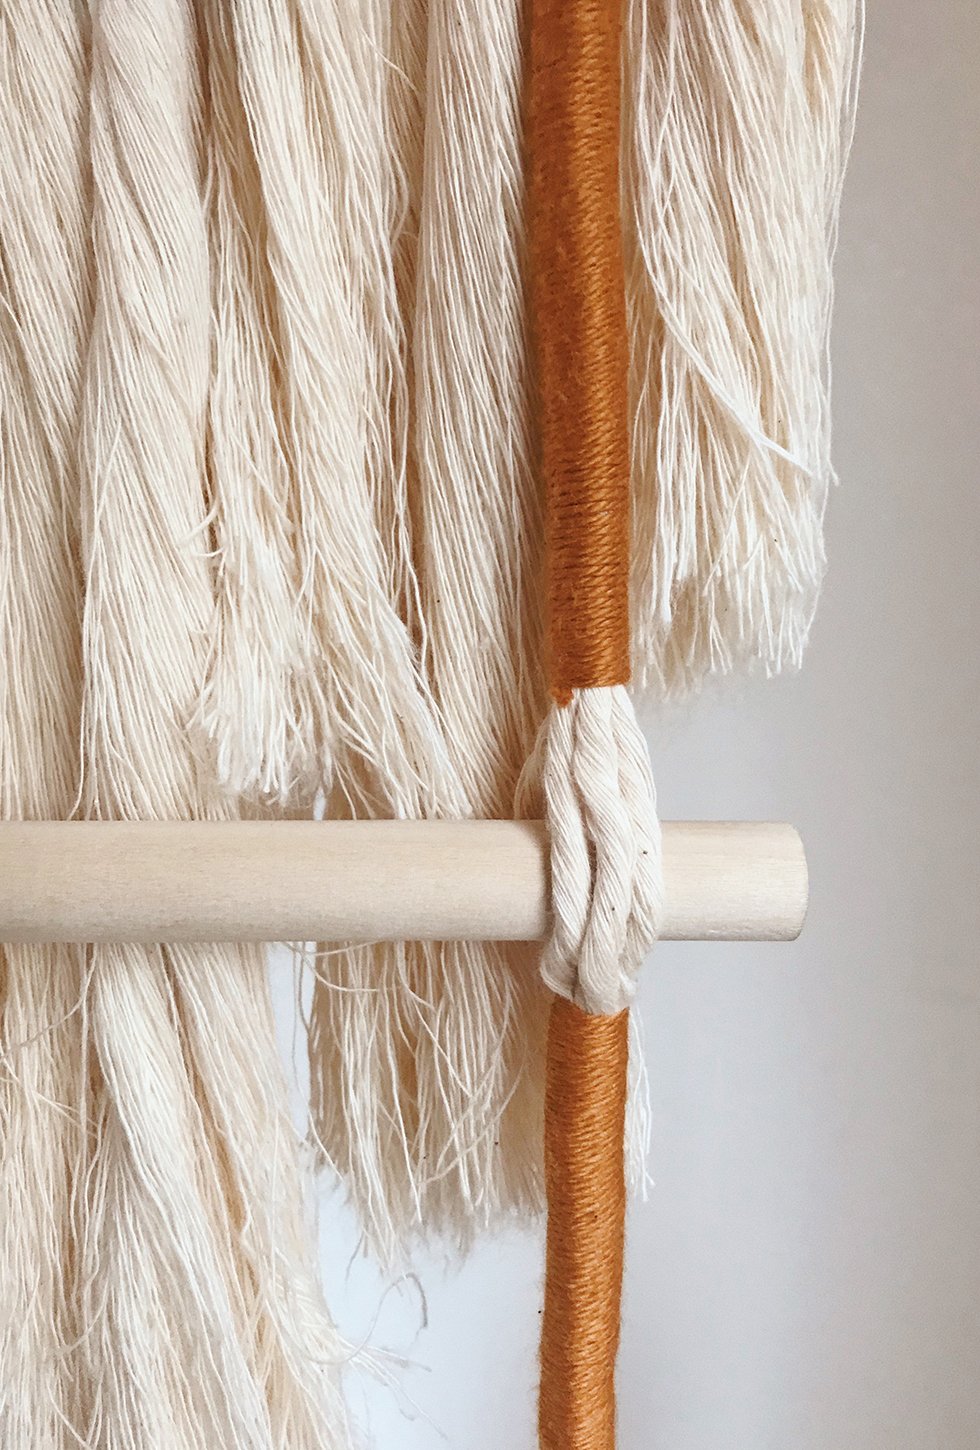
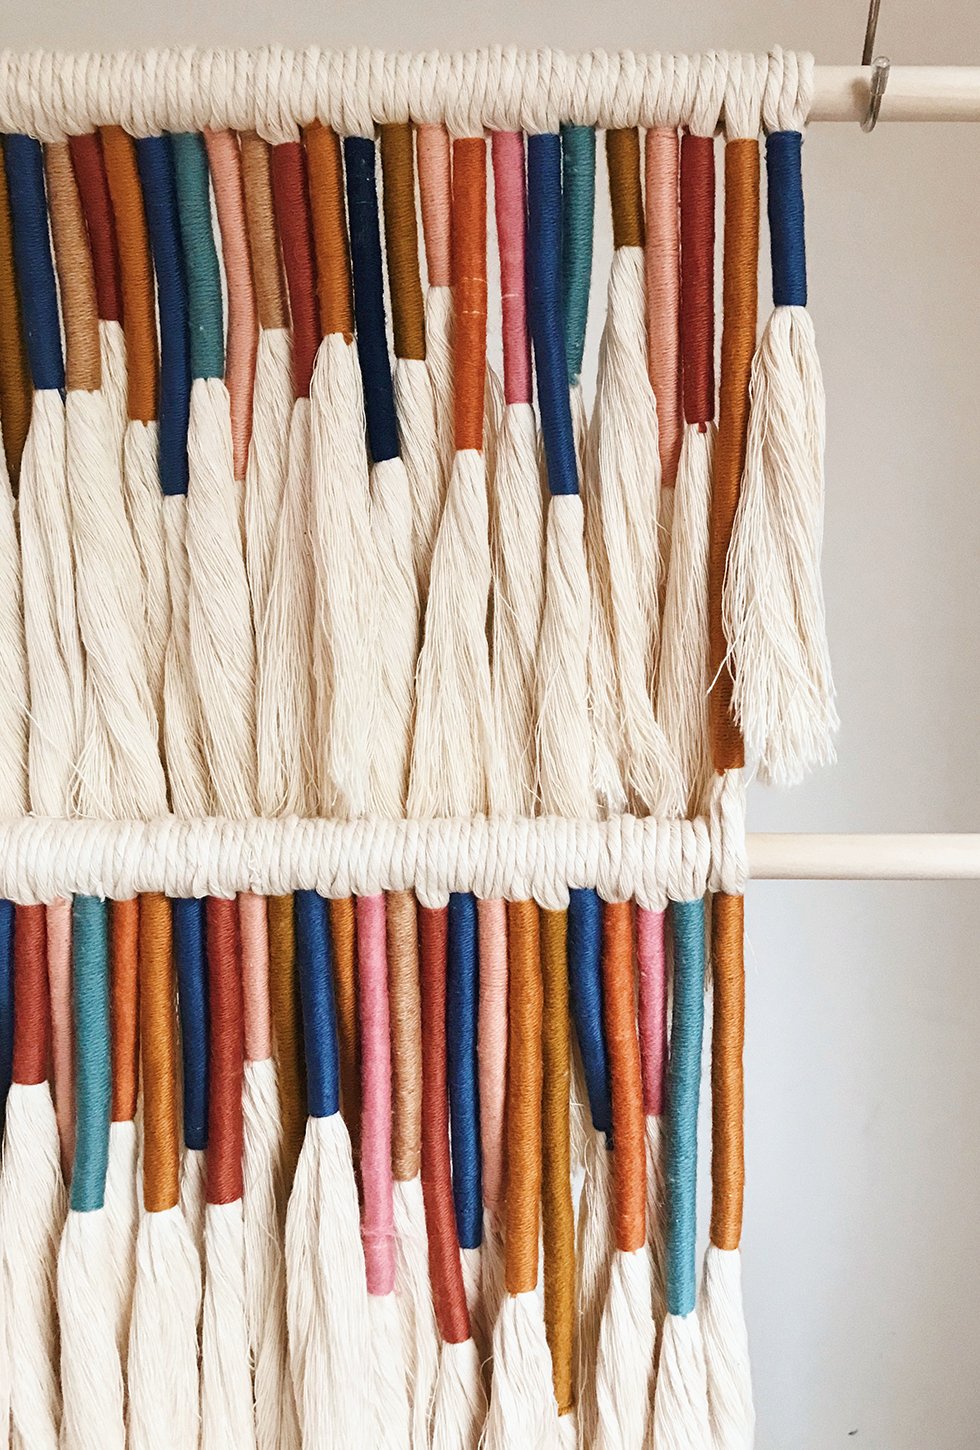
Slide each end of the second dowel into the open section of the long tassels. Voila, two tiers!
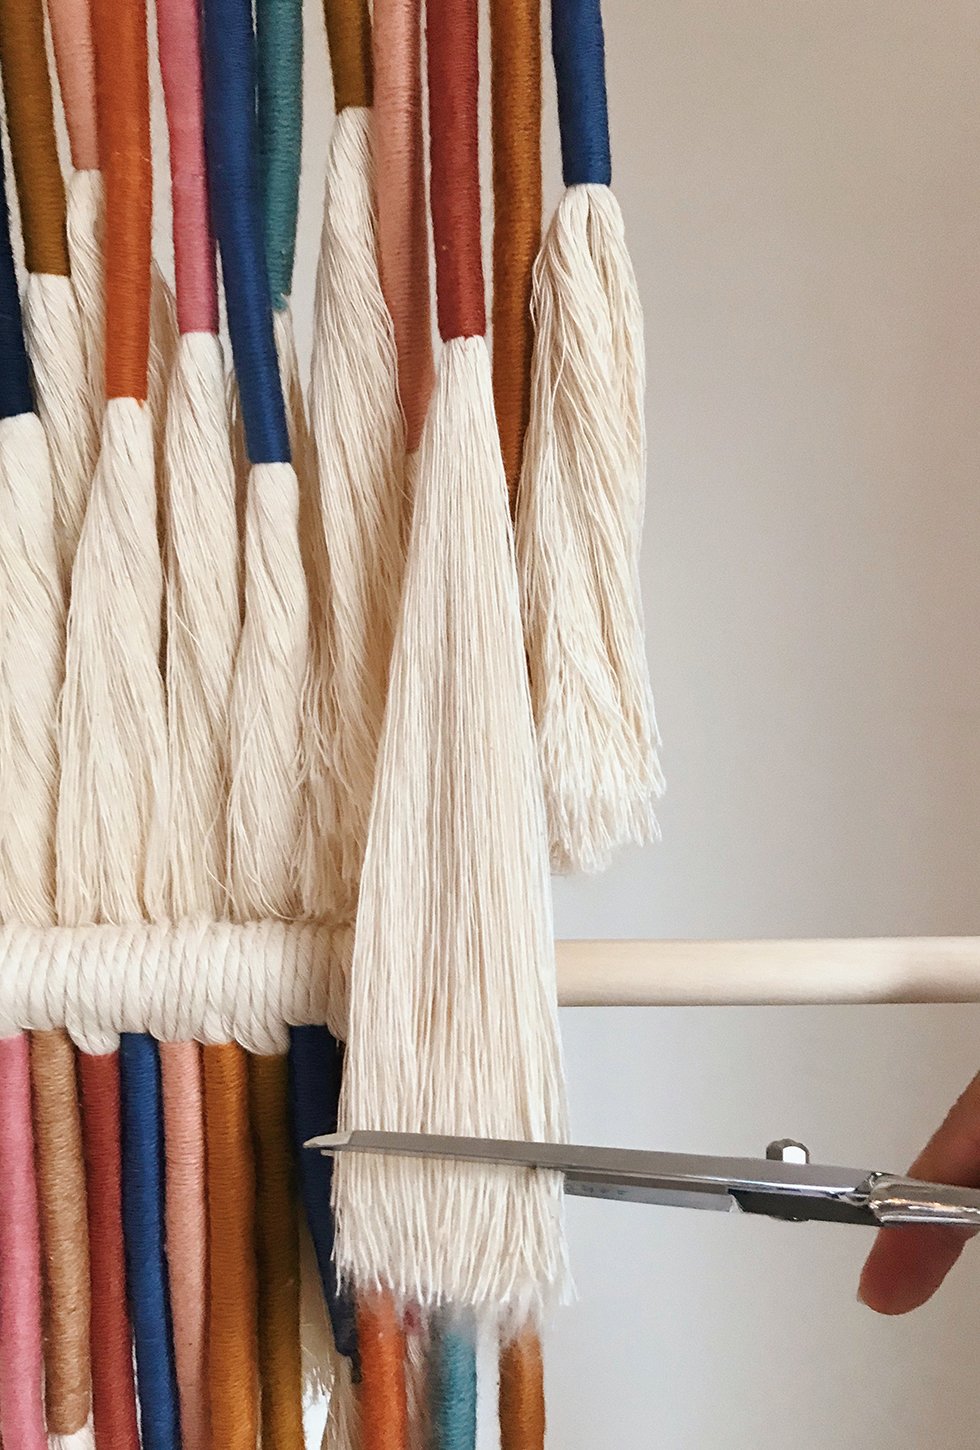
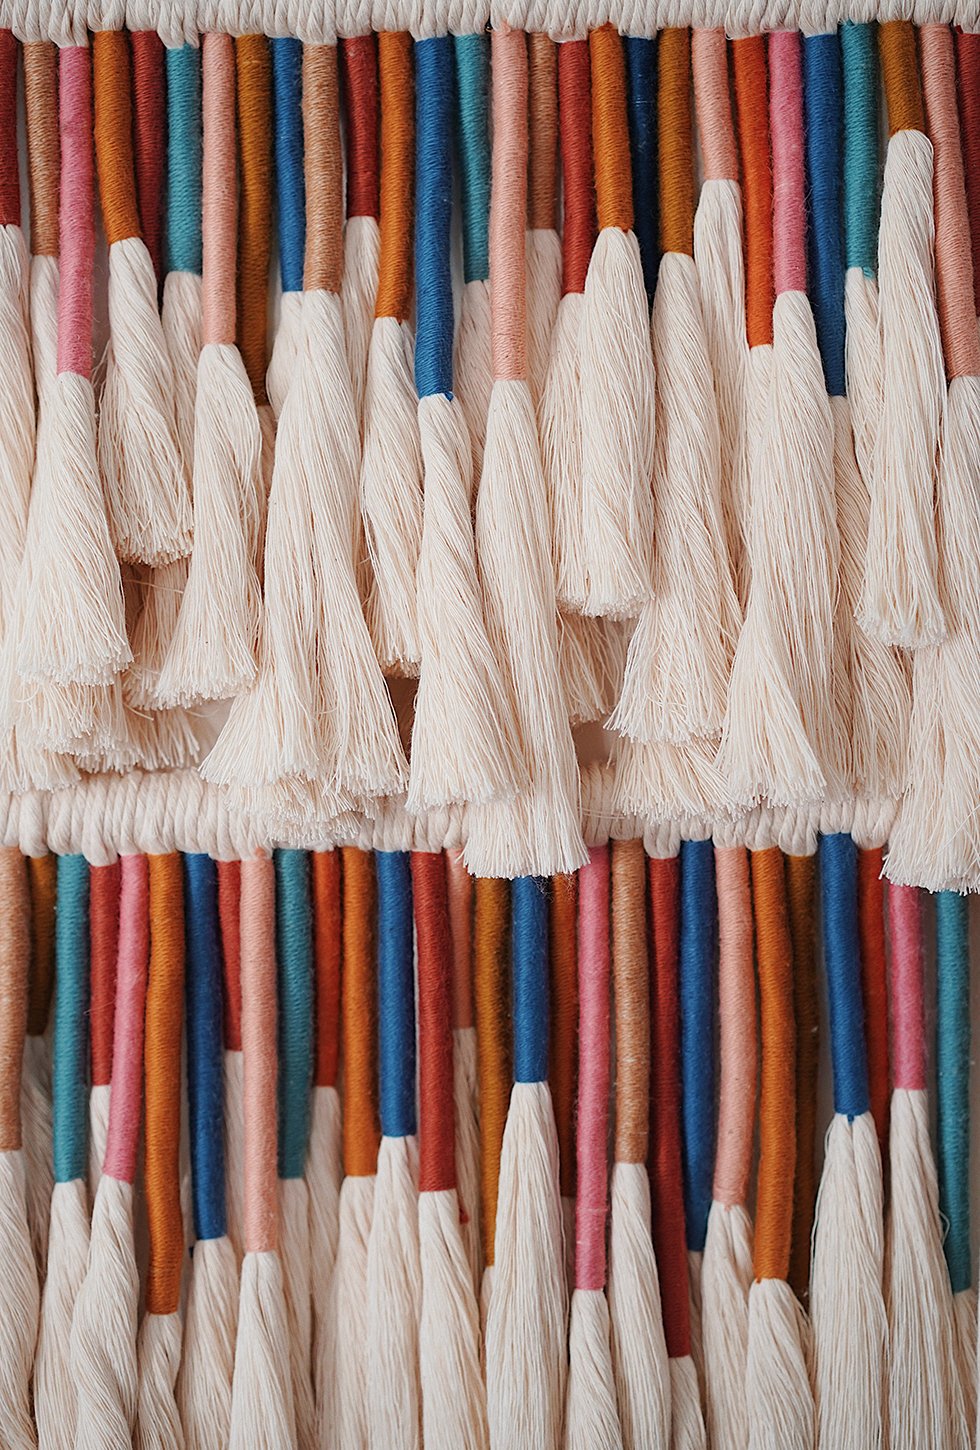
Now comes the fun part. Trimming! I love the effect of a blunt cut - I feel like it accentuates the layers more. Pull one tassel out at a time, give it another good brush and then, with a pair of sharp shears, give it a trim! Continue trimming the tassels along the first dowel and then on the second. Your tassel wall hanging is ready to hang!

photos and tutorial by HonestlyWTF


It looks great Erica! Don’t worry, there are never too many wall hanging DIY posts. Thank you for sharing.
Thank you!
See now THIS is a wall hanging project I could take on and actually finish. I love this!
Thanks, Gigi!
Boa noite! Parabéns pelos lindos trabalhos. bjos .
It’s my 1st time here, and the post that immediately called my attention was yours. Just gorgeous…thank you for the tutorial!
This wall hanging is STUNNING! I have finally found the perfect inspiration for my baby girl’s nursery, thank you!! The colours are beautiful. Please could you share a link to the yarns? Their quality looks so good! (And is the string the bisque or the white colour?) Thank you 🙂
Wonderful!! I got the white 🙂 As far as yarns, I just used some old yarns that I had. I like Purl Soho for brighter colors + A Verb for Keeping Warm for more neutral tones. Good luck with it!!
Can you share where or link to white cotton string ?
What are the dimensions of your finished project?
Yes! I wonder this too! Also wondering how many skeins of the white yarn you used for this hanging?
Hello. This is absolutely wonderful. Thank you so much for this tutorial. I was wondering how you fix it to the wall? Thank you again. Mégane
This is gorgeous!
It’s beautiful……. I’m putting it in my ‘to-do’ list
Wow! It must be fun to try this. Thank you for sharing the tutorial! This wall hanging is very nice.
Could you have made a more addictive project?! Just made my first tassel and I can tell I’m going to be hooked. So fun. Thanks for the wonderful tutorial.
What is the wrapping technique called? I’m struggling to understand the instructions which is frustration because it looks so gorgeous!!!…would love to find a video of someone doing it so its easier to understand.
You’re basically making what’s called a gathering knot. You can find many tutorials on how to do it. Hope this helps
LOVE your blog! Love your d.i.y. projects!!! I am so excited to try a few of these! You rock!
I’m SO going to do this as a headboard when I get my IKEA bed— do you know the one I’m talking about, the simple wood one with the high bar at the head that’s begging for this! I can’t wait!!
Ohhh that sounds amazing. Please share if you end up making it!! xx
nice
Could you make a video of how you do it? It does not look great in the photos as you wrap the thread with the colors. Thank you
She’s making what’s called a gathering knot. You can find many video tutorials showing how it’s made. Hope this helps.
how much of each string do i need?
It dosnt have any rule. How much you want
I am learning creative things…..so love to watch these. Thanks so much for sharing.
This is gorgeous. Erica, I am truly impressed.
SUCH a cute idea!! Definitely trying this!
I liked what you did with the tassels. You made some really unique pieces. I loved them. Looking forward to trying them out.
Jennifer
Great! I hope you do!!
I absolutely love this craft, keep it up for us all while in lockdown. Keep safe-stay indoors and have fun with crafting like this, brilliant! You are an inspiration!!!
Regards
Kay xx
Are you using a stiffener on the brushed out rope?
Yes!
me encanta esta idea para hacer algunos adornos
en colores diferentes
Just made a much smaller version! Thank you for the tutorial! How did you hang it? I’d like to hang it like yours without anything showing.
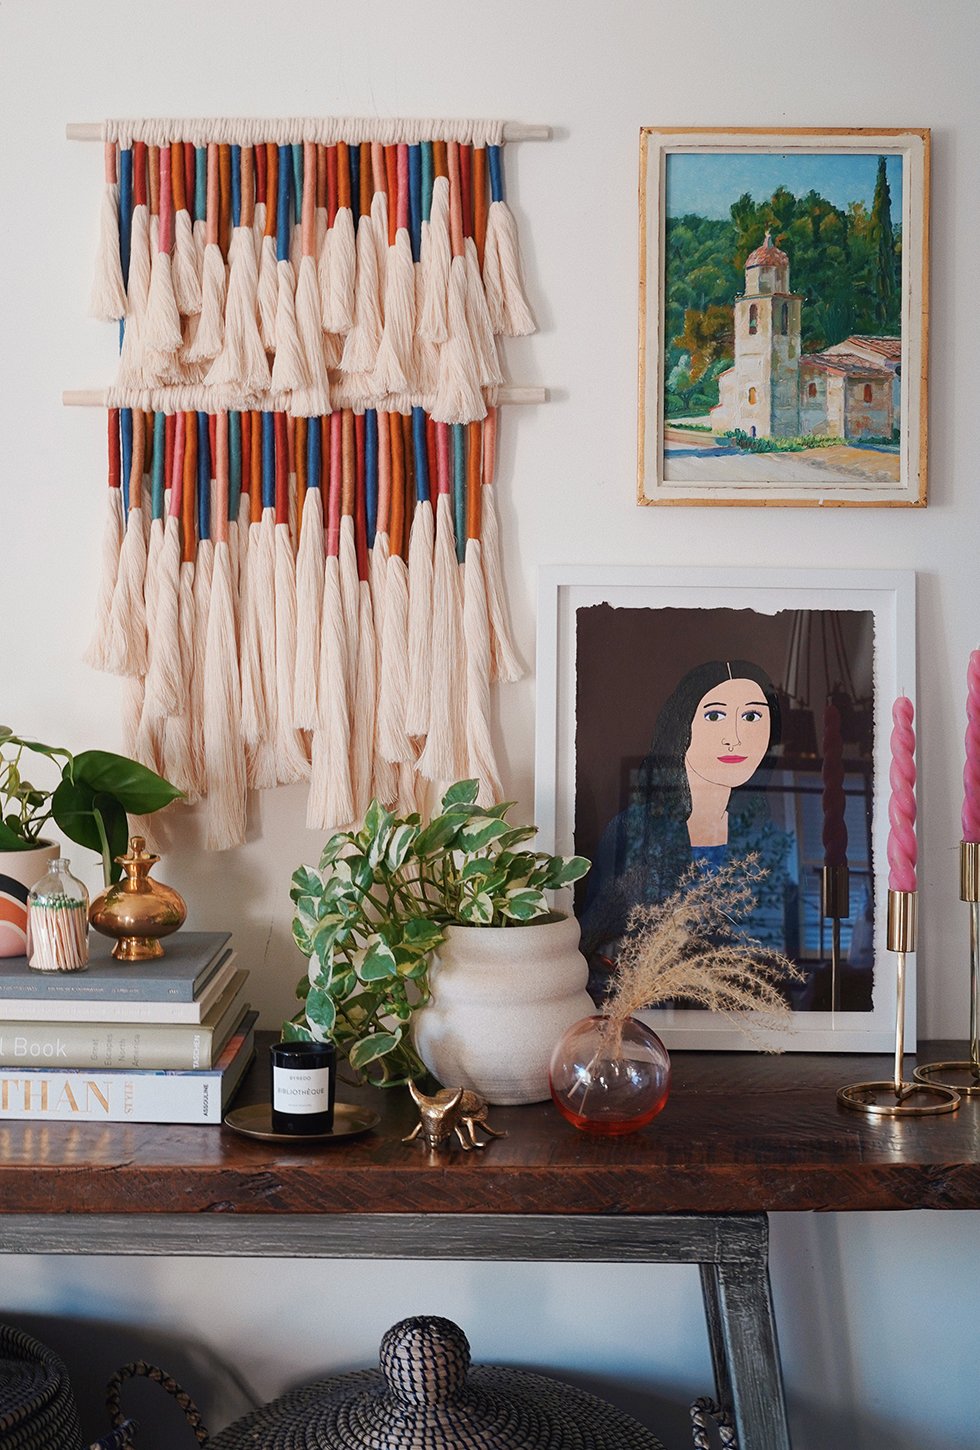
Oh great!! I centered the top bar and have it rested on top of a nail. Does that make sense? 🙂
Awesome, thanks!
Thanks for keeping me sane during the covid pandemic I have found something creative I love, thank you thank you thank you from Australia!
Such a cool project! I am having trouble brushing out the cord with the cat brush. I was careful to get the same type of cord & my cat brush even looks like yours. Any suggestions on the brushing out step? Thanks for sharing your work!
My advice would be to comb one tassel at a time, starting at the bottom. It is def a practice in patience. Hope this helps.
Super, muy buenas ideas, gracias por enseñarnos.
I’m loving your ideas so much,being a beginner I can’t wait to get started.You say to use single twist string to make the feathers & tassels. Could I use 4 strand macrame string 4.5 or 3 mm. Kind Regards, Lynette.
Its very beautiful but the photos of tutorial not open
Hi!
I am in the process of making this, but I do not have a cat brush! Do you have an suggestions/substitutions for brushing out the tassels?
I really loved interpreting this project. I made dimensional changes after I hung it. It needed some depth. Thanks for the inspiration. I love the knot project also. I wanted to share a picture but don’t see how.
Maravilloso¡¡¡¡ Gracias por compartir tus conocimientos. Que tengas un gran día.
What weight yarn are you using? Thank you.
if you dont have a catbrush, what else do you recommend? Thanks
Awesome work! I’ll give it a try.
I love your posts and explanations
Thank you 😉