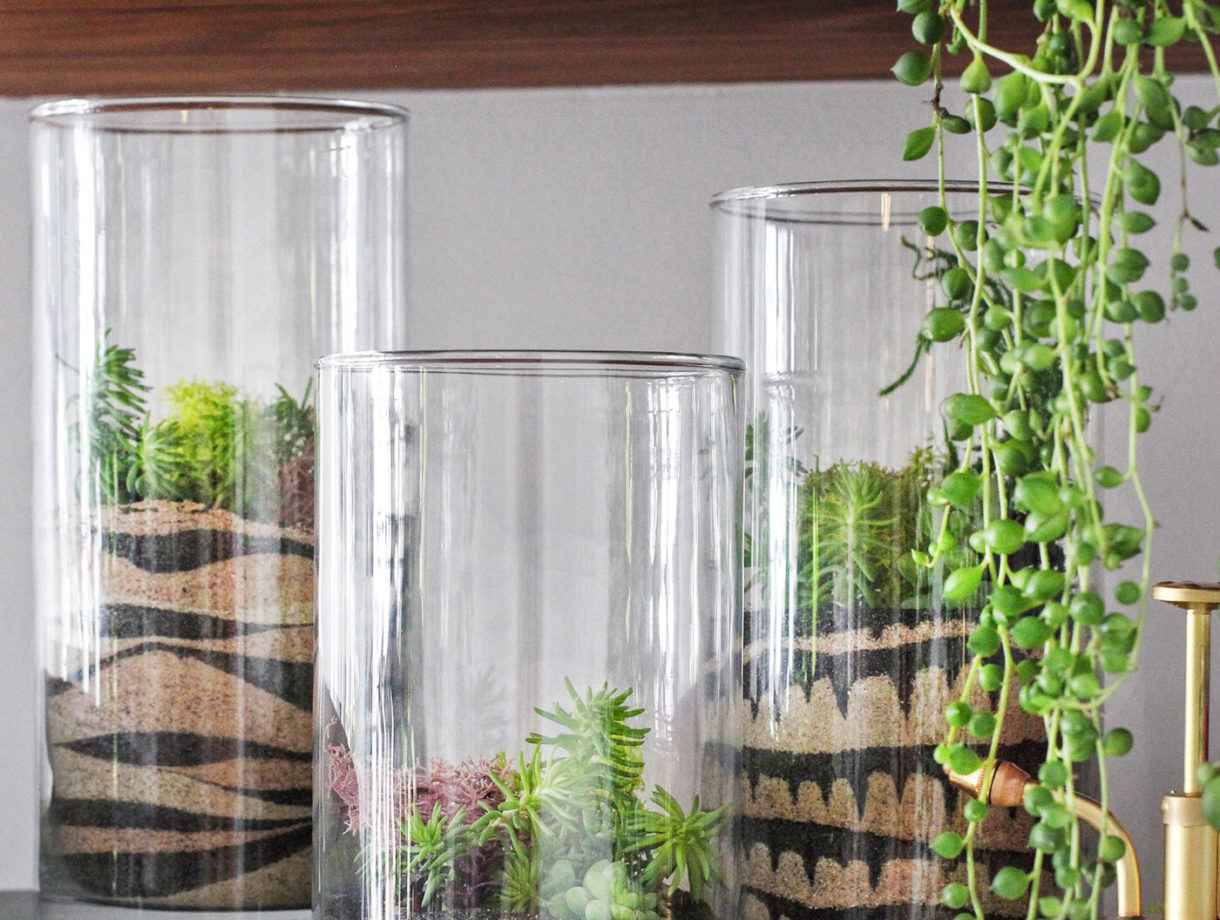
Attention green friends: my second kit with Makers Kit drops today! It was a recent obsession with cultivating my own green thumb (more on that later) and a nostalgic rediscovery of sand art that inspired the concept behind this easy to make terrarium. I’ve always enjoyed building my own mini eco-system as you can have so much fun experimenting with different plant species on an adorably small, manageable scale. Trust me, for someone who has a long history of wiping out cacti, this testimonial speaks volumes. And what better way to change up the standard terrarium formula than with layered sand art, a favorite childhood craft? I told you this would be fun. One of the most exciting parts about this kit is that we’ve provided you with a packet of assorted sedum seeds so that you can germinate them yourself and watch them sprout into a variety of luscious succulents in a few weeks time. After all, all good things require patience . . .
Each kit includes:
- sedum seeds
- planter pot
- peat pellet
- 3 bags of sand
- glass vase
- mixed moss
- pipette
- long spoon
You’ll need:
- a piece of paper
- scissors
- wooden skewer (optional)
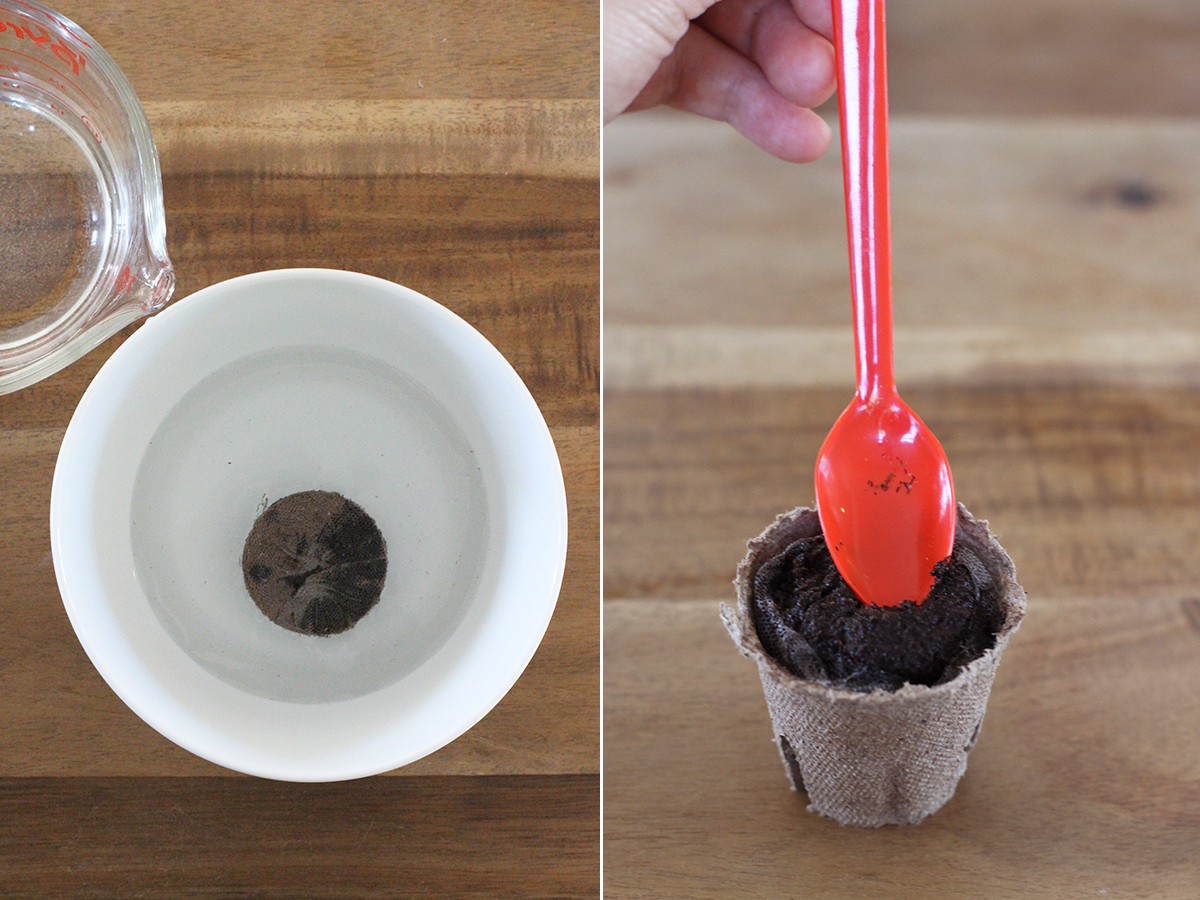
Start by placing the peat pellet in a small bowl. Pour water over the pellet until it’s completely submerged. Allow to sit for 30 minutes until it has expanded. Before placing the soil into the pot, make sure to squeeze out any excess water. Place the soil into the starter pot and sprinkle a pinch of sedum seeds over the top.
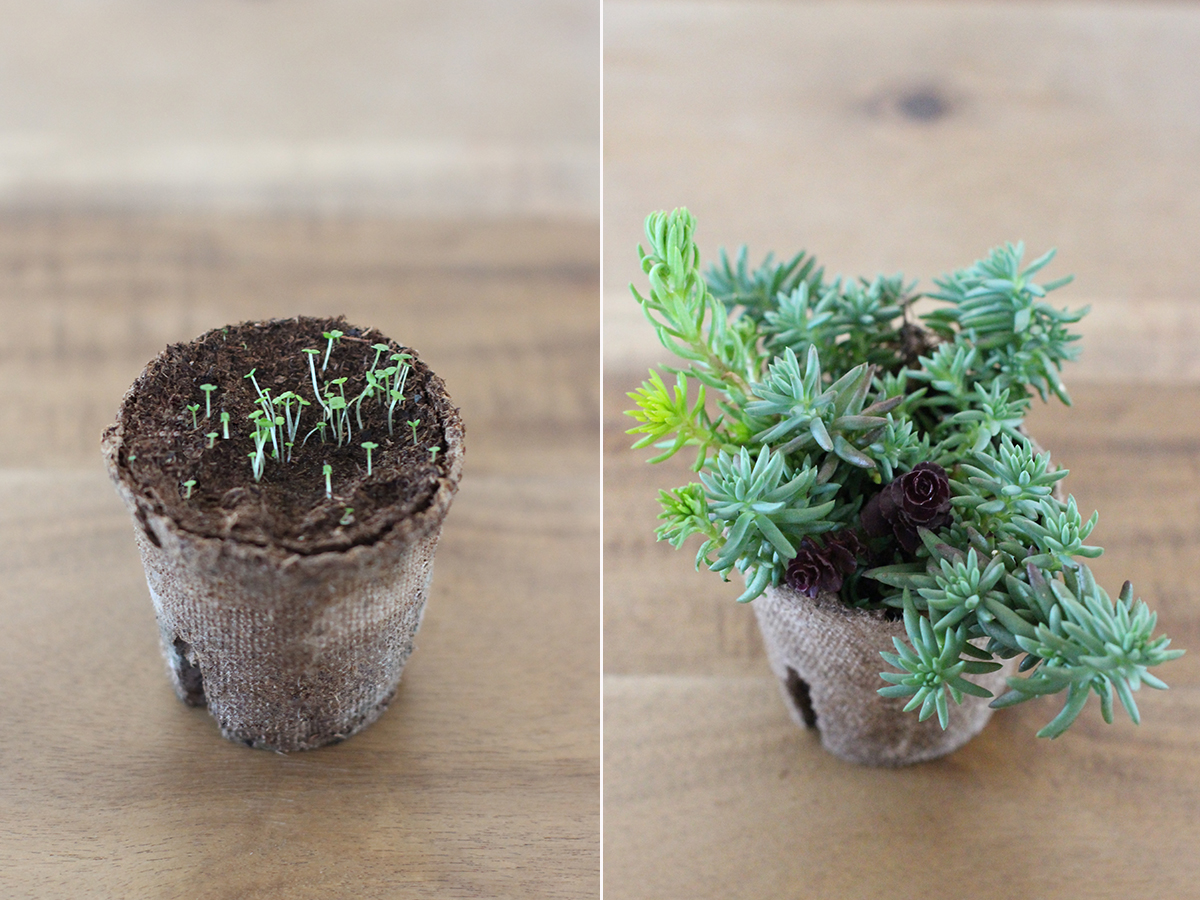
Water sparingly and occasionally, just enough to keep the soil moist for germination. Your sedum will sprout in a week and will take about a month to thicken. You can either assemble your terrarium now or wait until your sedum thickens.
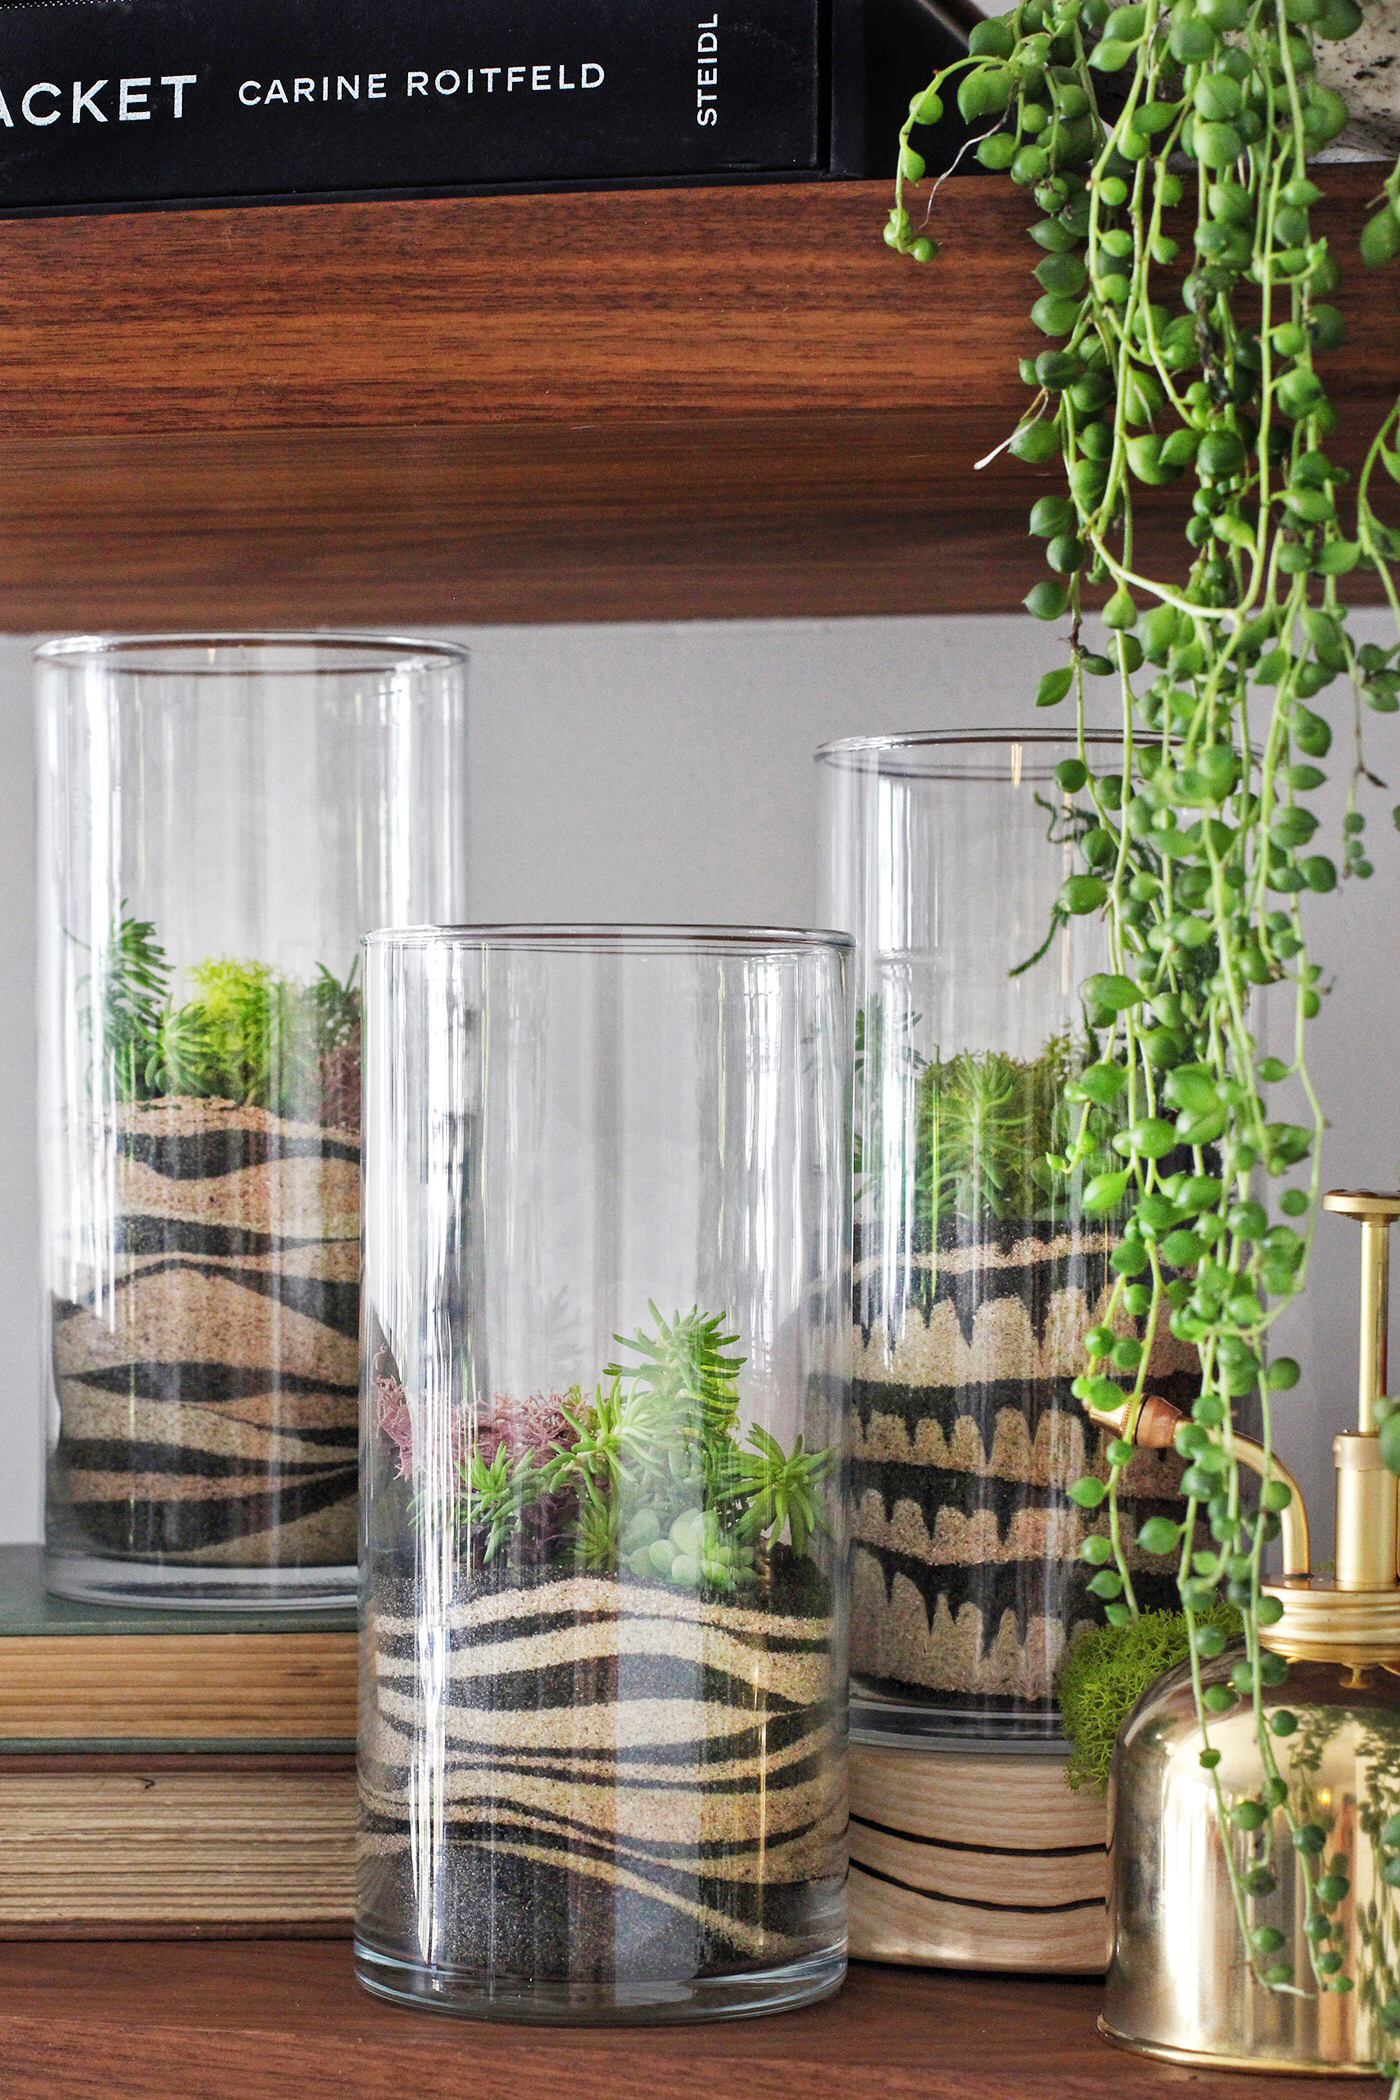
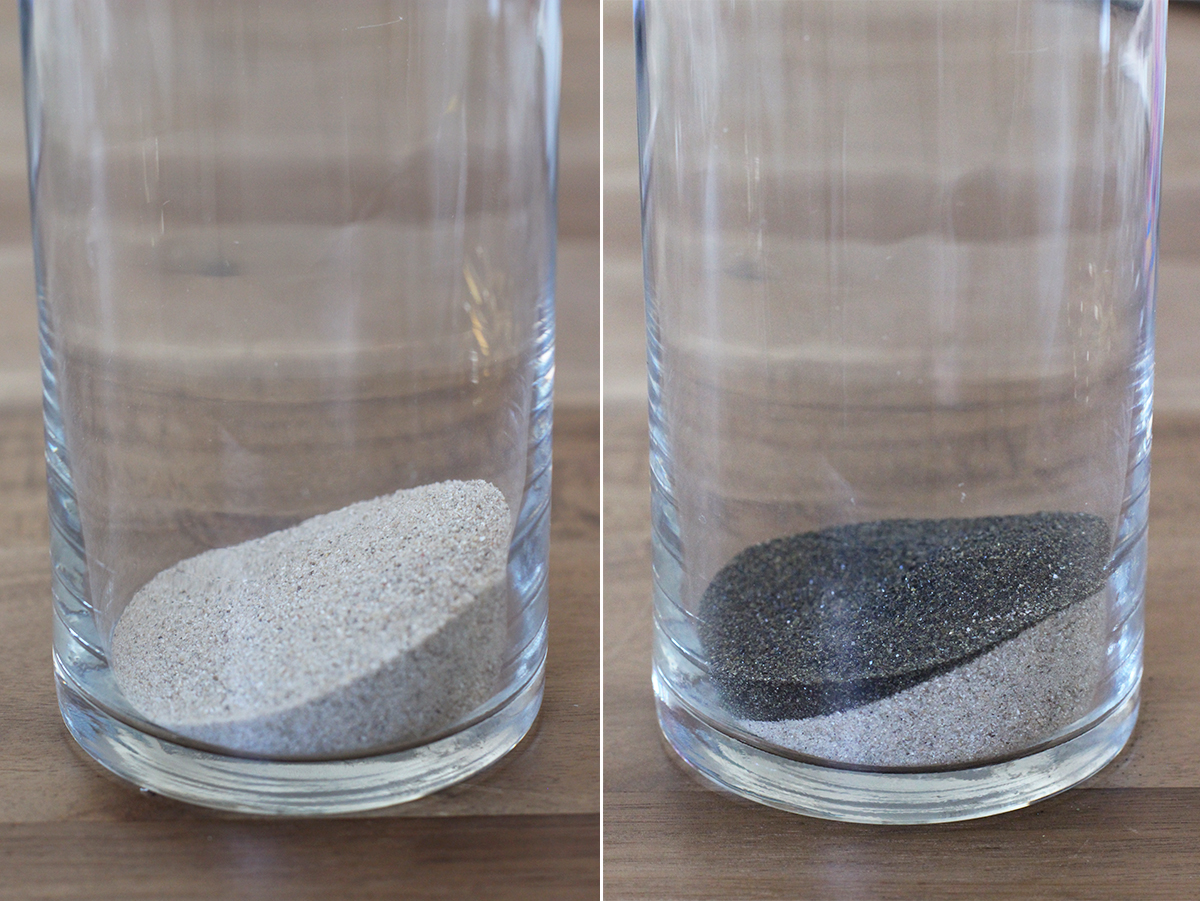
When you’re ready to assemble your terrarium, cut all the bags of sand open and start pouring your first color into the bottom of the glass. The trick here is to not worry about making the layers even. Layer on another color, paying attention to the patterns you are starting to create. Play around with the thickness of each layer – the more inconsistent you are, the better!
Once the sand is about an inch high, carefully place your sedum pot into the middle of the glass container.
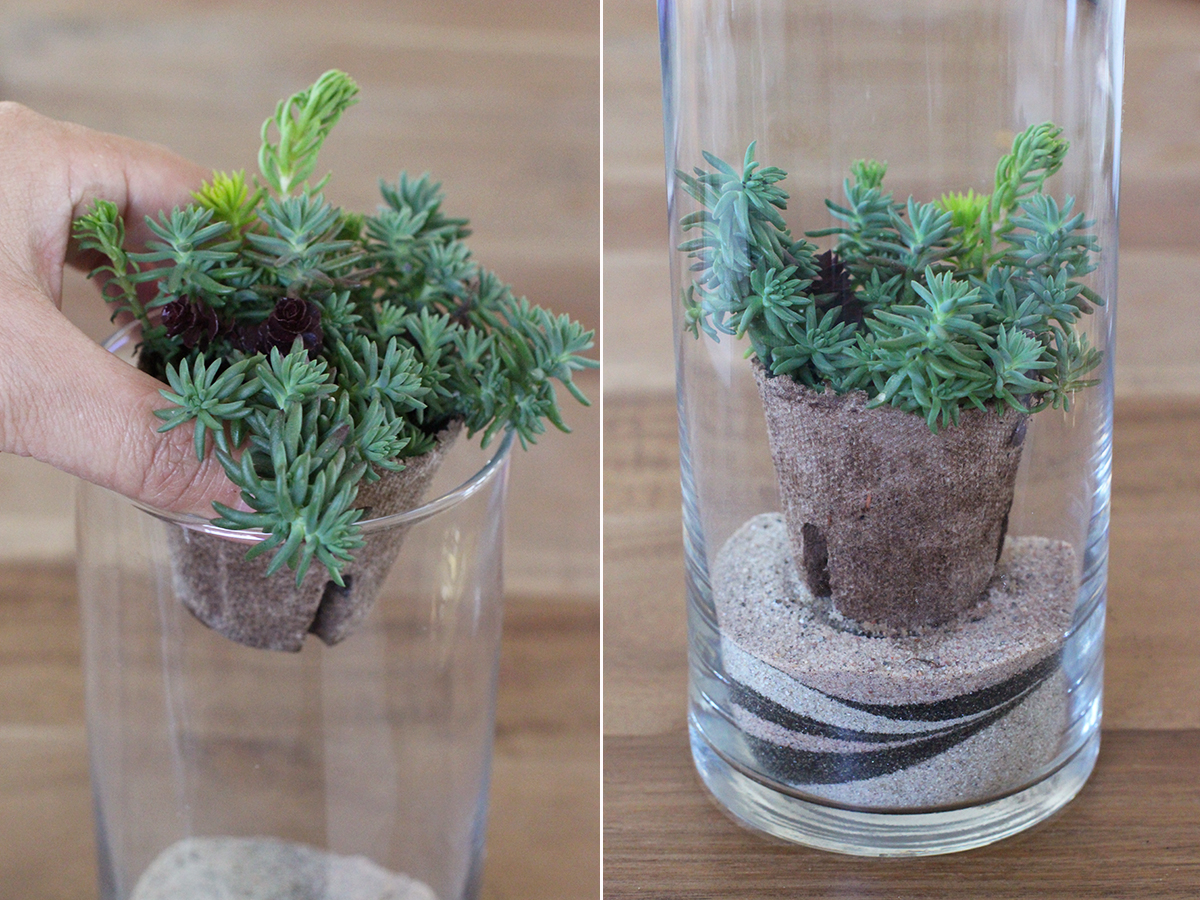
Slip a small piece of paper into the glass container, surrounding the sedum pot. The instruction card included in the kit is perfect for this! Continue pouring sand, between the paper and the side of the glass. Use the long spoon for better control.
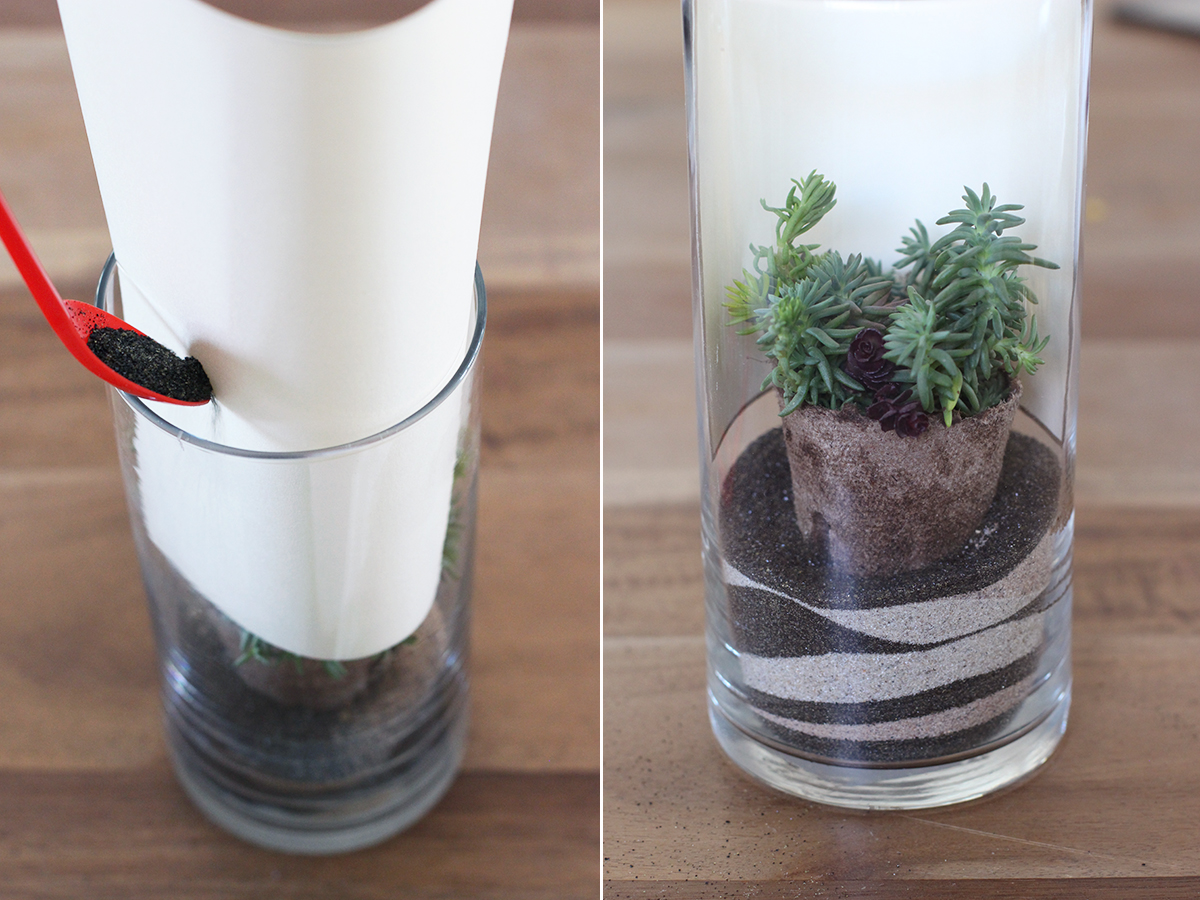
Stop once the sand almost covers the top edge of the sedum pot.
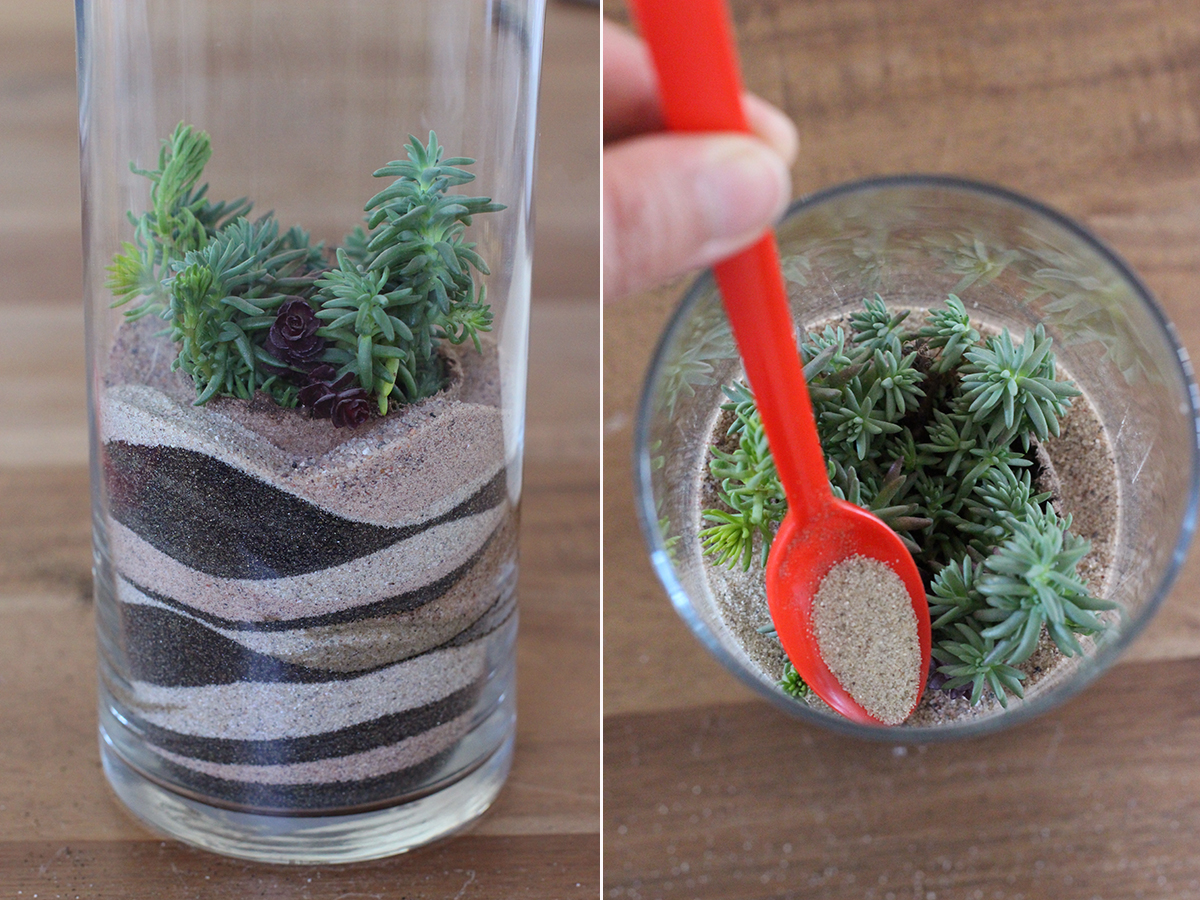
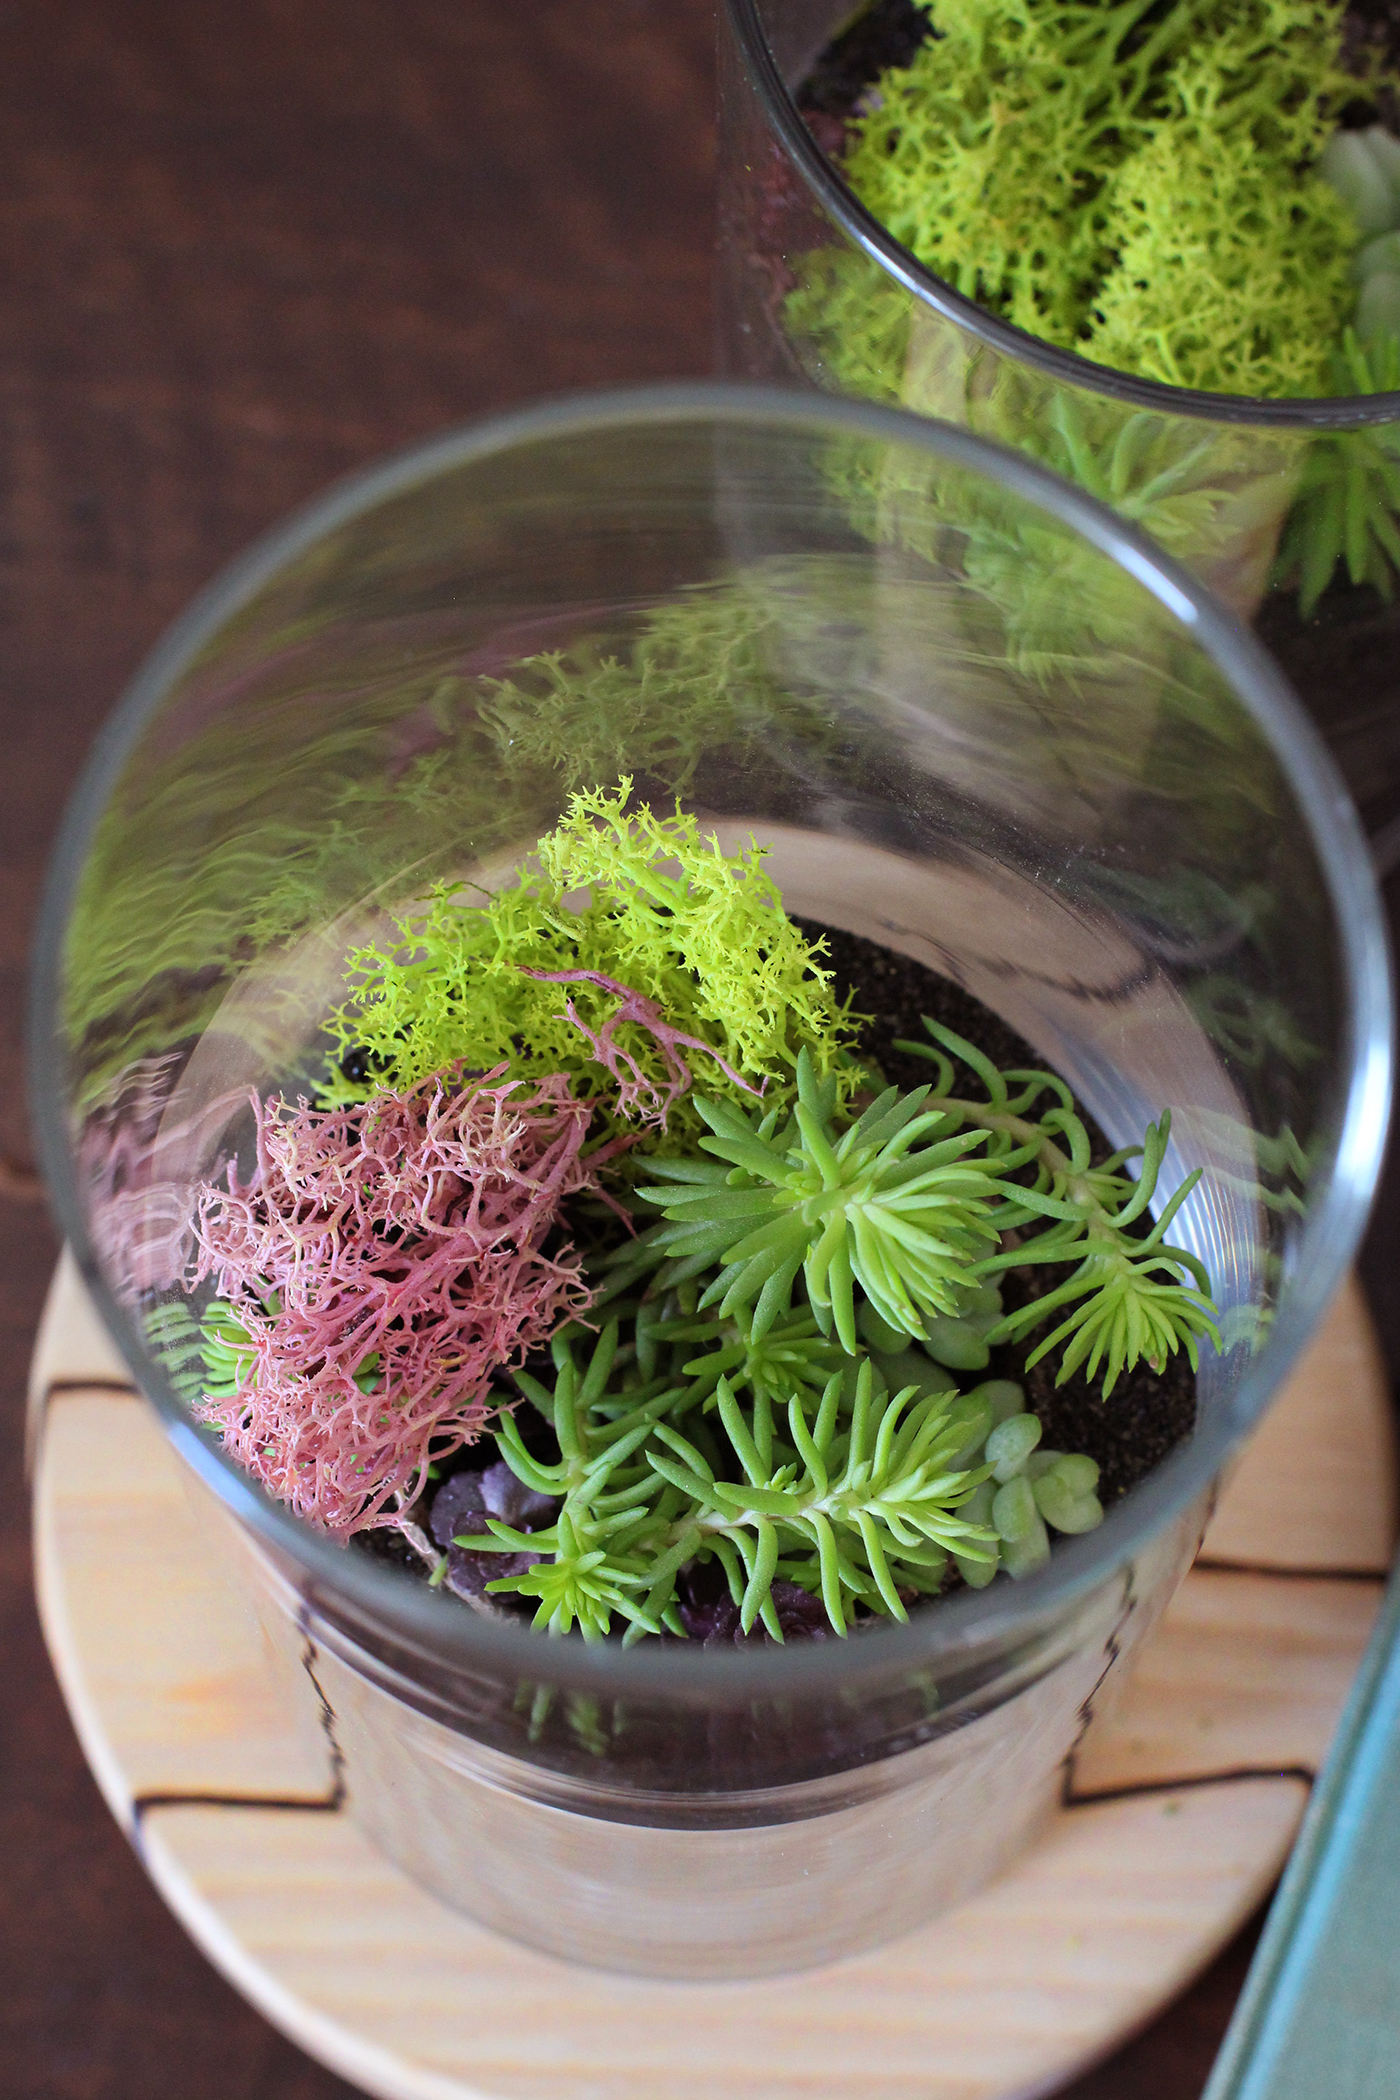
Add moss in any bare areas and use the plastic pipette to help wedge them in place. Use the pipette to water the sedum once every few days. Keep away from direct sunlight.
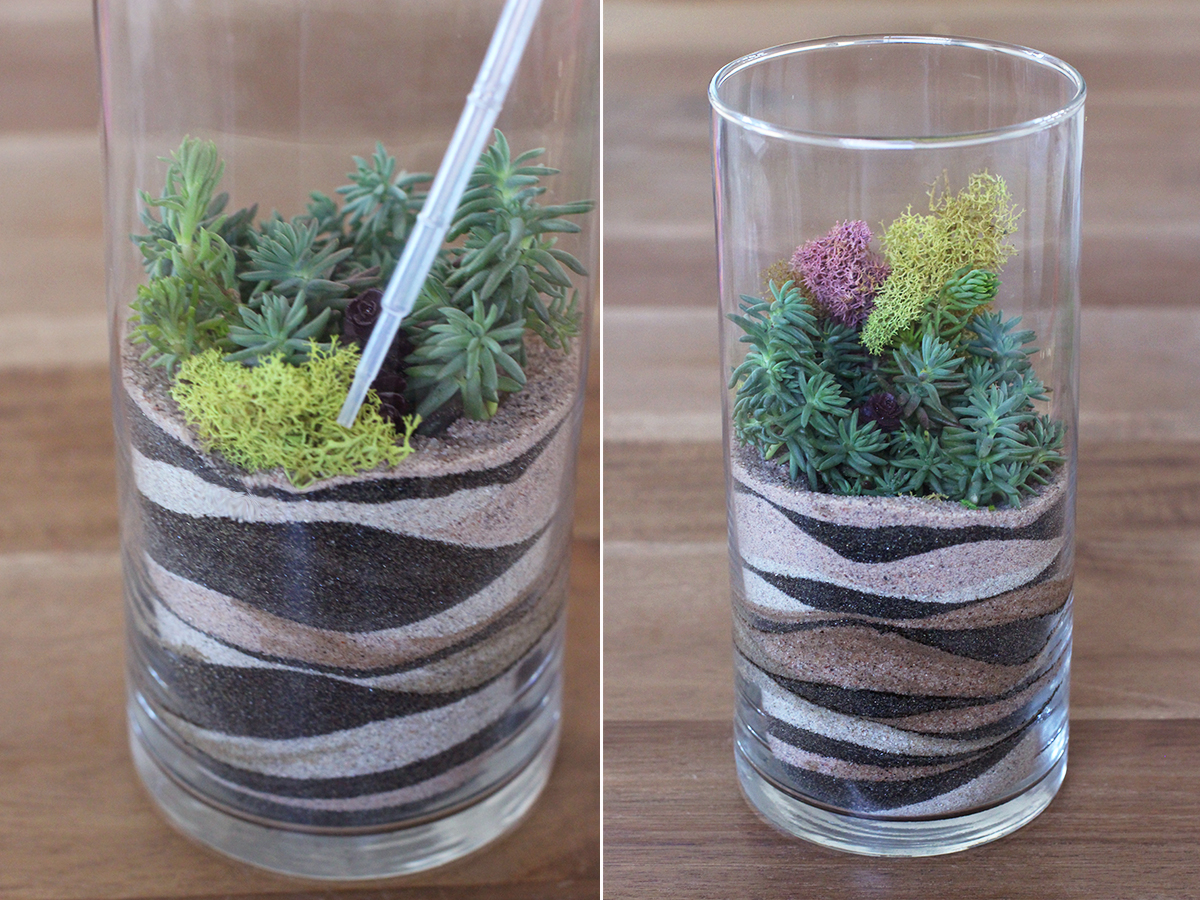
A long wooden skewer is a great tool to help create different patterns in your sand art. Use the sharp tip to push one color into another.
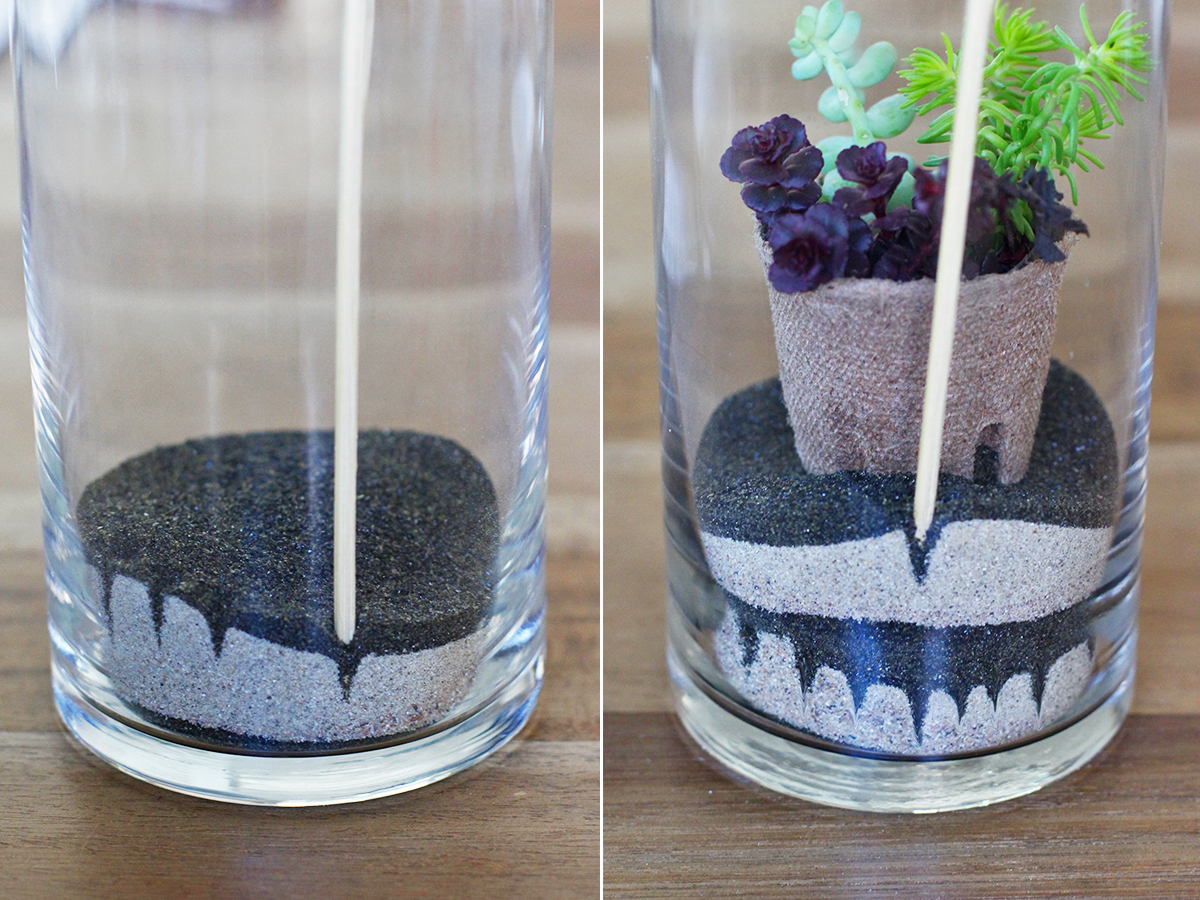
When creating your sand art, just remember that mistakes are a good thing! You might surprise yourself at the patterns you’ll end up with.
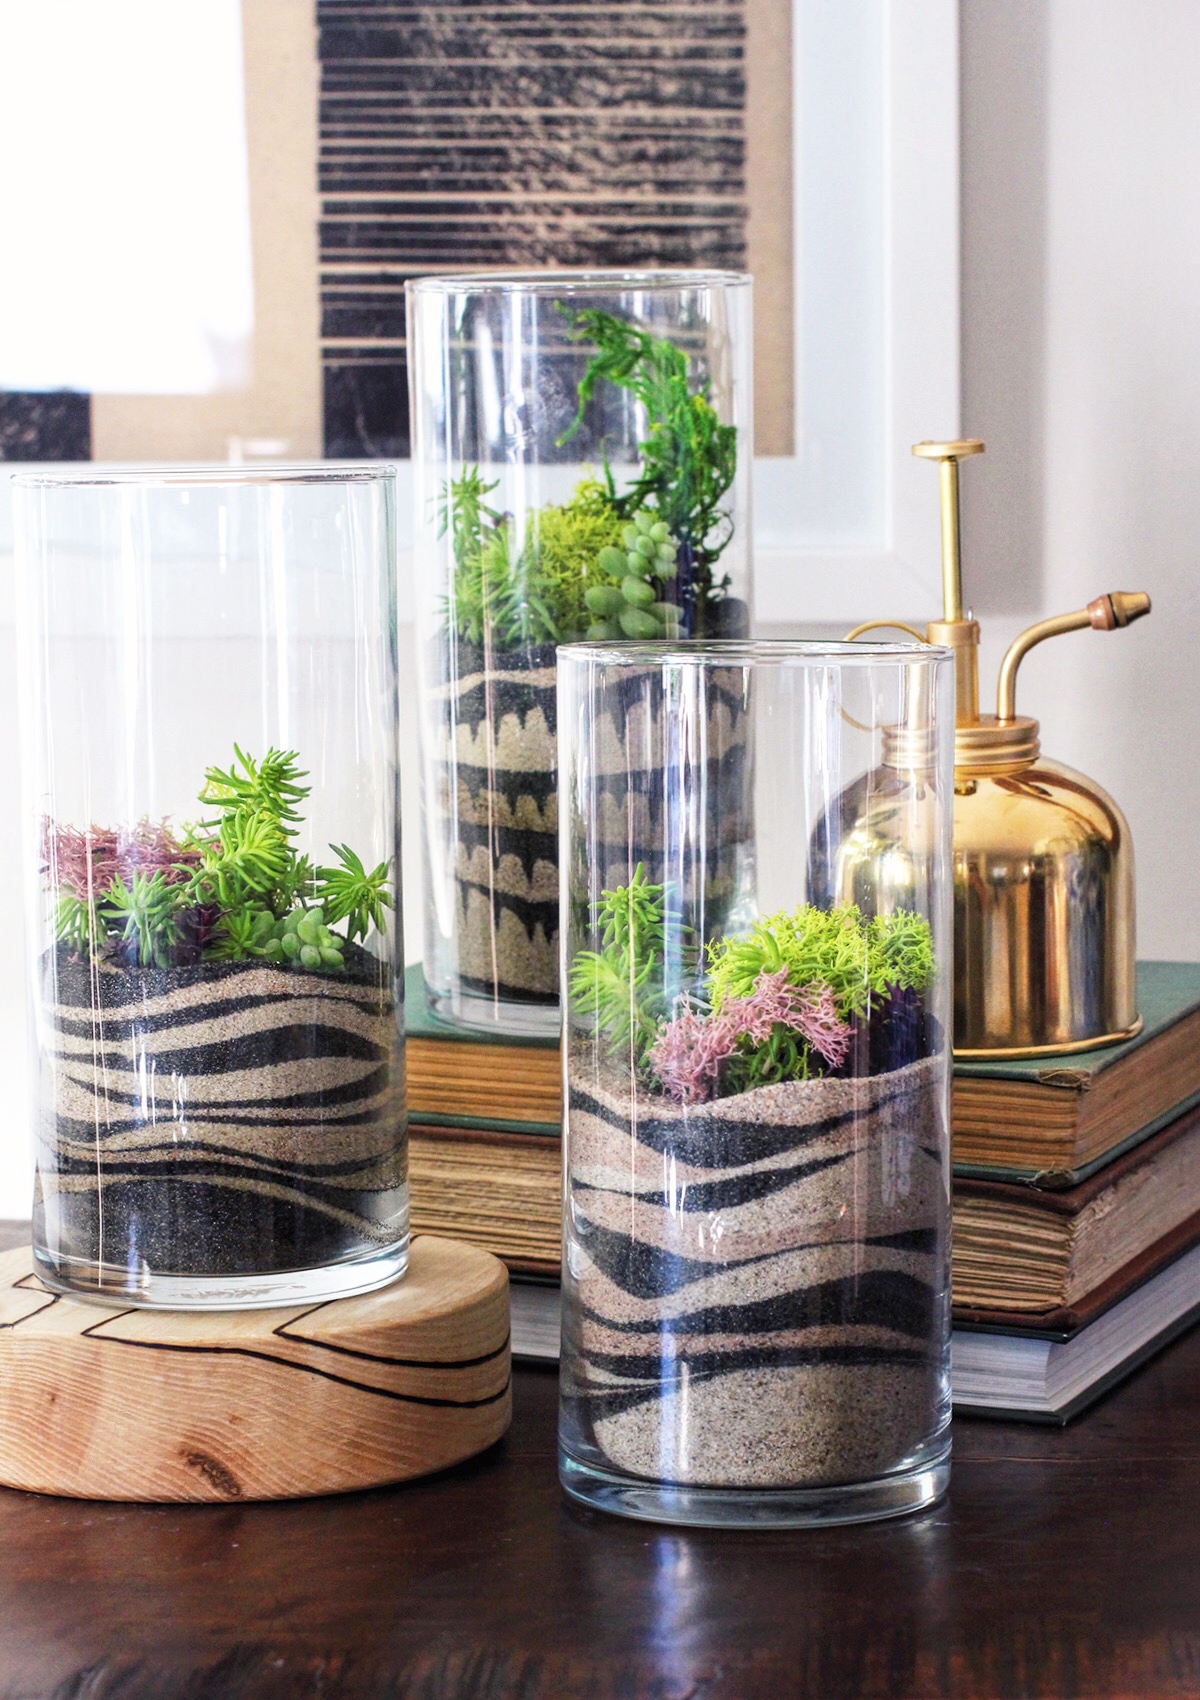
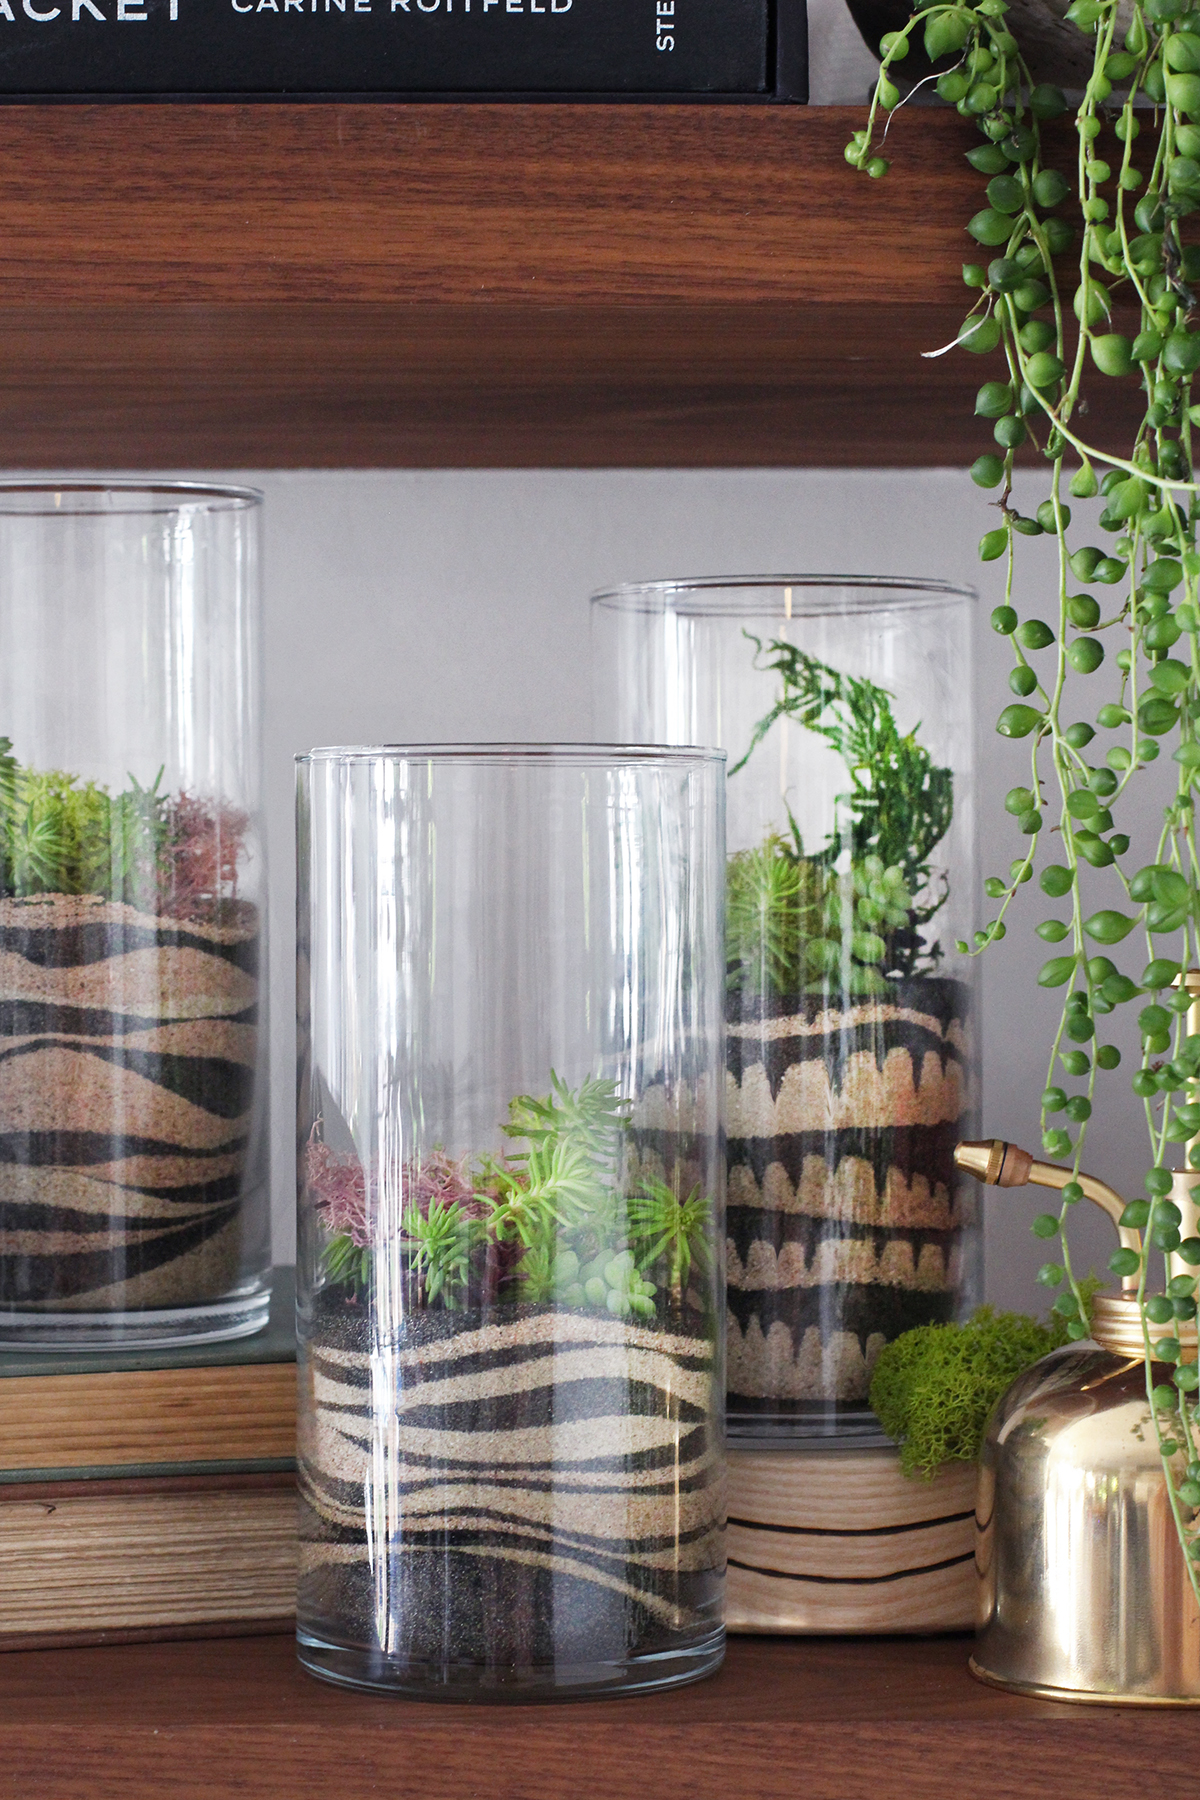
(images by HonestlyWTF; Makers Kit x HonestlyWTF Sand Art Sedum Terrarium Kit available here)
Wow, this looks amazing! I love crafting with succulents, and this project is really an eye catcher!
https://www.makeandmess.com/
Oh my, this looks just beautiful! Will have to try it:)
Fantastisch!!
Inspiratie van verschillende bronen en weer ziet nieuwe uit!
Aplaus
This is so wonderful! Thank you!
What a great weekend craft project, will have to try this out soon!
http://j.mp/whattowearwheretobuy
The soil is so beautifull!!!! Such an artistic innovative twist!
http://www.thefacelessstyle.blogspot.com
Great guides… I love this!…Thanks for sharing!
Hi, it’s beautiful, you did a great job but I am in love with the gold can/jar in the picture, where did you buy it? I think this is your water bottle for the plants! Thanks!
Wow! What a great idea to try!! Thank you for sharing the guide, very easy to learn.
http://piknu.me/
Beatifull !
This is Amazing
Thanks for sharing .