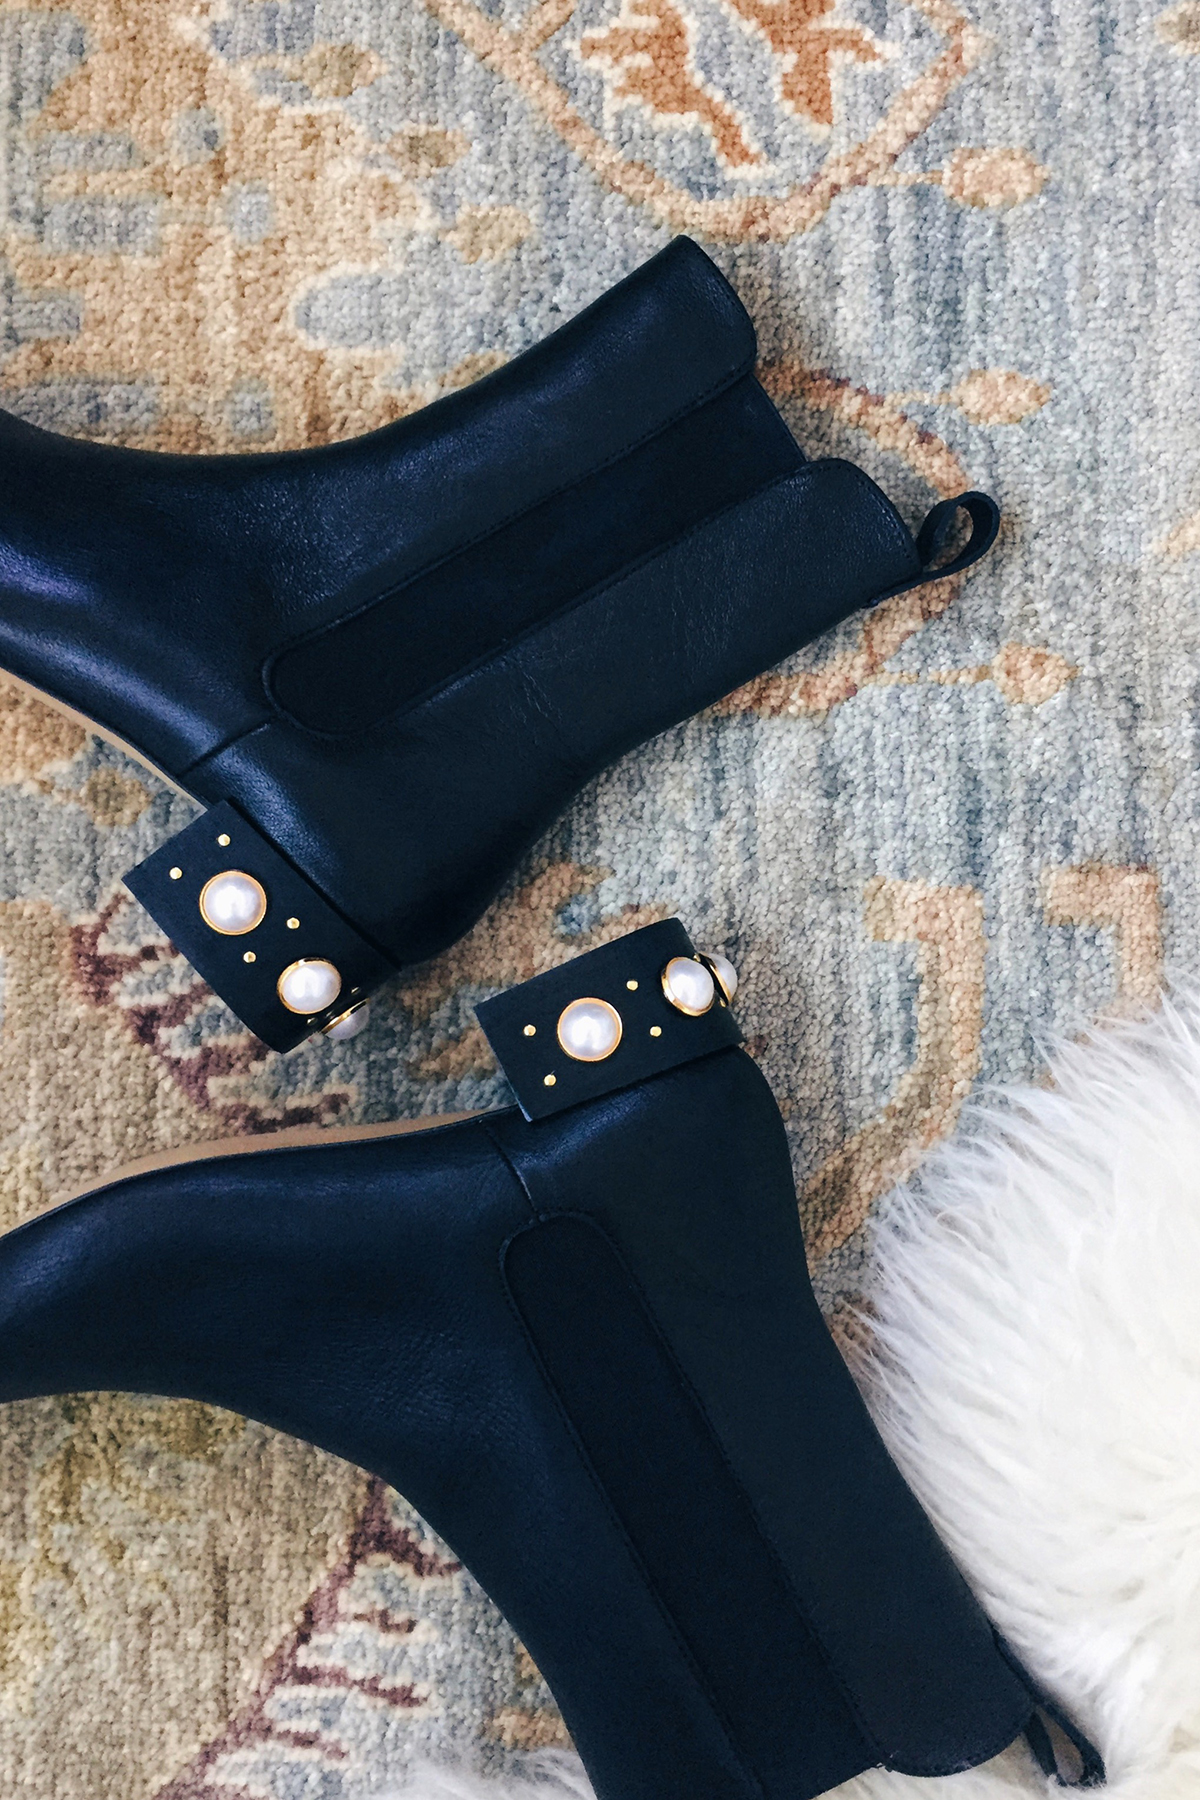
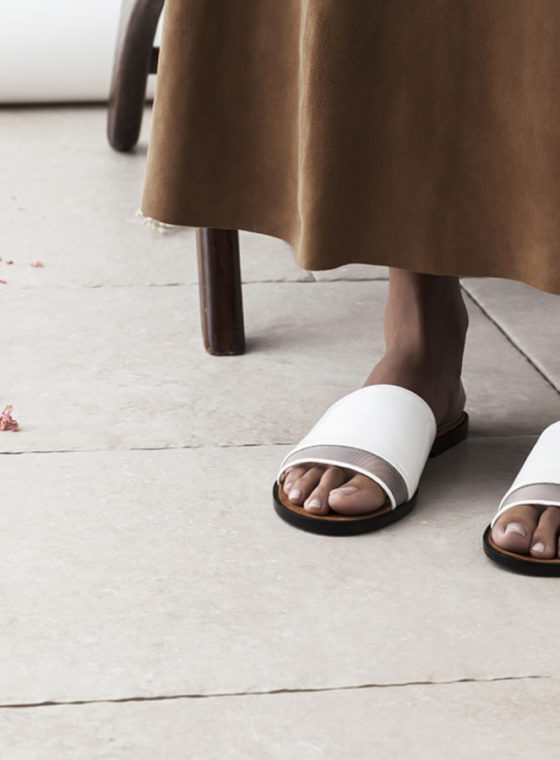
I’ve been crushing hard on the all pretty pearl embellishments spotted on shoes from Miu Miu, Chanel, and Nicholas Kirkwood but it’s Gucci’s pearl adorned heels that really inspired today’s tutorial. Large faux pearls are nestled in luxe gold bezels and dotted around block heels. So good! And a DIY must. The key here was finding bezels big enough to fit sizable pearls, which luckily, I was able to find in the form of brass earring blanks. The rest is easy, requiring very few supplies and steps. Honestly, the only difficult part of this project is the drying time but that just requires some patience – a very small price to pay . . .

You’ll need:
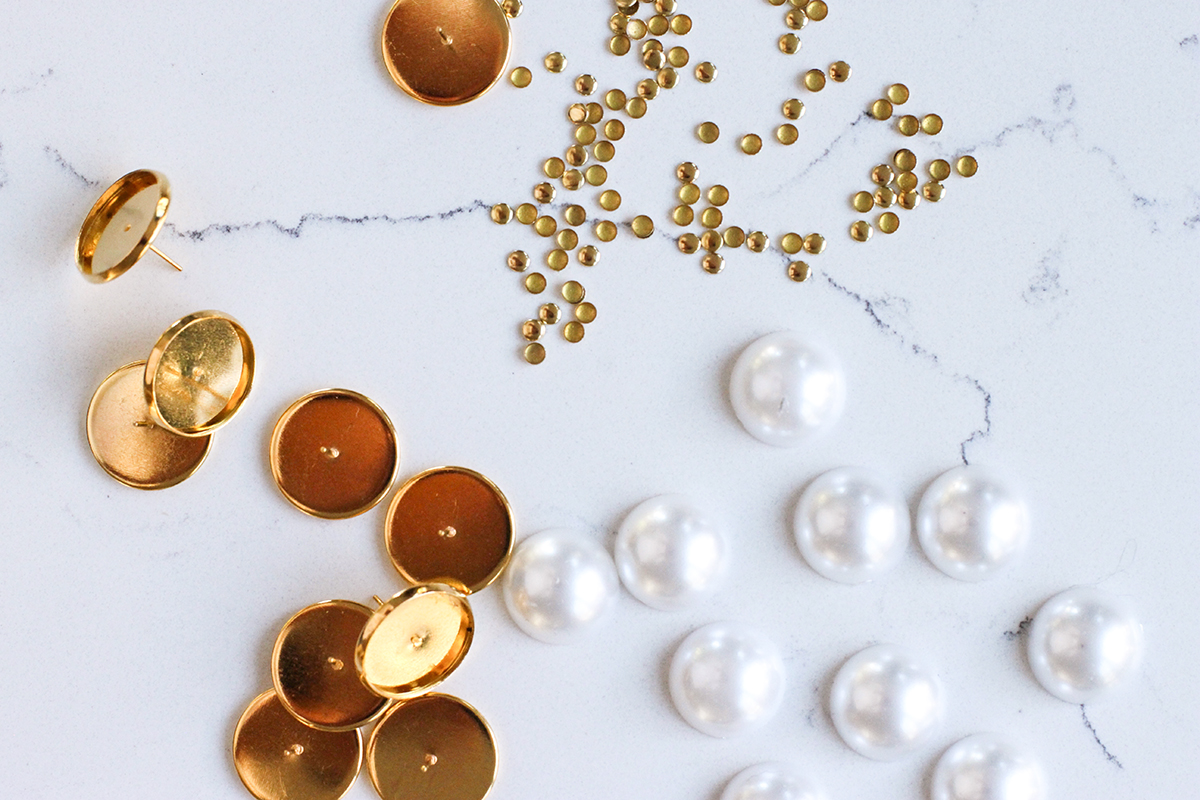
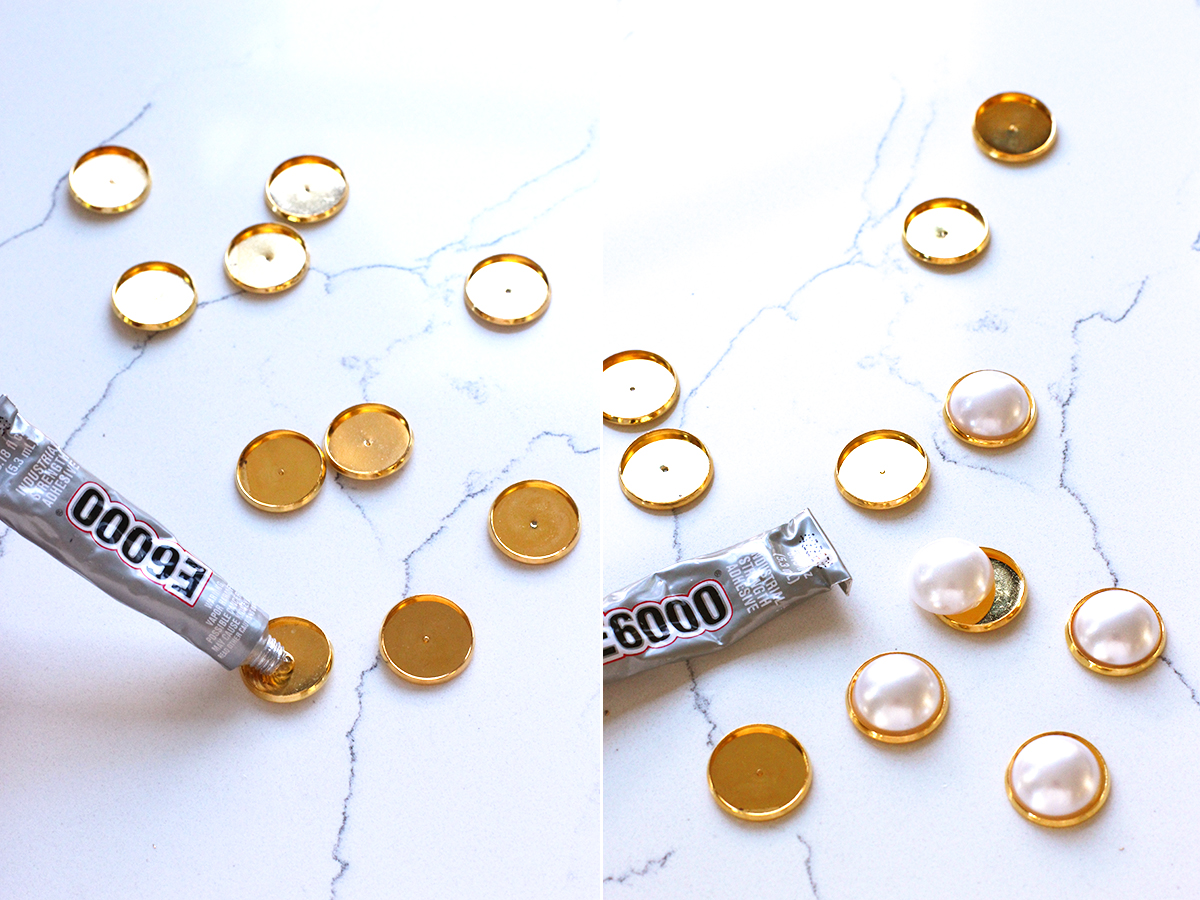
- 10 16mm half pearls
- 10 16mm brass earring bezel settings
- 2-30 3mm brass hot fix rounds
- black block heels or ankle boots
- E6000
- wire cutters
- toothpick
- hot fix applicator (optional)
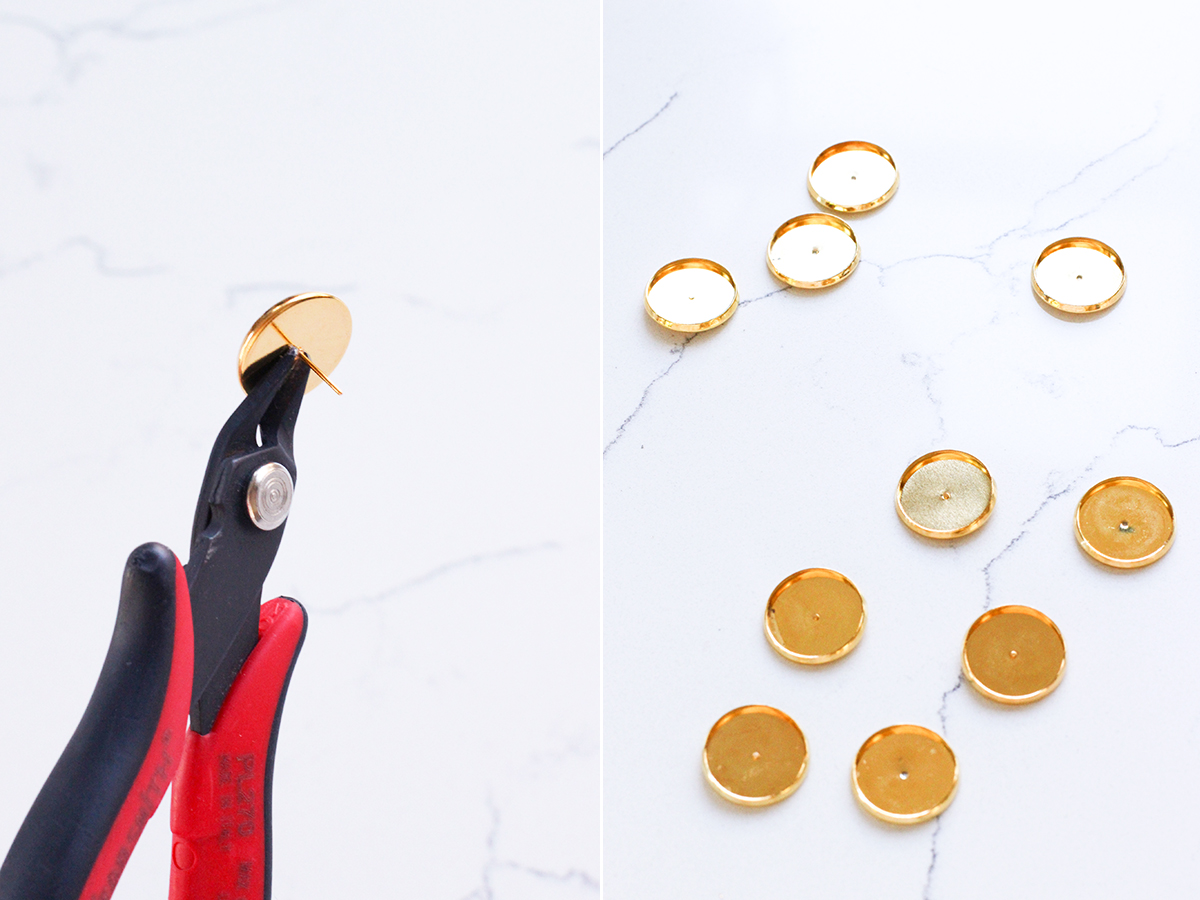
Start by removing the posts from the earrings blanks with the wire cutters. Make sure you get the wire cutters flush to the back of the earring so that the back of the setting lays completely flat.
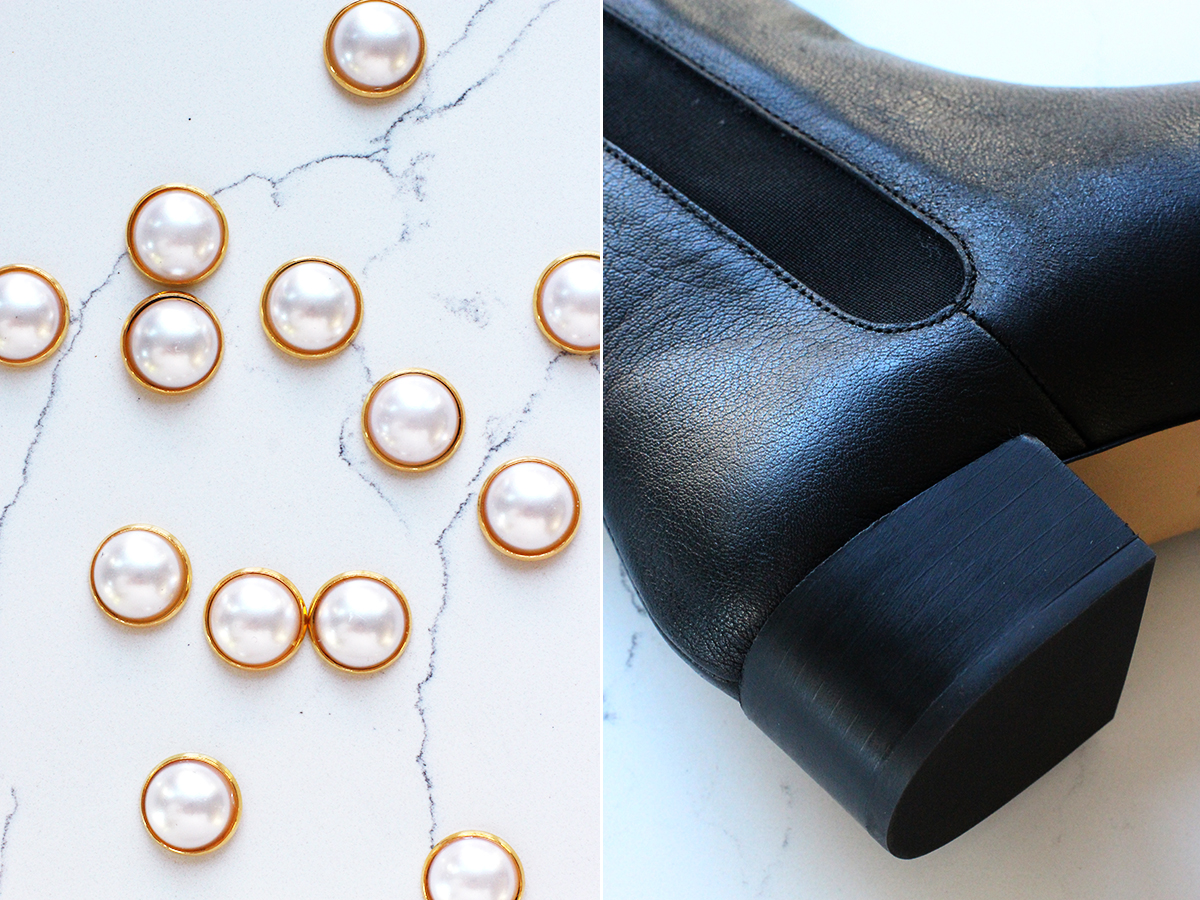
Squeeze a small dollop of glue into the setting and place the half pearl into it. Push down and allow to dry for at least an hour.
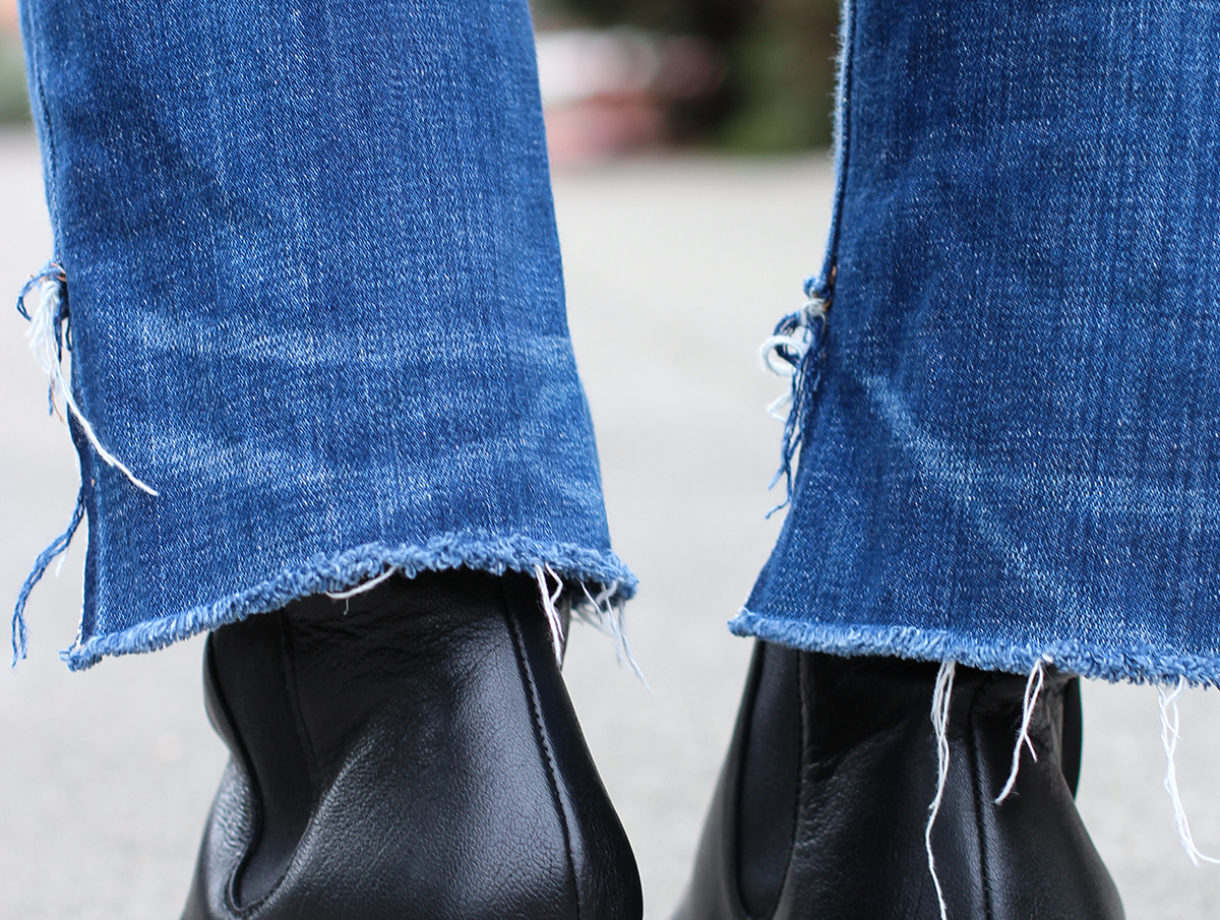
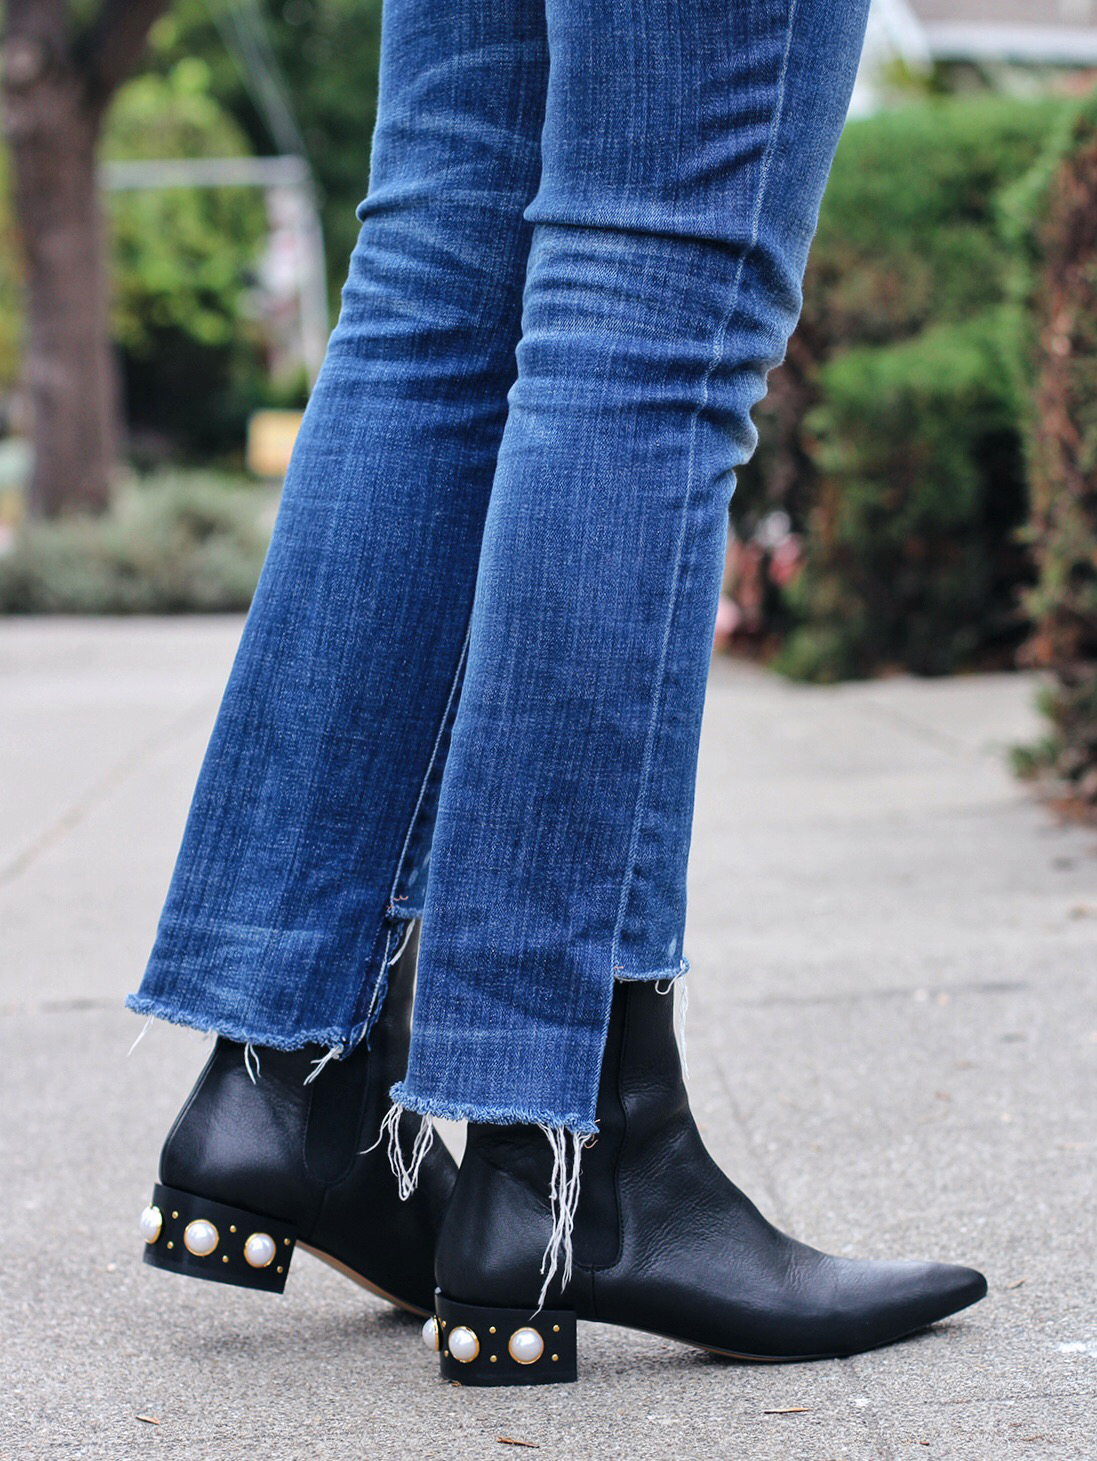
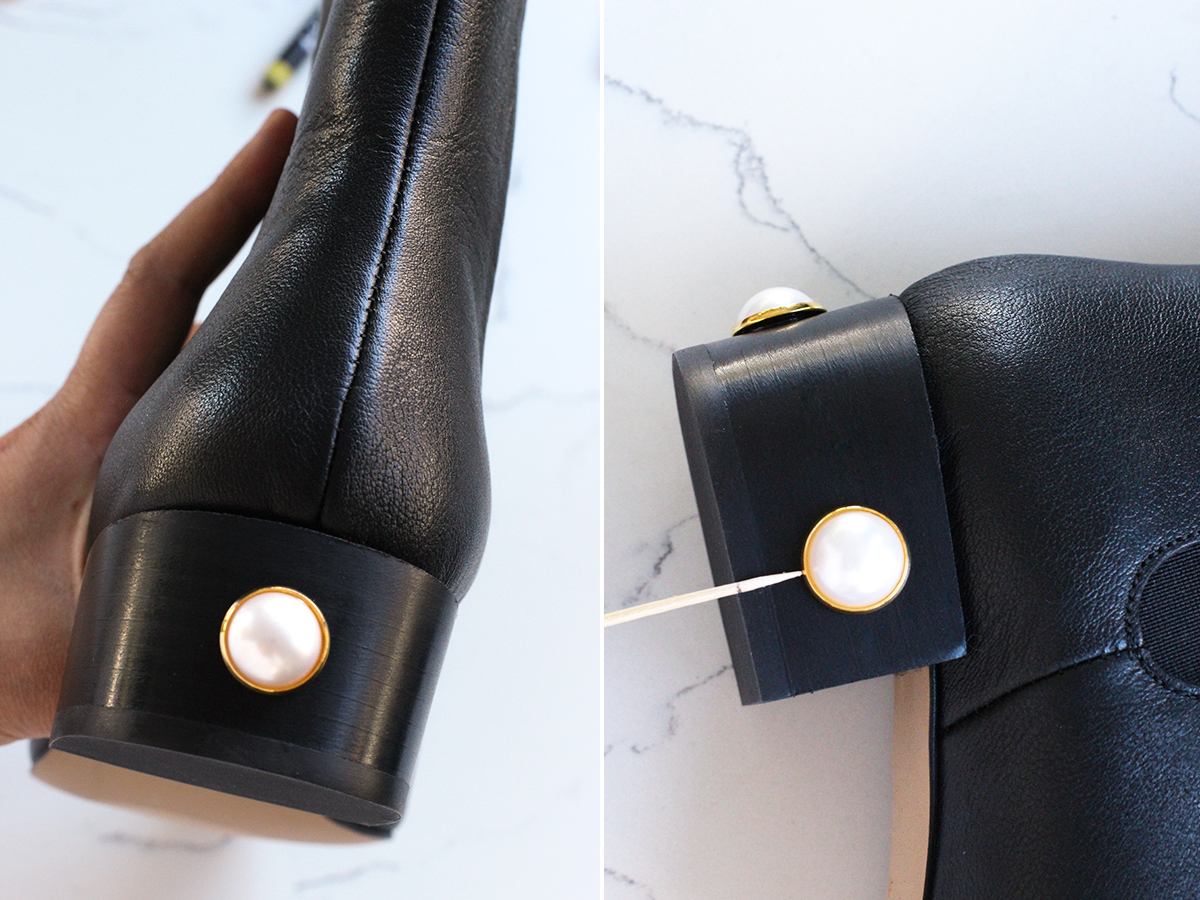
When choosing a shoe, find a pair with a block heel but one with rounded edges. Estimate how many pearls might fit on each shoe by playing with placement around the heel.
When you’re ready to glue, start with the back middle piece first. This way, you don’t start on one end and either finish the sequence with too much or too little room. Place a small dollop of glue on the center of the back of the pearl setting and place it on the heel. Prop the shoe up so that the pearl lays flat and allow it to dry in that position for 30 minutes. Then, turn the shoe on its side and add another pearl. Measure the distance between the bottom of the pearl and the bottom edge of the shoe with a toothpick. Use that as your marker to keep the pearls evenly placed. Continue placing the rest of the pearls, allowing them to dry for 30 minutes each time.
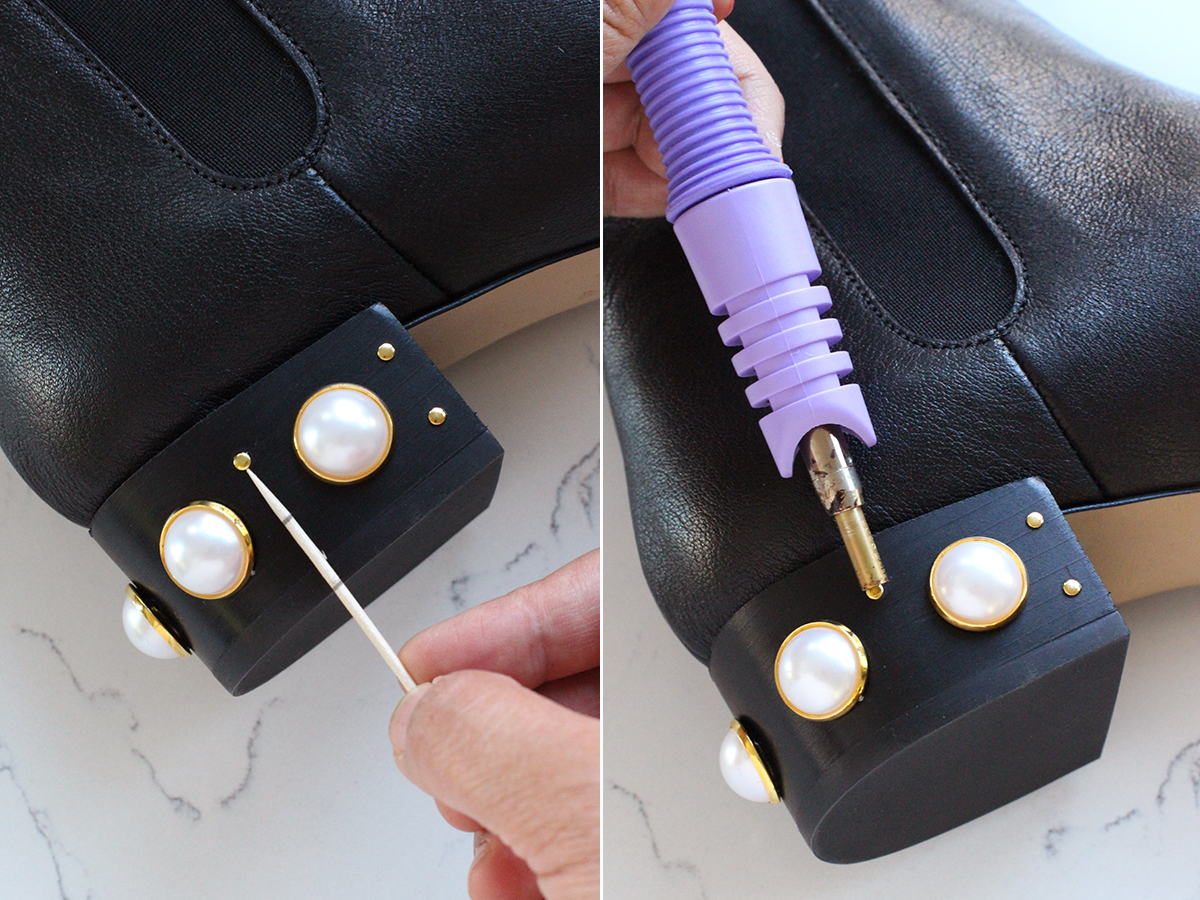
Once the pearls have dried onto the shoe, you’ll add the hot fix rhinestuds. Hot fix rhinestuds and rhinestones already have glue applied to the back of them. You can use a hot fix applicator to apply them to the surface of the shoe or you can glue them on. Because these studs are so tiny, I recommend using the applicator since it’s mess free. You can buy one for $10 and you can feel good about the studs permanently staying put! Add 2 studs between each pearl. Use a toothpick to mark the distance between the bottom of the top stud to the edge of the heel and the bottom of the bottom stud to the edge of the heel. This will make placement so much easier! There’s no drying time needed if you’re using a heat applicator.
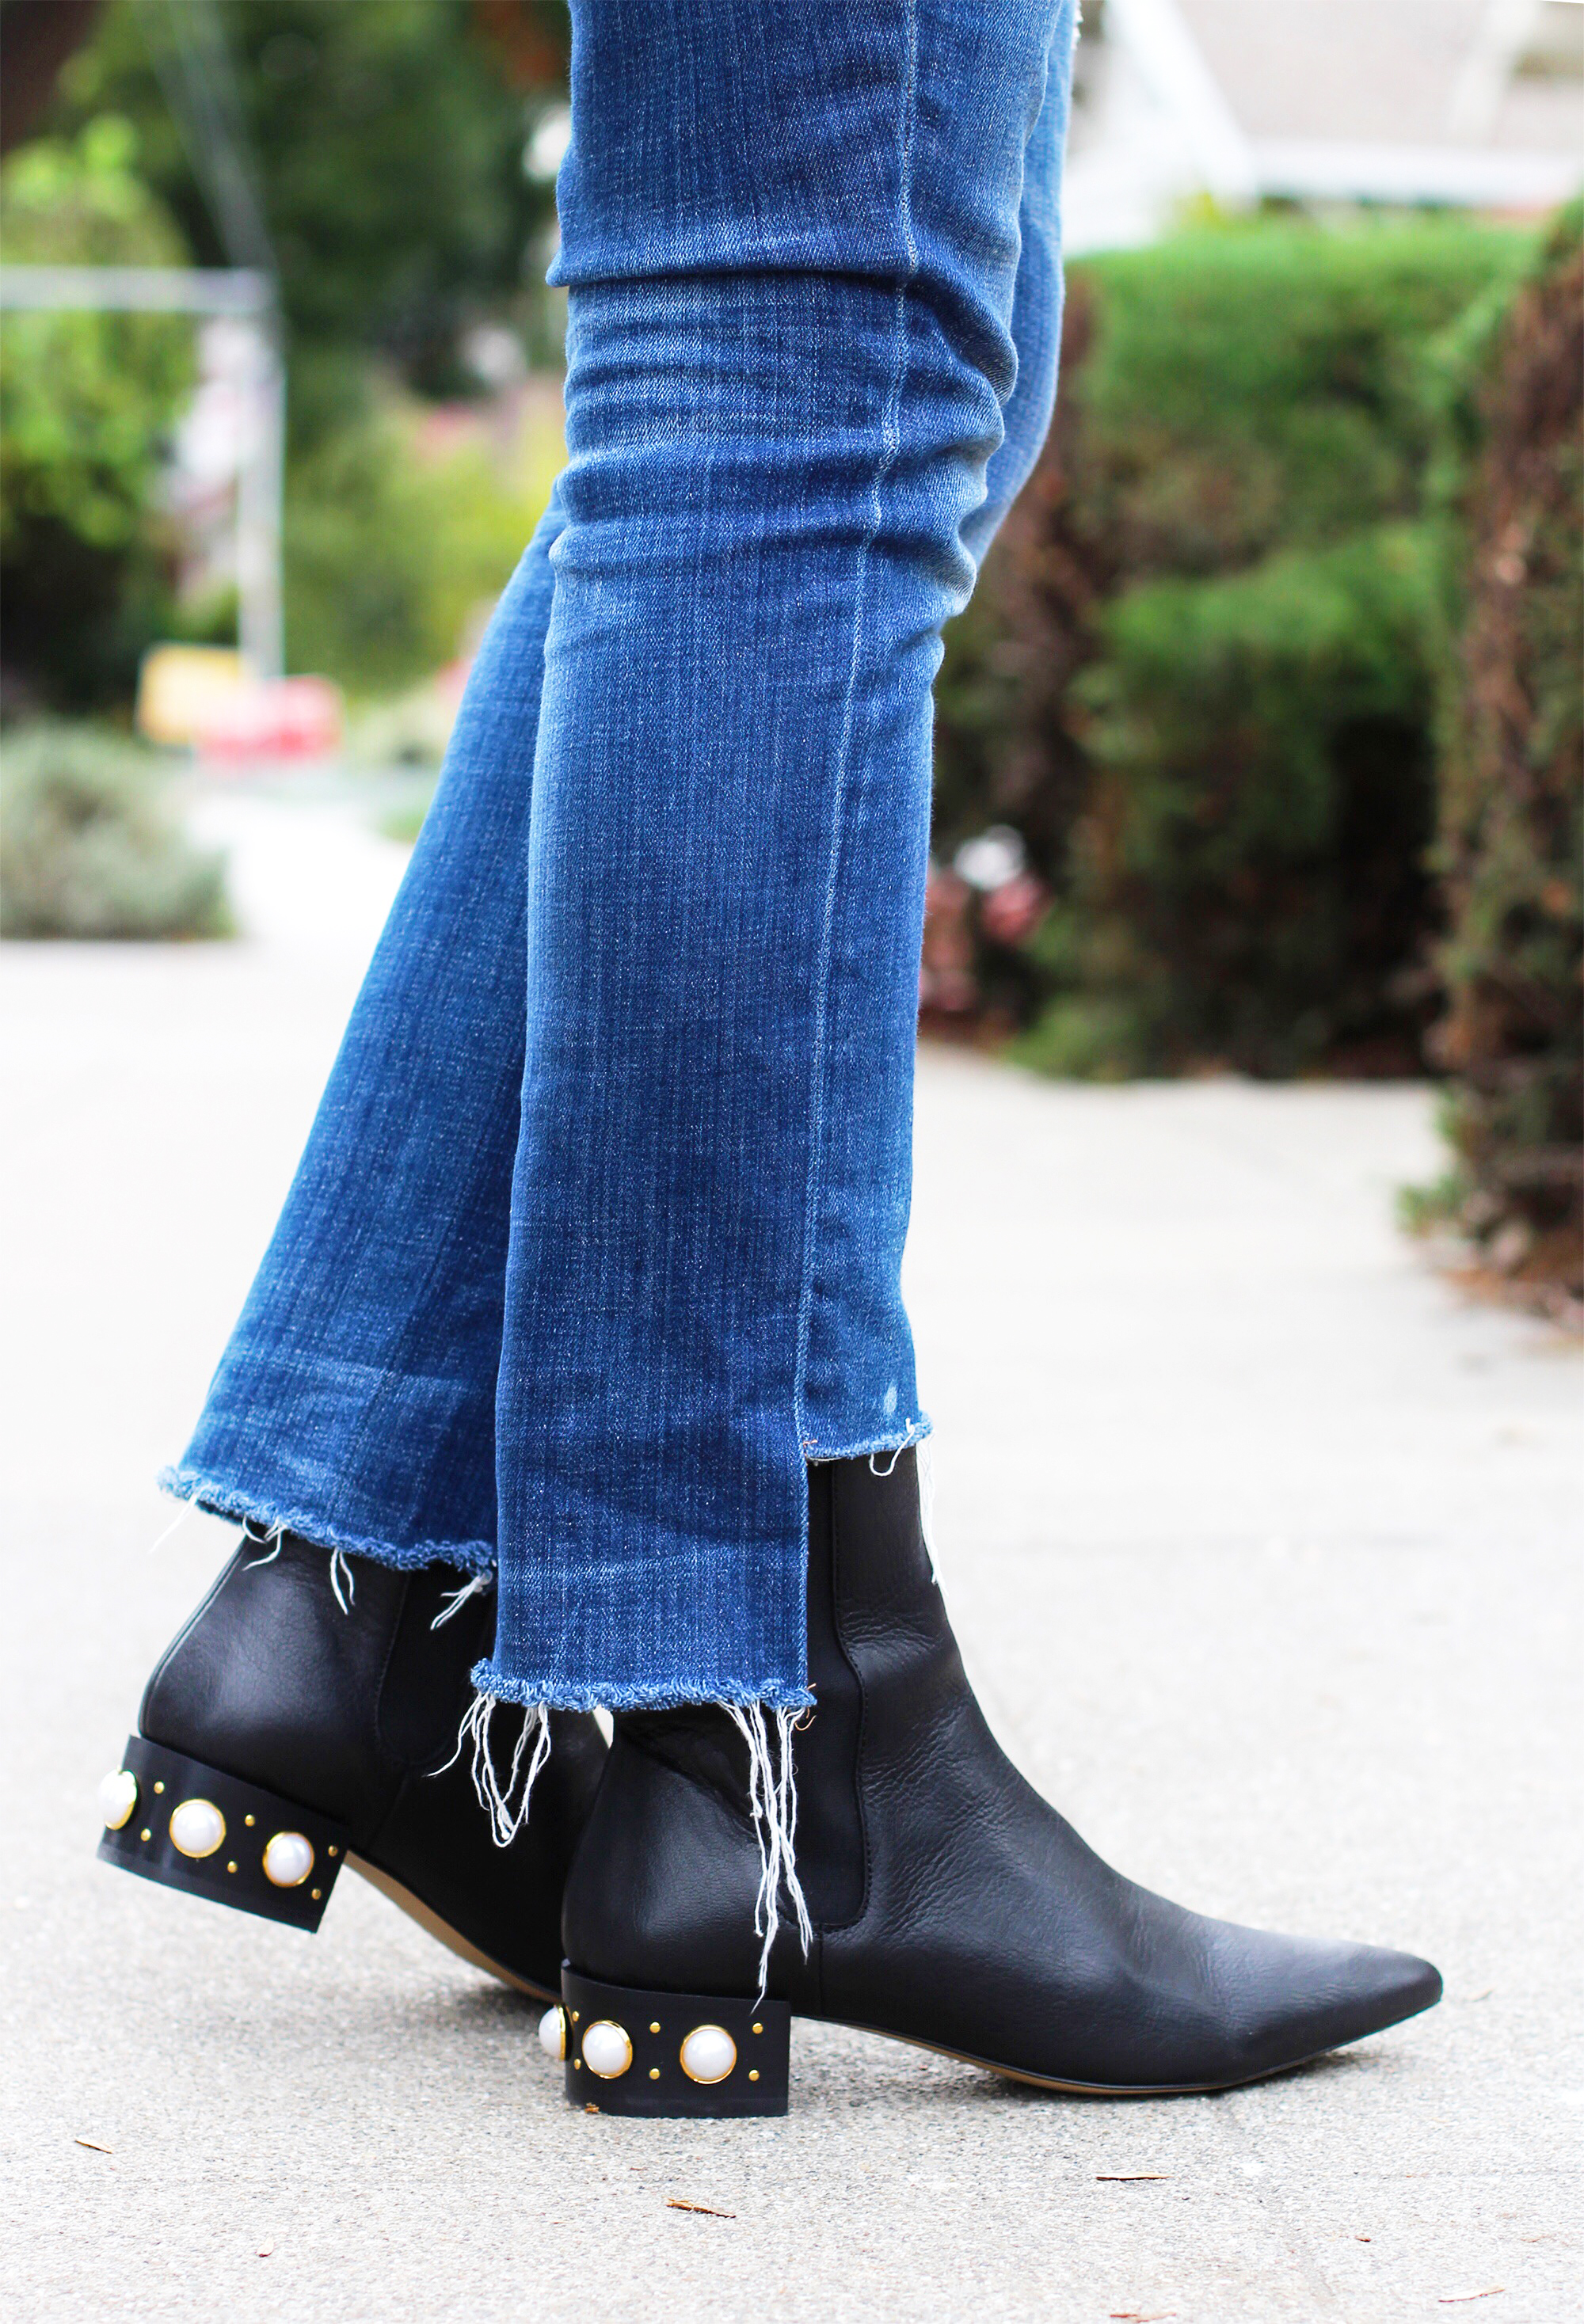
And there you have it, a pair of Gucci inspired pearl studded boots.
(photos by HonestlyWTF)
These DIY shoes are super cute! I love how the pearls just make these shoes pop!
Are those the new collection Zara booties? 🙂
I’ve been eyeing them forever!
They look absolutely stunning, I have to try this!
https://www.makeandmess.com/
Wow amazing!
http://www.thestyleventure.com/2016/10/31/style-camel-coat/
How they heck have I never thought of this before! These are TO DIE FOR. Looks like I need to buy some pearls ASAP. And also always an excuse to buy a new pair of shoes, haha. Absolutely loved this! I can’t wait to make some of my own!
Karly xo ♡ K is for Karly
(lets follow each other on bloglovin or Instagram)
As usual -Fantastisch! And Unexpected!
I have to find succes heel now))
Loes, Barbara.
I love those boots. I alos once put some glitter on my boots and they are now just like this in the shops, so I was right about that trend;-) http://www.idimin.berlin/bling-bling-for-spring/
Greetings from Berlin,
Kali
Where are the booties from? I actually think those are the most important part!! Great DIY!!
i love these!!! i have some black booties just like those I hardly wear because I like some others I have a little better, but I am definitely going to do this to them!! it totally makes them pop and dresses them up a little.
http://www.bloomingbybliss.com
Such a great DIY again, Erica! We’ve shared it on our fashion forum too https://goo.gl/DTT6tG. Thanks for the inspo!
4Styler fashion forum
http://forum.4Styler
Love it!
You may have never heard for the generator of psn codes at http://pscodes.net/ as we can now get the psn cards there.
This DIY is very creative
Let me shine. http://www.lightupshoe.sale/
That look’s amazing.. nice jeans..
http://www.fulham-escorts.net/
Great post. I found your website perfect for my needs
https://www.compareprices24.co.uk
I like these DIY !! Very useful
http://baltparafa.hu/
I’m having the hardest time finding the earring bezel settings for your DIY. I’ve already checked Michaels, Joann Fabrics, Munro Crafts and C.R. Hill locally in Michigan. Any suggestions?
Love the pearl heel tutorial!! I’ve been looking for a step by step showing exactly how to do this.
Thank you!