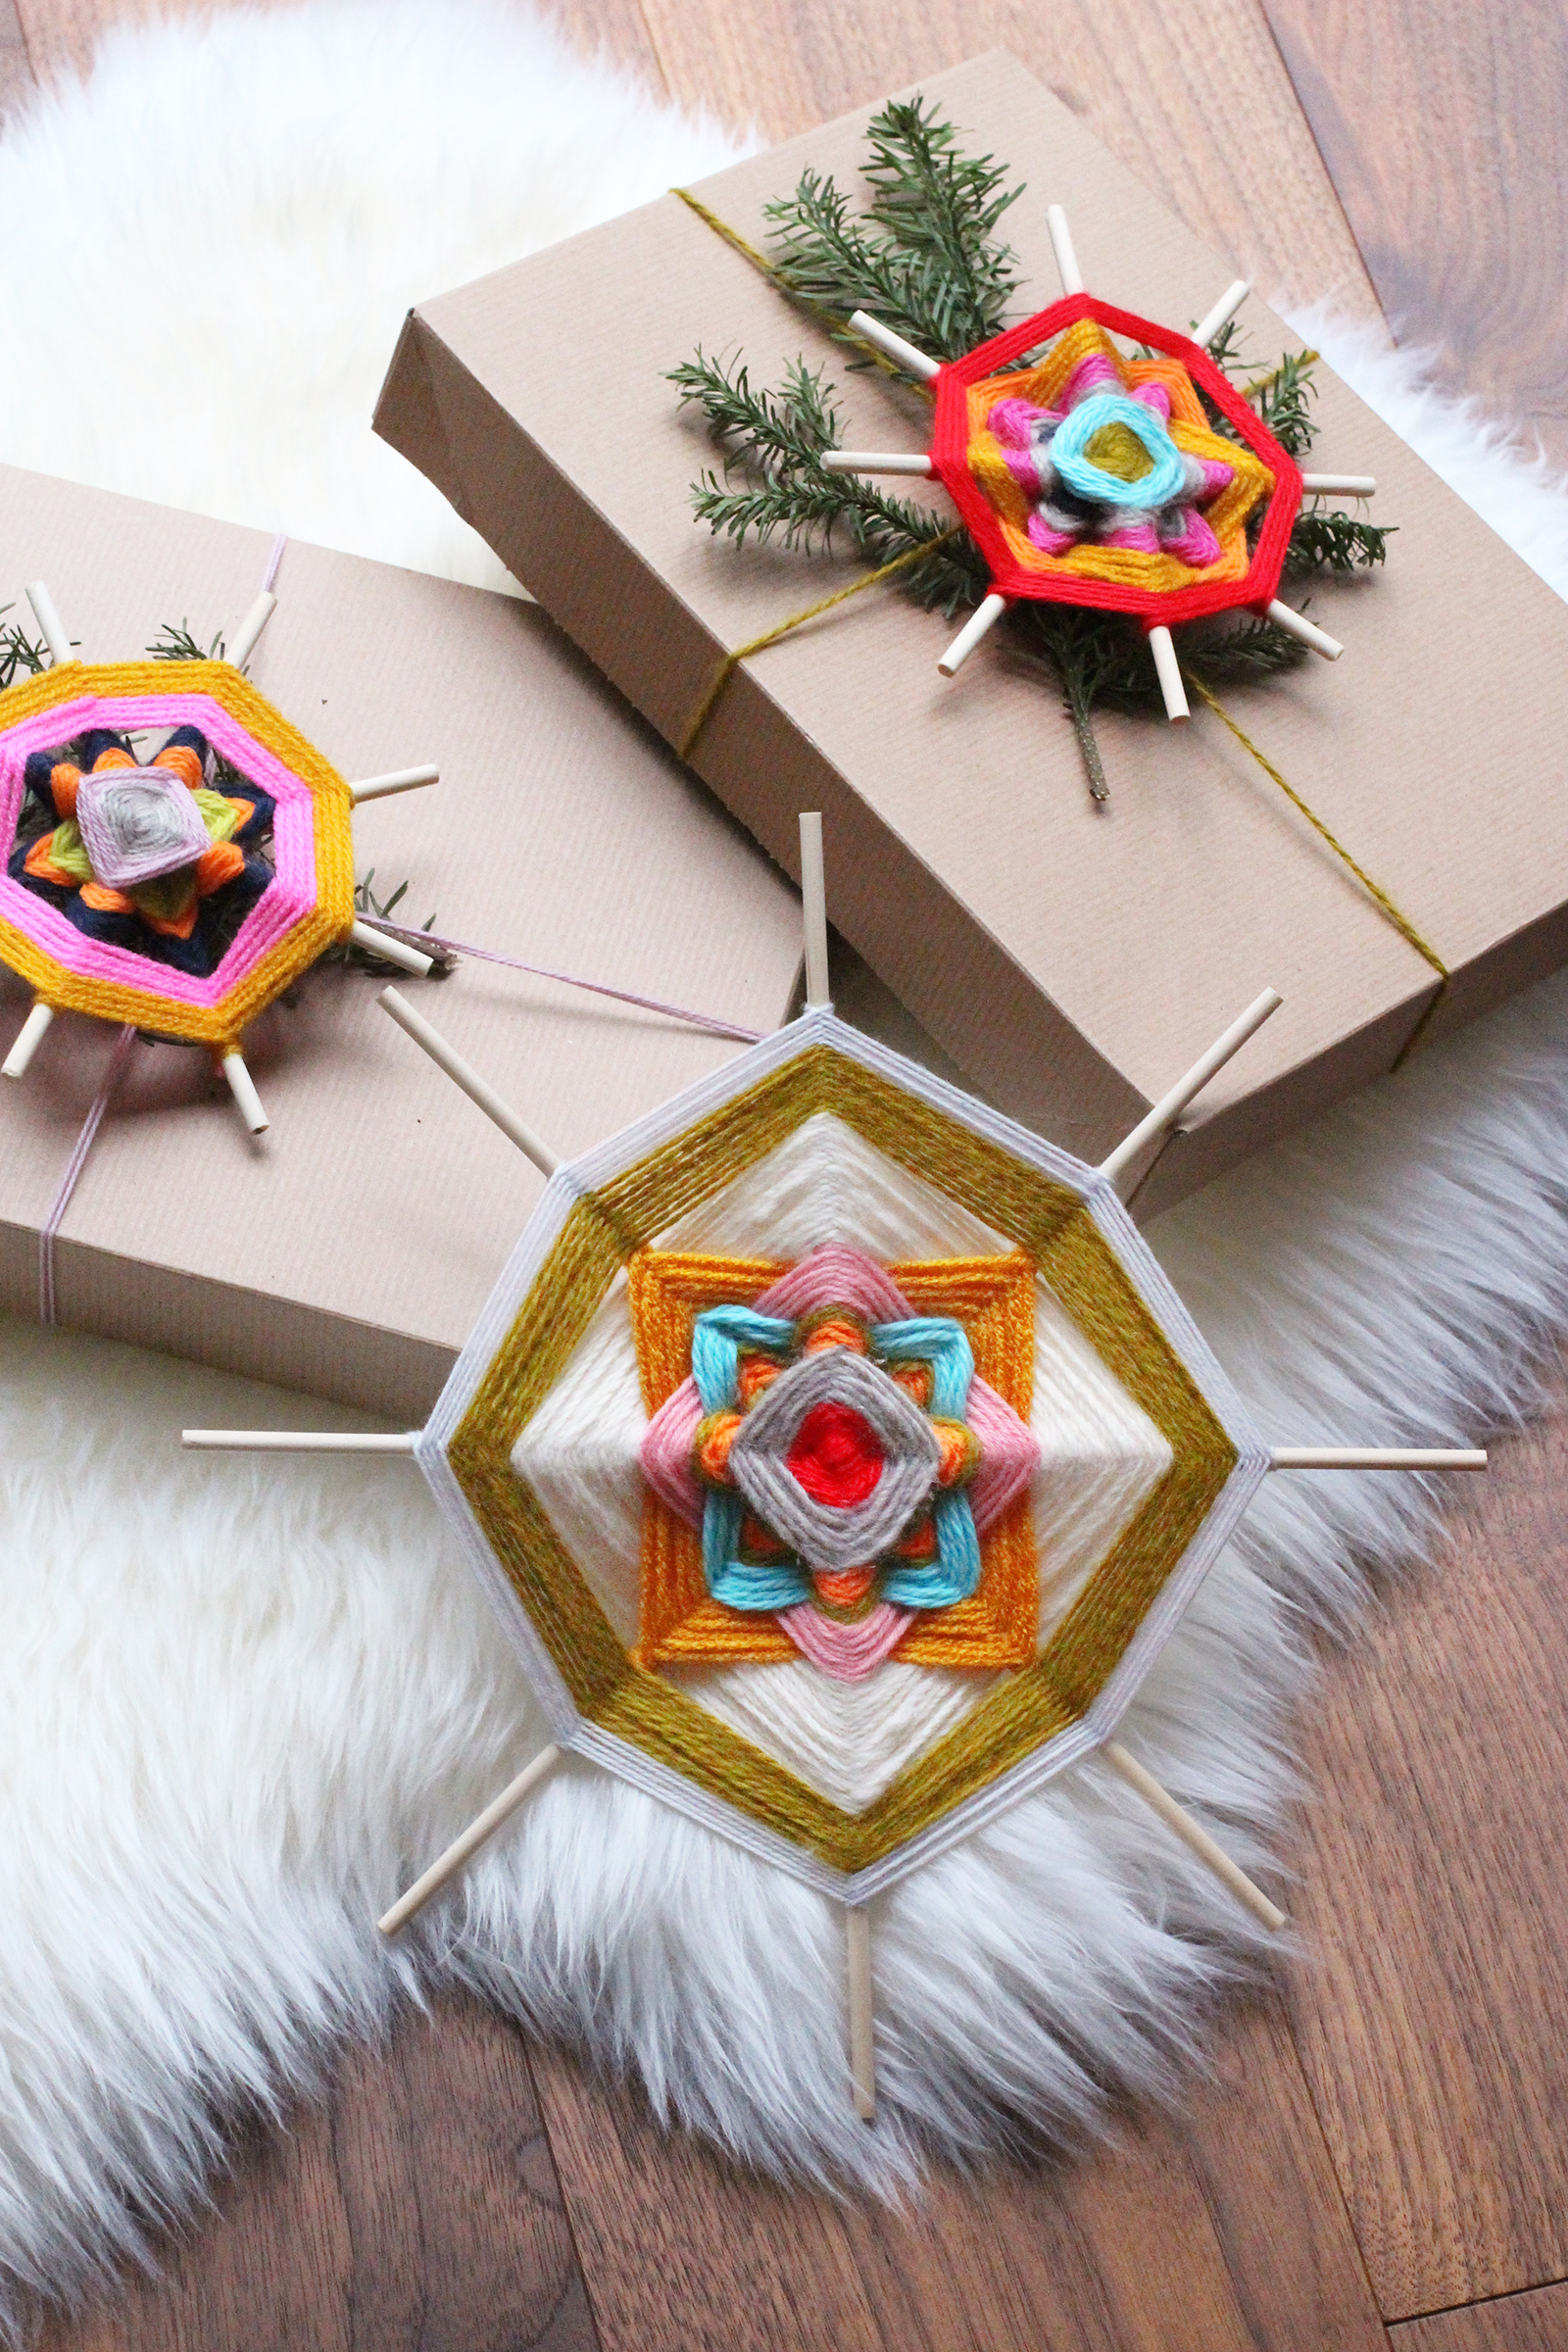
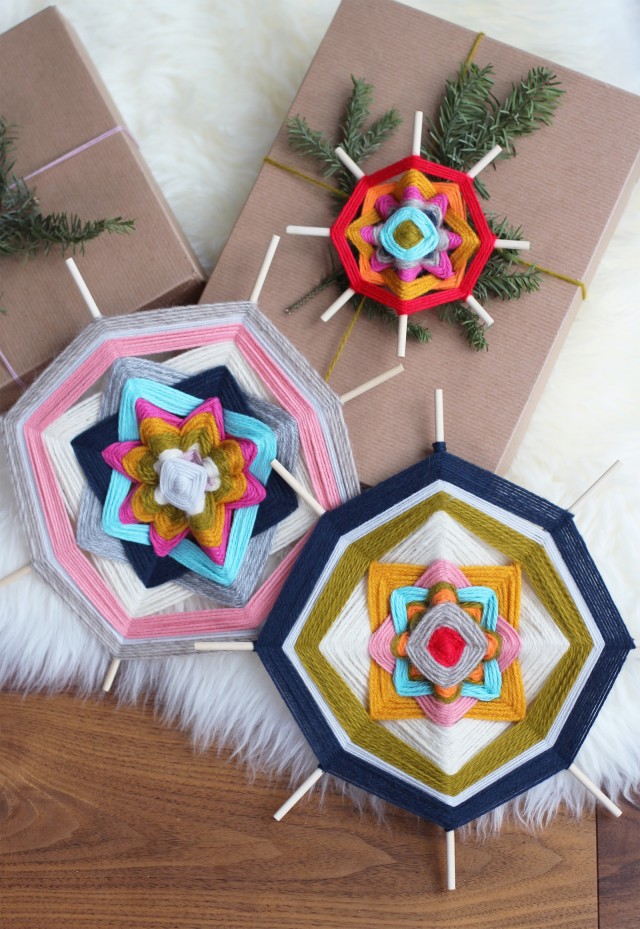
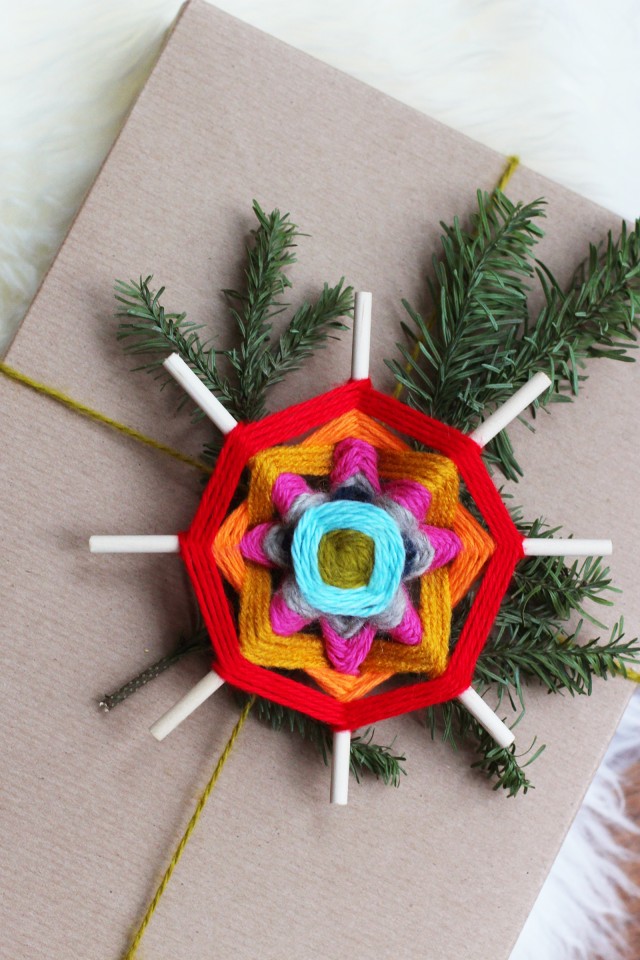
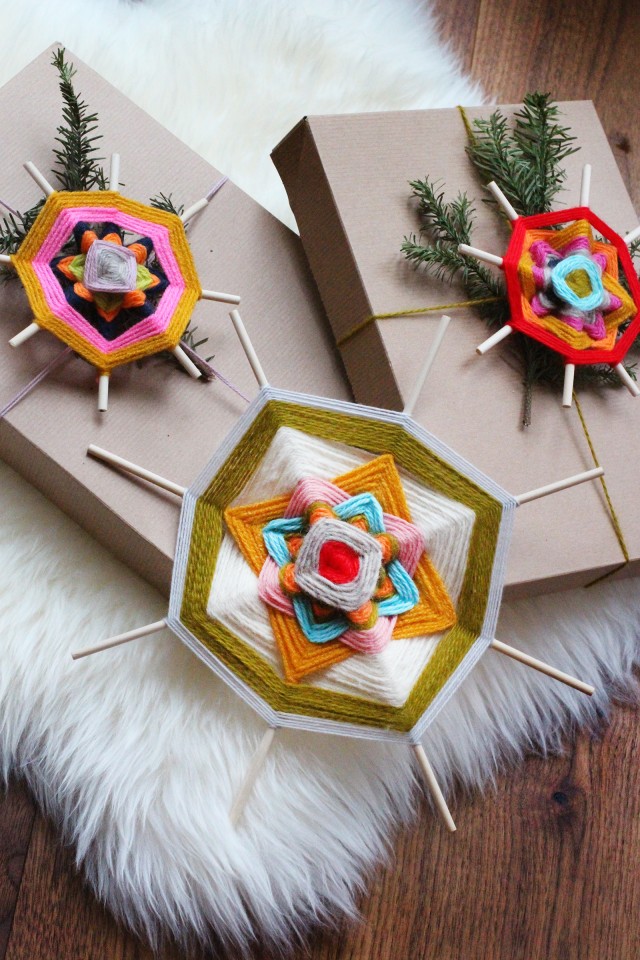
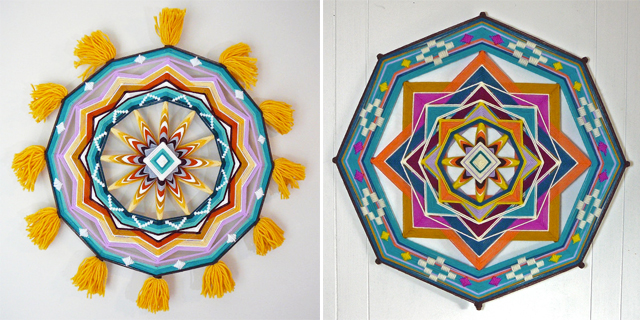
Remember those simple little diamond shaped yarn weavings we all made at summer camp with just two popsicle sticks and a some colorful yarn? Who knew that god’s eyes, which originated from Mexico’s Huichol Indians, can be so beautifully complex, incredibly dramatic, and so wonderfully therapeutic? There couldn’t be a better time to share the positive vibes of a protective god’s eye than the holidays – use them as present toppers, hang them as ornaments or simply gift them as is. Inspired by artist Jay Mohler‘s Ojo de Dios mandalas, we’re showing you a more complicated version today – be patient, it’s totally worth the time to learn how to master them. They are impressive and so much fun to make! Trust.
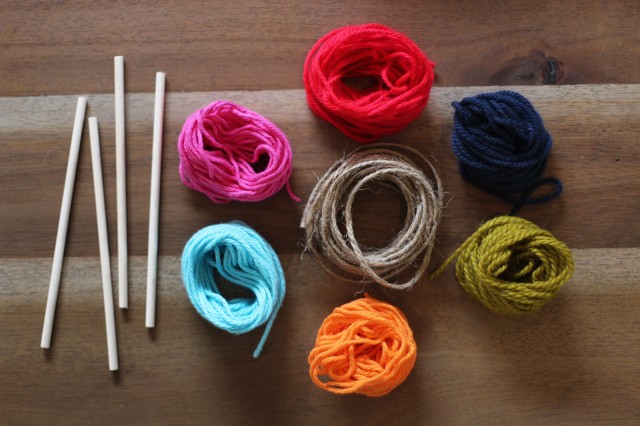
You’ll need:
- 4 6″ or 12″ wooden dowels
- yarn
- scissors
- ruler
- hot glue gun
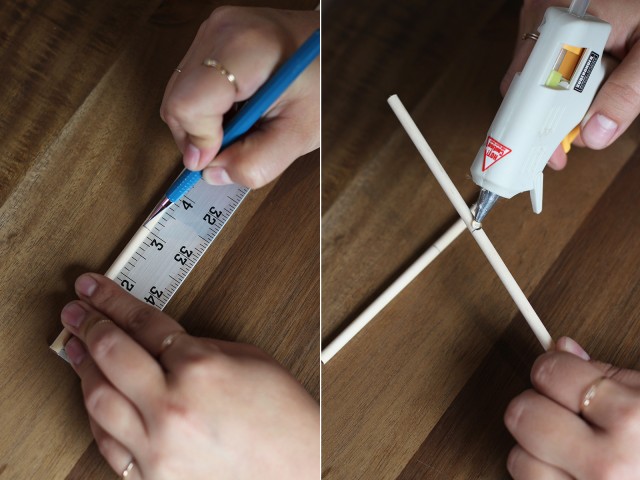
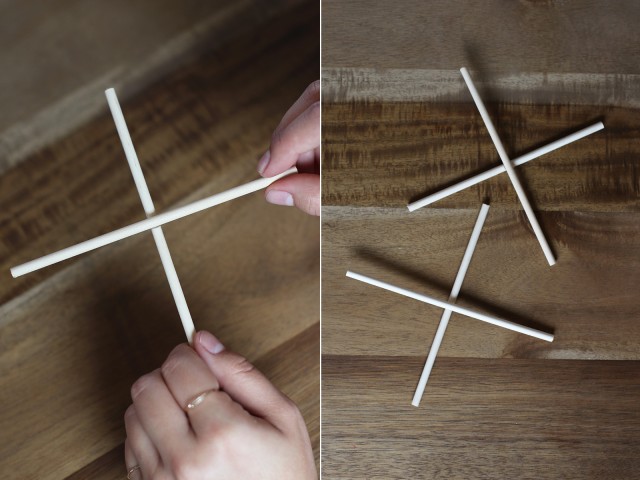
 Mark the center of each dowel with a pencil. Place a drop of glue on that center mark and match 2 dowels together so they are perpendicular.
Hold them in place until it has dried. And repeat with the other pair of dowels.
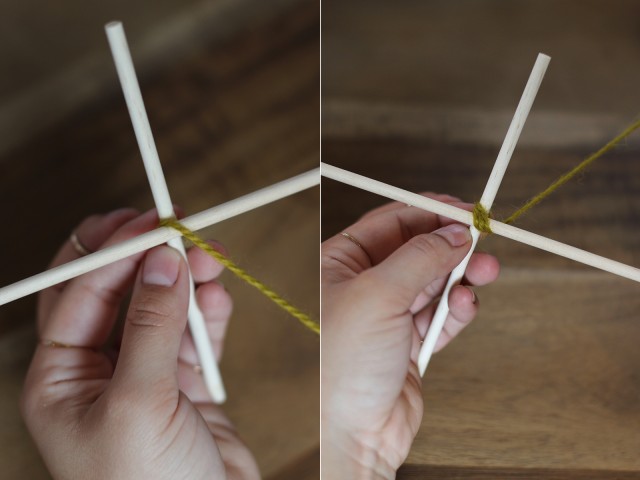
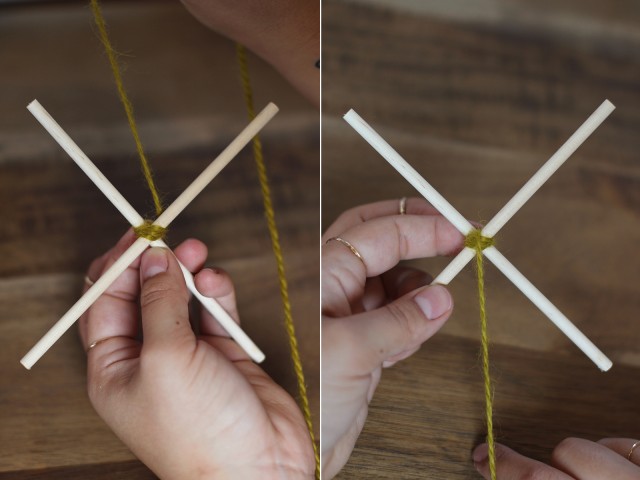
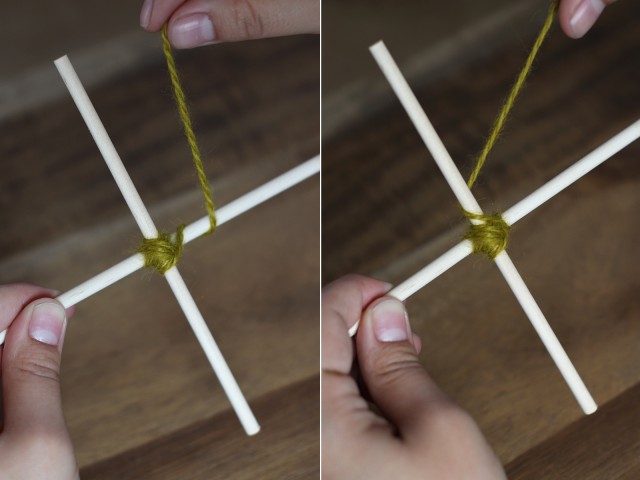
Take your first color and wrap it diagonally over the top dowel, in the upper left and bottom right quadrants, three times.
Cross the yarn under the top dowel to the upper right quadrant and over to the bottom left quadrant, wrapping it three times.
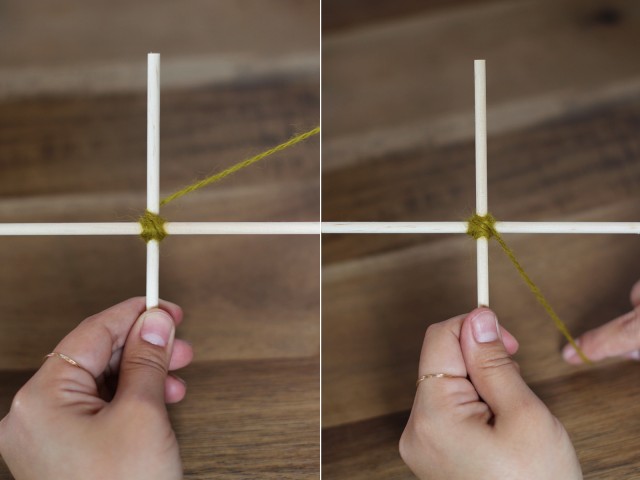
Repeat the steps – wrapping diagonally 3 times in the upper left and bottom right quadrants. And 3 times in the upper right and bottom left quadrants.
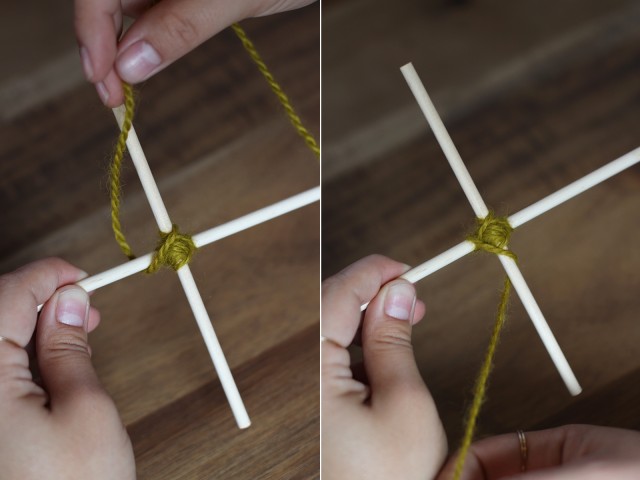
Once the yarn is back in the upper right quadrant wrap it around the right dowel once. Bring it under the top dowel from the left side and wrap it under towards the right side.
Cross it around the left dowel and then cross it around the bottom dowel – always from the outside, under and then crossed over.
Continue wrapping, cross the yarn around the dowel each time.
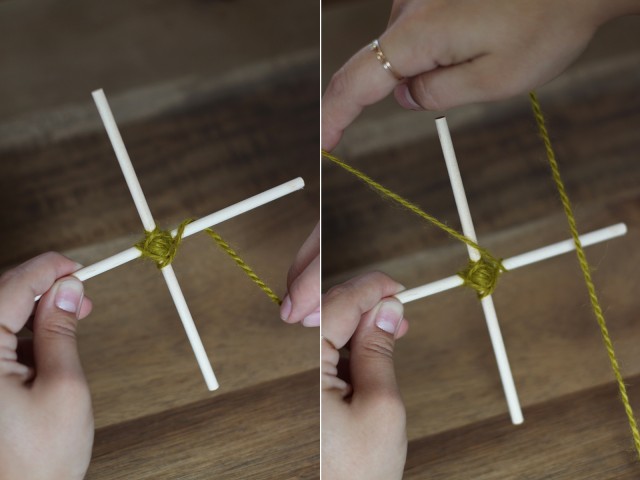
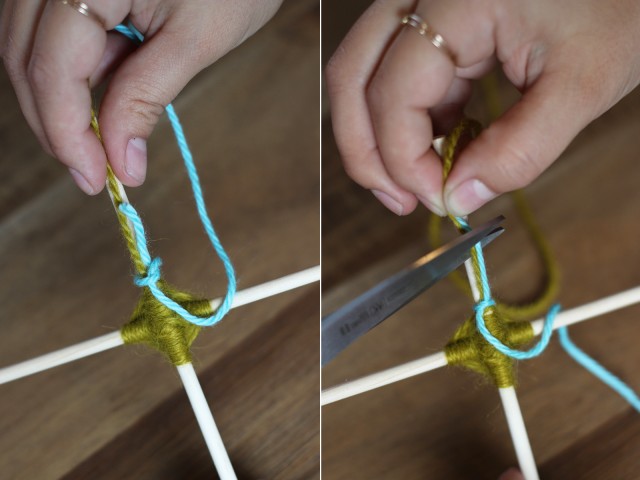
When you’re done, tie the yarn around the dowel into a knot. Pull tight to tighten.
Tie on a second color and trim the tails.
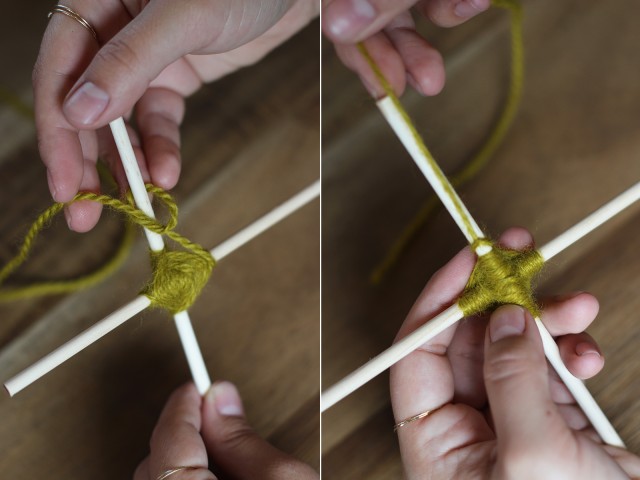
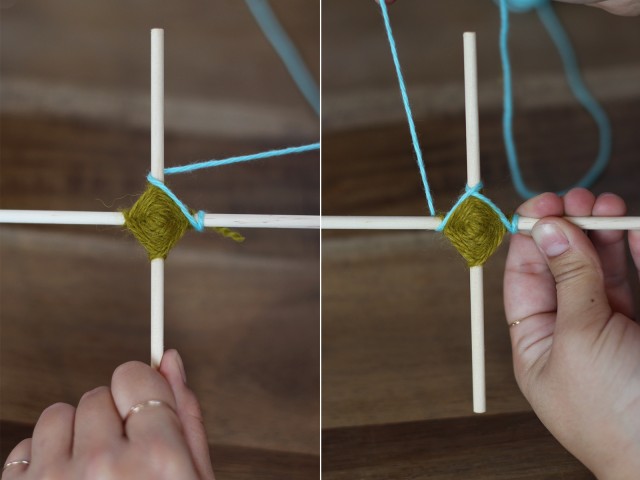
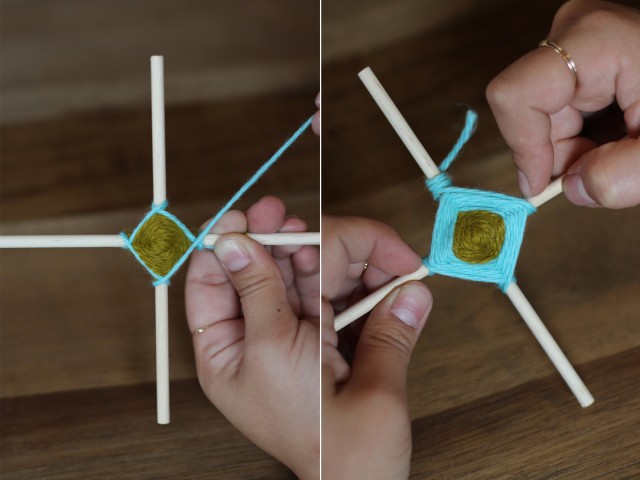
You’ll do the same here: bring the 2nd color over the adjacent dowel, under and crossed around. Now over the next dowel, under and crossed over to the next dowel . . .
Continue wrapping and tie off when done. Use your fingers to adjust the yarn so that the wraps are even on all sides.
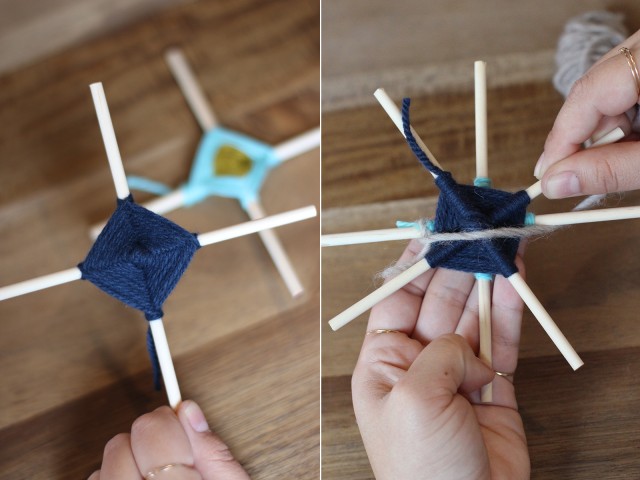
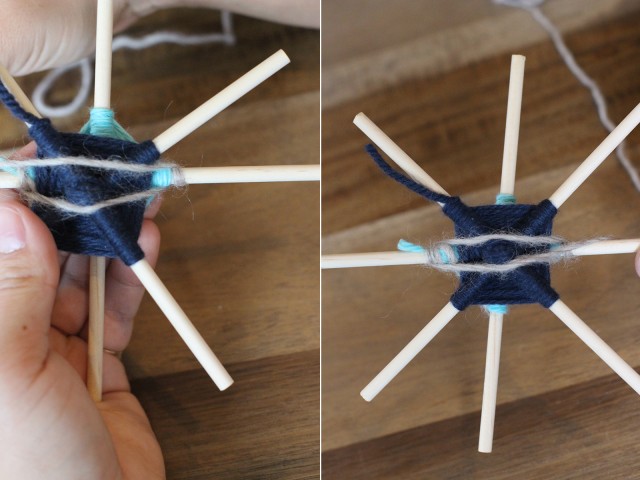
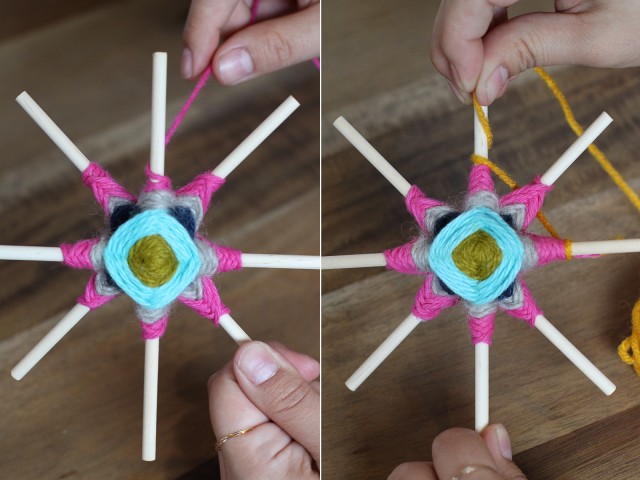
Set the god’s eye down and wrap the 2nd pair of dowels with a different color. Work out until it’s about the same size as the 1st god’s eye. Lie the 2nd god’s eye behind the 1st god’s eye. Tie a new color to one of the dowels on the 1st god’s eye.
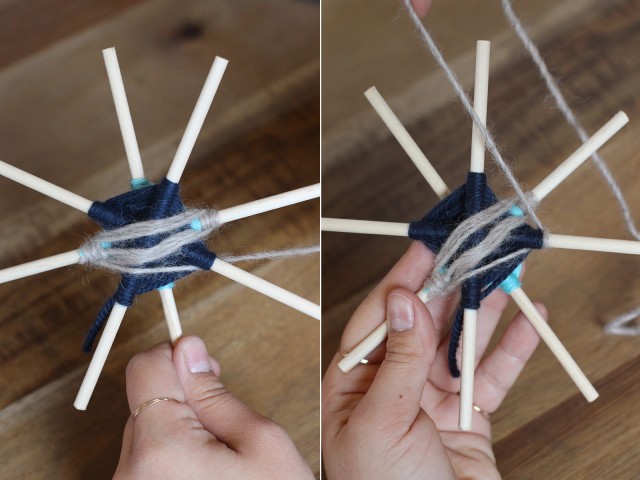
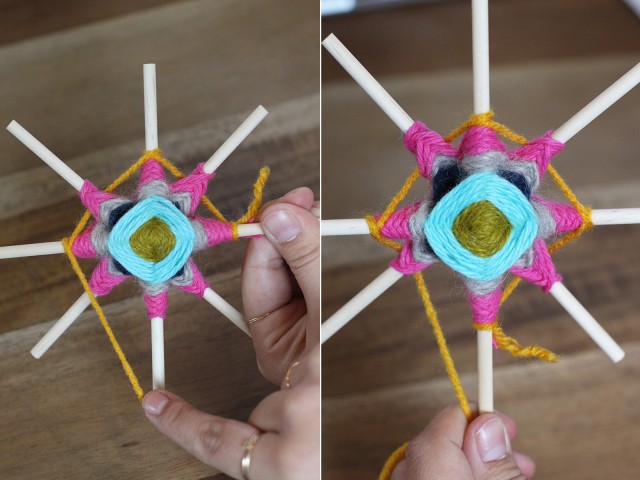
This is the trickiest part. You are going to create darts here so instead of wrapping adjacent dowels, you’ll wrap opposing dowels. This will give you that awesome negative space that makes these so special. So wrap around the opposing dowel with one full wrap and bring it back to the opposite dowel with another wrap. It’s not shown here but check the front of the god’s eye to make sure the yarns are crossing over each other just as they were in the first steps.
After one set has been wrapped 3 times, wrap it around an adjacent dowel and do the same – wrap one full wrap . . .
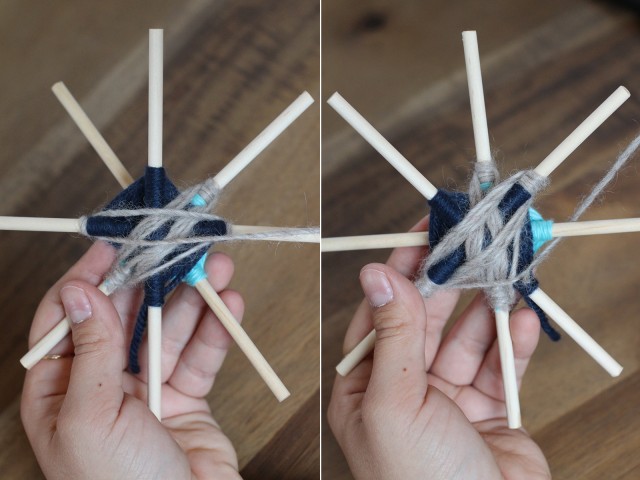
And bring it around the opposing dowel for another full wrap. Keep going . . .
Until all opposing dowels have been wrapped. The 2 sets of god’s eyes are now connected!
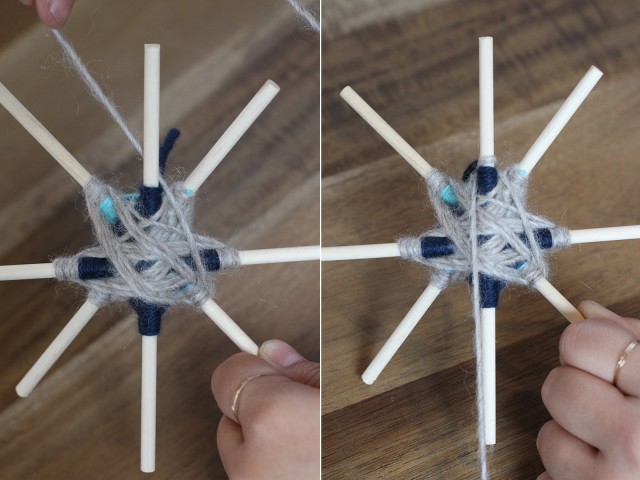
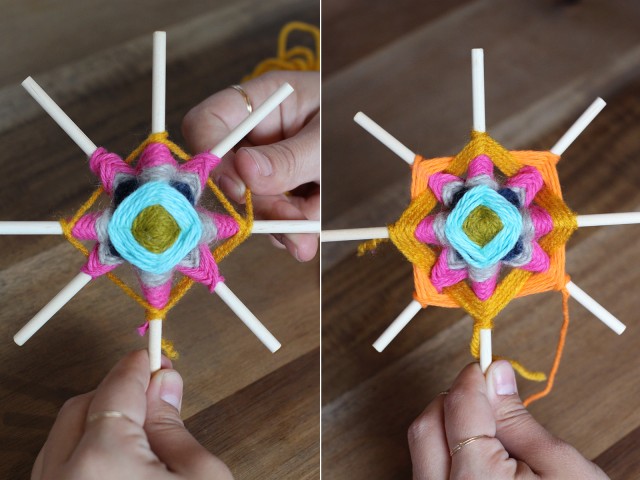
Turn it around and add another few wraps the same way, with another color. See how the yarns criss cross in the front? You’ll always want your wraps to look like this. After your last set of darts have been made, tie the yarn off and add a new color.
This time, you’ll be wrapping around the bottom four dowels. So you’ll skip every other dowel, going UNDER them each time. Remember, wrap over the top, under and then crossed around itself. Skip under the adjacent dowel and wrap over the top of the next dowel, under and crossed around.
Continue wrapping in this square shape until you’re ready to change colors. Add a new color onto one of the top 4 dowels and do the same – going UNDER every other bottom dowel.
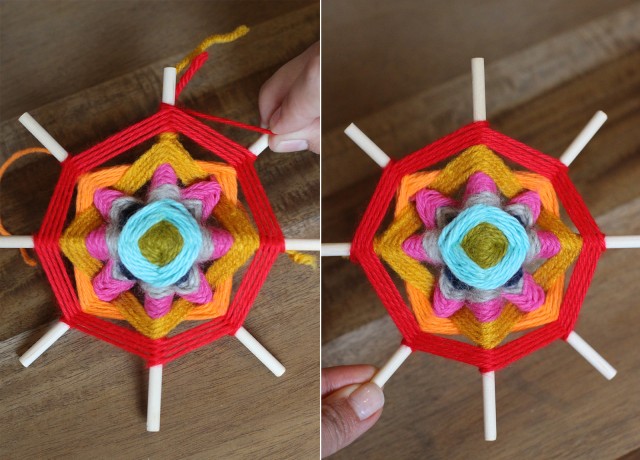
When you’re ready add your final color and wrap around all 8 dowels – over the top, under and crossed over. Over the top, under and crossed over . . . tie your final piece into a knot on the backside and trim away any excess yarn!
And that’s it – you’re finished! Add them to the top of a present or hang them from your tree.
Or just make a larger one using 12″ or 18″ inch dowels to hang on your wall. Either way, enjoy making your god’s eyes!
(images by HonestlyWTF)
how original and beautiful DIY is this one!! I love the colours your shoes!!
http://www.stelstyle.com
I can’t even tell you how many times I have taught the popsicle stick version to a little kid. I wish I had know this amazing variation when I was trapped in the arts and crafts room for hours a day.
Thanks for sharing!
amazing!
http://www.FashionSnag.com
So cute!
Xx
Elisa.
My Fantabulous World
What a cute idea! This could be a really meditative and relaxing holiday activity!
Stunning post!
♥♥♥
Jeanne
http;//fashionmusingsdiary.com
perfect..
xxxx
http://www.dominiquecandido.com
These look super cute! I remember doing a similar project in grade school!
http://www.bluelabelsboutique.com
These make such beautiful decorations, awesome! Thanks so much for the tutorial!
Prudence
http://www.prudencepetitestyle.wordpress.com
So beautiful, Erica! Thank you!
Wow, this is pretty awesome! (although I wouldn’t call them God’s eyes) 🙂
These look lovely! All those bright colours <3
Namrata
http://seasoncheck.blogspot.com
Amazing! I’ll give them a try! Thanx!
I did this once and it was so cool! I did it with actual sticks I got out of my backyard.
I was all geared up to teach my children’s knitting group these as our sneaky Christmas gift, then one of the local school teachers came in for supplies for them 🙁
We wove wall hangings instead and they were none the wiser .
Wow I never thought of making mandalas as a Christmas decoration/ornament! Btw I love all of your DIYs that aren’t necessarily part of fashion, but more toward your personal taste and quirkiness. Please keep up the inspiration and post more!
Always so pretty colors!!
We used to do this with toothpicks and embroidery thread………..
Para chimeneas de gas abierto, el ventilador tipo RSHG es la mejor opción, ya que asimismo asegura que esa corriente adecuada.
Amazing! Thank you!
I never knew these were called God’s eyes! Cool!
Hello, Neat post. There’s an issue with your site in web explorer, could test this? IE nonetheless is the marketplace chief and a big element of other people will omit your magnificent writing because of this problem.|
El consumo del pan puede hacerse cuando se alcanza la temperatura perfecta de veintisiete grados en su centro.
So lovely. I remember making these at summer camp. Layering them makes them so much more sophisticated and interesting.
https://www.etsy.com/shop/EarthChildArt?ref=hdr_shop_menu
This god’s eyes are so beautiful !! <3 <3 I'm going to share your post on my blog 😉
wow i just did and its beutiful
nice post
What a cute idea! This could be a really meditative and relaxing holiday activity!
Thank you so much for such a detailed and easily understandable tutorial!
Nat.
What kind of dowels do you use? I have been using these dowels from itsybitsystore similar in width to a regular BBQ stick but sometimes they break. Is there a better alternative I can find online?
I like using 3/16″ wooden dowels for the God’s Eyes. You can find them on Amazon or maybe even your local hardware store!
That is soooo cool
Love this tutorial, How much of each color yarn would you say you need?
Hi,
I run a hospital art program and would like to use your activity with our patients. Would it be okay if I use your instruction and images?
Thank you in advance.
Jessica Olding
Arts in Health Program Coordinator
St Vincent’s Private Hospital Brisbane