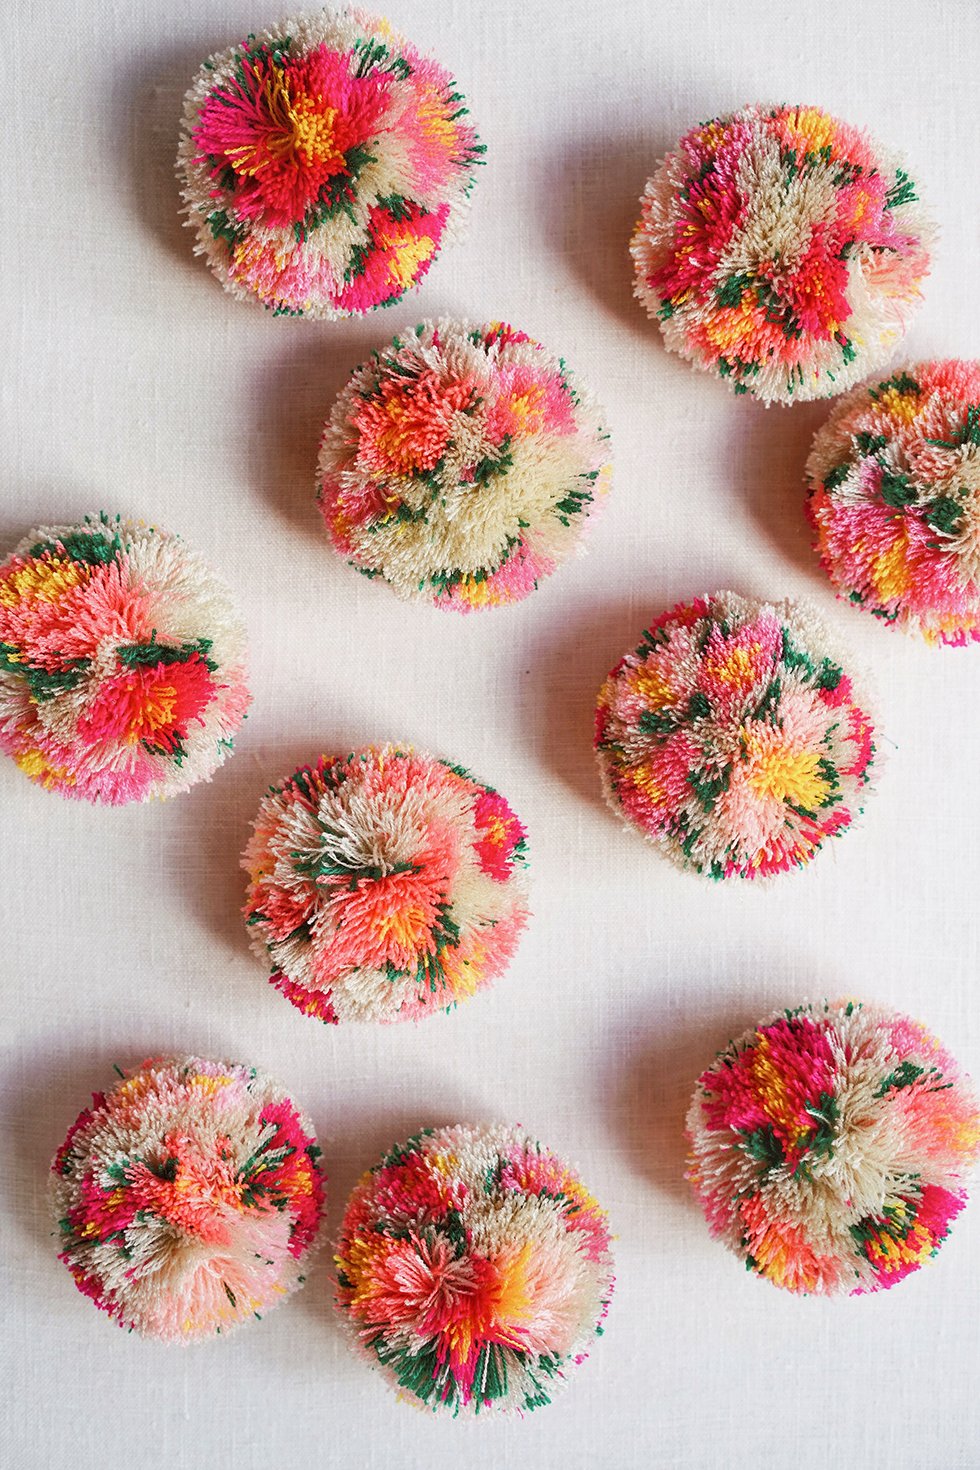
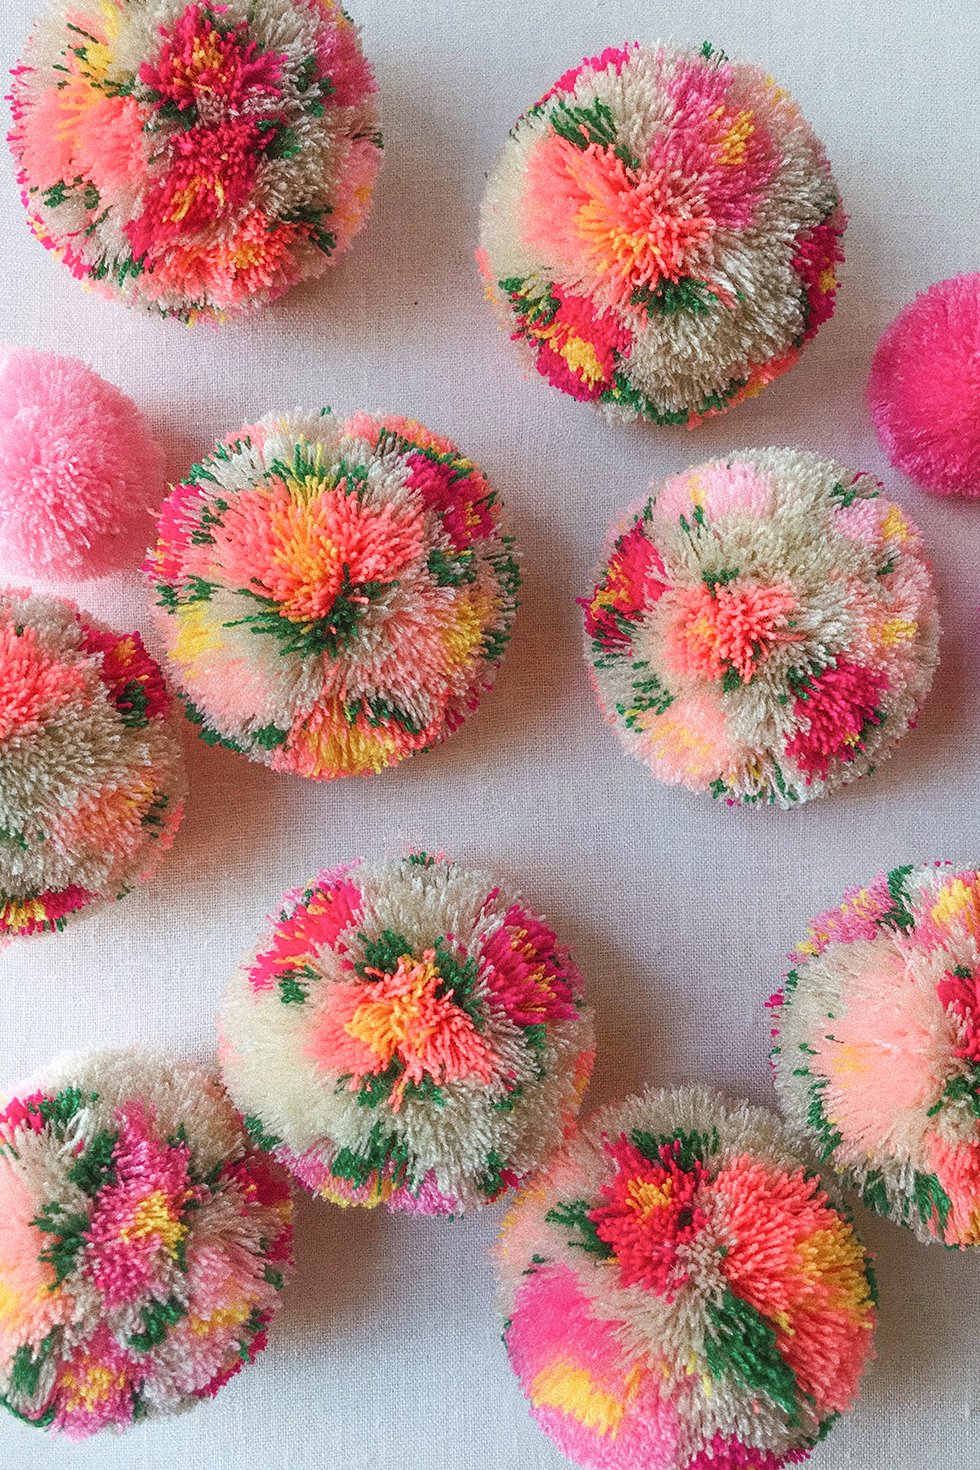
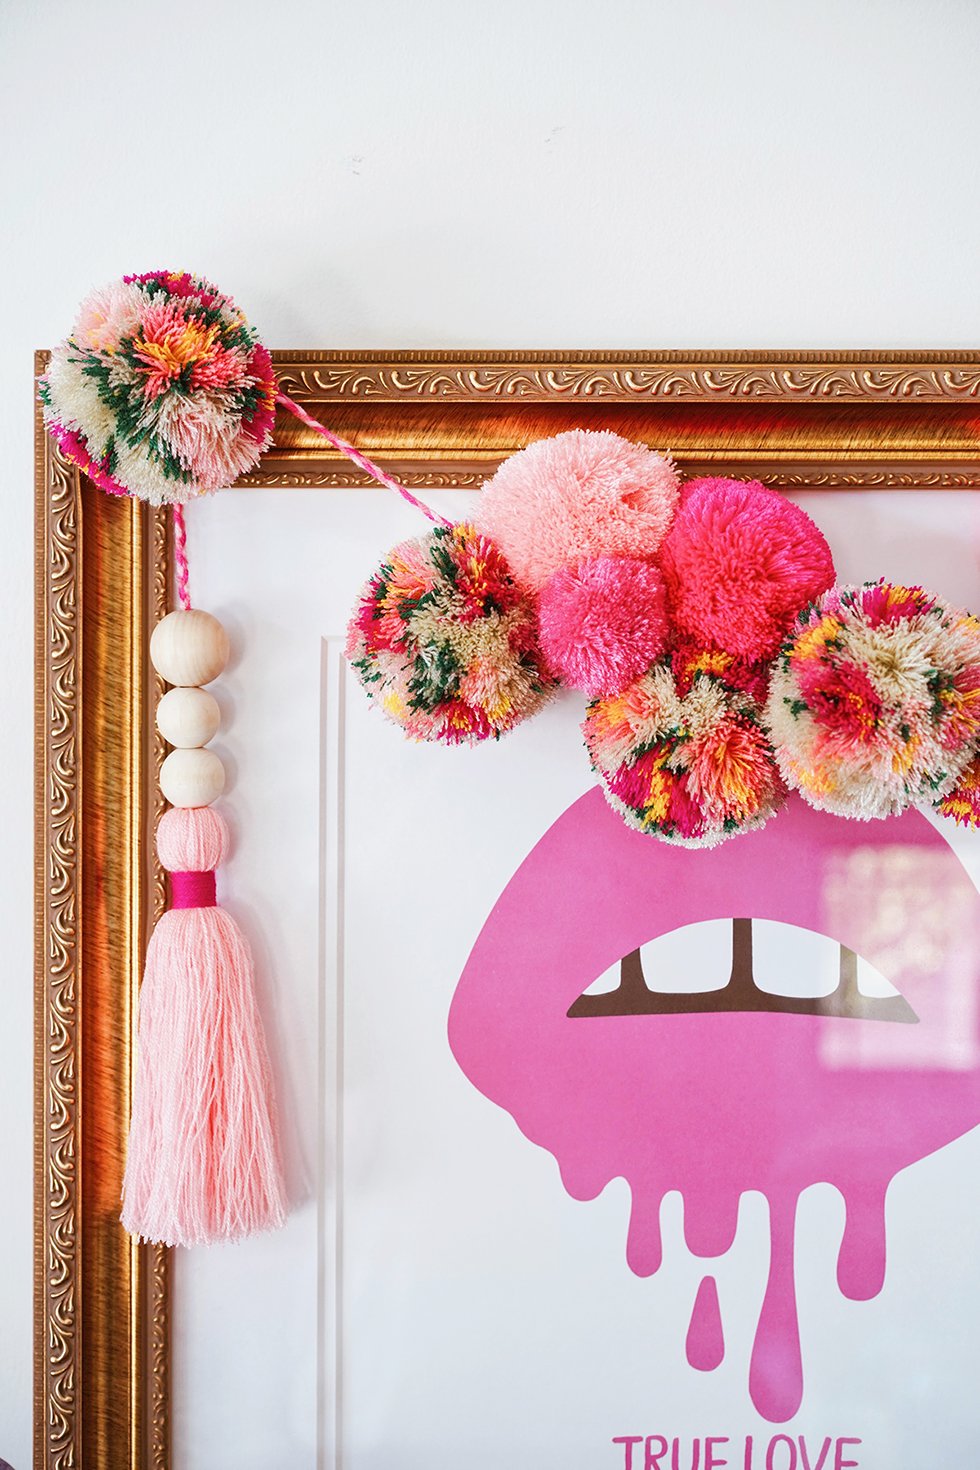
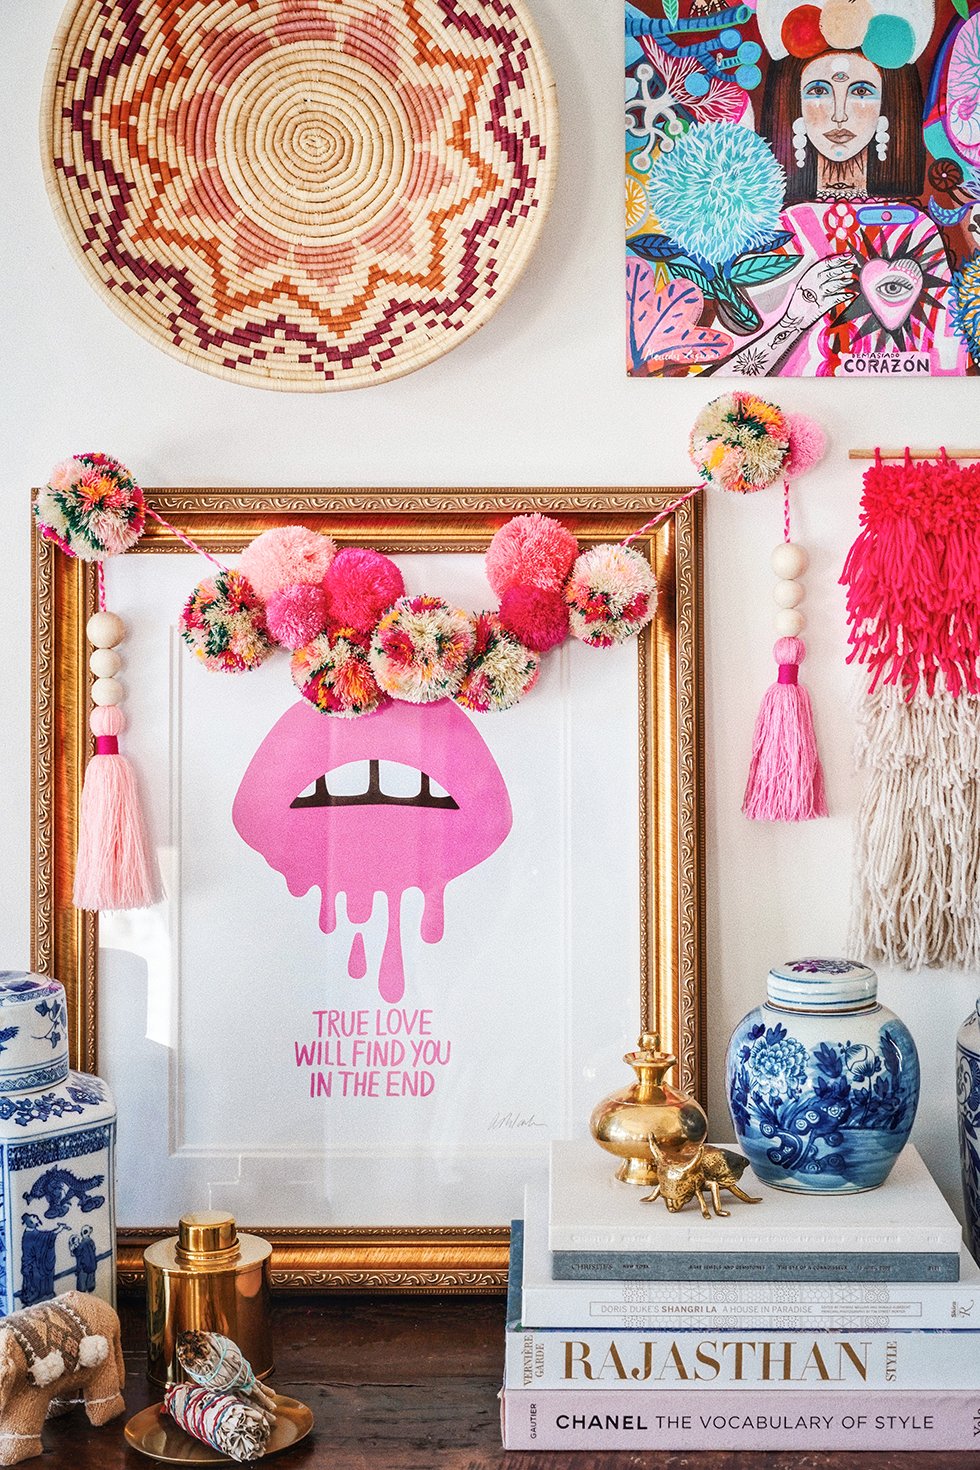
If you've been following HonestlyWTF from the start (nearly a decade ago - gasp!) you'll remember that a tutorial for how to make pom poms was one of the very first DIYs published on this blog. And if you're new here, then hello. My name is Erica and I'm obsessed with pom poms. I'd love to share a moment that even furthered my obsession with these fluffy balls of joy. A few years ago, I quite literally stumbled upon heaven amongst the colorful streets of Sayulita, Mexico, where thousands of the most vibrant strands of pom poms, inspired by traditional Huichol Indian adornments, hang from just about every storefront in town. They're so beautiful it's no wonder they're meant to symbolize good luck. What also made these pom poms so special was the super fine yarn used, which gives them that soft, lightweight texture that can't be achieved with standard woolen yarn. Just think "koosh ball". You can imagine how excited I was to have finally discovered where to buy that exact yarn all these years later. With a newfound admiration for pom poms, I was determined to do something a little different this time around. How about creating floral pom poms?? I love how they turned out and hope you do too. Note that you can totally make these using thicker yarn, it'll just have a different feel and perhaps, you won't be able to fit in as many flowers but they turn out pretty all the same.
You'll Need:
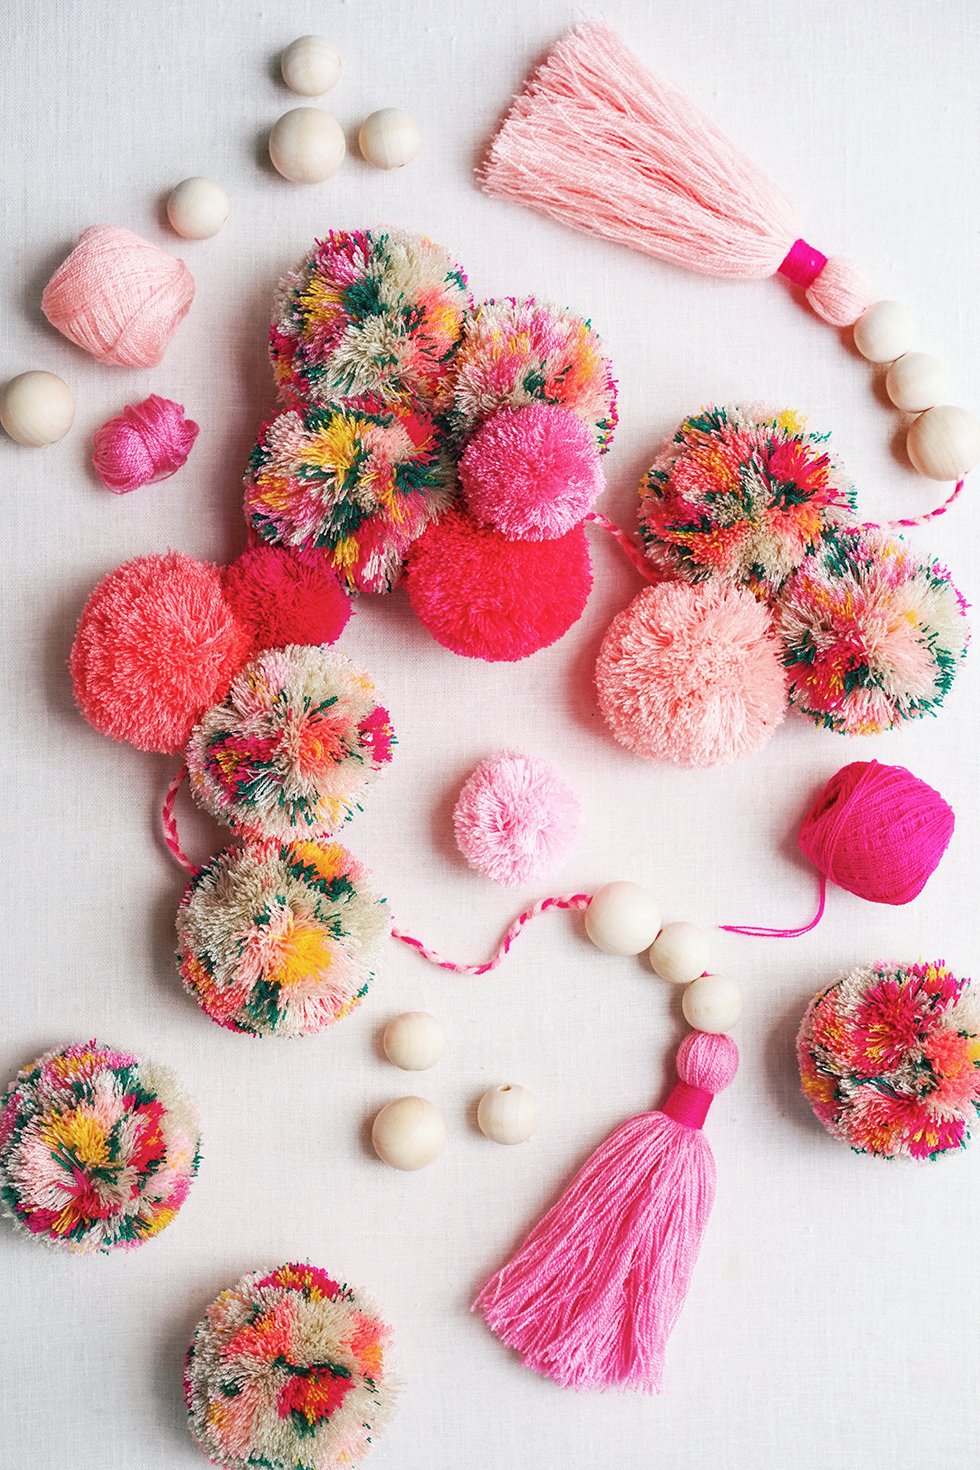
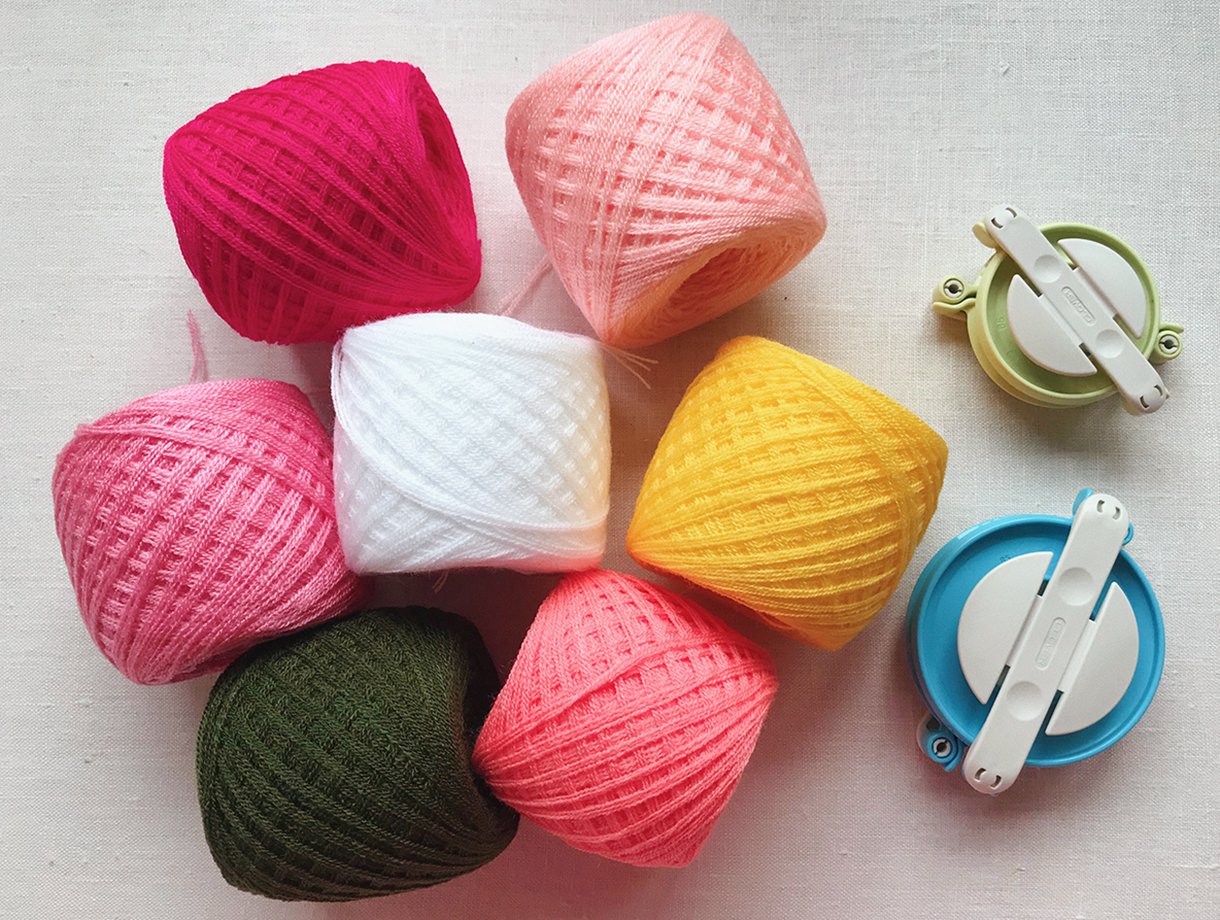
- Omegacryl yarn (thin) or wool yarn (thick)
- Clover Pom Pom Maker
- waxed linen cord
- sharp scissors
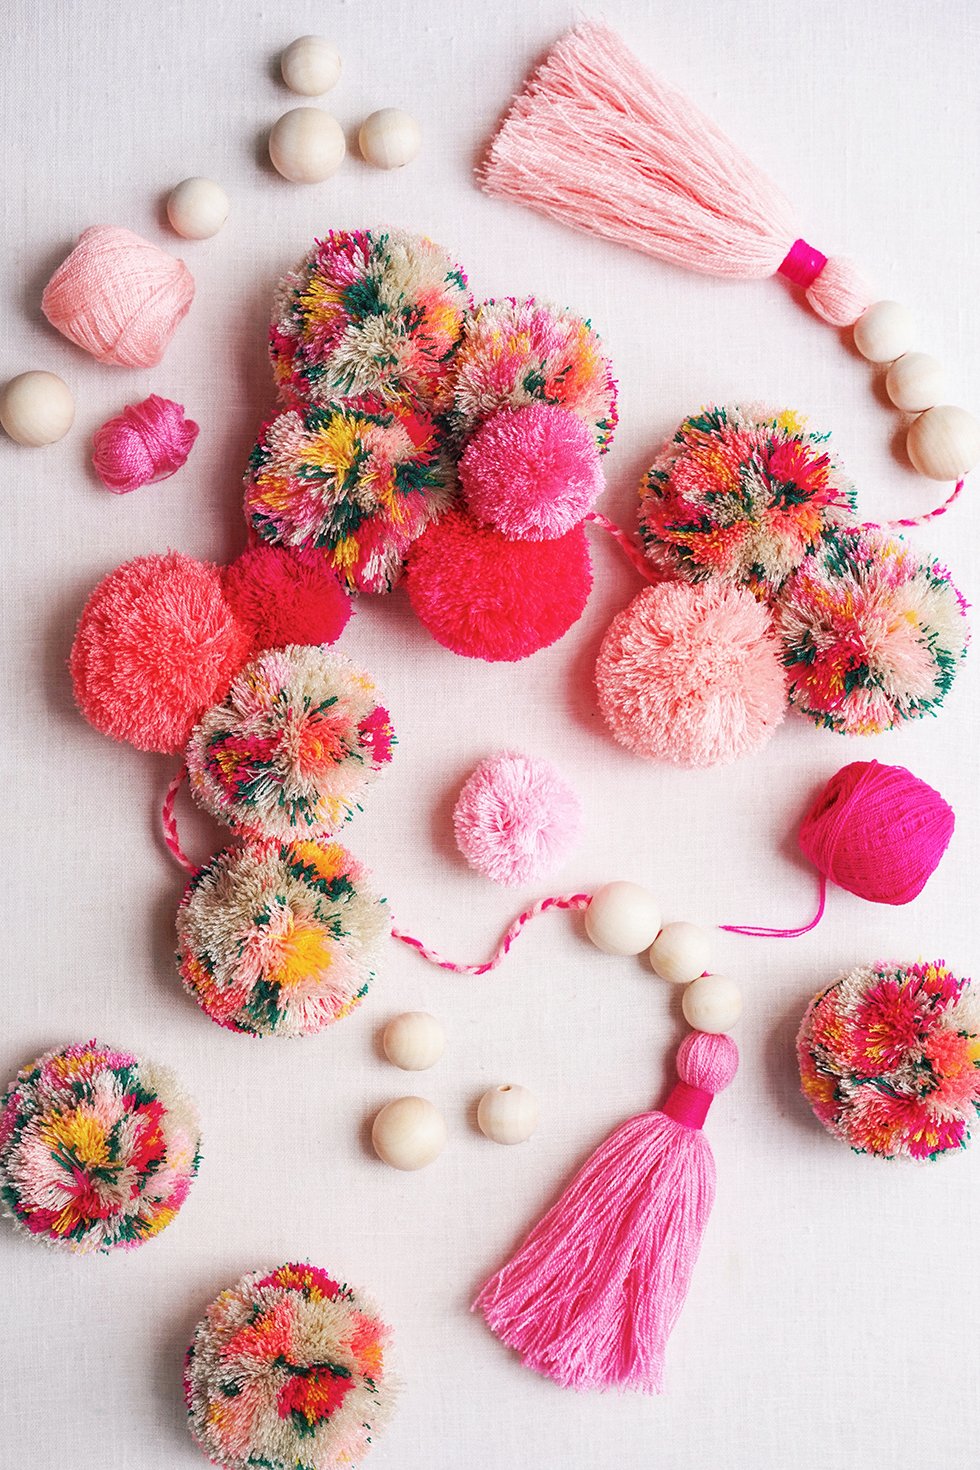
Base color: Beige, Middle of Flower: Canary Yellow, Leaves: Flag Green, Petals: Bougainvillea, Coral, Light Salmon, Rose, Light Pink
NOTE: For 10 very dense medium pom poms, I went through 3 skeins of base color (beige). So I would say one skein of base color will get you 3-4 pom poms, depending on how many flowers are in each one. And for 10 medium pom poms, I went through about half of the petal color skeins and about a quarter of the yellow and green skeins.
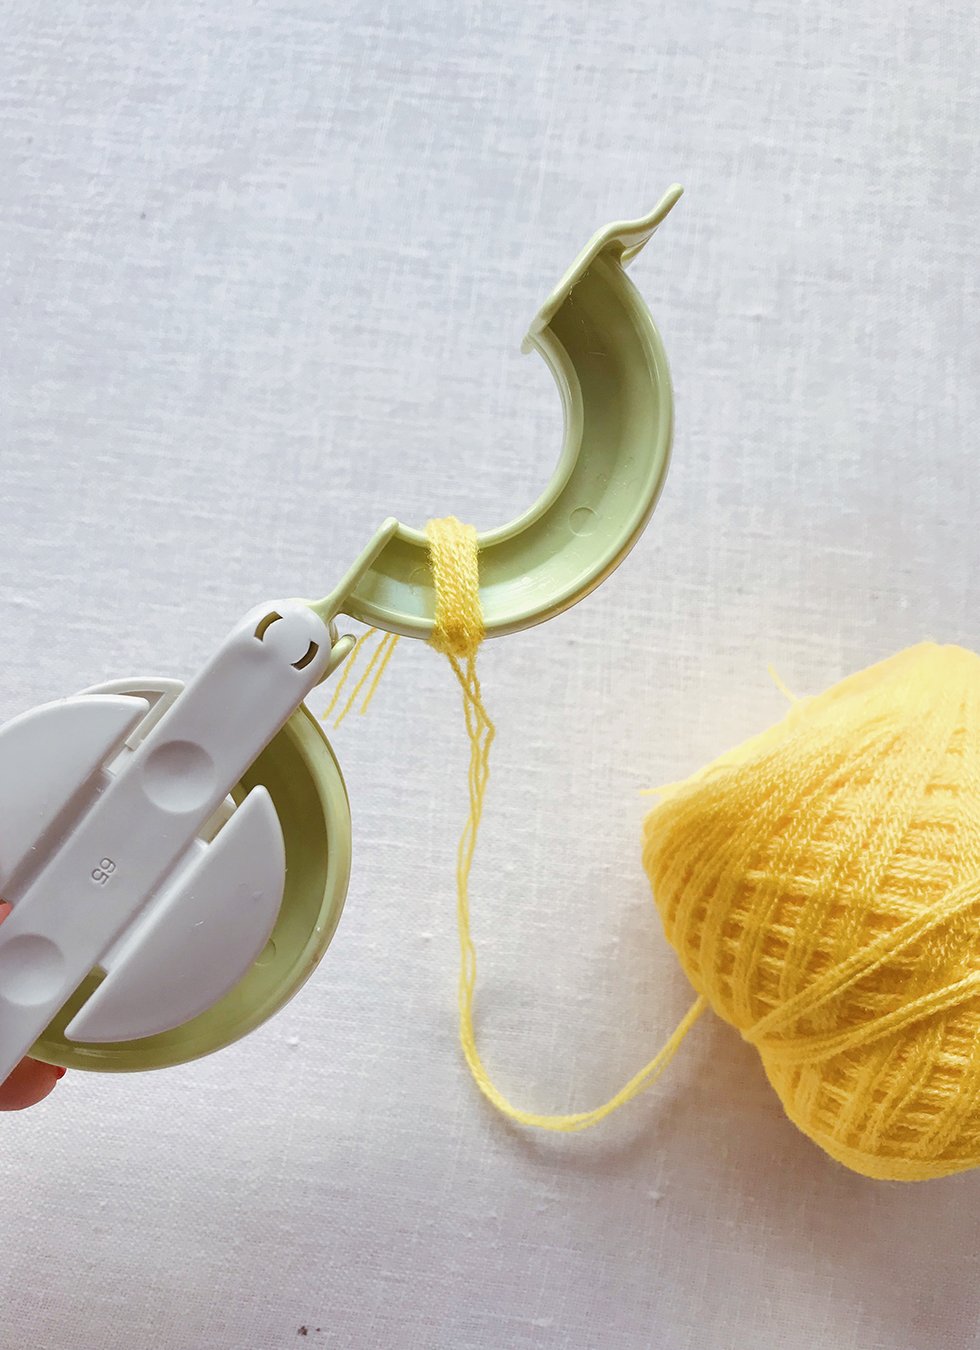
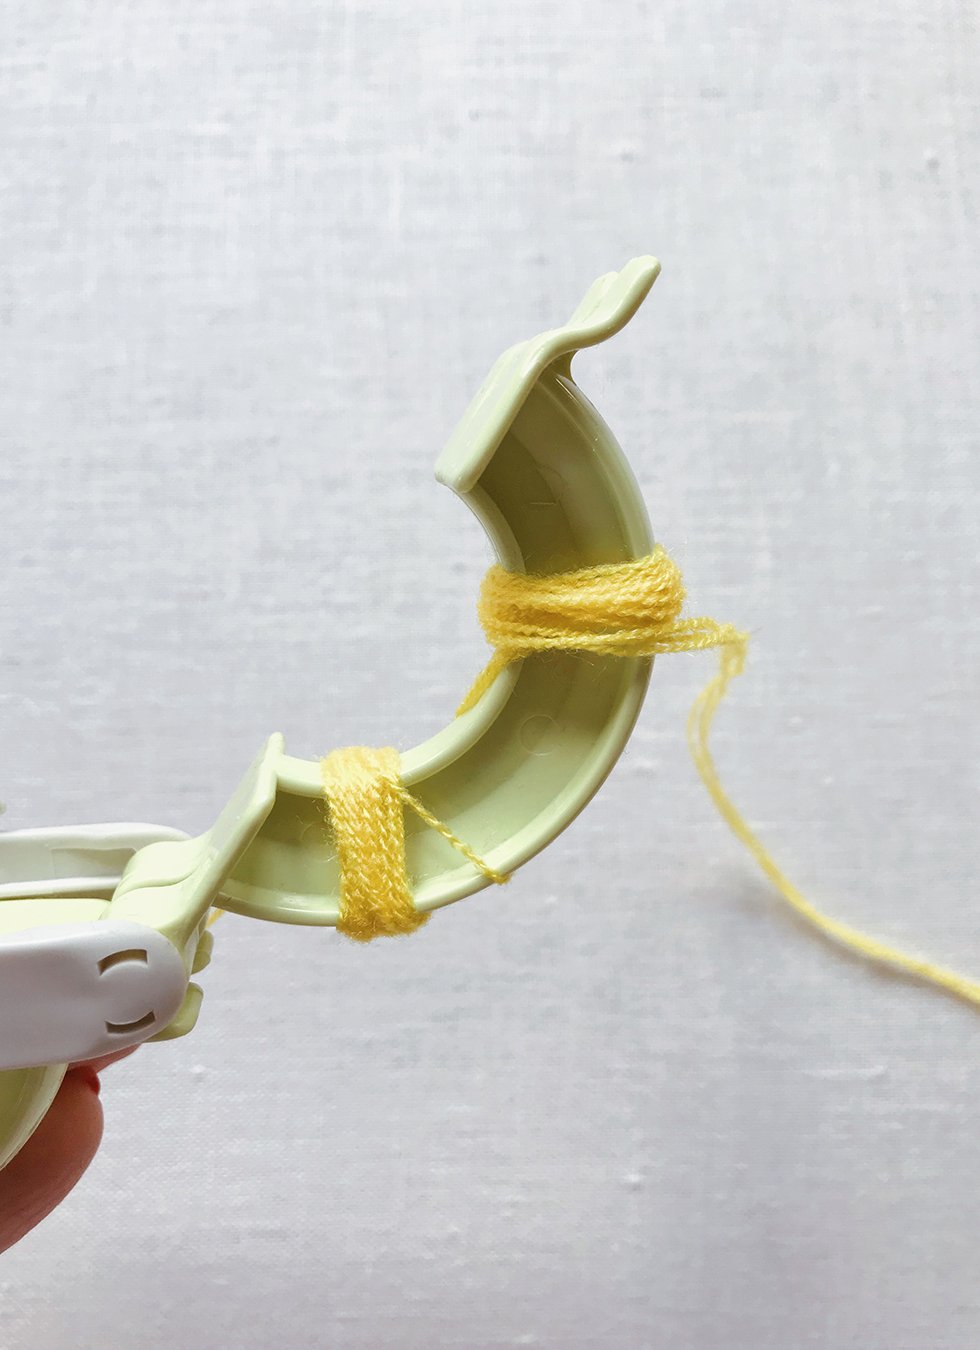
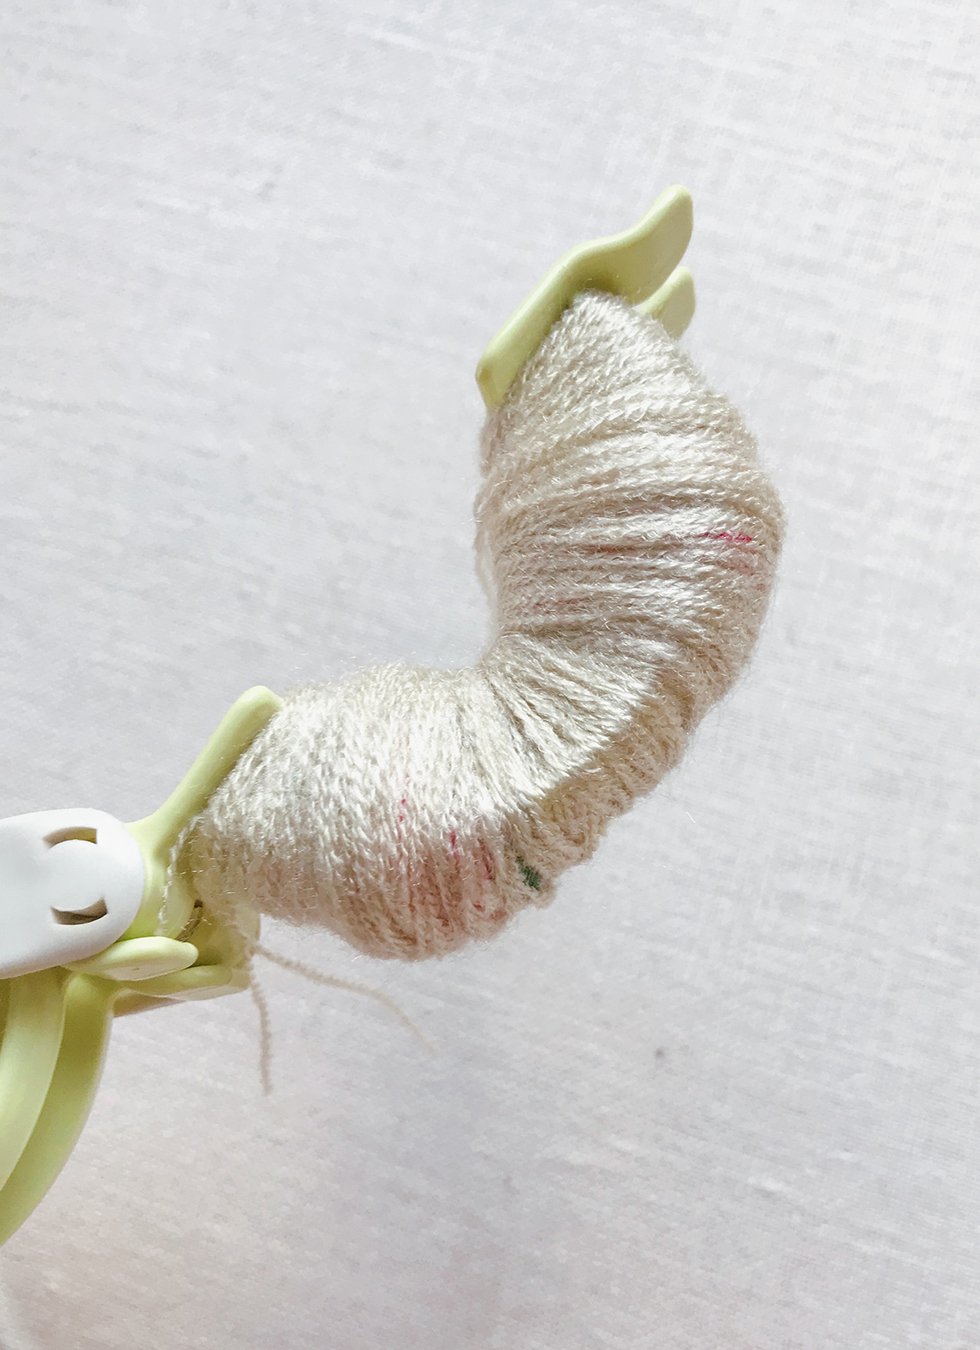
Out of all the pom pom makers I've tried, Clover's Pom Pom Maker continues to be my all time favorite. I like that it's easy it to use, that produces an even consistency every time and that you can really create dense pom poms. With yarn this thin, you'll want a really solid pom pom - otherwise, it just looks floppy and sad. So, if you haven't used a pom pom maker like this before, know that it's constructed of two parts. When attached, 2 sets of arms will pivot out. The first step is to pull out one set of arms and start wrapping the center of your flowers. I like to create 2 flowers at this layer. So wrap the yellow yarn around the arm around 4-6 times. And then continue a little further down for a few more wraps. Trim the yarn.
Note: I'm using the smaller (light green) of the 2 medium Clover Pom Pom Makers. It's 2.5" in diameter.
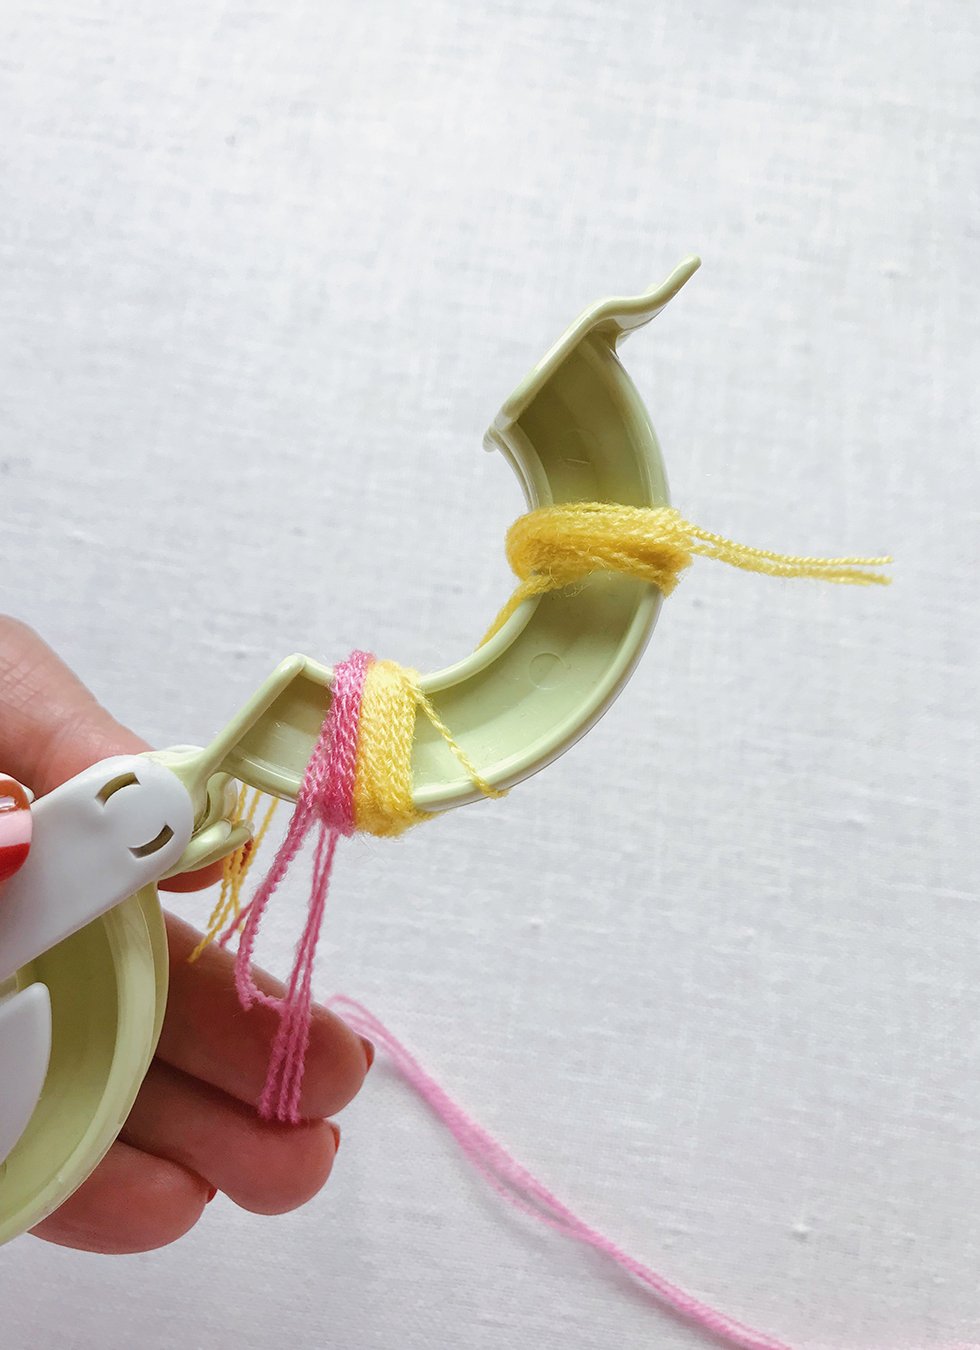
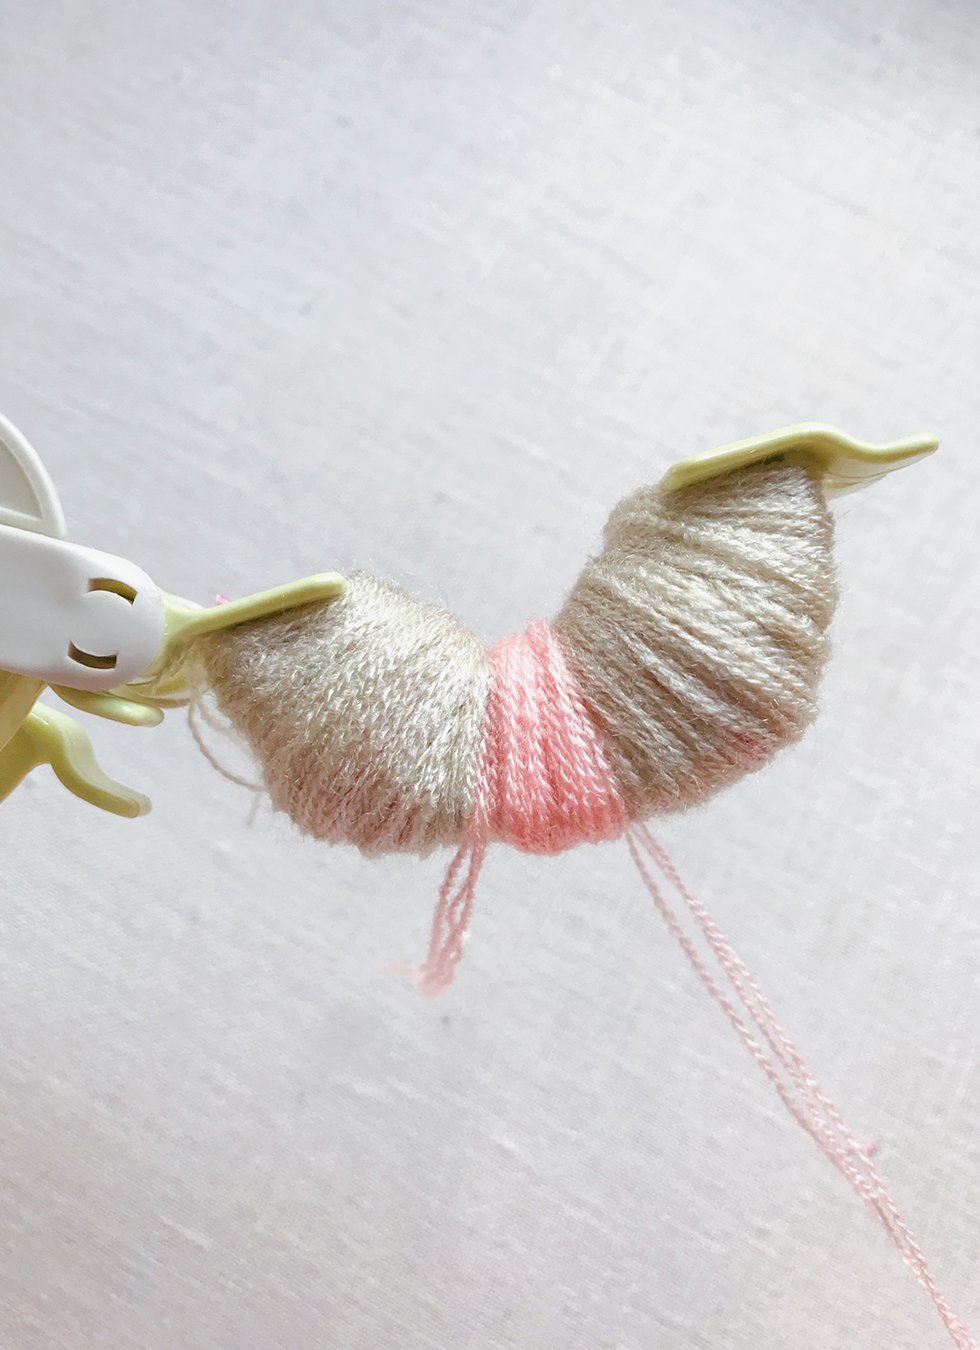
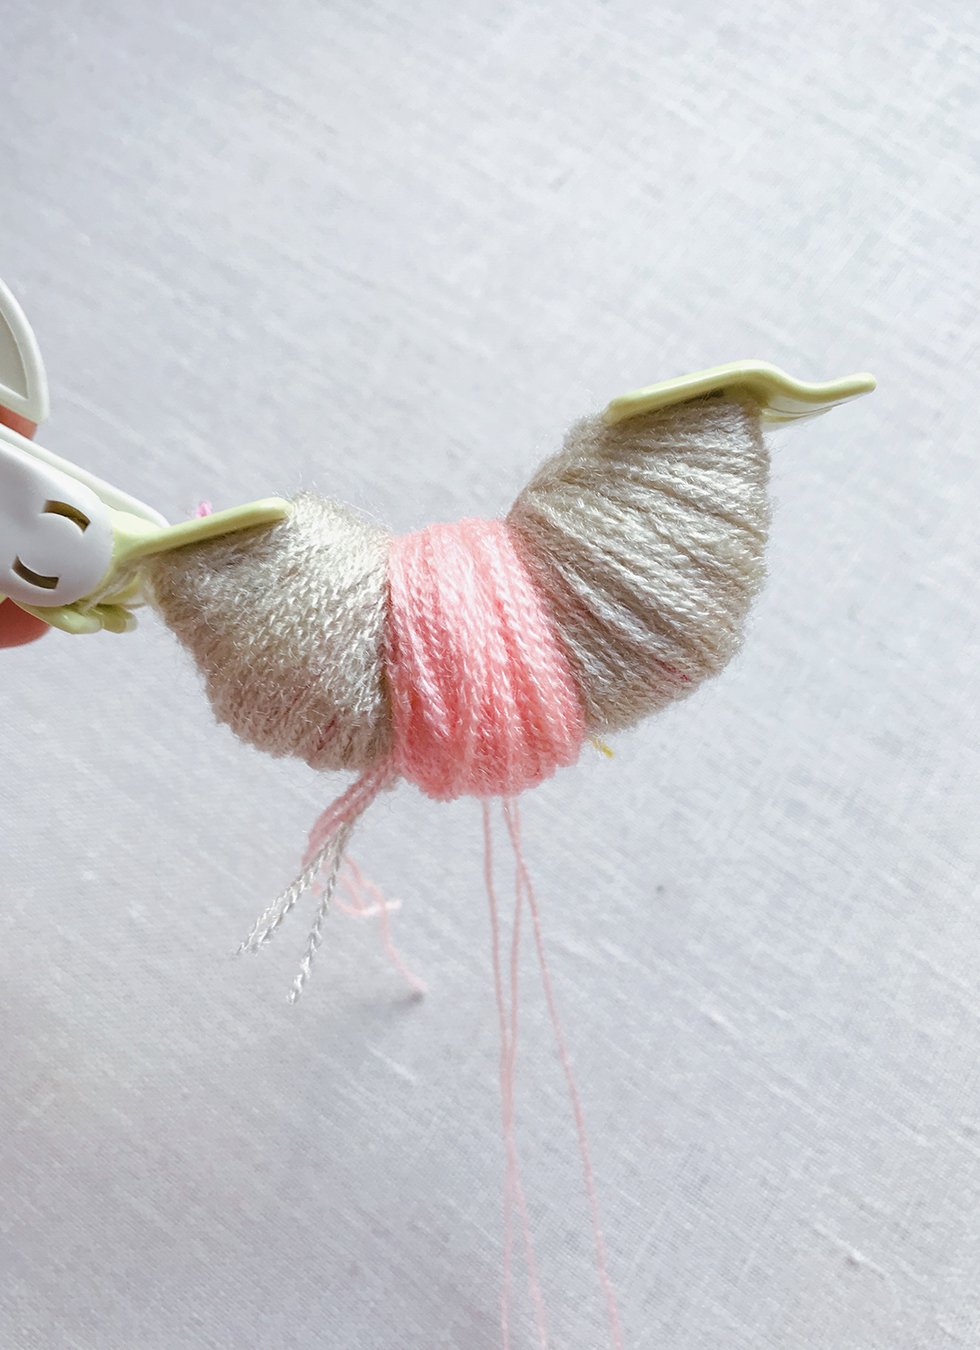
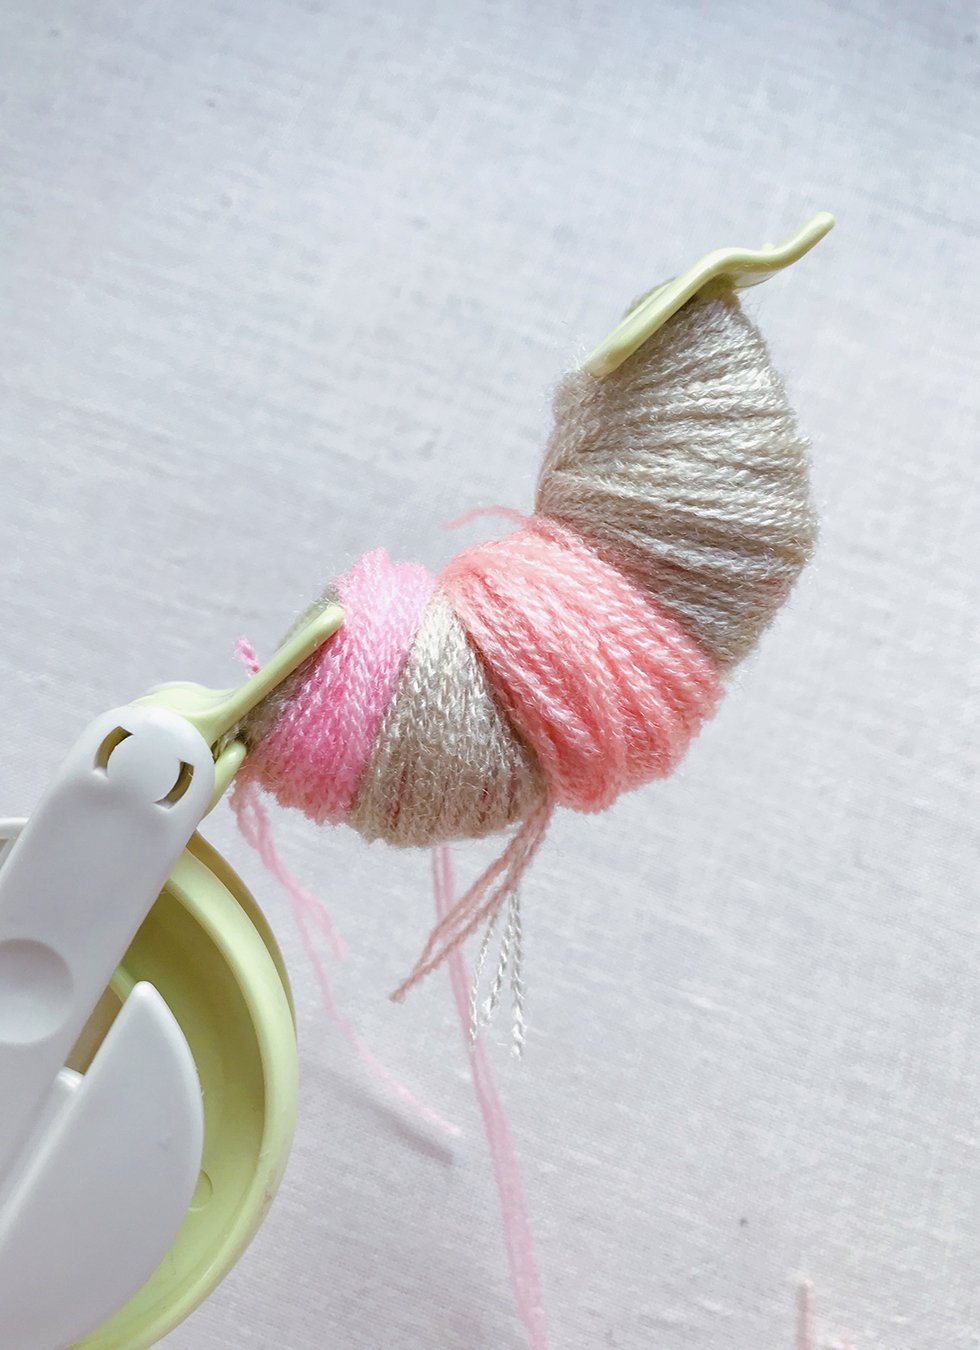
Now comes the petals. I like to think of it like breaking it down into three sections. Left, right and center. Wrap your colored yarn to the left side, of the center of the flower, 7-10 times. Then wrap the right side the same amount.
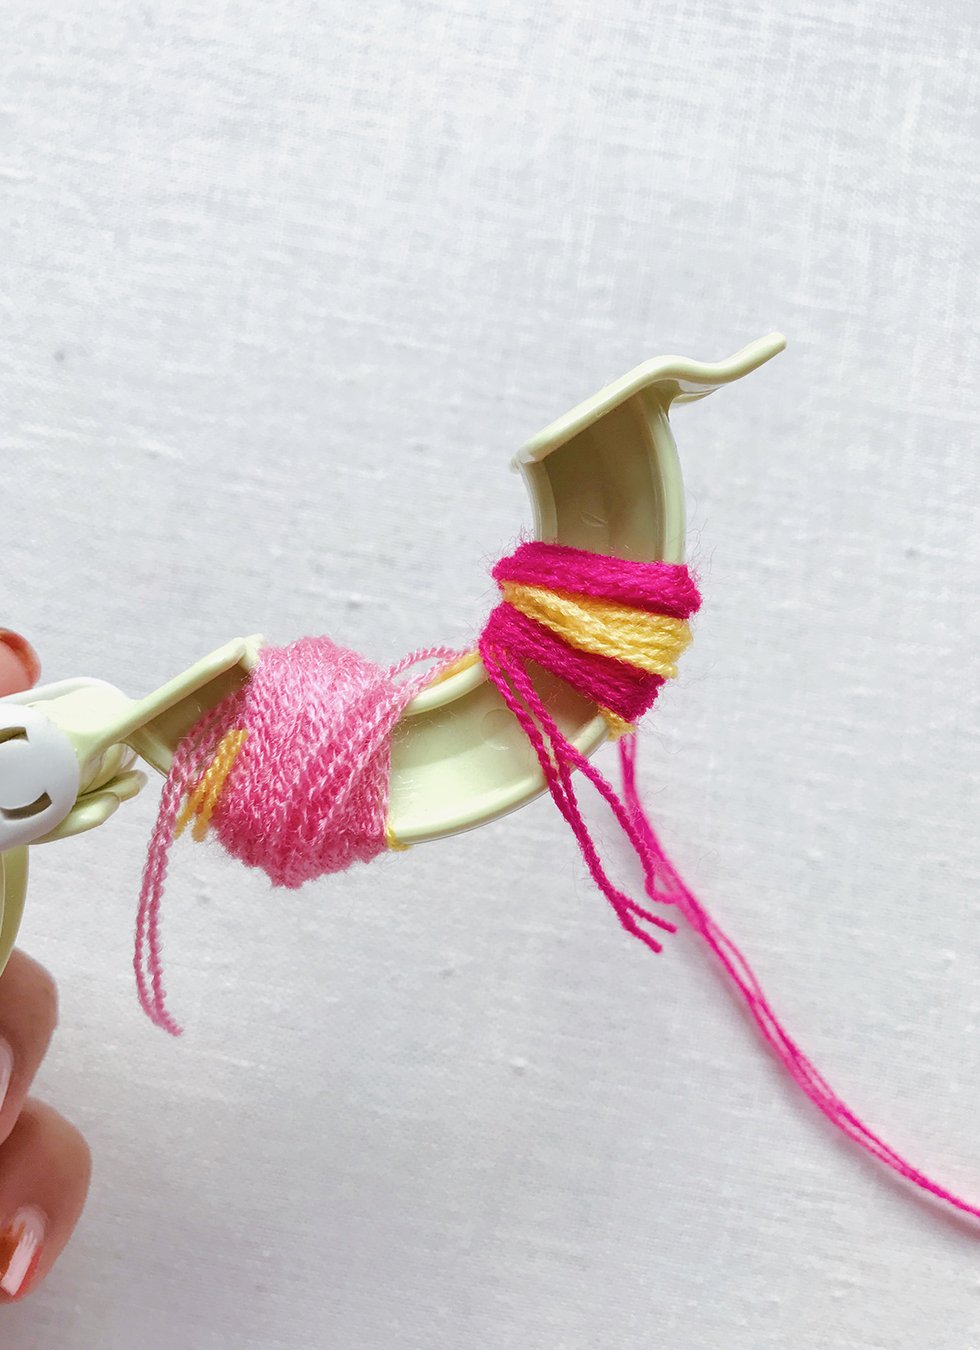
Wrap over the center of the flower with the same amount of yarn. Now that you have even coverage, you can trim the yarn and move onto the 2nd flower with another set of petals in a different color yarn.

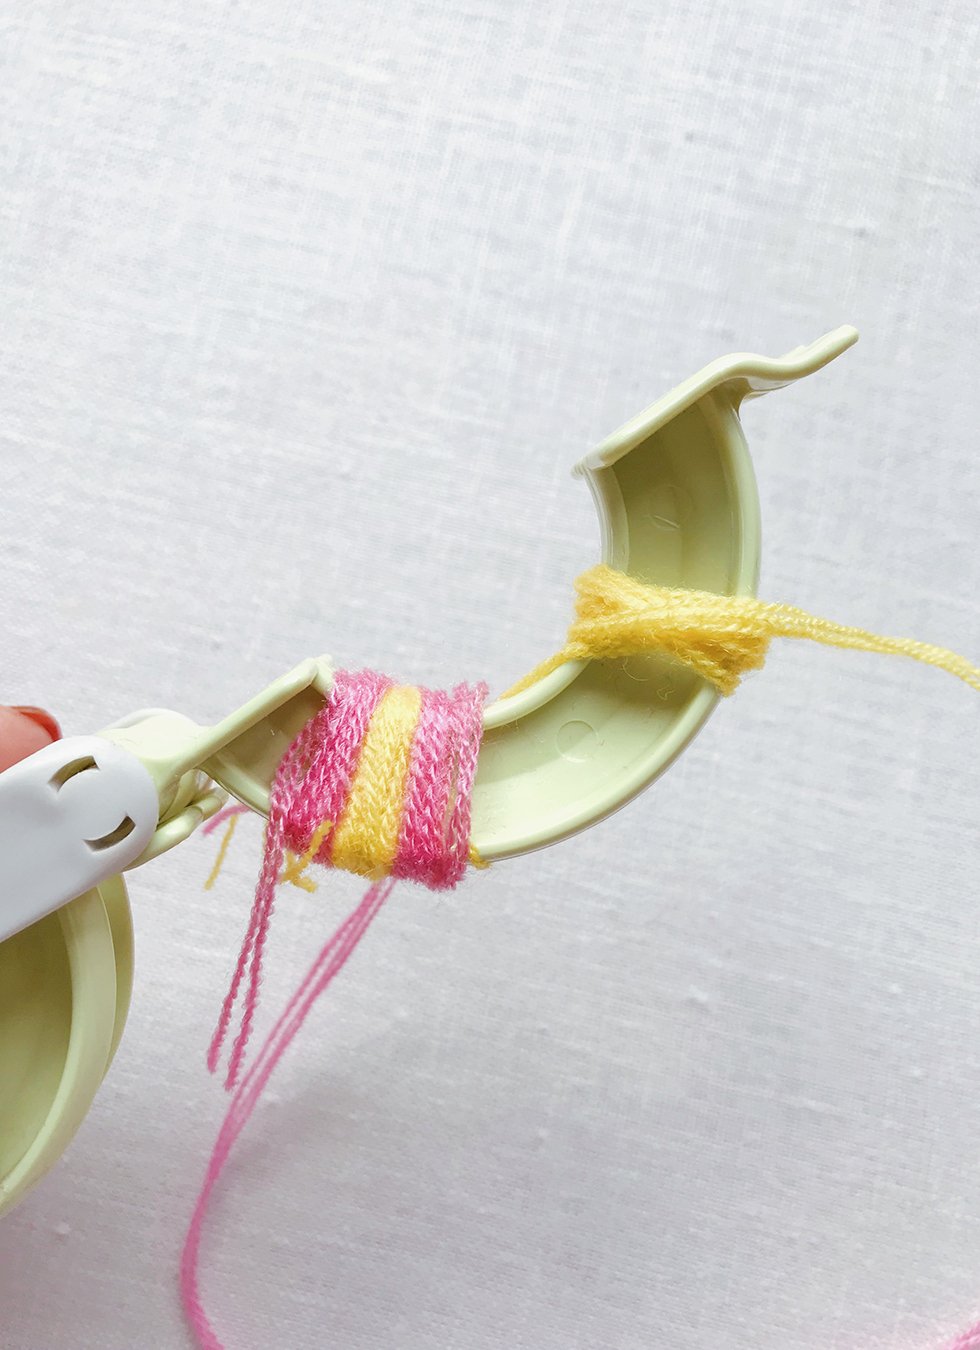
Add leaves with about 3-4 wraps to the left and right of each flower.
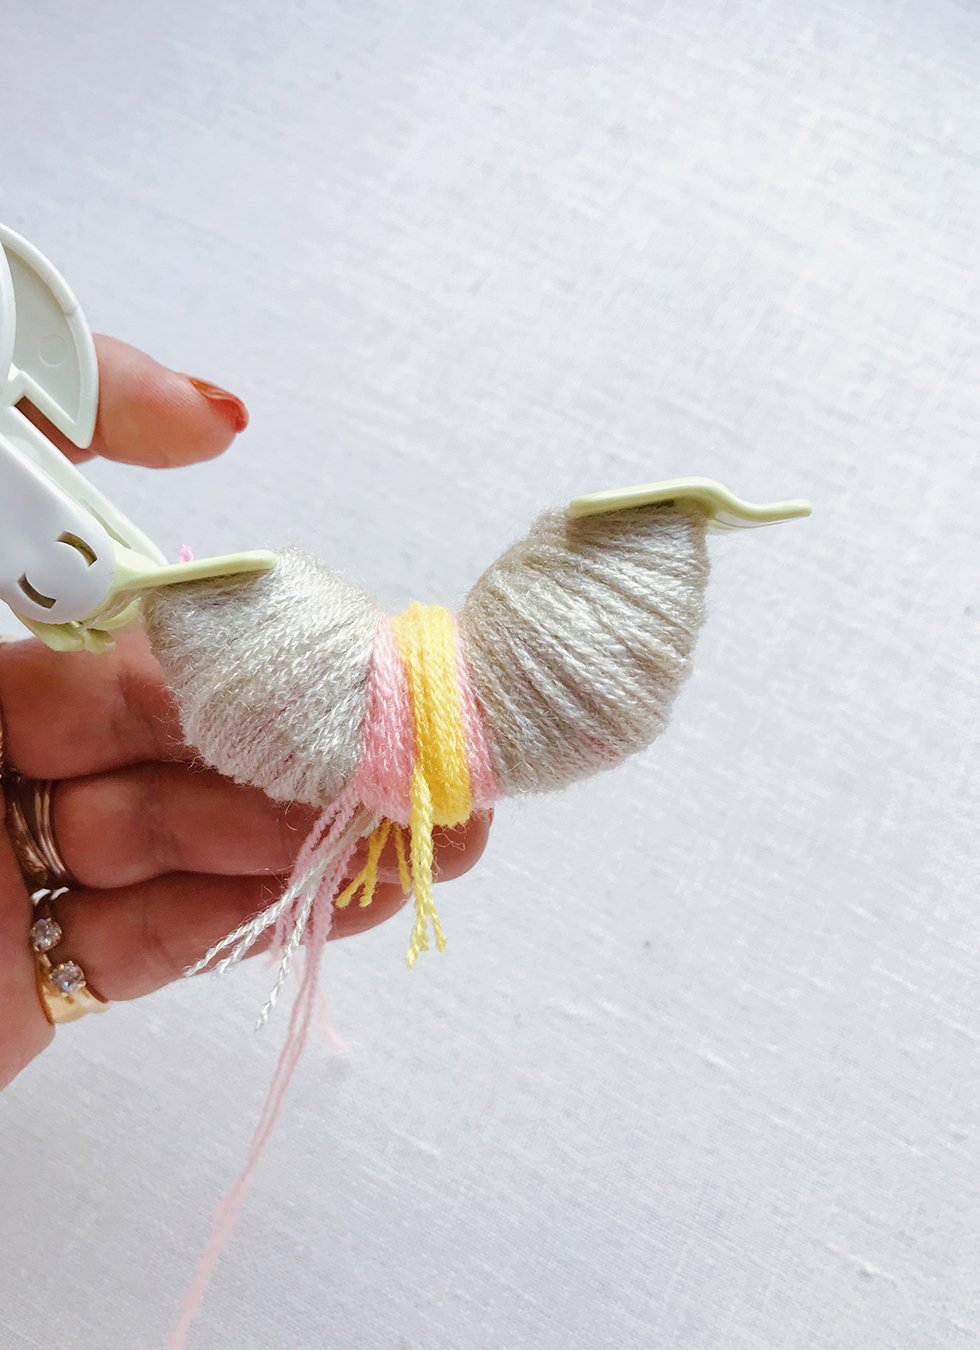
Continue adding petals. Trim.
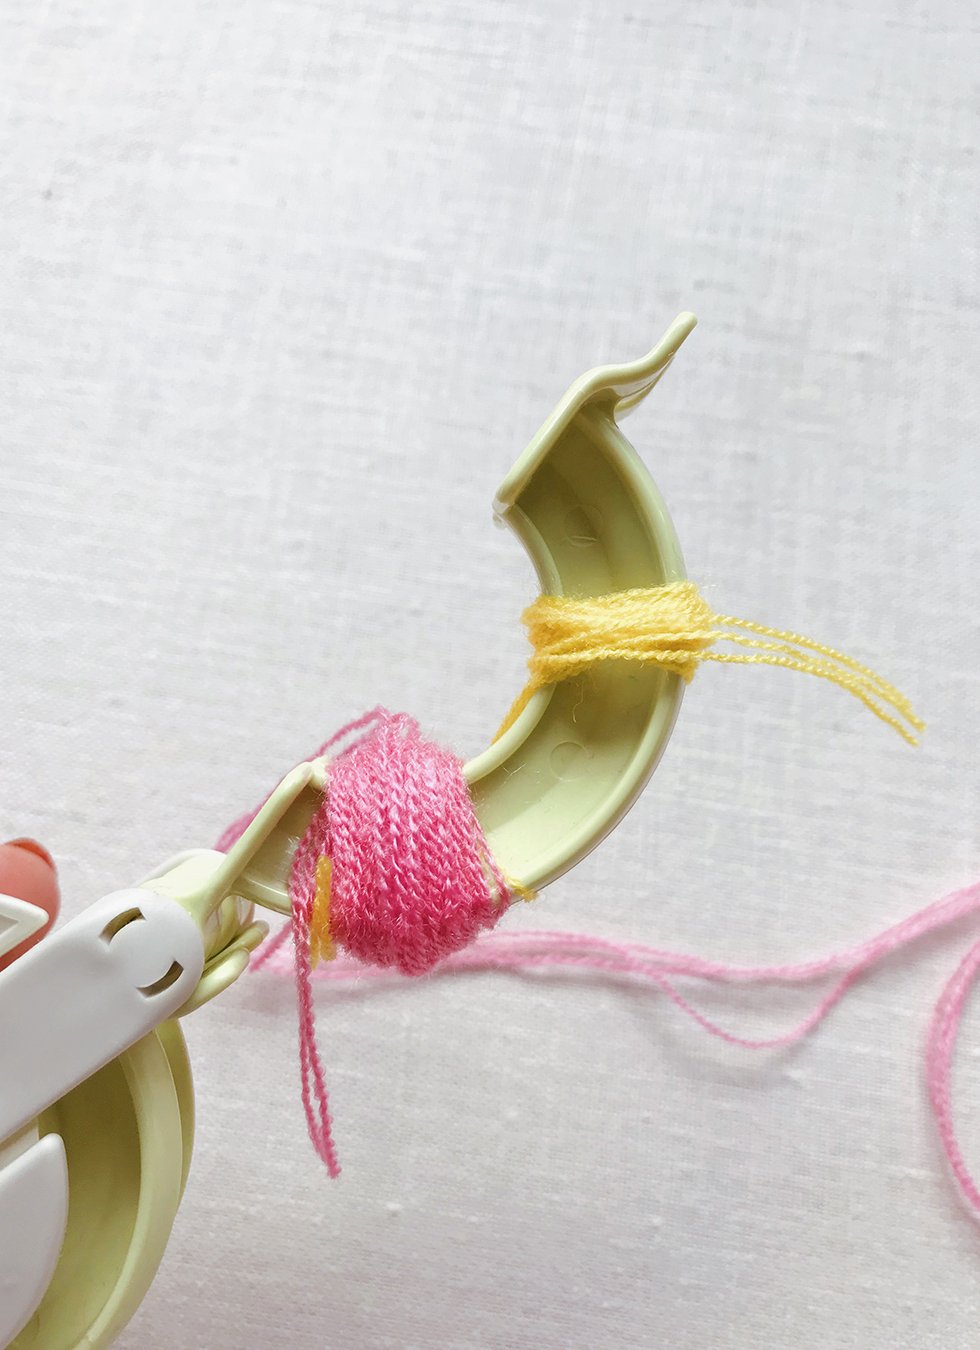
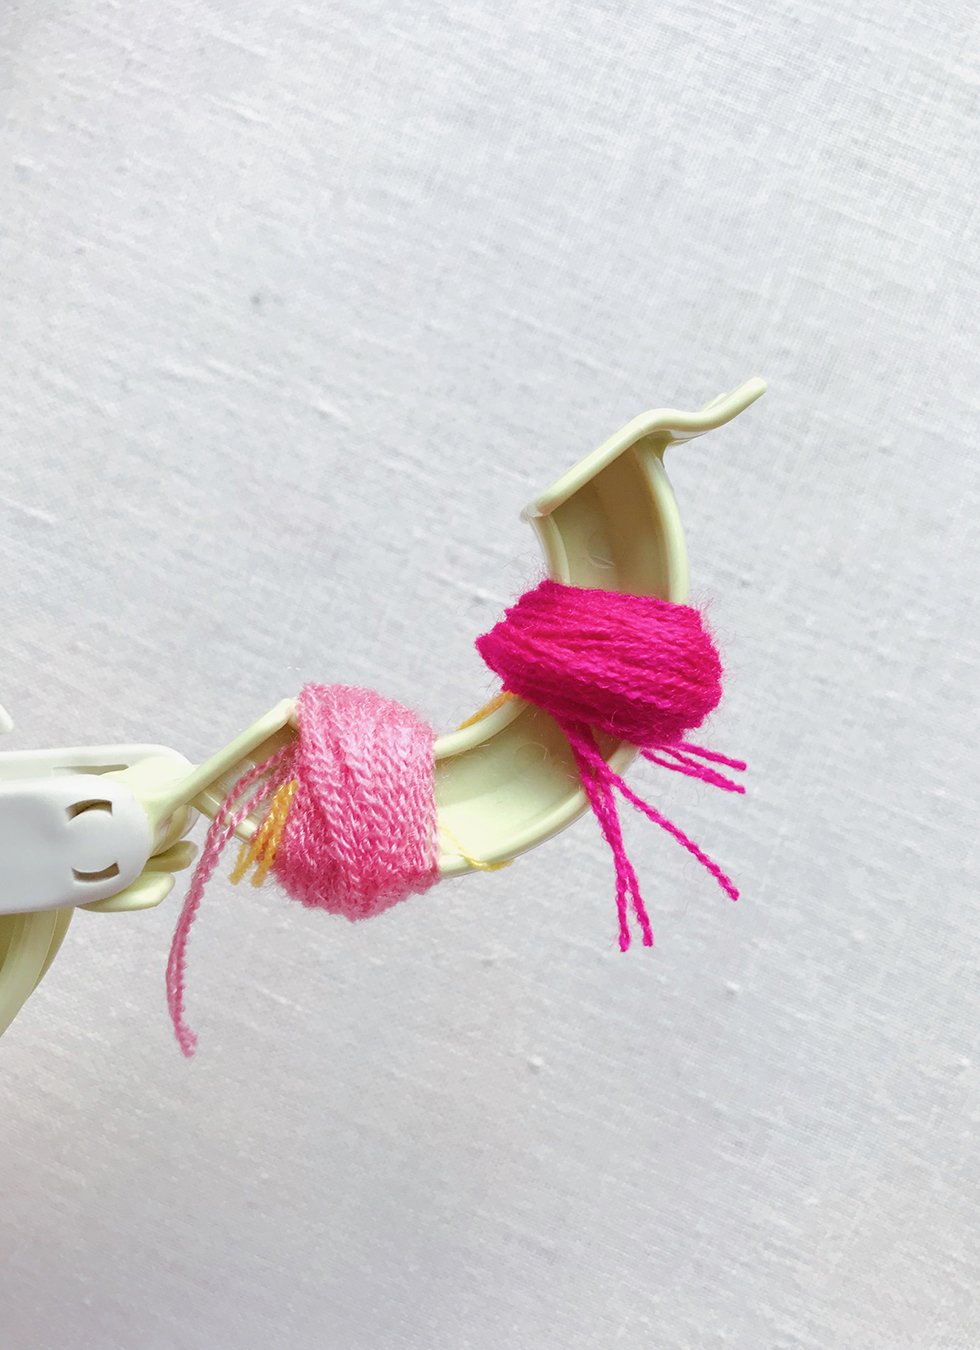
Note: Don't worry if you wrap the tails and strays into other colors. They'll all end up falling out in the end.
Cover the entire arm with 2-3 layers of your base color. This should be lighter in color so the contrast between it and the flowers are obvious. Here, I used a beige color but white is also a great option. When your base color is wrapped, add a third flower. You'll notice that there will be a notch between the 1st and 2nd flower. This is where you should place the 3rd flower. And this time, start with the petals.
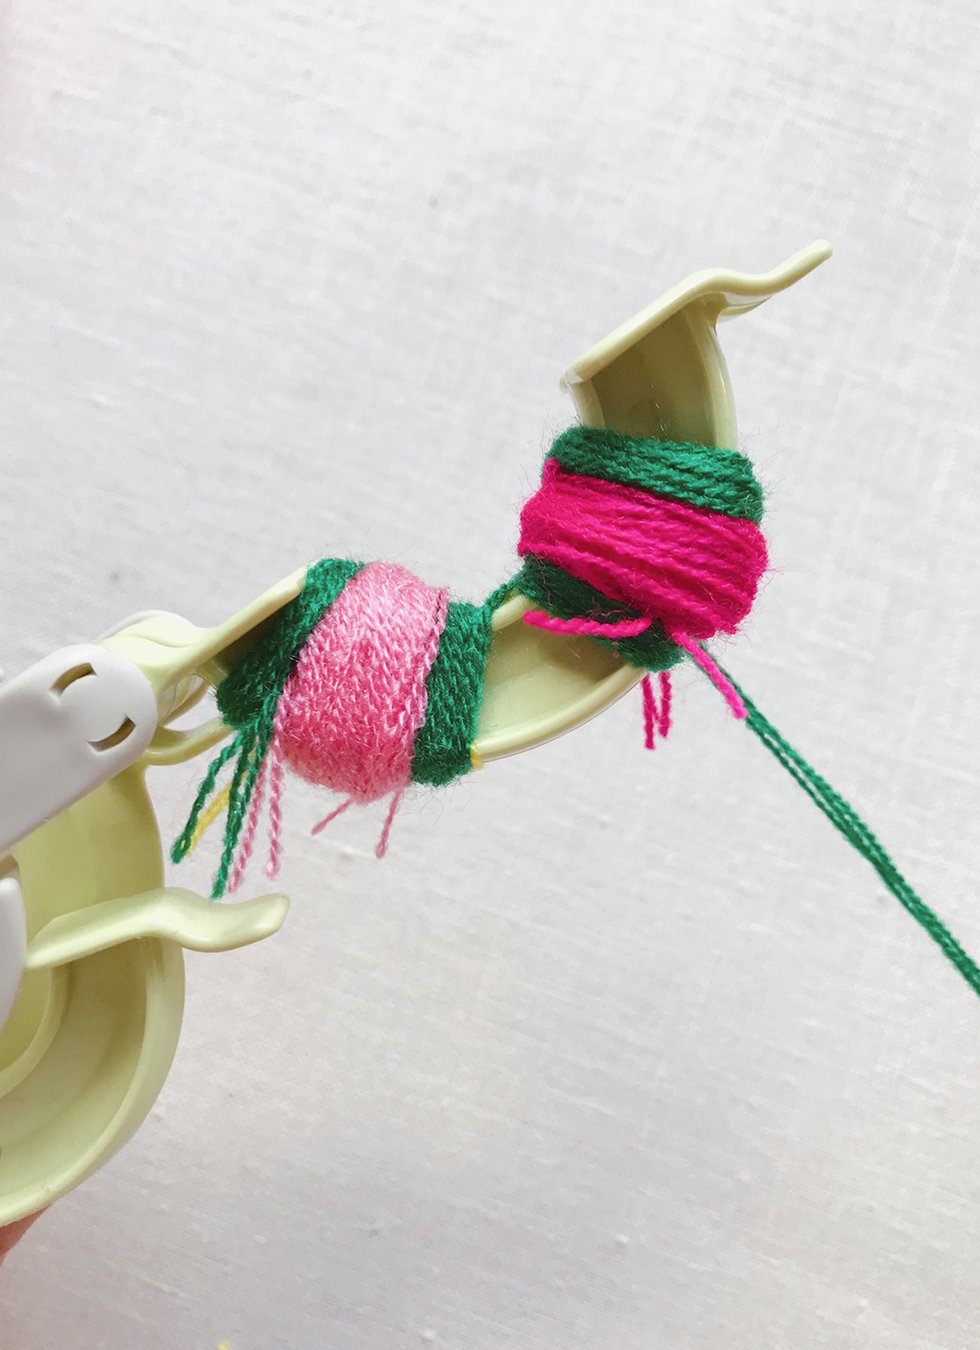
After wrapping a wide section with the petal color, add the middle of the flower. And then cover with another layer of petals.
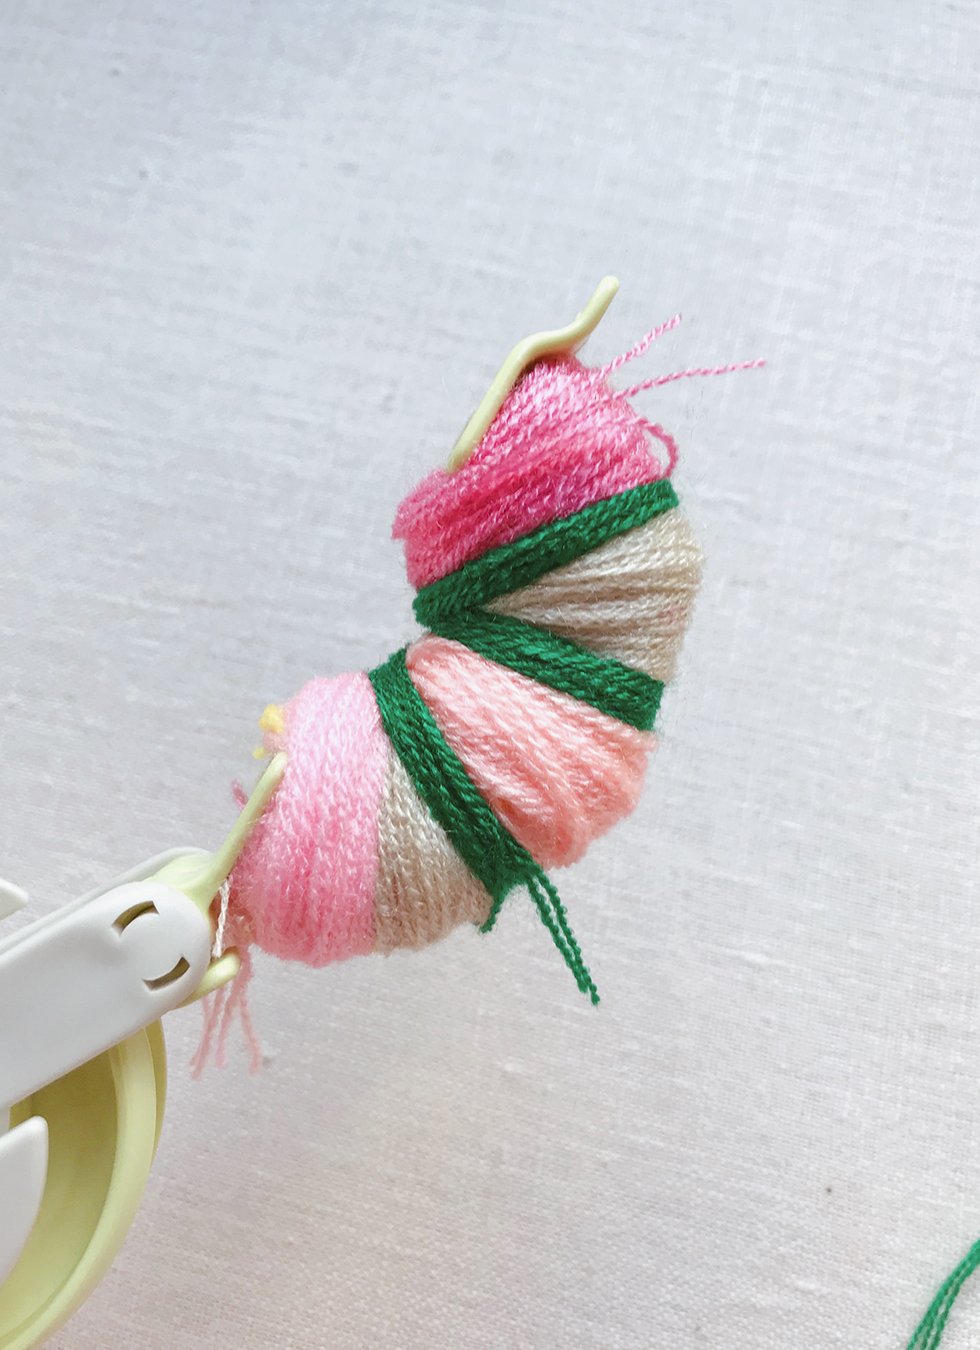
If you want, you can add more petals. Here, there was a notch in the far left and far right sides of the arm. So there goes my 4th and 5th flower. Add leaves. And remember, not all flowers need leaves on both sides. You can decide when to add them or leave them out.
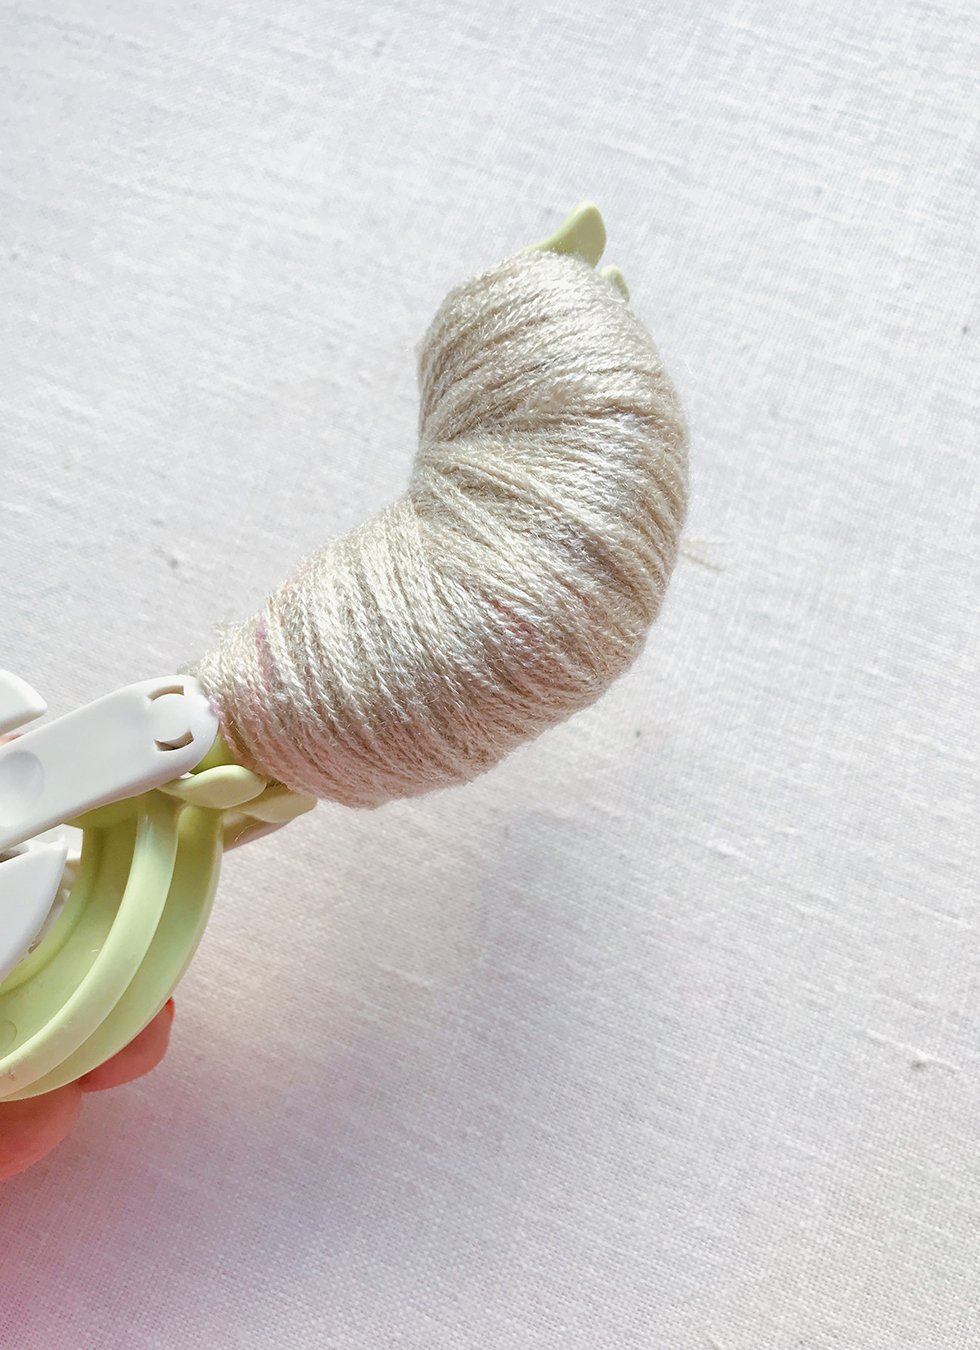
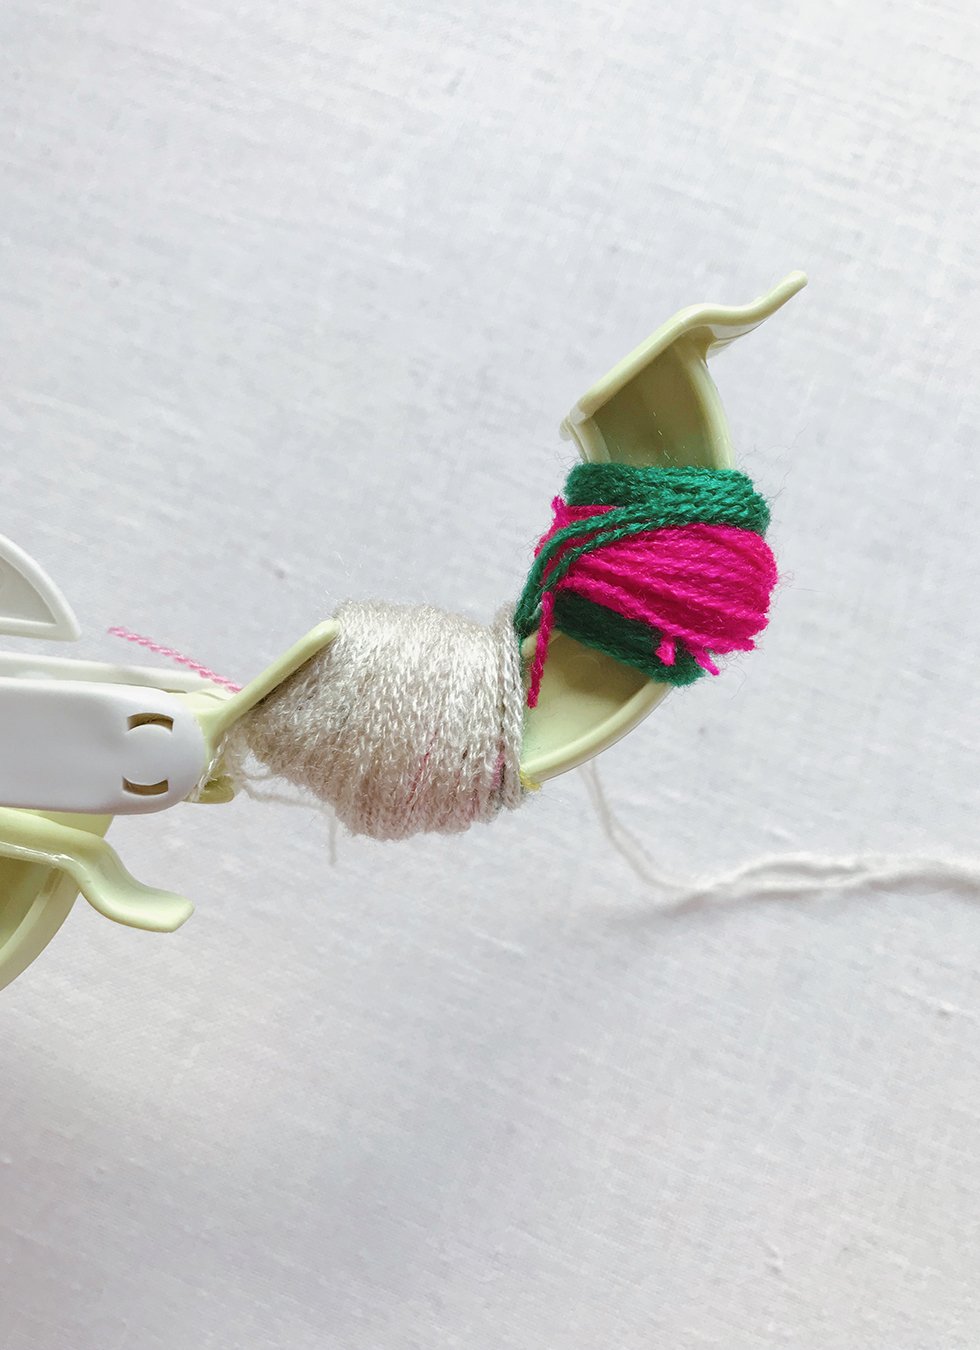
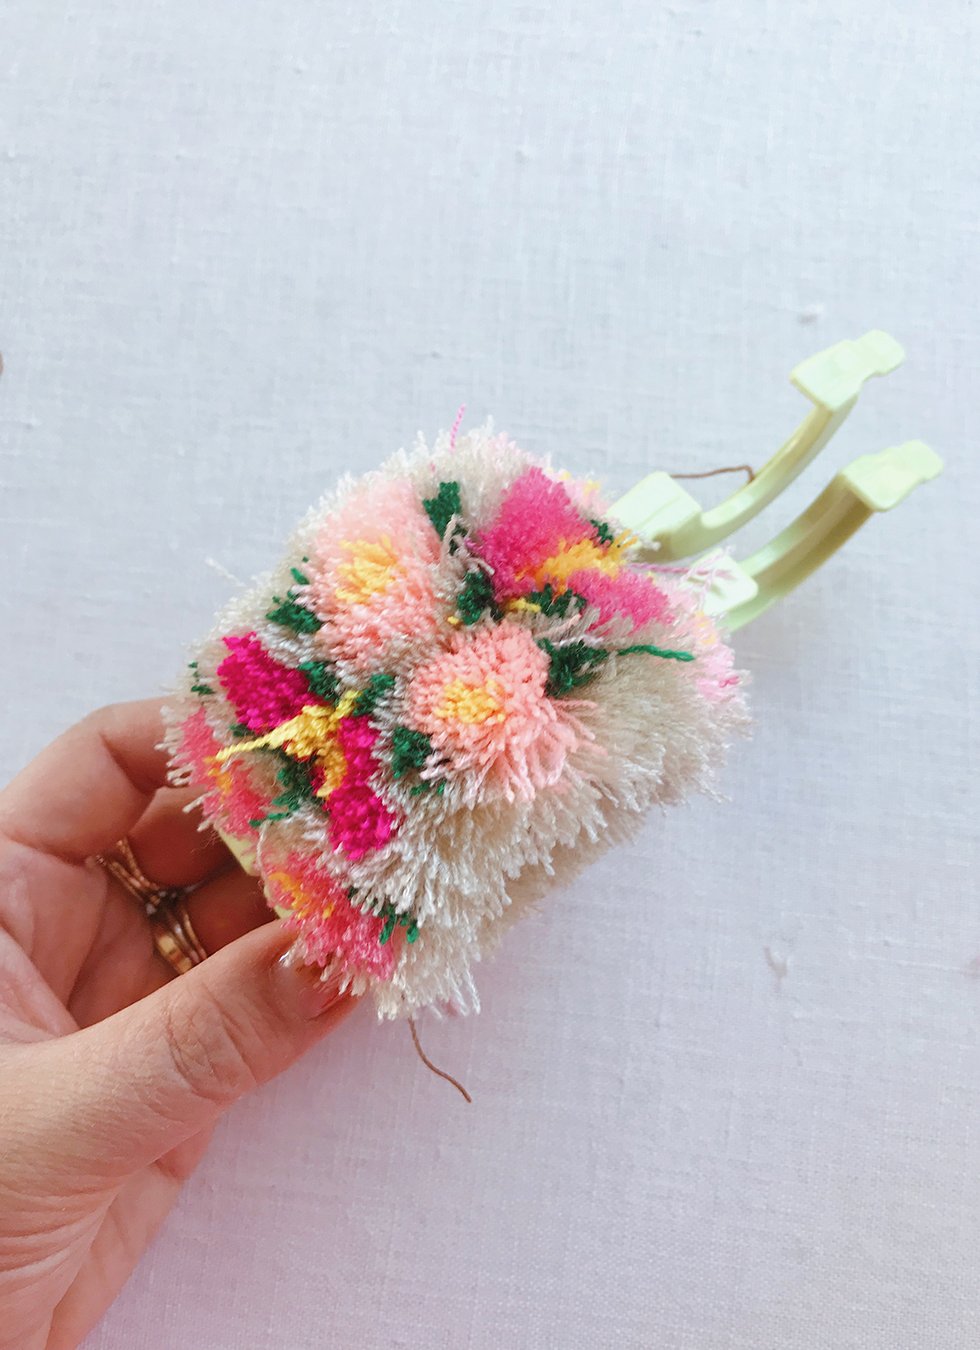
Wrap with your base color several times until the entire surface is smooth, even and without any notches. Close the arm. If you want a really dense flower, the folded arm should feel tight. Repeat the same steps on the other set of arms.
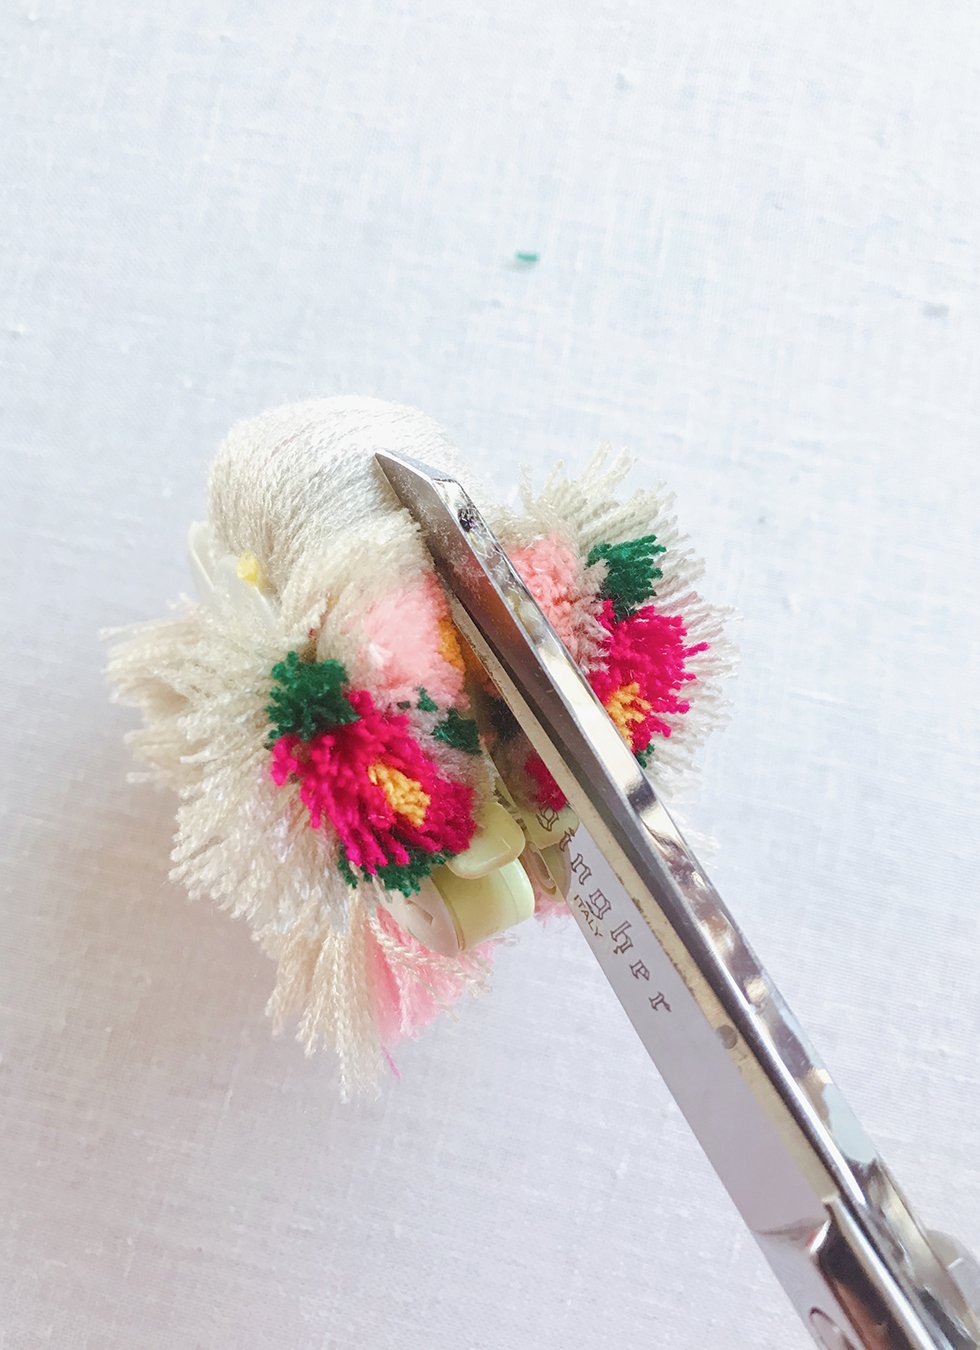
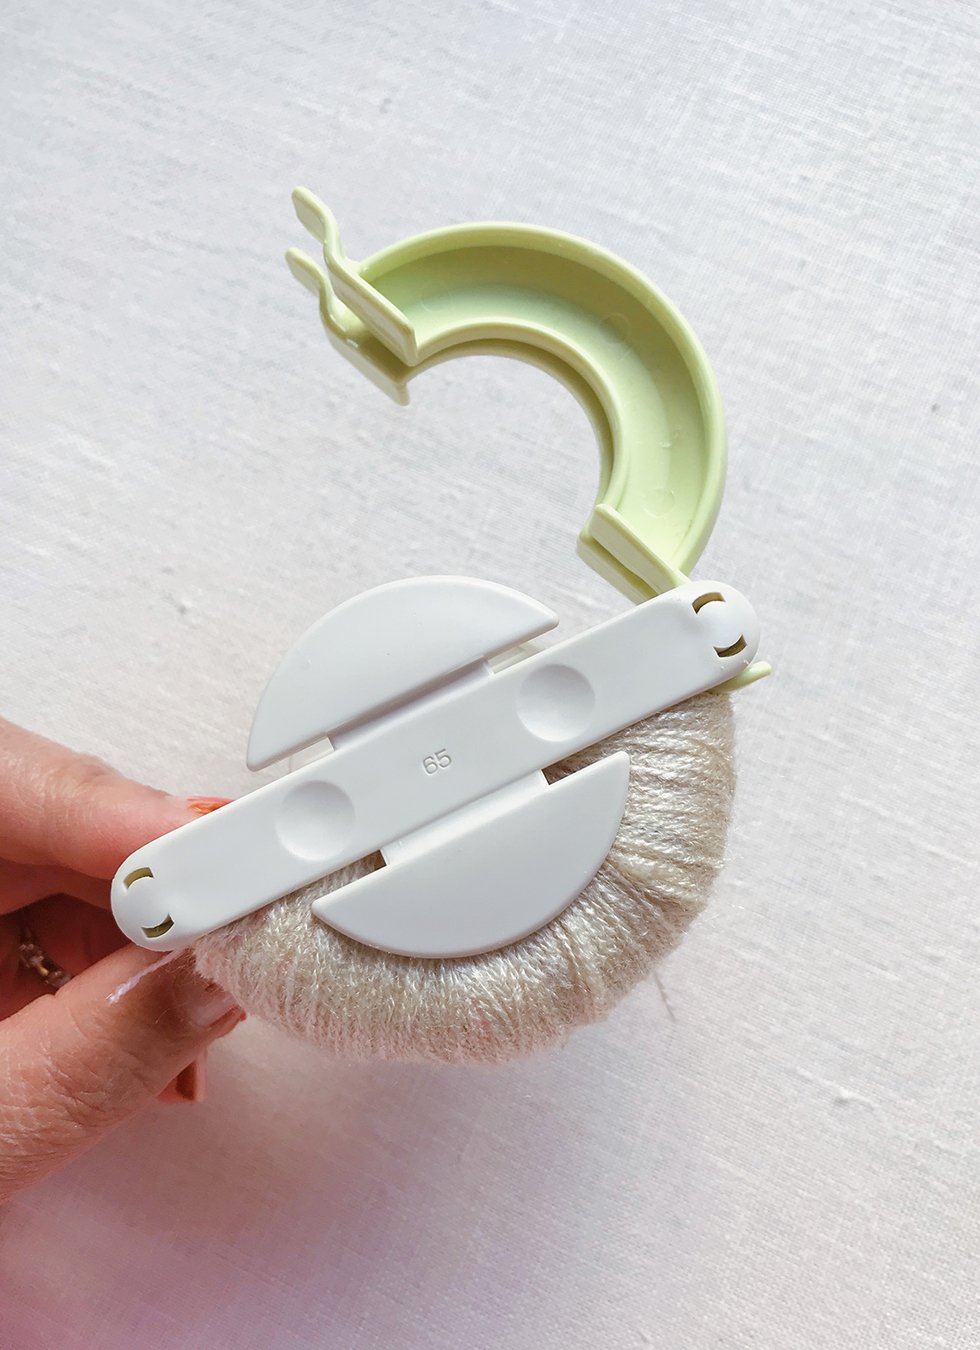
With both sets of arms closed, insert scissors into the middle ridge and cut along the entire circle. And watch the magic happen!!! It's important that you use a really heavy duty set of sharp scissors here. You're cutting through lots of yarn and you'll need something very sharp to get through it easily.
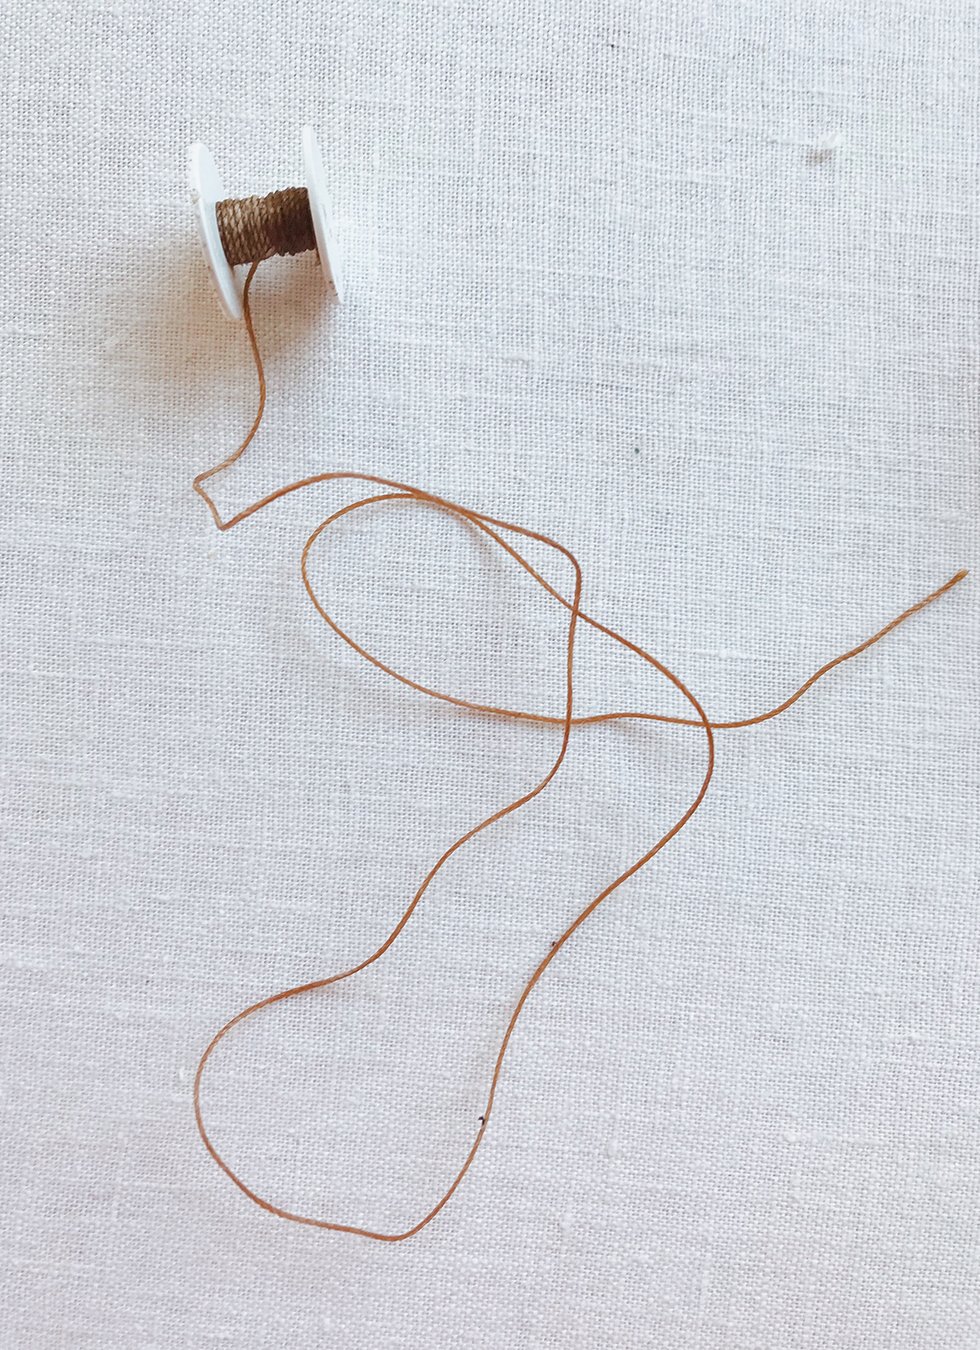

To tie off the pom pom, I like to use waxed linen cord. It's nearly impossible to break and because it's coated in wax, it provides an incredibly strong hold when tying. Cut a 12 inch piece and slip the middle between the two sections. Turn the pom pom maker around, pull the cord tight and tie into a knot. Turn the pom pom maker around again and tie into a tight double knot. You want the the cord to be wrapped around the center of the pom pom as tightly as possible. This way, your pom pom won't go falling apart over time.
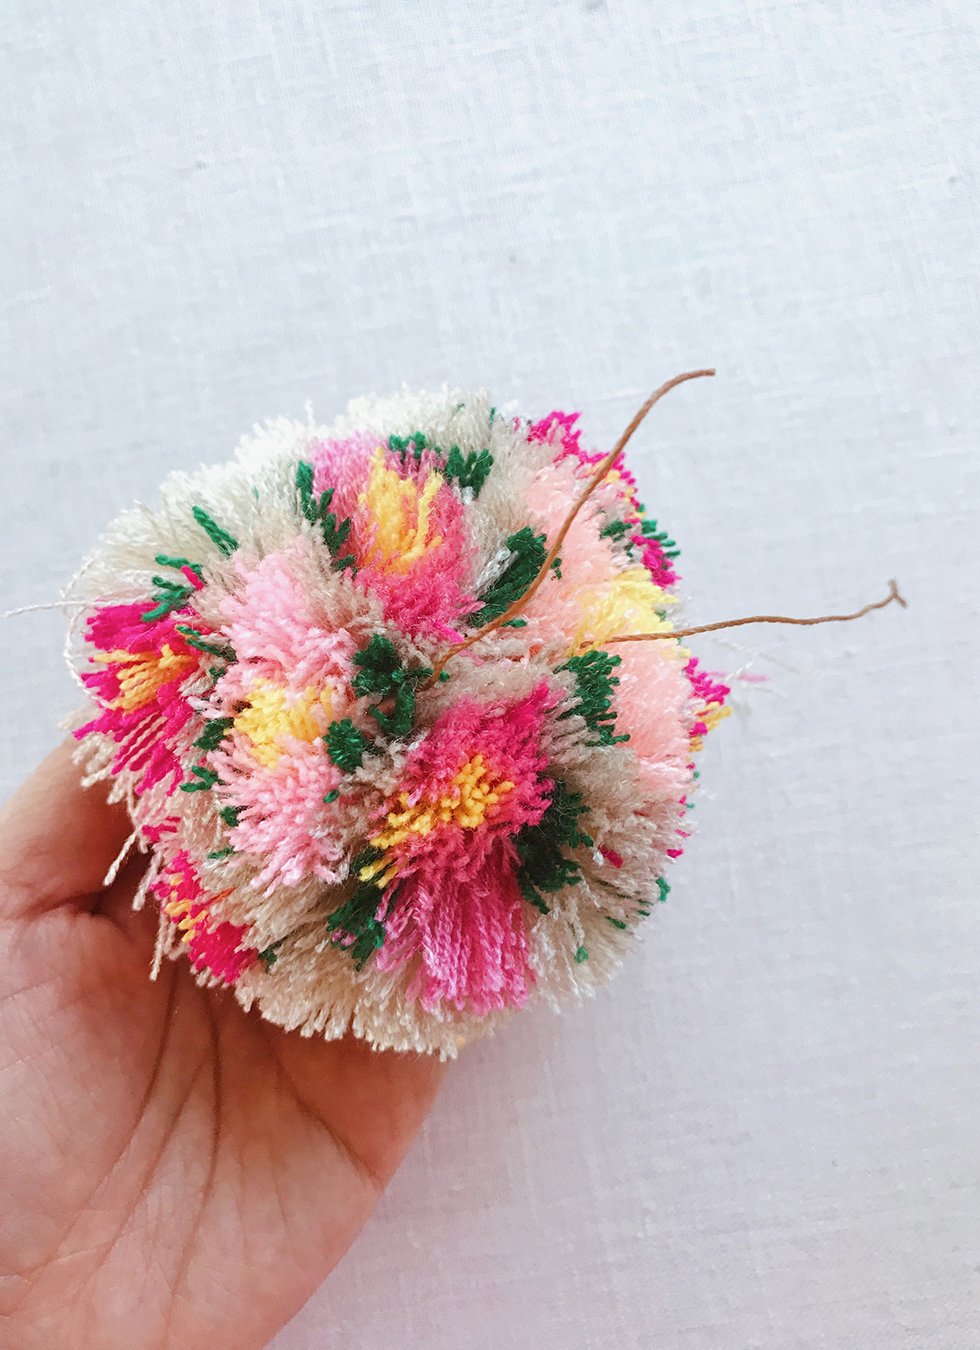
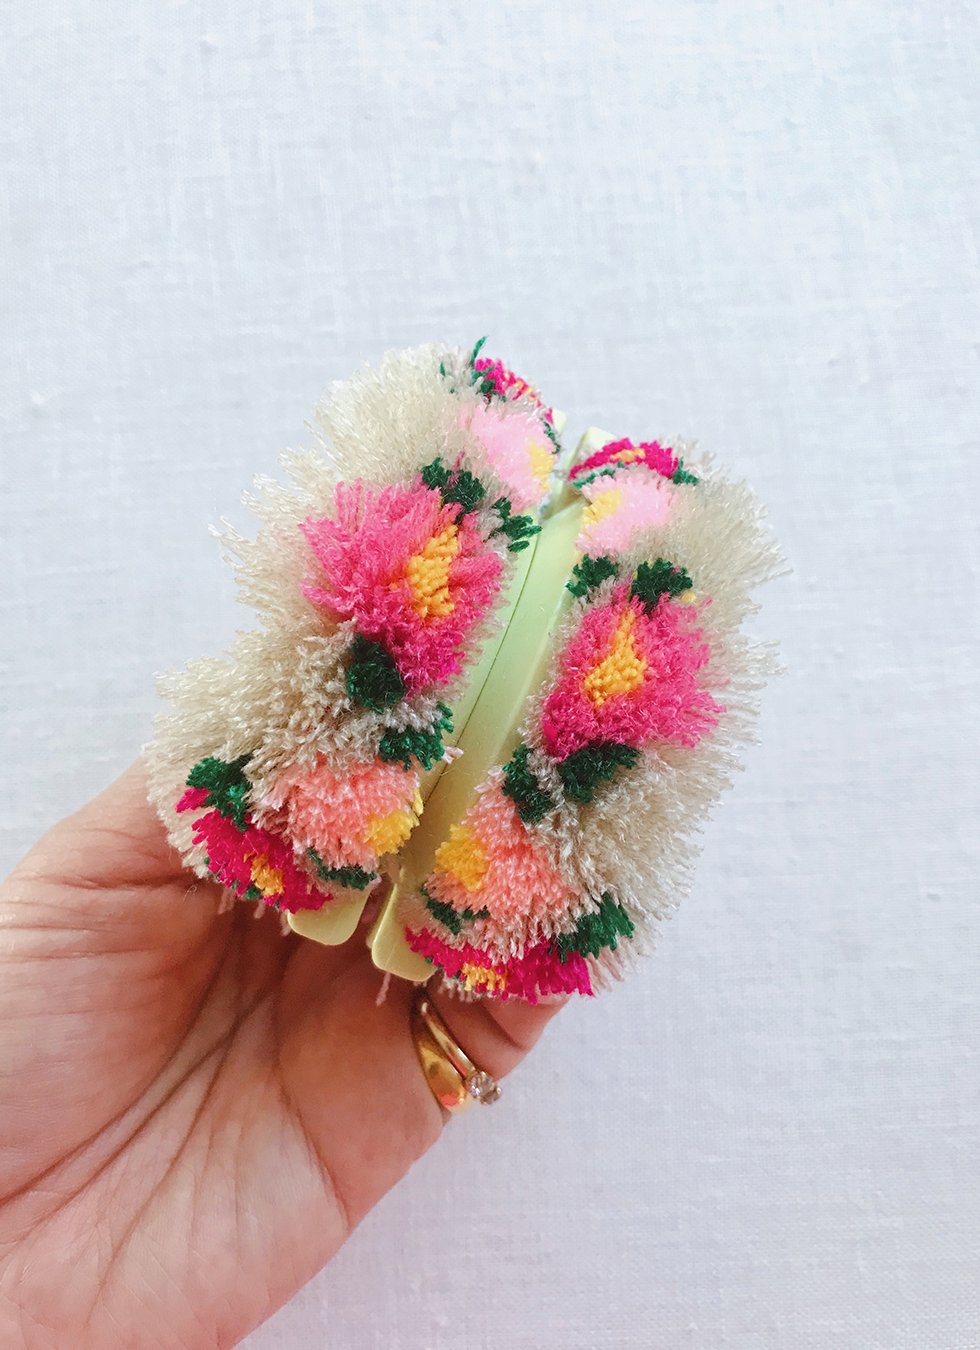
Open the arms, one at time. Pull the two sections apart.
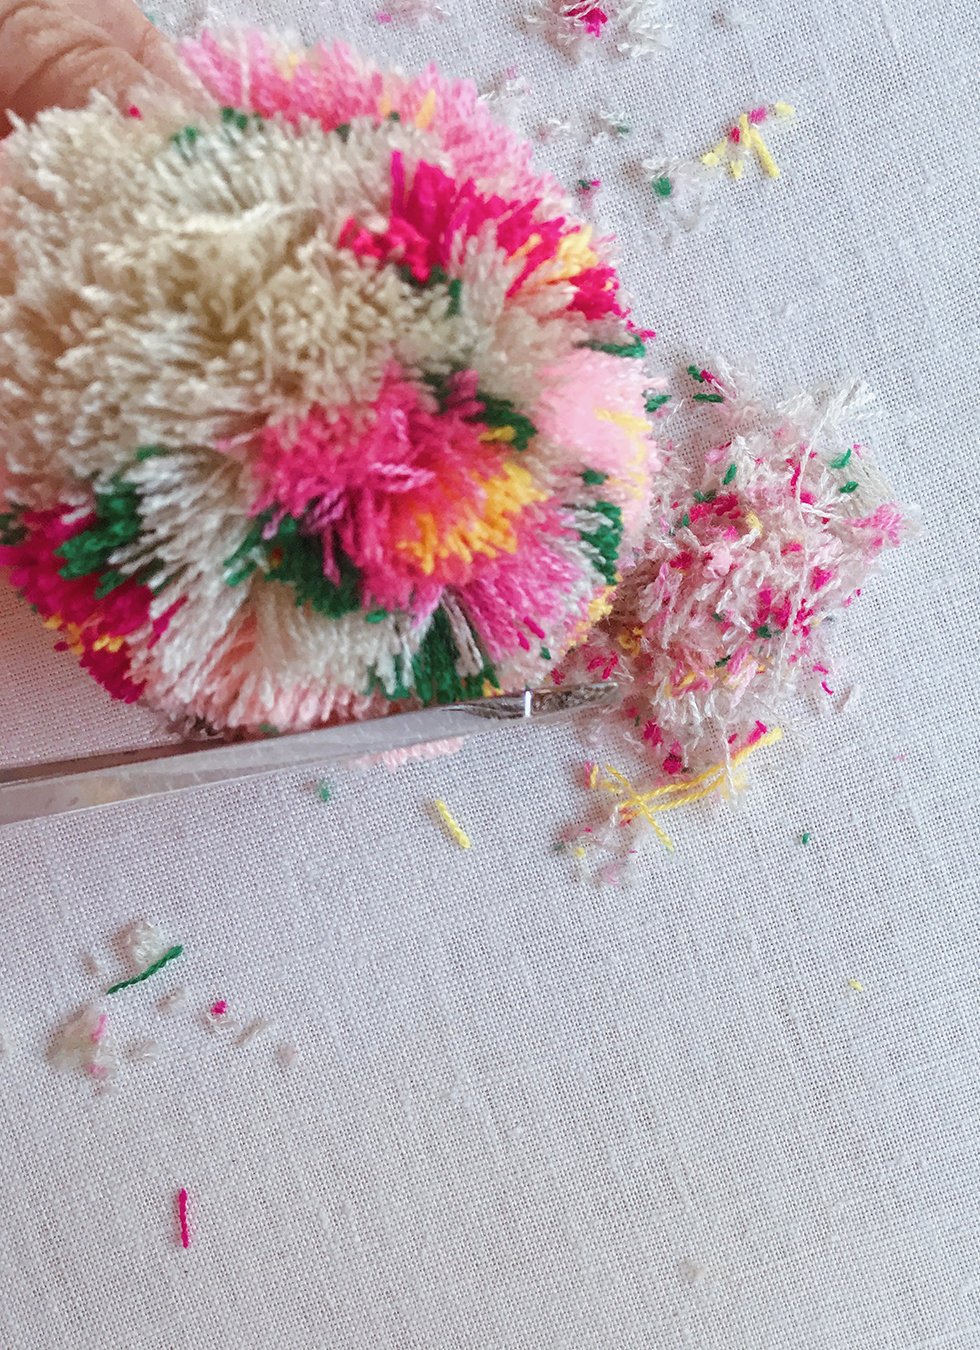
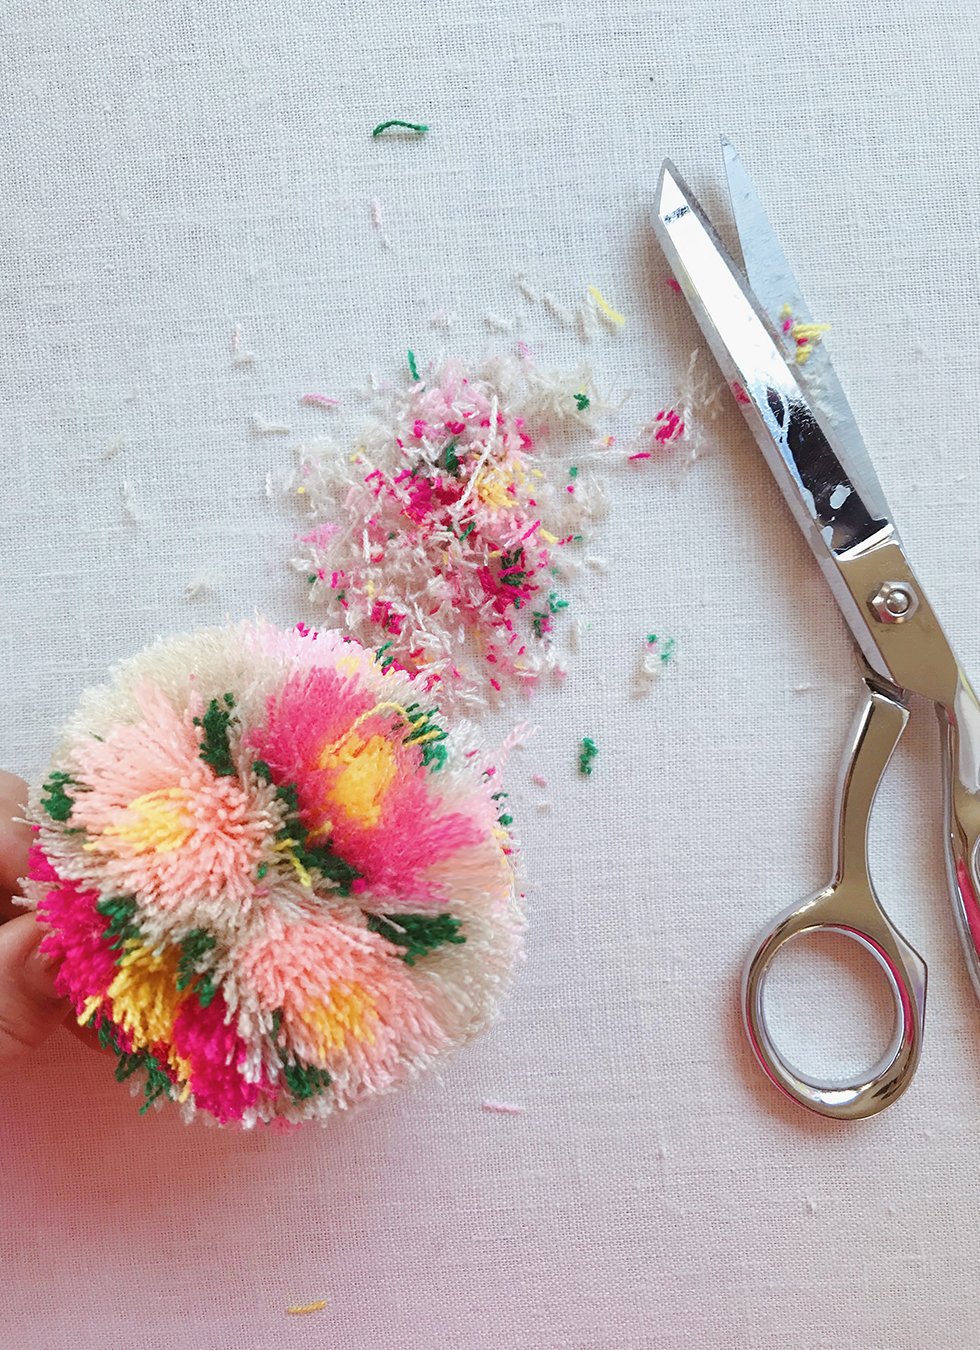
Give the pom pom a much needed trim. Shake it out, trim, shake it out again, then trim again until you shape it into as perfect of a ball as you can. And remember all those strays? You'll notice that most of them have already fallen out. If not, you can just trim them out. If you want to tie the pom pom onto something, like a garland, you can keep the waxed linen cord in tact.
And that's it!! Be sure to check out the video below to see it all in motion!
images and tutorial by HonestlyWTF
These are AMAZING! Thank you for the tutorial!
These look FABULOUS Erica!!!!!! Thank you so much for sharing this tutorial and for linking to The Neon Tea Party for Omegacryl! Beyond honored and thrilled!!!!!! Xo, Marisa
These are the lovliest poms I’ve ever seen! I love the use of the super fine yarn and never thought to do that! Thank you for always creating the prettiest DIY tutorials–they are inspiring and so easy to follow.
Thank you, Rebecca!
These are GORGEOUS! I’m getting married in March and am not too interested in real flowers, but I love to crochet and make yarn projects, so this is a perfect mash of both! Thank you for posting!
This just made my Monday!!! Thank you so much for sharing these are so adorable!
These are amazing, I recently started decorating my drapes and other places with pom poms. I love how colorful they are, and they spark joy
I love your projects and always look forward to new posts. I’m wondering how much yarn to buy. Could you estimate quantity per Pom Pom? Thanks Erica.
P.s. I’ve been to Sayulita several times and always come home with a treasure or two from the little shops.
Hi Carol, thank you!! And great question! For 10 very dense medium pom poms, I went through 3 skeins of the base color (beige). I didn’t get through even half of the pinks and barely used up a quarter of the yellow and green.
OMG this is so good. Imma make so many pompoms my house is gonna look like the ball room at IKEA. Thank you so much.
I love love love love love love love these! I made some disastrous POM POMS using a maker that was actually 2 pieces that you had to attach when all the yarn was wrapped. the two did not fit together, so I fudged it and snipped away and the whole thing fell apart.! I am so wanting to make many many many pom poms (unless you want to sell yours) to attach to yarn wrapped twigs for my daughter’s baby shower. The twigs are underway – leaving the poms for last… Thanks for the tutorial and the Clover maker idea. Wish me lick or sell me your Pom Poms!
gorgeous!
I love these! Remember making the pom poms from you blog years ago!
I can’t source the Omegacryl yarn in the UK but it seems closest to crochet yarn? How thick is it in mm?
Hi i love love love these!! Was curious what kind of yearn the thinner ones are?
Beautiful!!!!! Thank you for Sharing
They look sooooo gorgeous, I want to make at least a dozen of them!
https://www.makeandmess.com/
These are so cool! Thank you for the great tutorial!
Love this DIY! Thank you for sharing! I love how you combine the color, so pretty!!
This is brilliant! I know exactly who I can make one for!
Love it! Absolutely beautiful
And so simlpe.
I just came across your website and just had to tell you your title is awesome. So funny. Keeping it real is always the way to go!!
DIY means Do it yourself. but what does Wtf stand for
These are beautiful! Good job.
Love the website, definitely going to try out as many as possible…
nice
Gorgeous!
Thank you for sharing.
This is wonderful!!!!
Hi Erica – I am itching to make these pom poms so much that I’ve just ordered the Clover pom pom maker online. I am, however, from Australia, and can’t seem to find the Omegacryl thin yarn here. I am wondering if you might know a supplier of the Omegacryl yarn here? Or have you seen it under different names that I can search for?
Thanks so much!
Catrina
Hi Catrina! Unfortunately, there aren’t many people I know that sell the Omegacryl yarn. The only three I know are Creative Yarn Source, Neon Tea Party and Fancy Tiger. Were you able to reach out to see if they ship internationally?? Good luck!
I’m in Pom Pom heaven!!How awesome was that,i’m off to the craft shop!
Amazing!! Love it!
The prettiest pom-poms ever. Thanks for sharing the tutorial.
Amalia
xo
Is there a way you can do a tutorial on alphabet pom poms. There is a site online and the concept is exactly the same as the flowers but I’m just not getting the concept and find your instructions easy to follow
WOW ! Love them.
Just, hi
Omg you’ve made me care about pom poms! <3
I’m buying the exact same brand and colors, can you help us with the name of each color?
Beautiful! Will try it out tomorrow!
Love the craft ideas you have.
What type of yarn for the pom pom’s?
Thanks
Is there a way you can do a tutorial on alphabet pom poms. There is a site online and the concept is exactly the same as the flowers but I’m just not getting the concept and find your instructions easy to follow
Do you sell these somewhere??? Please say you do. Would die to buy some off you 😀
These are beautiful, I just got a pompom kit from Amazon yesterday to pick back up my favorite hobby again and I’m 70 years old. I never would have thought of layering string or yarn like this to make flowery ones. You inspired me more.
I can’t find Omegacryl here in Canada. Could I possibly use cotton crochet thread instead?
I never thought pom-poms could be so colorful and beautiful! Thank you for posting this tutorial!
Thanks so much. Very beautiful and very crafty.
Hi, lovely. But how do you tie the top pompons on the garland?
I just. Simply love this board.
Es la primera vez que te encuentro, la verdad estoy maravillada con esos ponpones tengo curiosidad de saber obre que apático montas los hilos y como los dispones psrs formar las flores son lindicimas en colombia nunca los he visto, tu me podrías dar alguna información o la marca y unas fotos en caso para yo también buscarlo? Estaría agradecida son lindos y hay que hacer pompones.
Muchas gracias.
have a nice day~
Love all your “shit”….We do think alike as I have had a board called “WTF” for a long time!. Keep these great ideas coming!
How ingenious of you! Beautiful, I’d never have imagined this was possible
beautiful!
Genius! Absolutely genius!
So cute! My girls would love to make these.
I am so in love with this! I just bought the supplies you recommended and can’t wait to try this out. Thank you so much for your tutorial post.
What does your WTF stand for? My granddaughter says its something nasty!! I hope not!
These are absolutely beautiful, I’m going to make some to hang in each of my niece’s bedrooms, but in colours that compliment the existing colour schemes.
Wow! Great talent!
Beautiful pompoms..
Awesome these are beautiful I’m going to try this with my granddaughters later today it’s magical when you see the flowers appear before your eyes x
I’m obsessed with making pom poms, too, but have never seen any like this. I like to make them to match the exterior paint on my little vintage campers and create a garland to hang outside when I’m camping with girlfriends. I will DEFINITELY be making some like this. Beautiful!
THANK YOU !. for all this information.. I am thrilled that you shared your knowledge !!.. these are SOOO pretty.. I just started using this pom pom maker and would have never figured out how you did this without your giving your secrets away !!.. that was so very kind of you
OMG. If I wasn’t obsessed with pom poms before, I am now! These are incredibly beautiful and I can’t wait to buy all the supplies to make some!
Are you wrapping 3strands at a time? If so then are you using more than one skein at a time (to pull the 3rd strand from)? Thanks!
oh my gosh, I love these! as many times as I’ve looked at pompoms on Pinterest (usually searching for my own stolen pins to report) I’ve never seen these. they are so creative and more interesting than any I’ve seen, including my own
Also, I love your blog name!
Absolutely Adorable!! I Love the cleverness of these Pom Pom’s!! I am hoping I can use this inspiration to make my own. Thank you for sharing such detailed instructions as well! Admirer, Sunshine xo