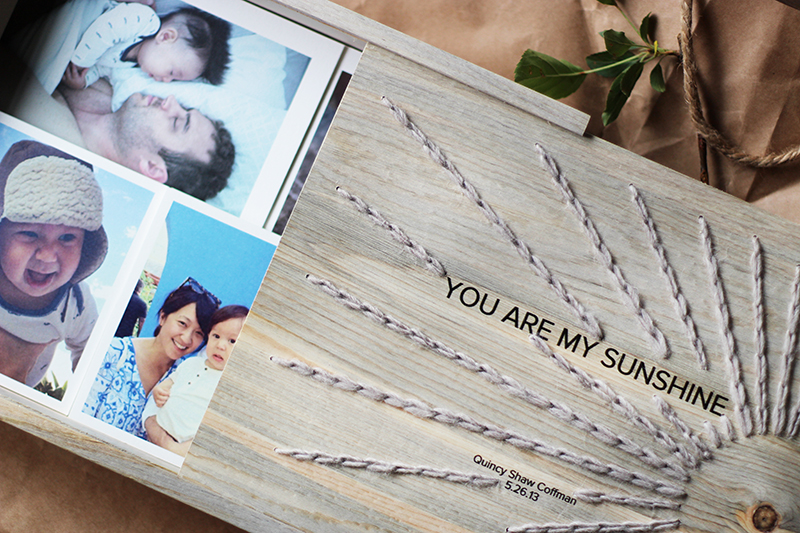
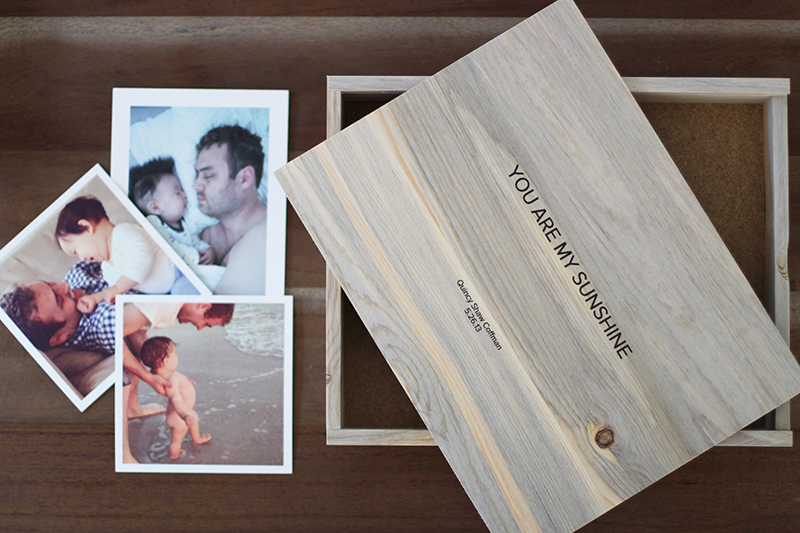
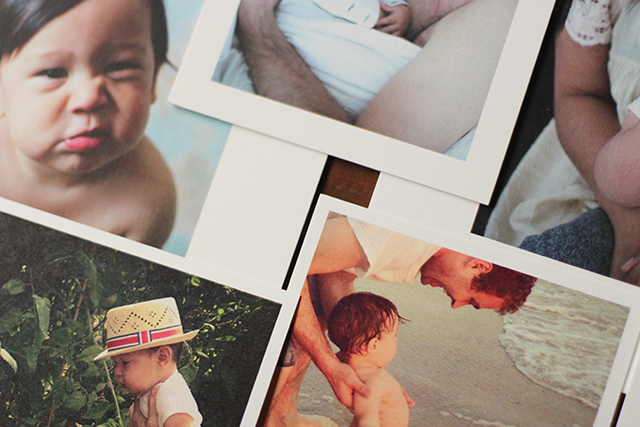
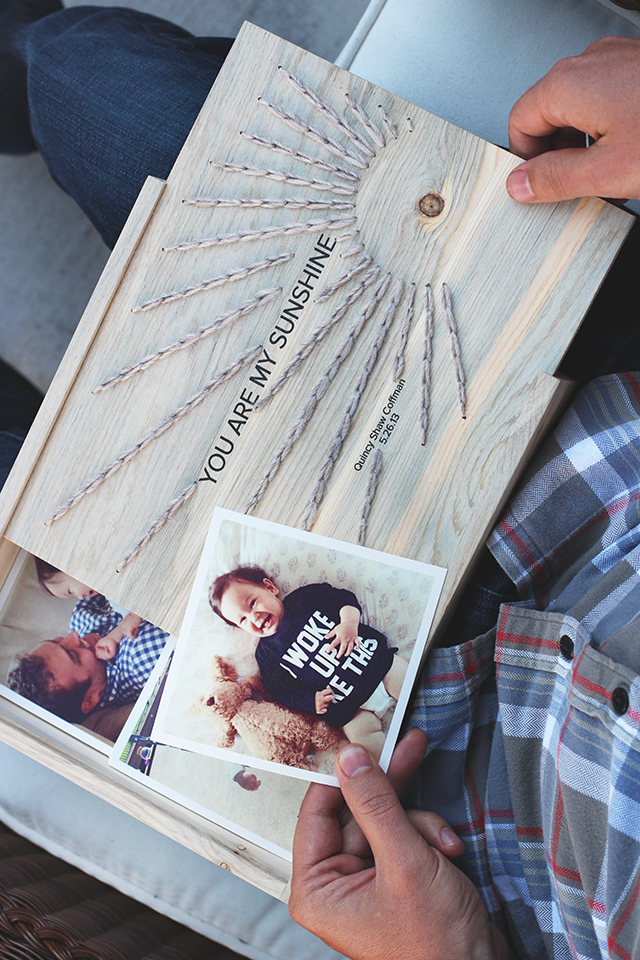
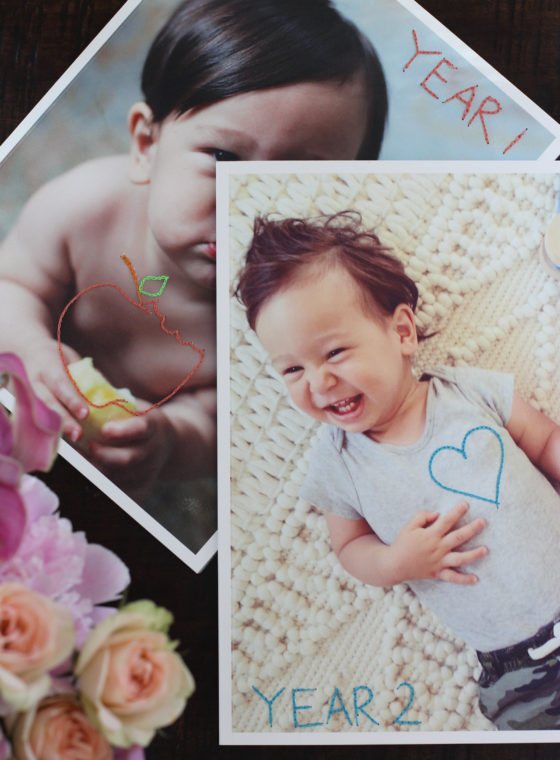
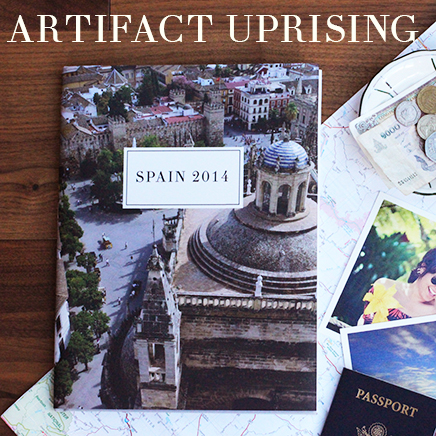
In today’s digital age, it’s easy to lose sight of beautiful, tangible objects like handwritten letters, notepads, and photographs. When I stumbled across Artifact Uprising, a Denver based company who transforms your digital images into professional-quality books and individual prints on thick card stock, I immediately placed an order of all of my family photos that I had been saving on my computer for the past year. This would make the perfect gift for my husband for Father’s Day. But of course, I had to add a handmade element. I ordered a gorgeous beetle pine box, to store all these precious keepsakes, and embroidered the lid with yarn. Embroidering wood, you say?!? It’s actually quite easy. Follow along!
You’ll need:
- a wooden box
- a Dremel or drill
- a thin drill bit
- an embroidery needle
- yarn
- pencil
Create your pattern by first mapping out a line drawing. To make sun rays, draw a small circle with a compass. Then, with a protractor centered on the center of the circle, make hash marks every 10 degrees.
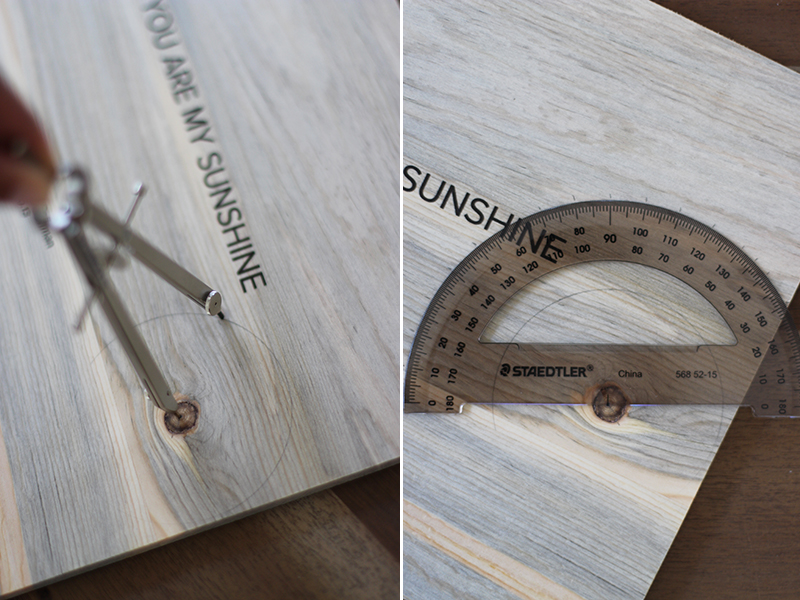
With a ruler or straightedge, draw lines from the center of the circle past those hash marks. Then make hashmarks on the rays, every half or quarter inch. Place the board on top of wooden risers before drilling. With a drill, carefully drill holes where the hashmarks are.
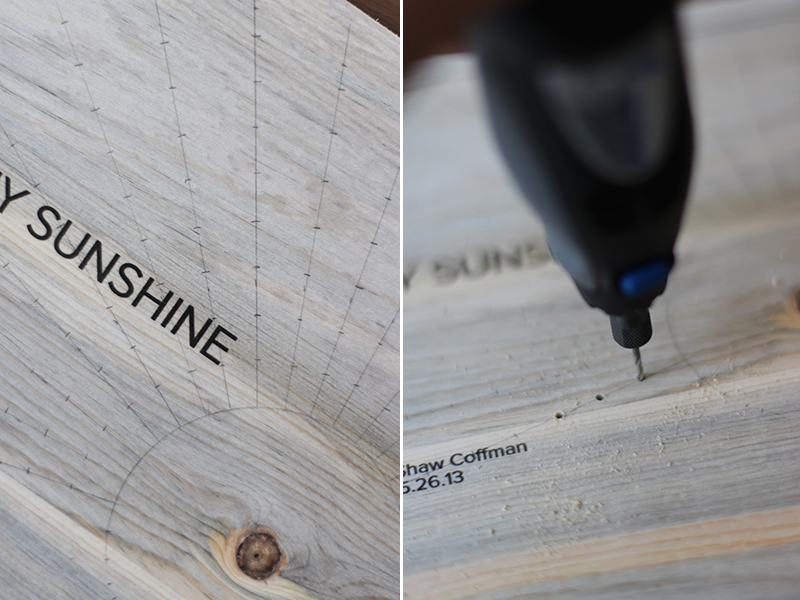
Erase all the pencil markings before embroidering. Thread your yard through an embroidery needle and knot it at the end. To make a chain stitch, make a stitch by threading the needle through the first hole from the bottom and down the second hole through the top. Come up the third hole from the bottom and pass the needle through the first stitch.
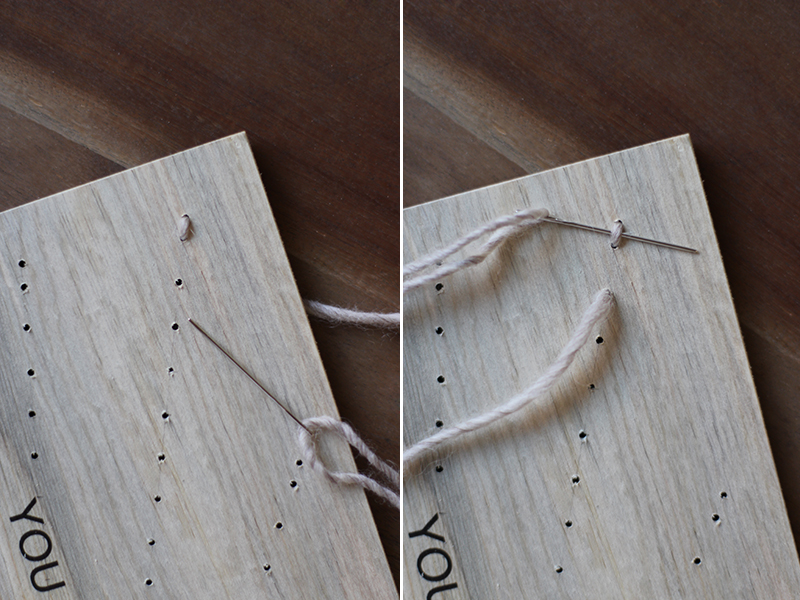
Pull the yarn through that first stitch and back through the third hole from the top. Again. Thread the yard through the fourth hold through the bottom, pass the needle through the second stitch, and thread the needle through the fourth hole again – this time from the top. This is a chain stitch, y’all!
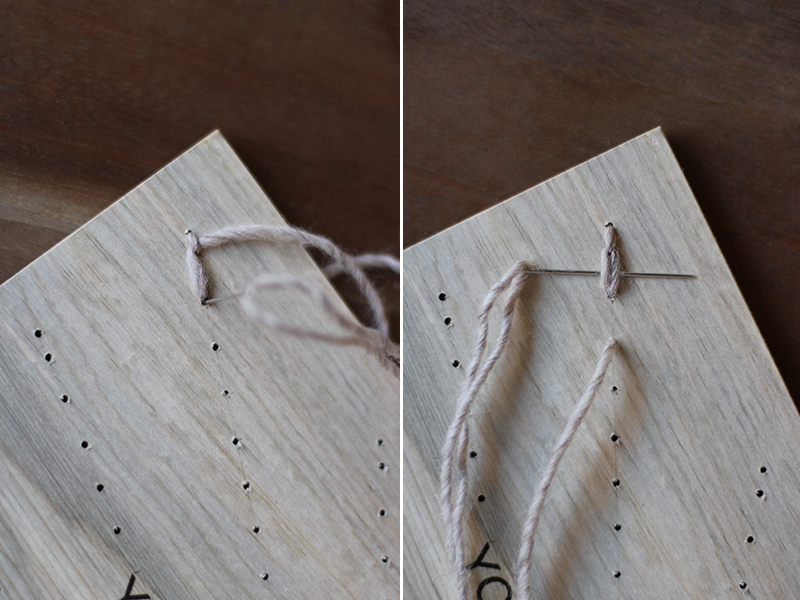
Continue stitching all the way down each line.

Each time you’re finished with a line, knot it from the backside.
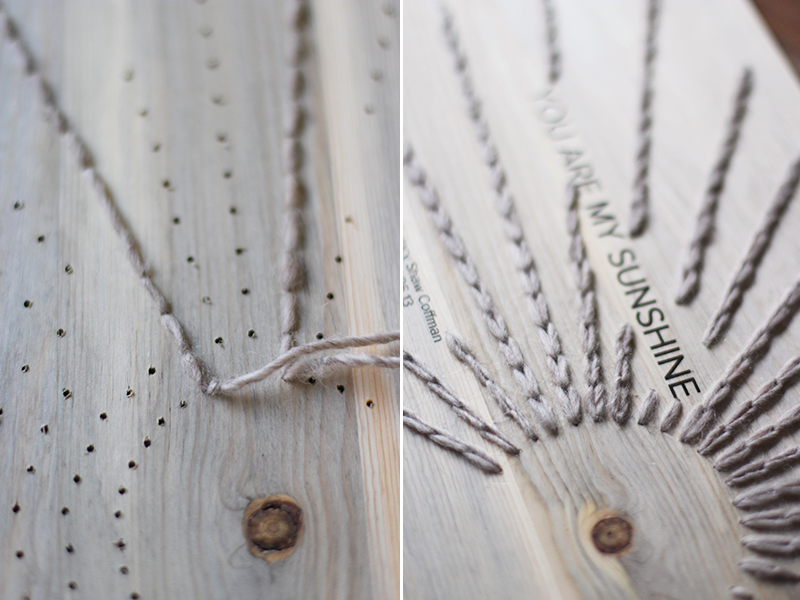
Voila, you’re finished!
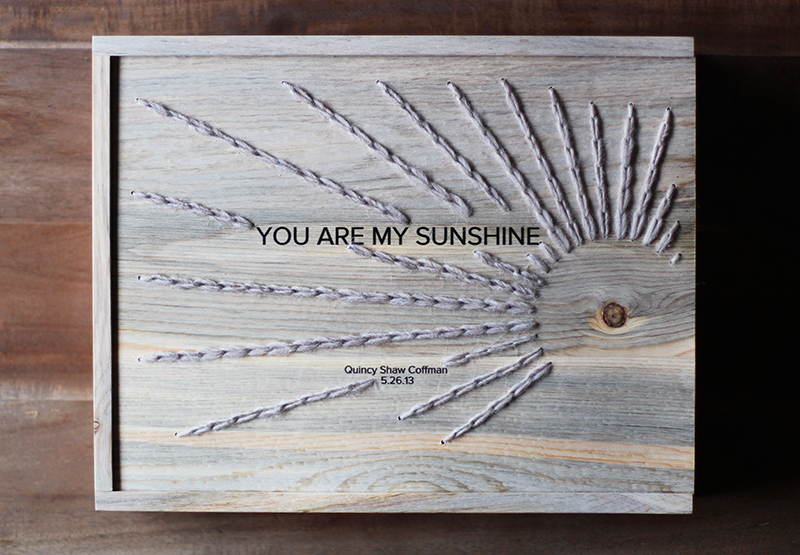
Fill it with memories . . .
Wrap it up . . .
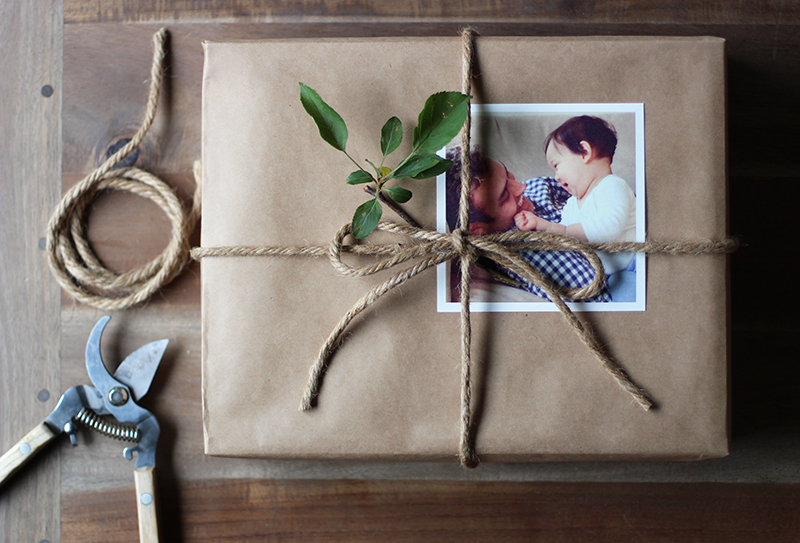
And give it that special someone. Artifact Uprising is offering our readers an exclusive discount. Use AU10WTF for a 10% off all orders placed by June 5th at 10pm MST, which is also the deadline to get your orders in for Father’s Day in time. Happy Father’s Day!!
(images by HonestlyWTF)

I love this project!
wow love this idea. so cool to embroider wood
Wow super cool diy! Looks awesome 😀
xx Mira
http://www.glamdevils.com
Amazing DIY!! Like that idea 😉
xoxo Iren
http://www.liakw.com
This is so cool! I’m going to make it!
XO CHAMAFASHION
http://www.chamafashion.com/
Really sweat present!!
Erica! You have outdone yourself. This is absolutely brilliant! We are mighty grateful for your support. Thank you!
I like DIY ideas..
http://www.fashiondenis.com
Lovely DIY!
XO
Jeanne
http://fashionmusingsdiary.blogspot.fr
This is really beautiful, such a lovely way to add a little special touch to a gift
Lauren
livinginaboxx
‘You Are My Sunshine’, ahhh very touchy!
Wowzers. Now that is a great crafty piece to have around the house. :] // itsCarmen.com ☼
Great idea! 🙂
I loved this! I think it would make a cool jeweler to give as a gift.
This DIY is a great idea !! I’ll try to do it ! Thanks for sharing it with us 🙂
http://www.the-astro.weebly.com/a-s-t-r-o—s-e-l-f-i-e/m-y-d-a-i-l-y-h-e-a-l-t-h-r-o-u-t-i-n-e
That’s such a sweet gift and a pretty easy DIY awesome 🙂
I am in love with this idea – it makes such a thoughtful and special gift! x
Ohhh that’s a lovely idea!
Lots of love, xx
http://marysreturn.blogspot.com.ar/
http://marysreturn.blogspot.com.ar/
loved this box and the step by step tutorial for making it, thanks
Swati
What a great tutorial and a lovely father’s day gift.
Love this idea for a jewelry box!
http://blog.sommijewelry.com
Honestly gorgeous!
i love how it’s monochromatic!!! so cool!
http://www.handmadebykelly.com
I’m a total scrapaholic- love this! Brown wrapping paper can be so effective 🙂
Wow… thank you for sharing. I Love it. 🙂