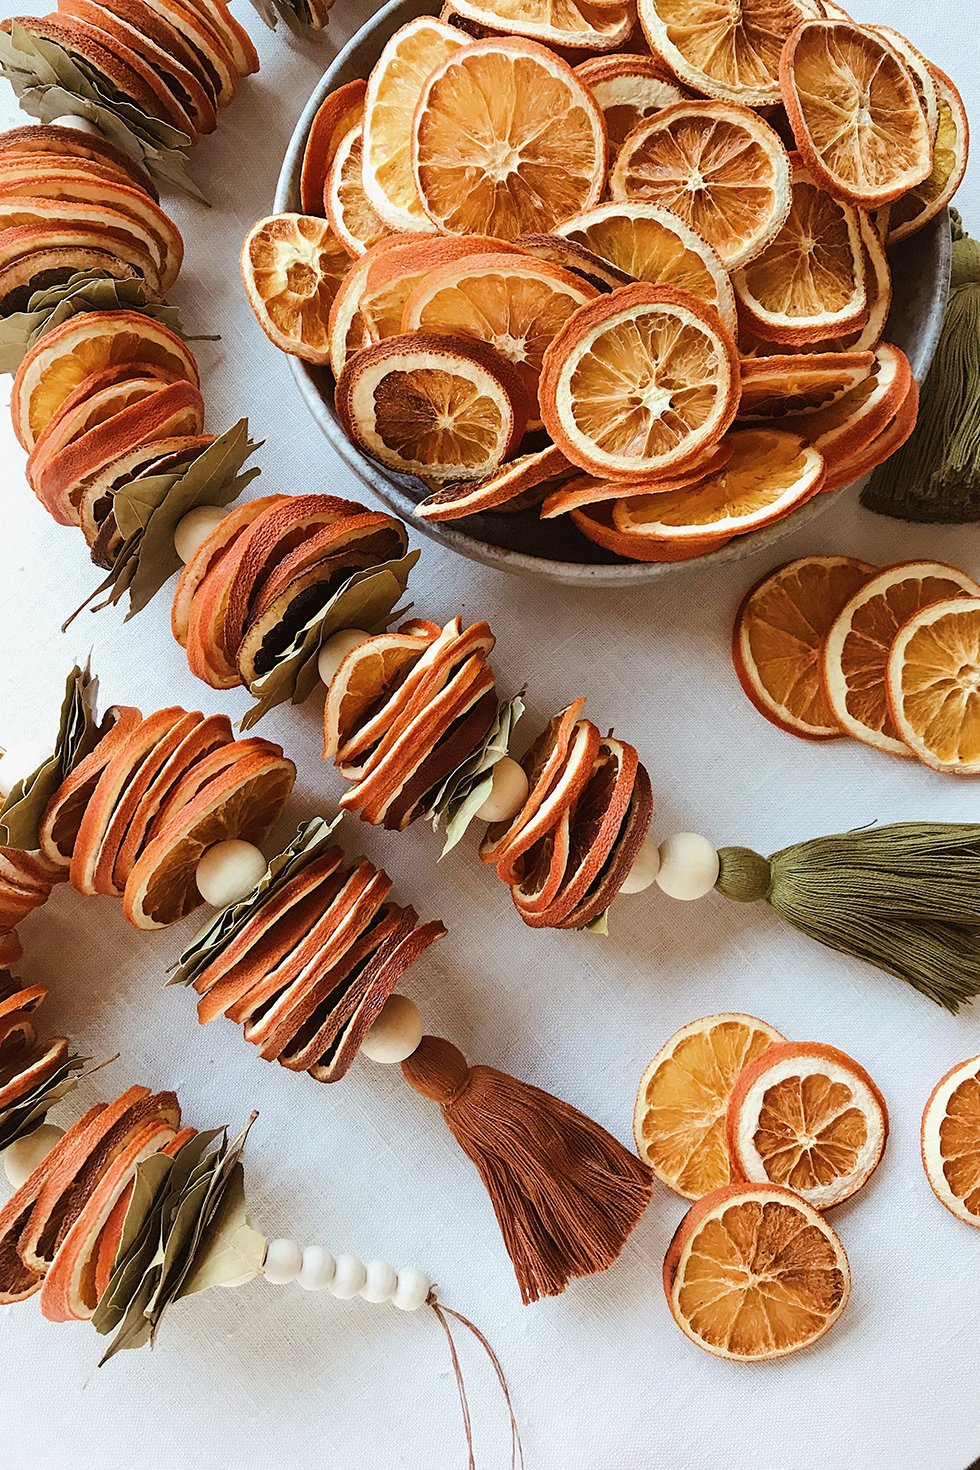
Last week, I was overcome with a sudden desire to dry oranges. I didn't have an exact plan of action but nevertheless, I went to the grocery store and bought 3 bags of 5lb navel oranges. 15lbs of oranges, folks. I started baking them at 200 degrees, thinking I could shorten the lengthy baking time suggested online. They burned. And although I was actually quite digging the burned "ombré" effect, I wanted that bright, saturated orange hue. The key was to go lower and slower. After days of drying (yes, days) and the cozy, warm aromas of citrus coming from the kitchen, I pulled out some supplies that I already had in my pantry and craft closet. Who knew some wooden beads, tassels and bay leaves could make such beautiful, festive garlands? This is a great project to do with your kids and an even better gift to give! I also imagine that I'll keep these up in the house for the rest of the winter season, even after the holidays. They're cheerful, fragrant and wonderfully colorful!
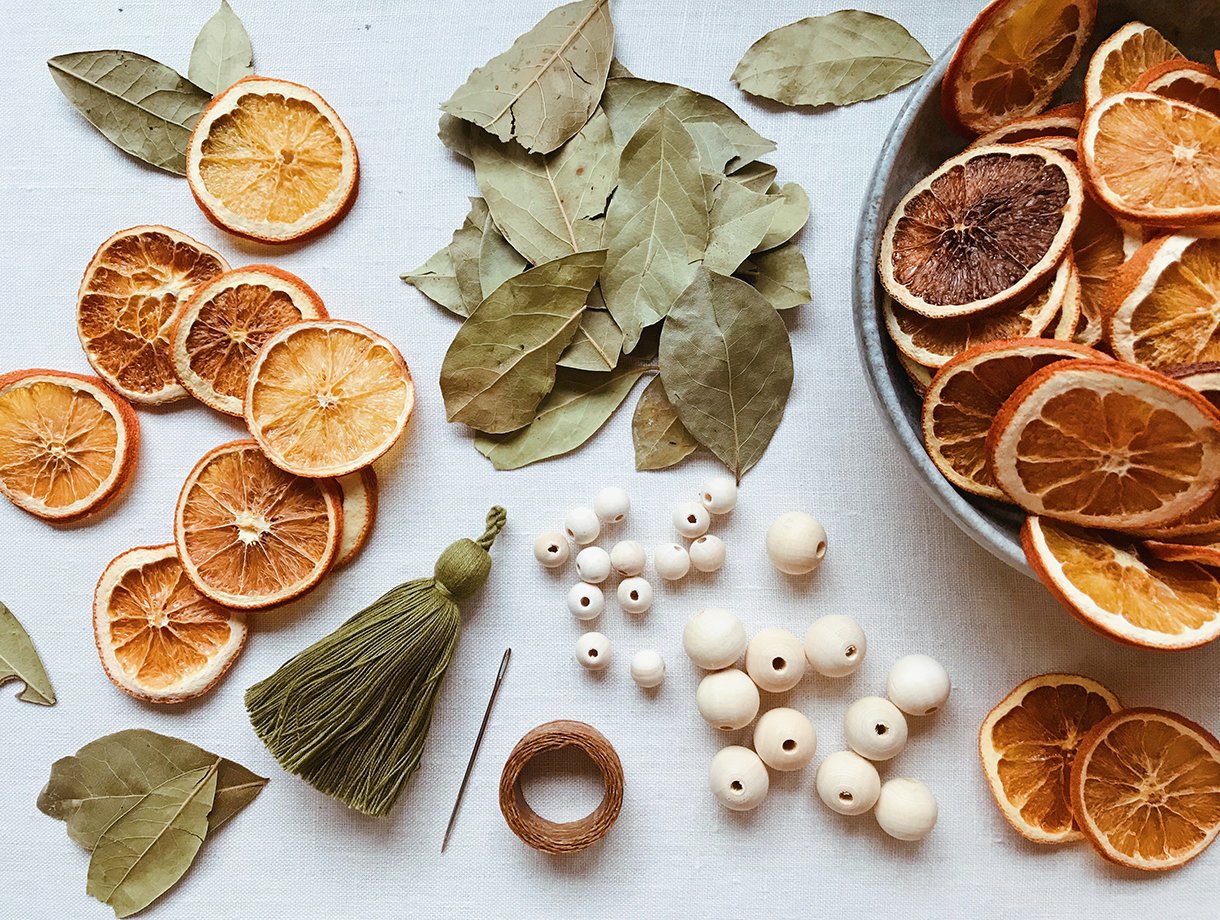
You'll Need:
- 5-10lbs of navel oranges
- 4 oz bay leaves
- 15mm + 20mm wooden beads
- waxed cotton thread
- cotton tassel
- embroidery needle
- scissors
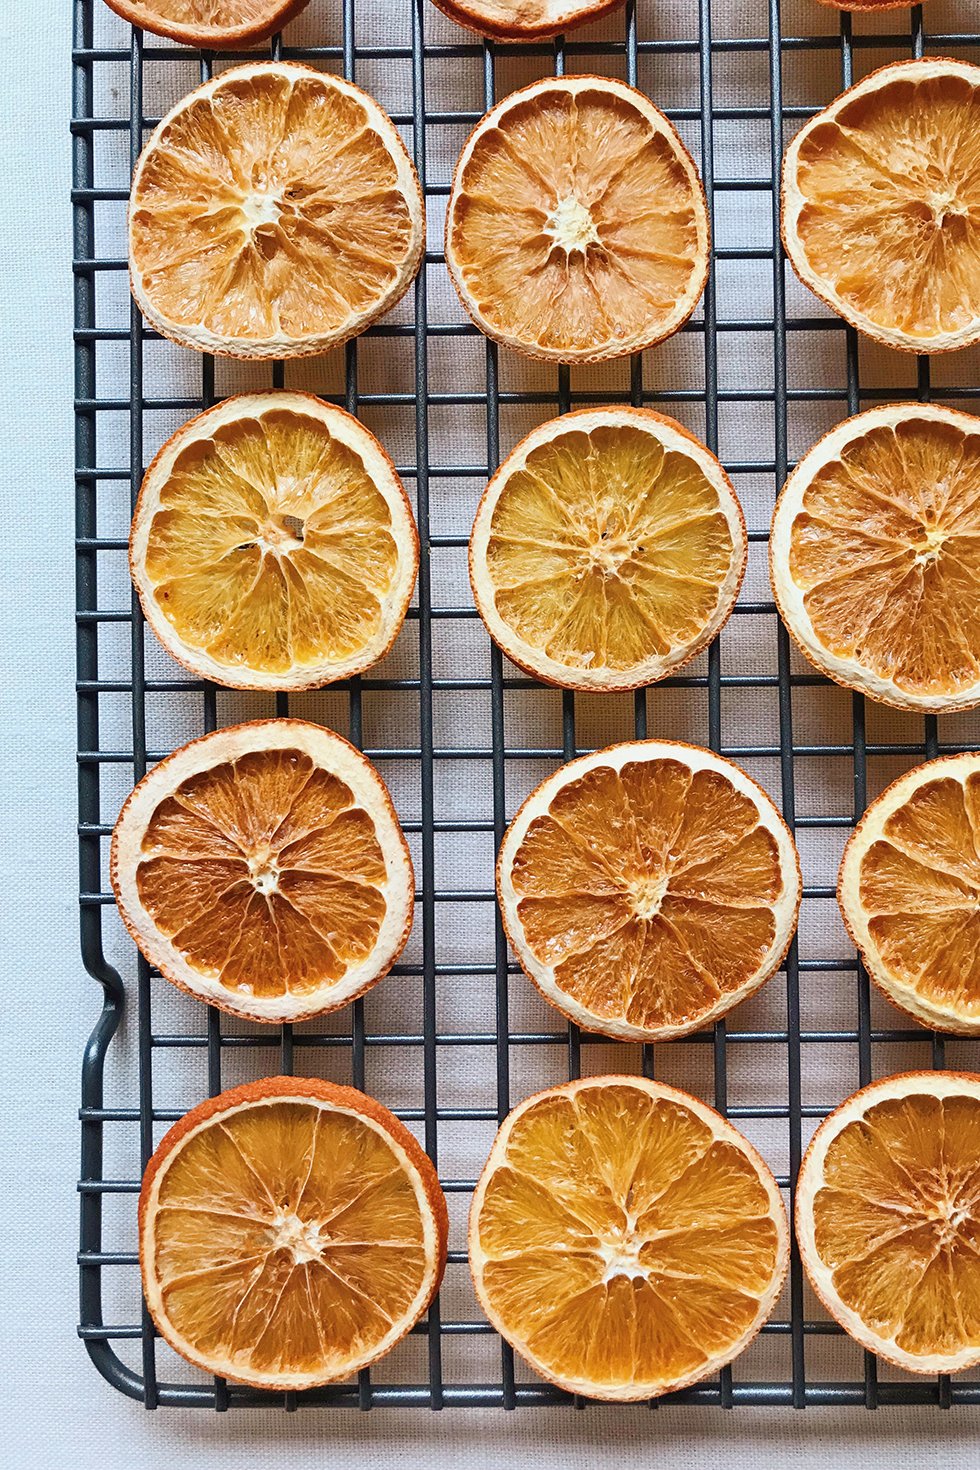
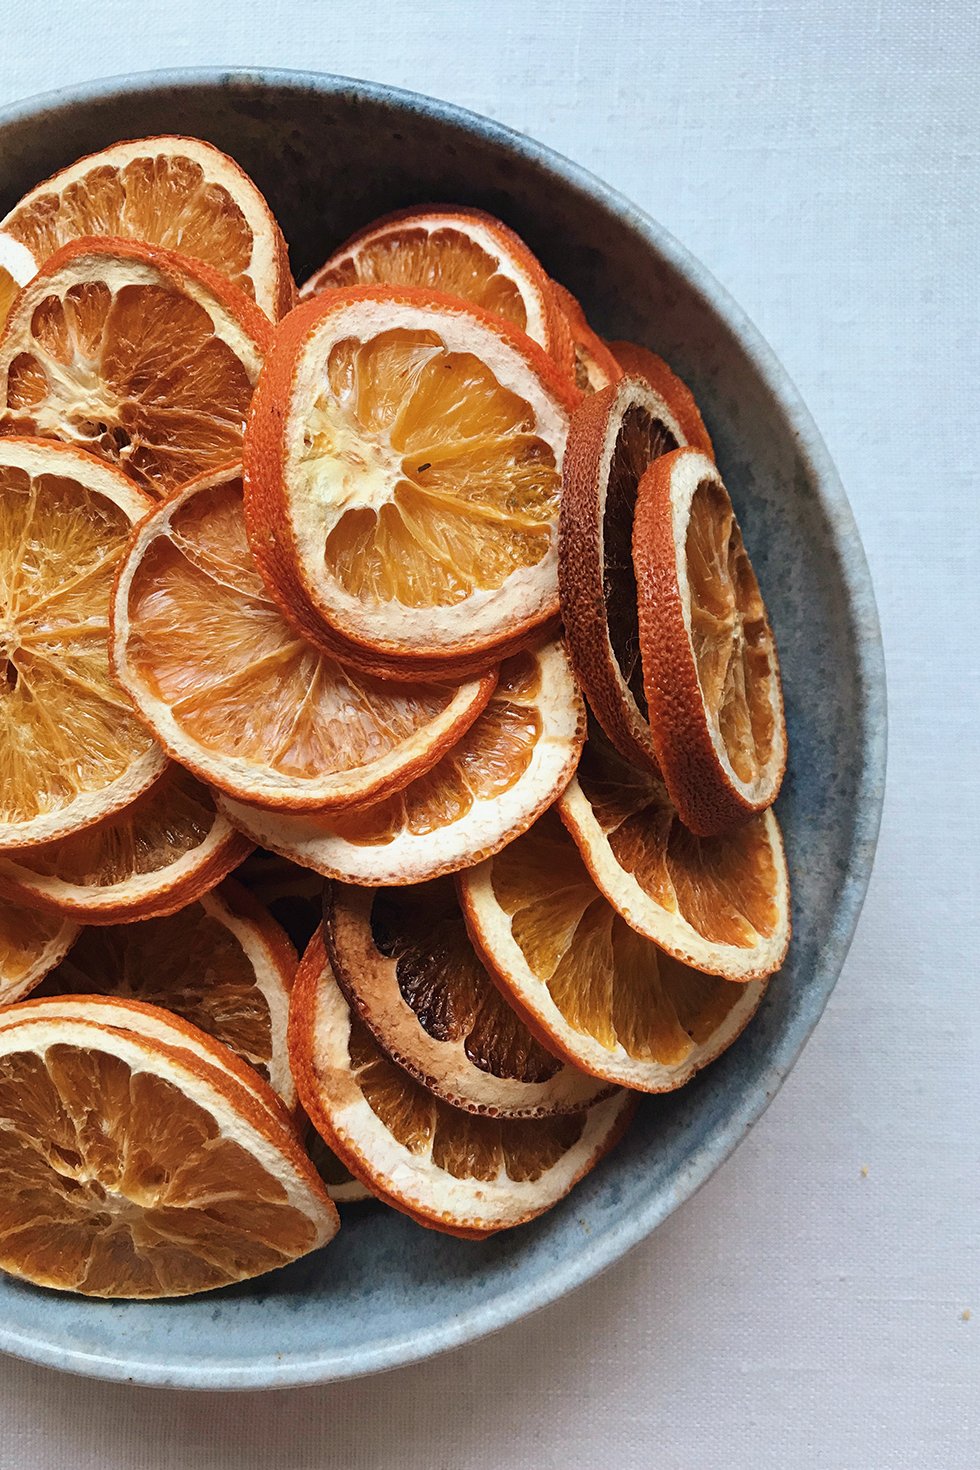
Start by drying the oranges. You'll want to give yourself at least a day of drying time as they take about 4-5 hours per batch. Slice the navel oranges into 1/4" slices and lay them, in a single layer, on top of a baking sheet lined with parchment - or even better, directly on top of a cooling rack. Bake at 175 degrees for 4-5 hours until the oranges are crisp dry. You won't any moisture remaining at all since they might develop mold and rot over time. And keep in mind that all ovens are different so be sure to check on them during the baking process every hour or so.
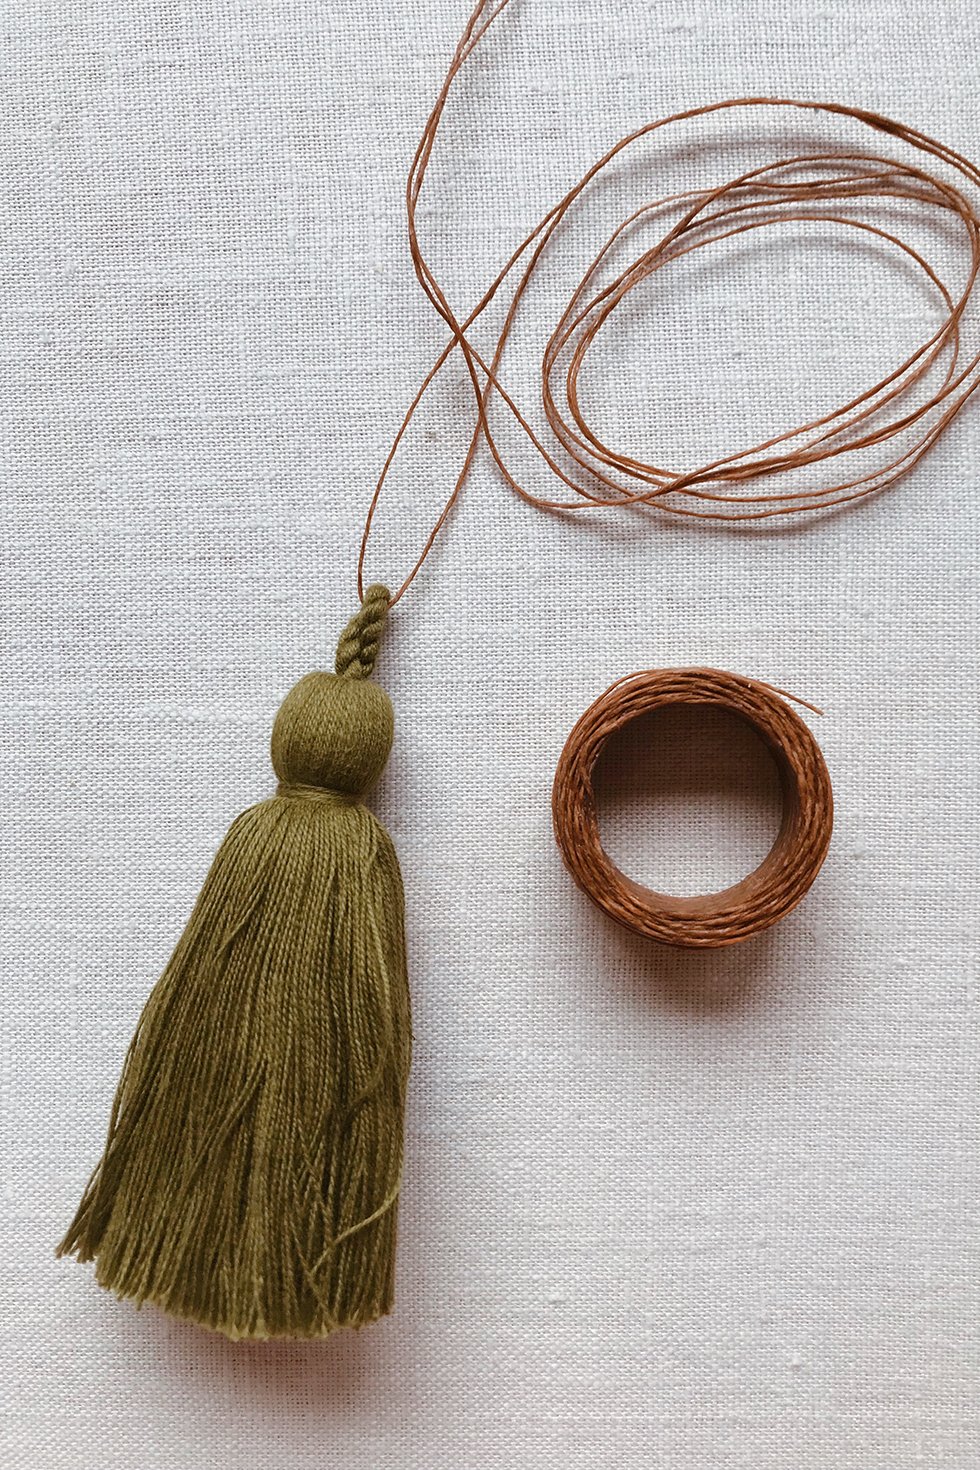

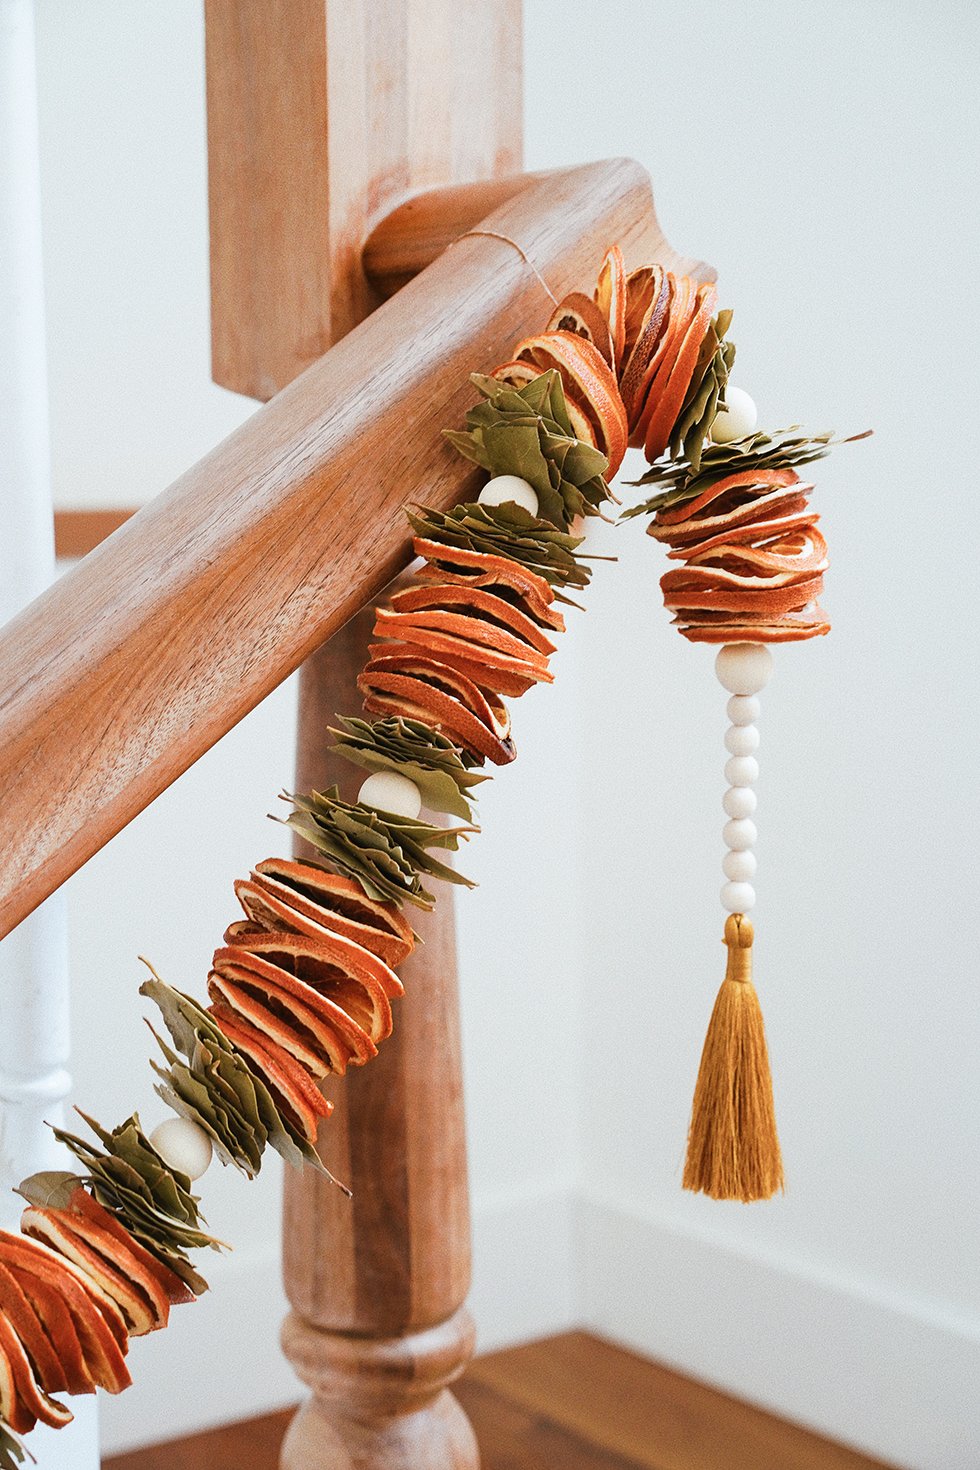
Once your oranges are dried, you can start assembling the garlands. I like using waxed cotton thread because it's extremely strong and the stickiness of the wax helps threading on the elements with ease. Cut double the desired length of your garland. Thread the tassel on and fold the waxed cotton thread in half. Match the ends and give it a good twist.
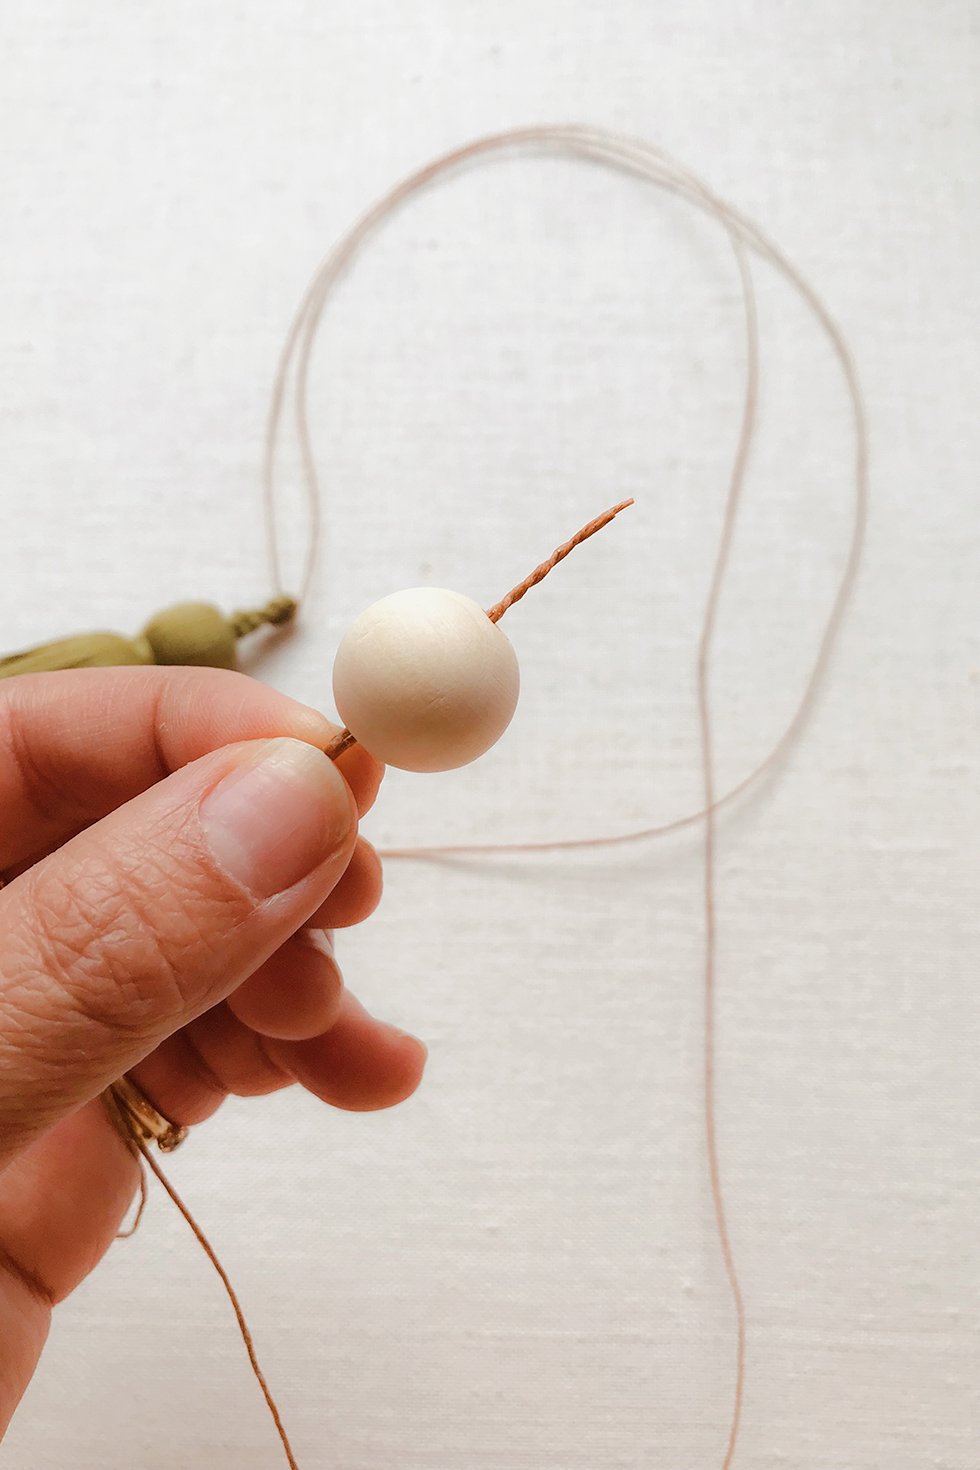
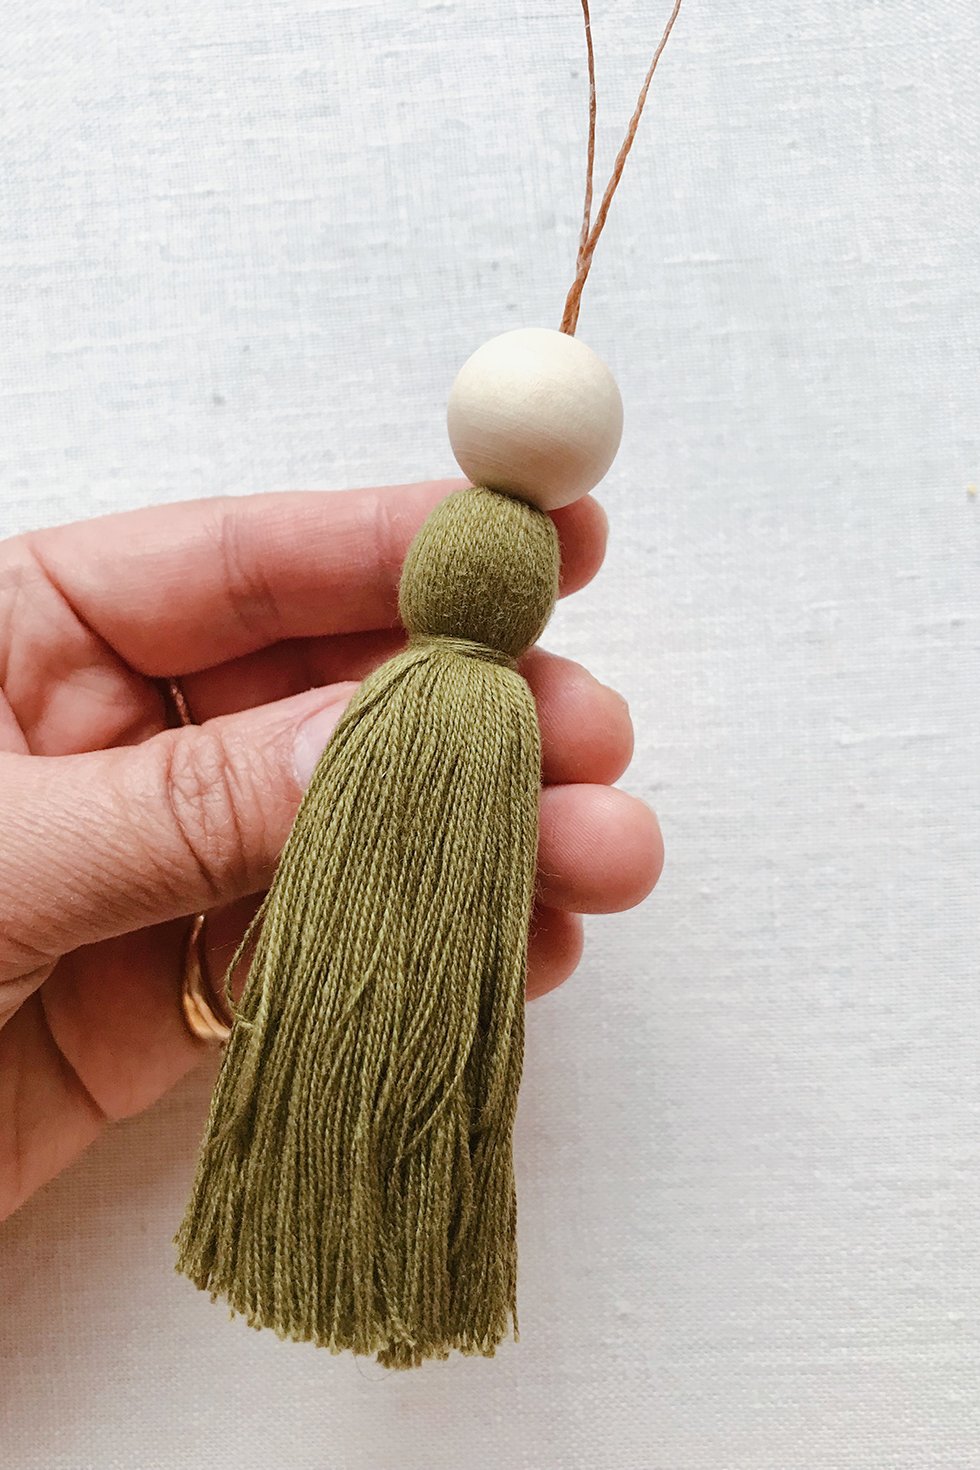
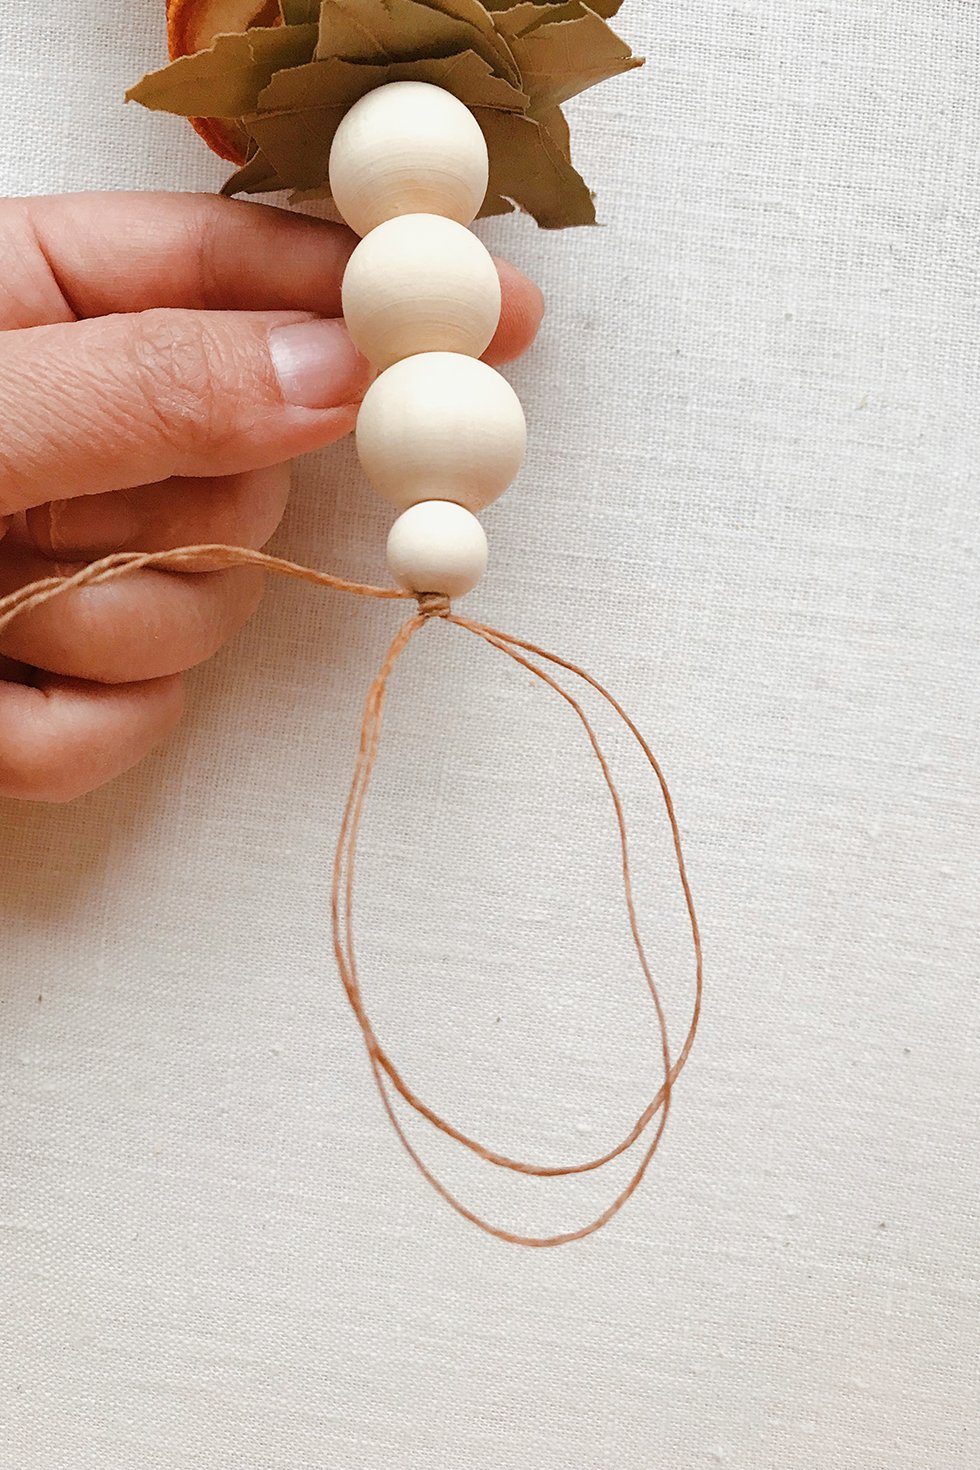
Thread on a couple of wooden beads.
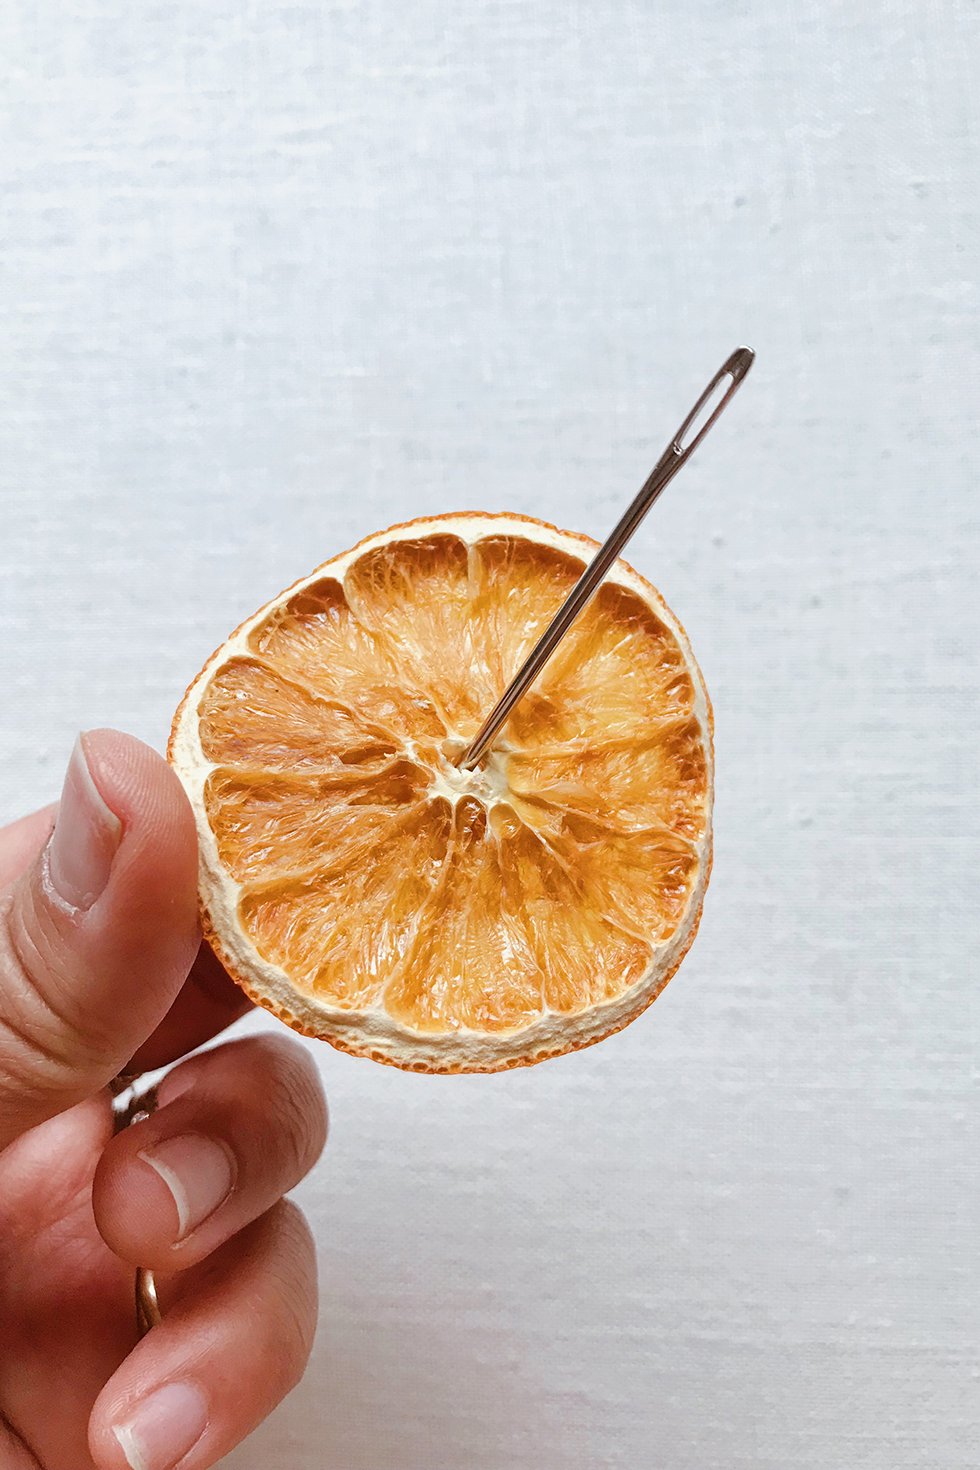
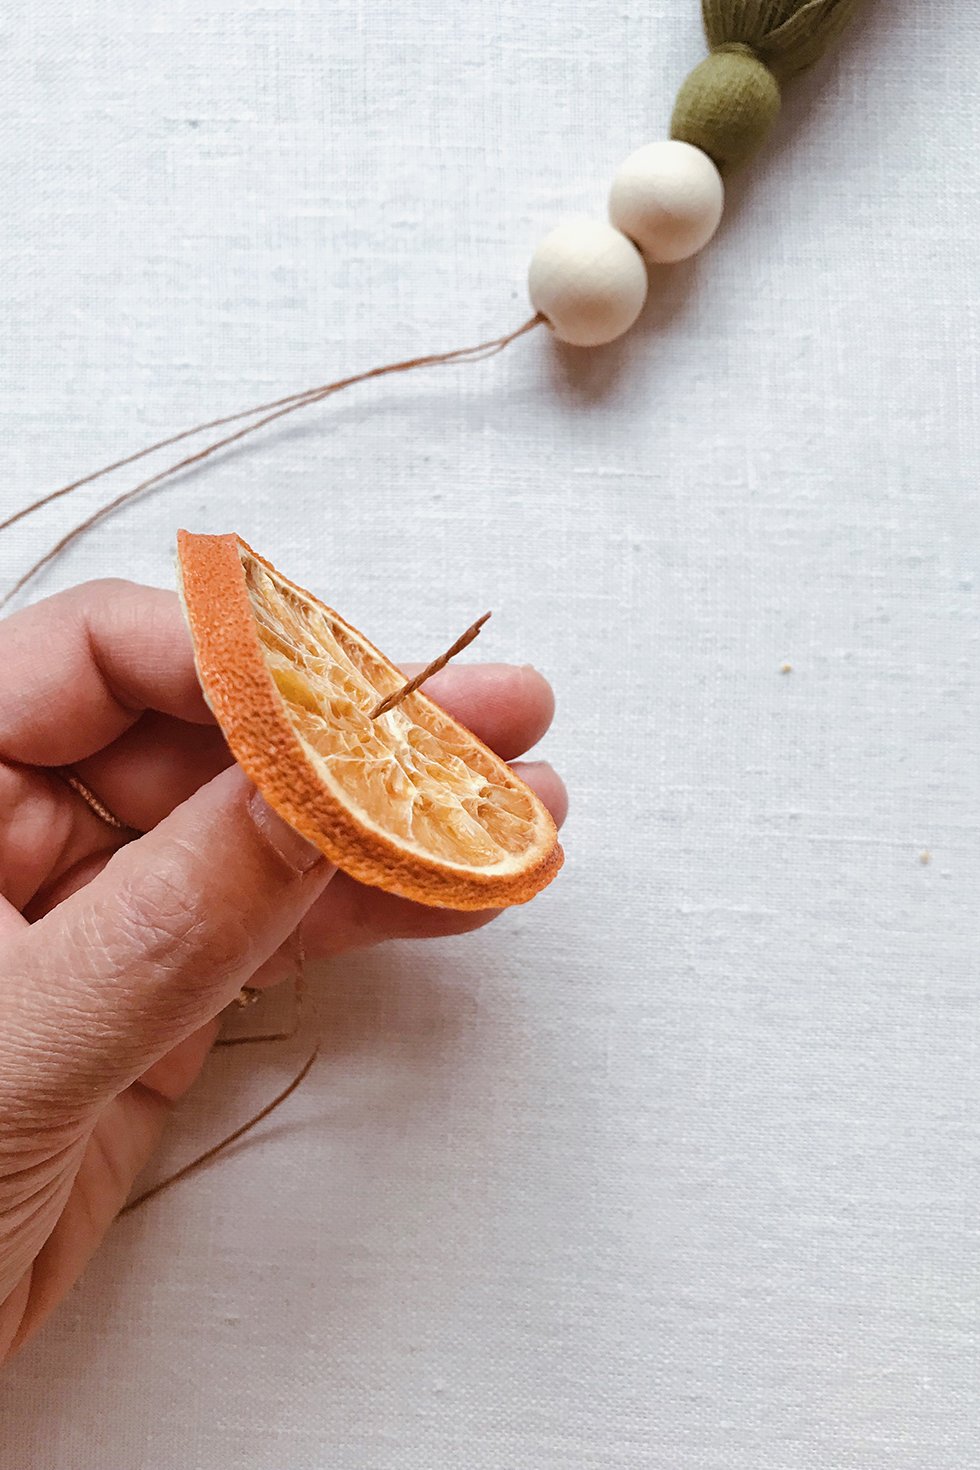
I like to use a thick and sharp embroidery needle to make holes in the oranges and bay leaves. Make a hole in the center of the orange slices and thread a few on.
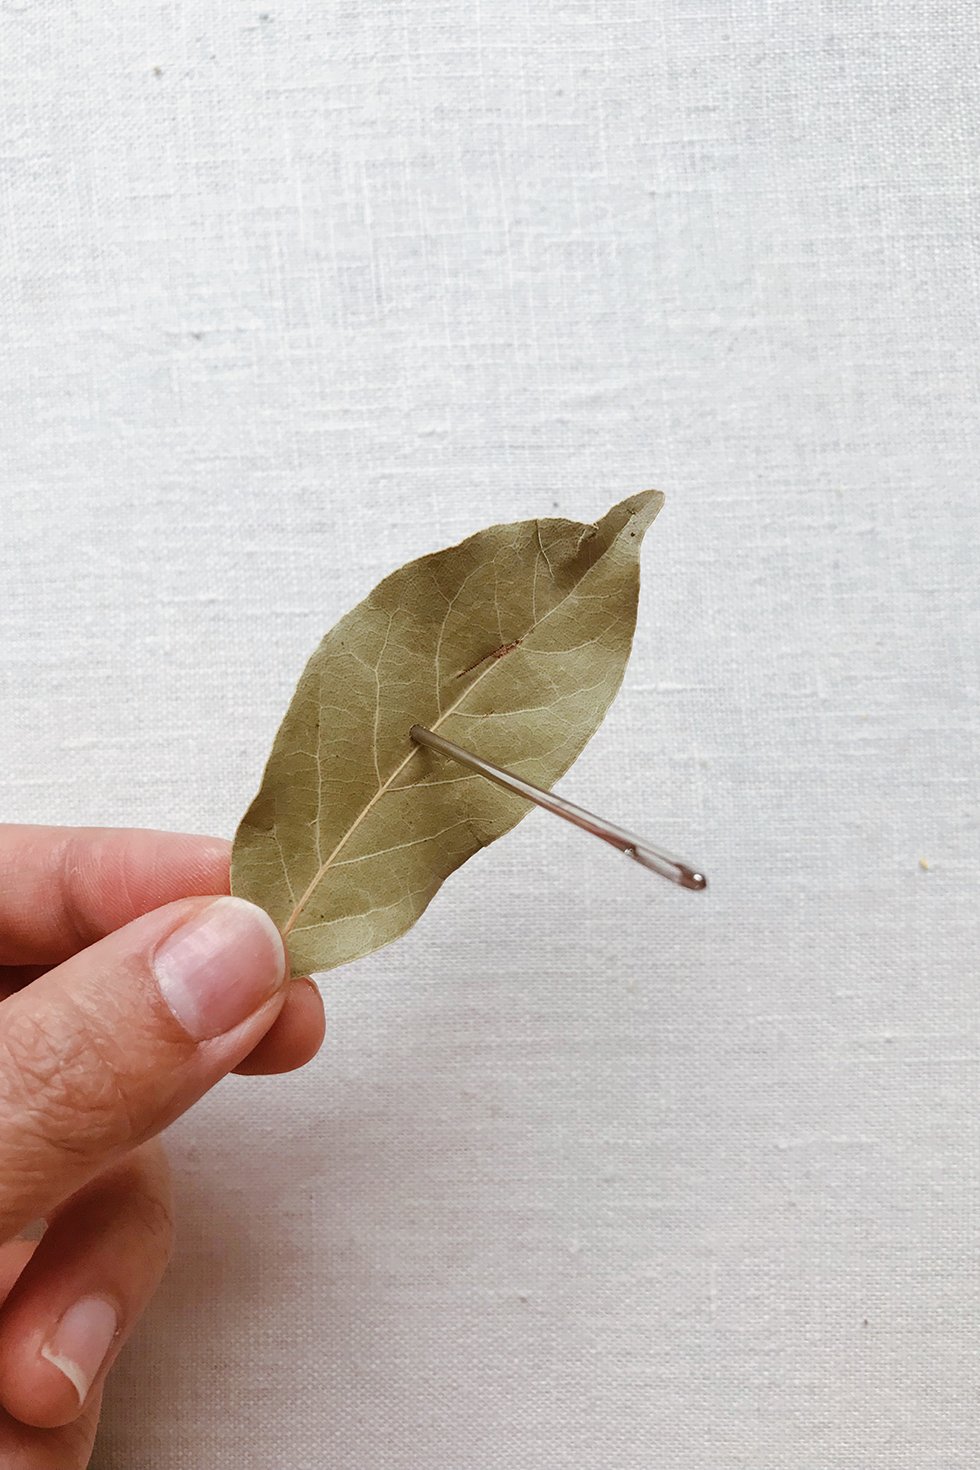
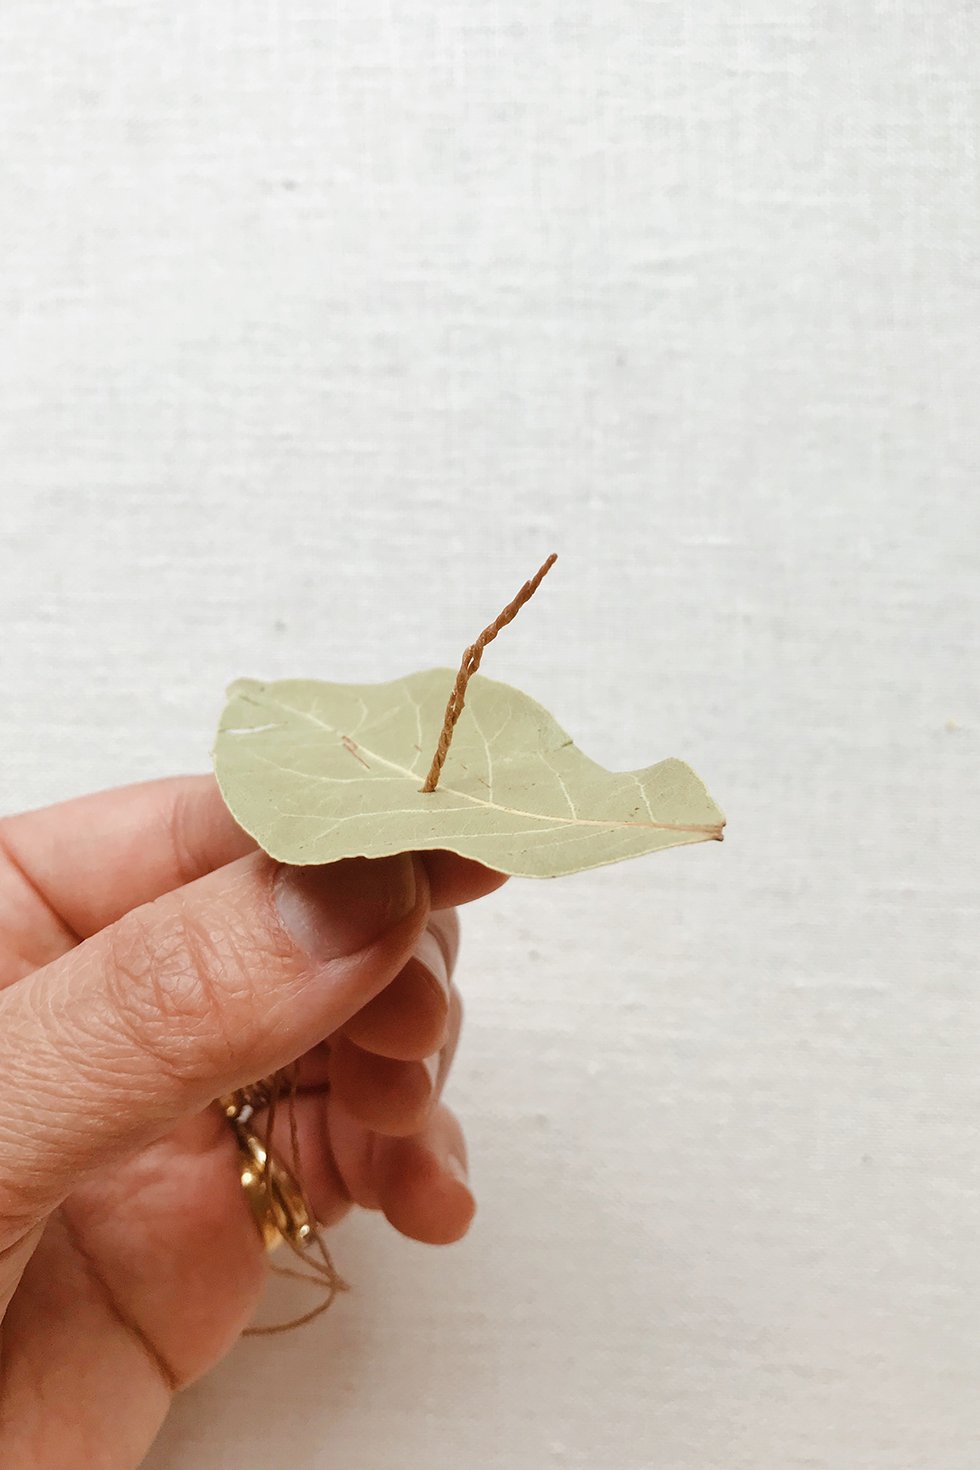
Use the needle to poke a hole in the center of the bay leaves. Thread them onto the garland. Note that it's okay to use broken leaves - you won't be able to tell once they're on the garland!
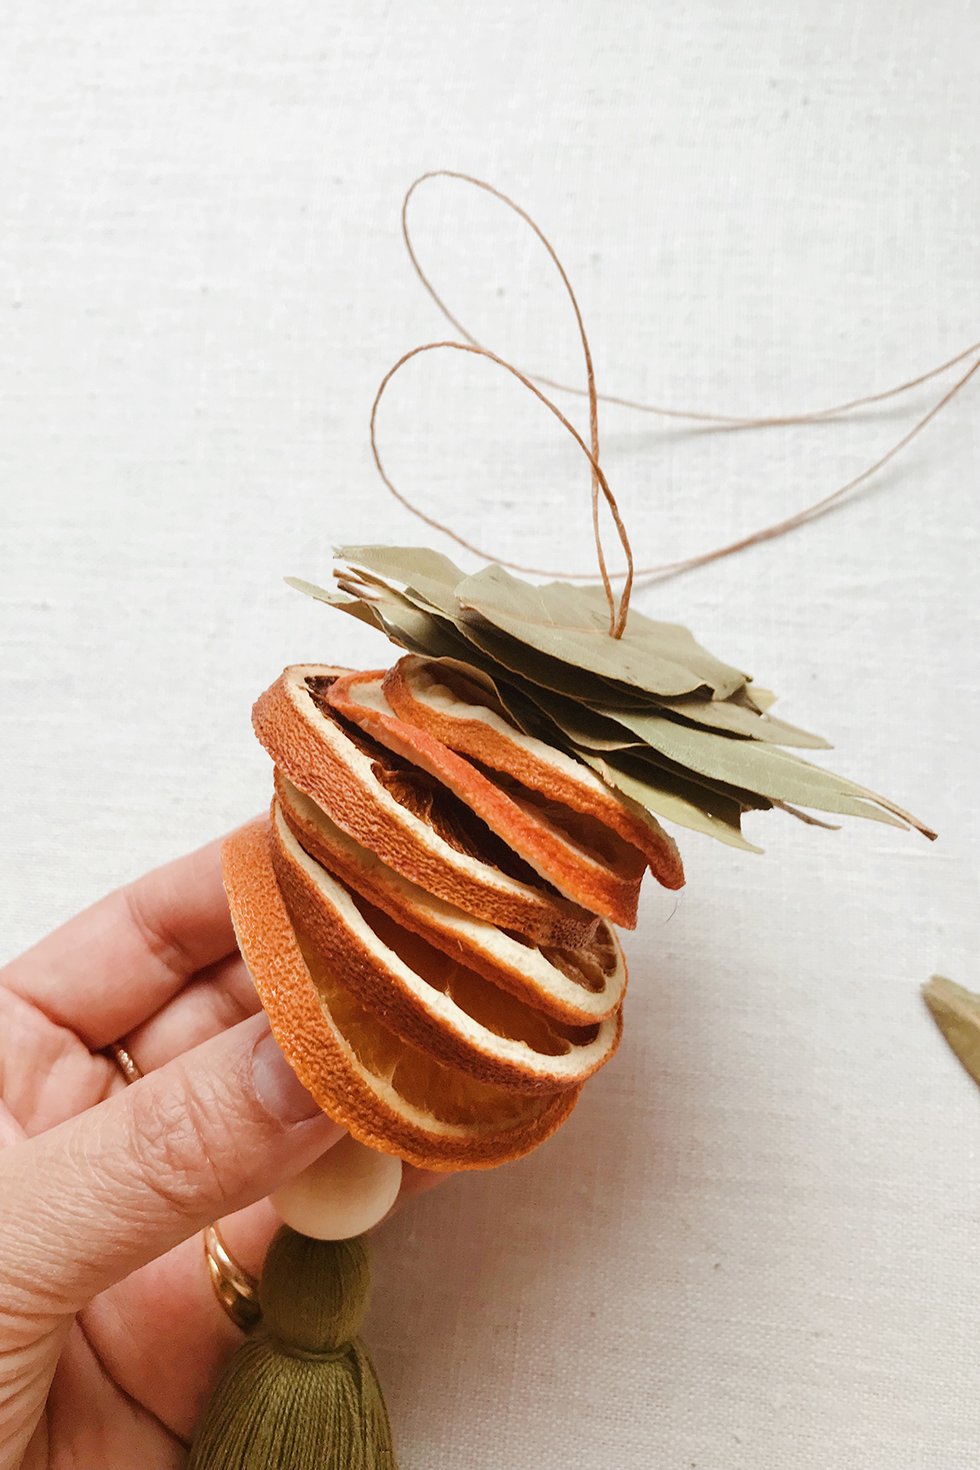
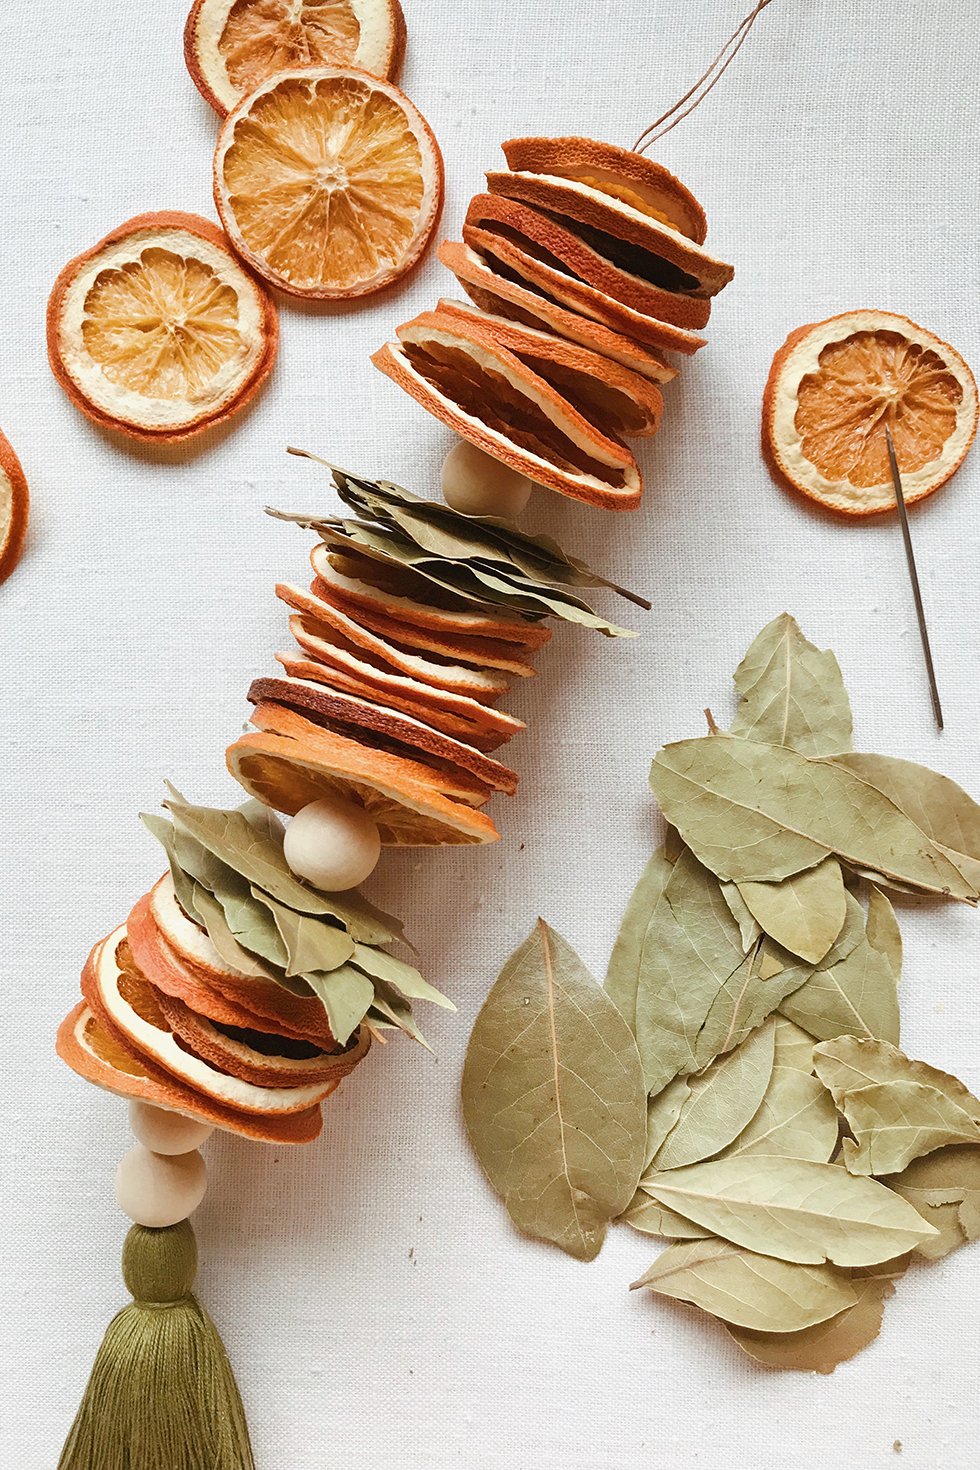
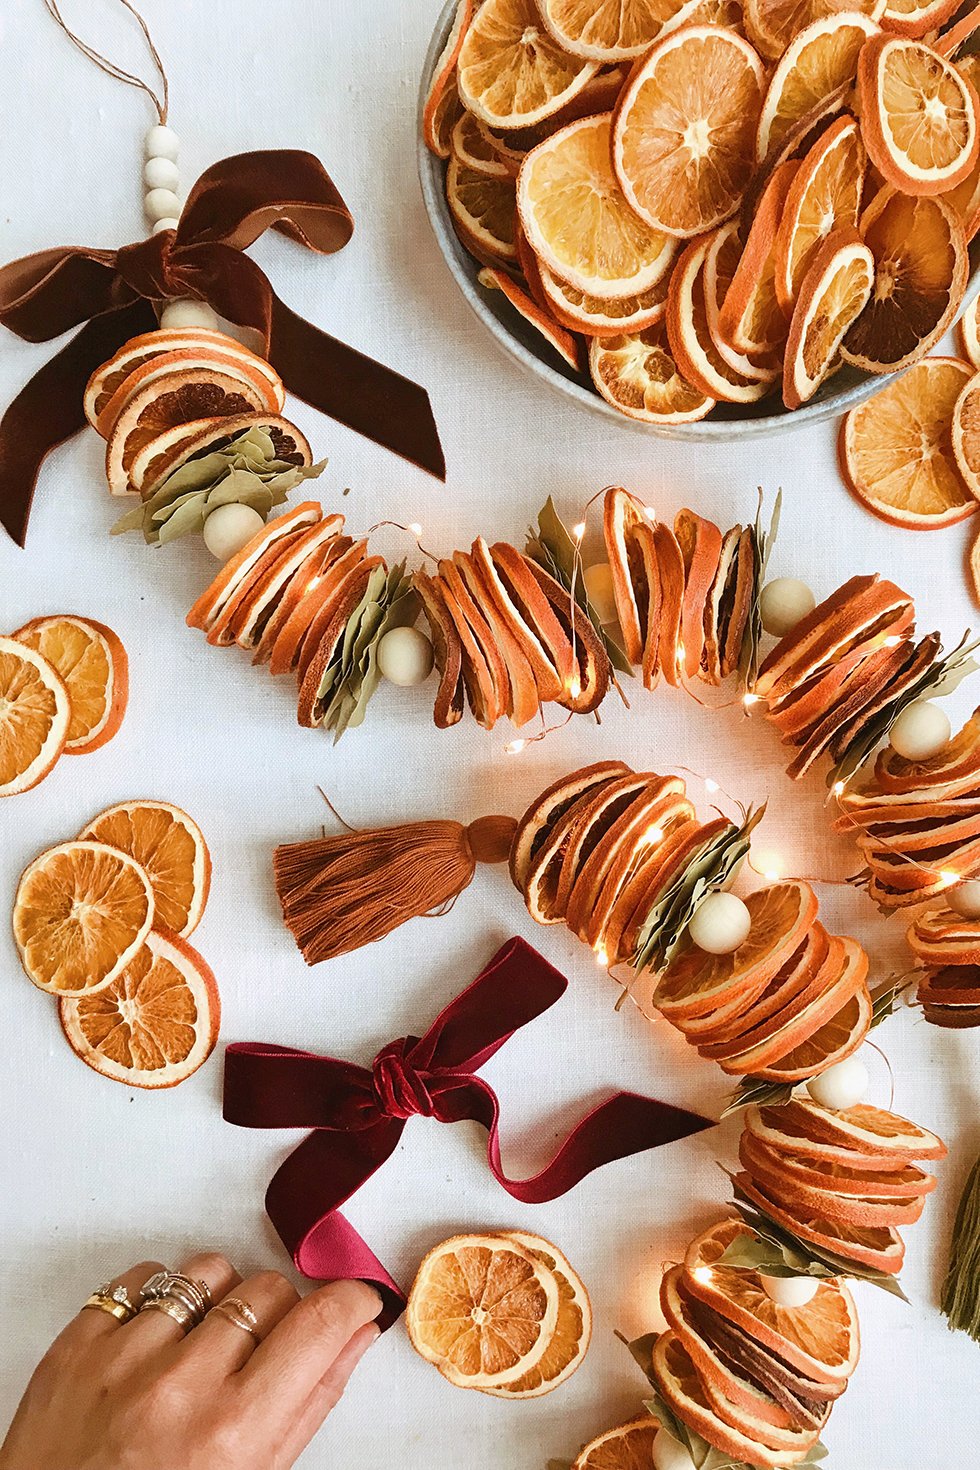
Continue alternating between the oranges, bay leaves and wooden beads.
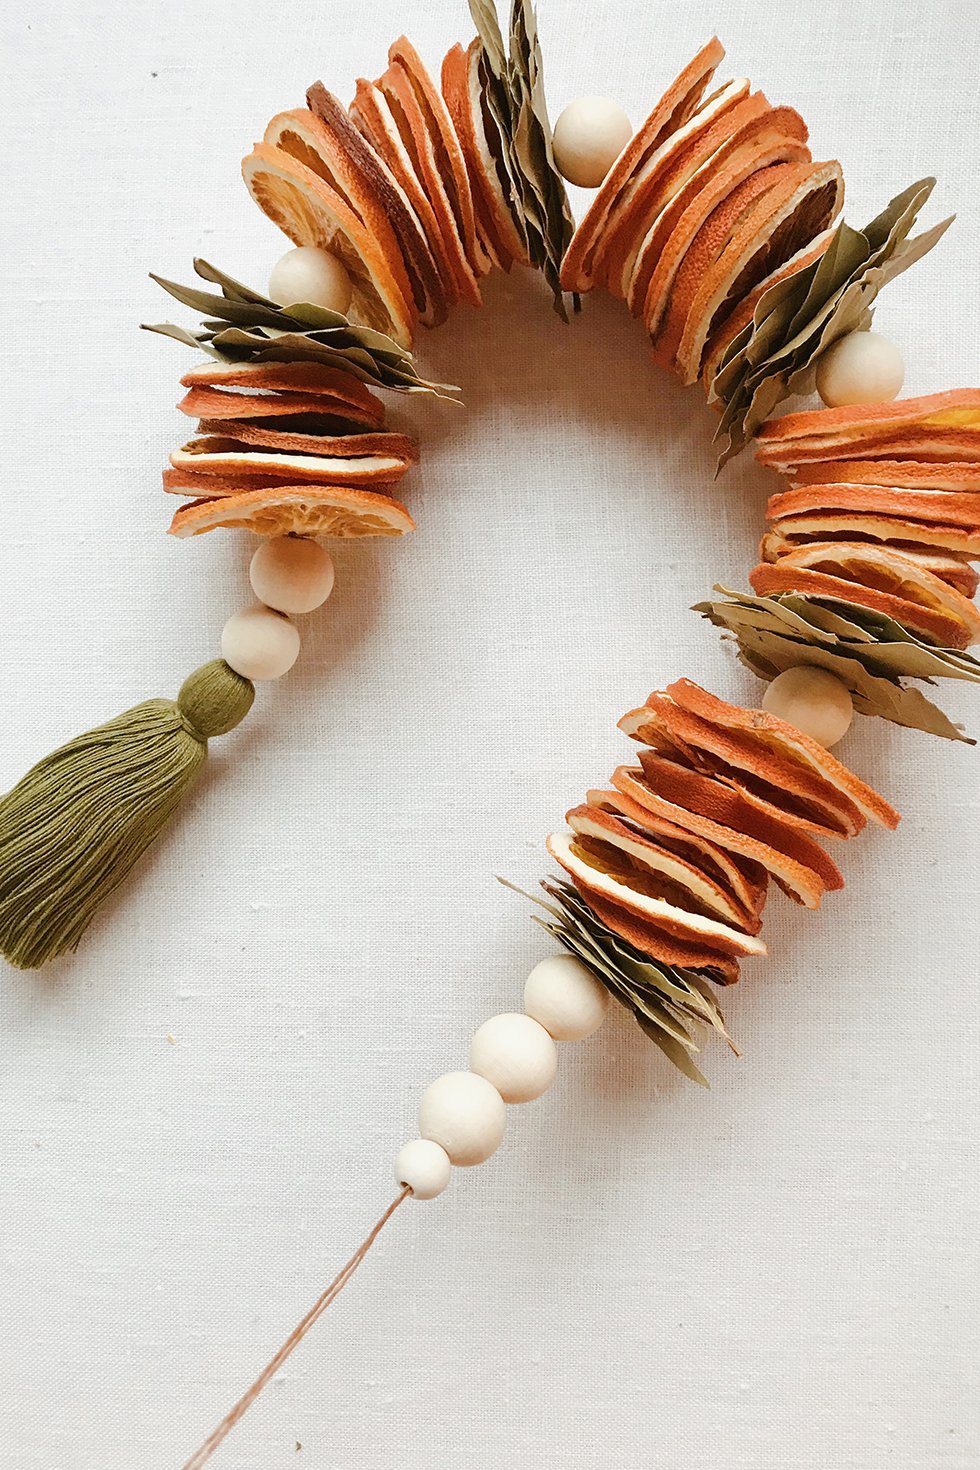
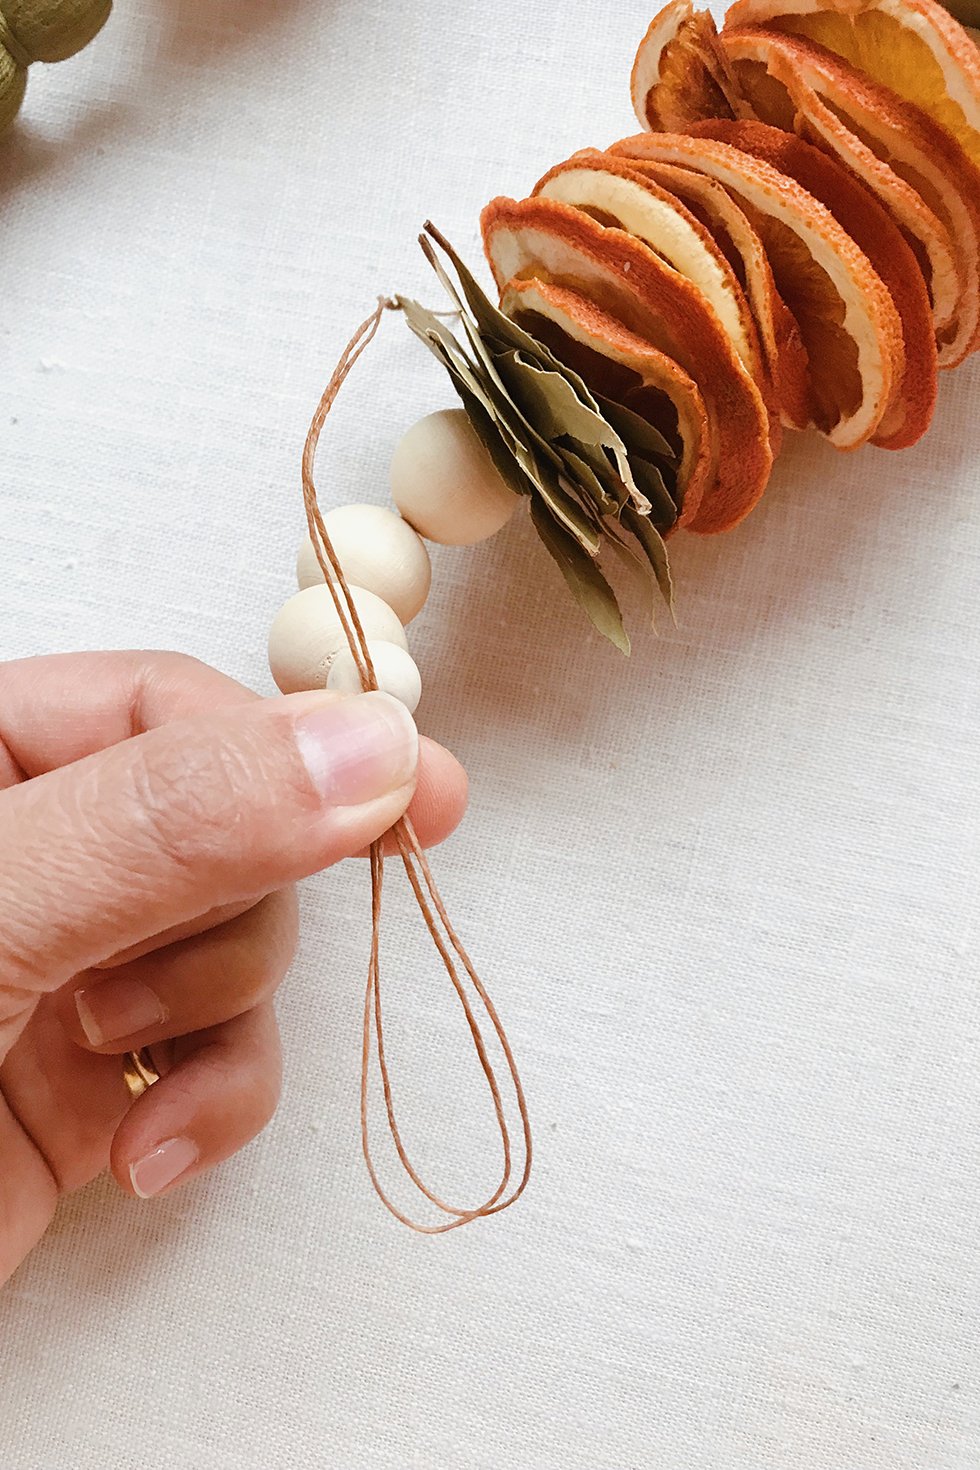
Finish with a few more wooden beads and then loop the remaining waxed thread.
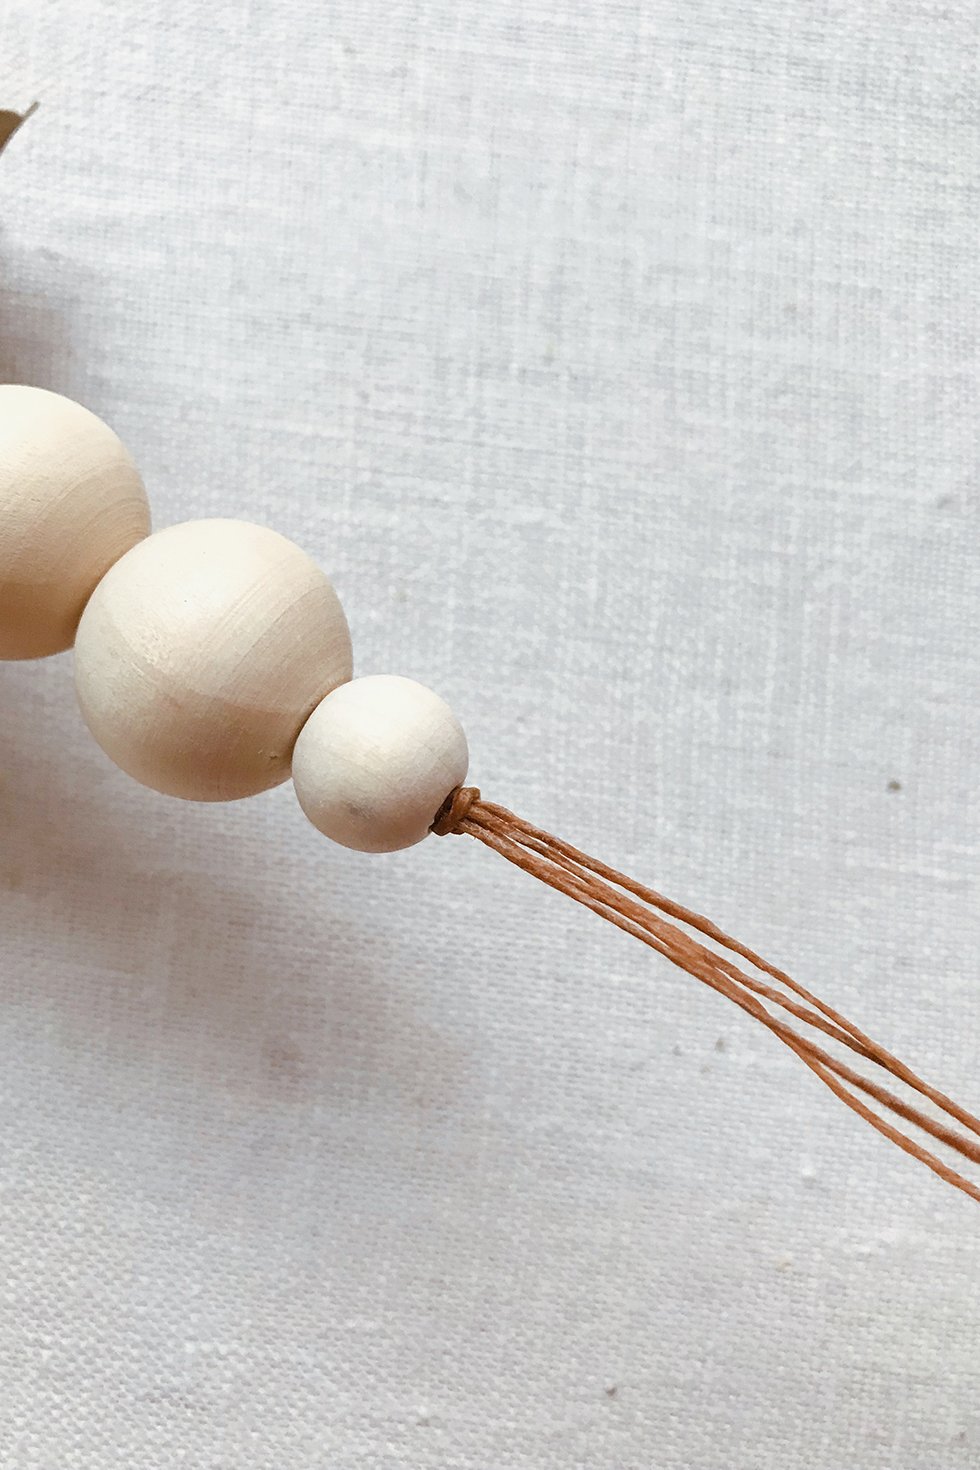
Tie the loop into a double knot, with the knot as close to the top bead as possible. Trim the excess.
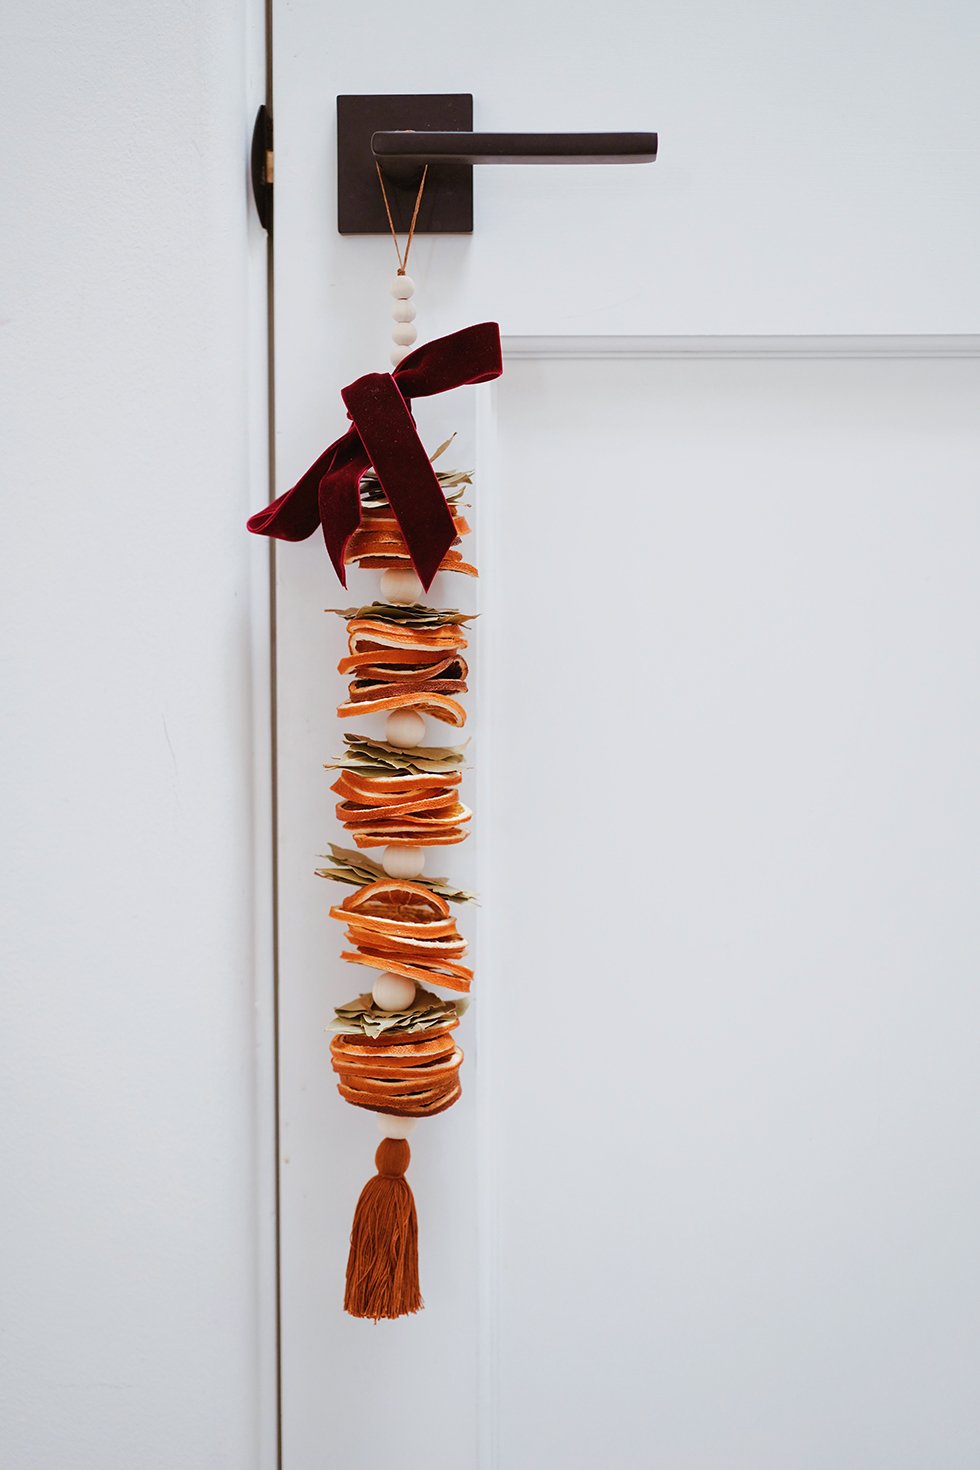
Finish with a velvet bow or just leave as it is. These are great hung on doorknobs or made longer to hang along on a bannister. If the oranges are properly dried, these garlands should last you for years to follow. Just be sure to store them in a dry place!
images by HonestlyWTF
Nice
love this!
Awesome.
http://krmangalam.edu.in/
Very nice Yaar.
http://indoreinstitute.com
I like your post. It is really useful to me. Thanks for sharing this useful idea!
This is so insanely pretty! I’m curious if the bay leaves could be substituted for a heartier leaf like preserved magnolia? Or does the bay leaf contribute to the aroma too much to swap it out? My experience with bay leaves is that they crumble so easily but maybe I’m using the wrong brand.
Nice website and your ideas are wonderful. Thank you. Sherrill
I love this idea. I’m going to try it out for myself and possibly holiday gifts.
Also, where are your stacked rings from? I love them!
Ciekawy i pachnący świąteczny dodatek, świetnie się sprawdza w kawiarniach. Dzięki za wpisik i wszystkiego dobrego w 2021 🙂
I was given one of these fabulous garlands and hope to keep store it for next year. Do you have any suggestions for the best way to store it. I have some large tins, but don’t want it to rot or mildew. l live in New England. Your pictures are great but the garland is even more spectacular in reality due to the fragrance.
you may try to use vacuum pouches
Where did you hide the battery box from the mini lights ?
Very nice thank you.
This is gorgeous and I made my own inspired by yours. Thank you for the clear instructions, supply list, etc.
Such a nice post, thanks for sharing this with us.
Awesome!
These citrus garlands are just lovely!