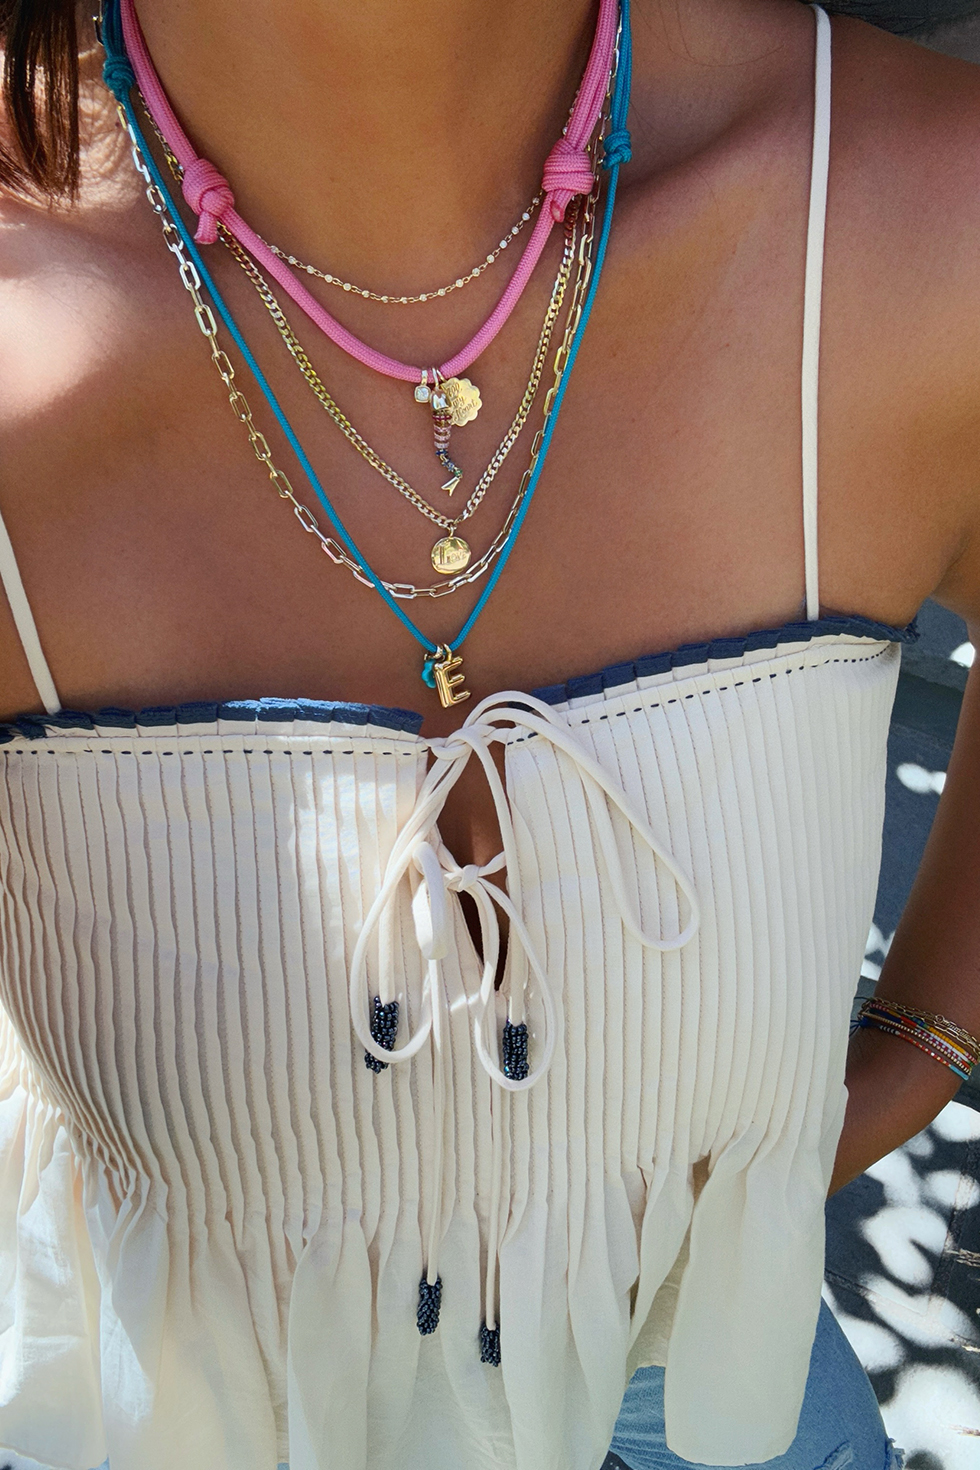
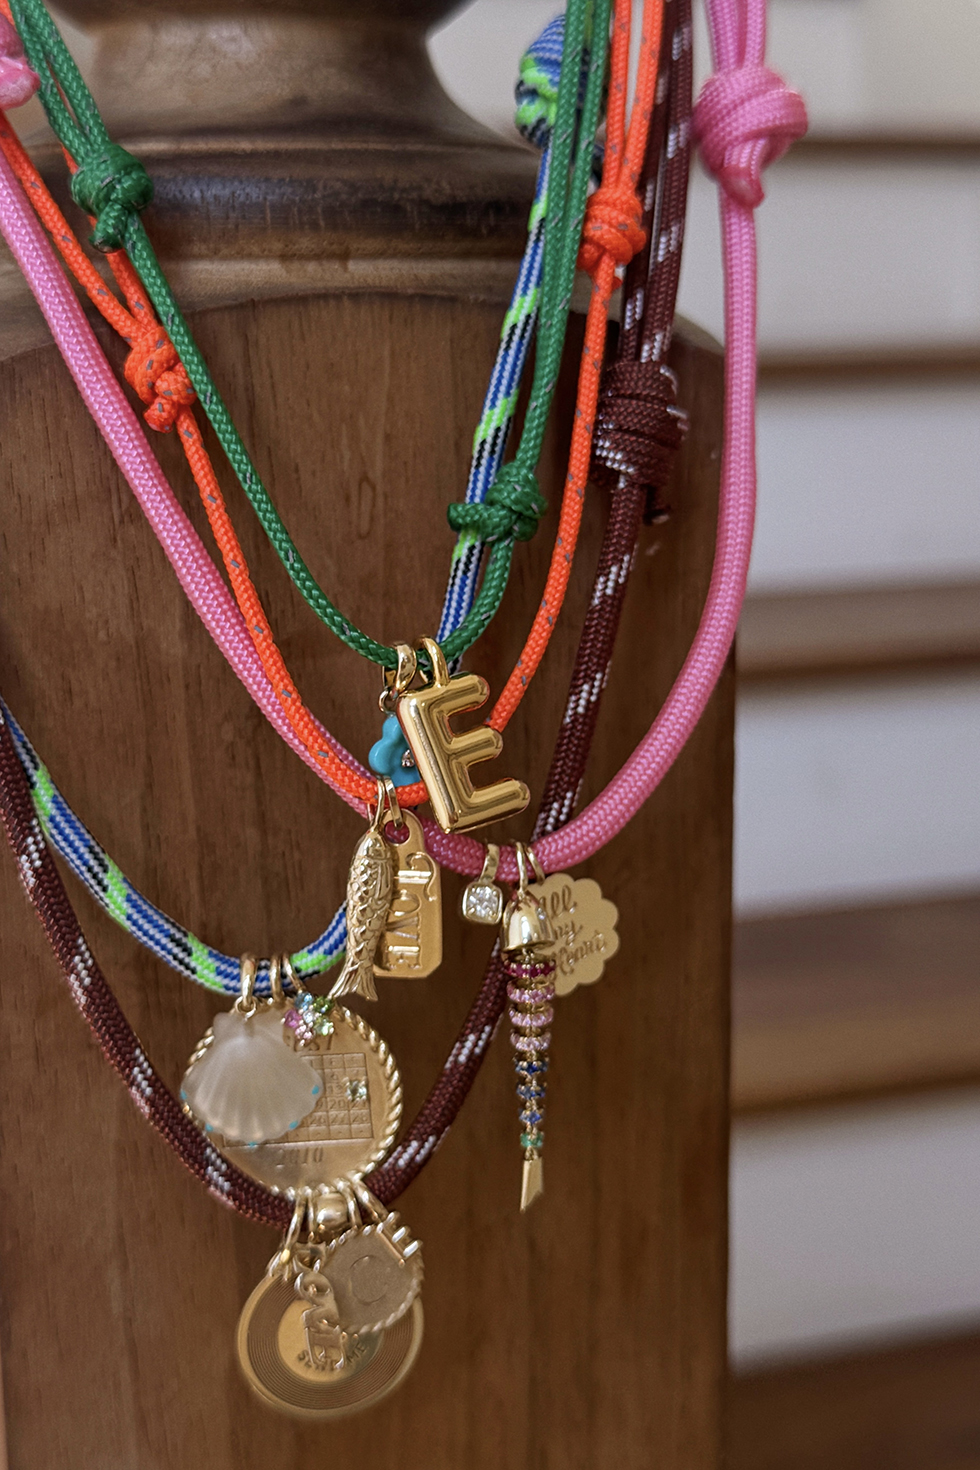
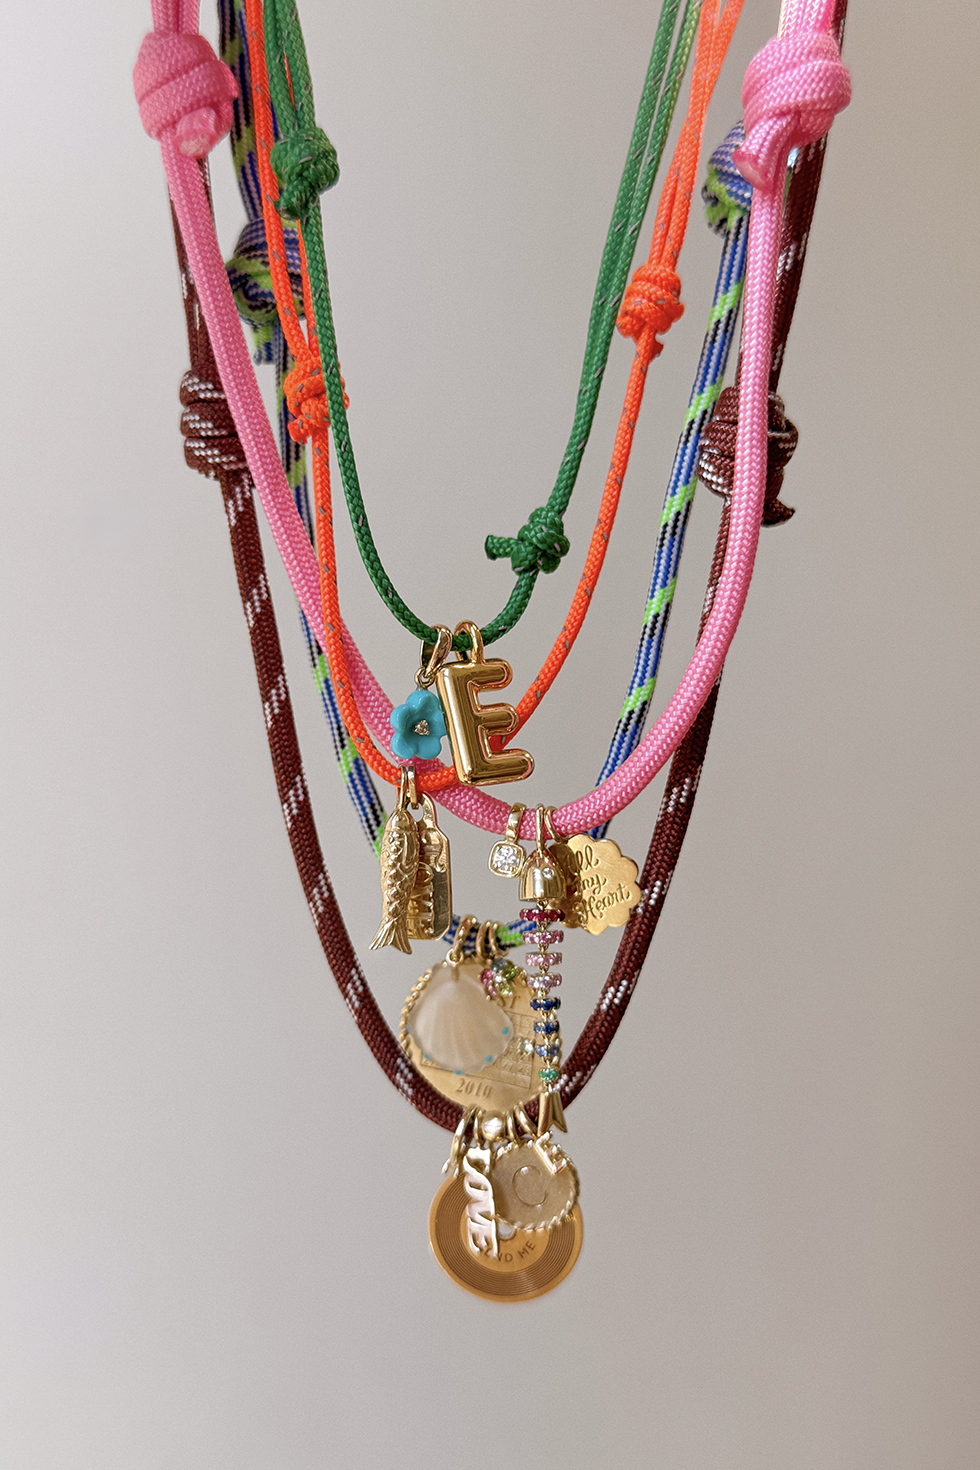
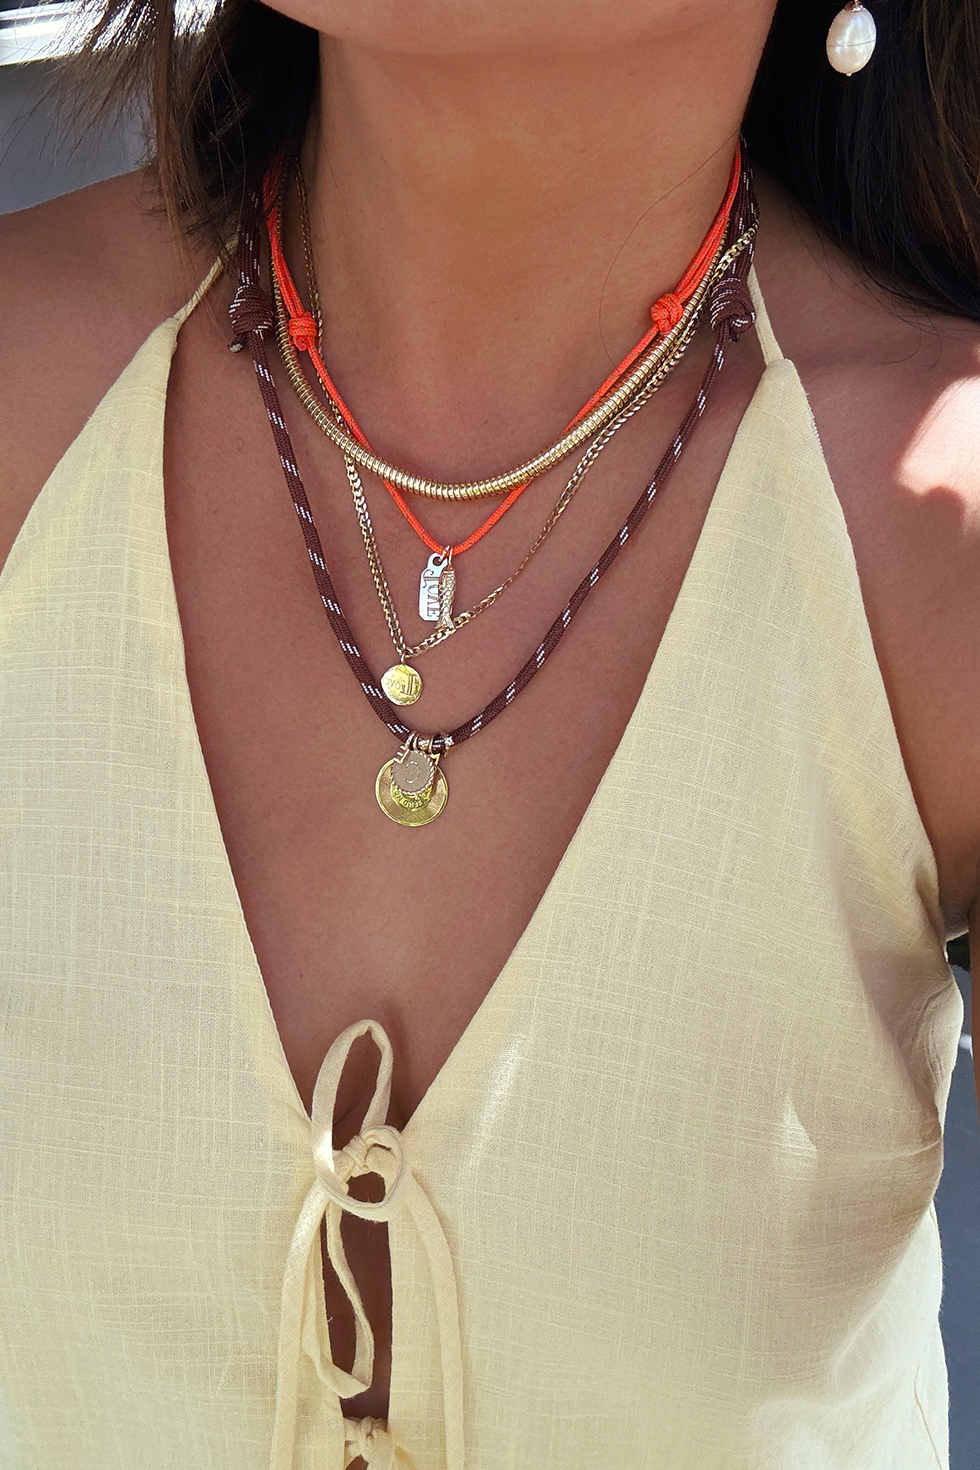
After the overwhelming love we received for last year's DIY collaboration, Ariel (of Ariel Gordon Jewelry) and I thought it was a no-brainer to revisit the project that brought together our shared love of the ocean, crafting, and boldly vibrant accessories. For 2025, we’re thrilled to introduce the second wave of our DIY kits, now all-new colorways. Each of the four kits includes a curated mix of thick and thin rope, freshwater pearl charms, beads, clips, and a lighter for sealing the ends.
Today's tutorial is a go-to favorite: the sliding knot. This adjustable technique is perfect for beginners or anyone in need of a quick refresher. We’ve had the best time dreaming up this next chapter — and we hope it inspires you to make something beautiful with your own two hands. And remember, don’t be afraid to play!
You'll Need:
- AGJ x HWTF Rope Kits
- scissors
- lighter (included in kit)

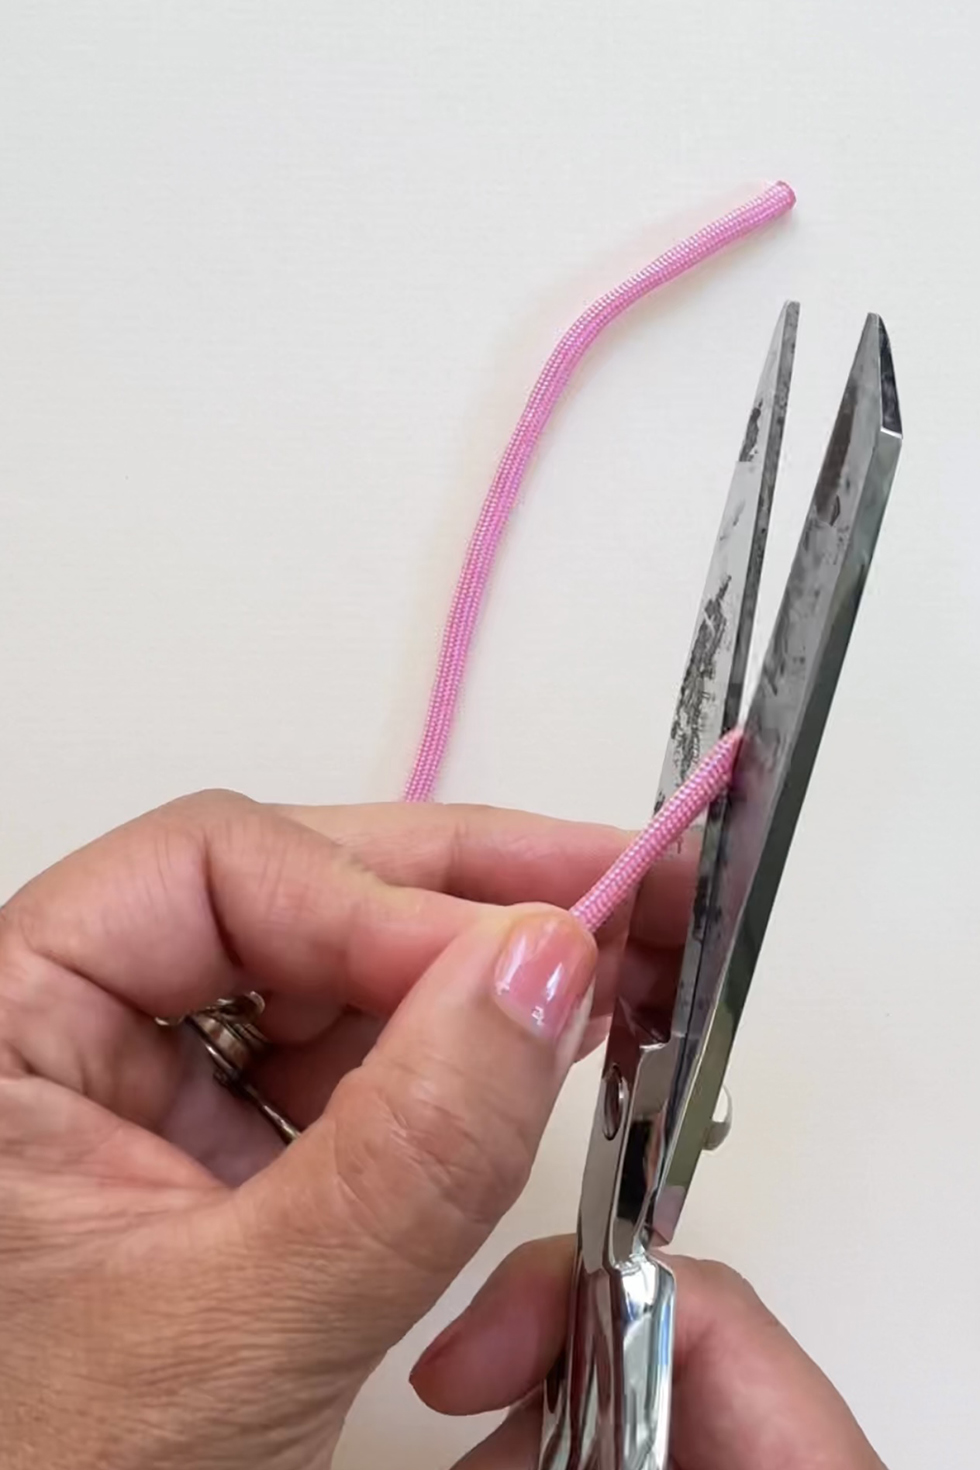

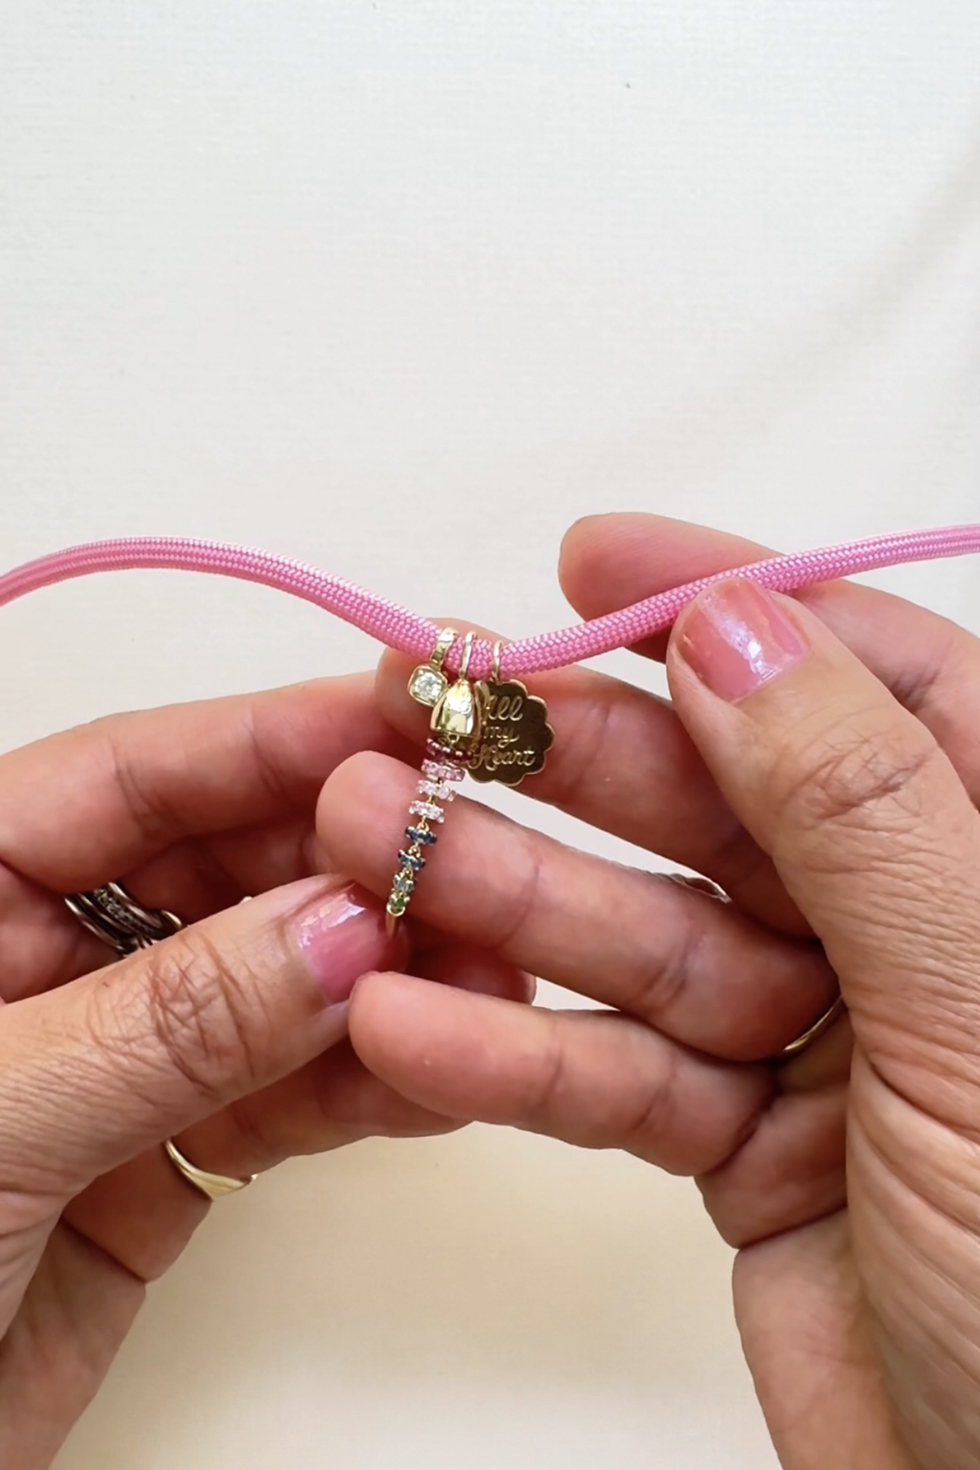
Start by cutting approximately 36" of rope. Cut the end at an angle if you are looking to add charms onto the necklace. Take a lighter and carefully burn the end for 2-3 seconds.
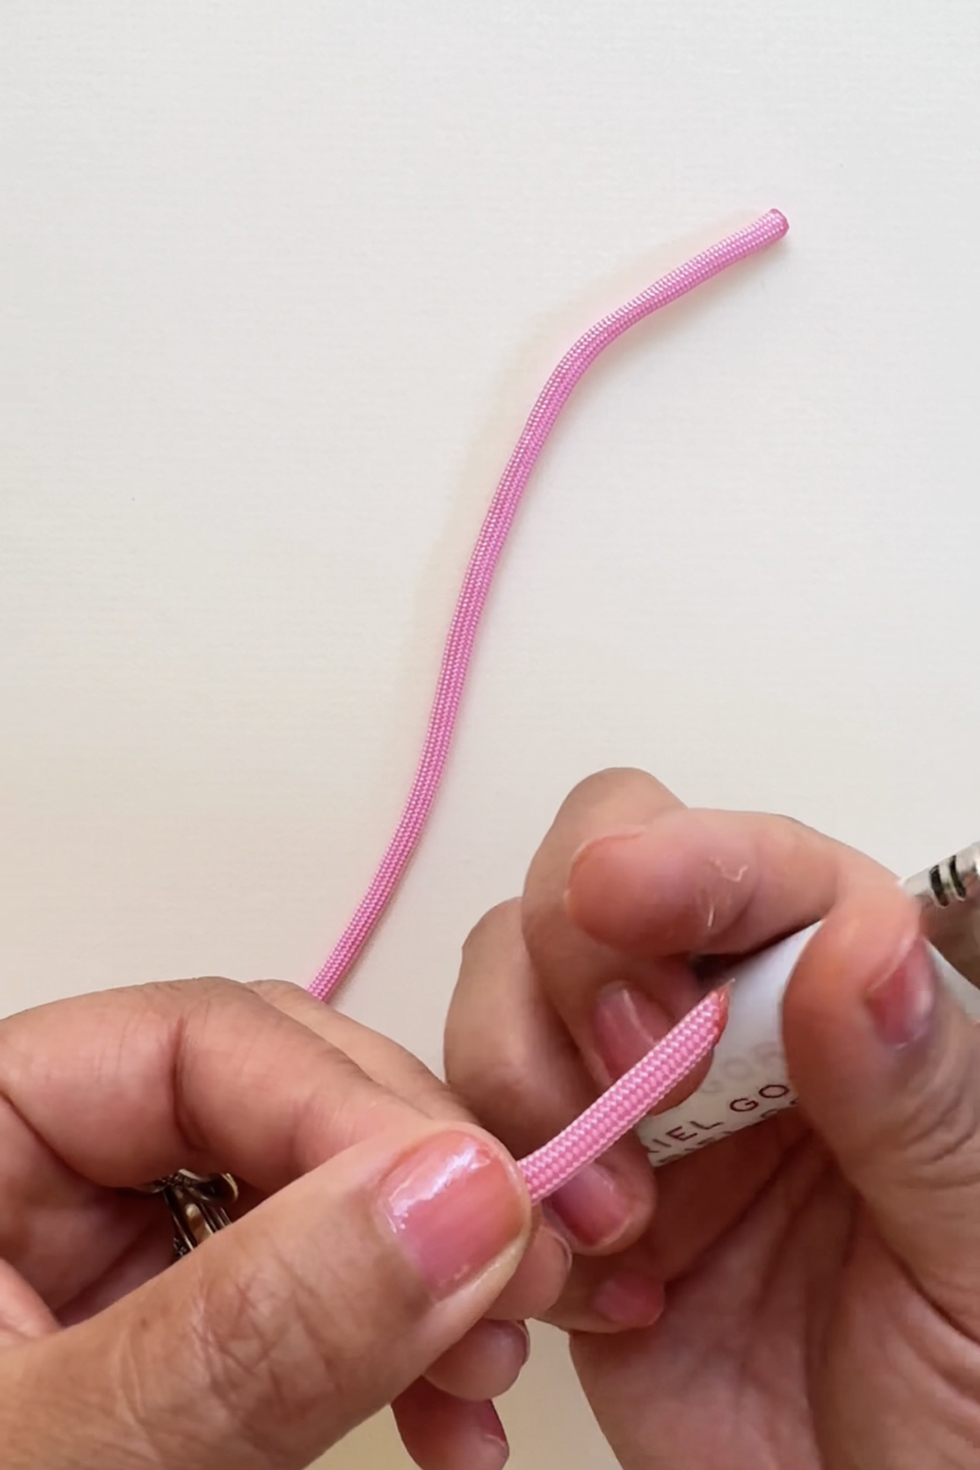

This is so the rope doesn't fray and so that you can create a sharp tip. Add charms.

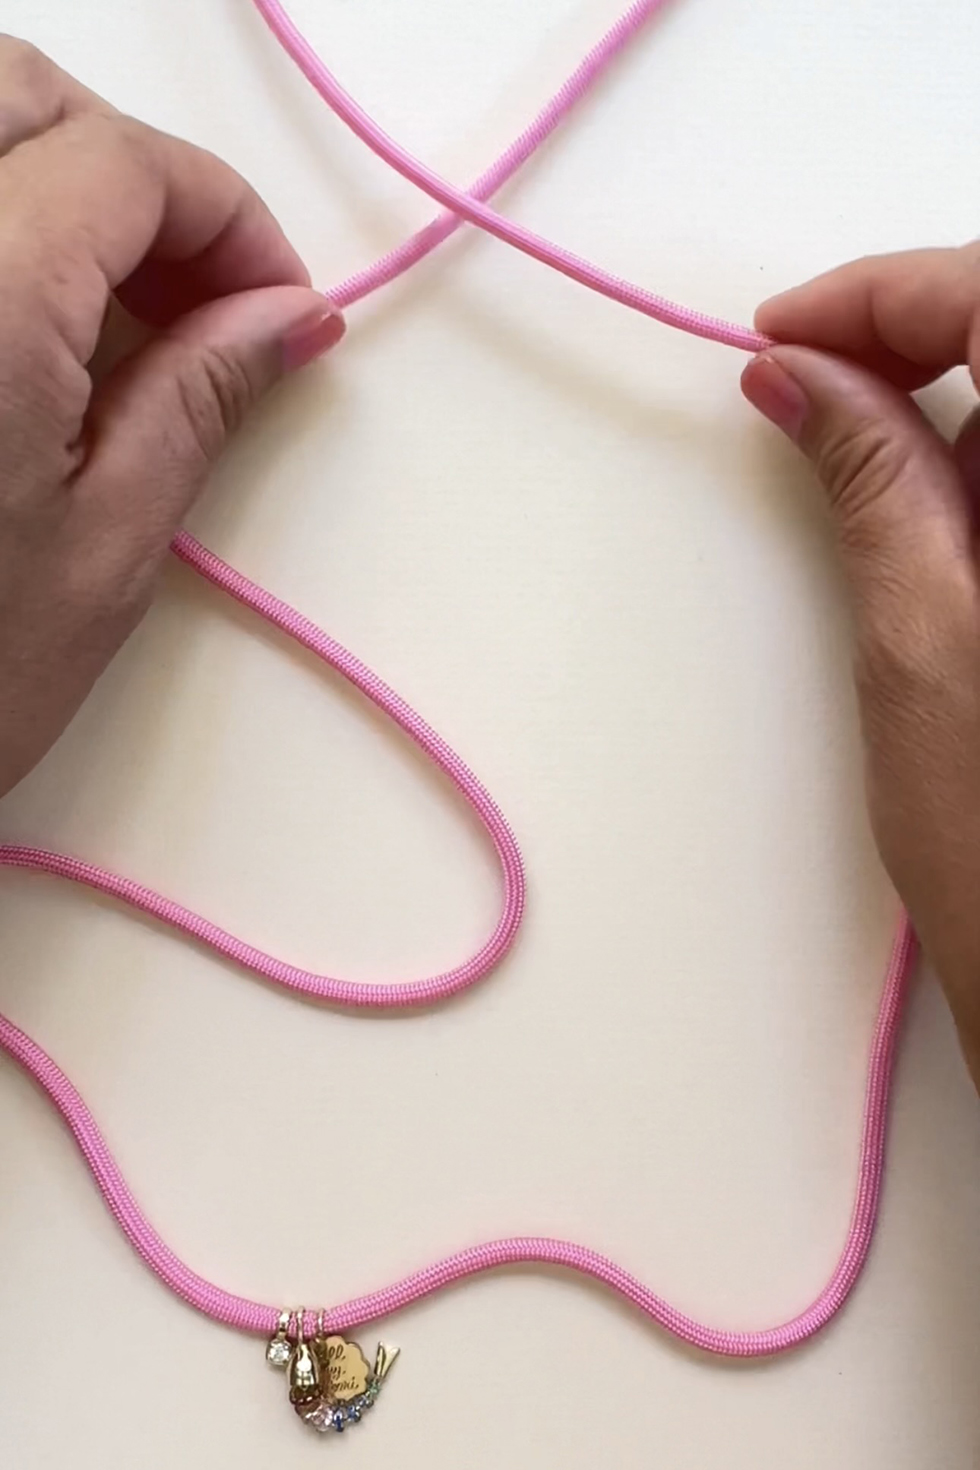

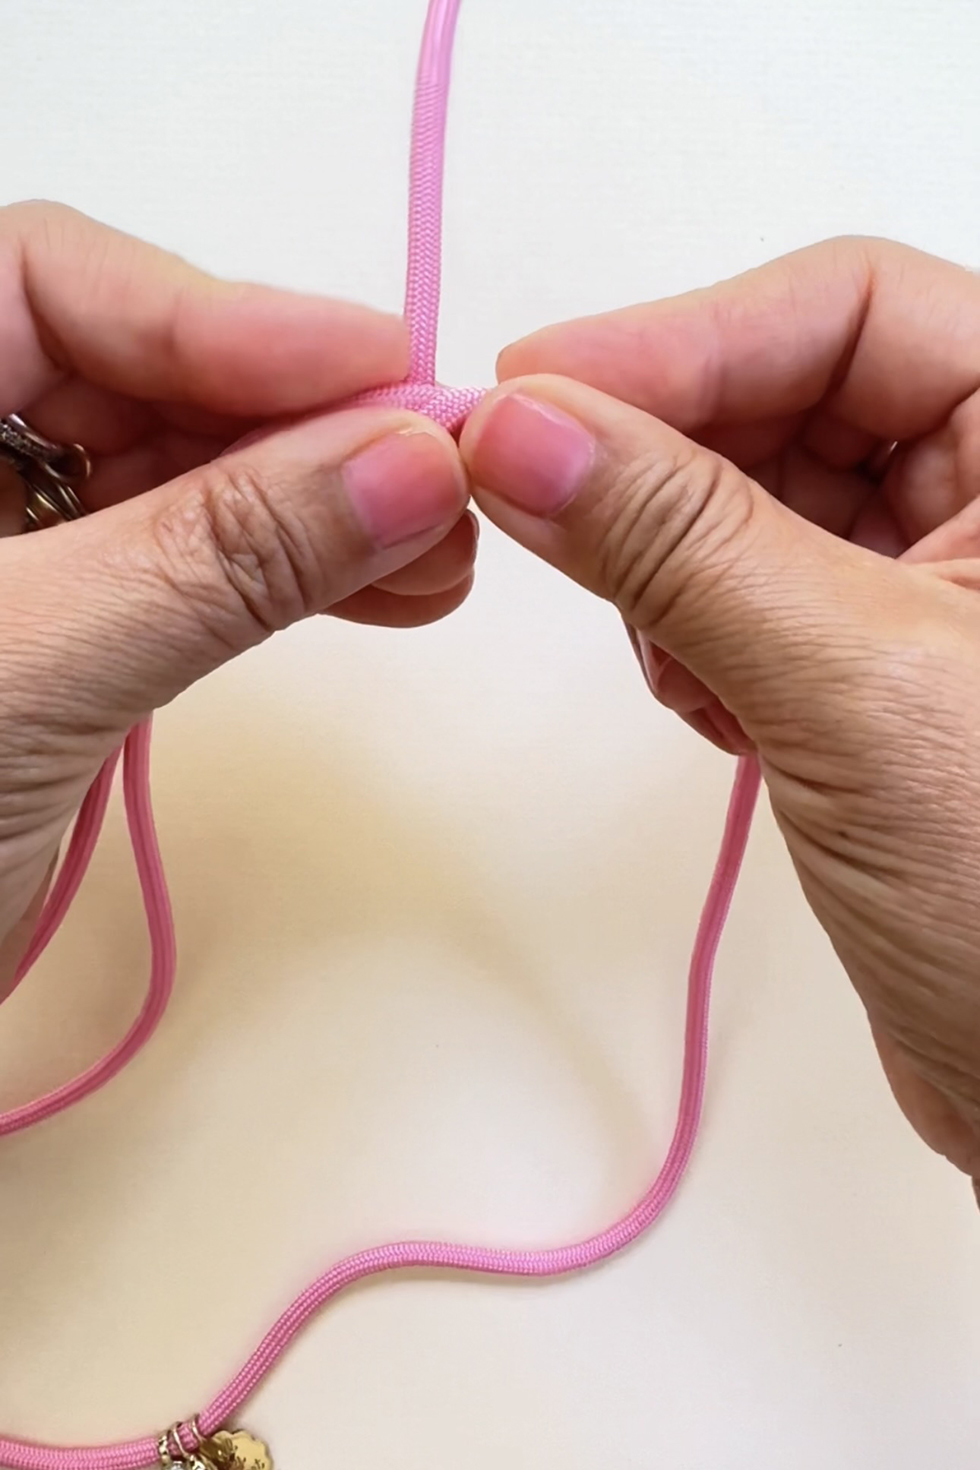
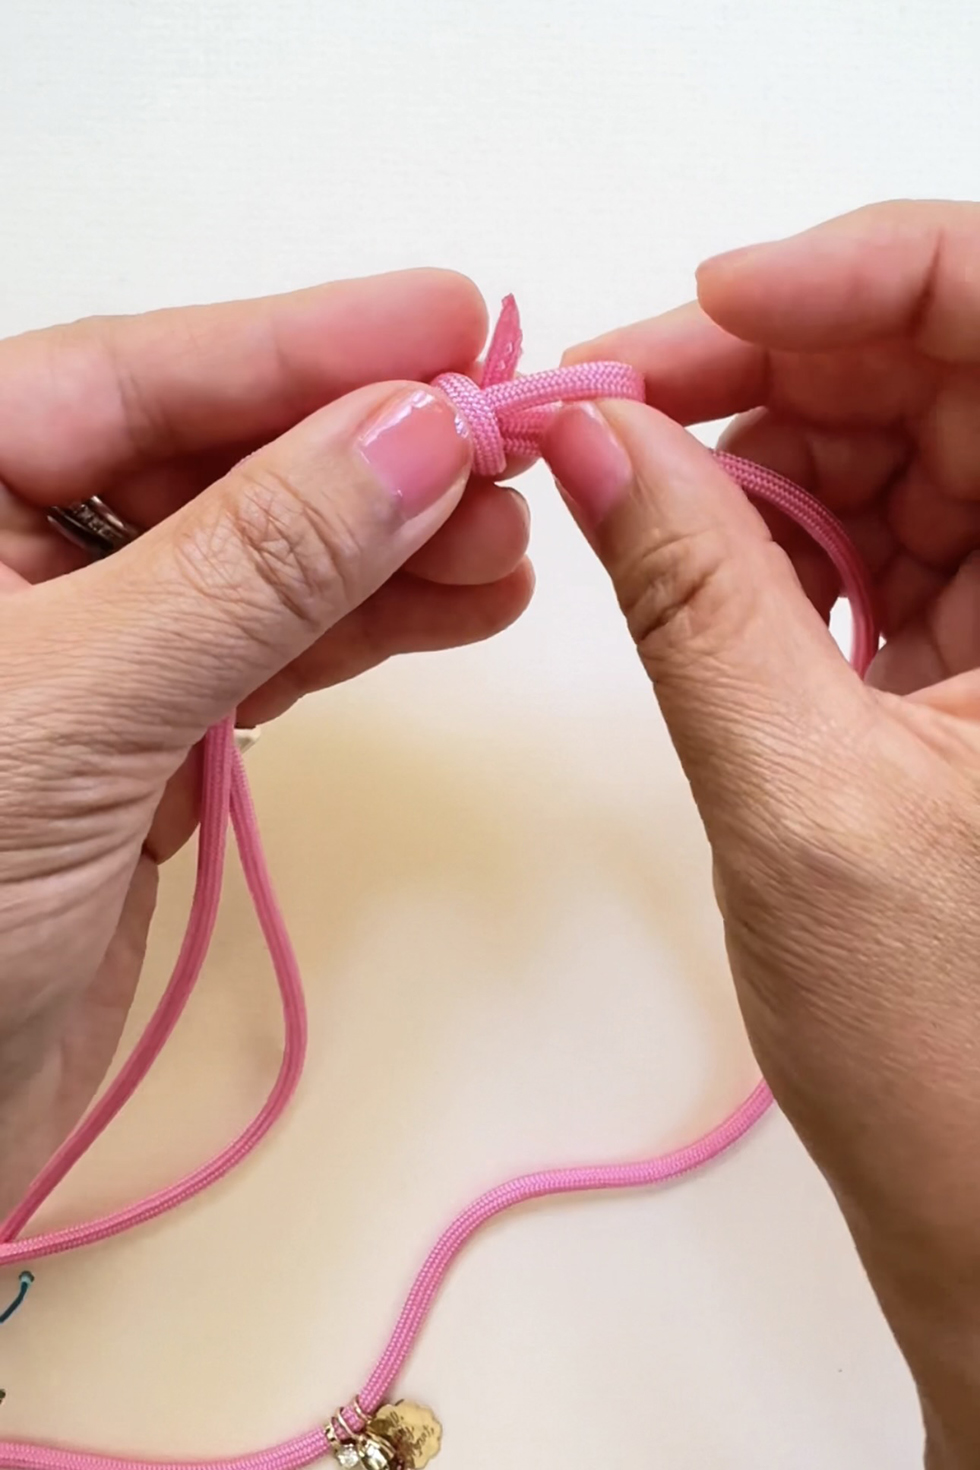
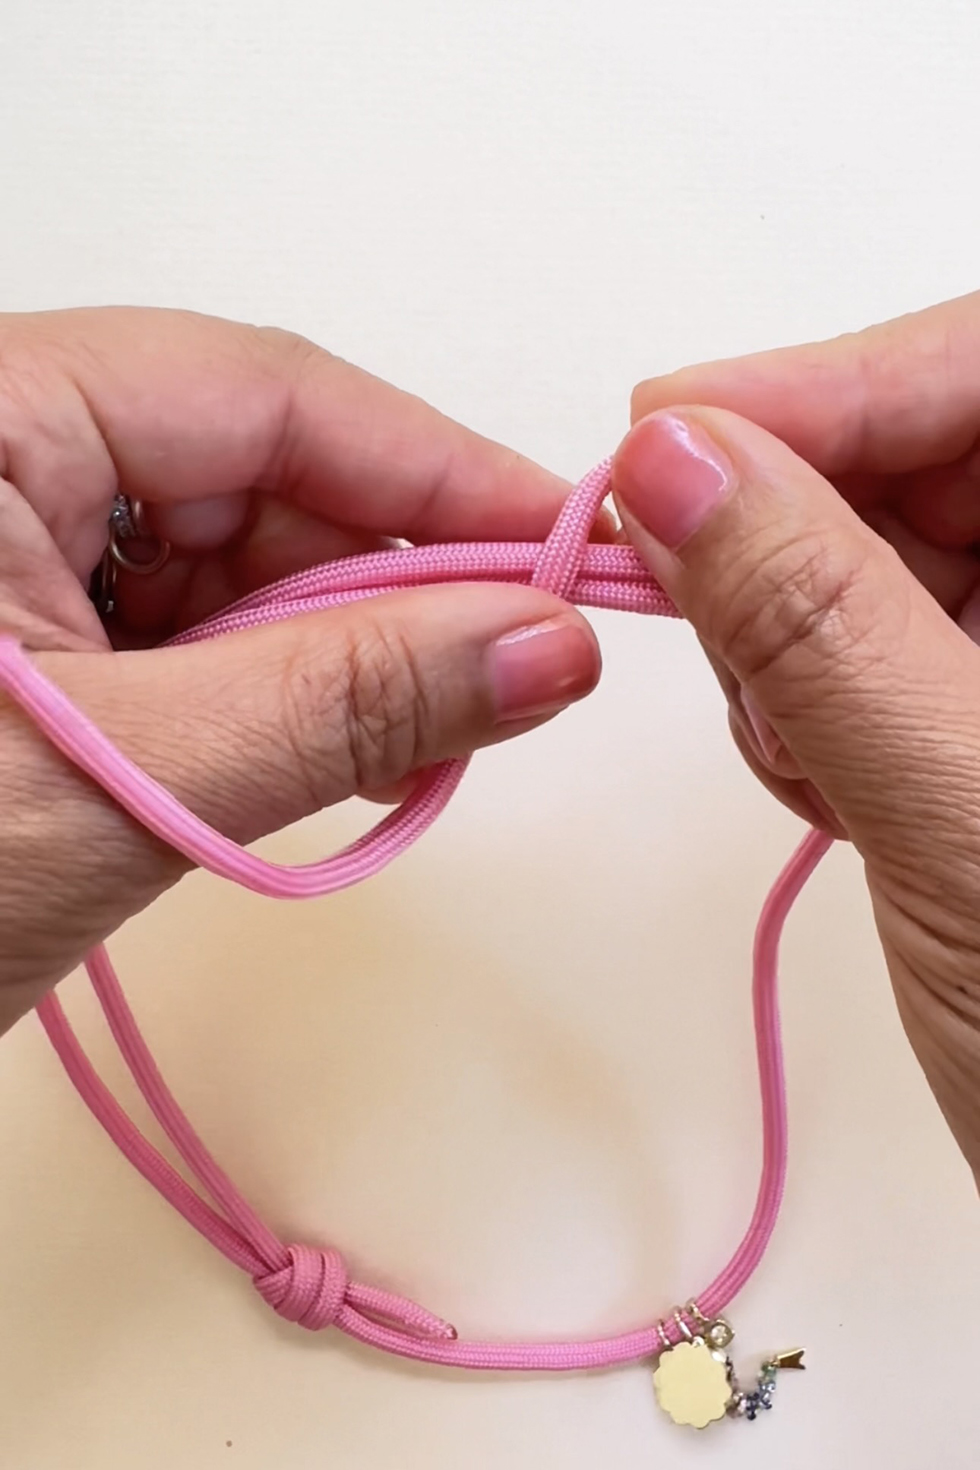
Overlap the rope ends with the left rope above the right rope.
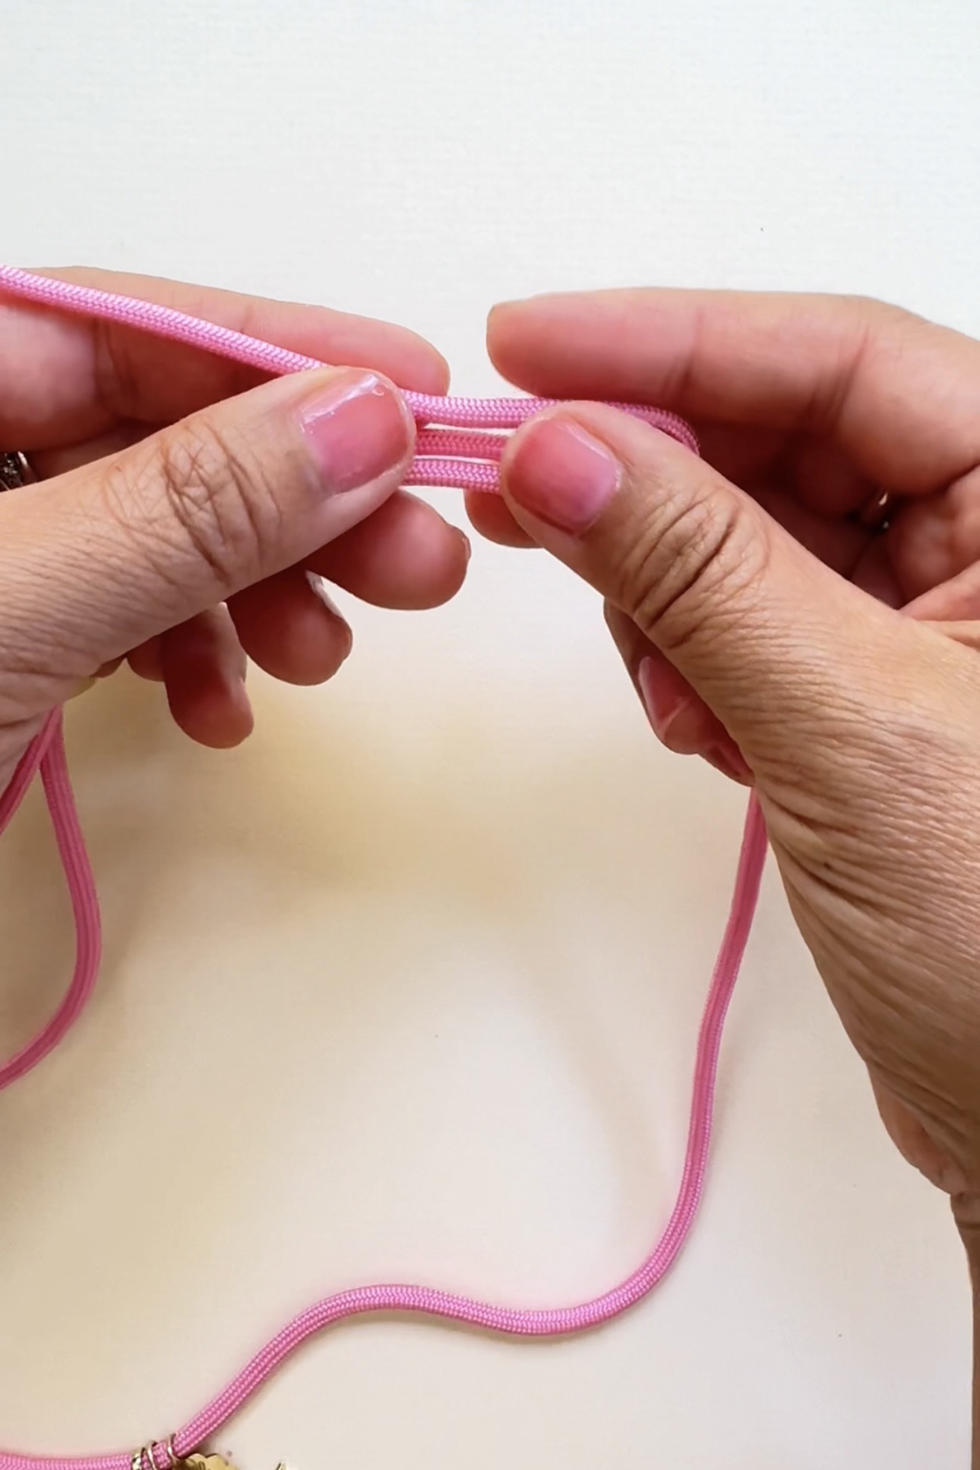
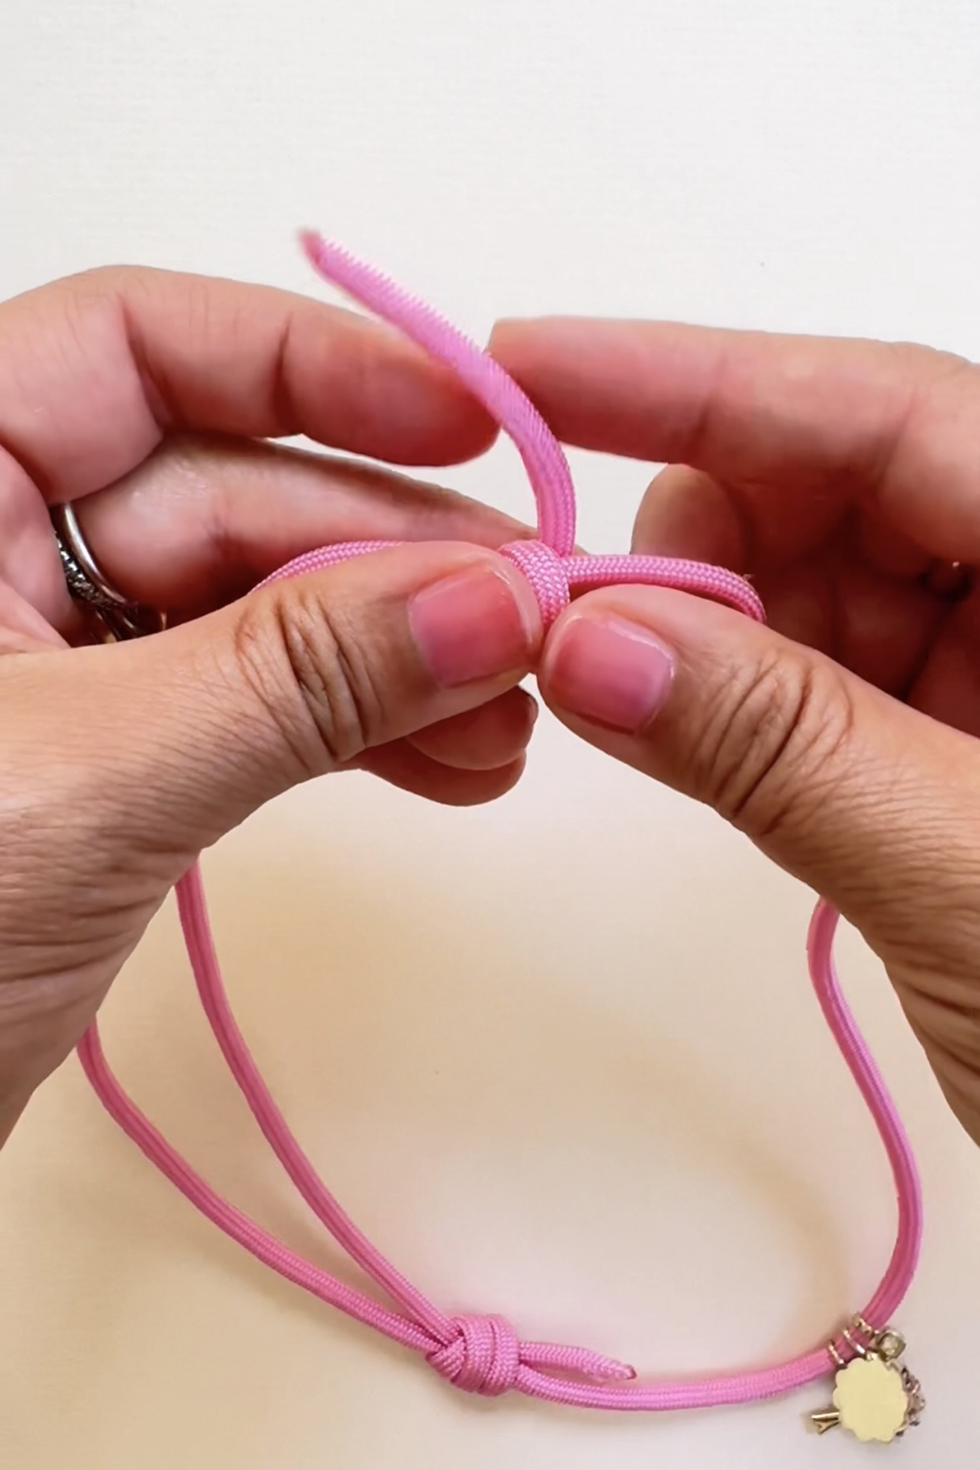
Fold 3" of the left rope (top) back onto itself. Fold the last 2" of rope down over the overlapping ropes. Let's call this the "tail".
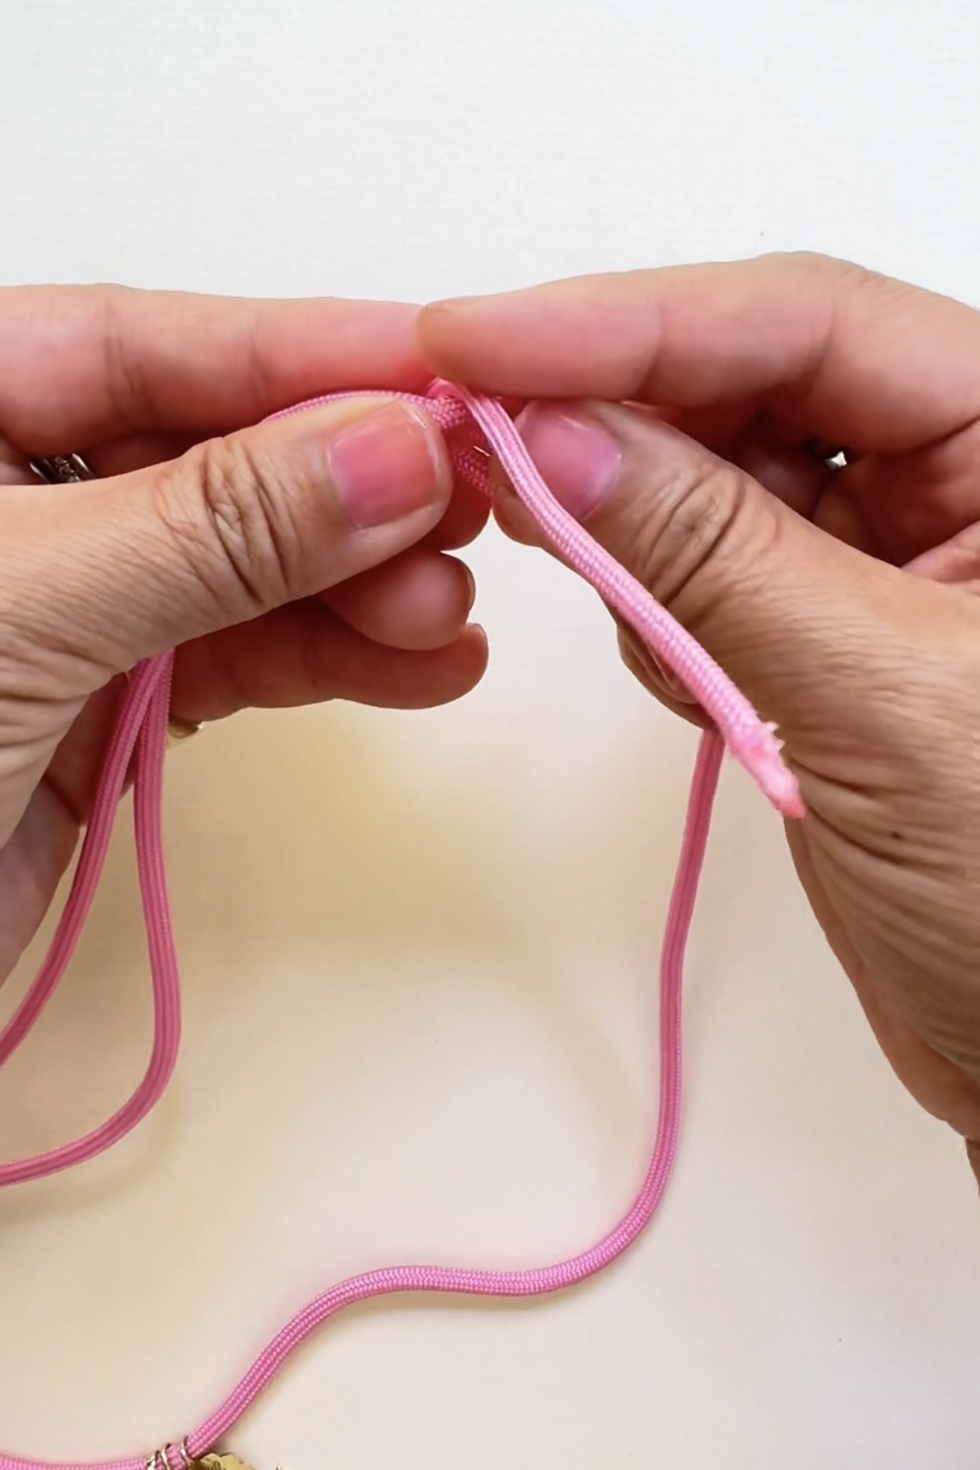
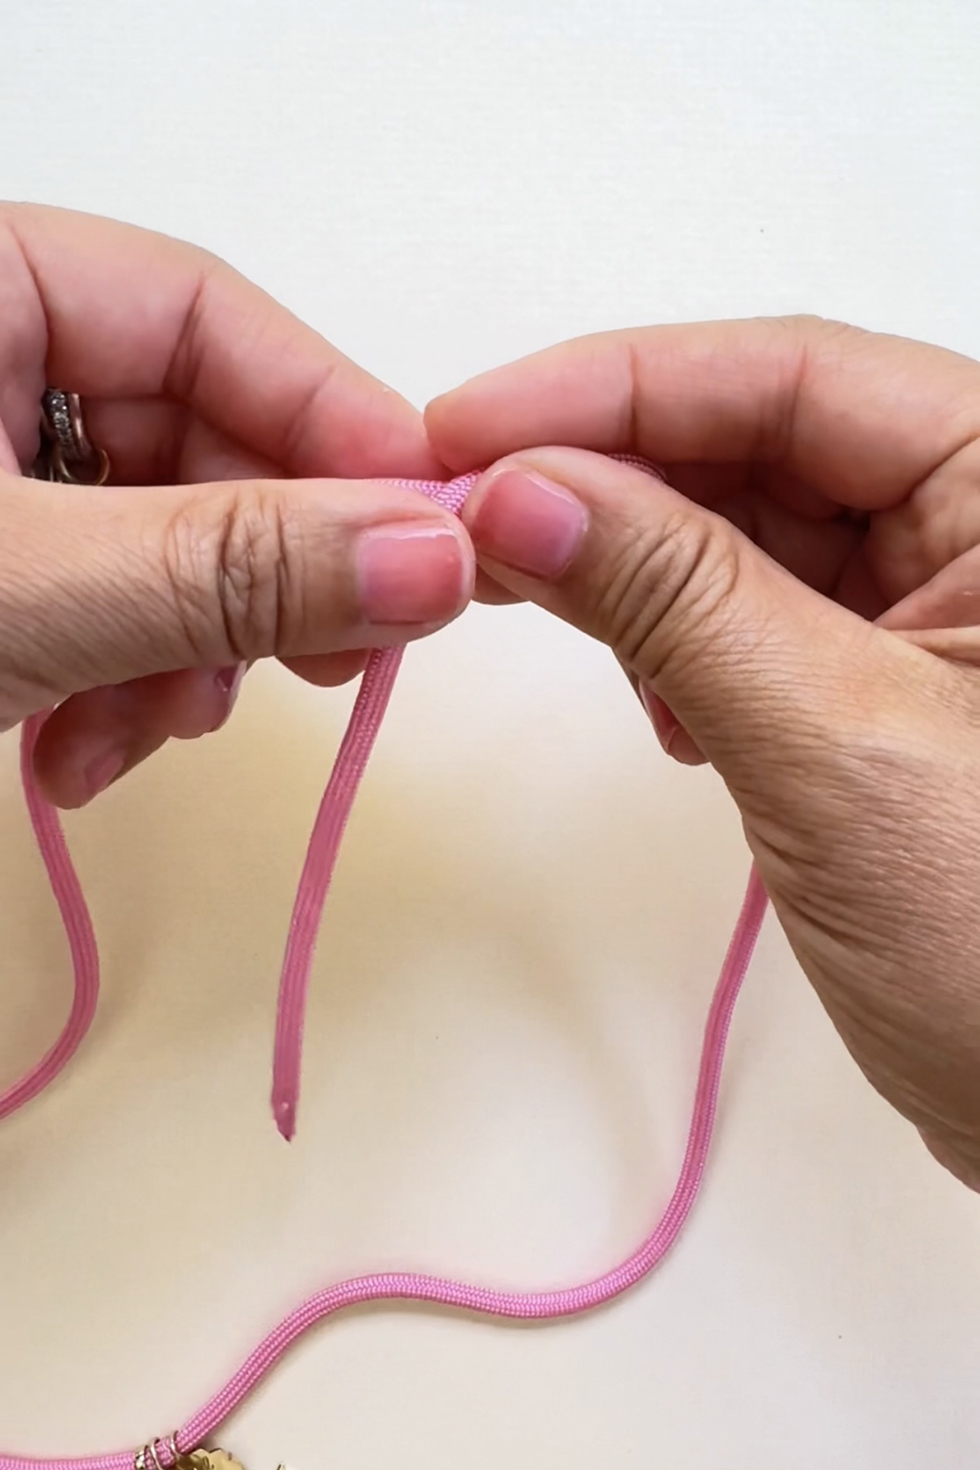
Tightly coil the tail around the ropes.
You can do one full rotation or two. I like to do one for bracelets and anklets, and two for necklaces.
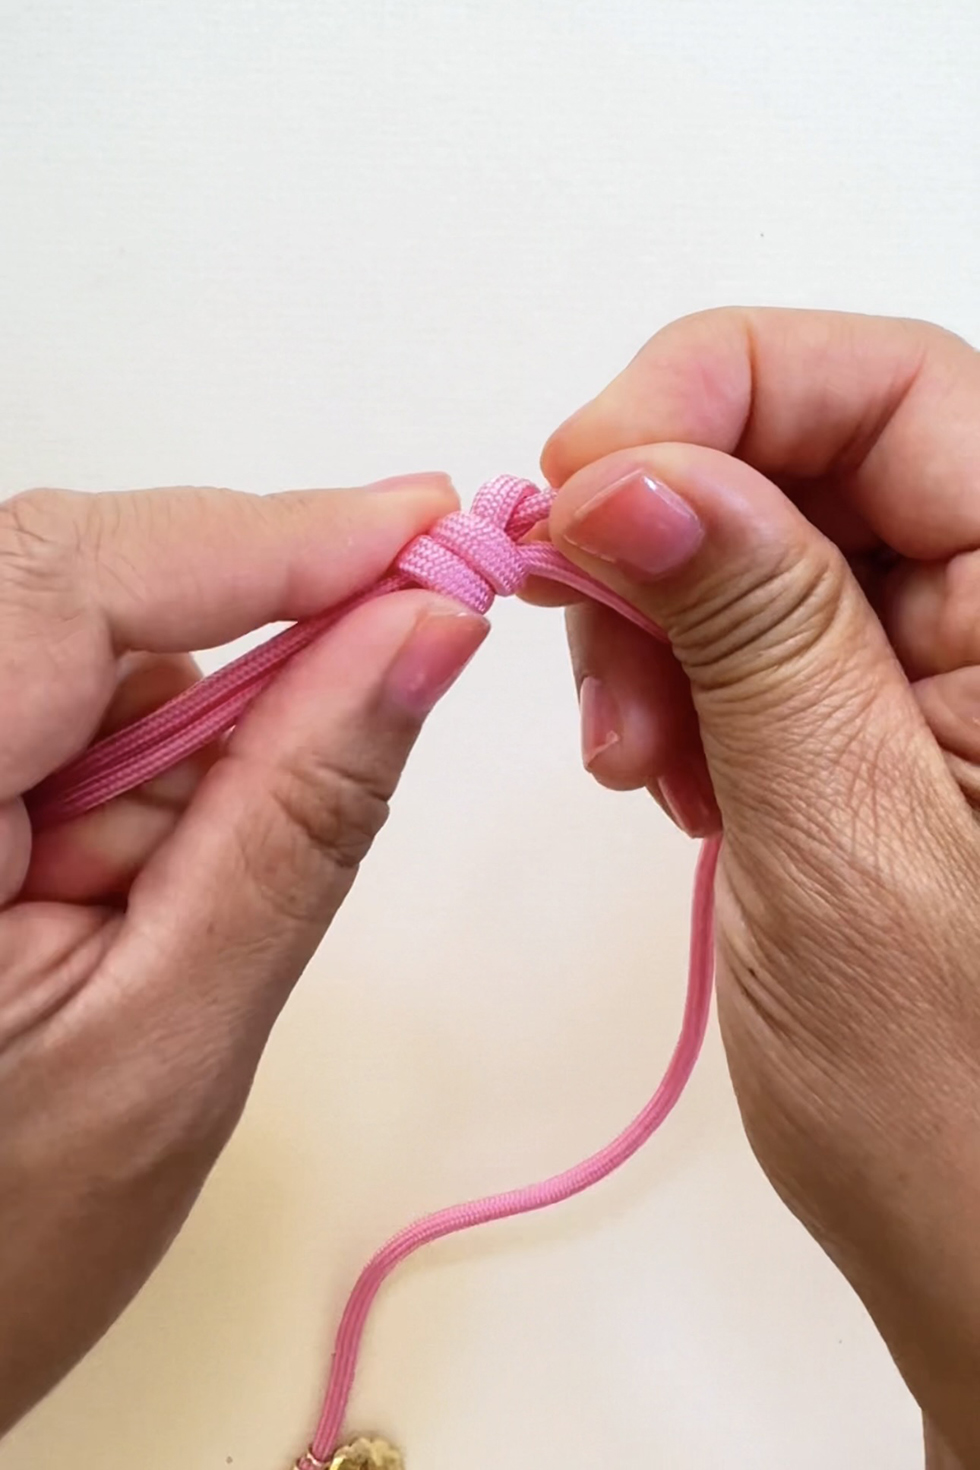
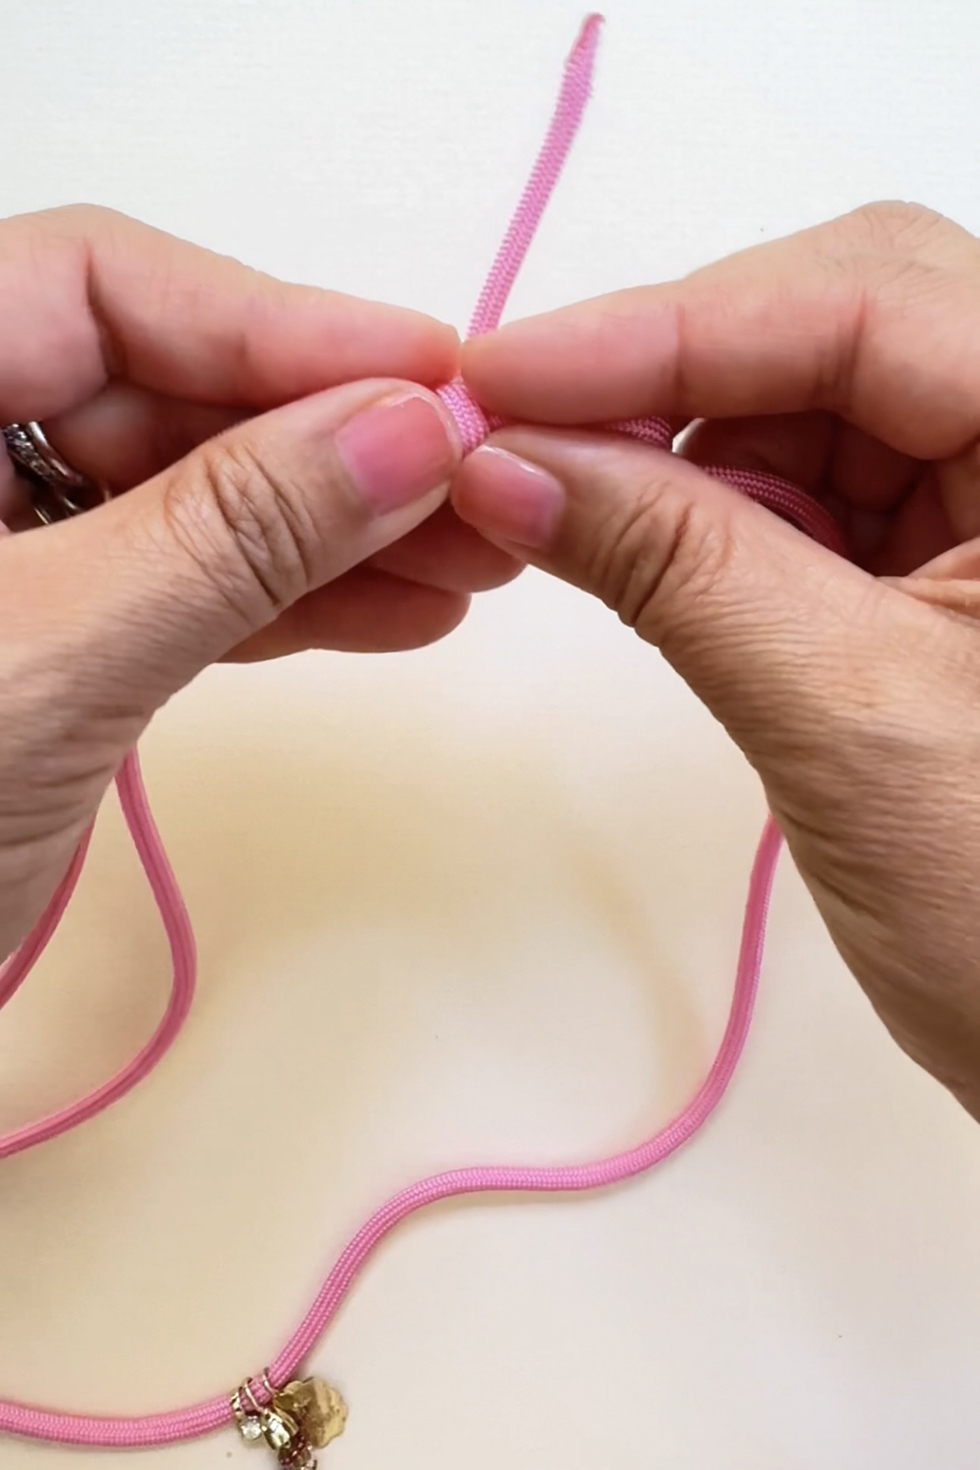
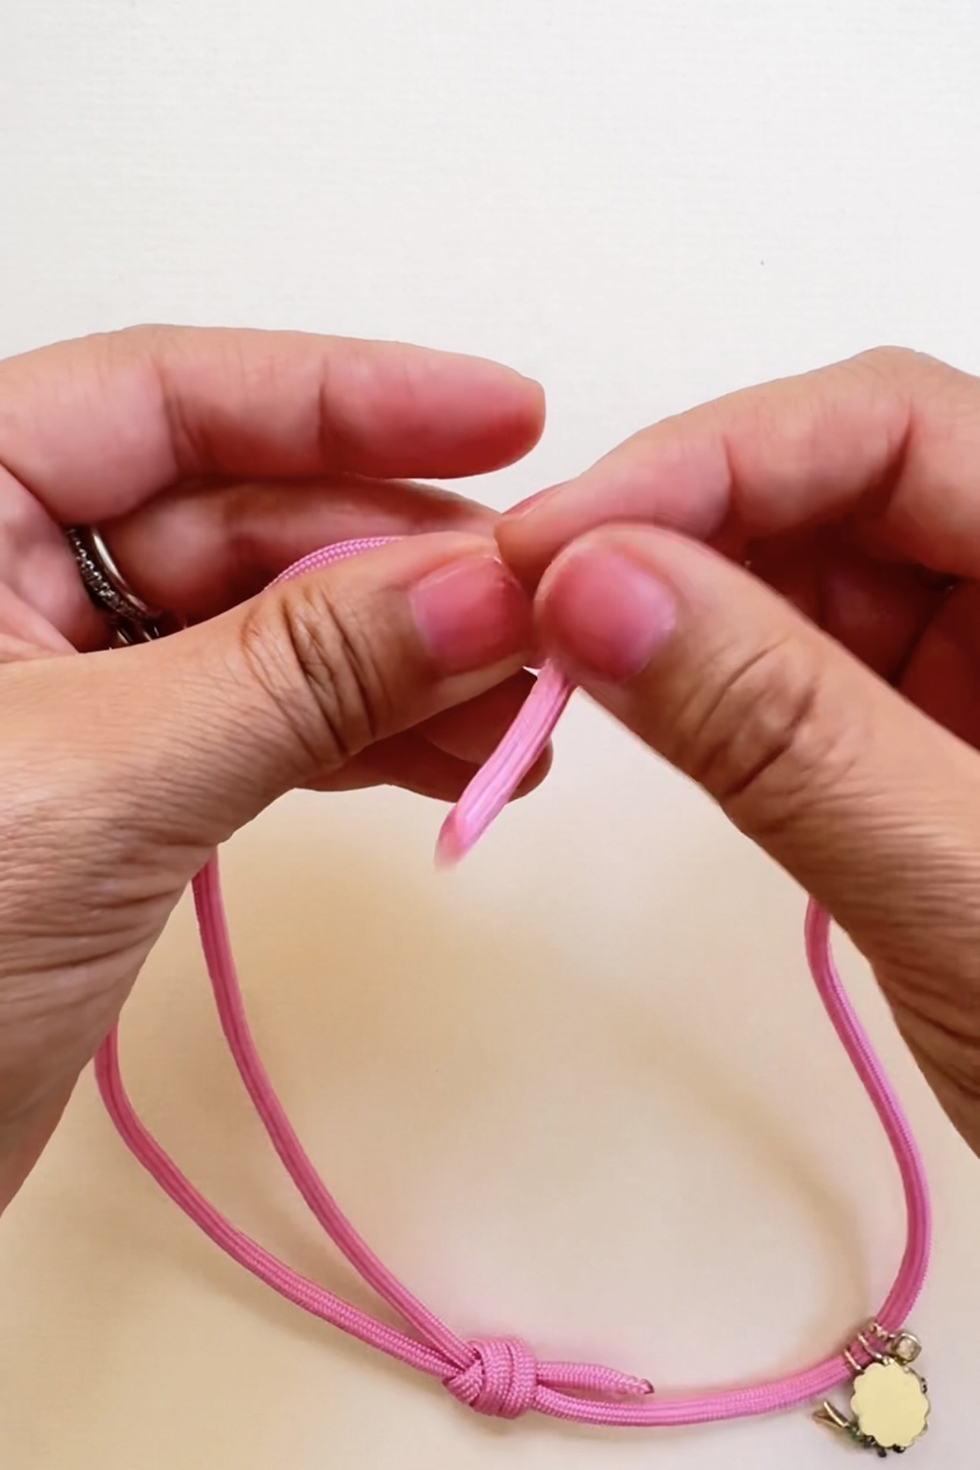
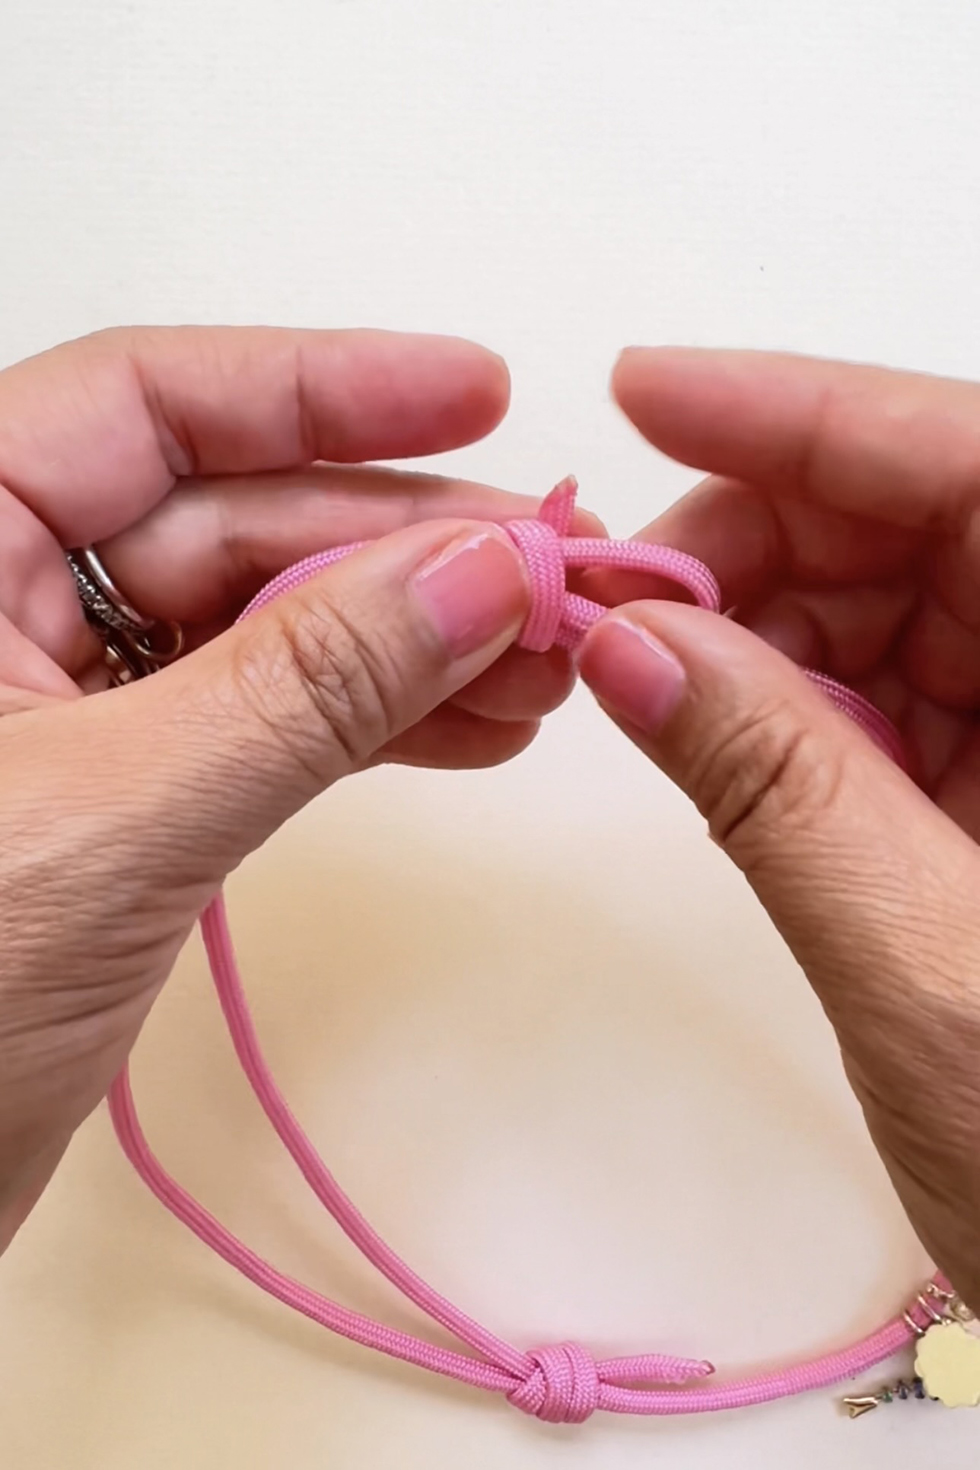
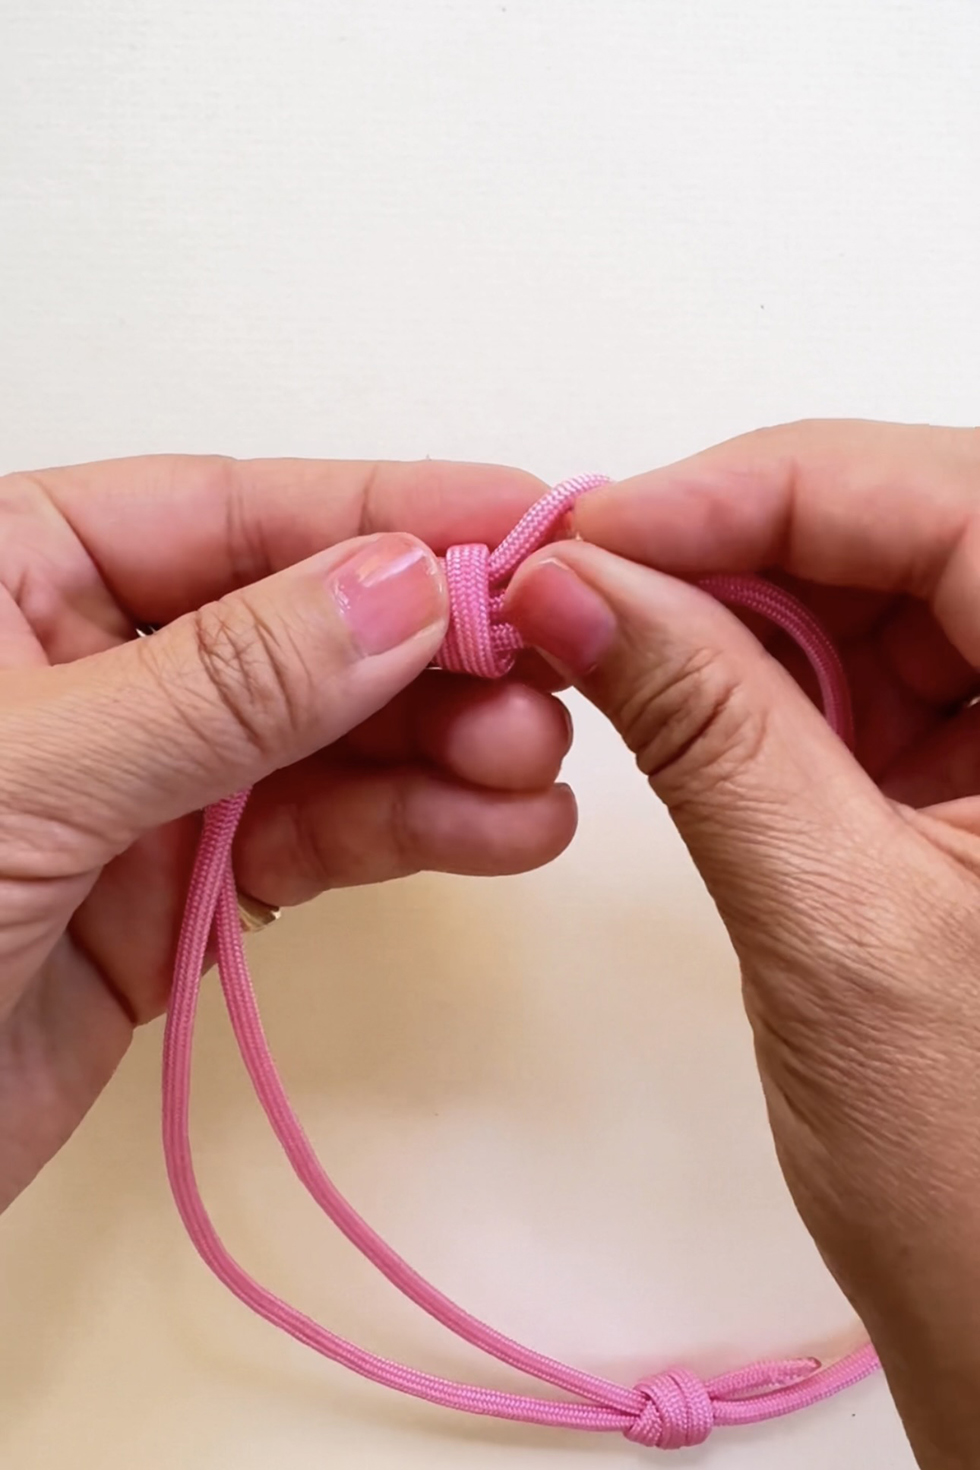
Then take the tail's end and thread it through the open loop from behind. Grab onto the tail end with your right hand and use your left hand to push the knot to the right - towards the tail end. Keep pushing with your left fingers and pulling with your right fingers until the knot is as tight as it can get.
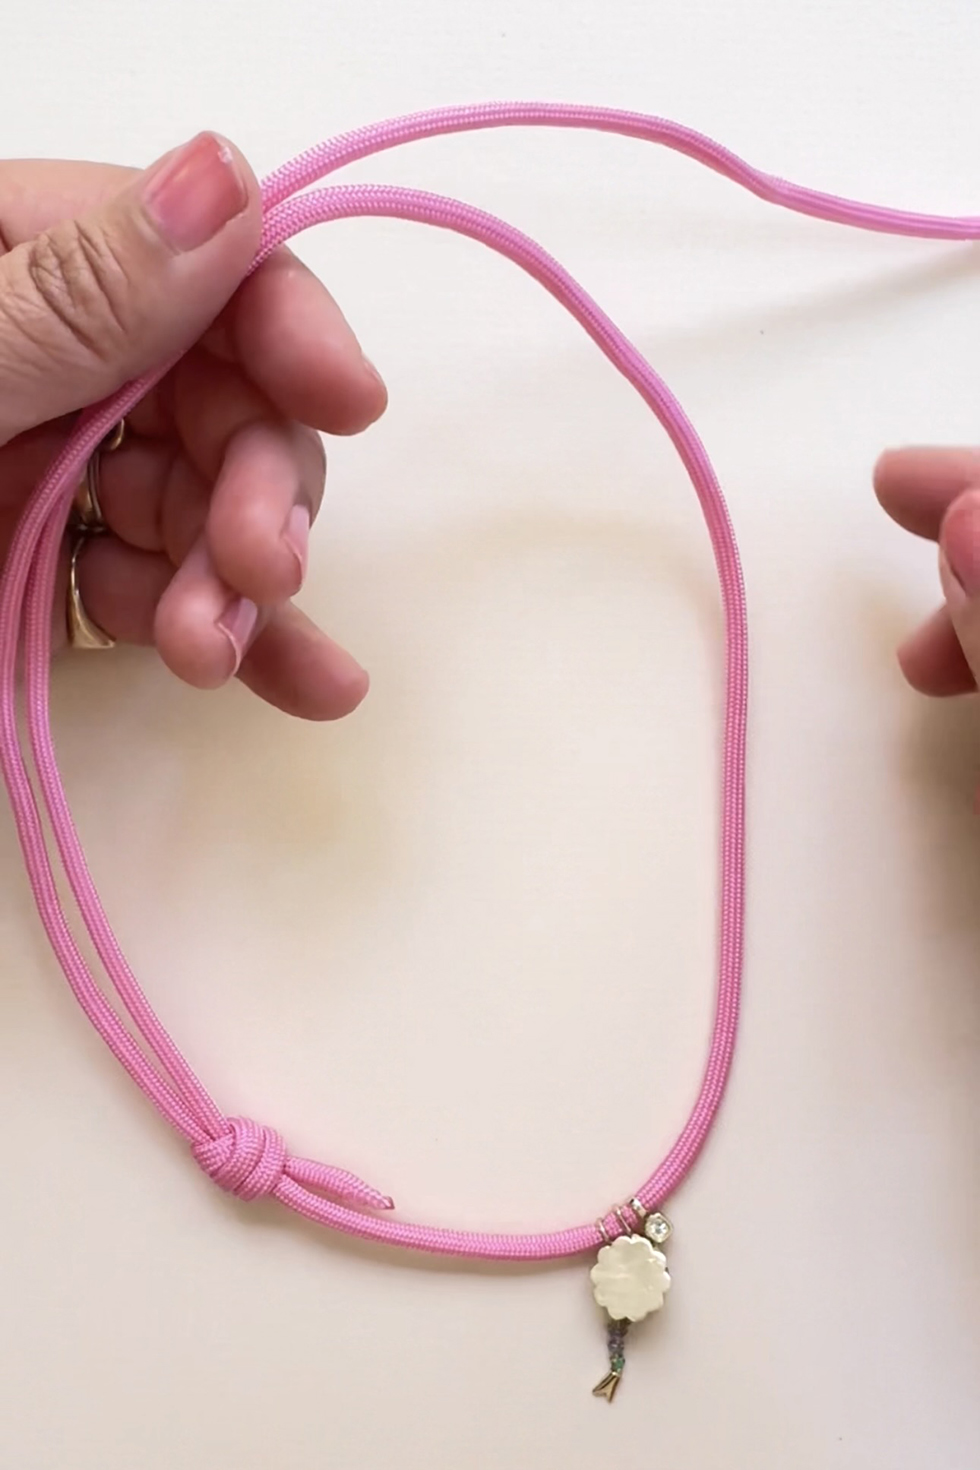
Flip the necklace around so the loose rope is now on top. Repeat the same step as before. Fold 3" of the left rope (top) back onto itself. Fold the last 2" of the tail over the overlapping ropes.
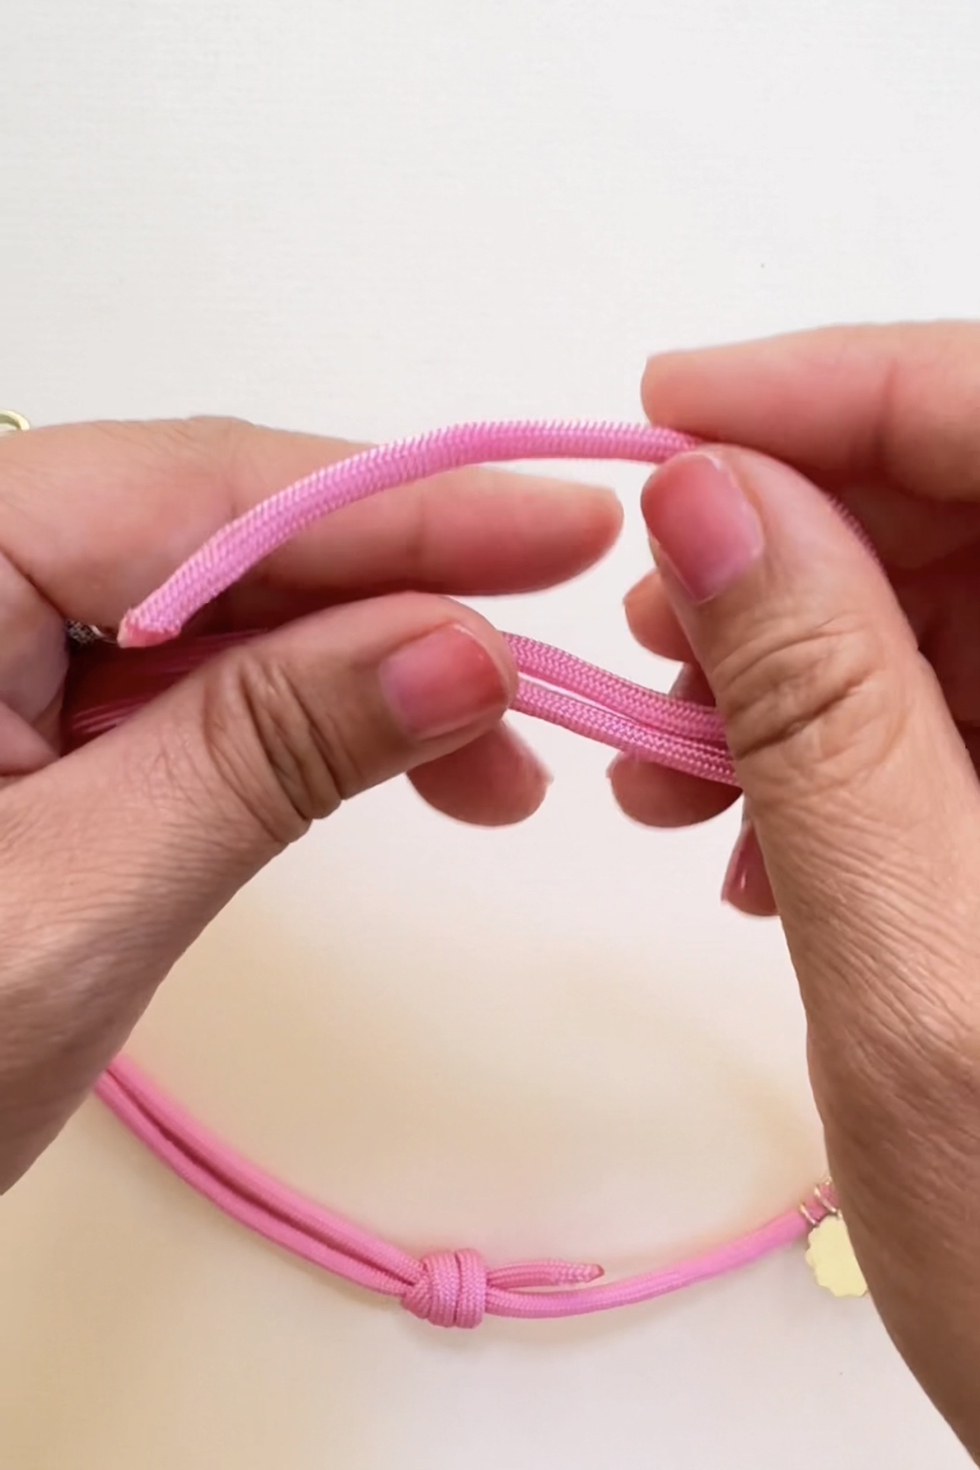
Coil the tail around the ropes.
Make two full rotations.
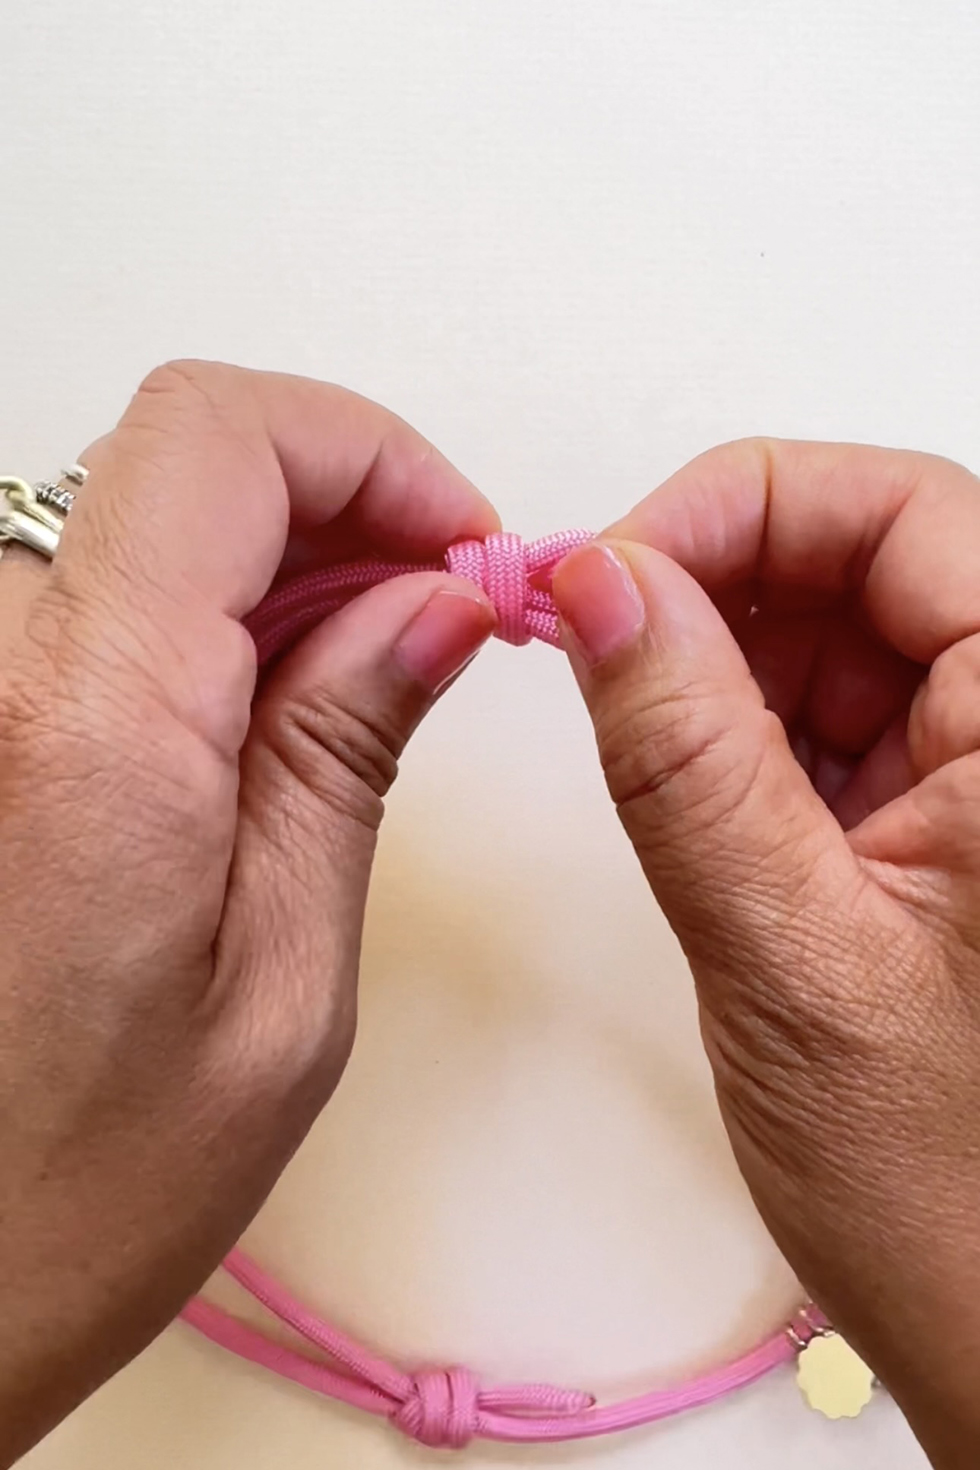
Take the tail's end and thread it through the open loop from behind. Grab onto the tail end with your right hand and use your left hand to push the knot to the right - towards the tail end. Keep pushing with your left fingers and pulling with your right fingers until the knot is as tight as it can get.
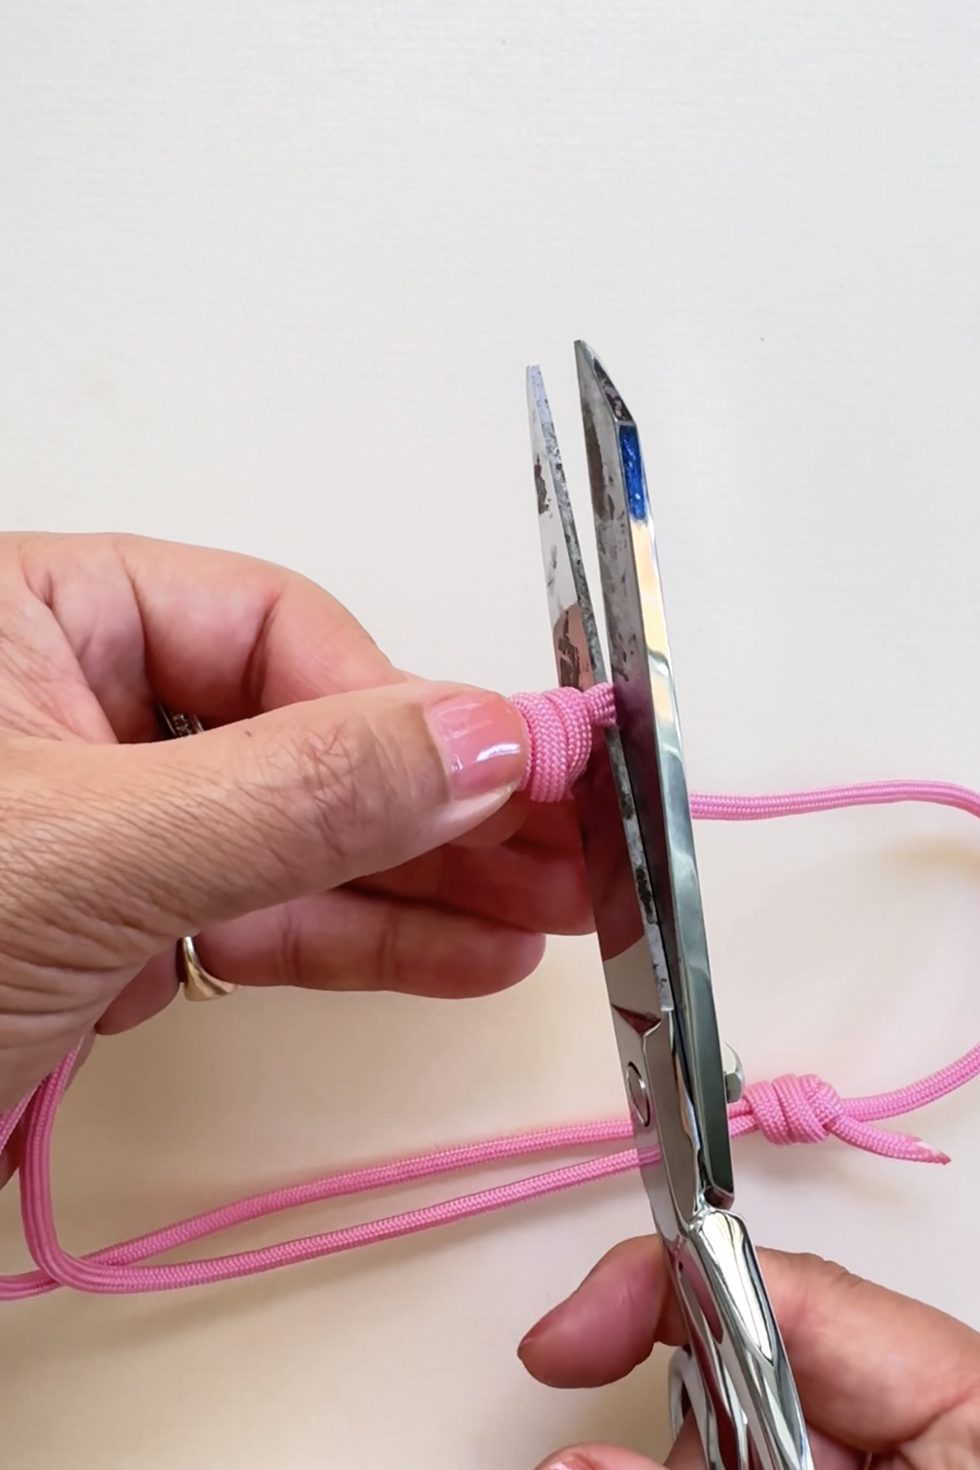

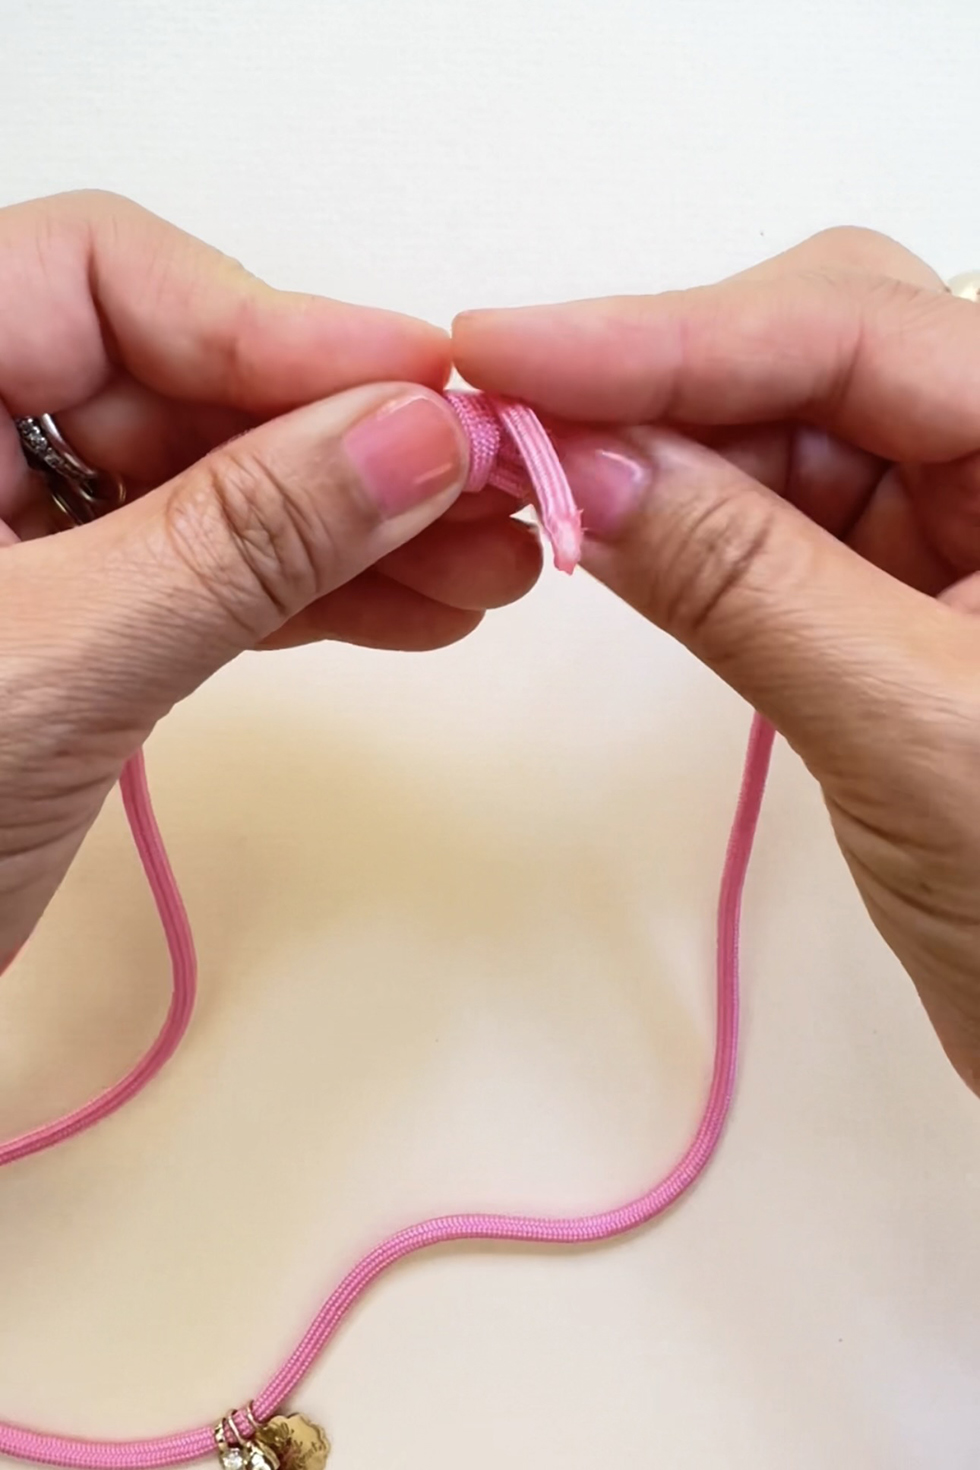
Trim the ends, leaving about 3mm of rope. Using the lighter, burn the ends until you see them melt slightly.
Voila, you've made a sliding knot necklace!!
tutorial by HonestlyWTF, AGJ x HWTF Knotty Rope Kits available here


Loving this refreshed AGJ x HWTF collab! ✨ The new 2025 rope kits are the perfect mix of creativity and coastal charm — can’t wait to make my own sliding knot masterpiece!