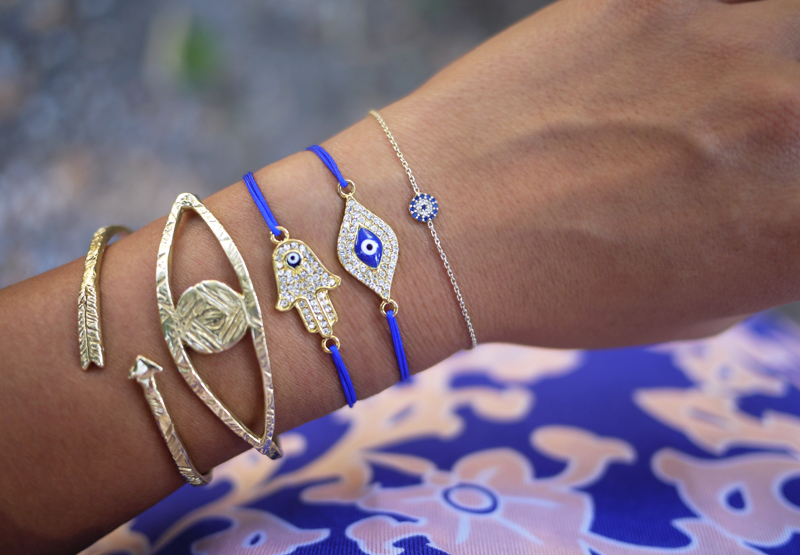
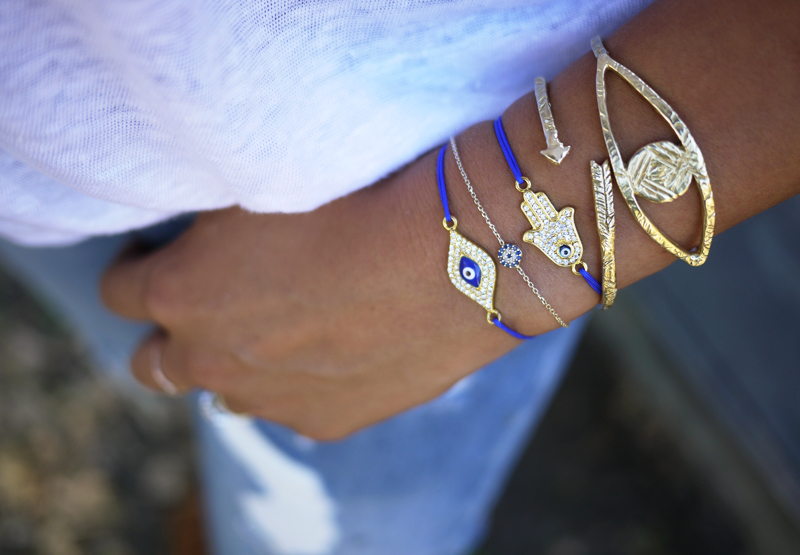
After visiting the Mediterranean twice this past year, I’ve come to embrace the ubiquity that is the evil eye symbol and have since integrated it into the jewelry repertoire. Today I’ll be showing you how to make a sliding knot bracelet with an evil eye charm, which is thought to protect against negative energy and evil powers. And whether you’re superstitious or not, this is a super simple method which can be applied to any connector or charm!
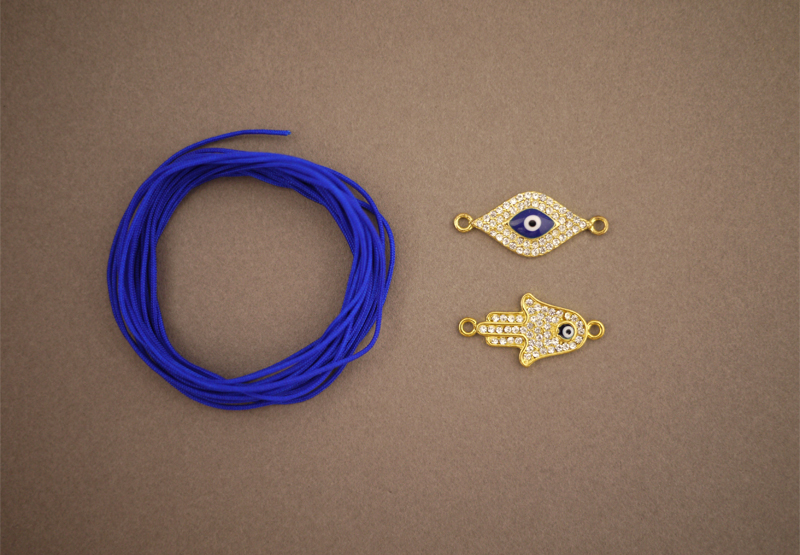
You’ll need:
- evil eye or hamsa charm
- 12 inches of chinese knotting cord
- scissors
- lighter
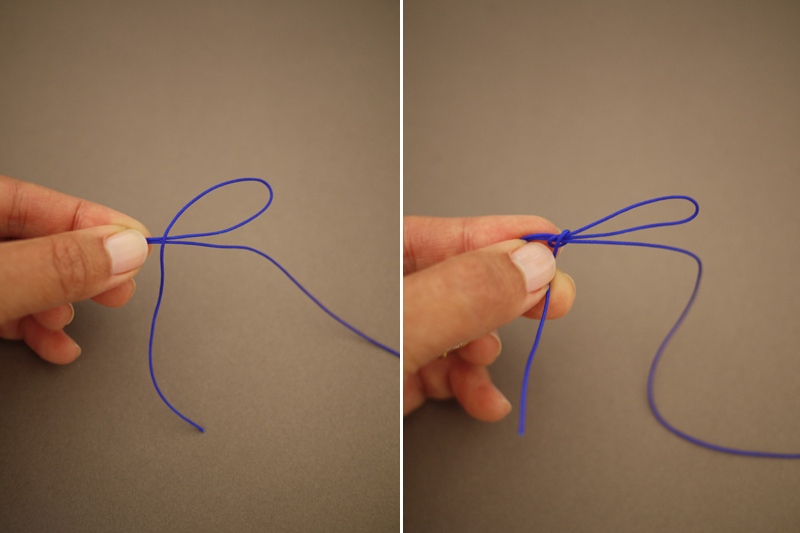
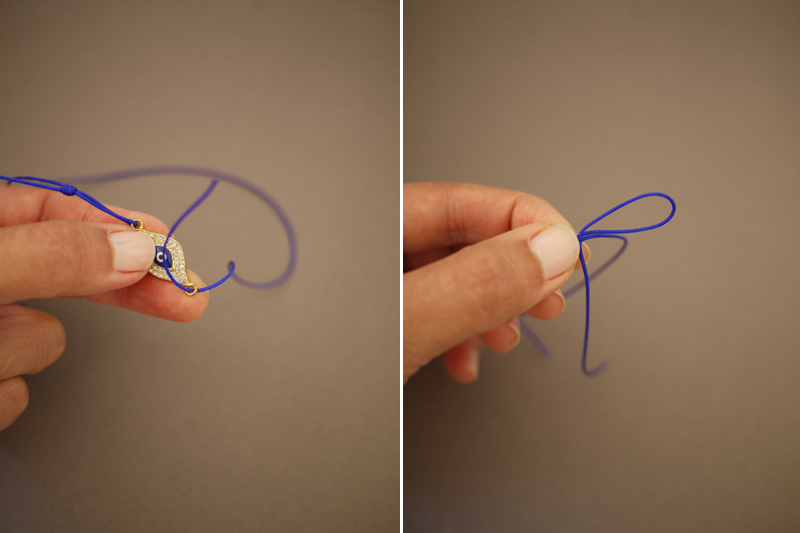
Thread 4 inches of cord through one side of the charm. Fold 2 inches of cord back on itself and then again to create a zig zag.
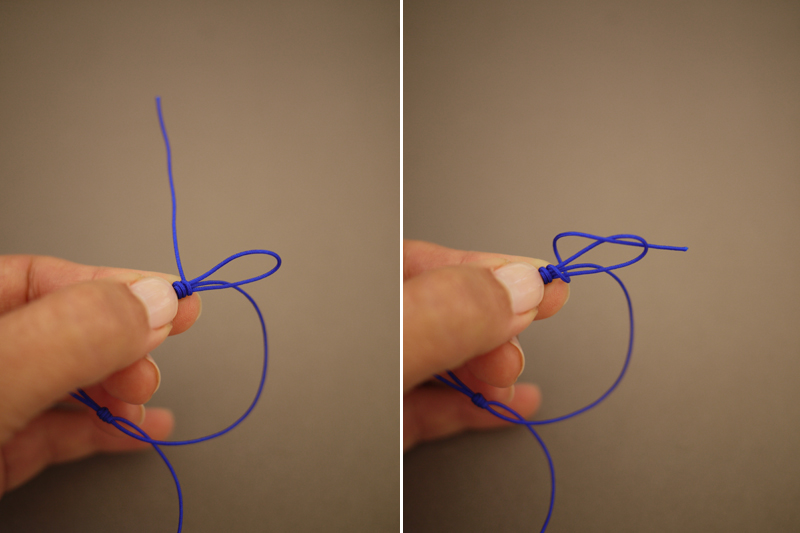
Fold an inch of the tip down over the parallel cords. Coil the cord three times towards the loop.
Thread the tip through the opening of the left loop.
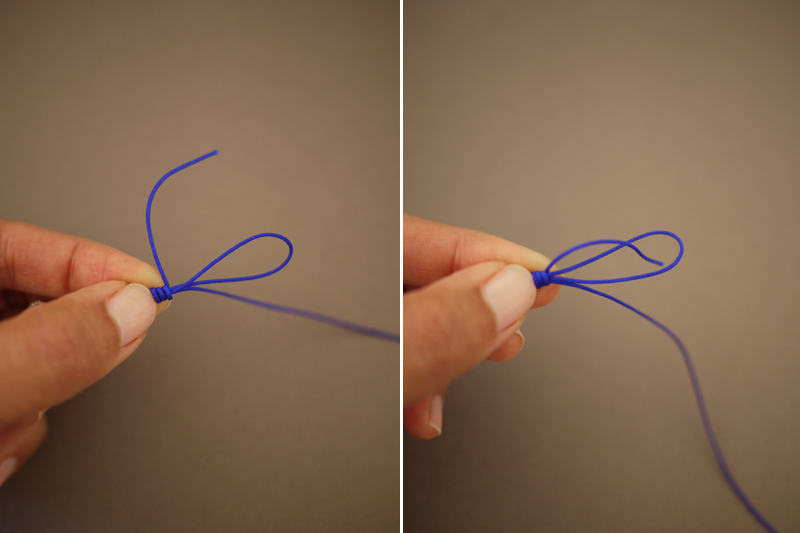
Push the coil to the right and pull the tip until the knot is tight. Test the adjustable knot by sliding it towards the base of the charm. The excess cord will be trimmed later.
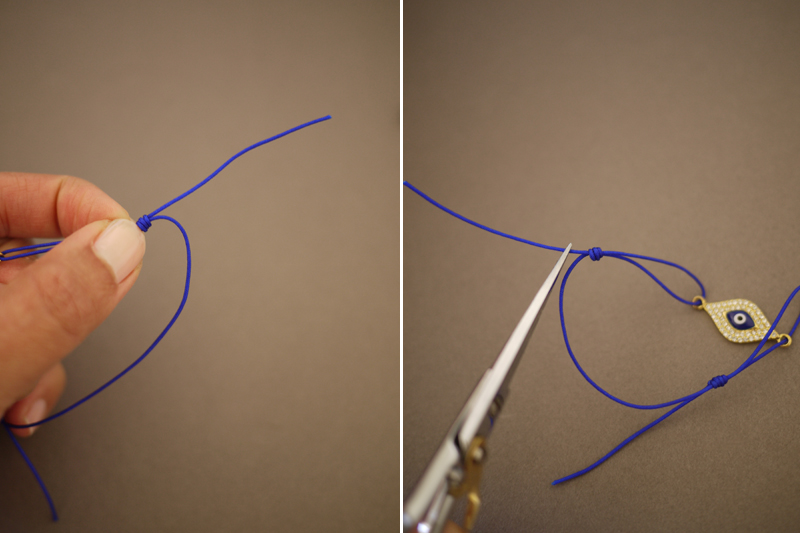
Thread the other end of the cord through the opposite side of the charm and create the same zig zag.
Coil the tip around all the cords three times and thread the tip through the loop.
Push the coil to the right and pull the tip until the knot is tight. Trim both ends, leaving approximately 2-3mm.
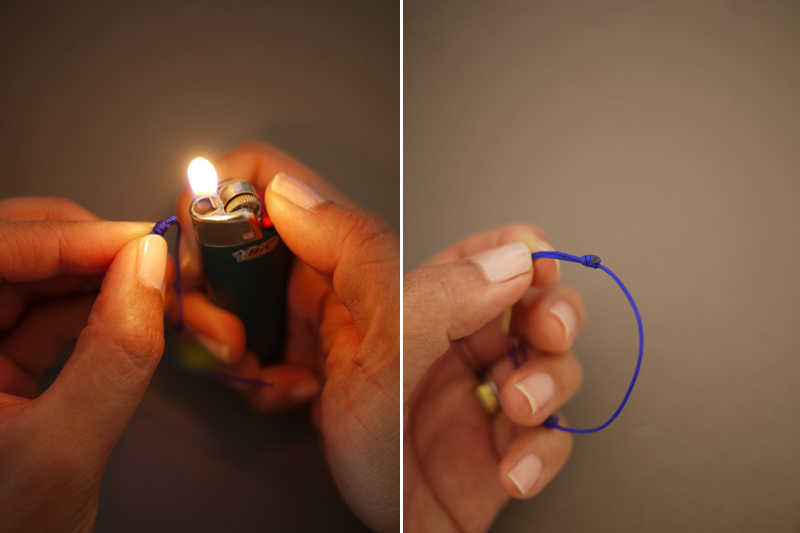
Melt the ends with a lighter.
Your bracelet is finished . . .
And you’re now protected against the evil eye!
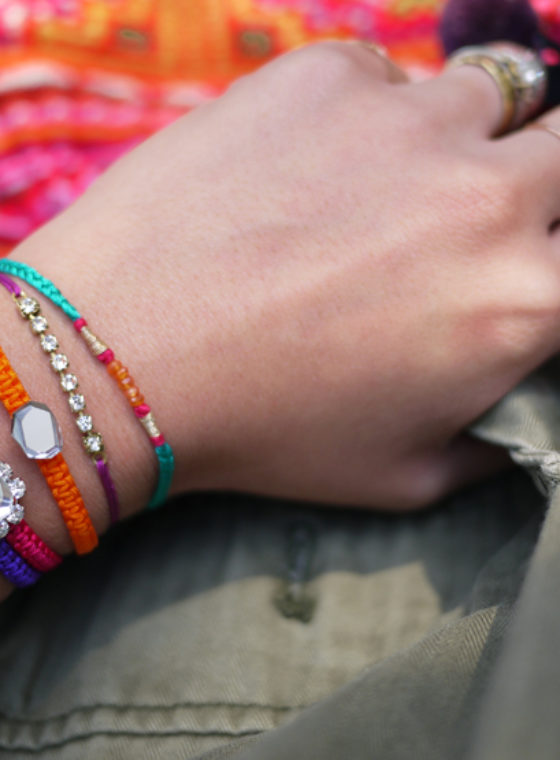
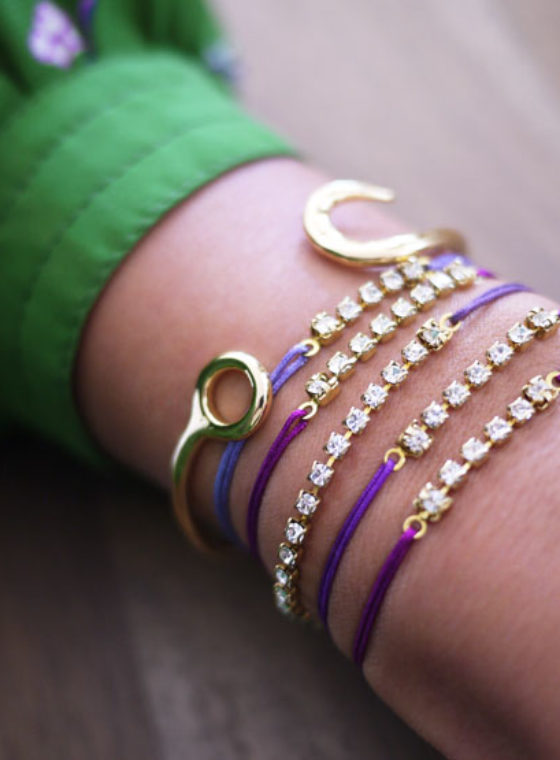
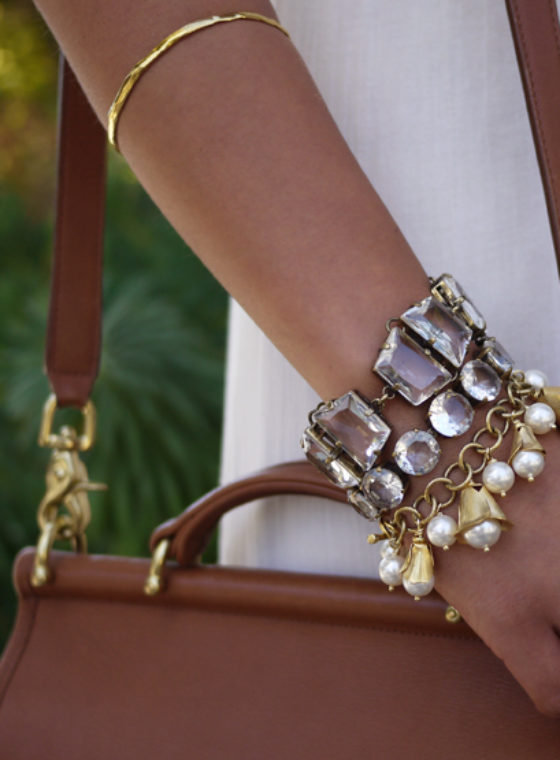
(evil eye & arrow bracelet by Odette New York, small evil eye bracelet purchased in Turkey, DIY bracelets by HonestlyWTF; all images by HonestlyWTF)





How awesome!! Can’t wait to give it a whirl~*
http://aclosetintellectual.blogspot.com/
Always helpful and creative ideas!
xxx
Miss Starshiny
OMG they’re so cool! I have to try….but it will be difficult to find these charms here where I live 🙁 Great idea and tutorial!
xoxo
http://www.sparklyfashion.com/
beautiful!! I love how they turned out!
xo Andrea
Wonderful and Marvelous
OMG LOVE IT!!! I’ll try!!
My new DIOR bag in http://cravingforbarneys.com
LOVE THIS DIY!! <3
thedamselinadress.blogspot.com
SO CUTE!
http://diamondsandspikes.com/
http://www.facebook.com/diamondsandspikes
I love your bracelet DIY projects; I can never get enough. More, please. =)
Satisfy Your Cravings For Celebrity Style and All Things Stylish and Sweet
great tutorial, thank you 🙂
Love the bracelets!!! The color is also amazing!!!
http://bonnieclydemarni.blogspot.gr/
I absolutely love it! They look AWESOME! 🙂 And so easy to make, too
Rory
http://www.WearAboutsBlog.com
INTERNATIONAL GIVEAWAY: Enter to win an item of your choice from TSJ!!!
amazing as usual
xo-Leila
Love it, so pretty <3
Love these! May i ask where you got the charms from? Thanks 🙂
that blue is stunning
http://youngandimpressionablee.blogspot.com.au/
xx
Excellent! Just like the ones they sell at the bazaar! 😉 Seriously though, blue eye beads are my main superstition, I truly believe you should always have one on you – keychain is the easiest way, but if it’s a special occasion and you’re not carrying your keys you should pin one to the inside of your clothes or something. And yes, I really do that.
http://nomadic-d.blogspot.com/
This is great, I love it 🙂
XO
badboyshighheels.blogspot.com
I love this diy!!
http://thestelstyle.com/
Such a great idea and love the large Odette cuff. Very cool.
Kate
http://www.thrillofthechaise.com – Enter our new GIVEAWAY!
Beautiful color!!
This is so pretty and the color is beautiful 🙂
New post on SEARCH IN FASHION – DIY: Cocktail ring
Hello I live in the middle of the Mediterranean Sea on an island called Malta anyways on our traditional boats we put that evil eye sign and when I saw this DIY I felt so proud! 😉
I love you blog!
I’m posting looks from Los Angeles and summer accessories:
http://www.thegavlaks.com
LOVE! and so simple!
http://styleadorned.blogspot.ca/
brilliant!
Bises,
monkeyshines
http://monkeyshines-monkeyshines.blogspot.com/
looks great.
So simple and fun!
gorgeous bracelet and thanks for the sliding knot technique!
x,
Natalie
these are awesome
http://www.vasilievablog.com/
x
I love it!!
Bonjour, génial et très beau ! J’ai 1 “mauvais oeil” mais, avec 1 attache (grr….!!). Je vais trouver 1 système pour contourner la difficulté, maintenant que …je suis “protégée”. Je ne ris pas. Hyper superstitieuse ! De plus, ce qui est beau PROTEGE.
Merci
Vi
Those bracelets look great! Xo
Thanks for this, I’ve been wanting one of these bracelets.
I love the result, it turned out really great!
Virginie/ Style Reload
http://www.virginiepeny.com
Awesome and I´m an evil eye fan. I going to try that one cos
it really looks simple 😀
xo
glamDevils
Love this DIY. I’ll definitely be trying this one out.
So that’s how you make a sliding knot bracelet! Awesome!!!
Always great & simple ideas!!!
I’ve seen a lot of these lately but this one looks pretty easy. Although those charms look a little pricey. Know where I can get anything a little cheaper?
Cute!
I Loved!
http://detrasdellabial.blogspot.com.es/2012/08/zara-campaign-autum-winter-20122013.html
xo
Karla V
so gorgeous!
Great post!
http://beefelle.com
So fun! Easy to do et verry verry nice colours!!!!
http://aufildemiyuki.blogspot.com
Honestly! You are soo creative;)
xx alex
http://www.placetrends.blogspot.com
http://www.placetrends.blogspot.com
http://www.placetrends.blogspot.com
Love this DIY!!
http://www.martamartimm.com
– Im from turkey and those bracelets are so popular there right know, great tutorial !
I think they look amazing! As a single piece I wouldn’t wear it instantly but when I see how you stacked them up it looks really cool Loving the blue.
amazing bracelets <3
As always, one amazing DIY project!
Loving the evil eye element. Simple yet powerful!
DC2NYConfessions Blog
Don’t miss exciting BOHO GIVEAWAY
These are really cool, I haven’t tried to make a sliding knot… I think it intimidates me. but i would love to try this, the hamsa charm is really pretty!
http://turquoisewildflower.blogspot.com
lovely!
I needed this tutorial 😀 thanks.
I always love your DIY’s, this is gorgeous… Love the blue
oooohhH! loving these kind of bracelets! <3
-adele
livelikeadreamer.blogspot.com
livelikeadreamer.blogspot.com
So cute! Love. Must try.
LOOOOOVE!
Yet another RAD tutorial
xo
Love this!!! Will have to make one!!
Wtf
http://www.stylegodblog.blogspot.com
wow…… this is SO amazing…. the colors, the design, everything.
http://www.eatblogpray.blogspot.com
xo
Amazing tutorial,you definitely always hav
lovely tutorial,you aalwaays have the best ones for the perfect arm candy,,ahh
http://unasrandomfashion.blogspot.com/
http://unasrandomfashion.blogspot.com/
http://unasrandomfashion.blogspot.com/
Love!
Val
http://valentinaduracinsky.blogspot.com/
love them…and mixed with royal blue look cool!!
mediterraneanblick.blogspot.com
Am putting together a bag for a trip to Cyprus and was pondering accessories. Your blog just made my day and I am so eager to make these. Fabulous. Thanks!
Sarah x
http://www.ittybittyandohsopretty.com
i love this DIY! such cute bracelets and i love the charm! I saw a lot of them when I went to turkey last year!
check out online magazine http://www.amazine.com, where you can post your DIY tutorials 😀
I have these little charms hidden in amongst things in each room of my house! I love the bracelets, I may have to use a few of my charms to make something pretty.
nice one!
we have a lot of hamsa jewllery here in israel.
i would be happy to invite to be my GFC since you look a nice fellow blogger. check out my blog and follow i will do the same s
thanks
tali
http://unzippedfashion.blogspot.co.il/
I love simple and beautiful things like these brazalets. congrats!!
http://tobchic.blogspot.com.es/
http://tobchic.blogspot.com.es/
http://tobchic.blogspot.com.es/
Yet another wonderful bracelet DIY 😀
wow, love thoose!
Great post and even better tutorial!!
xx,
Jinna
http://greaseandglamour.com
How awesome! A couple of my sliding knot bracelets have broken and now, I can fix them!
Thanks.
http://styleminx.com
mustbebeautiful.blog.com
i’ve just bought a couple of these!
Oh wow, what a beautiful bracelet! Thank you so much for all these tutorials!
http://www.jewellerybyjora.com
I love this DIY! I’ve been to the mediterranean recently too, so I’ll definitely be giving this a go! 🙂
Check out my DIY fashion blog 🙂 emma-alittlesomething.blogspot.com
my sister and i went to turkey last month and bought bracelets just like this! hers just broke, so this would be the perfect fix.
I love ;0 -> Astonished Face
I’m obsessed. Will be trying this out soon. 🙂
pastelhearts.wordpress.com
awww this is so so pretty!
Aaron Basha has the best evil eye collection. They released it in 2008 and other followed suit. All 18K gold. I’ve been wearing mine for 3 years now, shower and all, still looks amazing!
Just want them now…not now…NOW!!!!!!Great job…!!!
kisses,
Bloody Mary
http://kosma28.blogspot.com
Love this! I bought everything from your resource and the materials have already arrived. Great service!
But try as I might, I just cannot get that knot. I’m SO frustrated…
I love this, it so simple!!!
Great post. Royal blue looks so good!! We love the evil eye in Greece.
xxx
Nina
http://trendsurvivor.com/
Yeah I got the knot but how can you tighten the bracelet when you have it on your wrist? This seems to require another set of hands. Help???
Another awesome diy!!!
thank you SO MUCH for this tutorial!
http://somethinglikecreativity.blogspot.co.at/
i will buy it if you make it for me lol =)
omg i just love this tutorial i live in the middle east and seeing this i a norm in where i live, i have tons of evil eye inspired jewelry and clothes (i dont believe in them though)
just for some info this is not pronounced “Hamsa” it is pronounced “Khamsa” with a K. Khamsa means the number five which some say, represents the five pillars of islam which are: 1.the testimony of faith 2.prayer 3.giving zakat (support of the needy) 4.fasting during the month of Ramadan 5.the pilgrimage to Makkah once in a lifetime for those who are able.
Khamsa is also called “hand of Fatima”, so named to commemorate Muhammad’s daughter Fatima azzahraa.
I’m Turkish, i hope this evil eye protects you from evil-minded people. And i don’t know why but 🙂 i felt so happy when i heard that you’ve been in Turkey. I hope you enjoyed.
I love your diy style
COOL!!!
Sewunlikely.blogspot.com
Just made this bracelets love them!!!! Thank you….
Love the blue fabric! The 2 bracelets are awesome. You have always beautiful ideas.
theyellowbalconey.wordpress.com
What a sweet DIY project. And so pretty
Xx
Callie
Love this idea!!!!!!!! Will try it asap!!!!! Thanks
http://cafesocietyxxi.blogspot.com/
Hello.. How long should one thread be for one bracelet?
hi there,
i was just wondering if you have a website where i can purchase some of those macrame bracelets.
please reply back
thanks
roula
Oh my god i love this arm party!!! i would like to buy them all.
http://fiveothreeblogspot.com
Cheers,
M.
Being Greek, I’m very familiar with the “evil eye”. I can’t wait to try making this.
Does anyone know where I can buy those charms (or similar) on the internet? Thank you!
SOOOOOO GORGEOUS
I Think it is very pretty but i Think it is hard to make, i could not. So act like we are very stupid and make some more pictures
BTW i am from Denmark and i am not so good at english :-((
Does anyone know where I can get similar beads in London?
Yay love this tip!!!
Works great for my hemp bracelets!:)
Thanks from California
Which size of the cording – .8 or 1.2? I just got the .8 and seems a bit thin??
Bought some cool connectors at a local craft store –
@Lori, I used .8mm cording in the tutorial.
Where is the other bracelet from? the circle evil eye with the crystals on the gold chain? its gorgeous
Wow, these look amazing. It’s great to show people that can make the expensive jewelry today! The pictures are very helpful! Keep it up!
Simple and creative idea.Thanks!!
super simple and so fun! love your tutorials!
It’s also called a hangman’s knot, if anyone knows that term instead. We used it a lot in theatre productions for sets because it does slide.
That’s neat! 🙂 Very simple and would make for a good project for the little ones.
HERMOSASSSSSSSSS
THANKS FOR SHARE WITH US, CONCHITA
It’s Amazing. I love it very much. Cool
I can’t seem to find a good place to buy the Hamsa/Evil eye. $9 a piece is a bit much if you want to make a bunch of these 🙂 any recommendations?
Guys, check out this tutorial on the sliding knot I found on youtube 🙂 very helpful
http://m.youtube.com/#/watch?v=W2GhB8k7vBw&desktop_uri=%2Fwatch%3Fv%3DW2GhB8k7vBw
Love the bracelets!! Have you ordered the knotting cord and the charms of that website? Is it a reliable website? Please email me back i need to know cuz im planning to order some for myself!
The bracelets are so gorgeous. Thanks for sharing your ideas for making these bracelets. You tips are very simple to understand.
Dying to know where that arrow cuff bracelet came from. So cute!
I love your DIY’s but maybe you could post little videos?
some tutorials are hard to do with just pictures
Thanks
There are some nice evil eye pieces at http://designerjewelrysavings.com/ .
Hi- I love this so much! Where did you find the charm?
I love this simple idea.
These people used your pics – http://www.aliexpress.com/item/Free-shipping-diy-sliding-knot-bracelet-evil-eye-symbol-and-hamsa-charm-turkey-bracelet-can-protect/1292963357.html?
I absolutely love this tutorial, great job! My favorite design is definitely the the Hamsa Evil Eye, so I had to check this tutorial out. Got my Beads from http://www.clbeads.etsy.com and my Cord from http://www.knottingcord.etsy.com
I pretty much get everything from Etsy, it’s the perfect place to buy and sell all things DIY and handmade… Thanks for the awesome site!!!
Why would you wear the evil eye and the Hamsa at the same time though? Why would you wear the evil eye at all? Stop appropriating religions it’s disgusting and it makes you look like an idiot.
Wow those DIY bracelets look really good!
your bracelet DIYs are SO beautiful! I am going to try this one!!!!
hi, just passing by to your site. Can you give inspiration with paper or carton board for next idea of DIY?
Great post 🙂 very well explained as well.
http://www.sassyshifsays.in/haircare-garnier-ultra-blends/
Free bookmarking site 2016….
http://www.getwebpromotions.com/
http://newbookmarkingsite.com/
These look so gorgeous. I would love to do this DIY.
hi!
love your work!
can you tell me what kind of thread you use please??
many tks
hi,
Thanks for such a relevant blog… this is a great blog, which provide the relevent info.
Laundry Service in Gurgaon | Dry Cleaners in Gurgaon
I love how dainty these look! I think I’ll substitute the evil eye charms for something more boho!