My dear friend Ariel, of Ariel Gordon Jewelry, and I have always shared a love for the ocean. Driven by our passion for the sea and a mutual enthusiasm for accessorizing and crafting, we naturally decided to create a DIY kit inspired by the vibrant and colorful nautical ropes that had always fascinated us. These ropes, with their endless possibilities, were the perfect inspiration for our second collection of DIY kits. We envisioned a series of kits that would allow you to create a variety of accessories, from bracelets and anklets to bag straps and phone lanyards. Ariel and I have experienced so much joy creating these tutorials and kits, we hope you feel the same while experimenting with them!
The third tutorial is how to make a bag strap - my personal favorite. You can make a crossbody bag strap or a shoulder strap - it can be as simple or as embellished as you wish! Here, I'll be introducing how to make a bootlace knot, which I'm newly obsessed with. The goal with these tutorials is to give you the foundation necessary to tap into your own creativity to create your own custom accessory!
Method 1: Crossbody Bag Strap
You'll need:
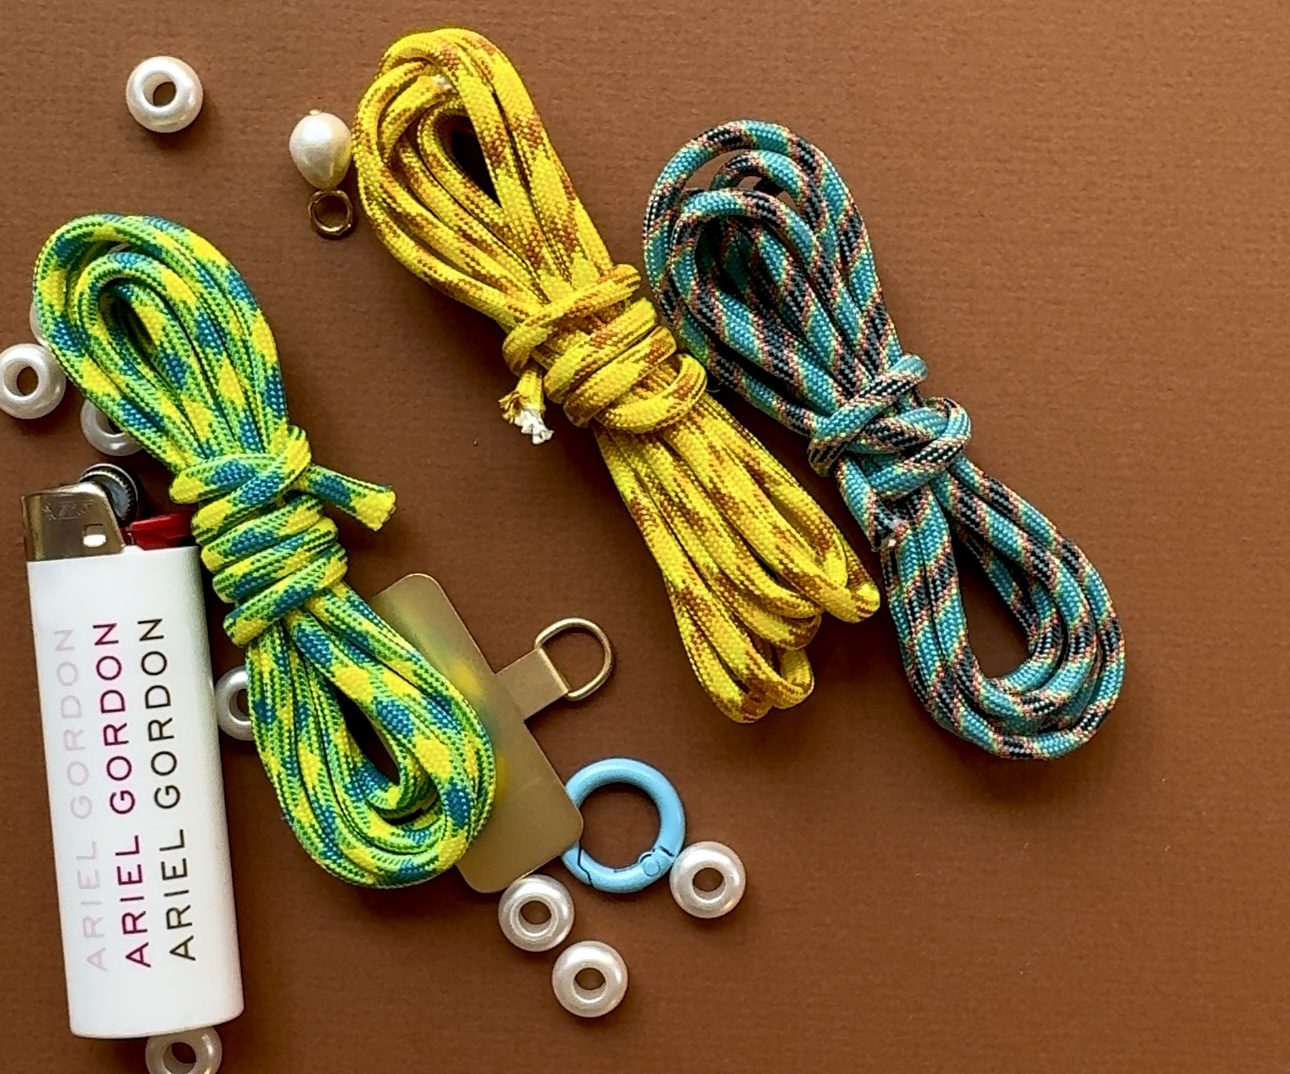
DIY KNOTTY ROPE KIT includes:
- thick rope in 3 colors (5 ft each)
- thin rope in 2 colors (4 ft each)
- large pearl charm
- small pearl charm
- pearl beads
- metal phone insert
- O ring
- lighter
ADDITIONAL SUPPLIES NEEDED:
- 2 carabiners
- scissors
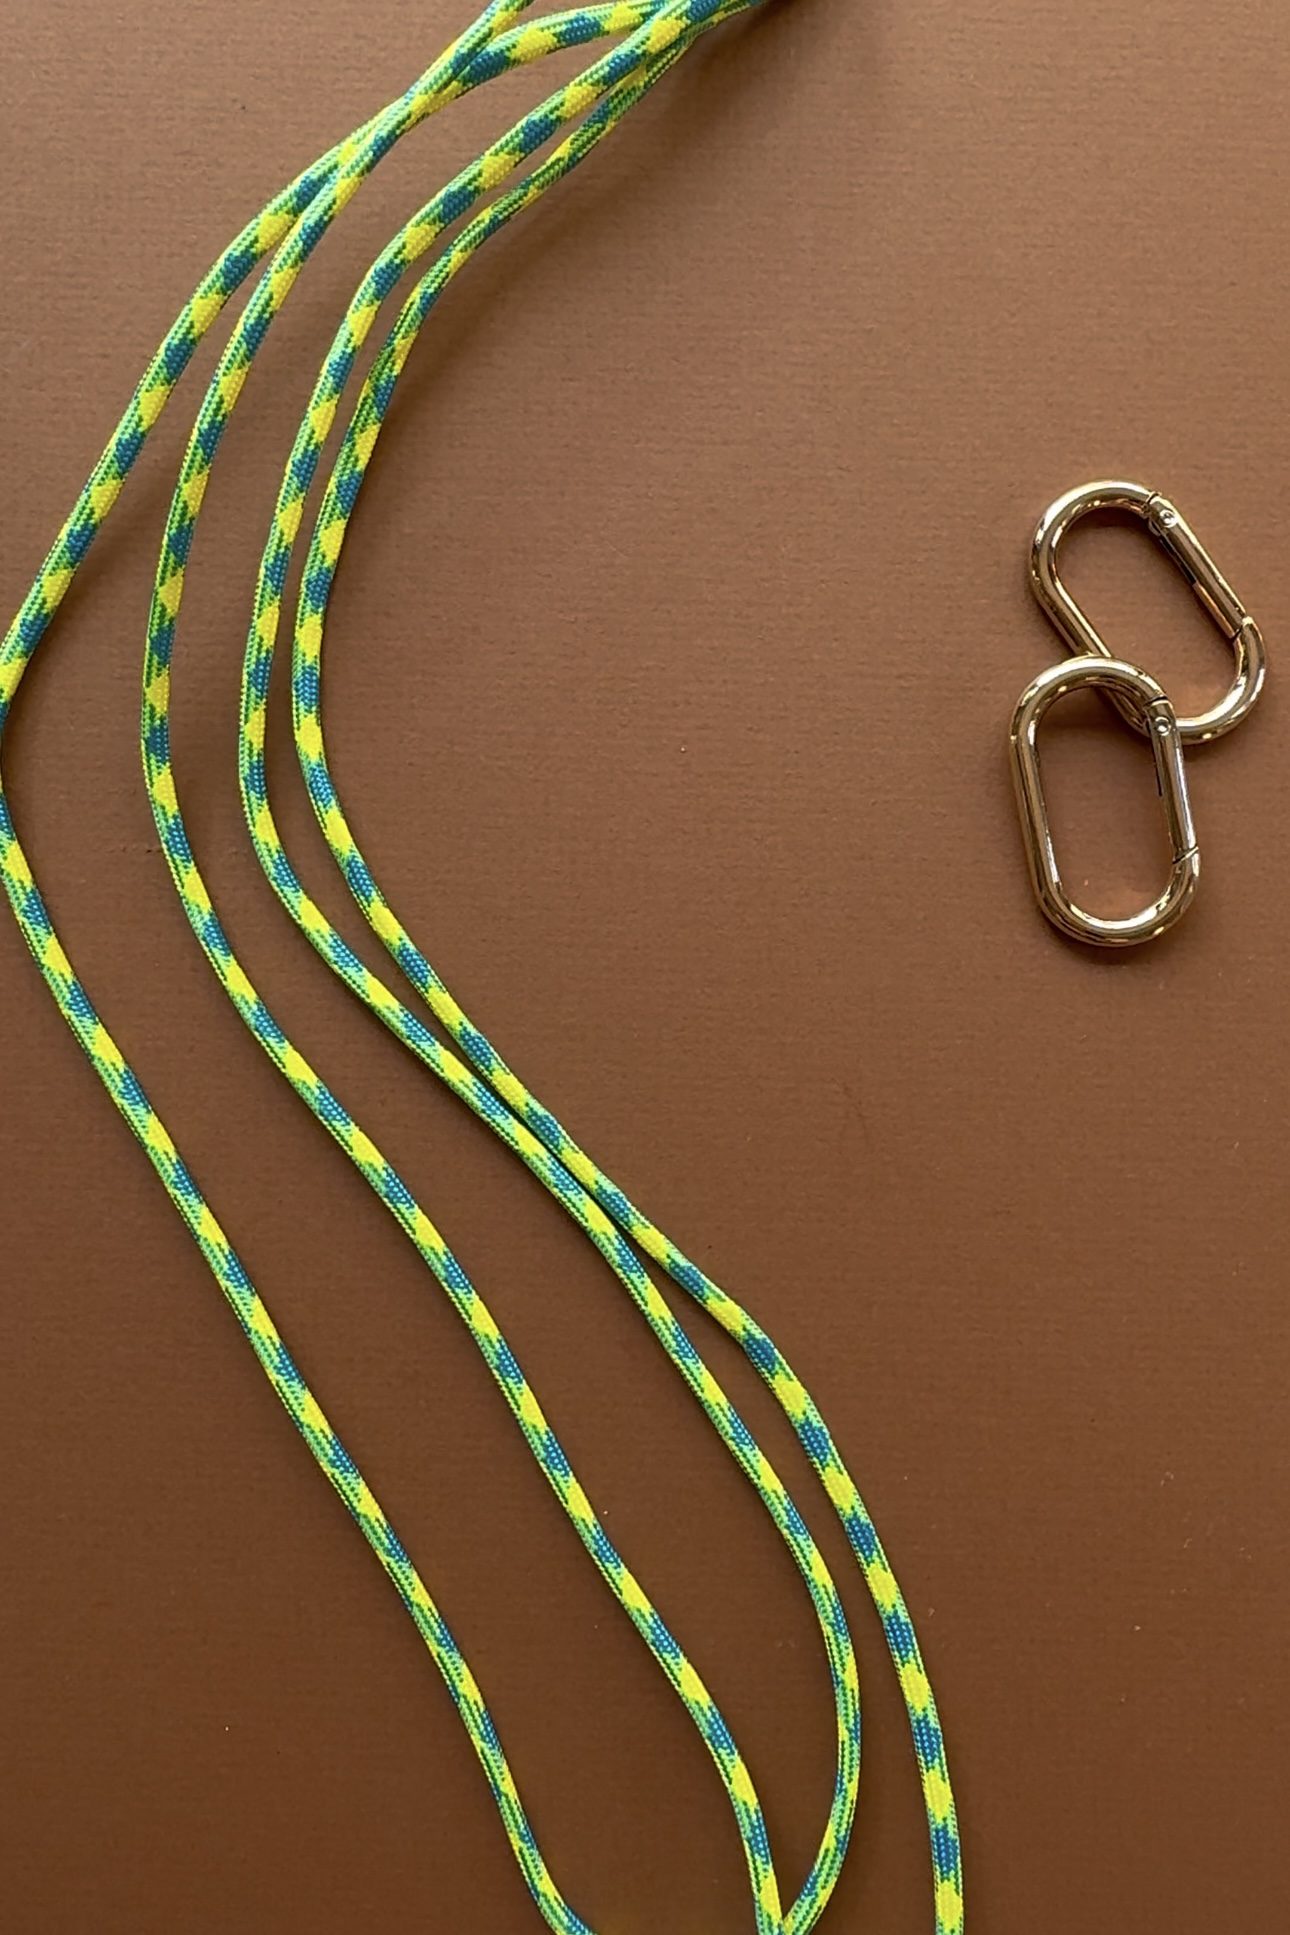
To start, cut lengths of the thick rope according to what you would like to make. Approximate measurements are as follows:
- shoulder bag strap: 3'
- crossbody bag strap: 5'
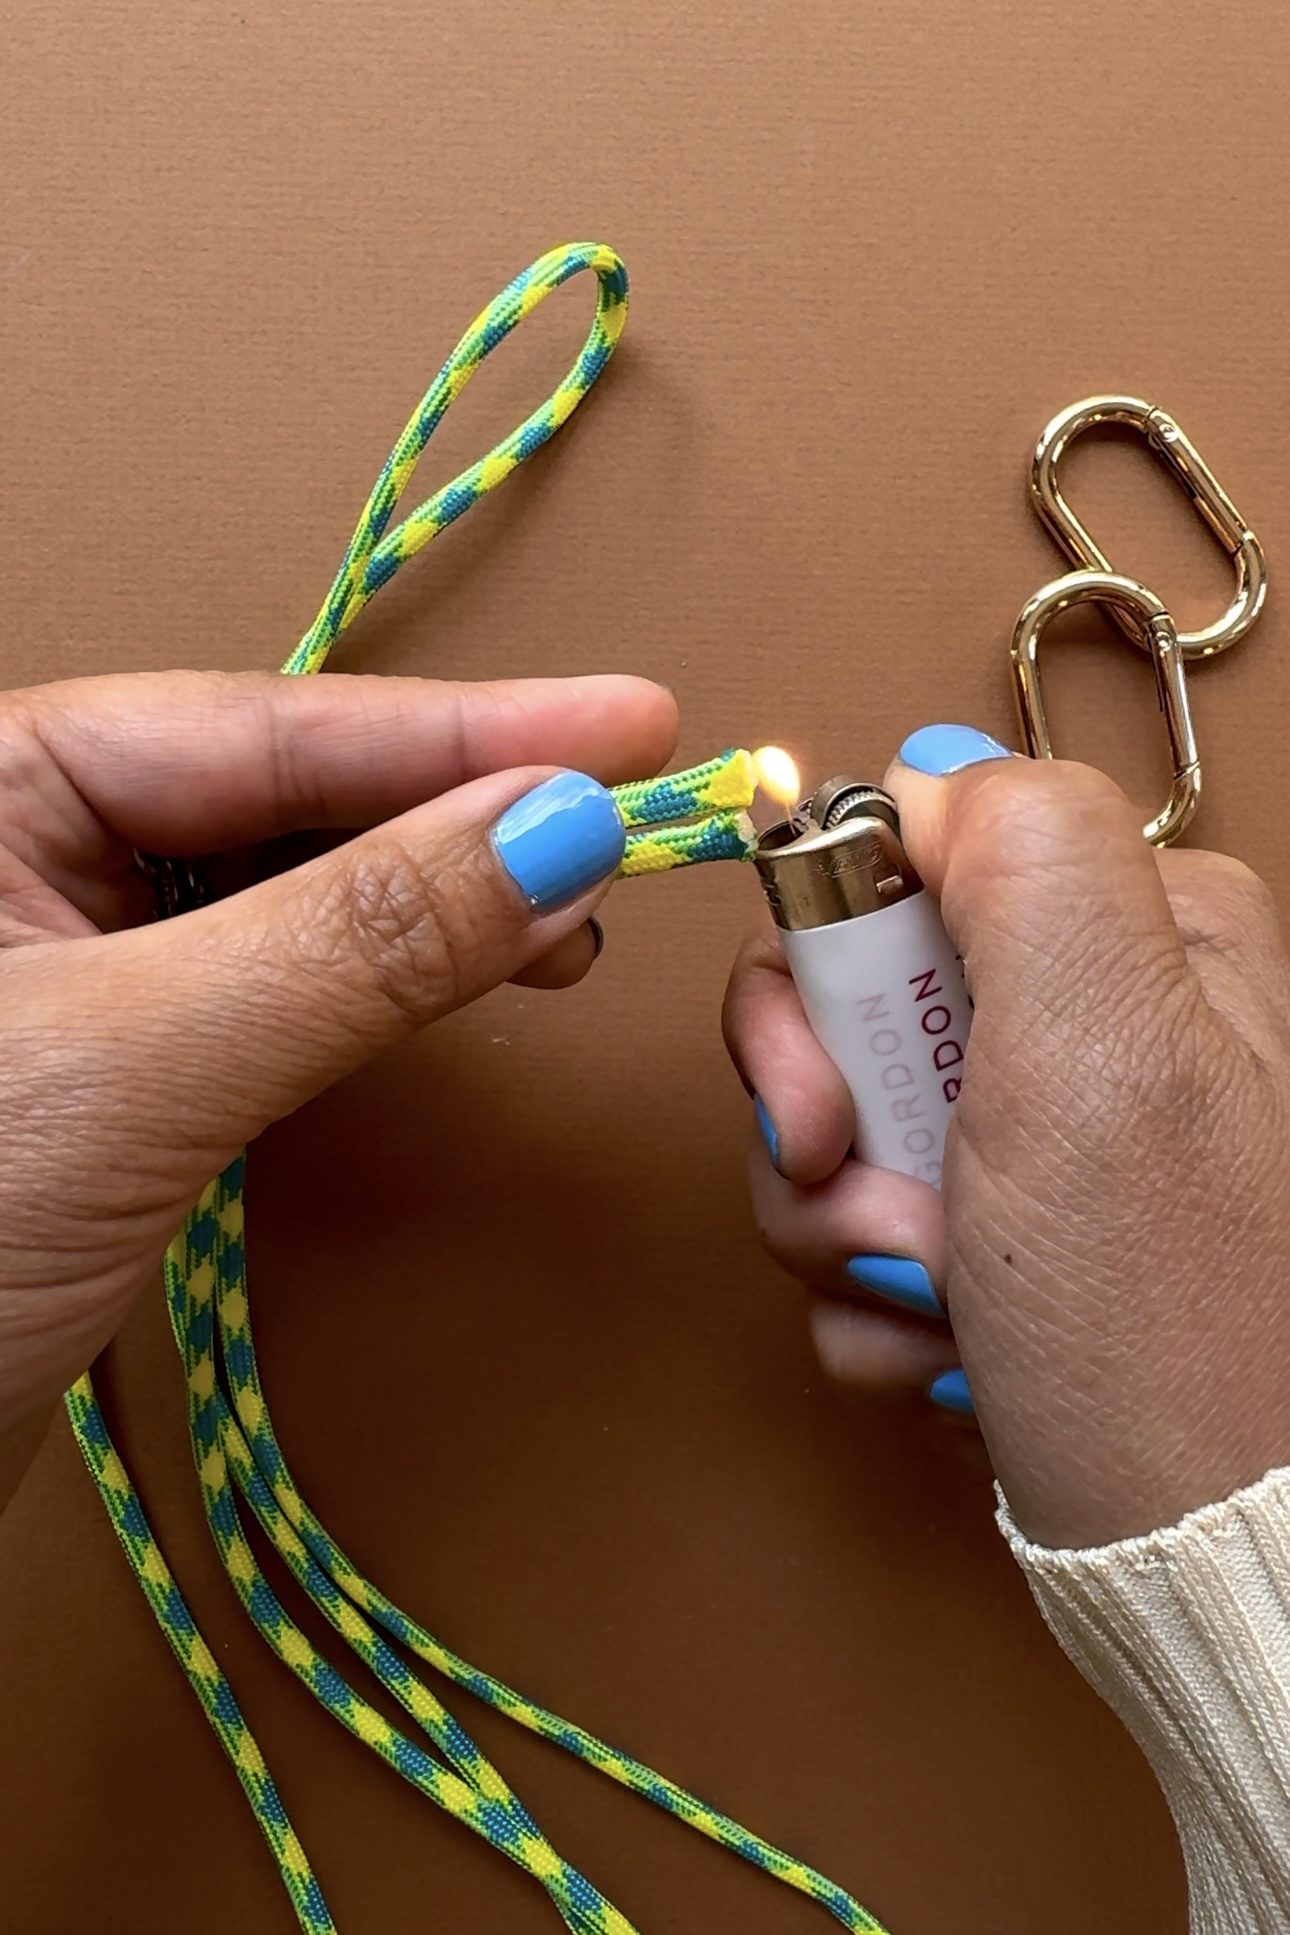
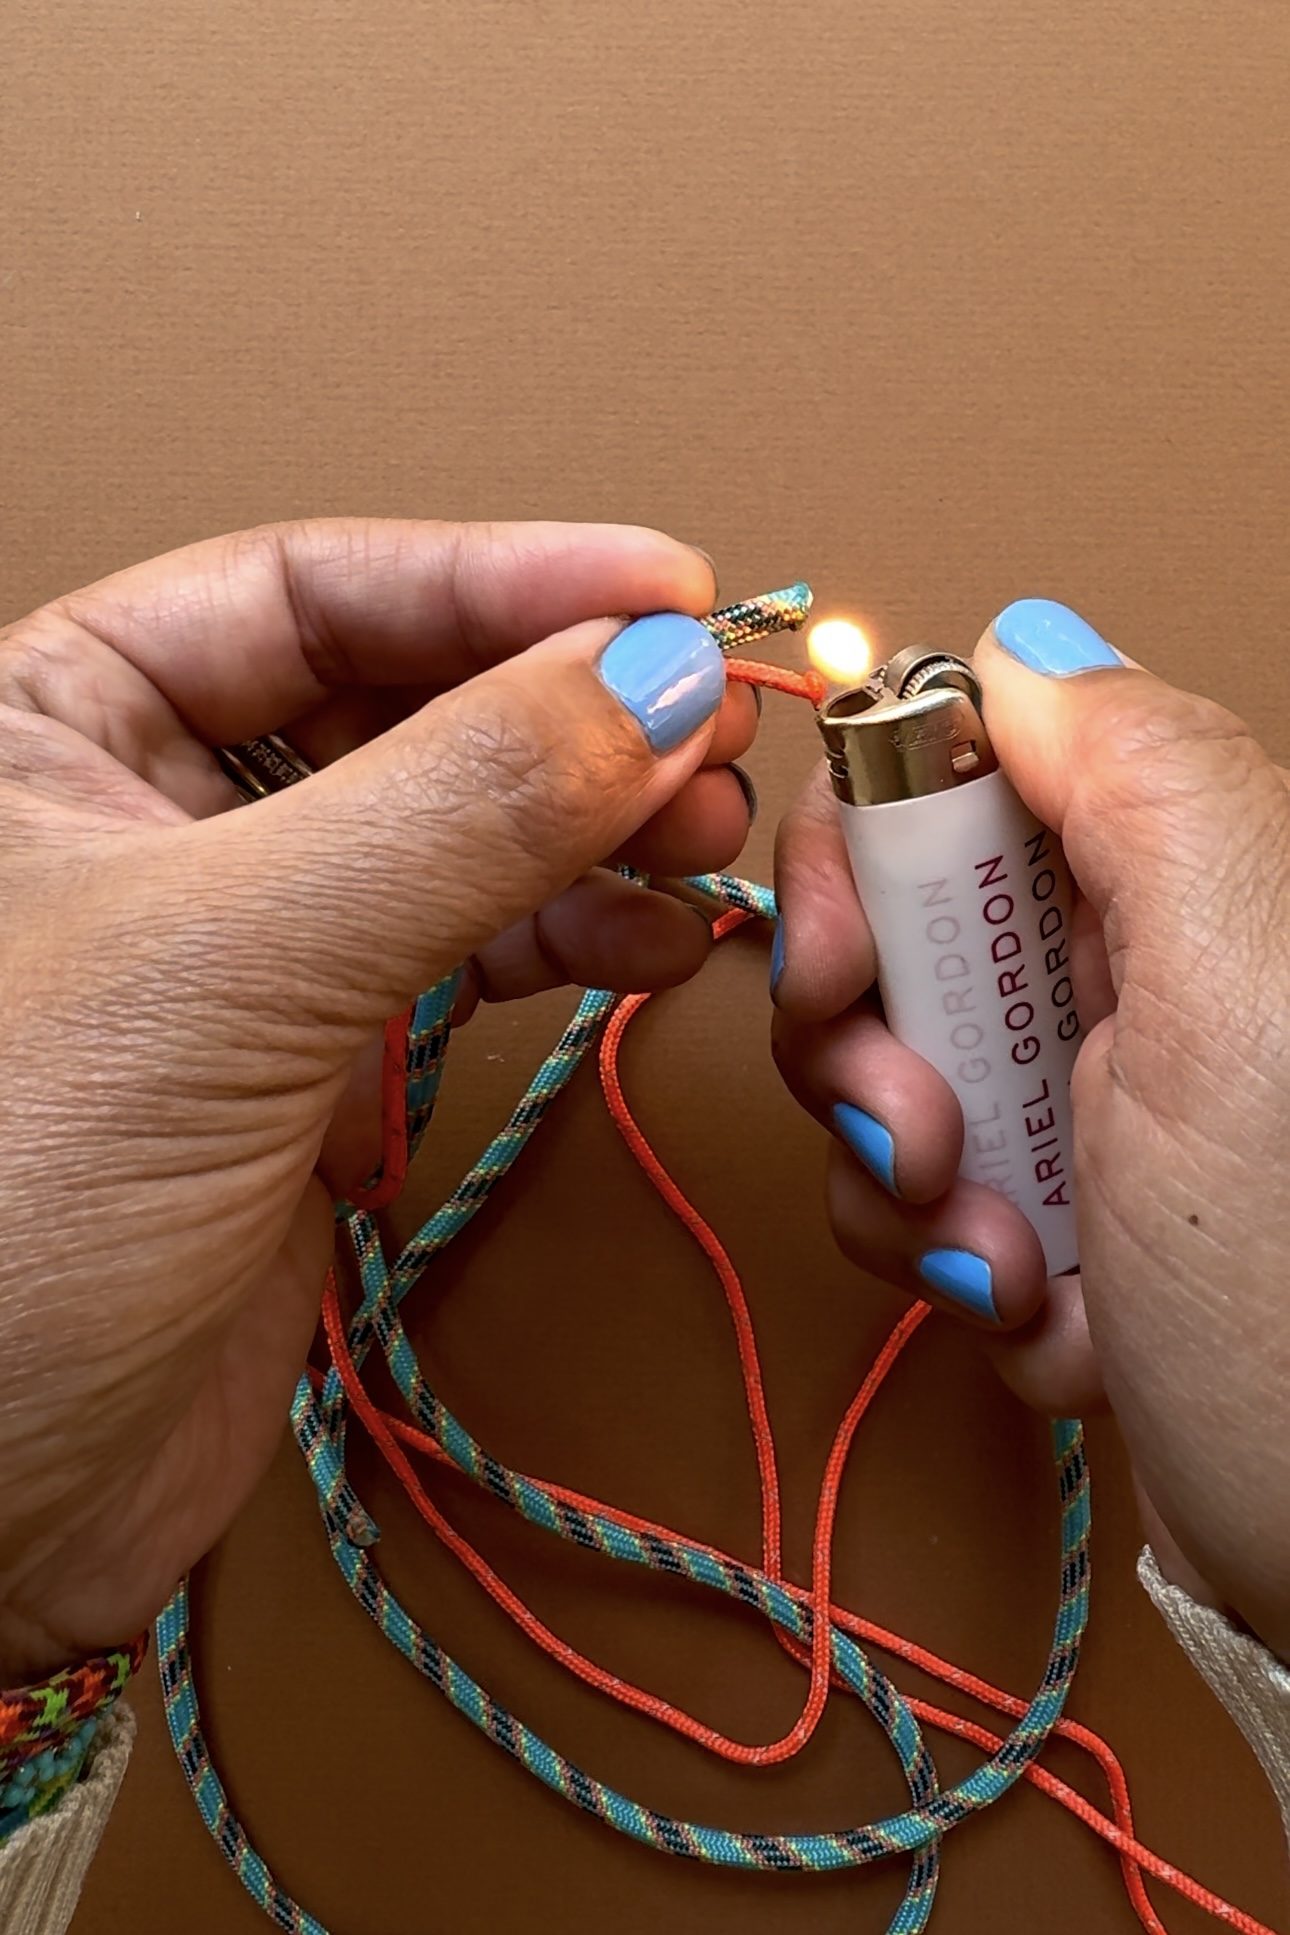
Trim the ends and lightly burn them. This prevents the inside of the rope from fraying and separating, making it easier to handle.
Start by creating a continuous loop with the base cord. Burn the ends simultaneously until the rope starts to melt but doesn't burn or char.
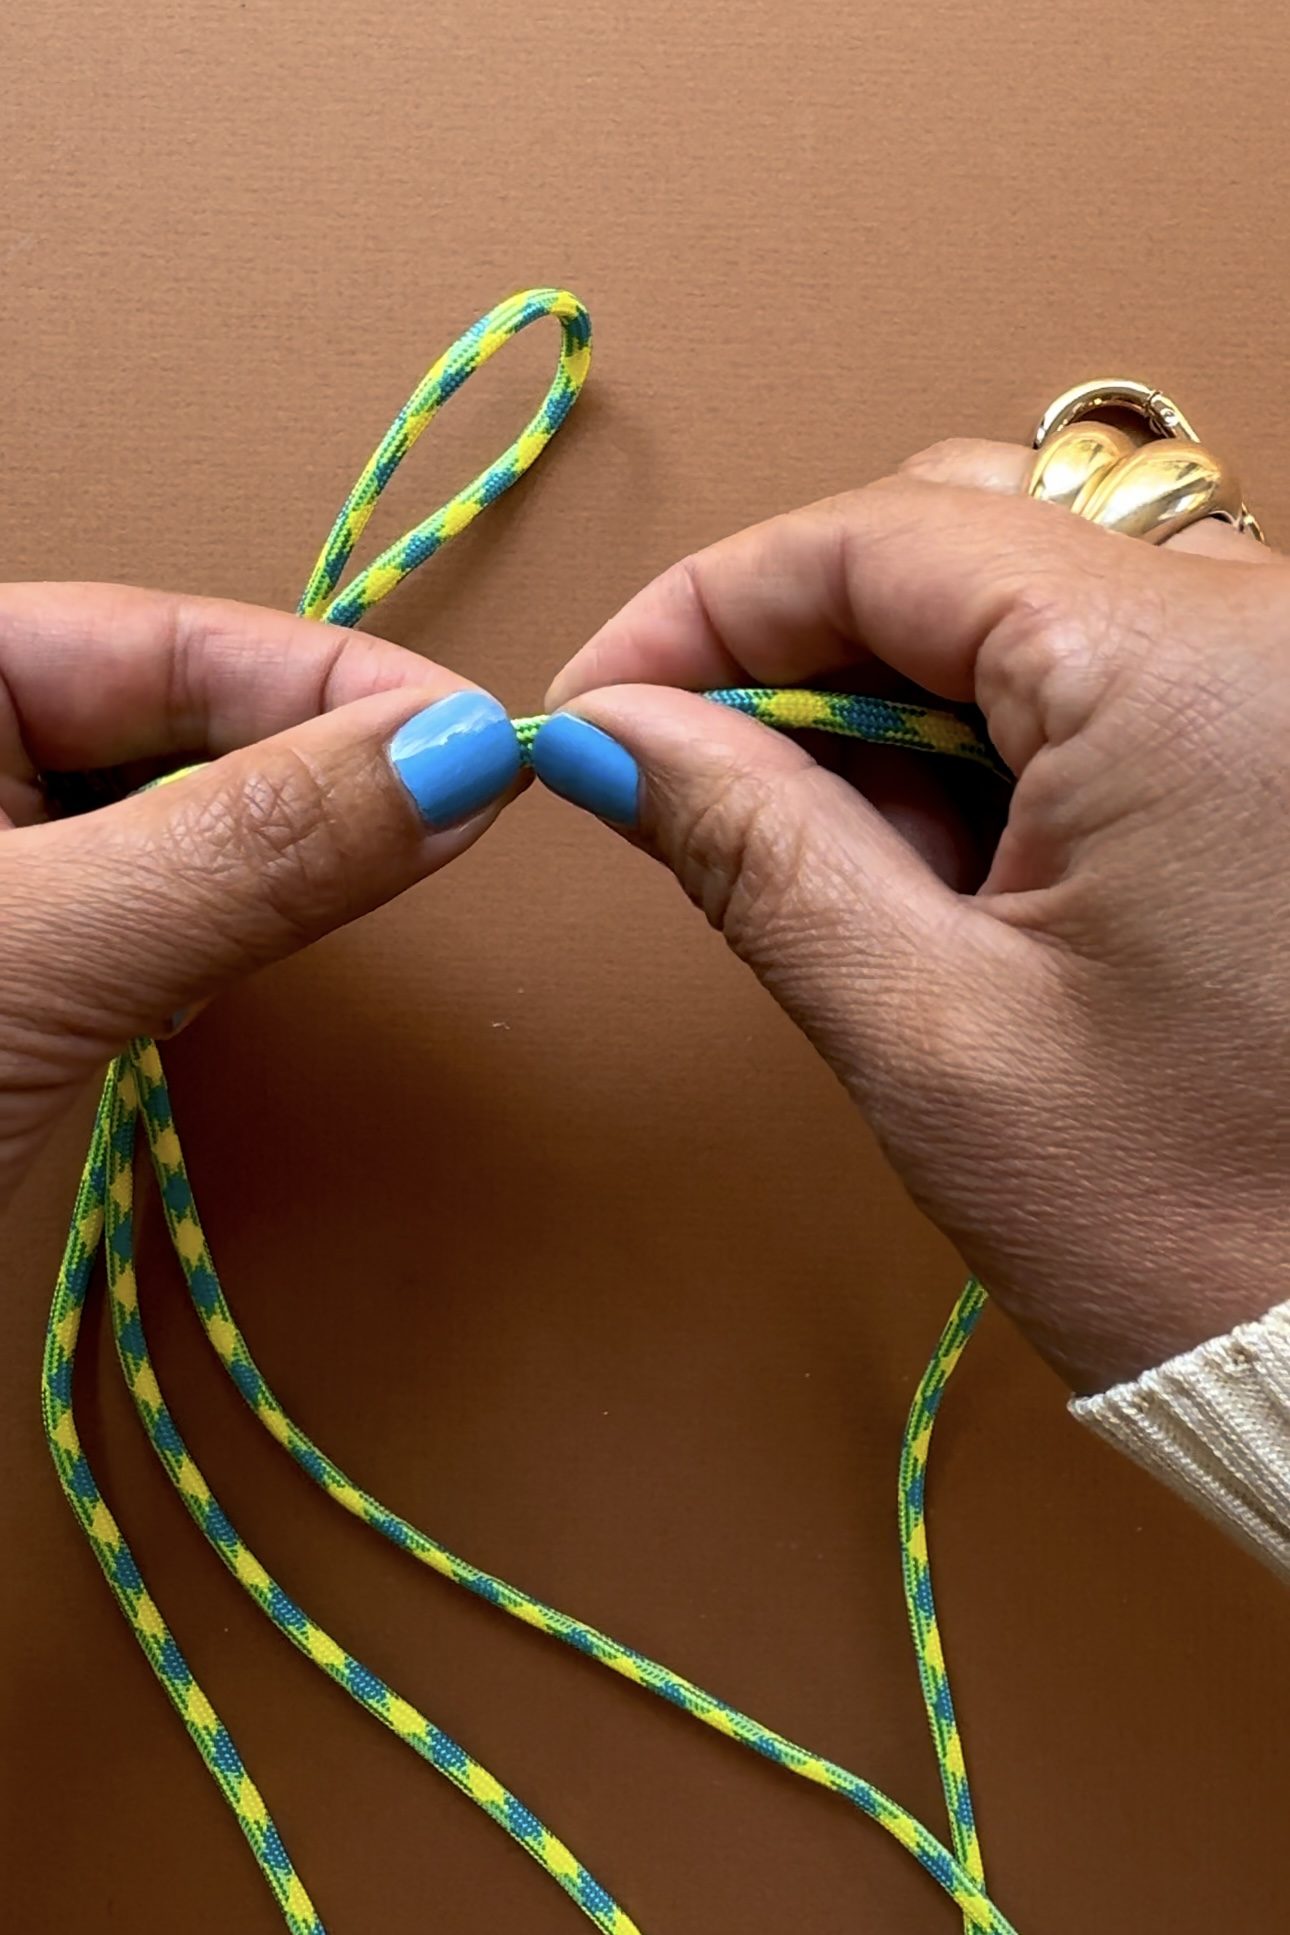
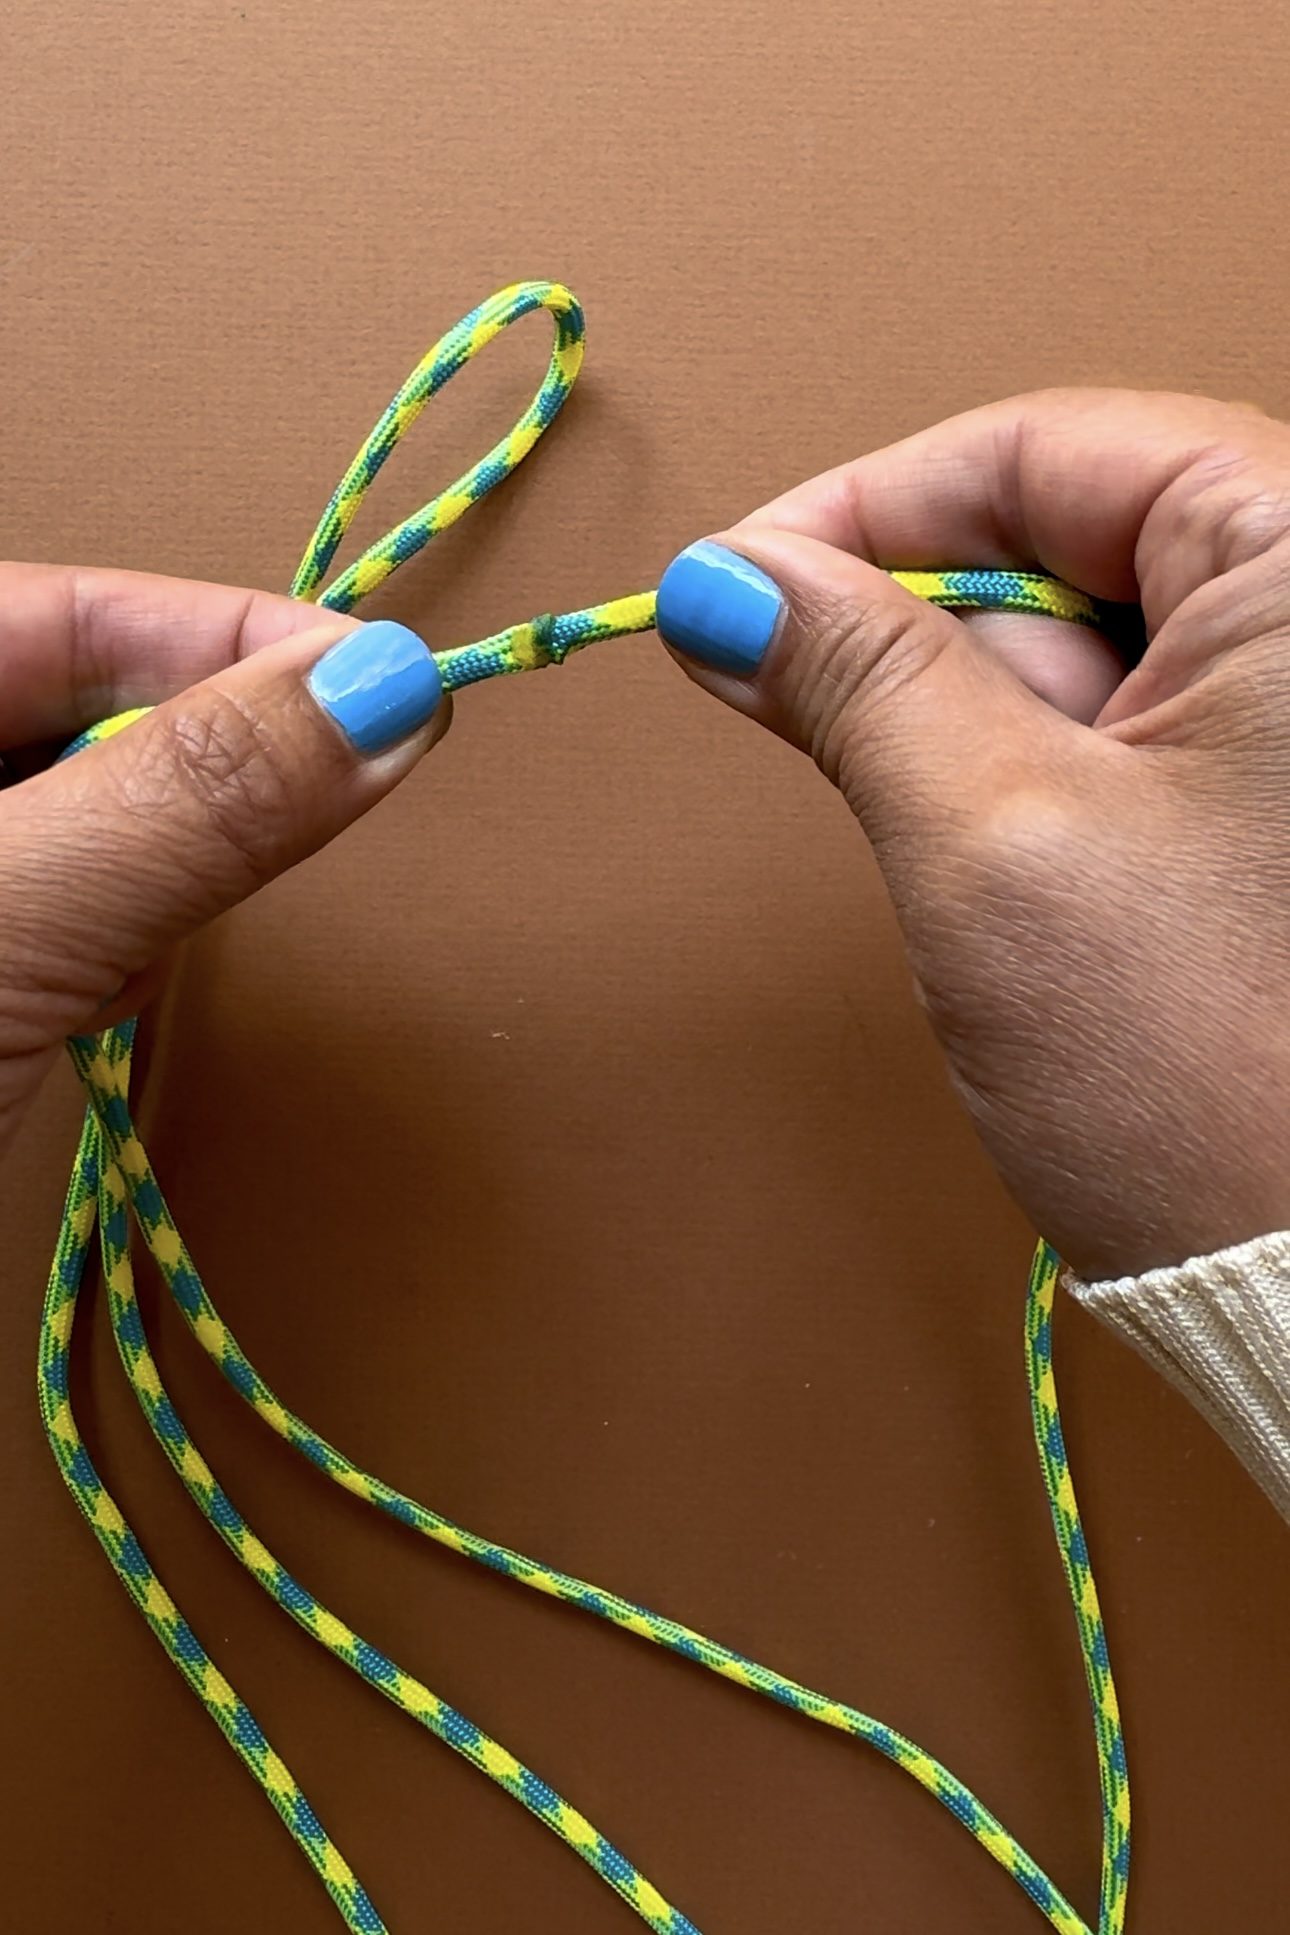
Immediately press the ends together.
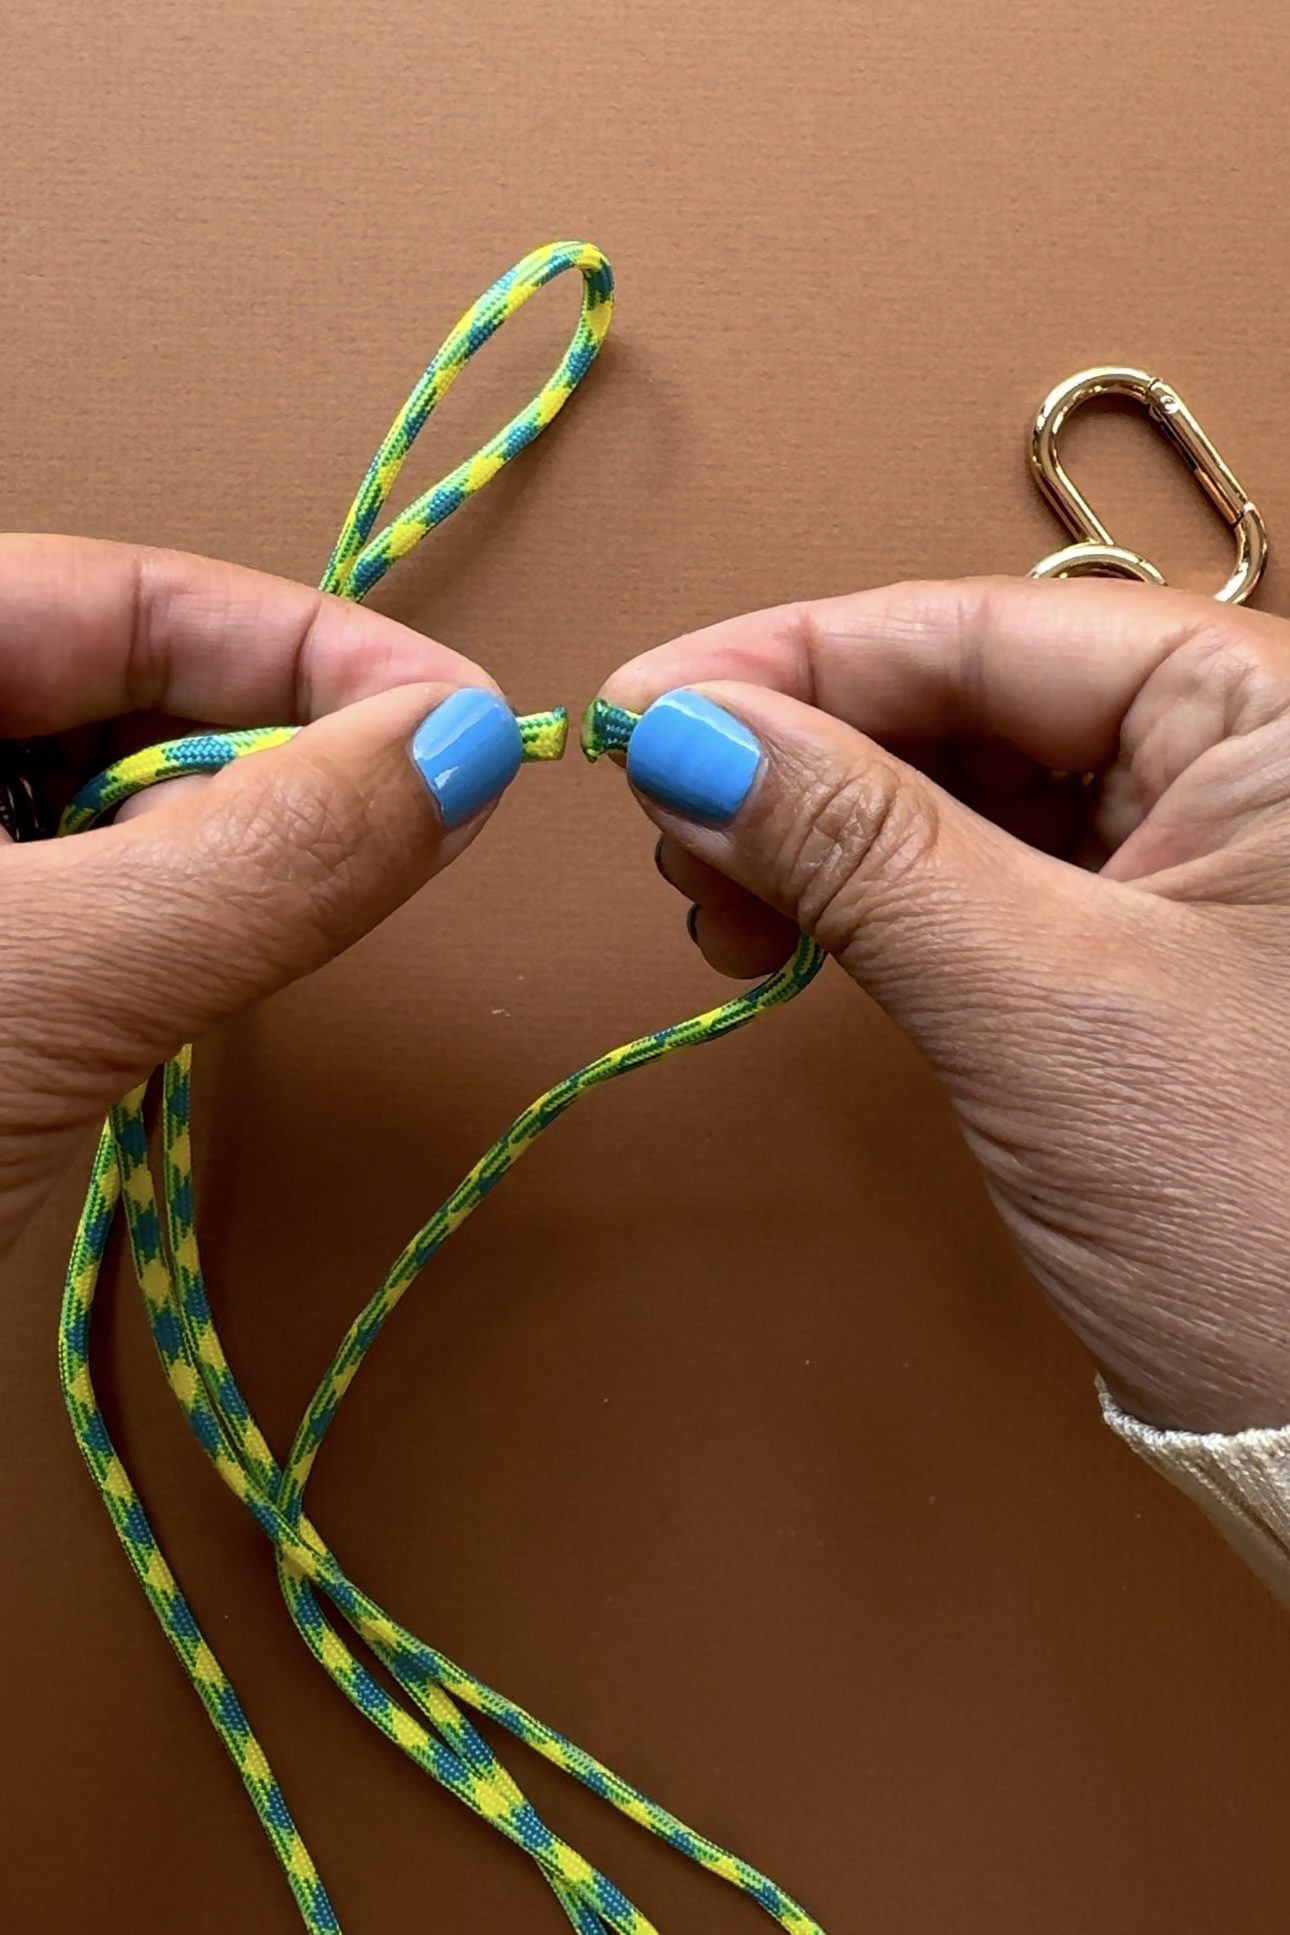
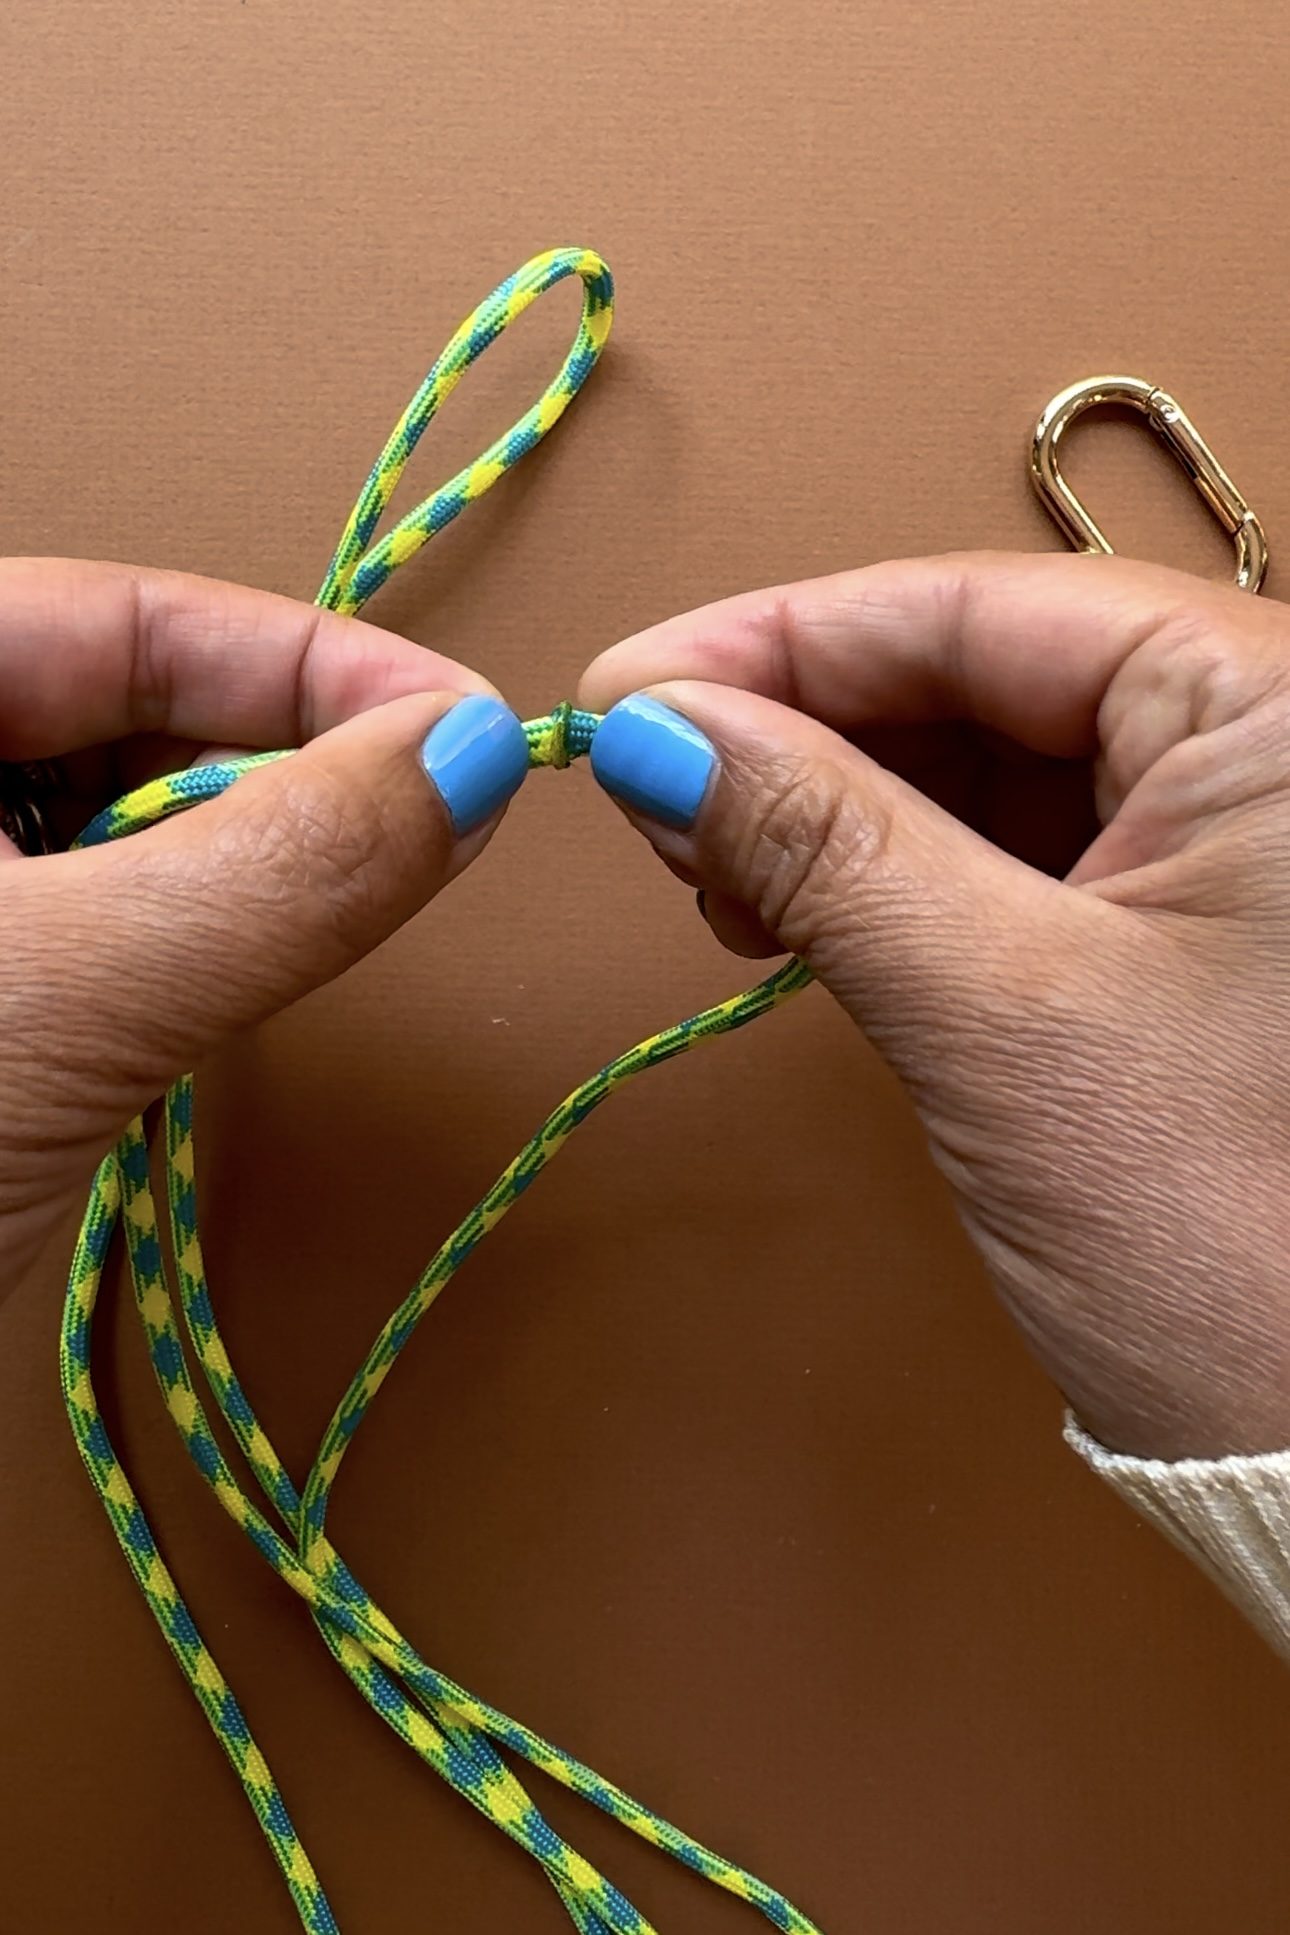
Wait a few seconds before rolling the seam between your fingers. Be sure not to burn yourself! Tug on the rope to make sure you've got a strong fuse.
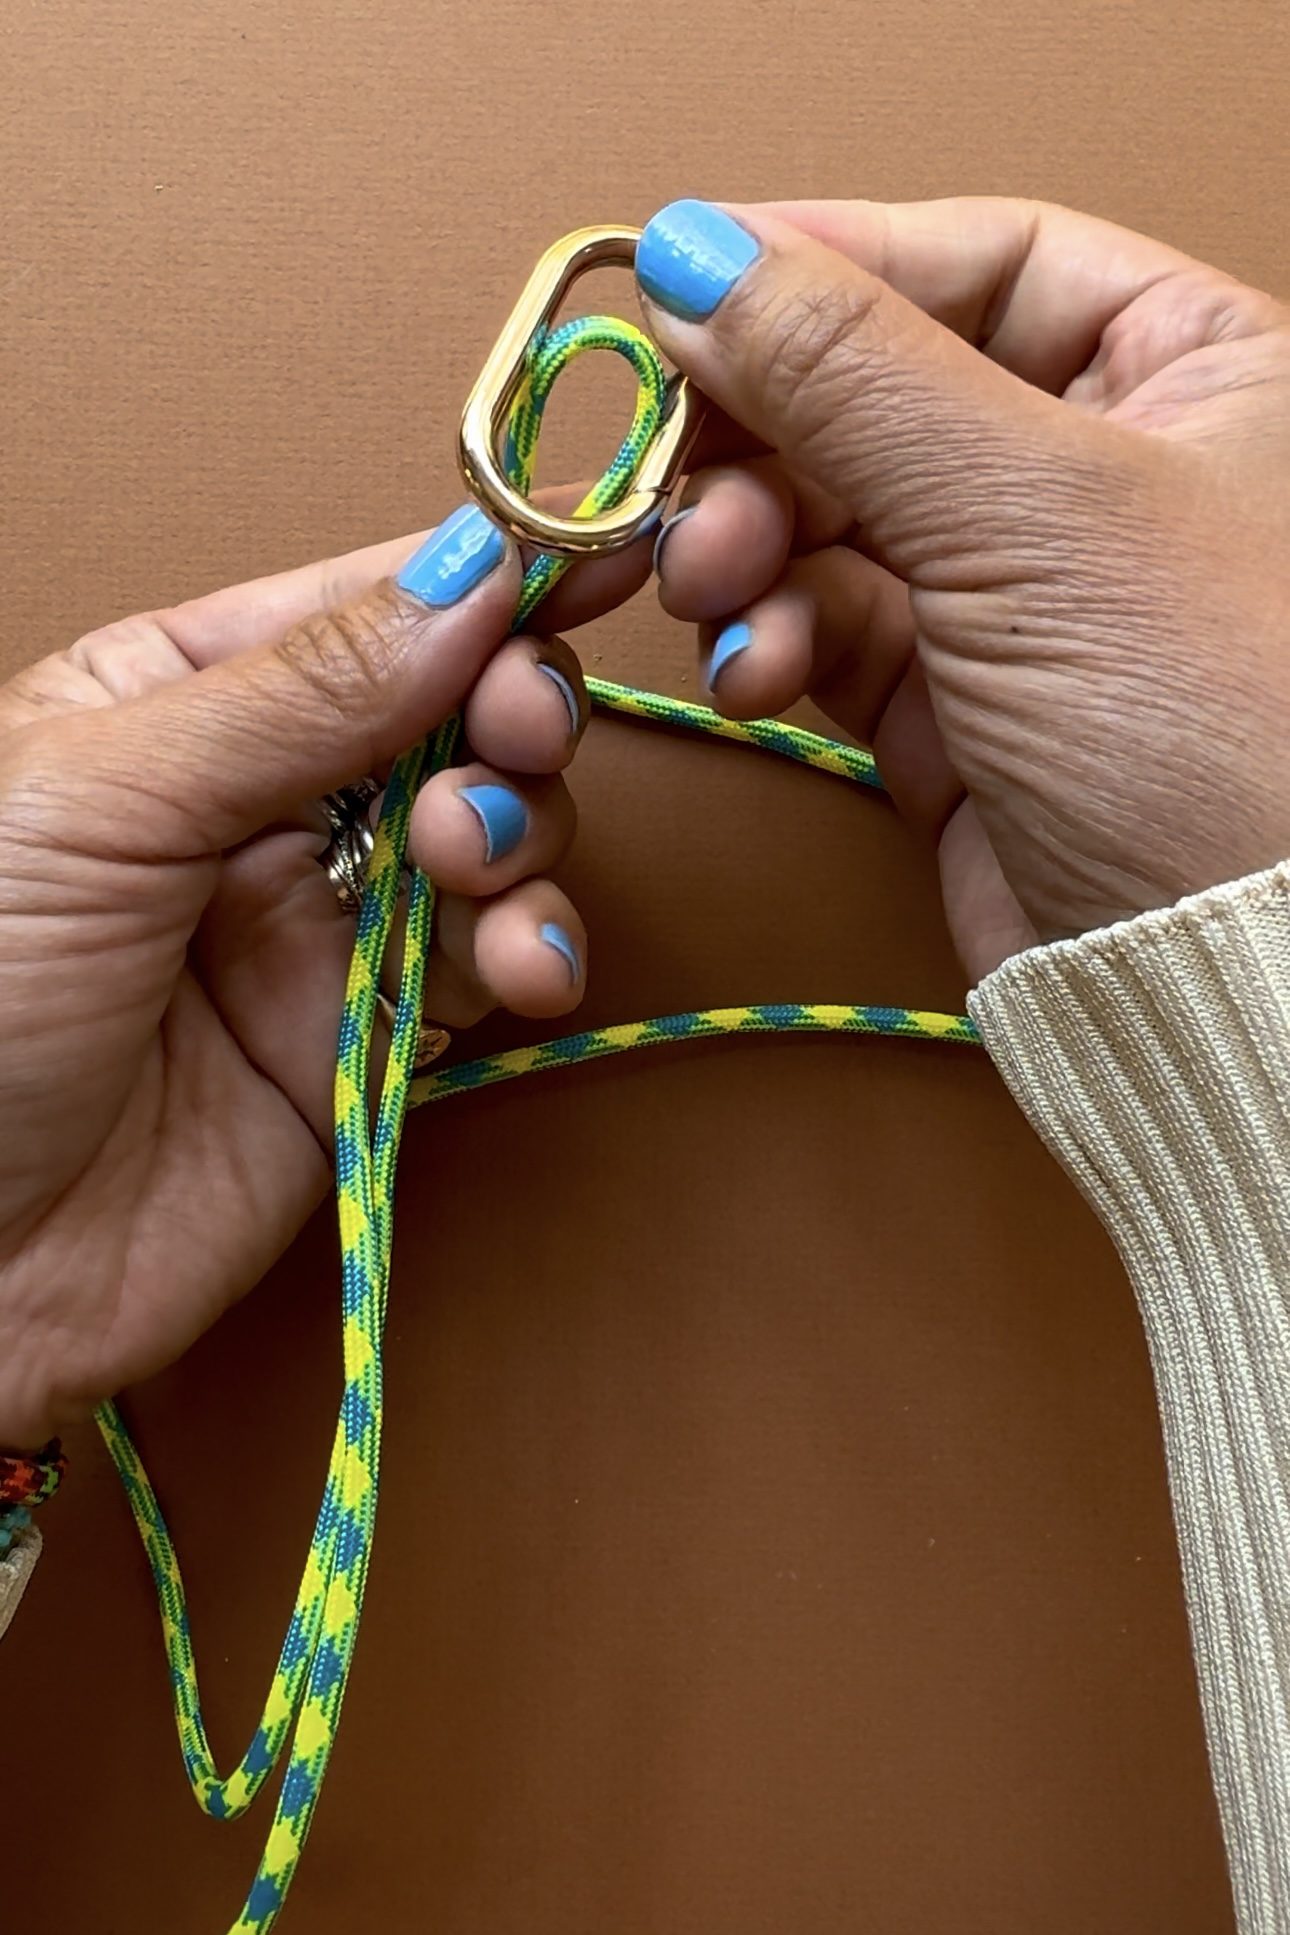
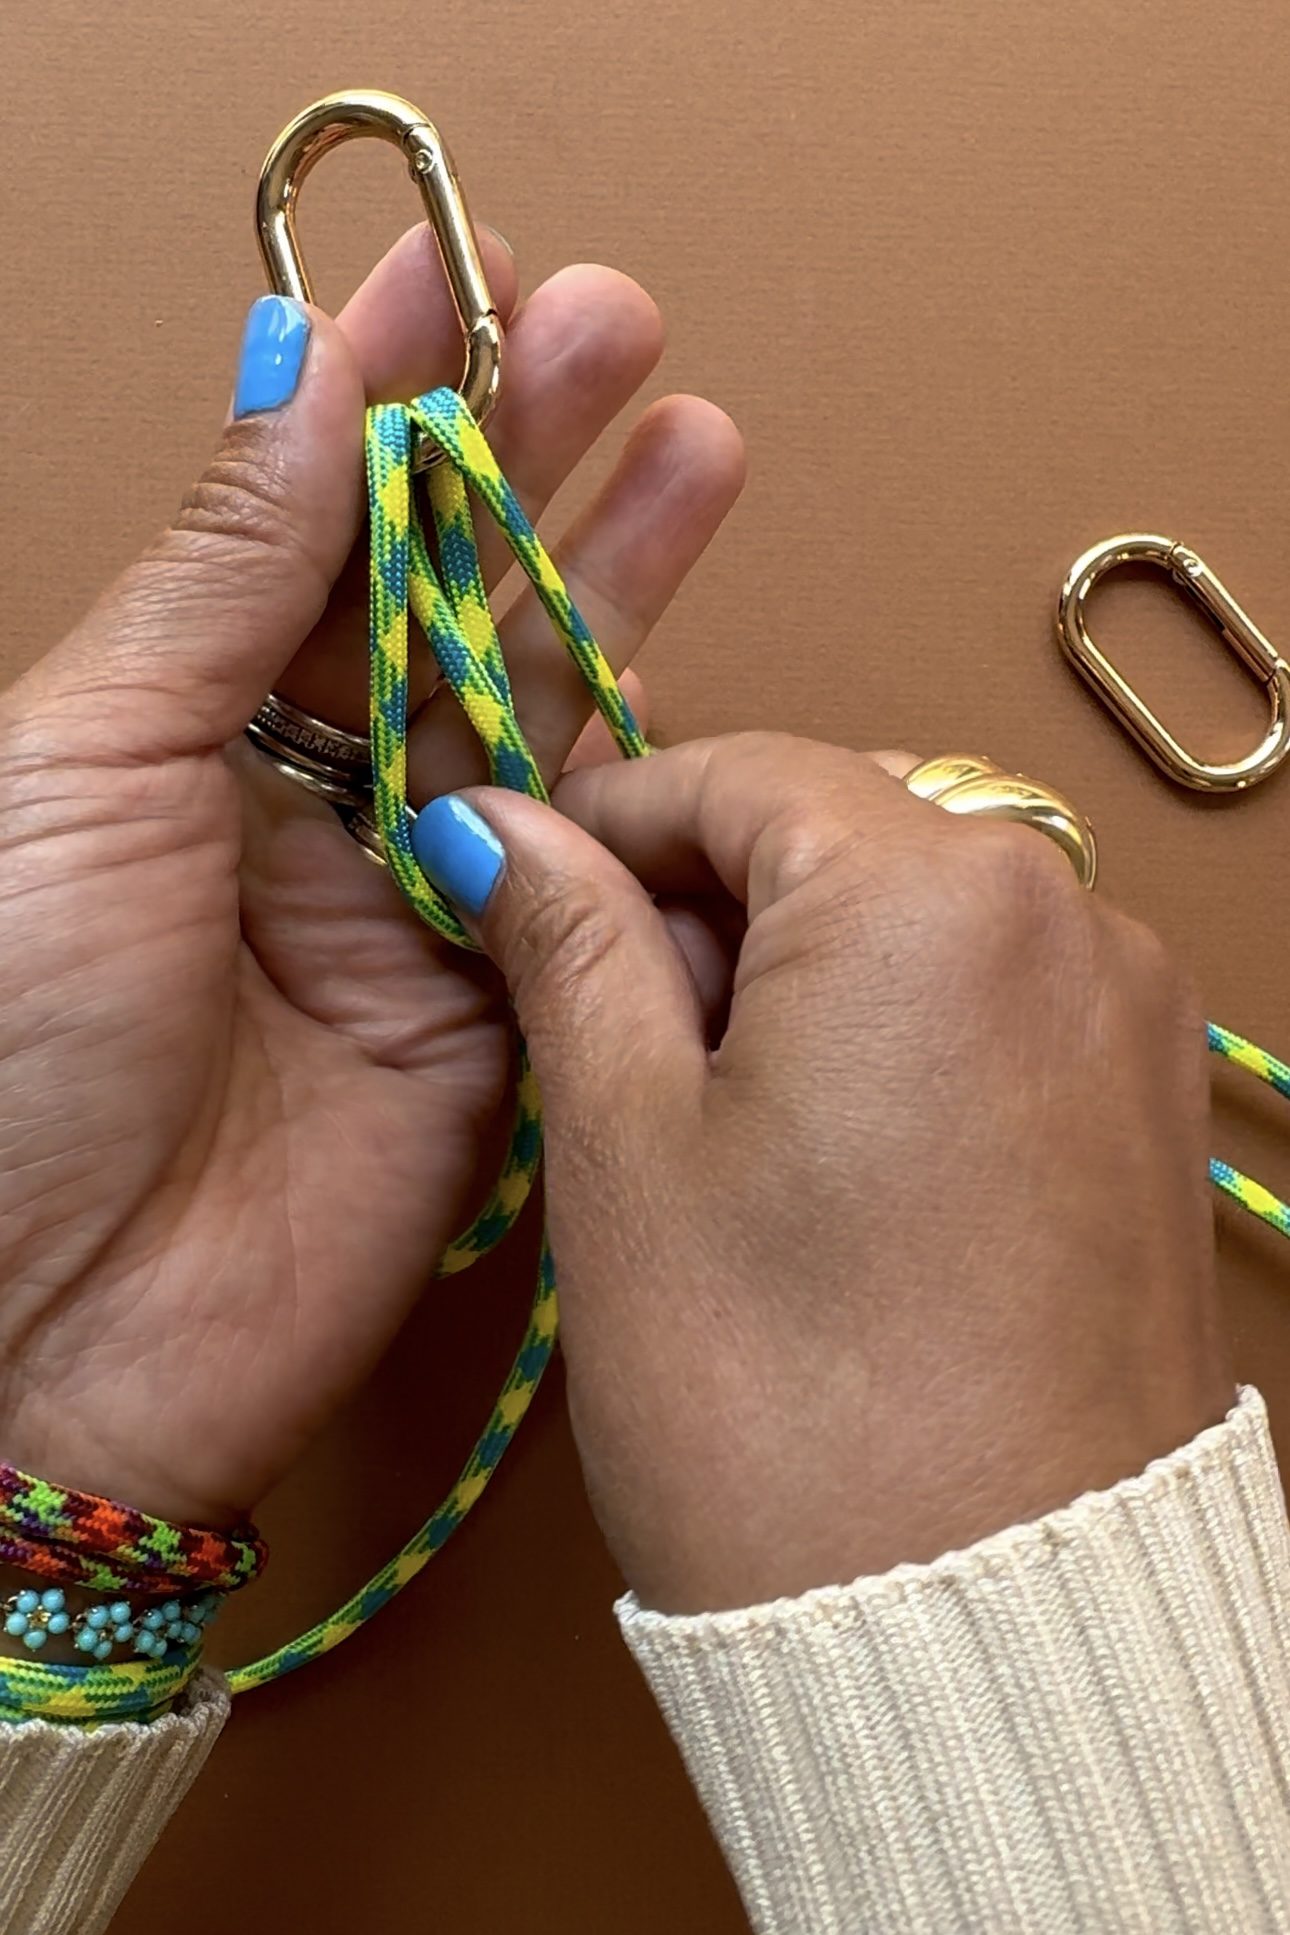
Now the base rope is a closed loop. Take one end and fold the loop over the carabiner. Pull the set of ropes through the loop and pull tight. This is a cow hitch knot.
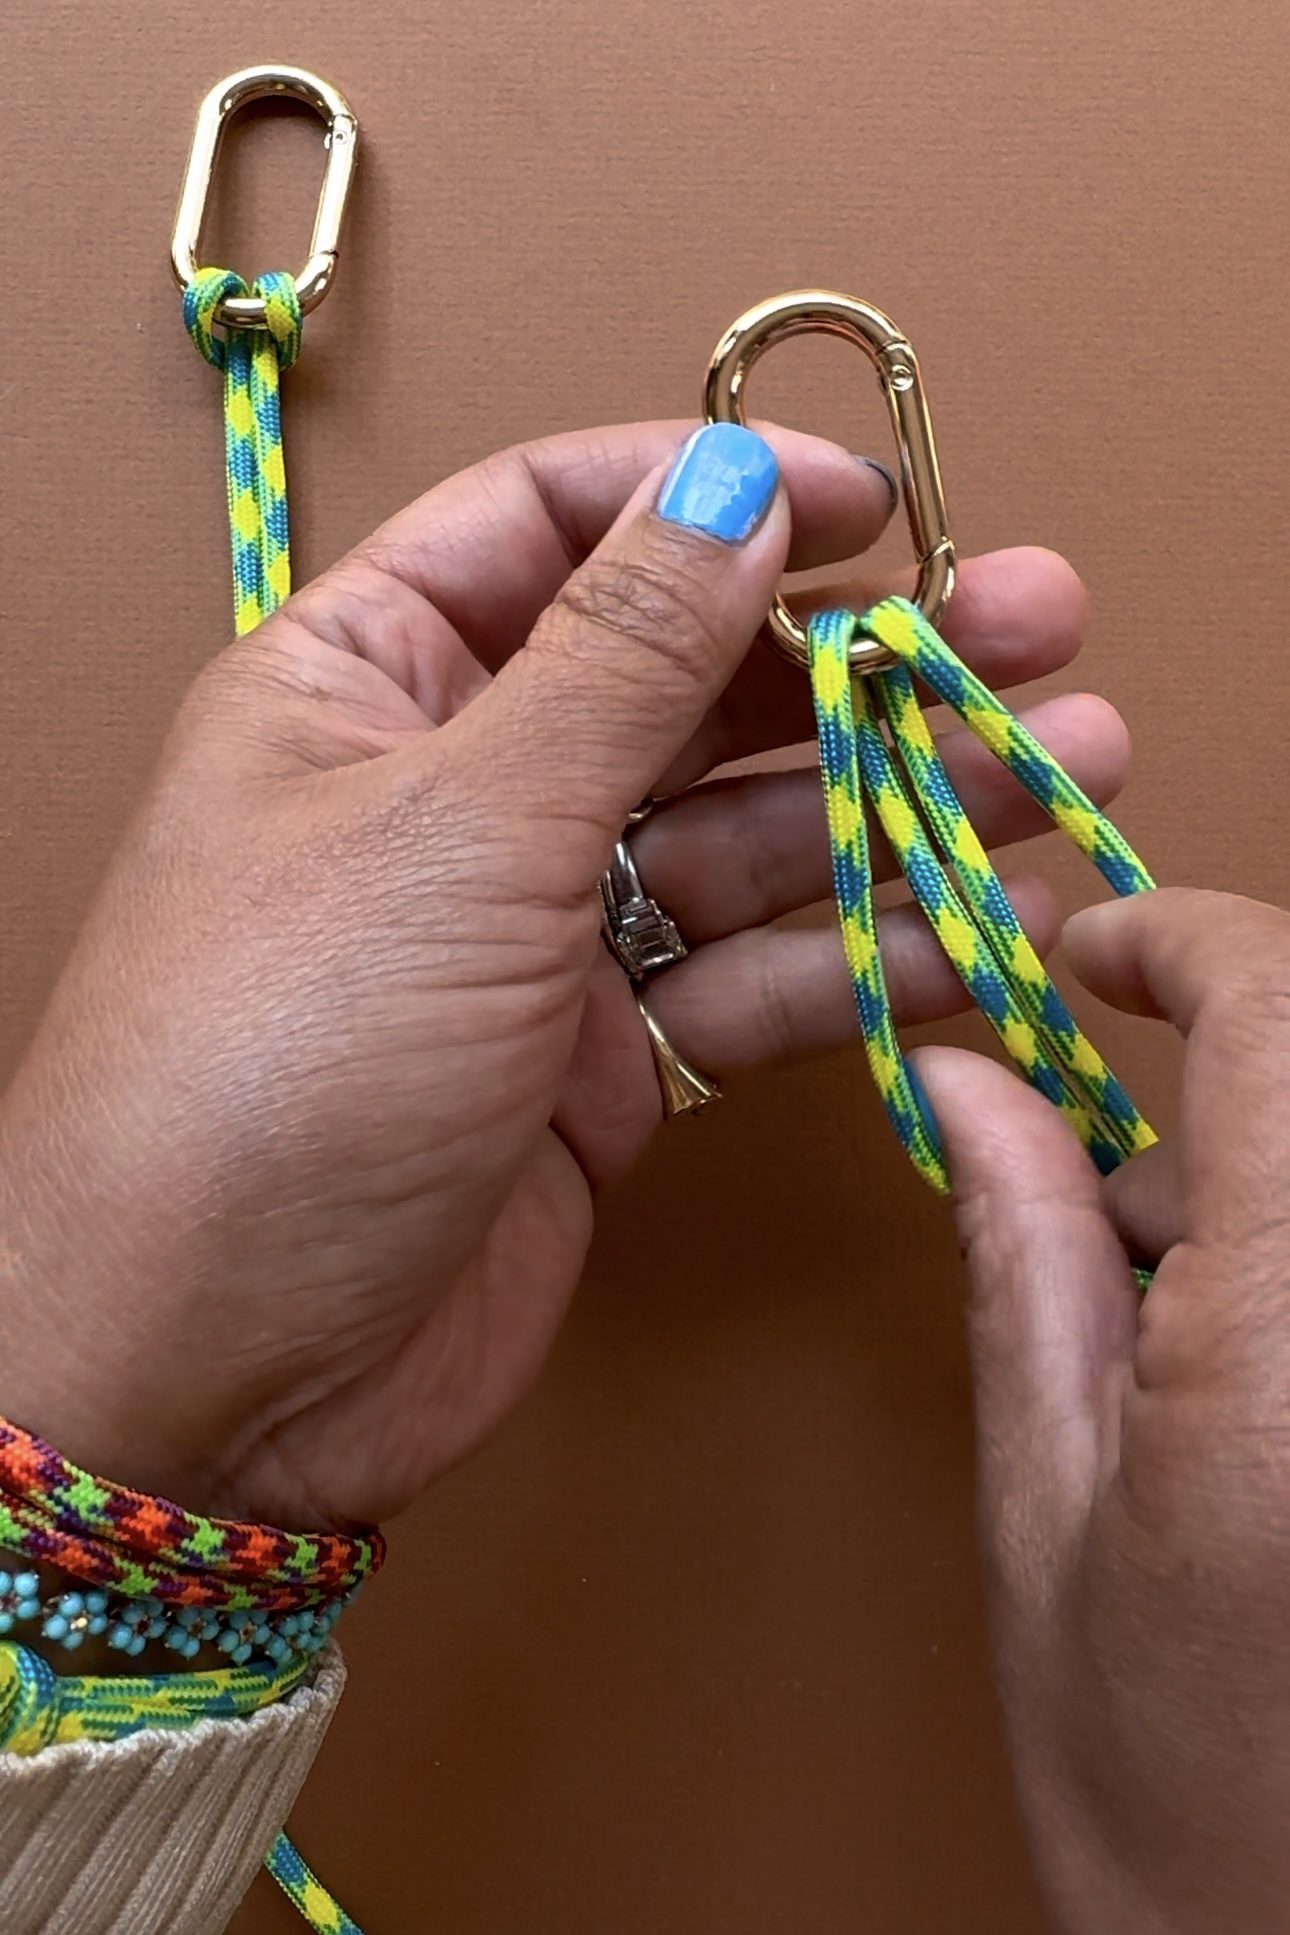
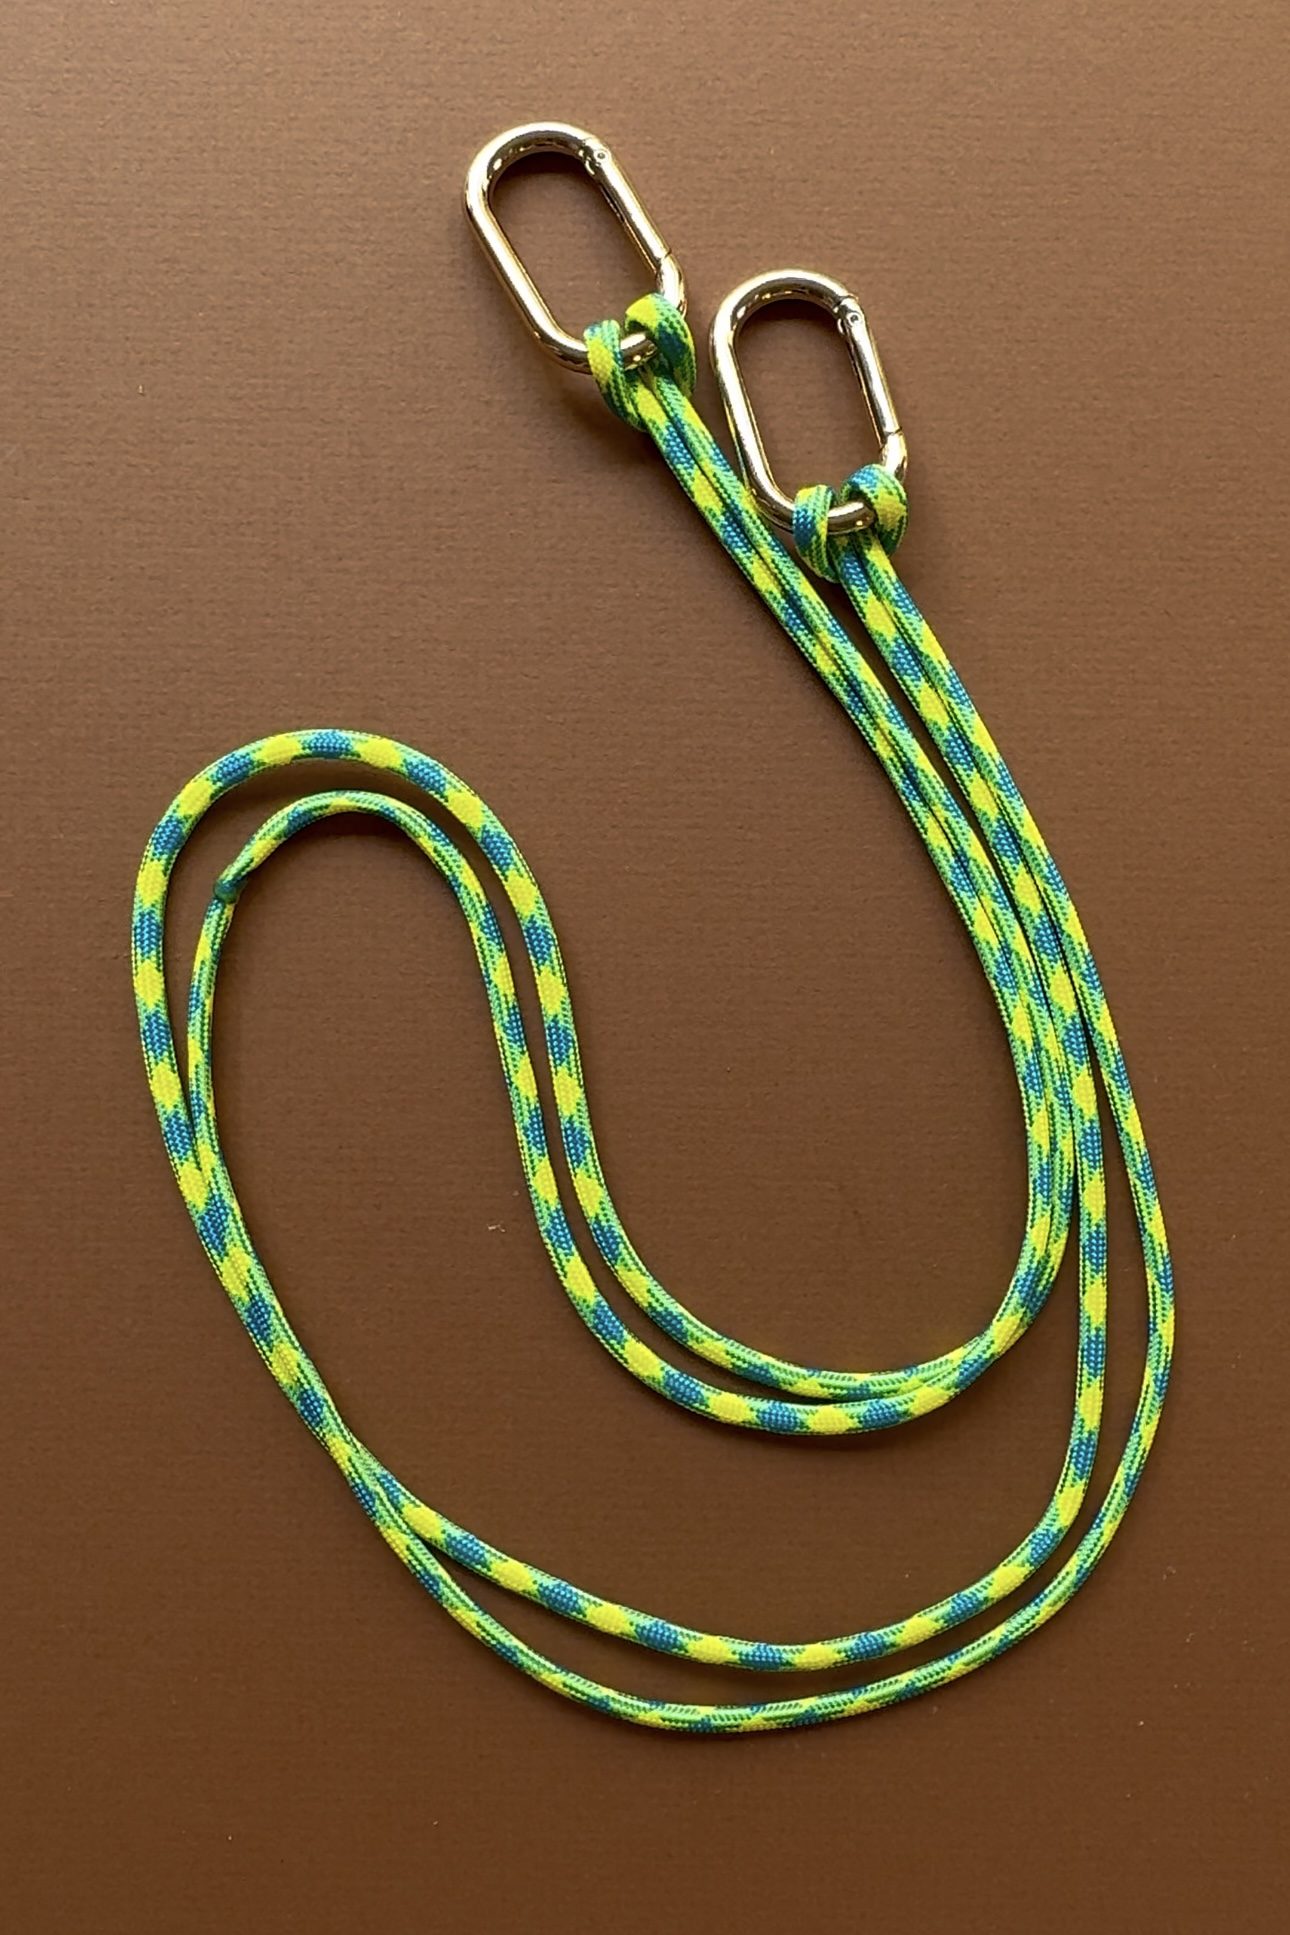
Repeat the step on the other side. You can stop right here as you've now made a bag strap . . . but why stop here?
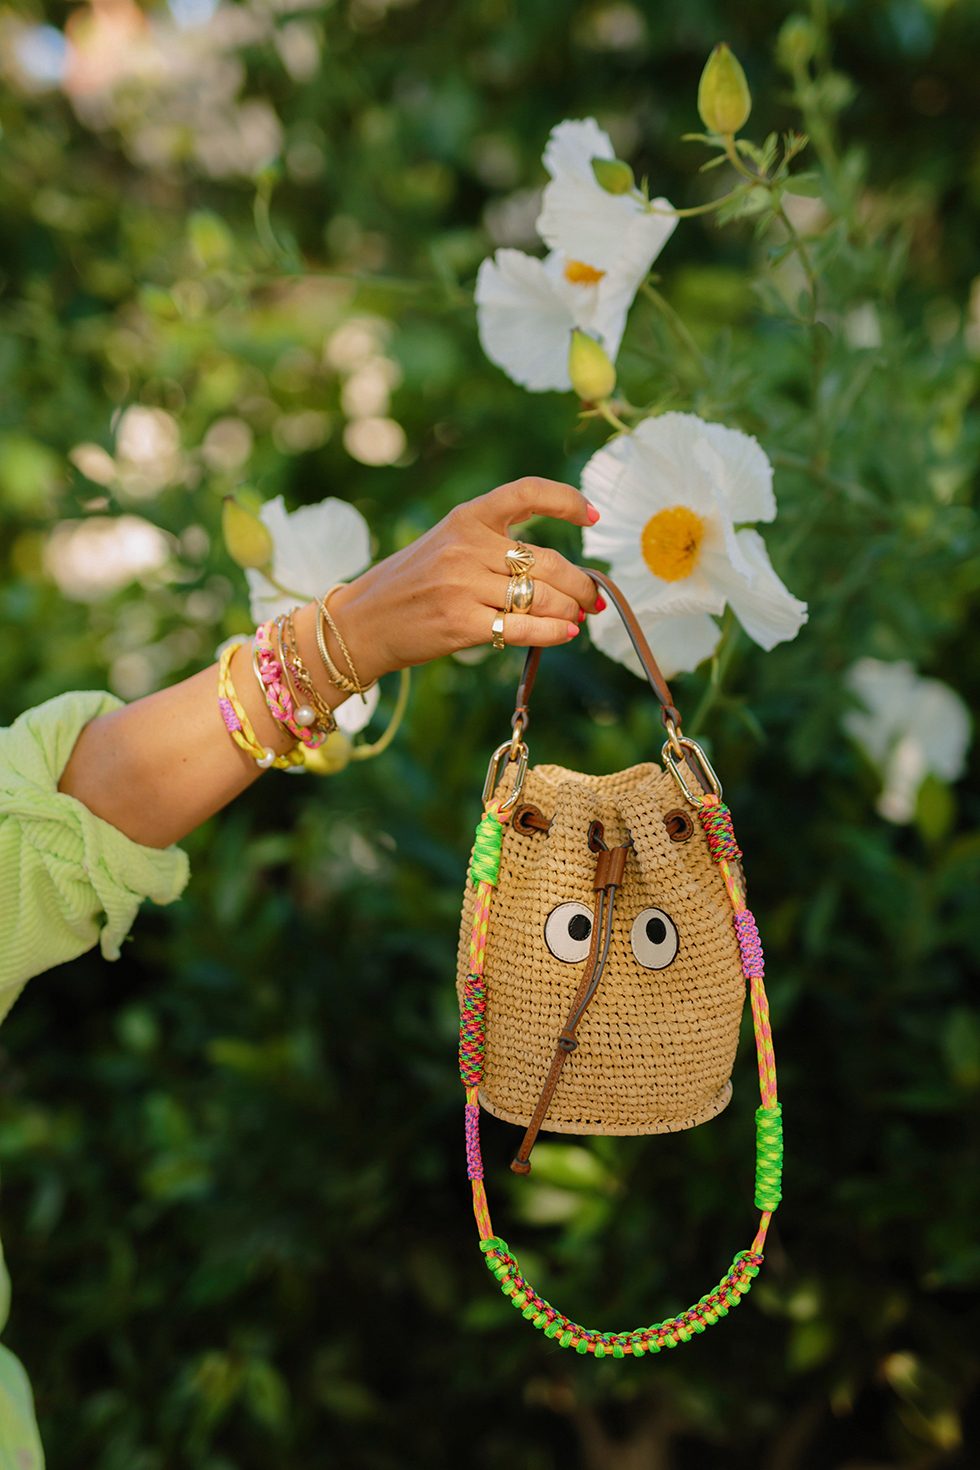
Here I'm embellishing the bag strap with a macrame weave with a thin and thick rope. However, you can do it with a single color thick rope, single color thin rope or you can make a bootlace weave as seen below in 'method 2'.
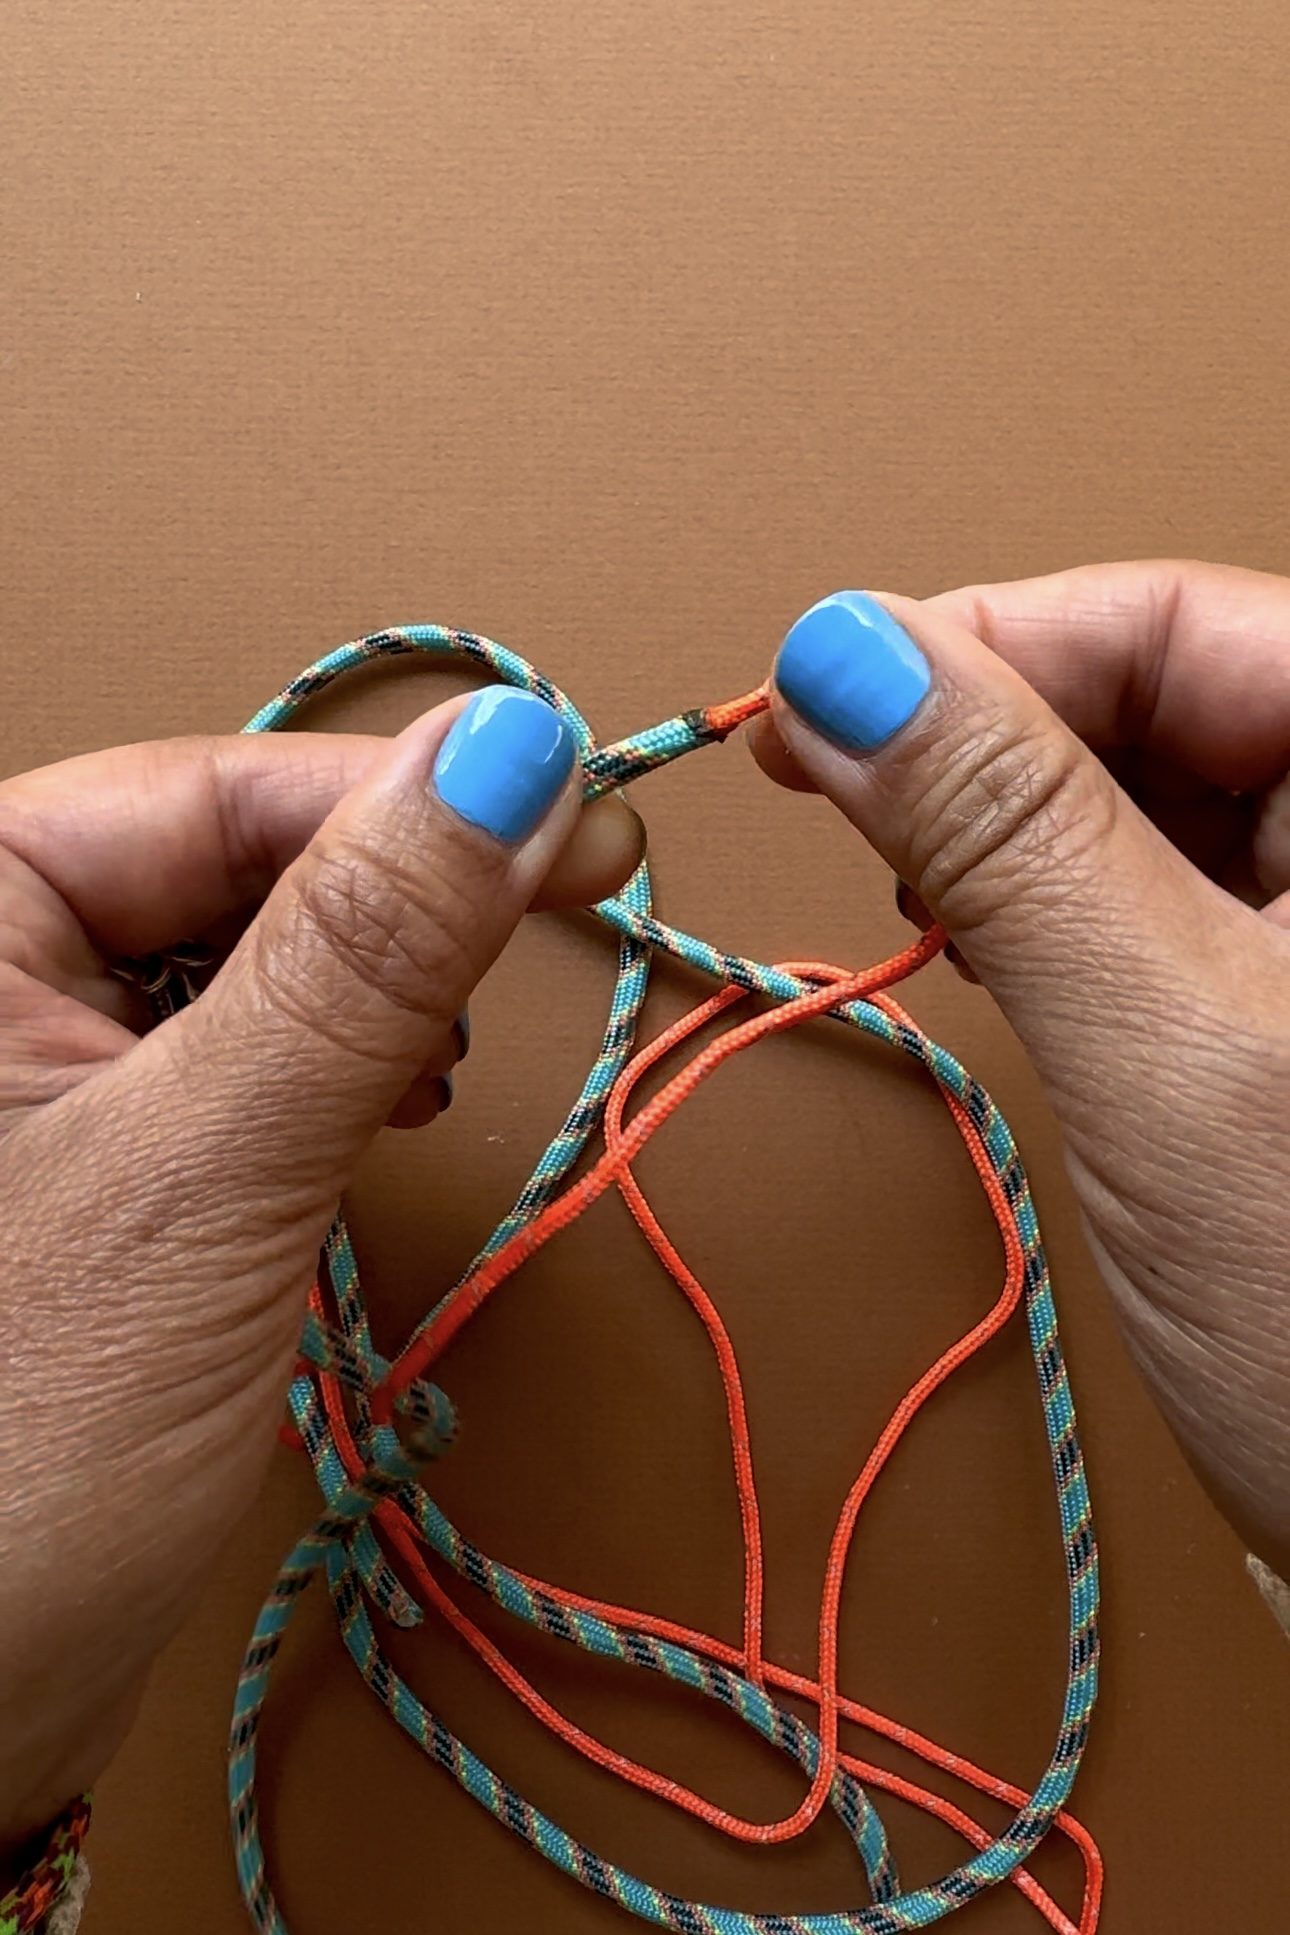
Fuse the ends of a thin and thick rope together.
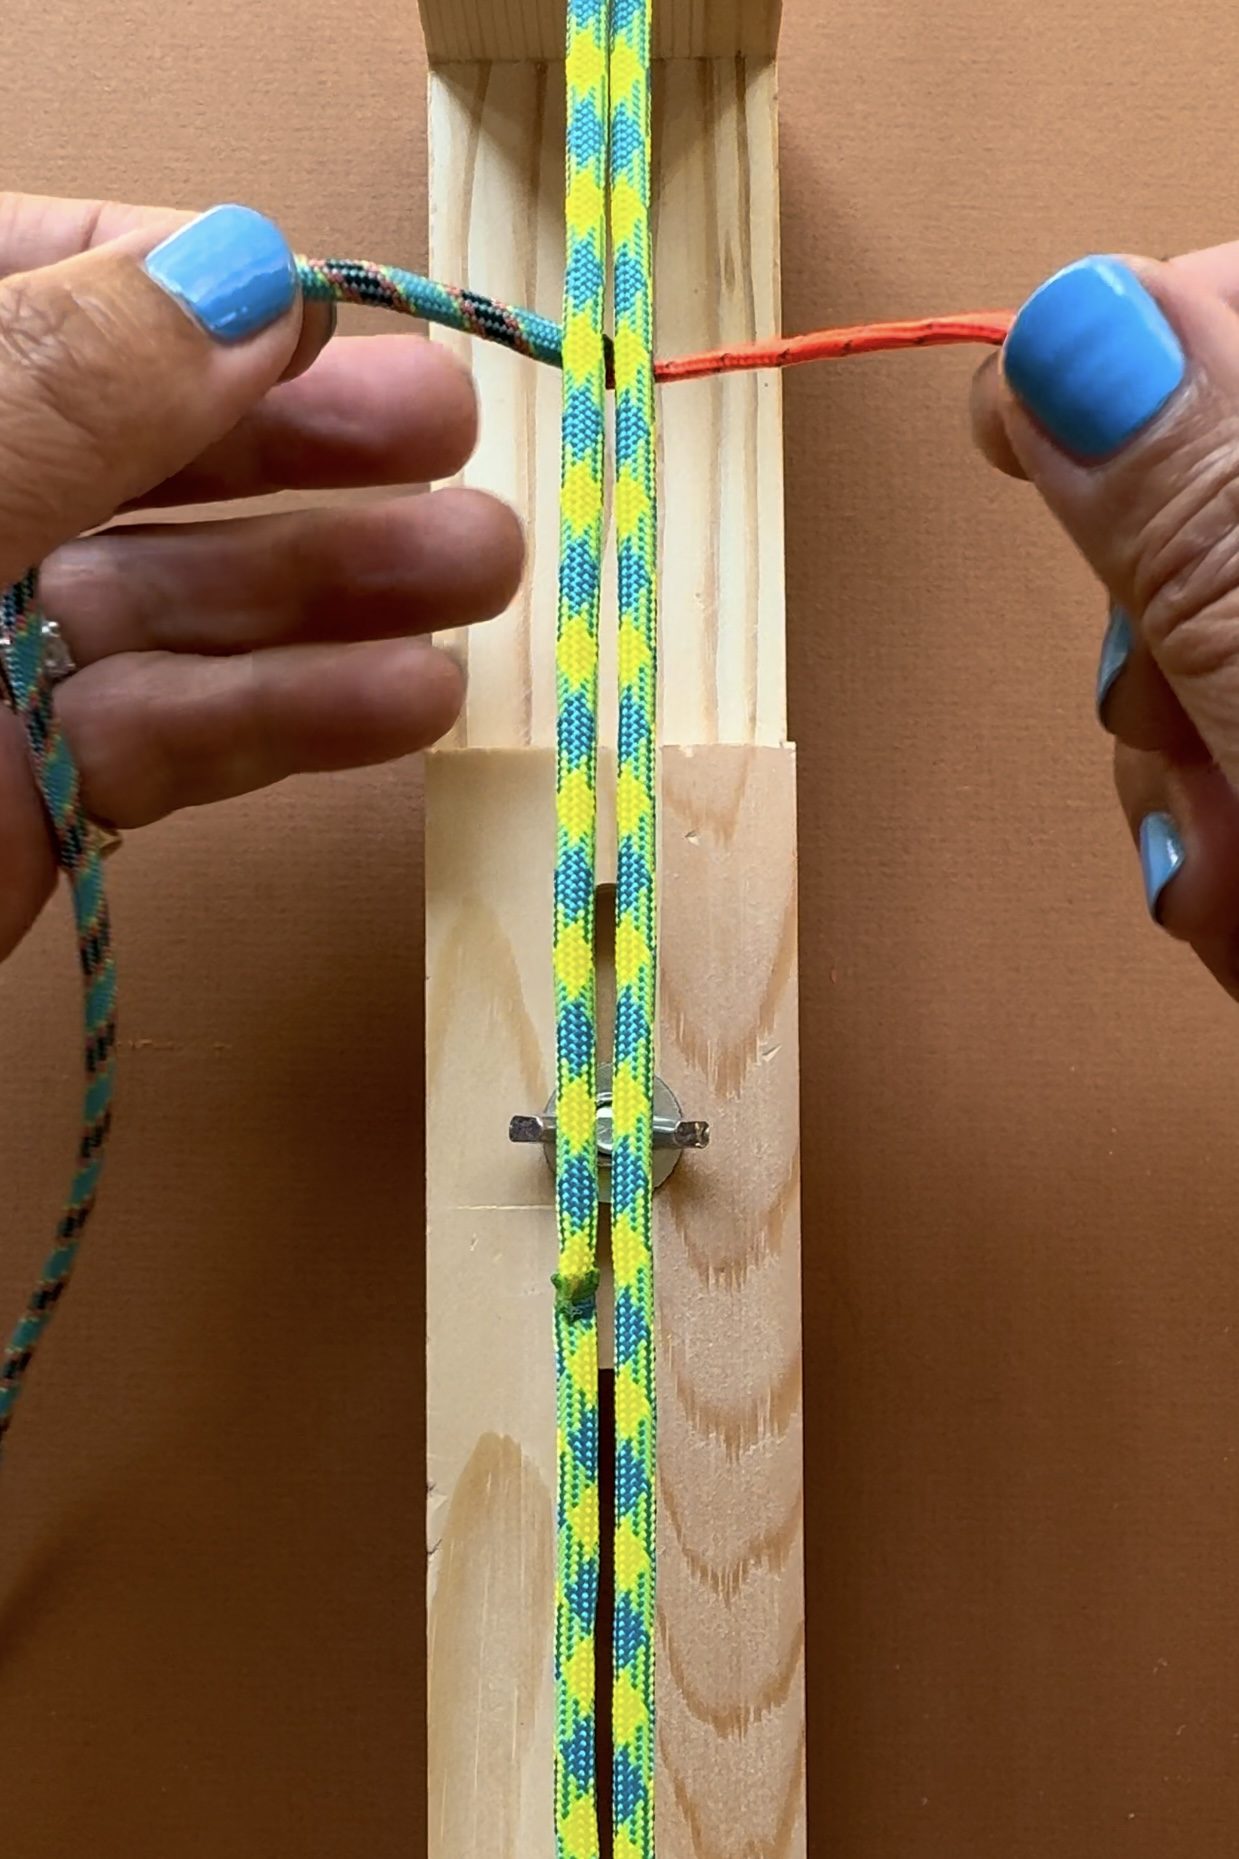
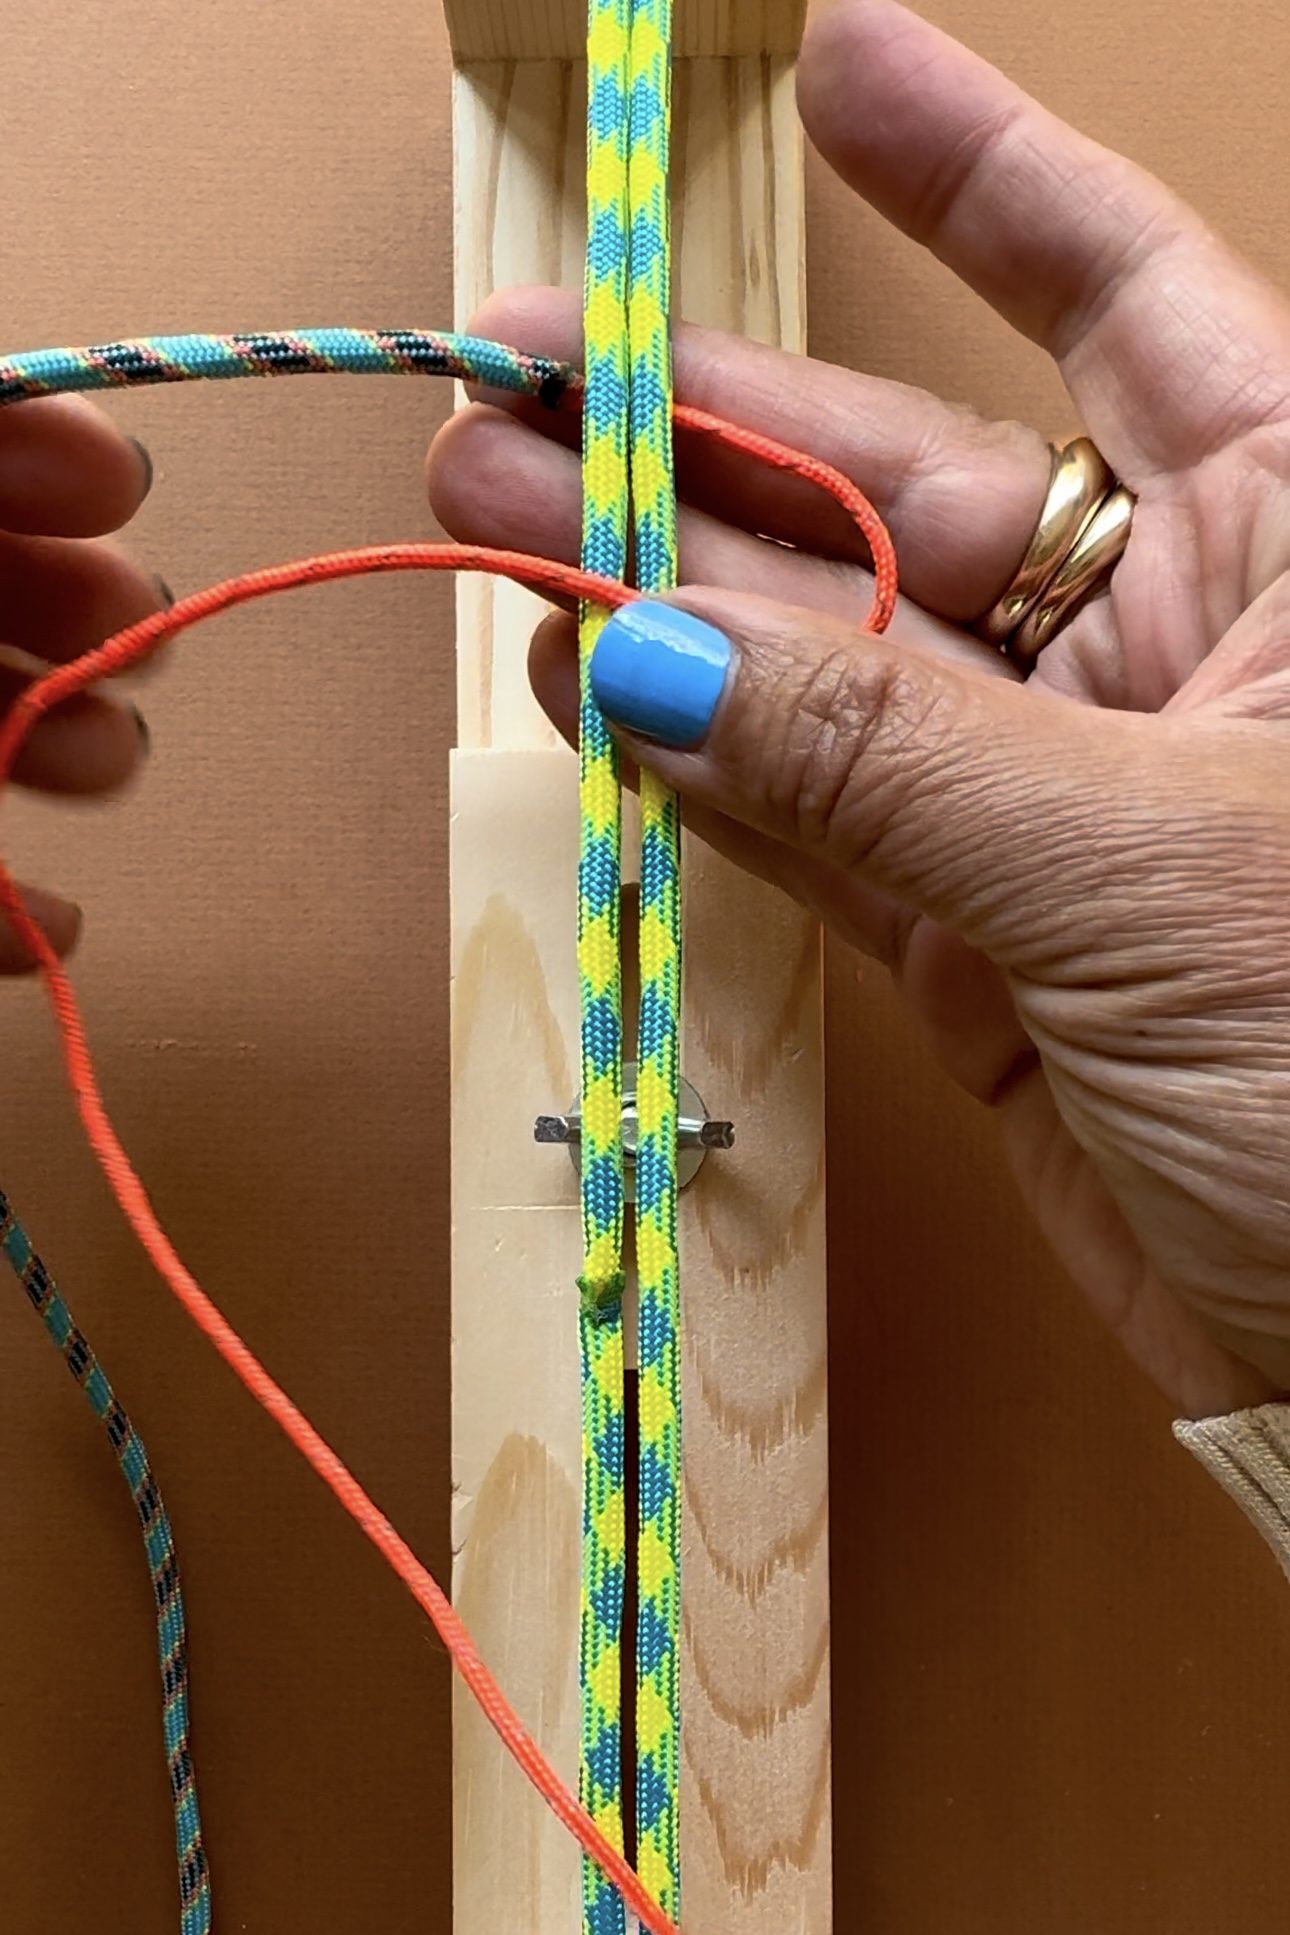
Line the seam under the base ropes. Loop the right rope over the base rope, leaving a loop on the right.
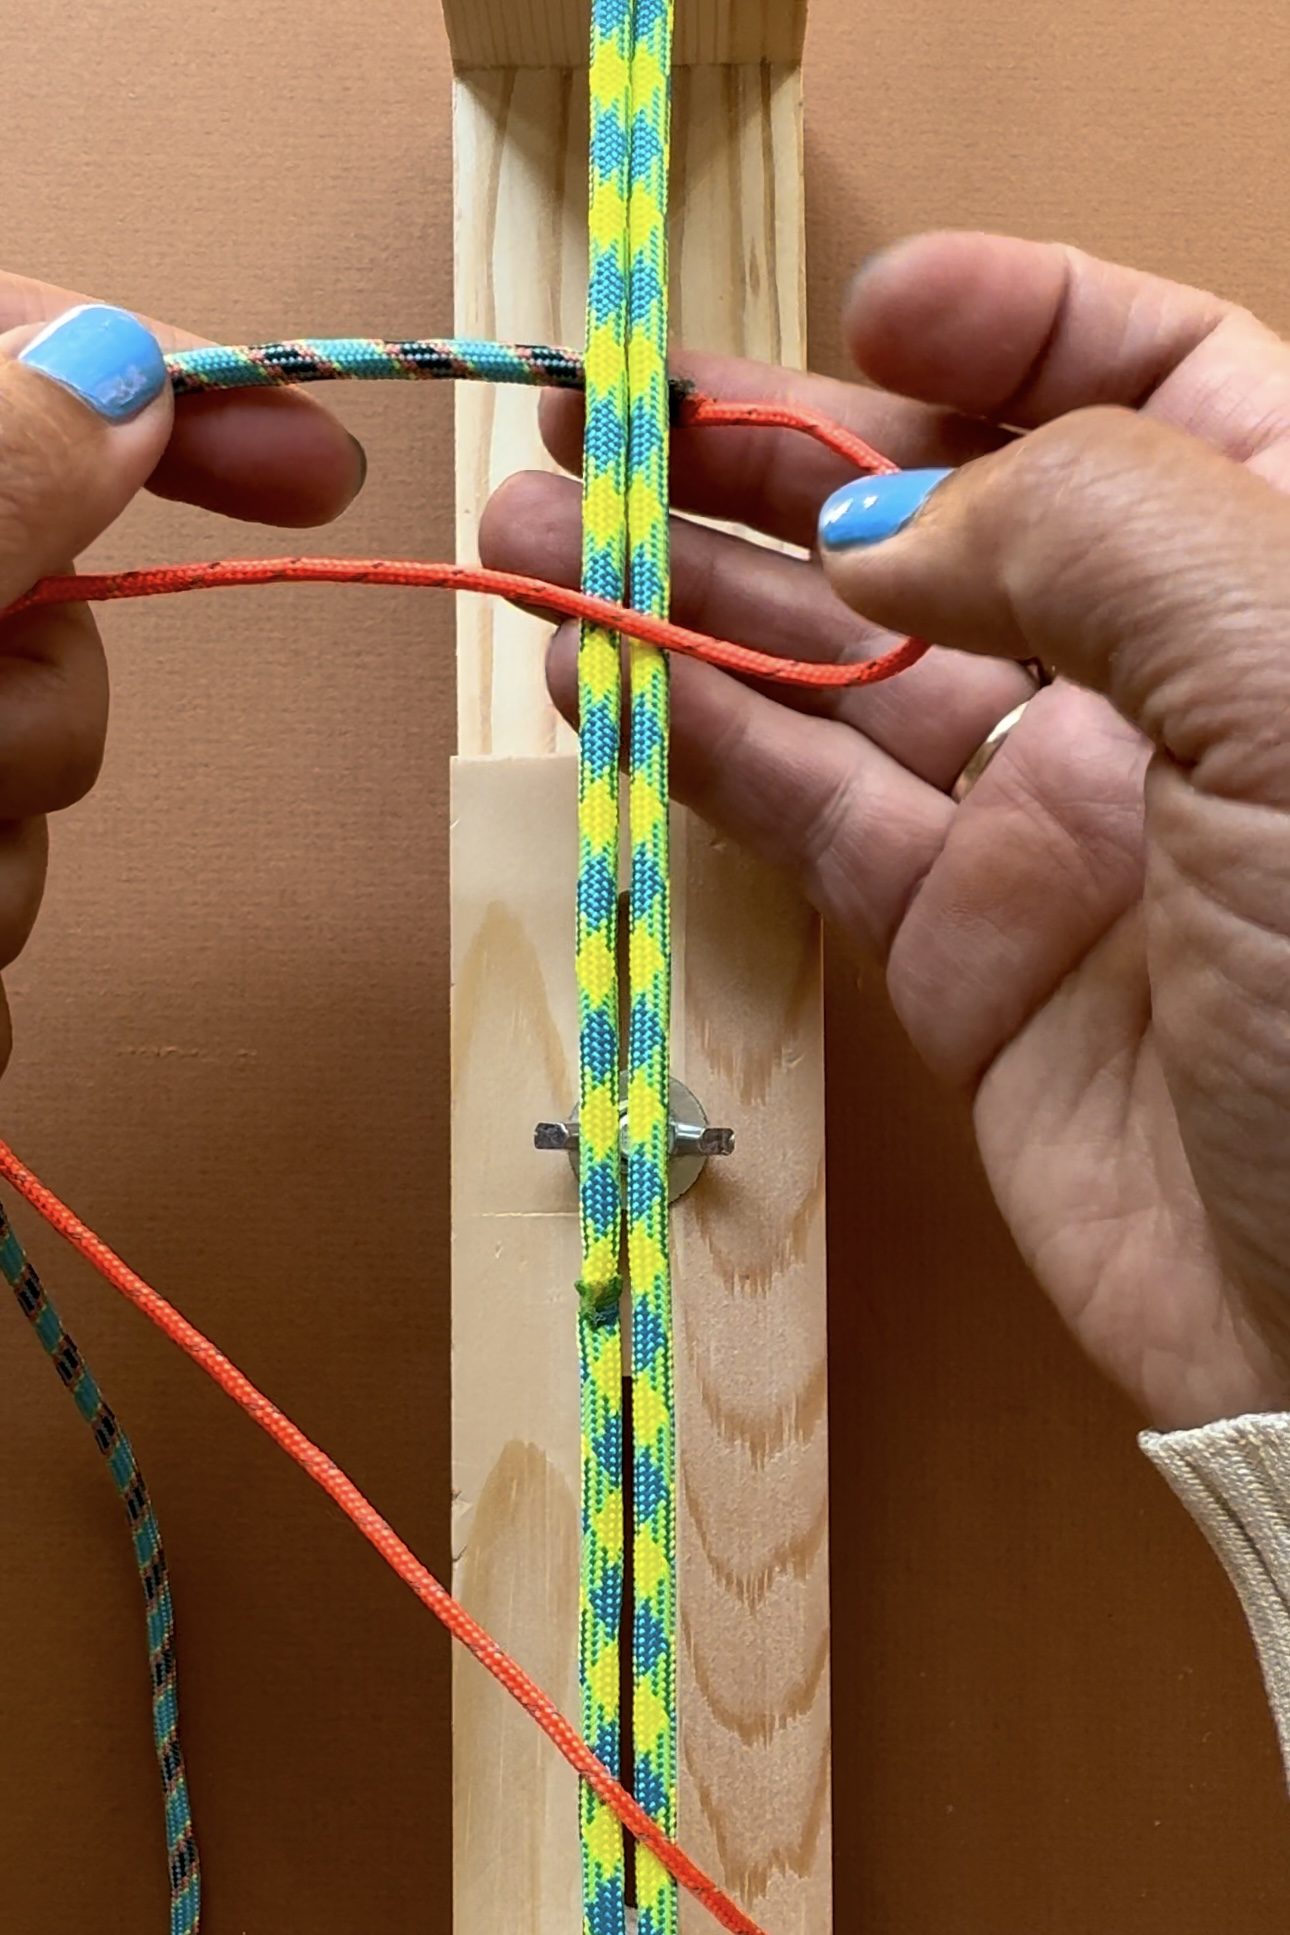
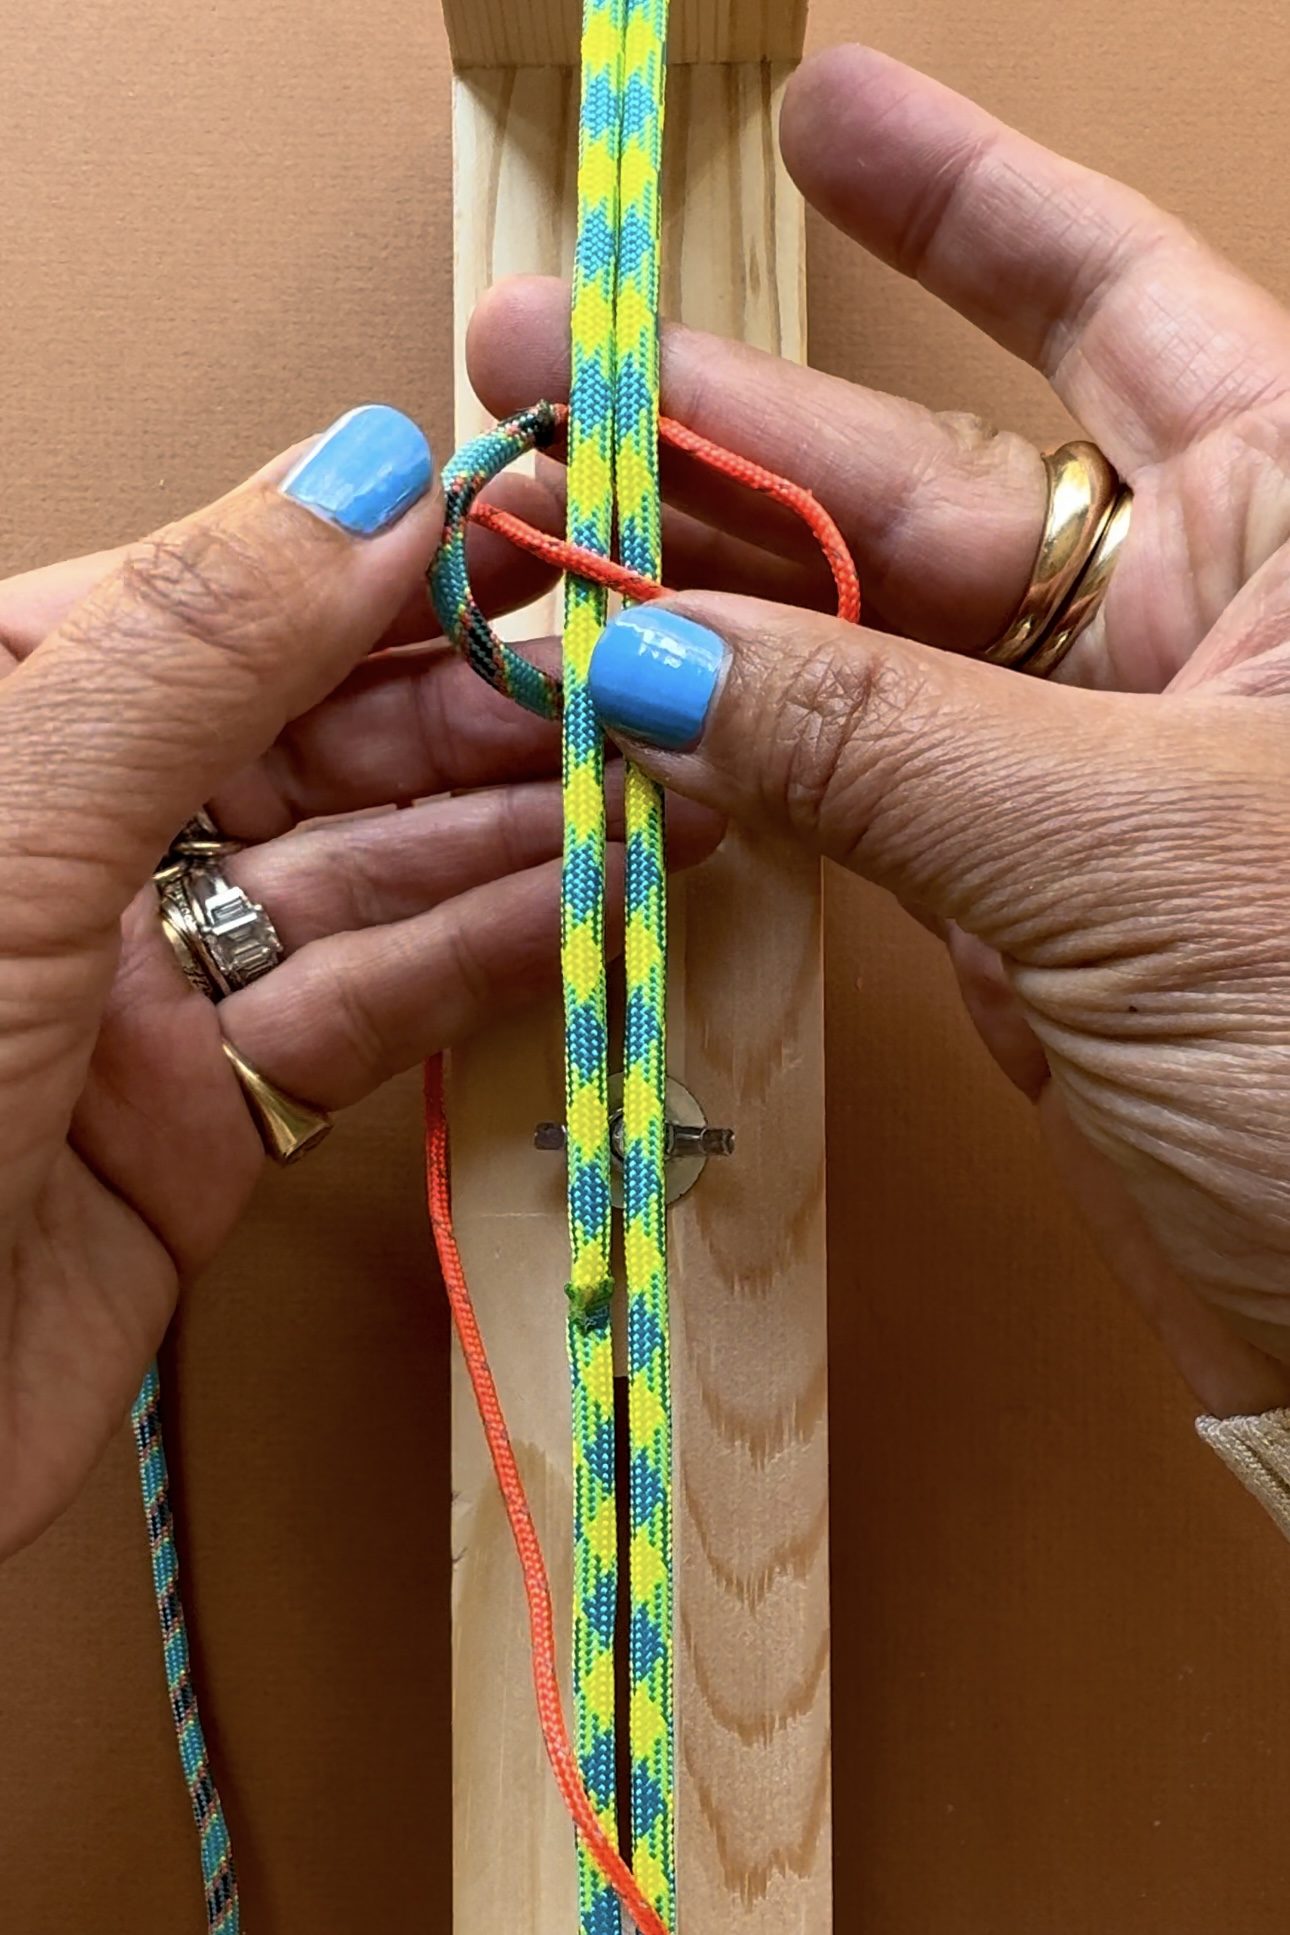
Take the left rope and fold it over the right rope on the left side.
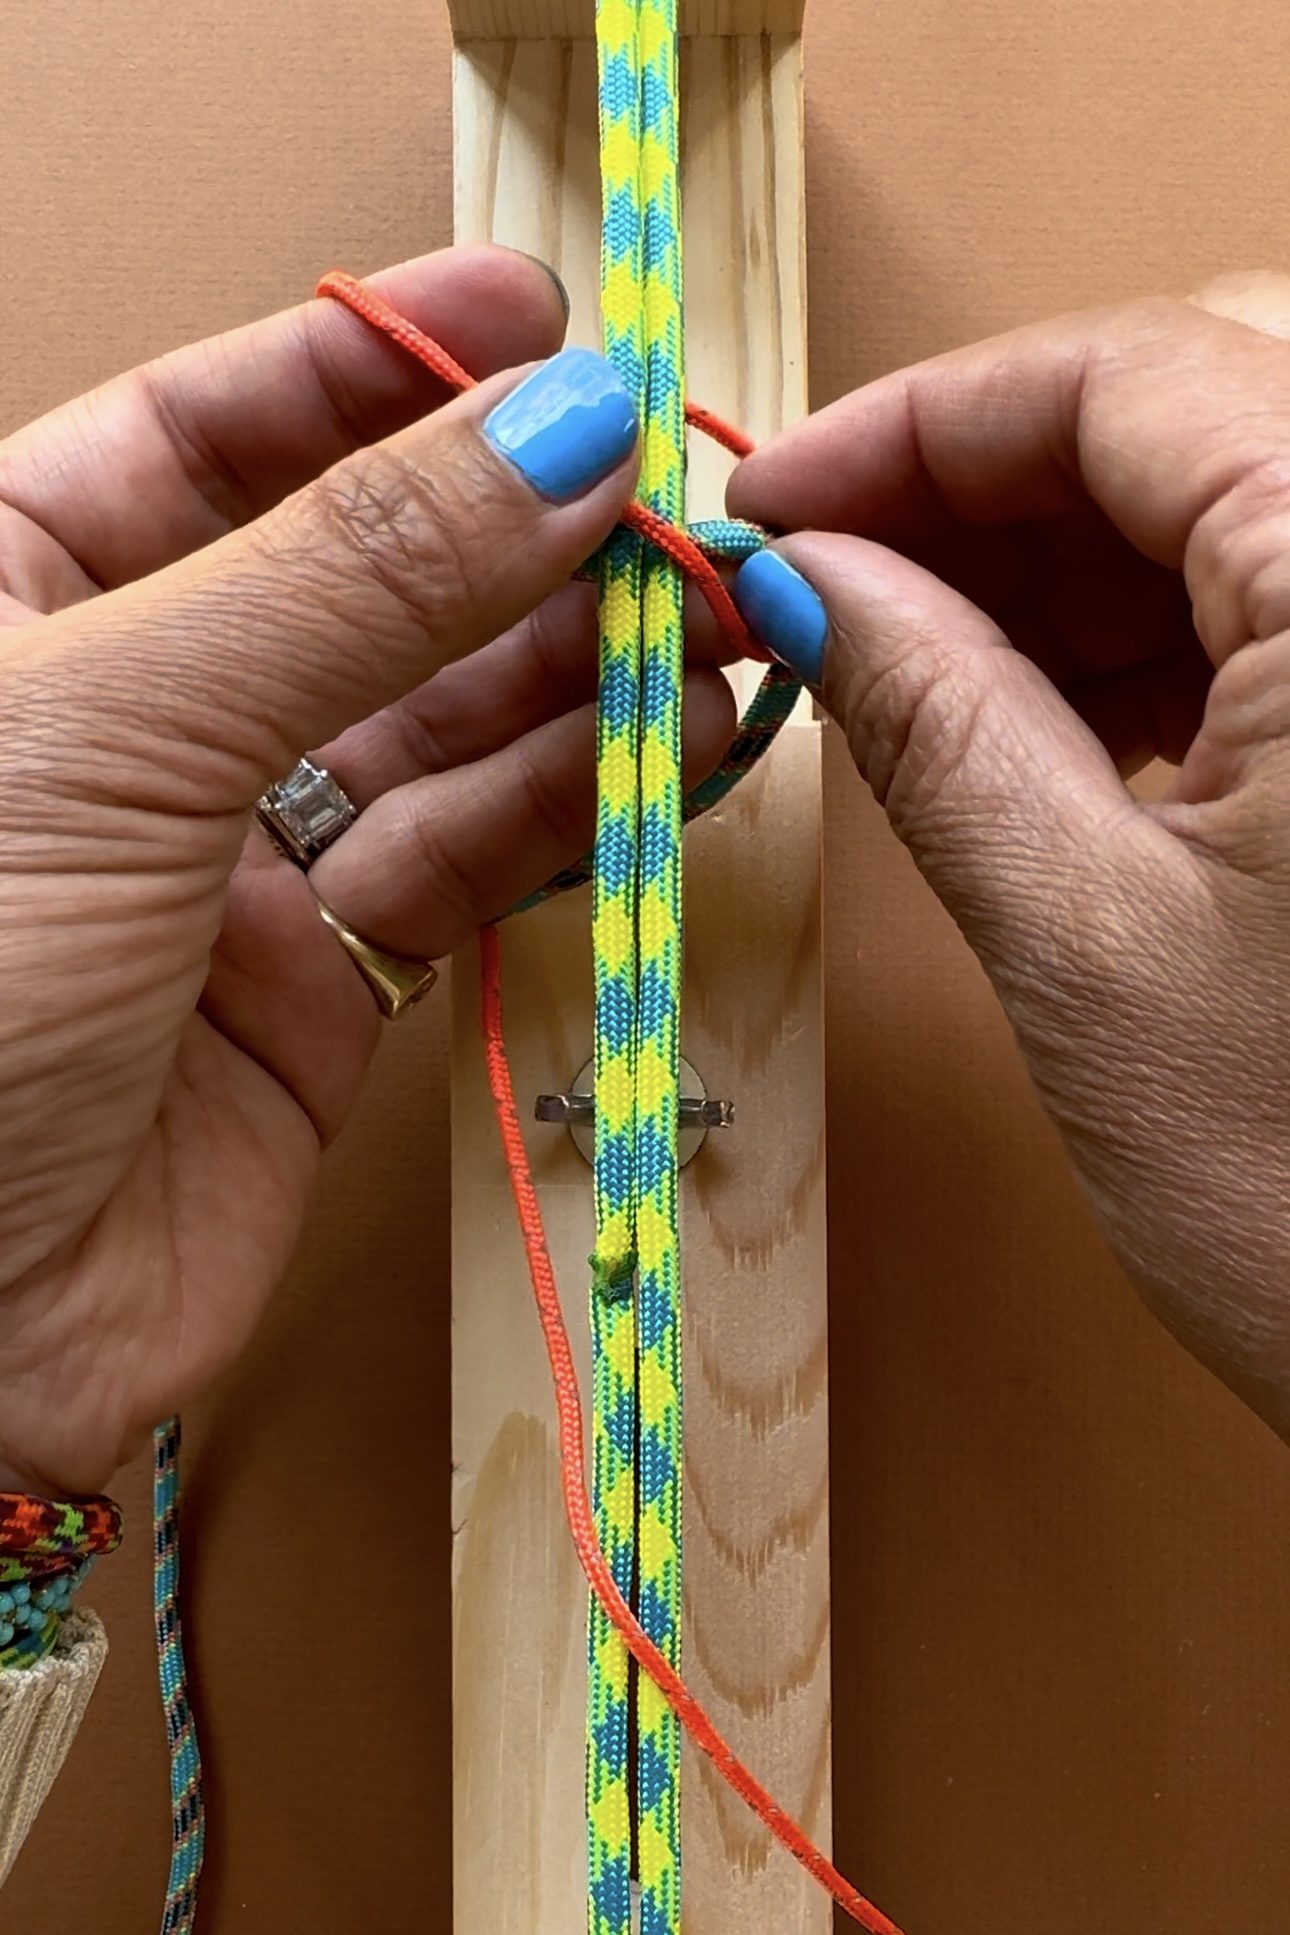
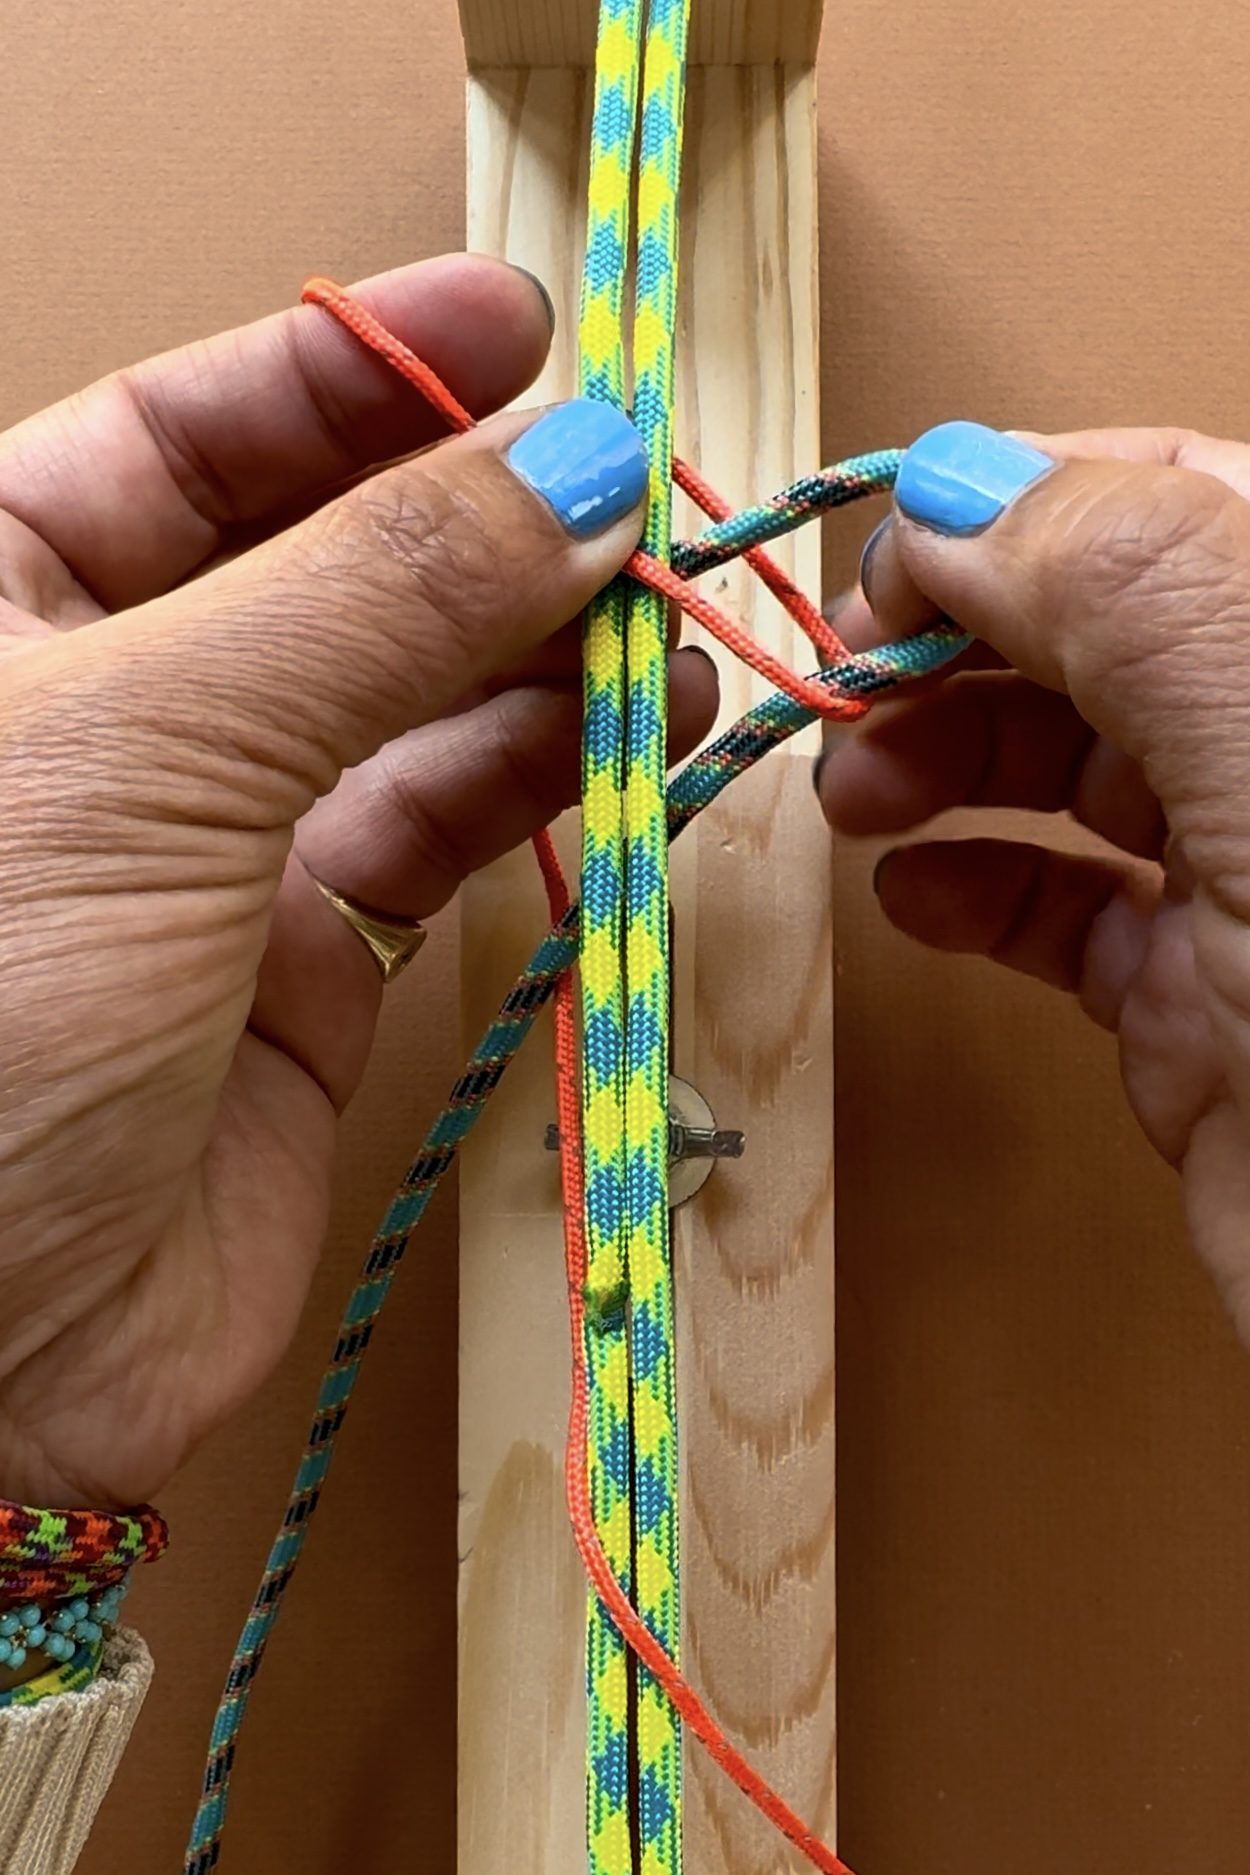
Bring the left rope under the base rope and through loop on the right.
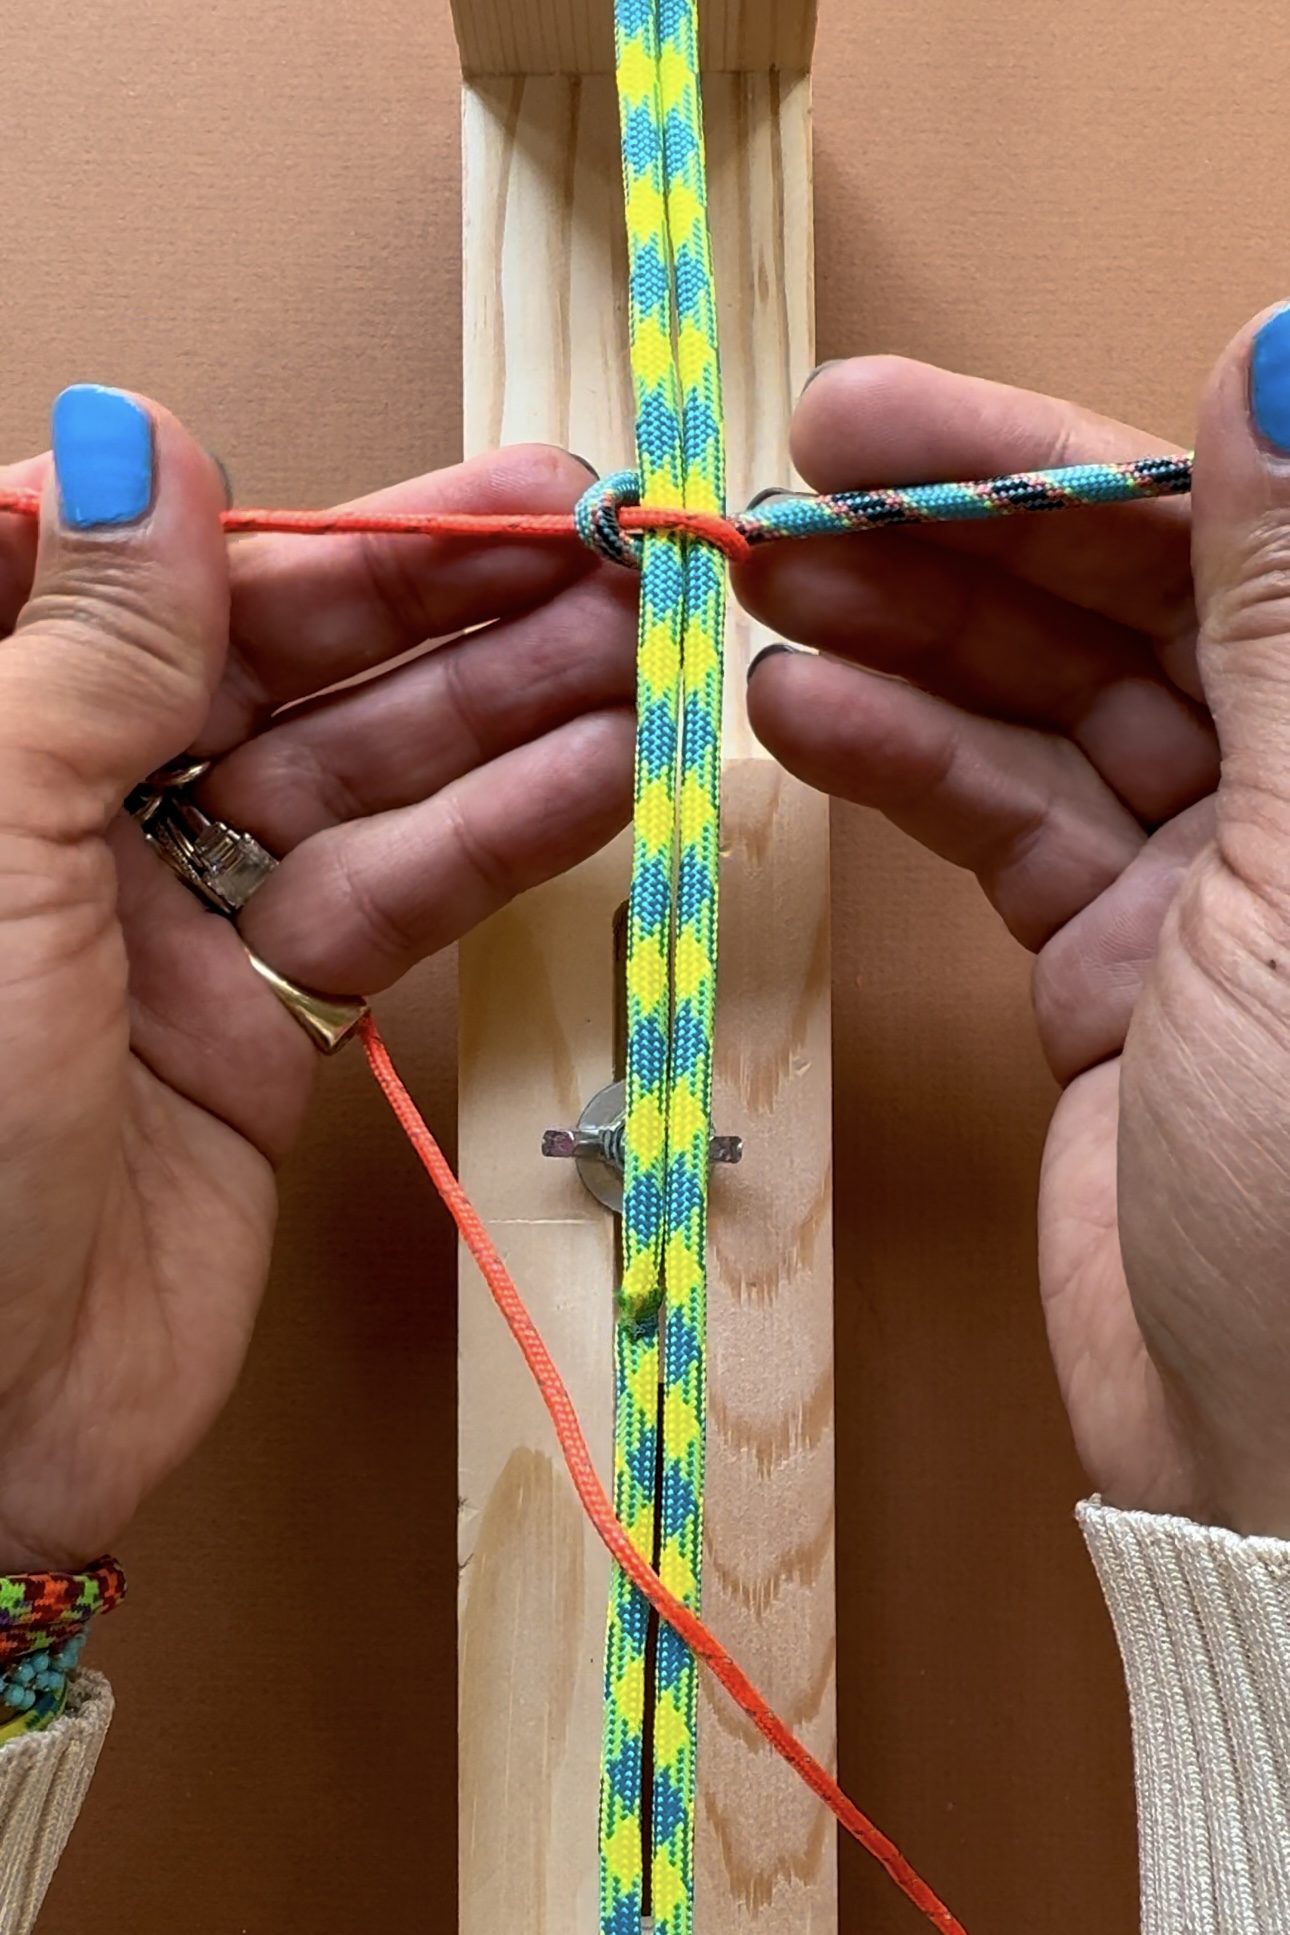
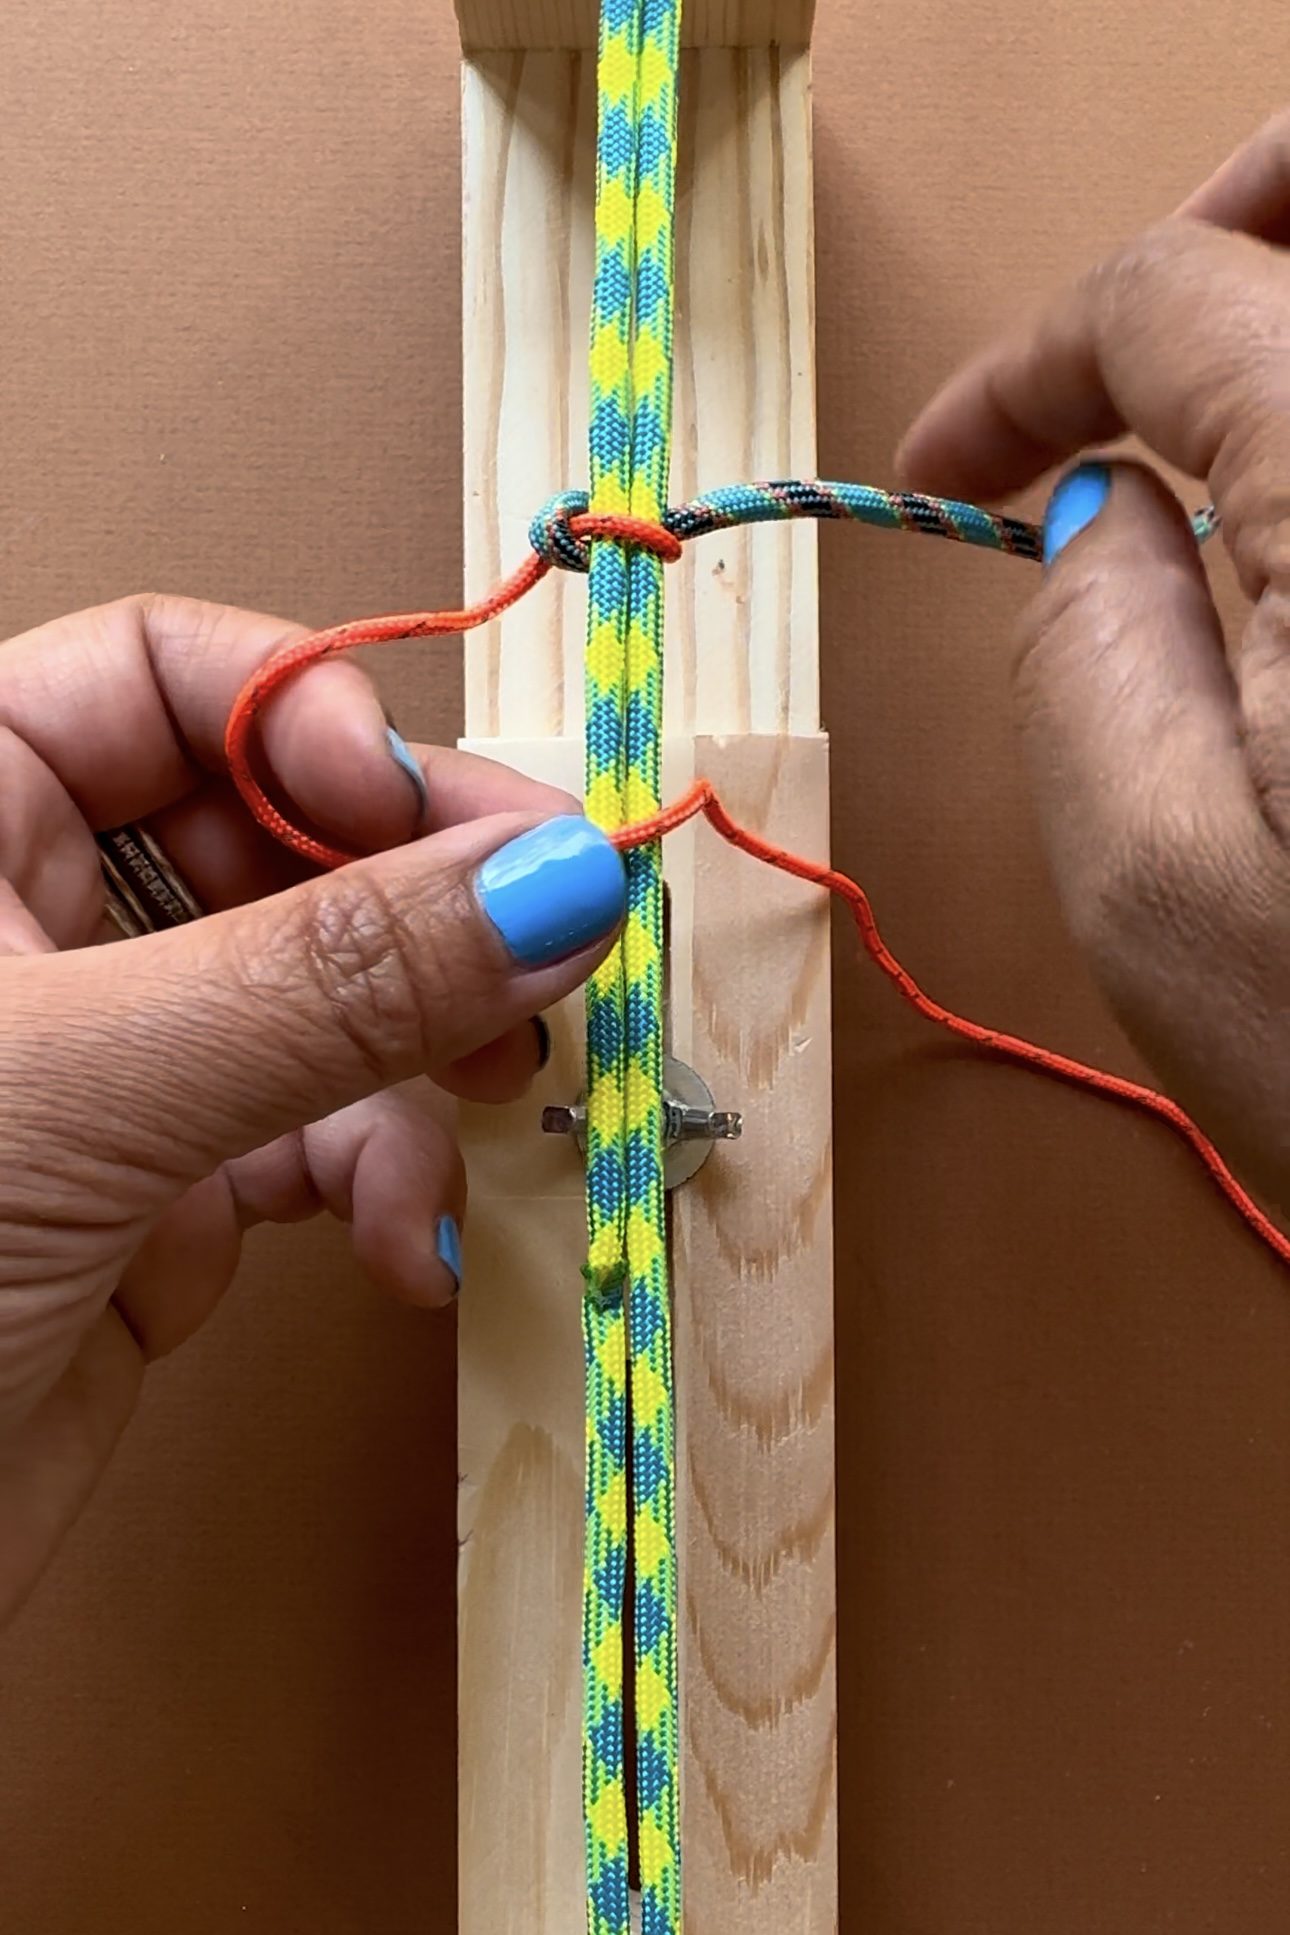
Pull tight to complete the first half of the square knot.
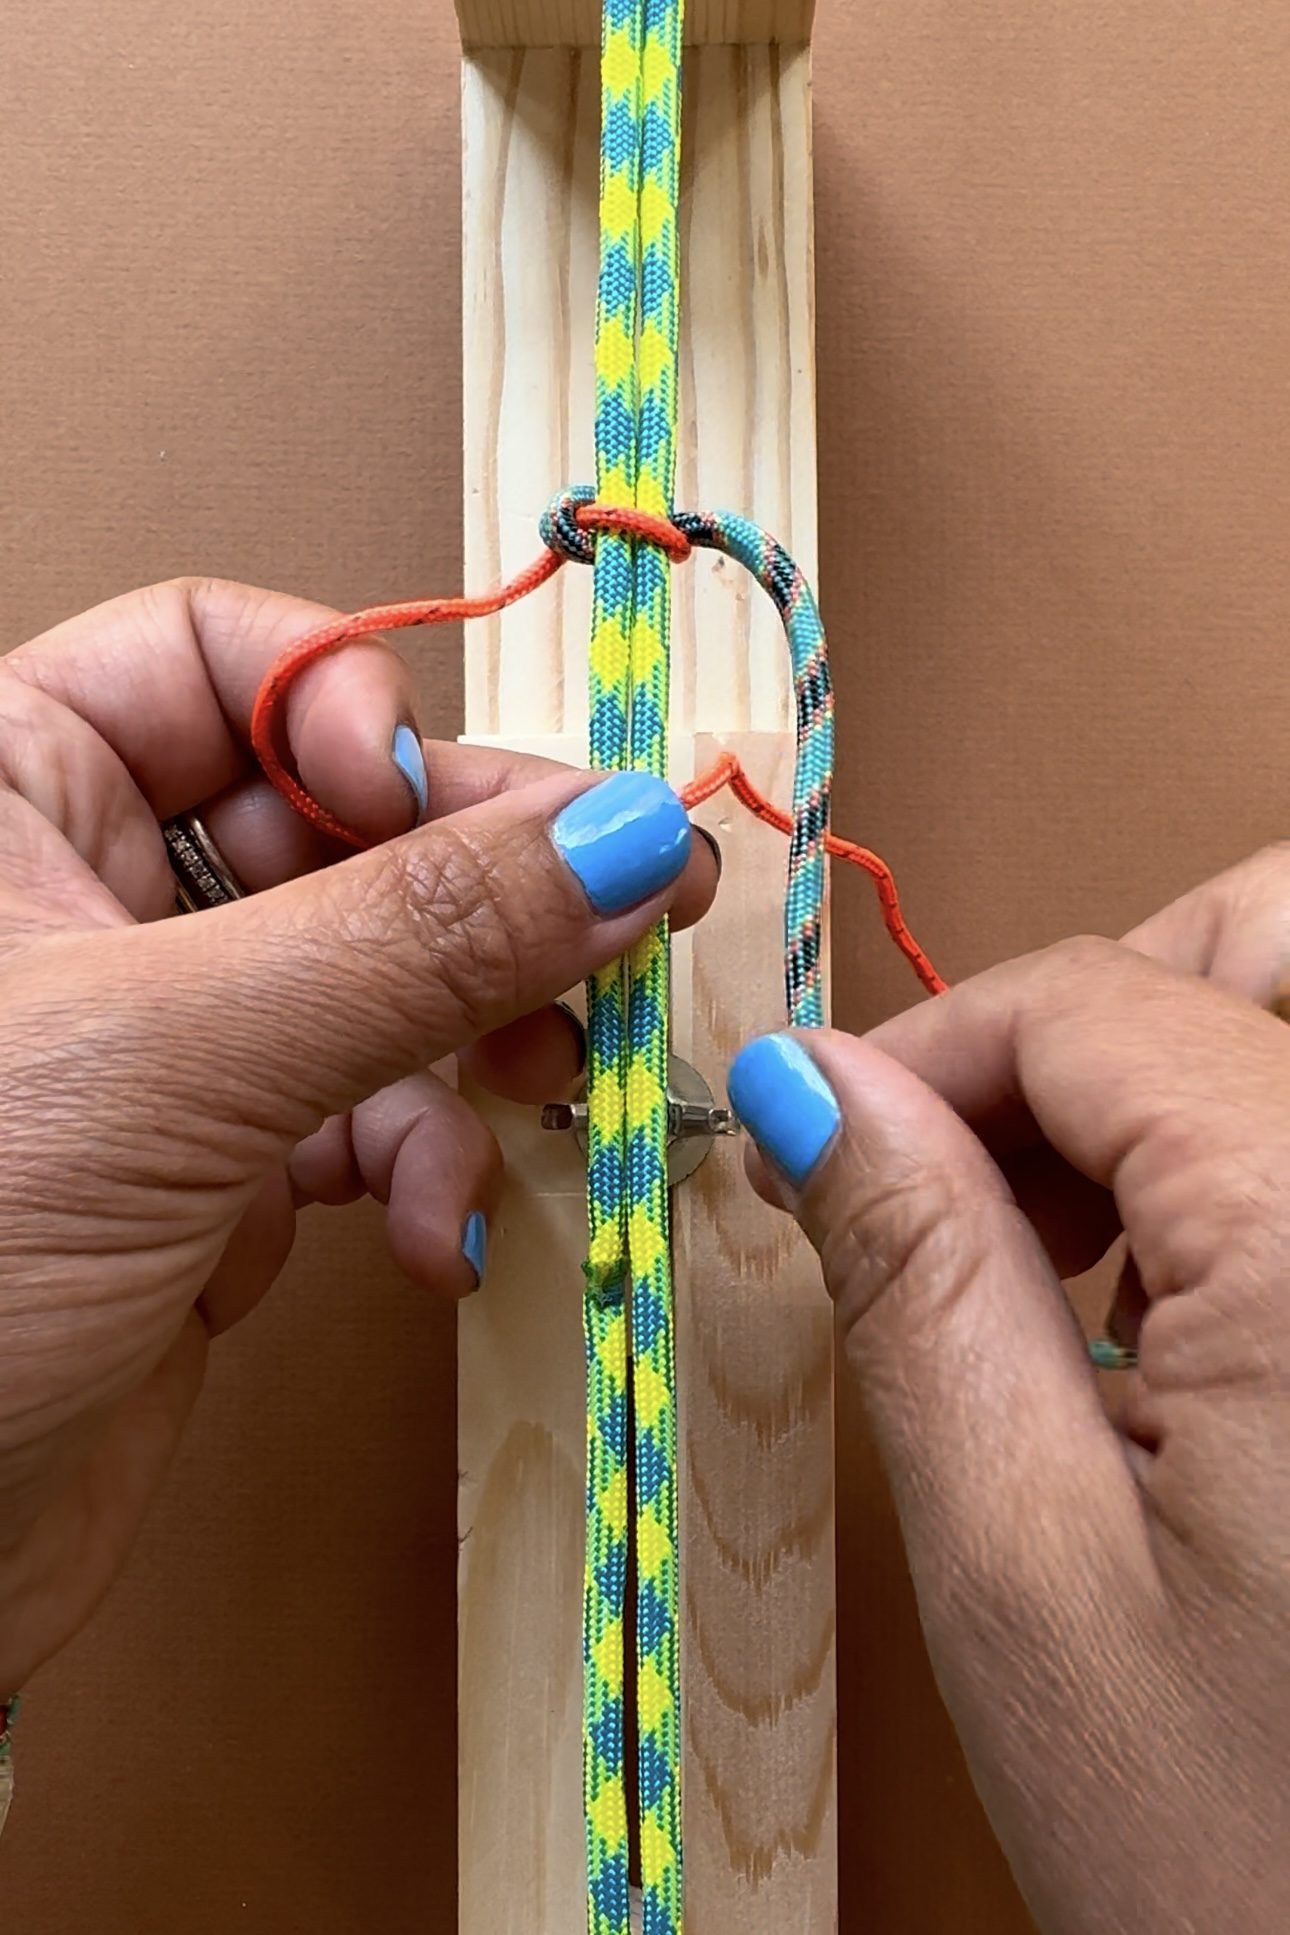
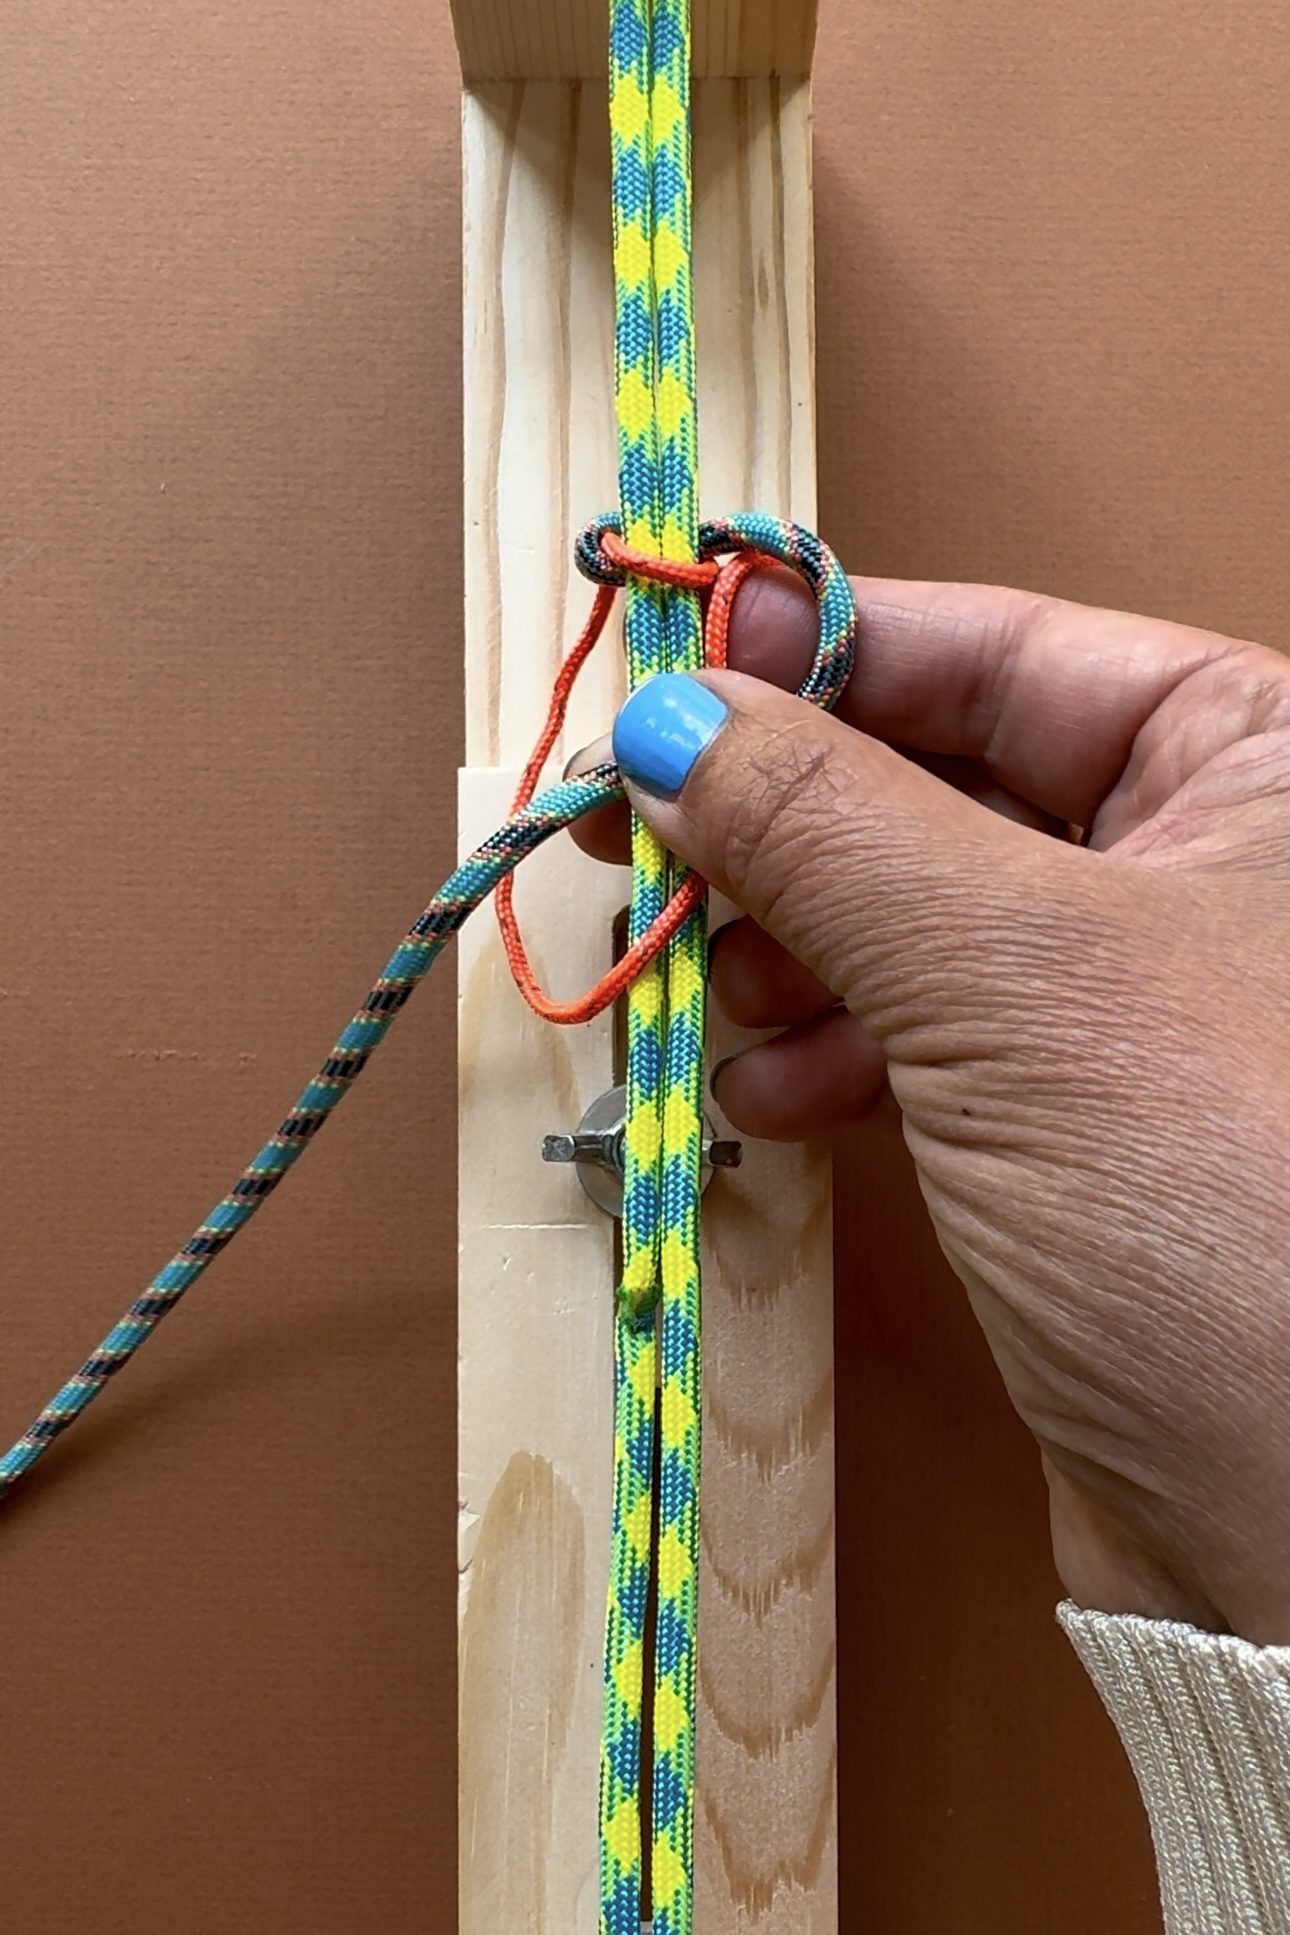
Take the right rope and fold it over the left rope on the right side. Bring the right rope under the base rope and through the loop on the left. Pull tight. This is a complete square knot.
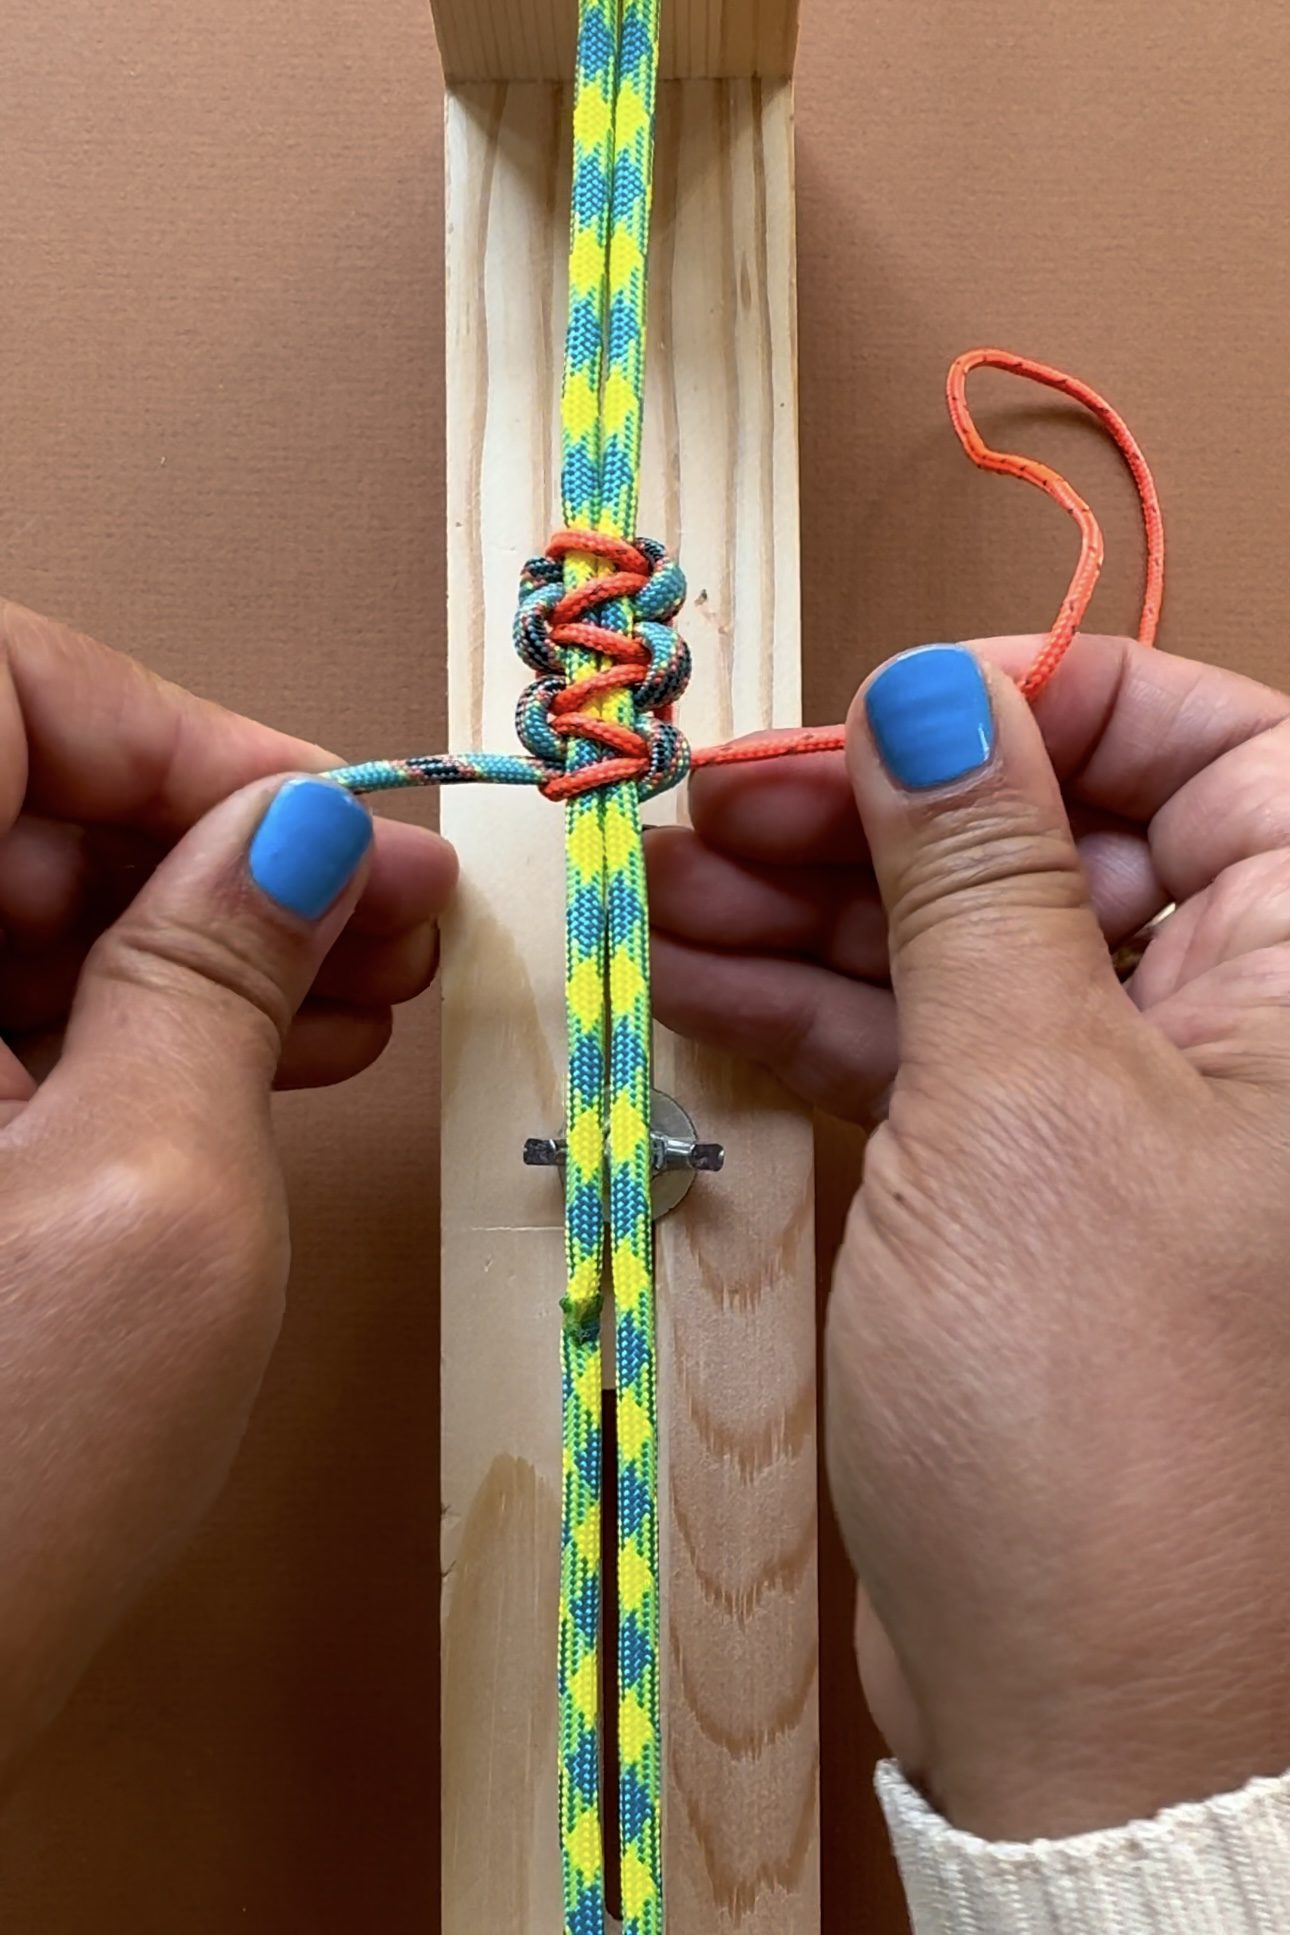
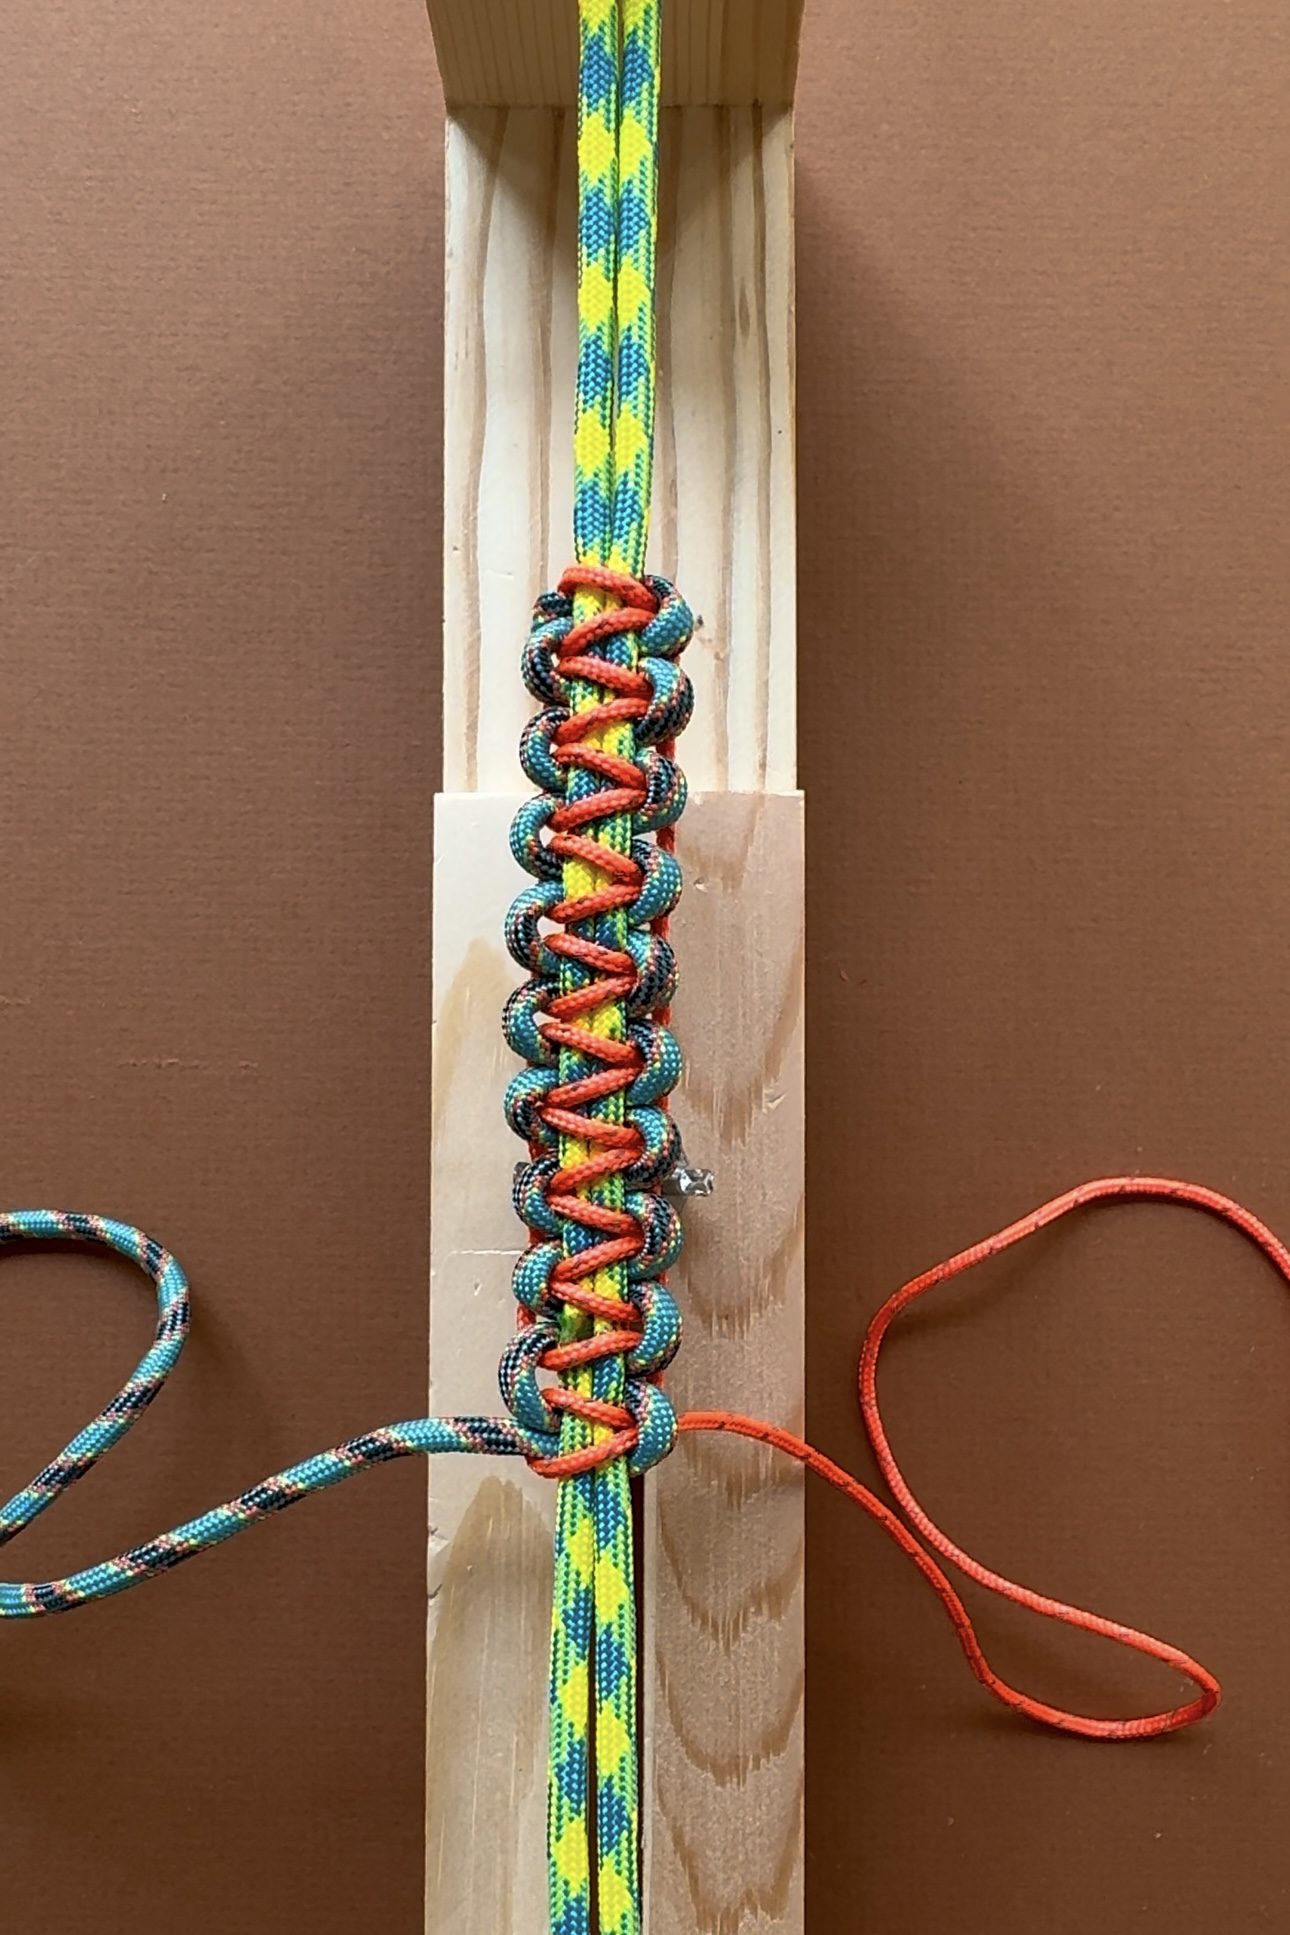
Keep alternating sides and continue the square knots until you've reached your desired length or the rope begins to run out.
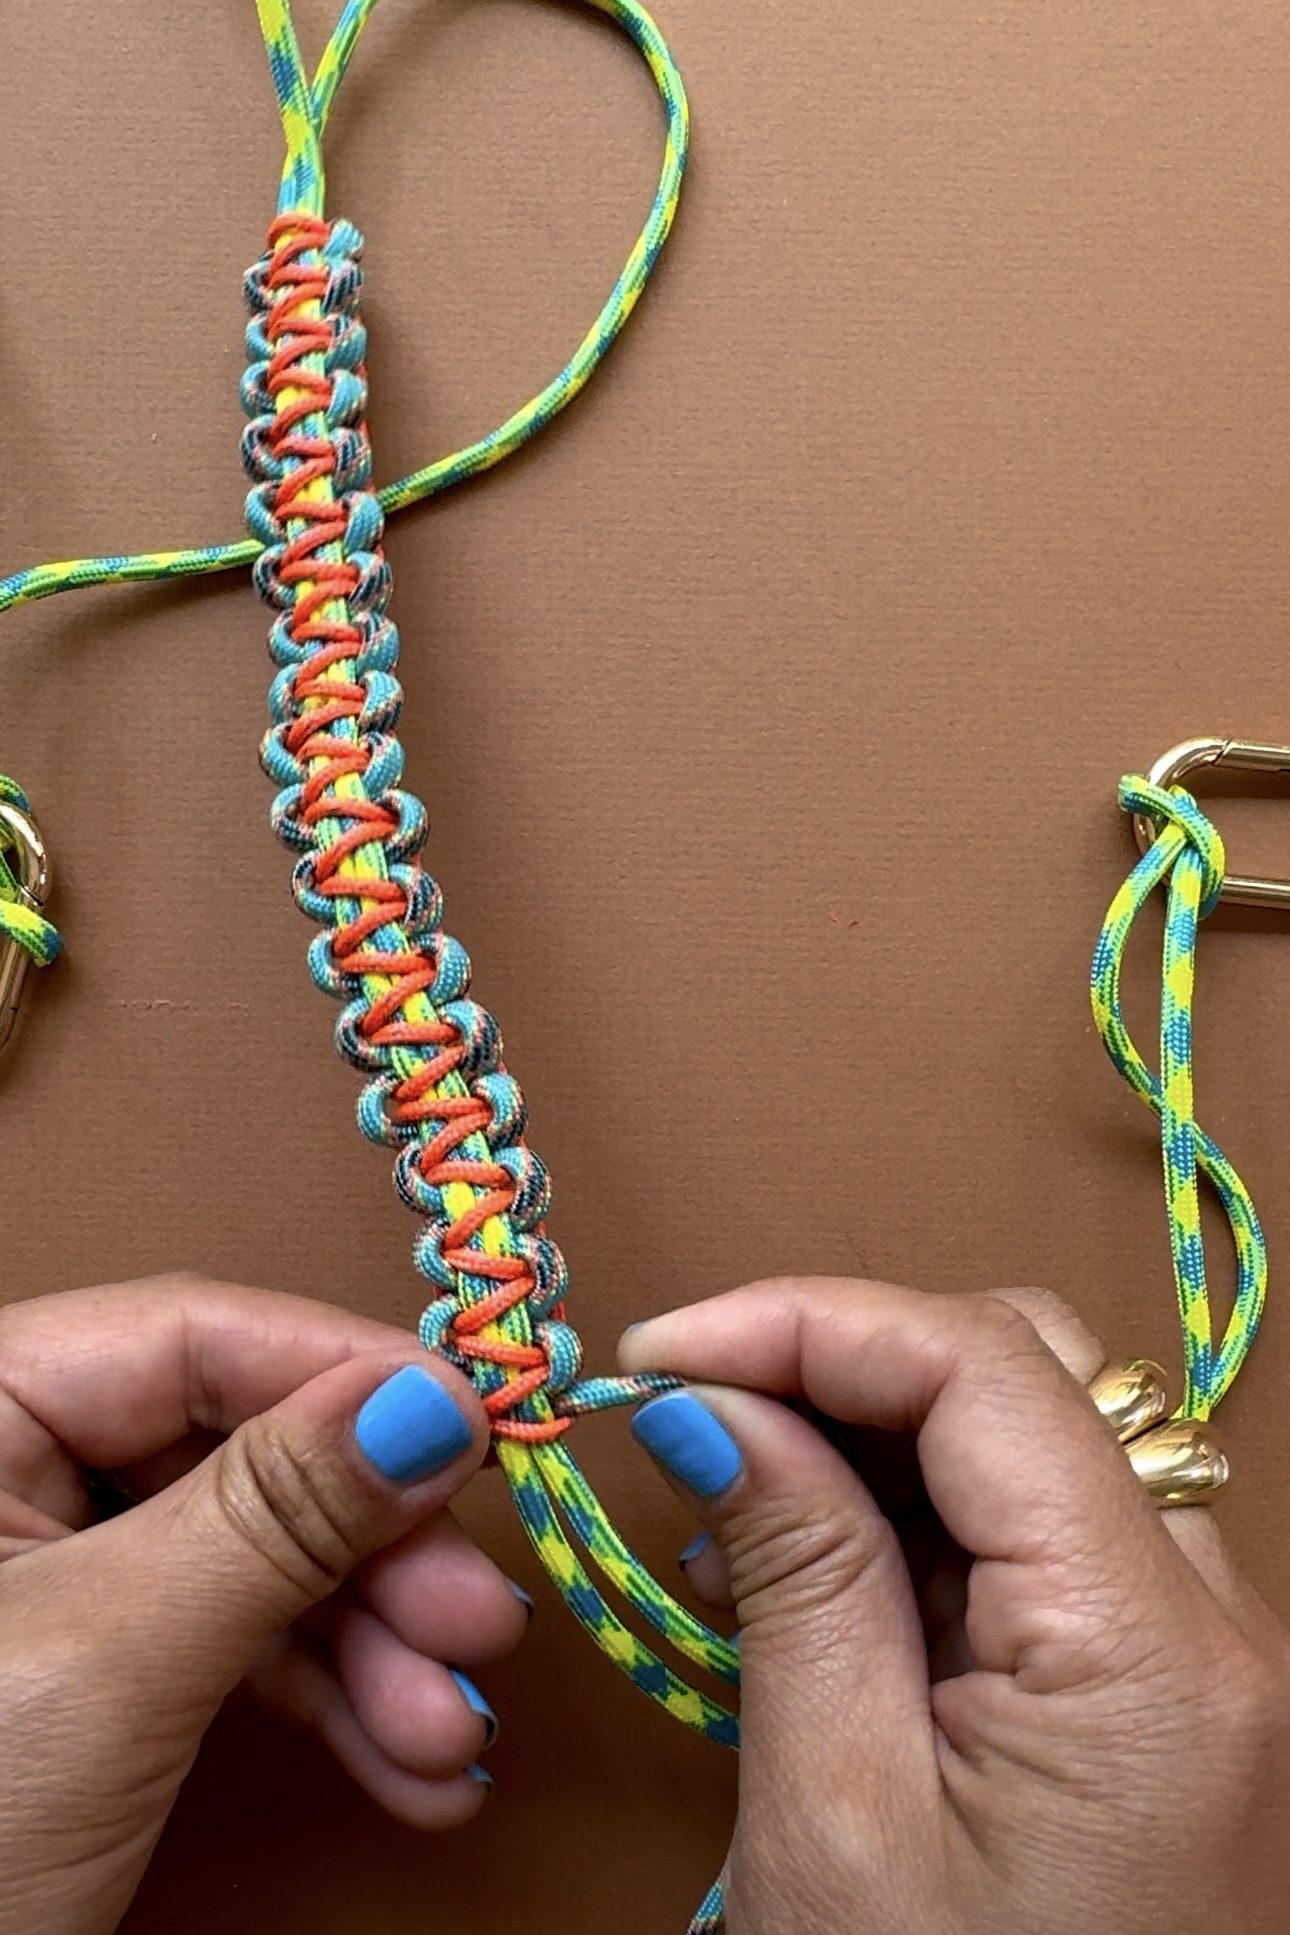
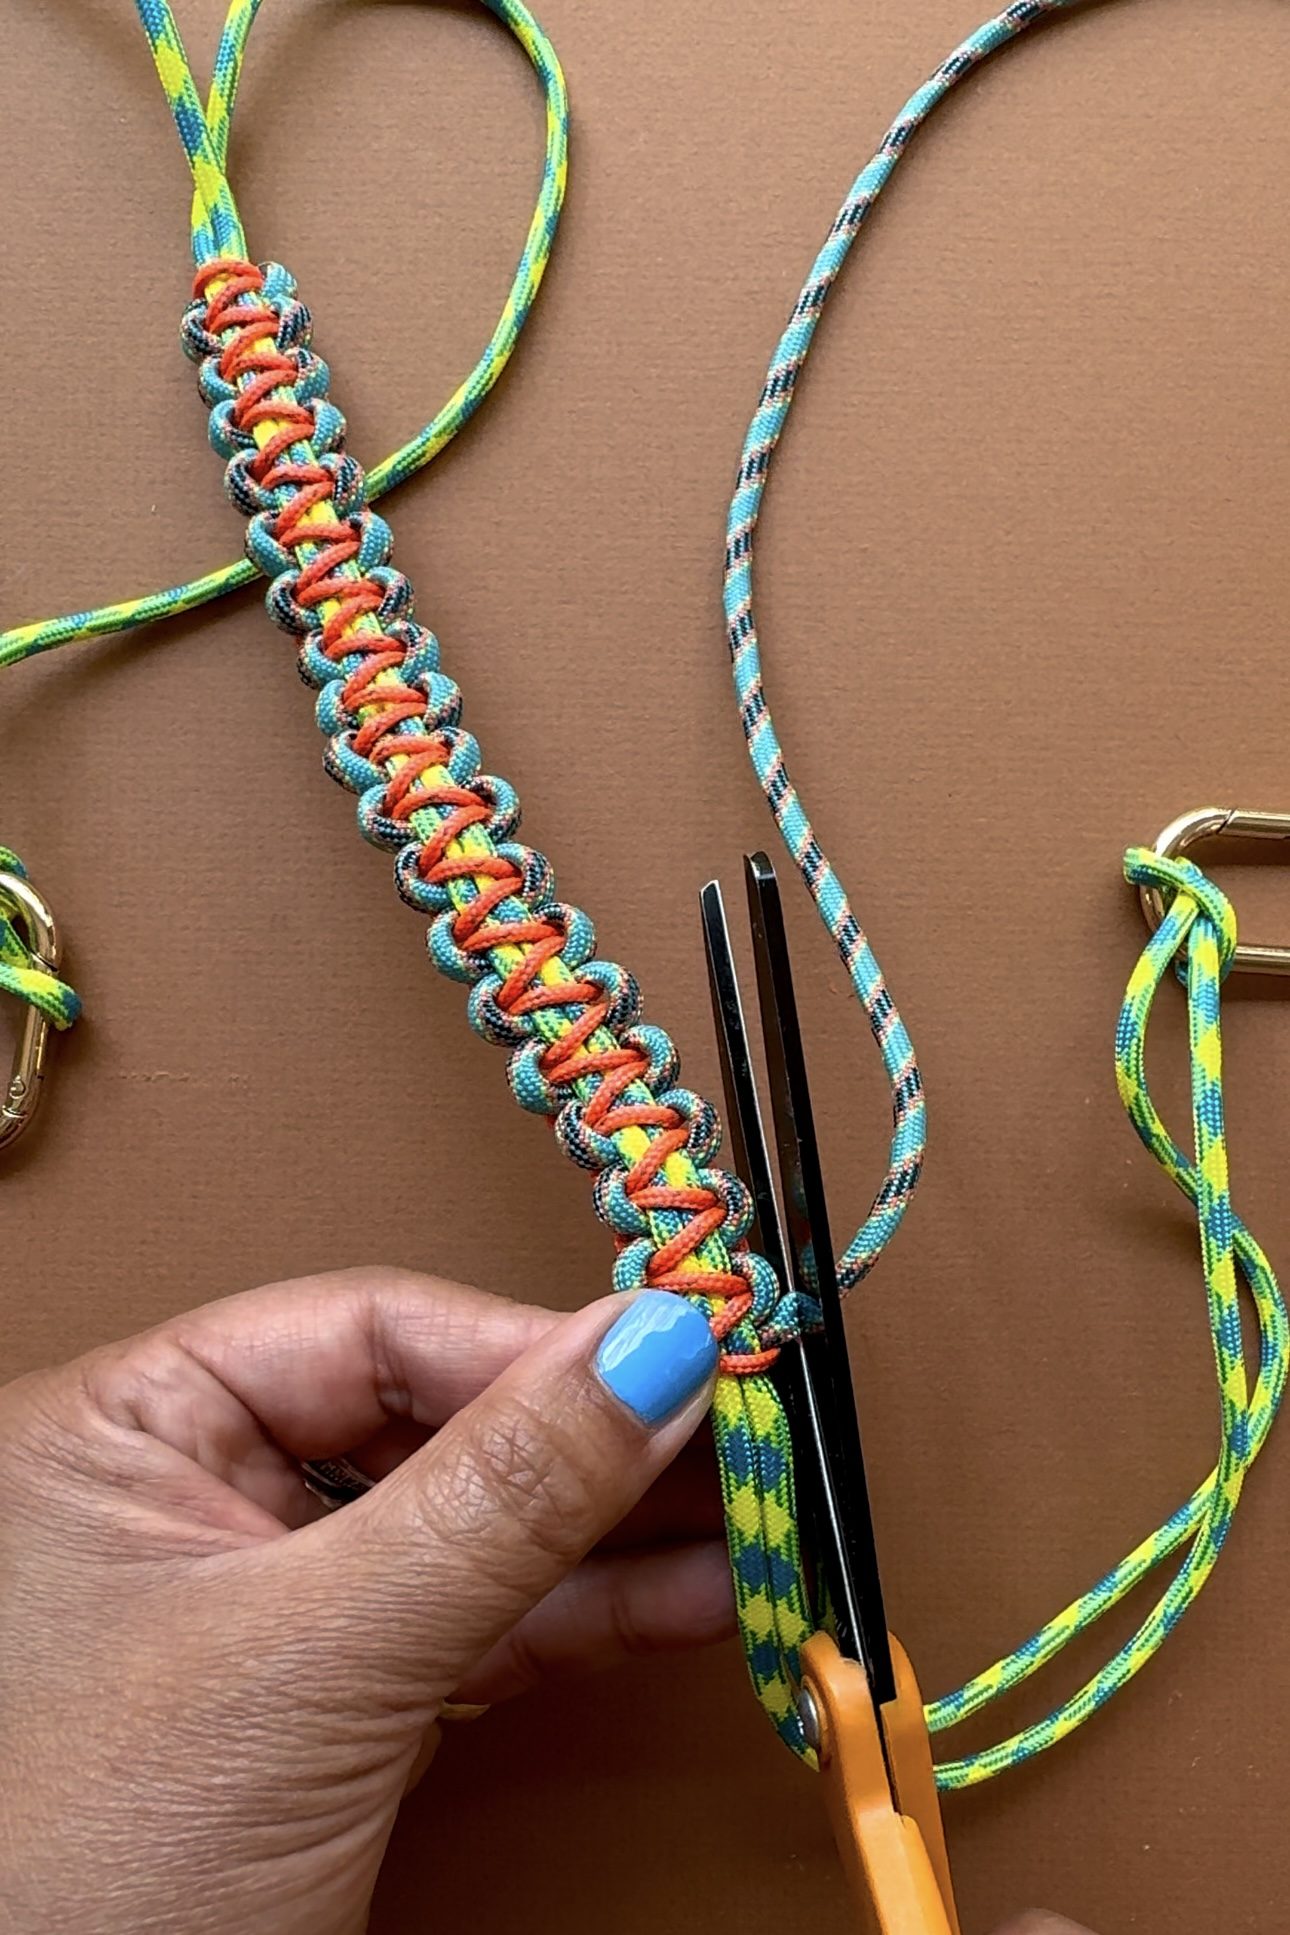
Trim the ends, leaving about 2mm of rope.
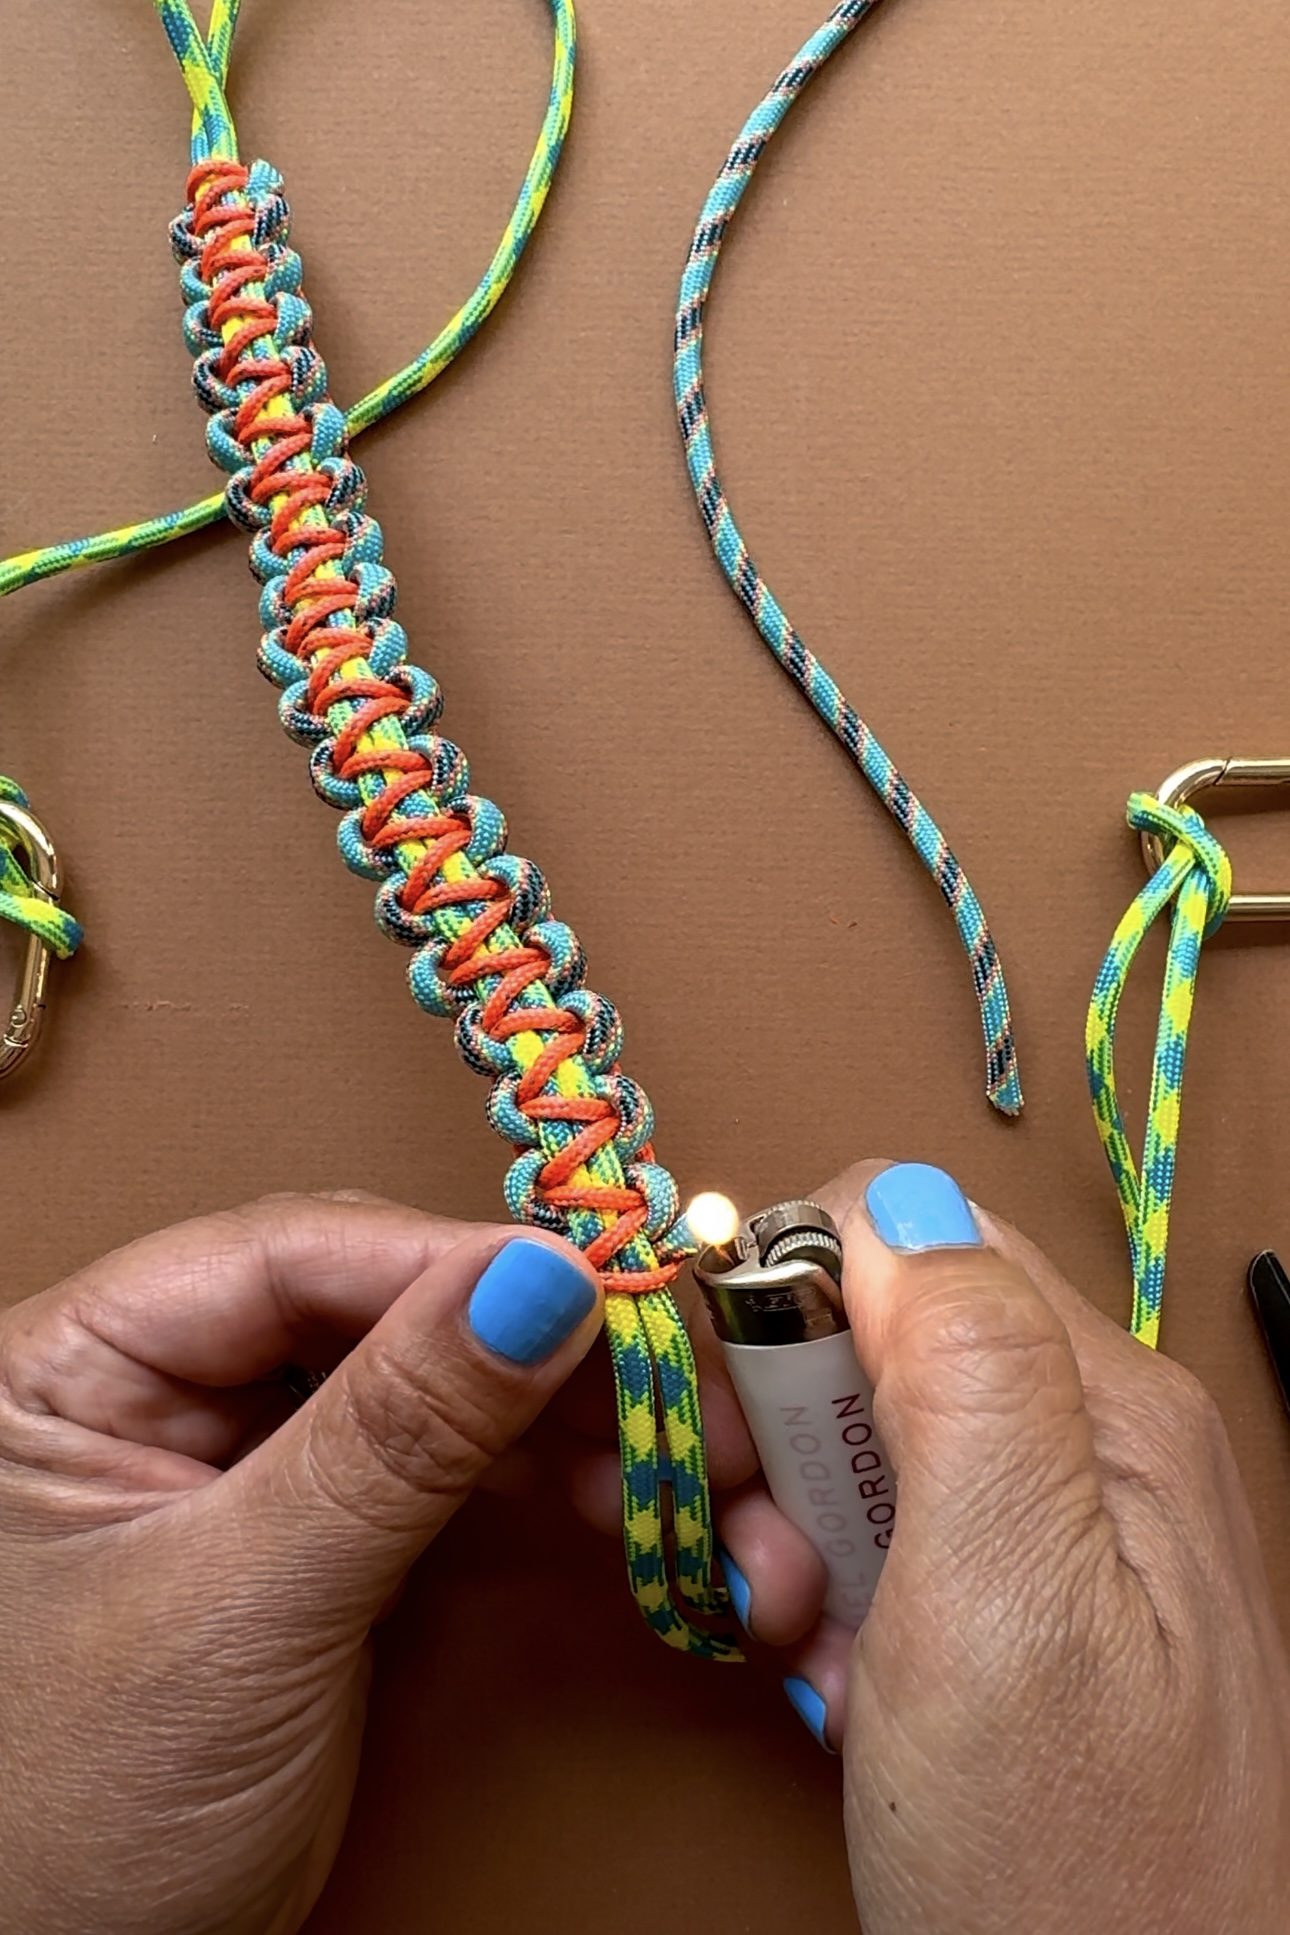
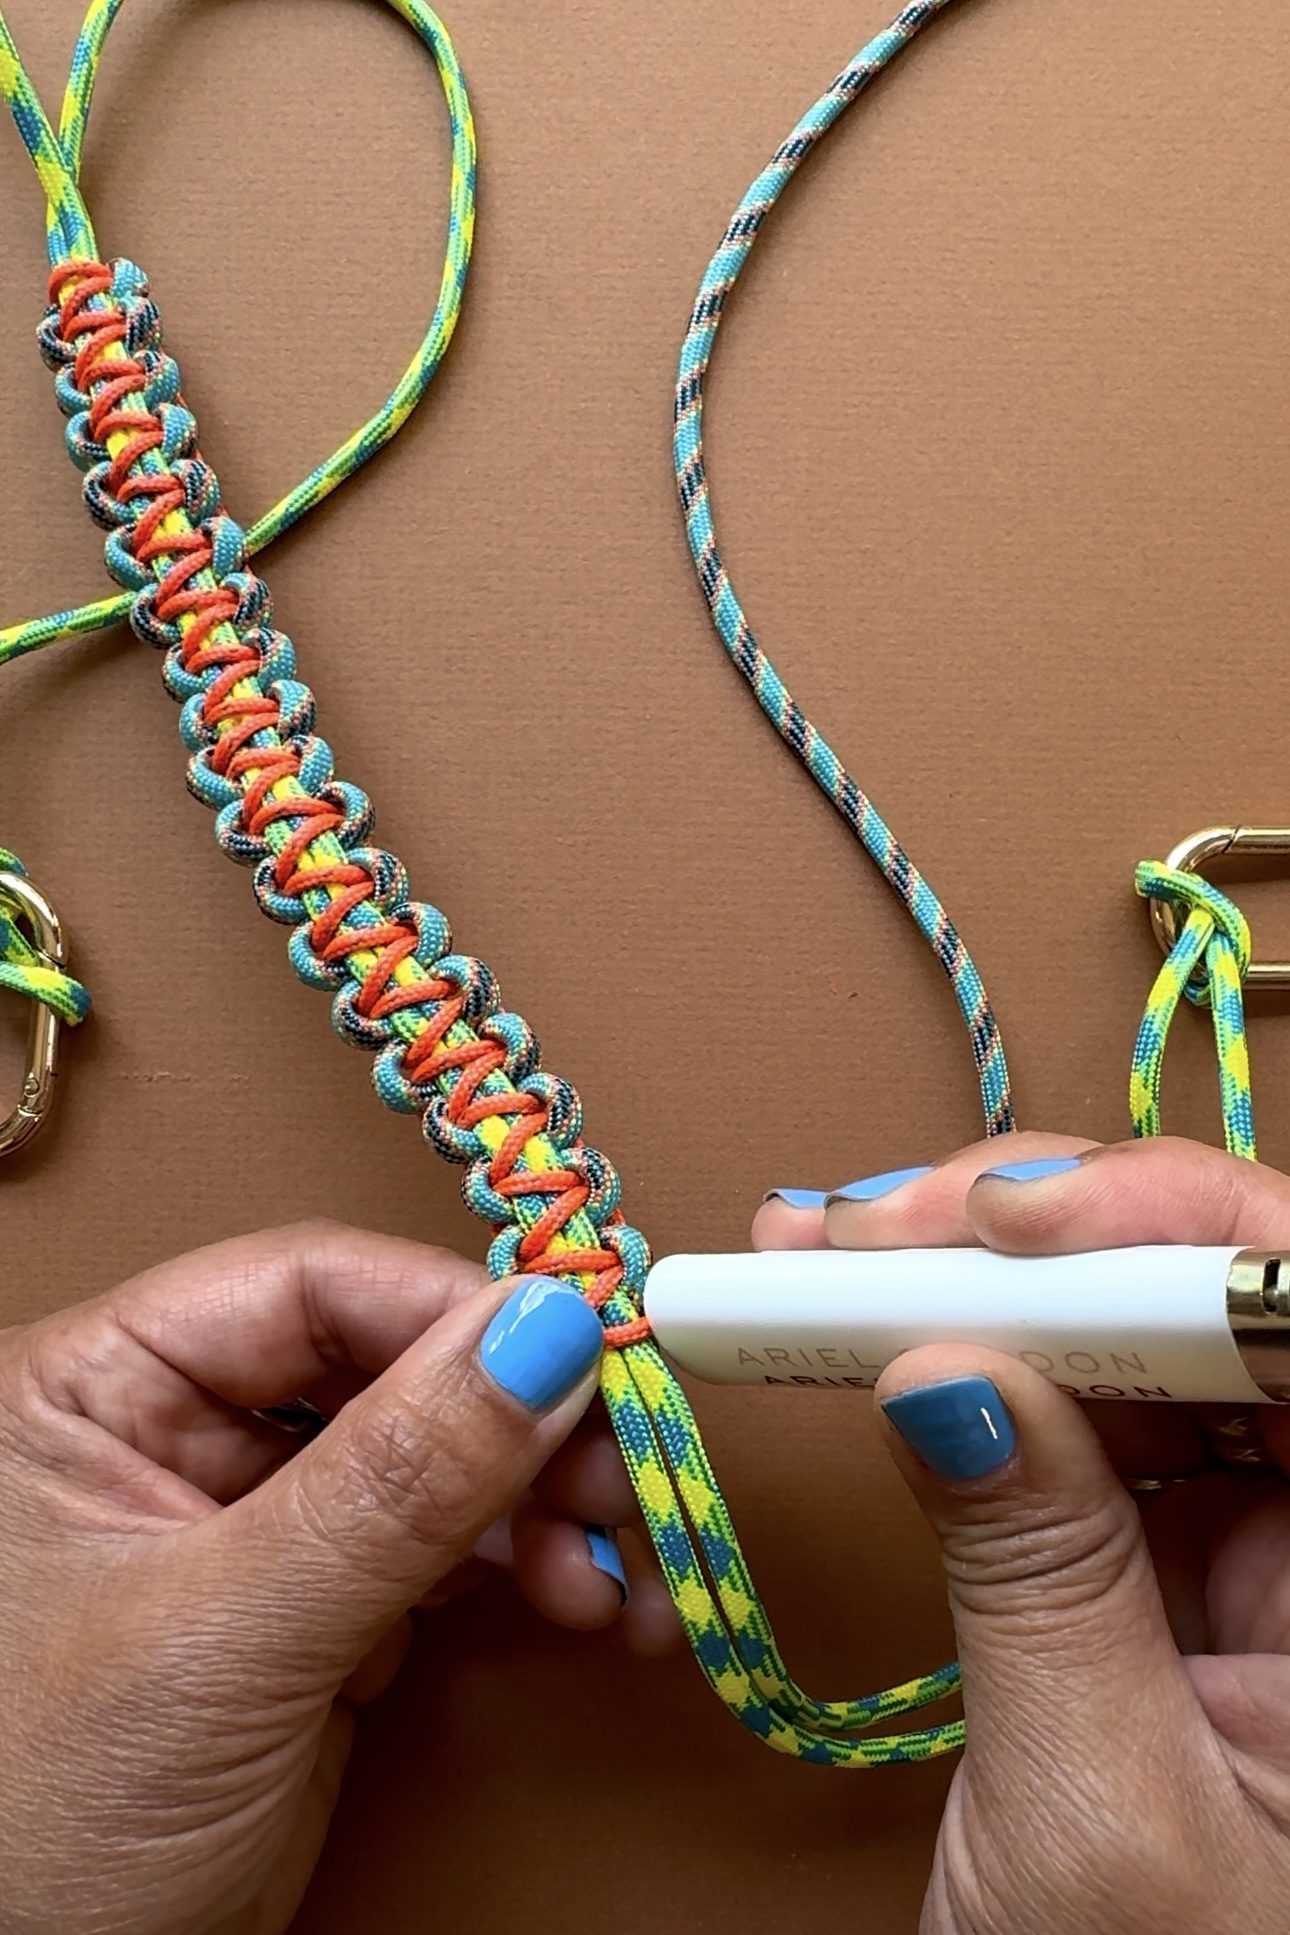
Burn one end until it starts to melt and immediately press the end down against the last square knot with the back of the lighter.
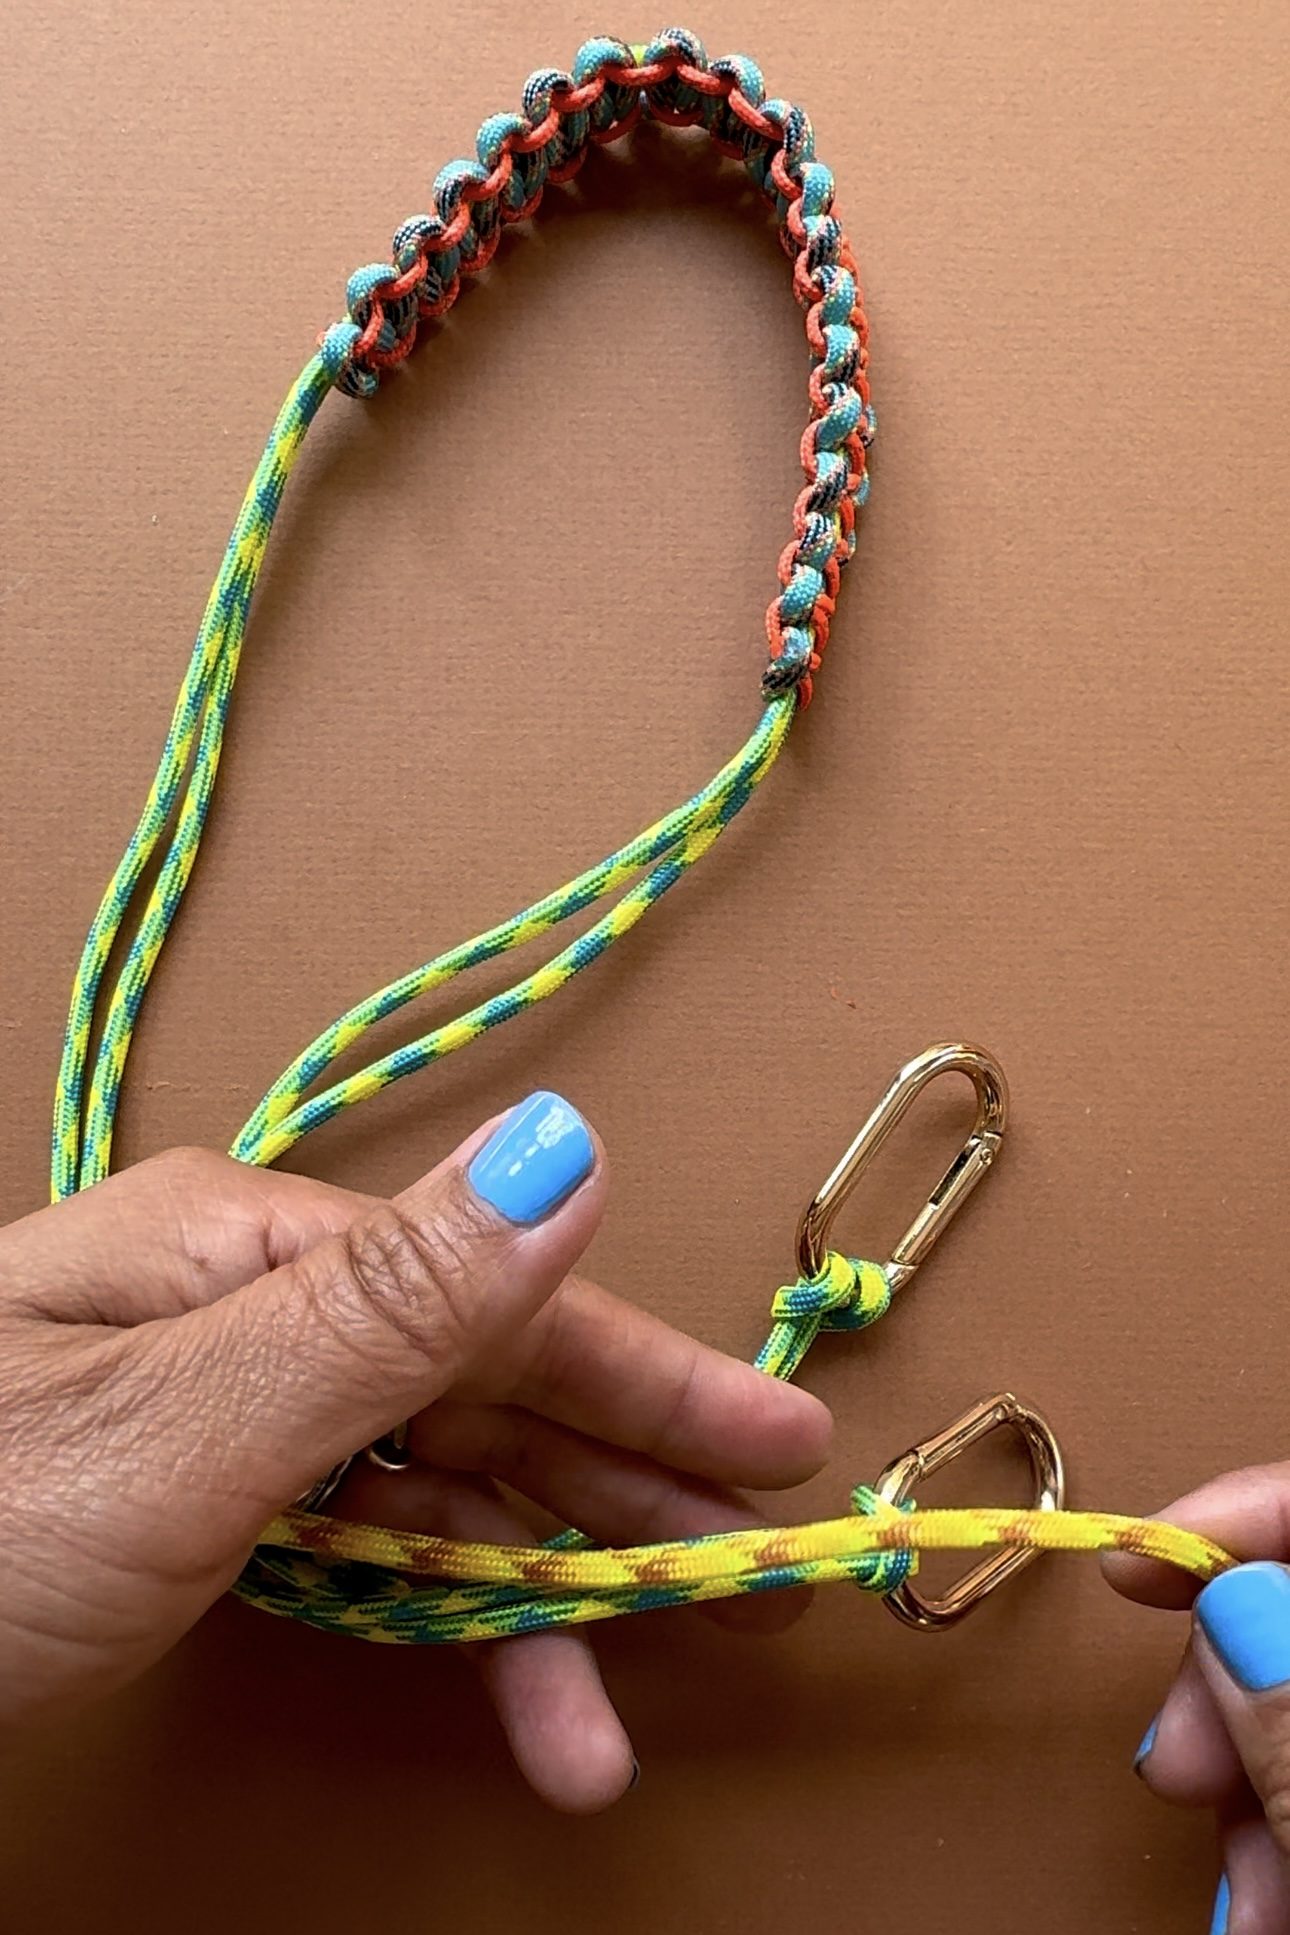
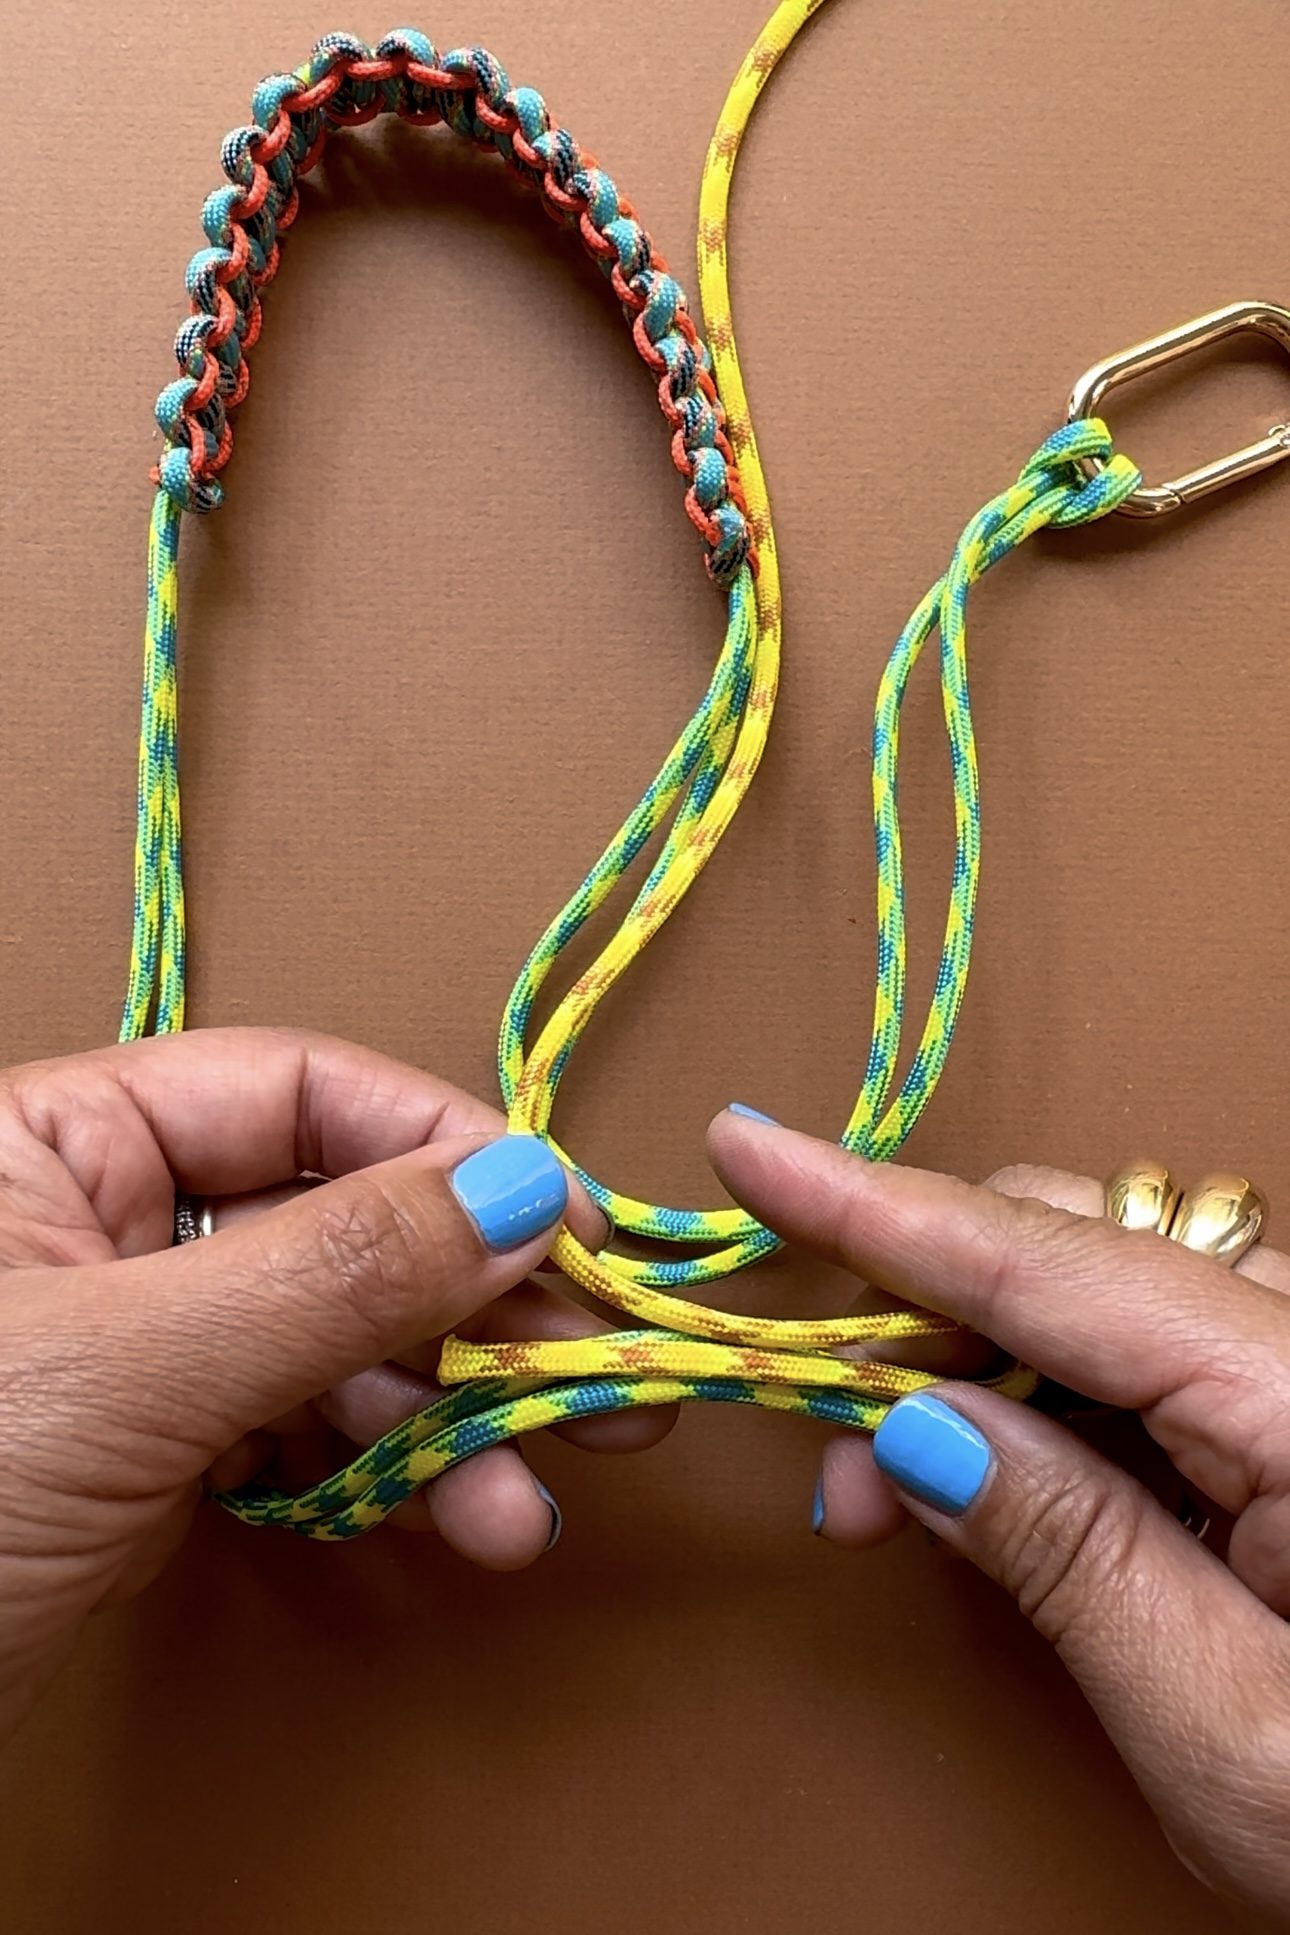
Repeat the step on the other side. Burn one end until it starts to melt and immediately press the end down against the last square knot with the back of the lighter. This keeps the macrame weave from unraveling.
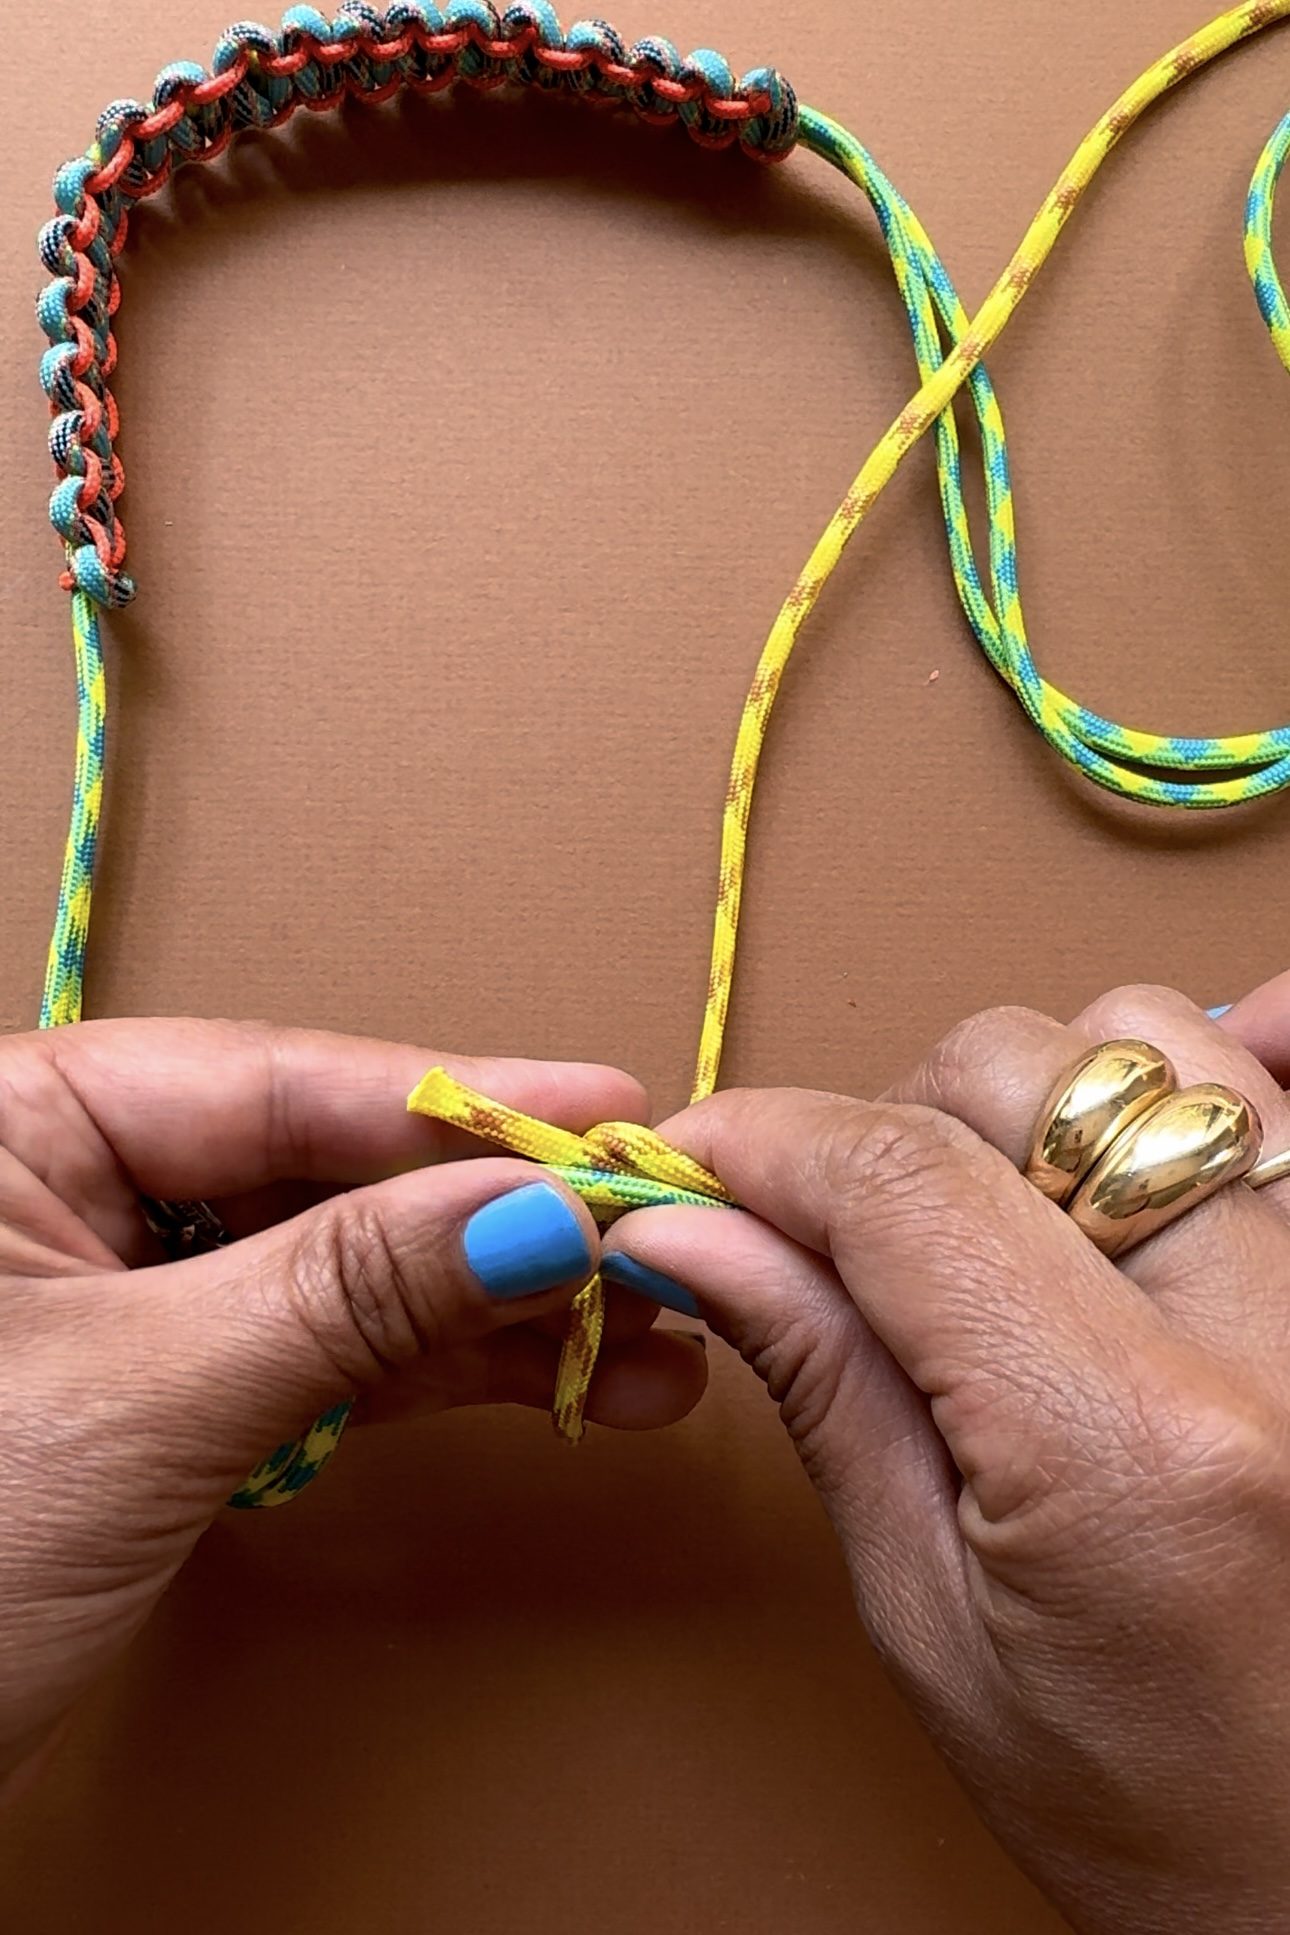
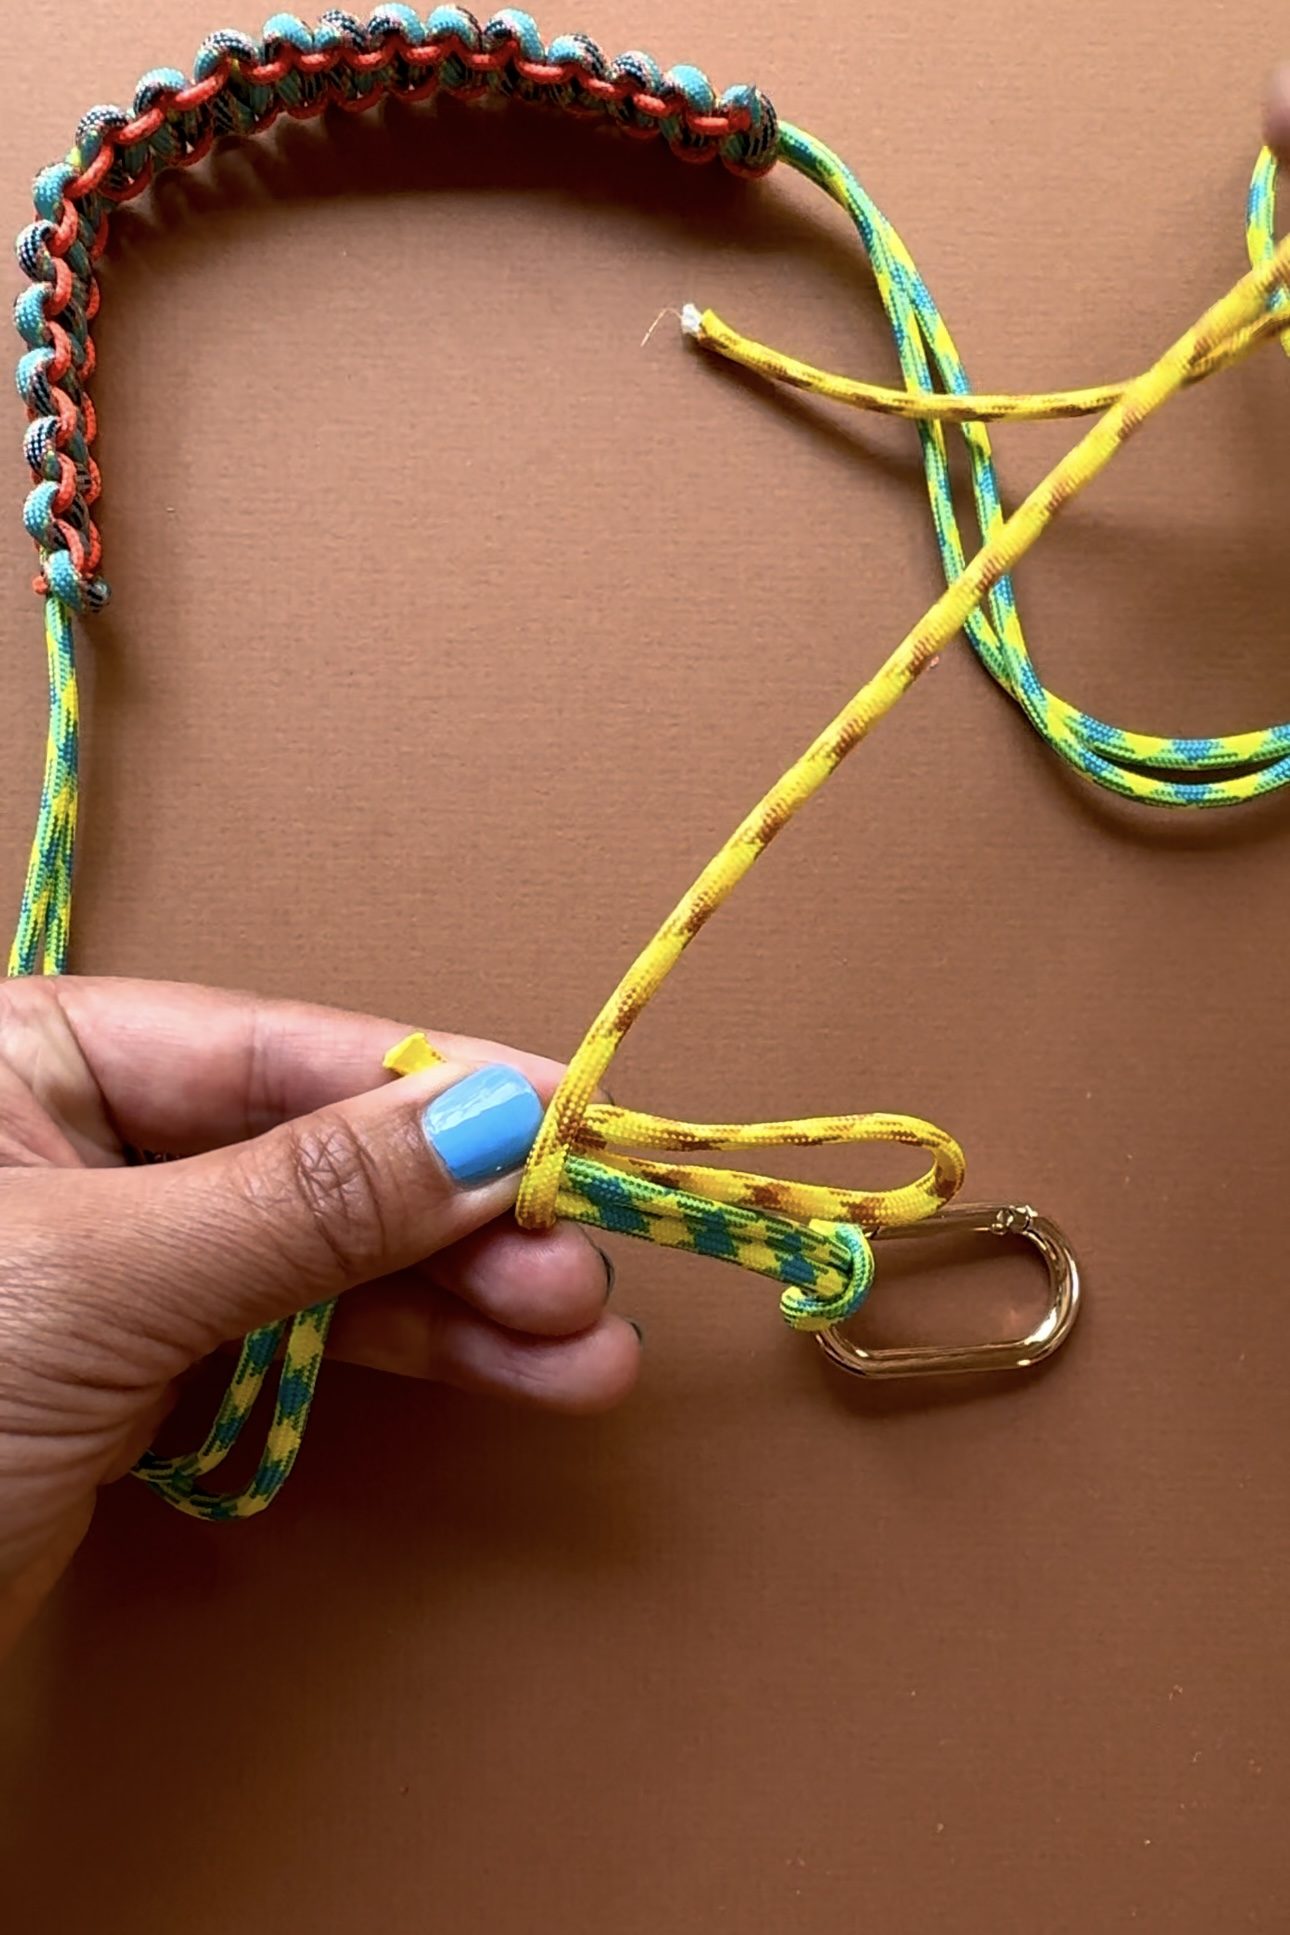
You can further embellish the bag strap with a barrel knot using thin or thick rope.
Cut about 12" of rope. Lay 3" of rope parallel to base rope.
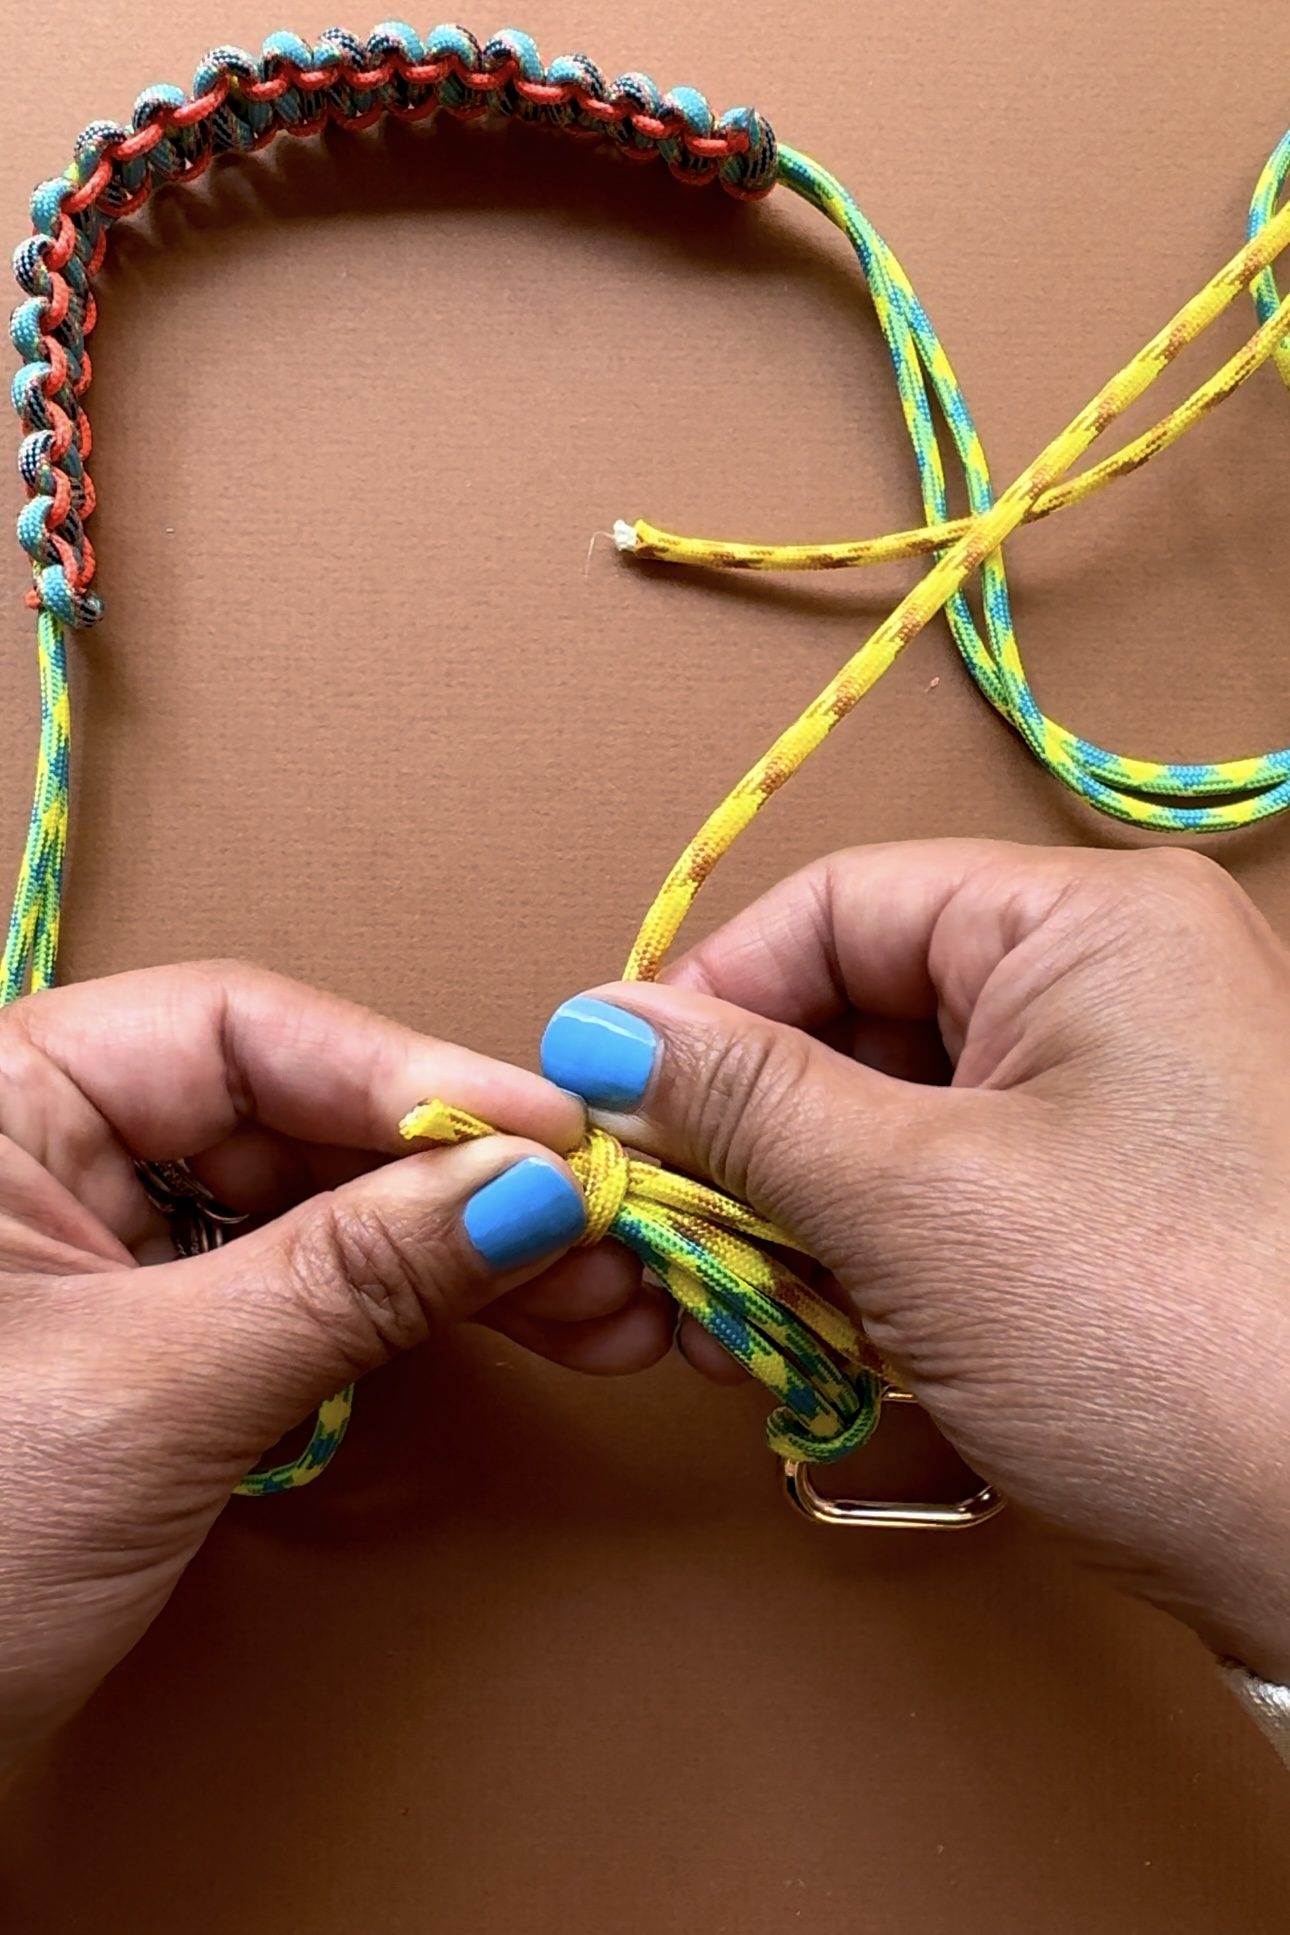
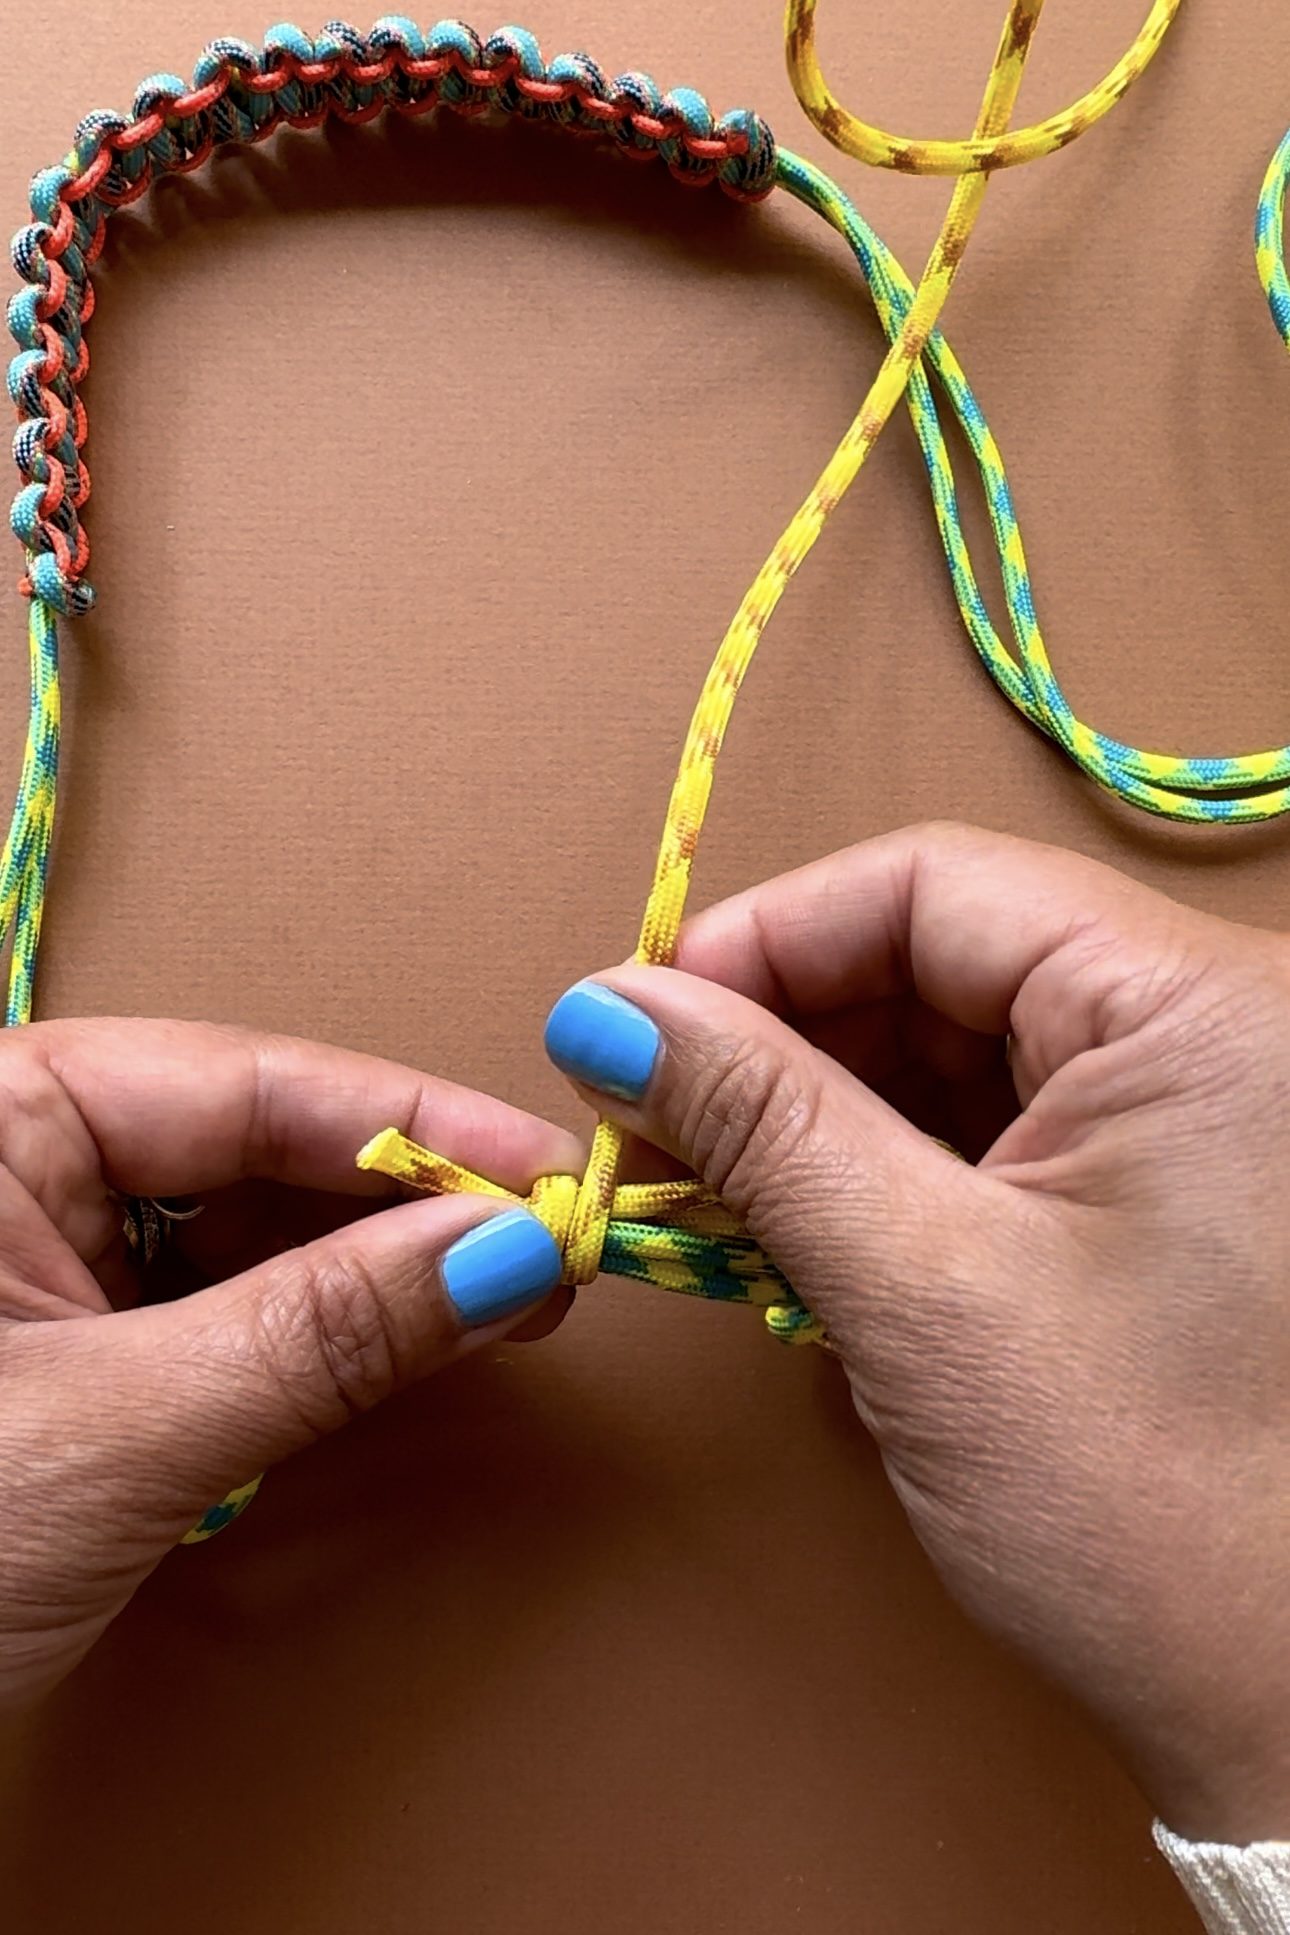
Then fold the rope back over itself. Leaving a 1/2" tail, start coiling the rope. Make sure to make the coil as tight as possible. Use your left fingers to help keep it in place.
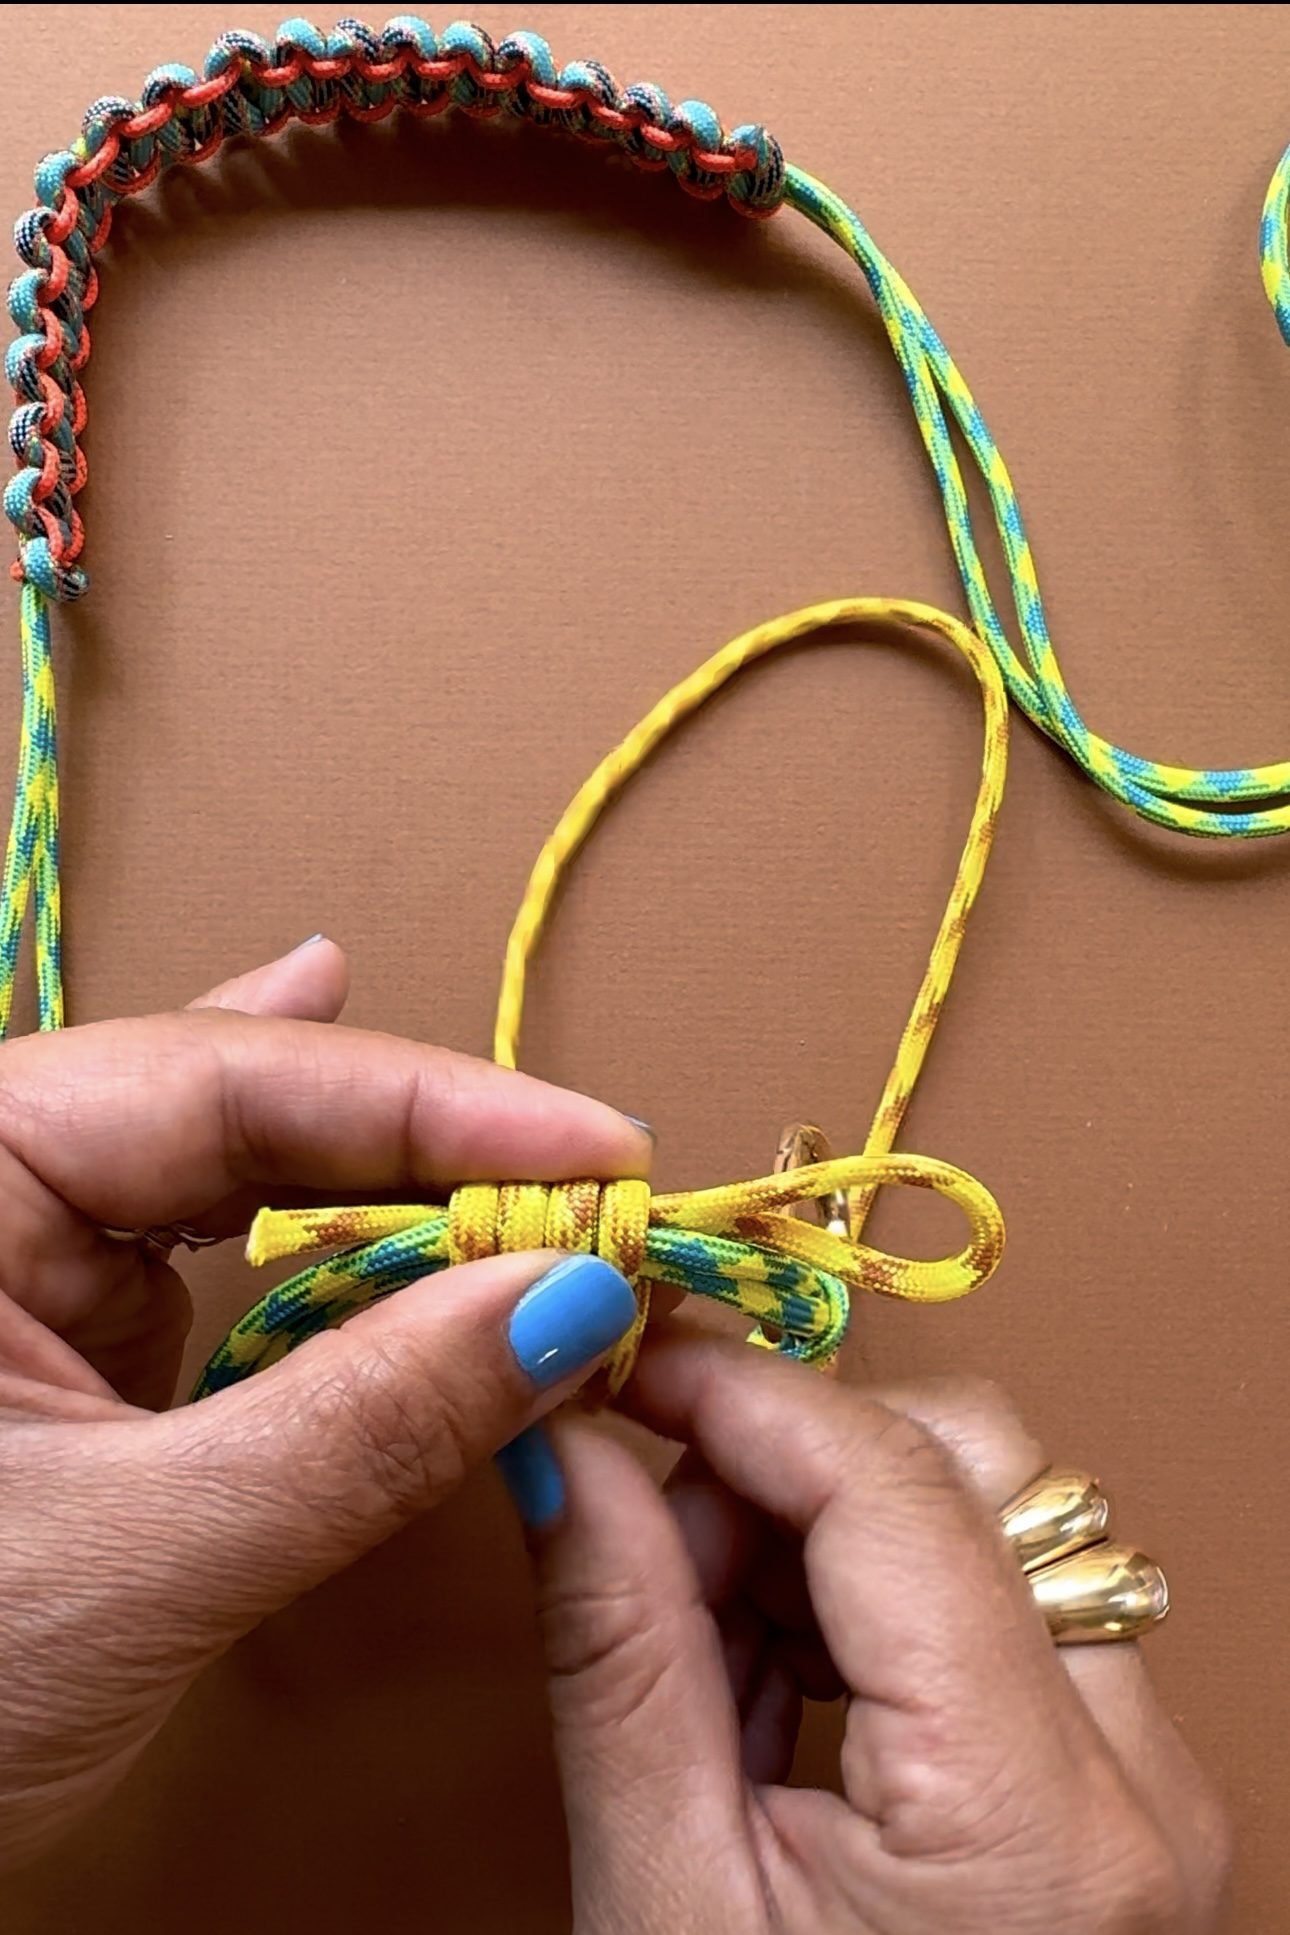
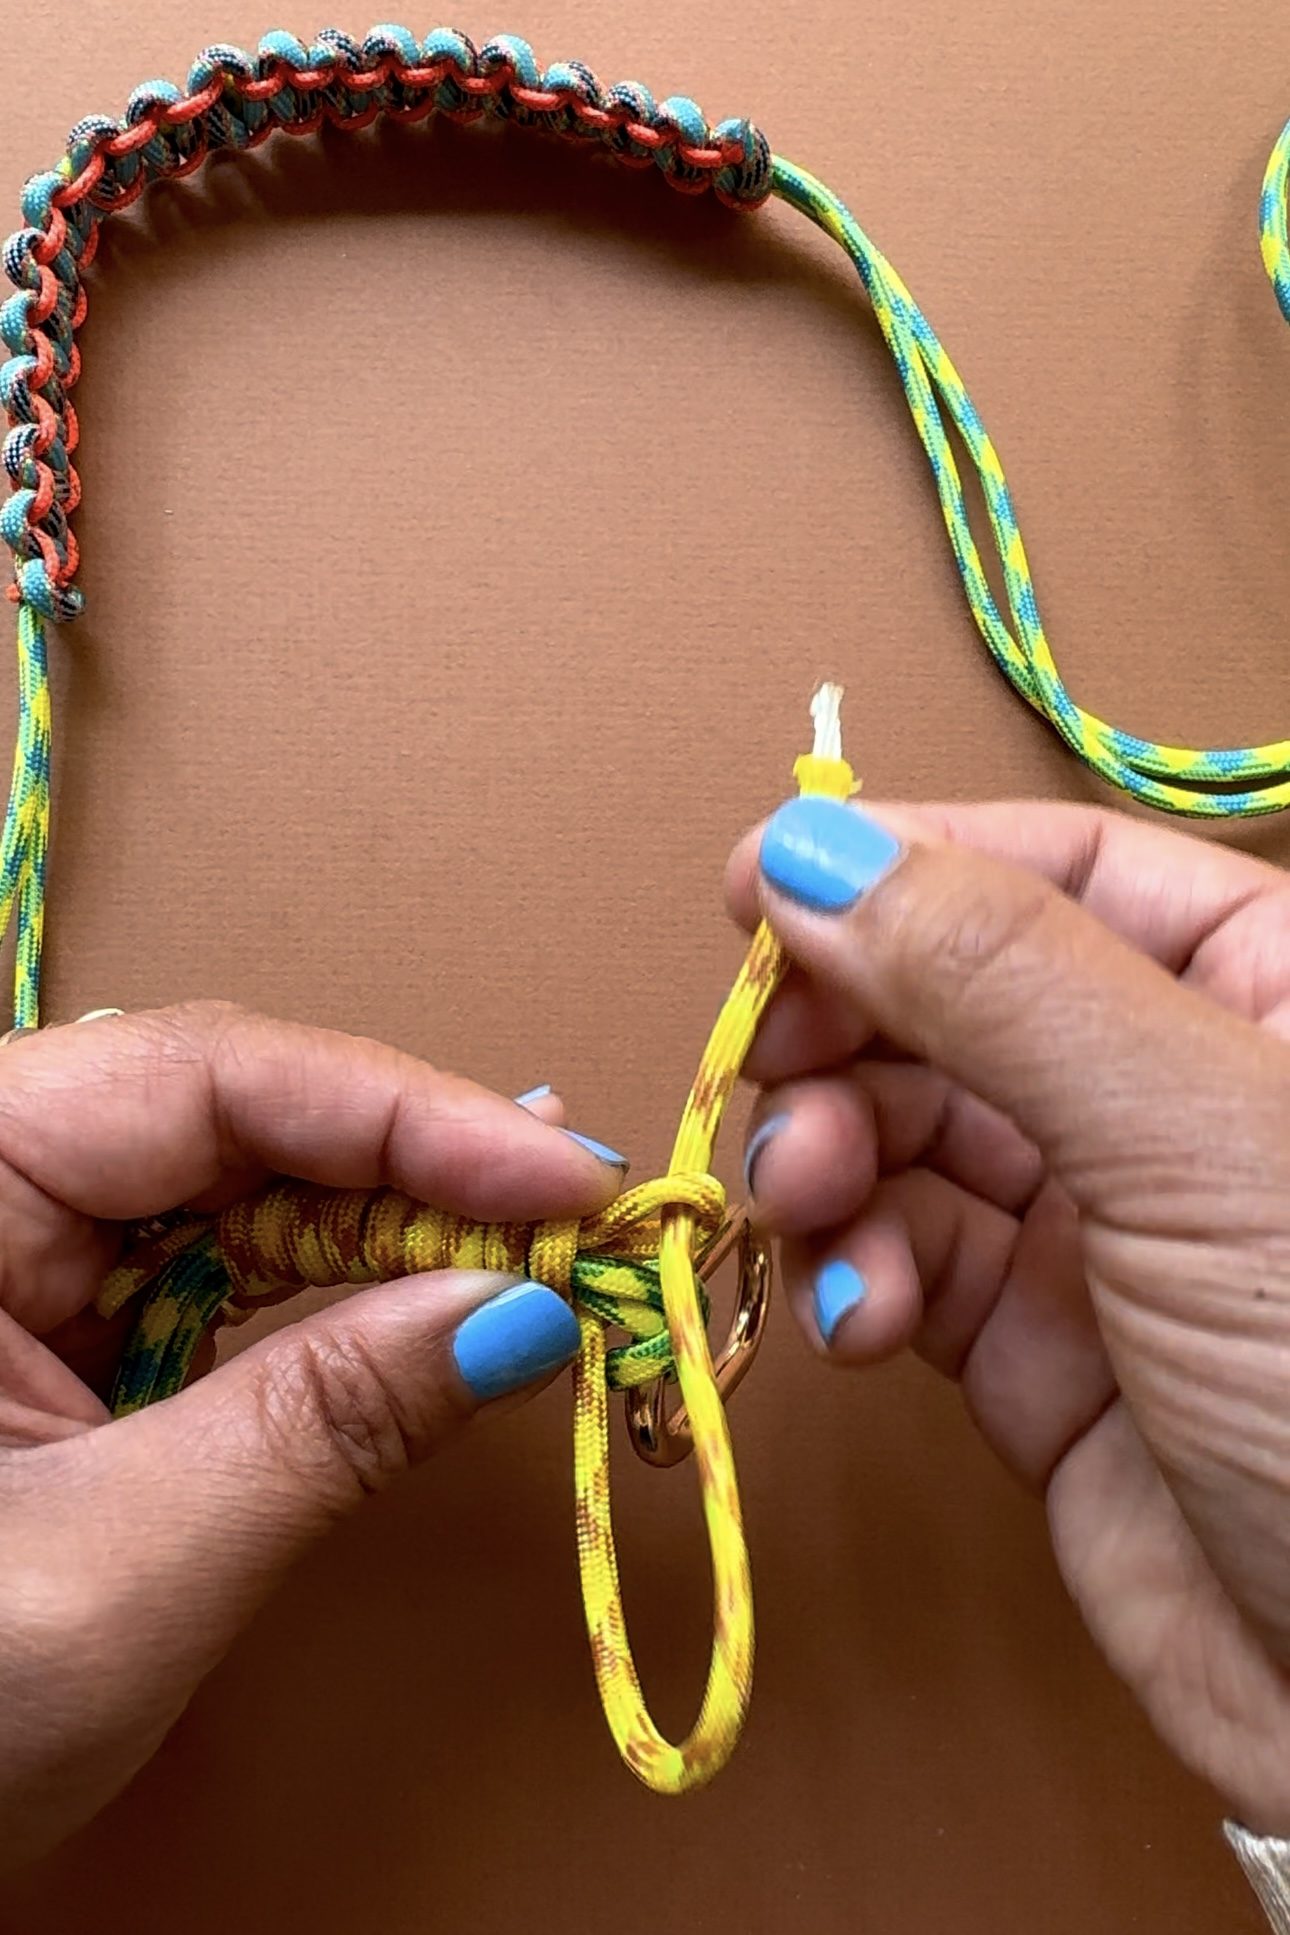
Once you've reached the desired length, pull the end of the rope through the open loop from behind.
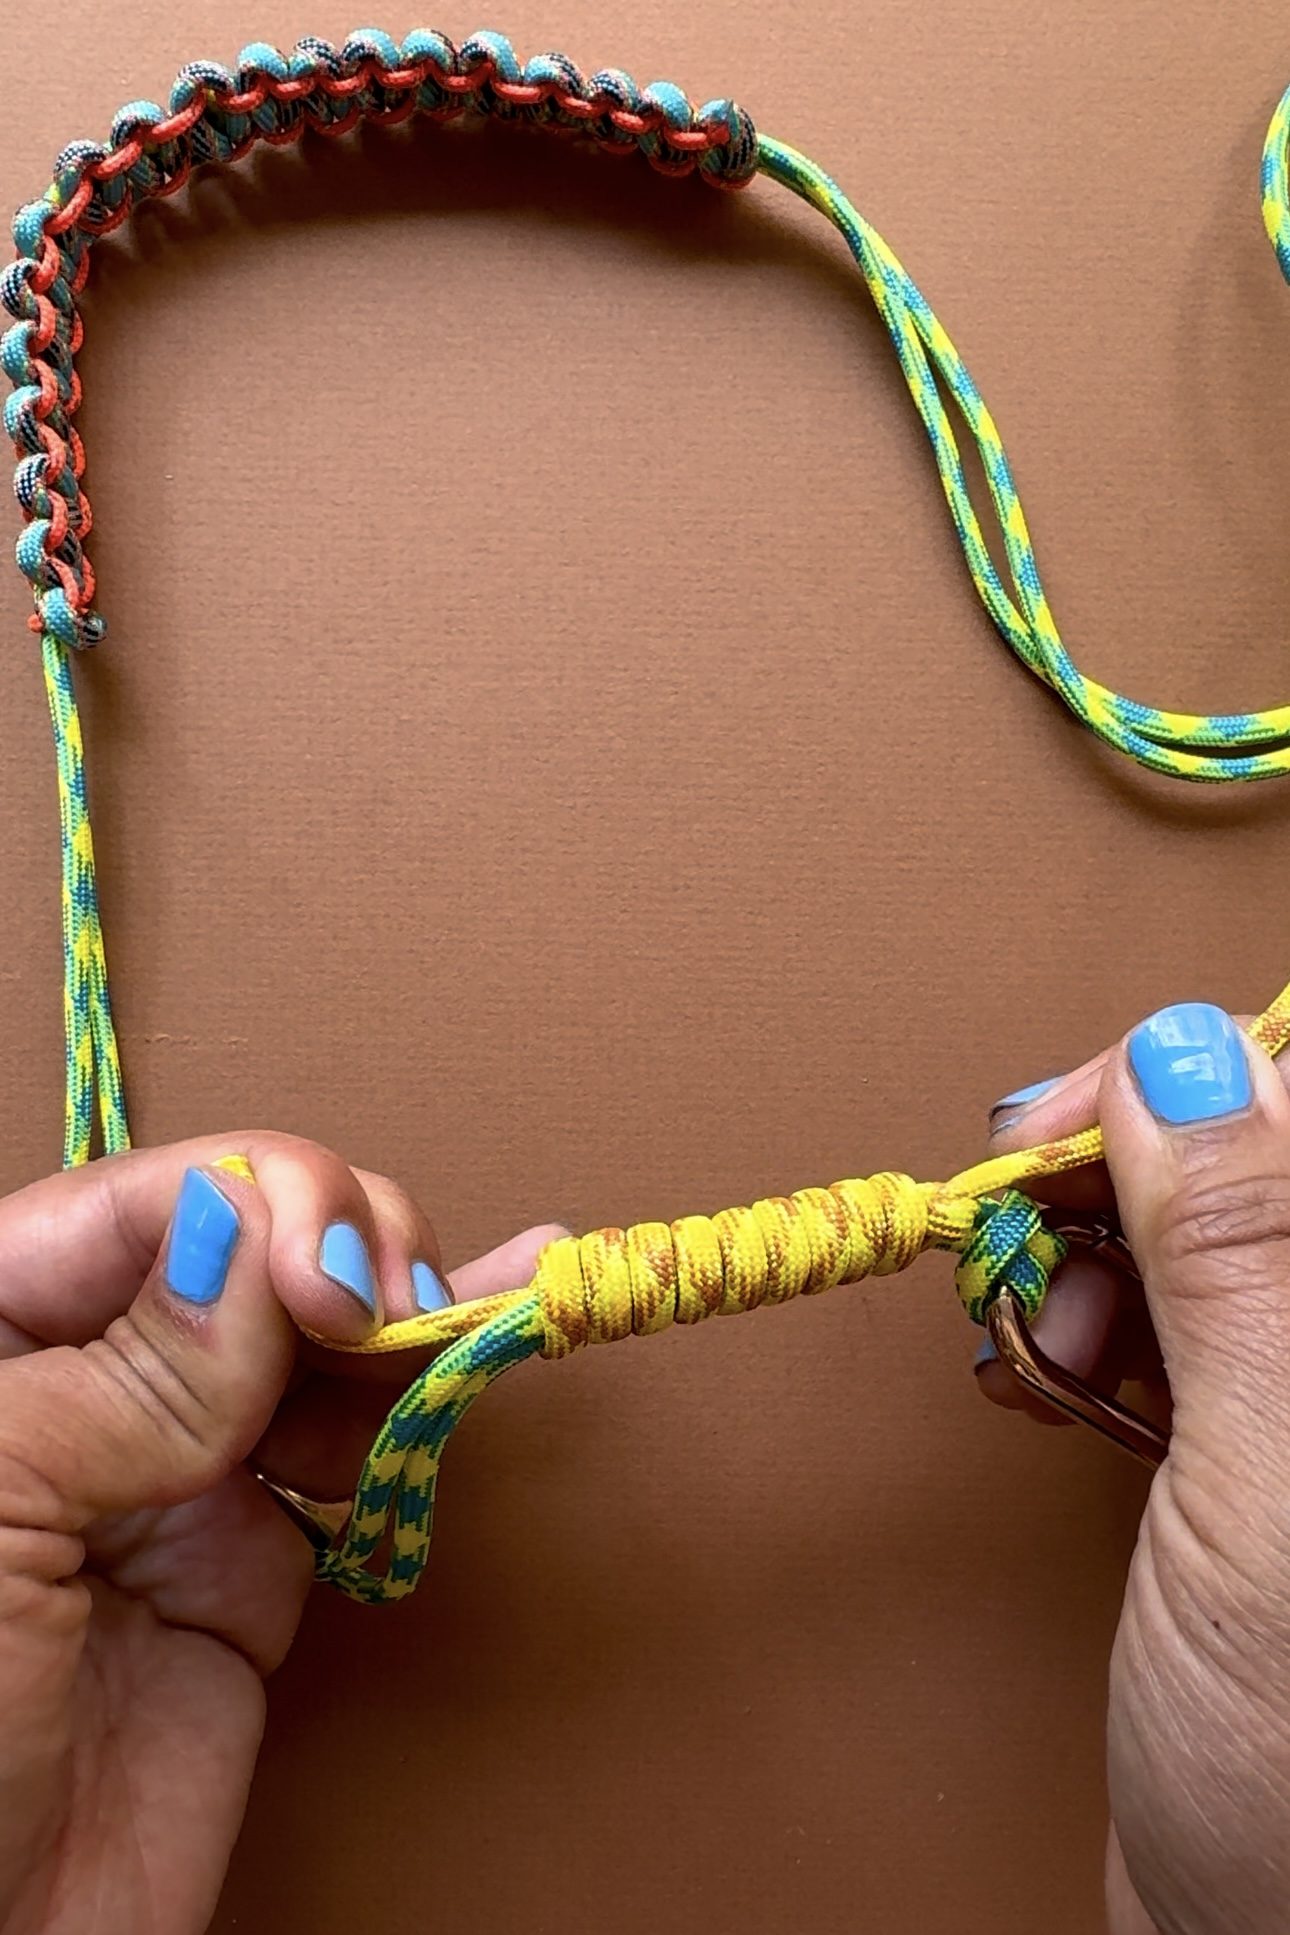
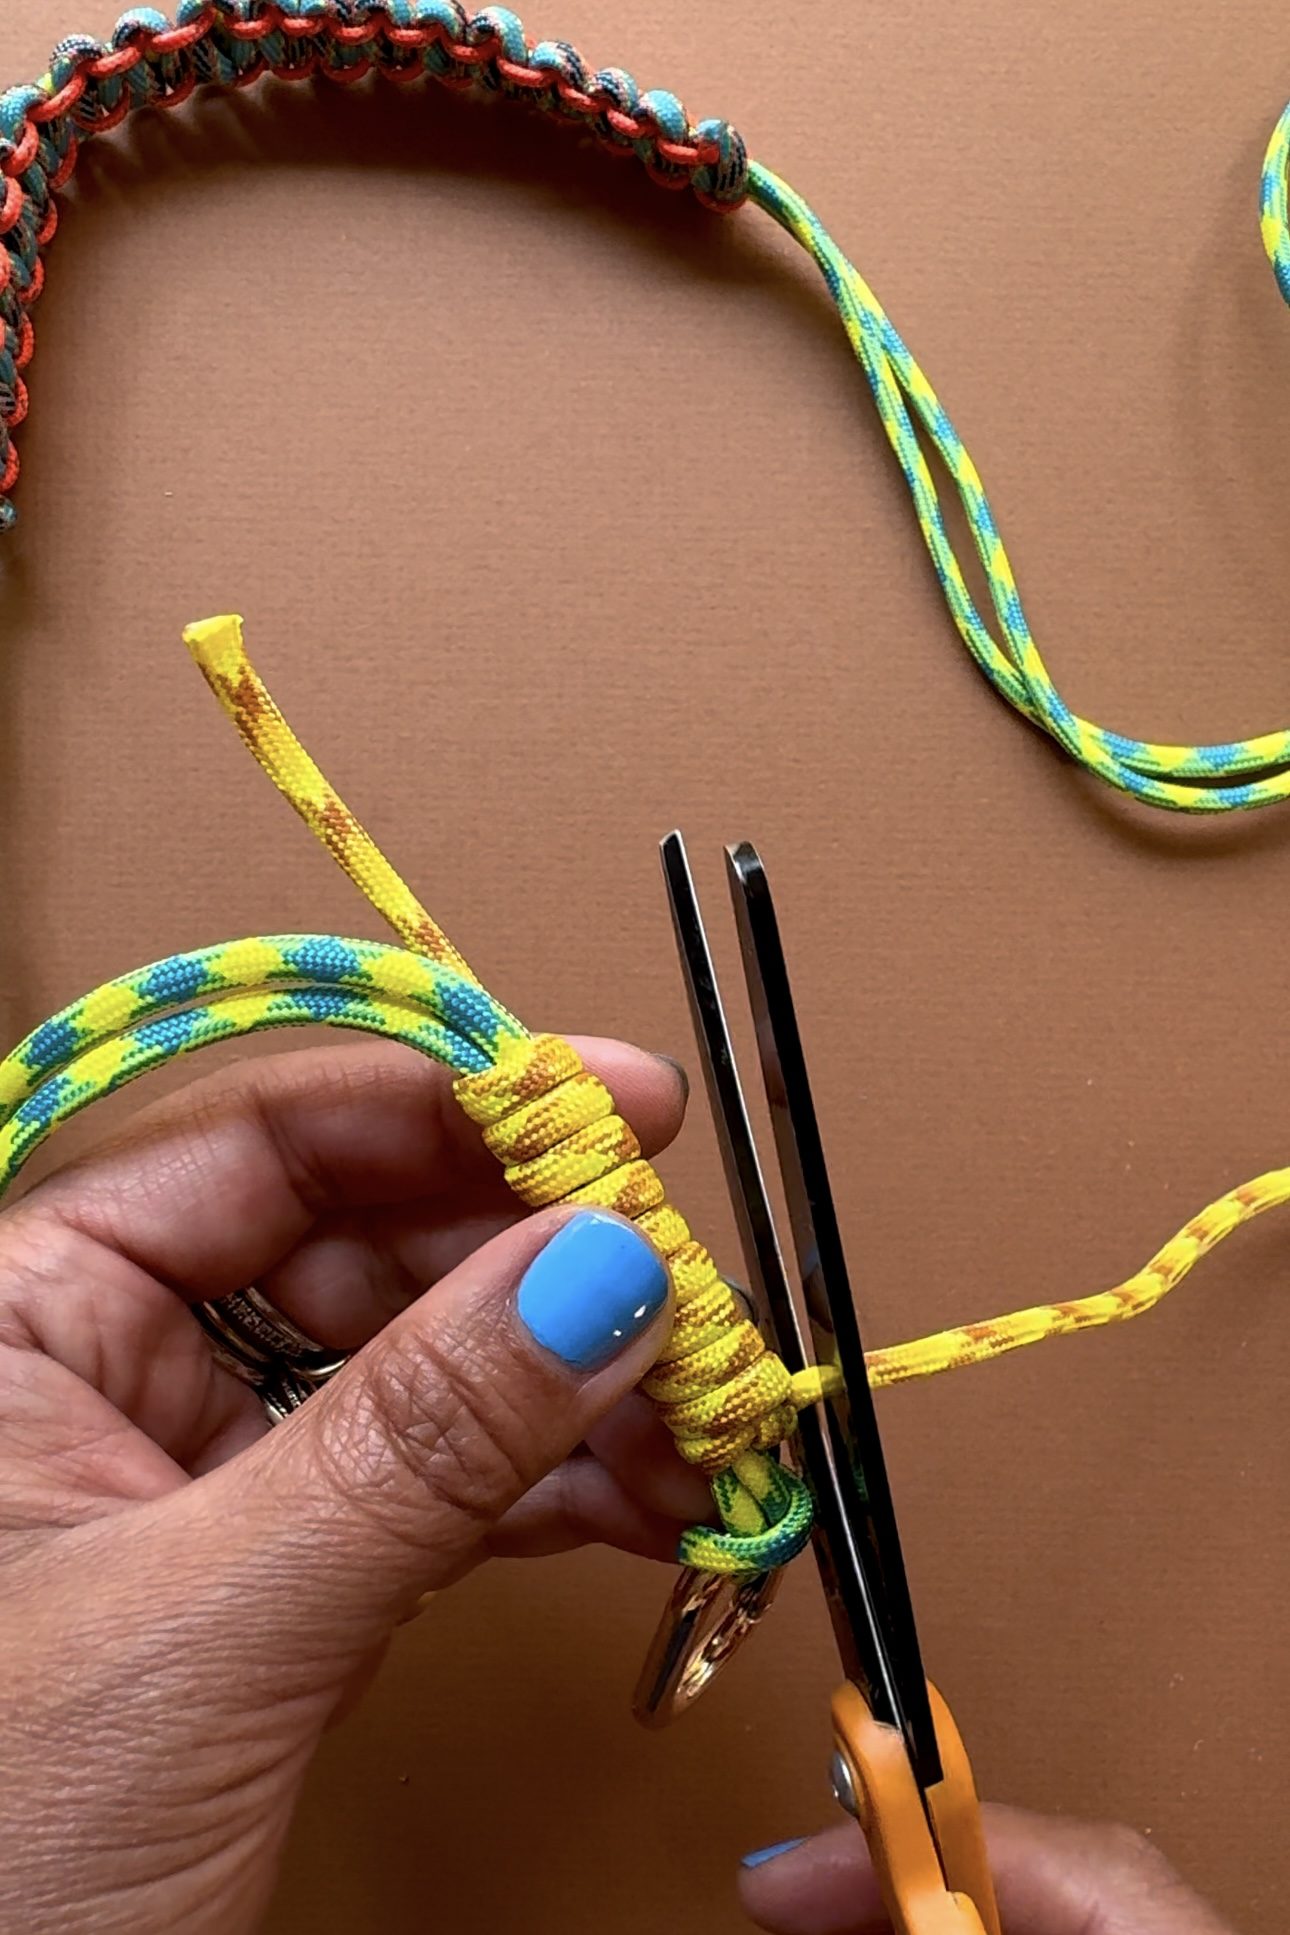
Pull both ends until tight. Trim the ends.
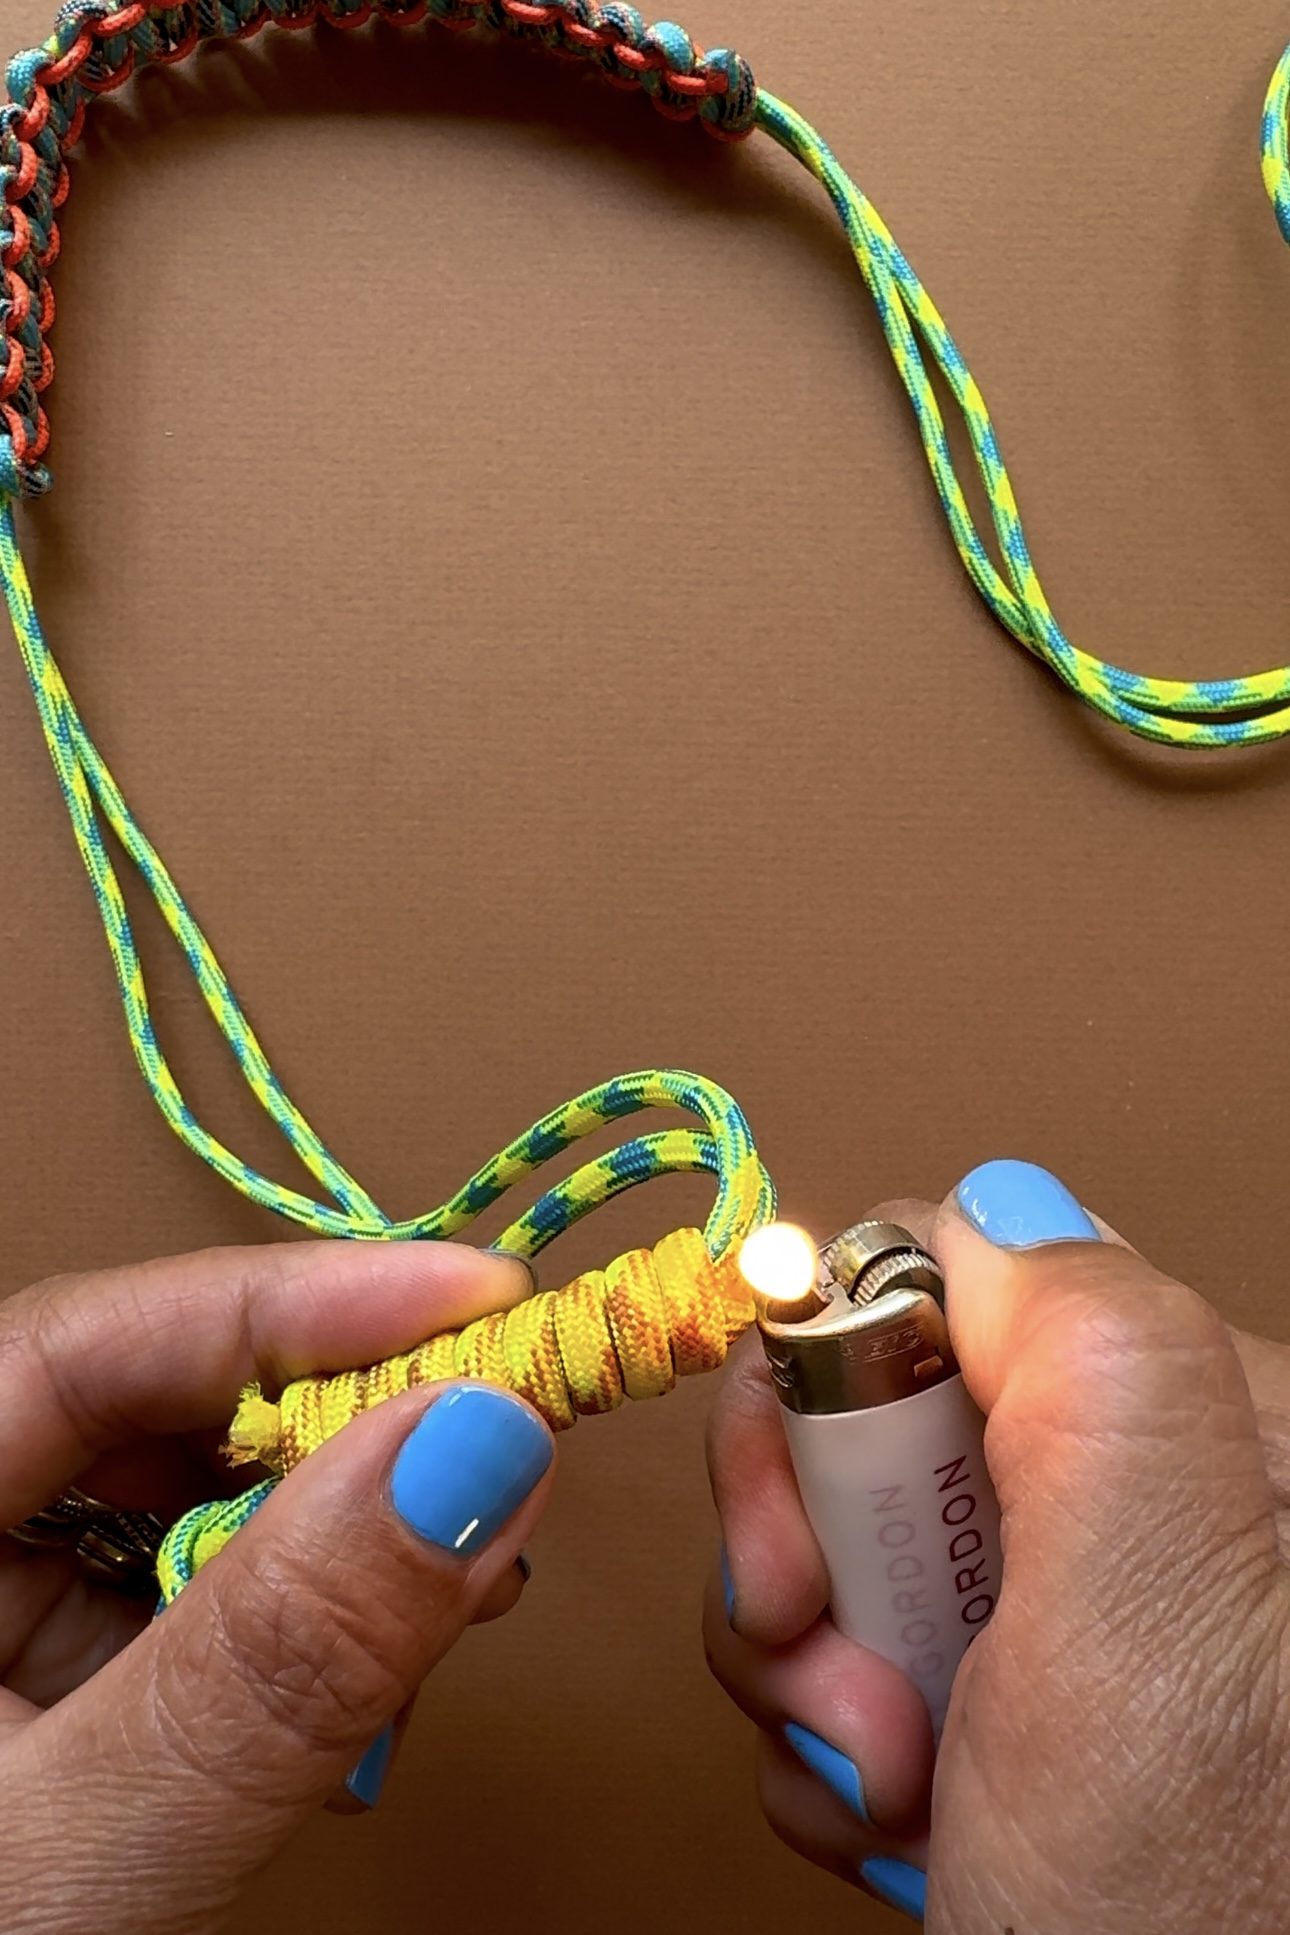
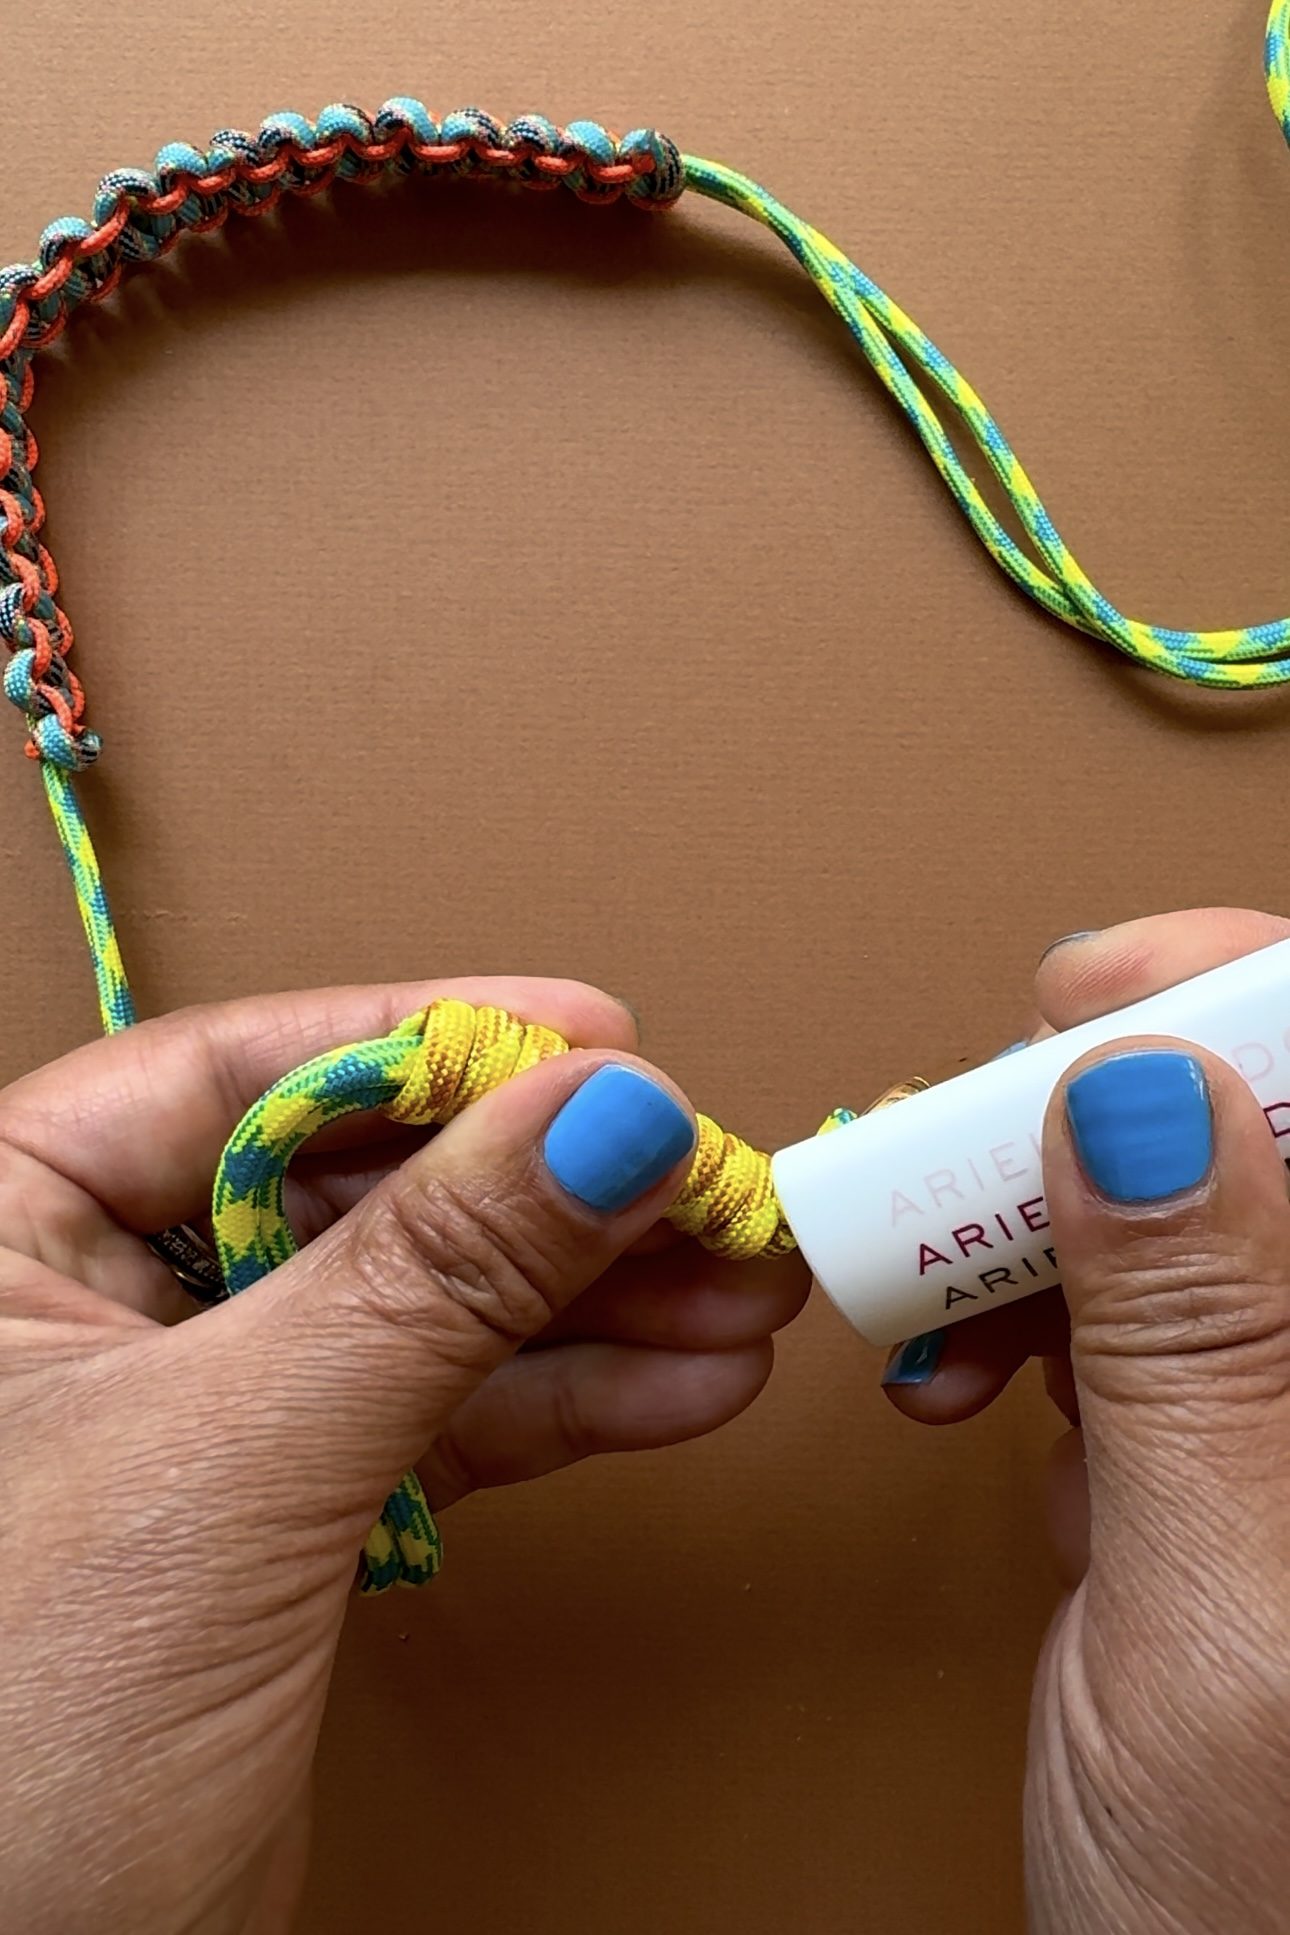
Burn the ends until they begin to melt. Immediately use the back of the lighter and press the ends down onto the knot. This keeps the barrel knot in place. You can slide the barrel knot along the base rope to adjust the placement.
Your bag strap is ready to attach!
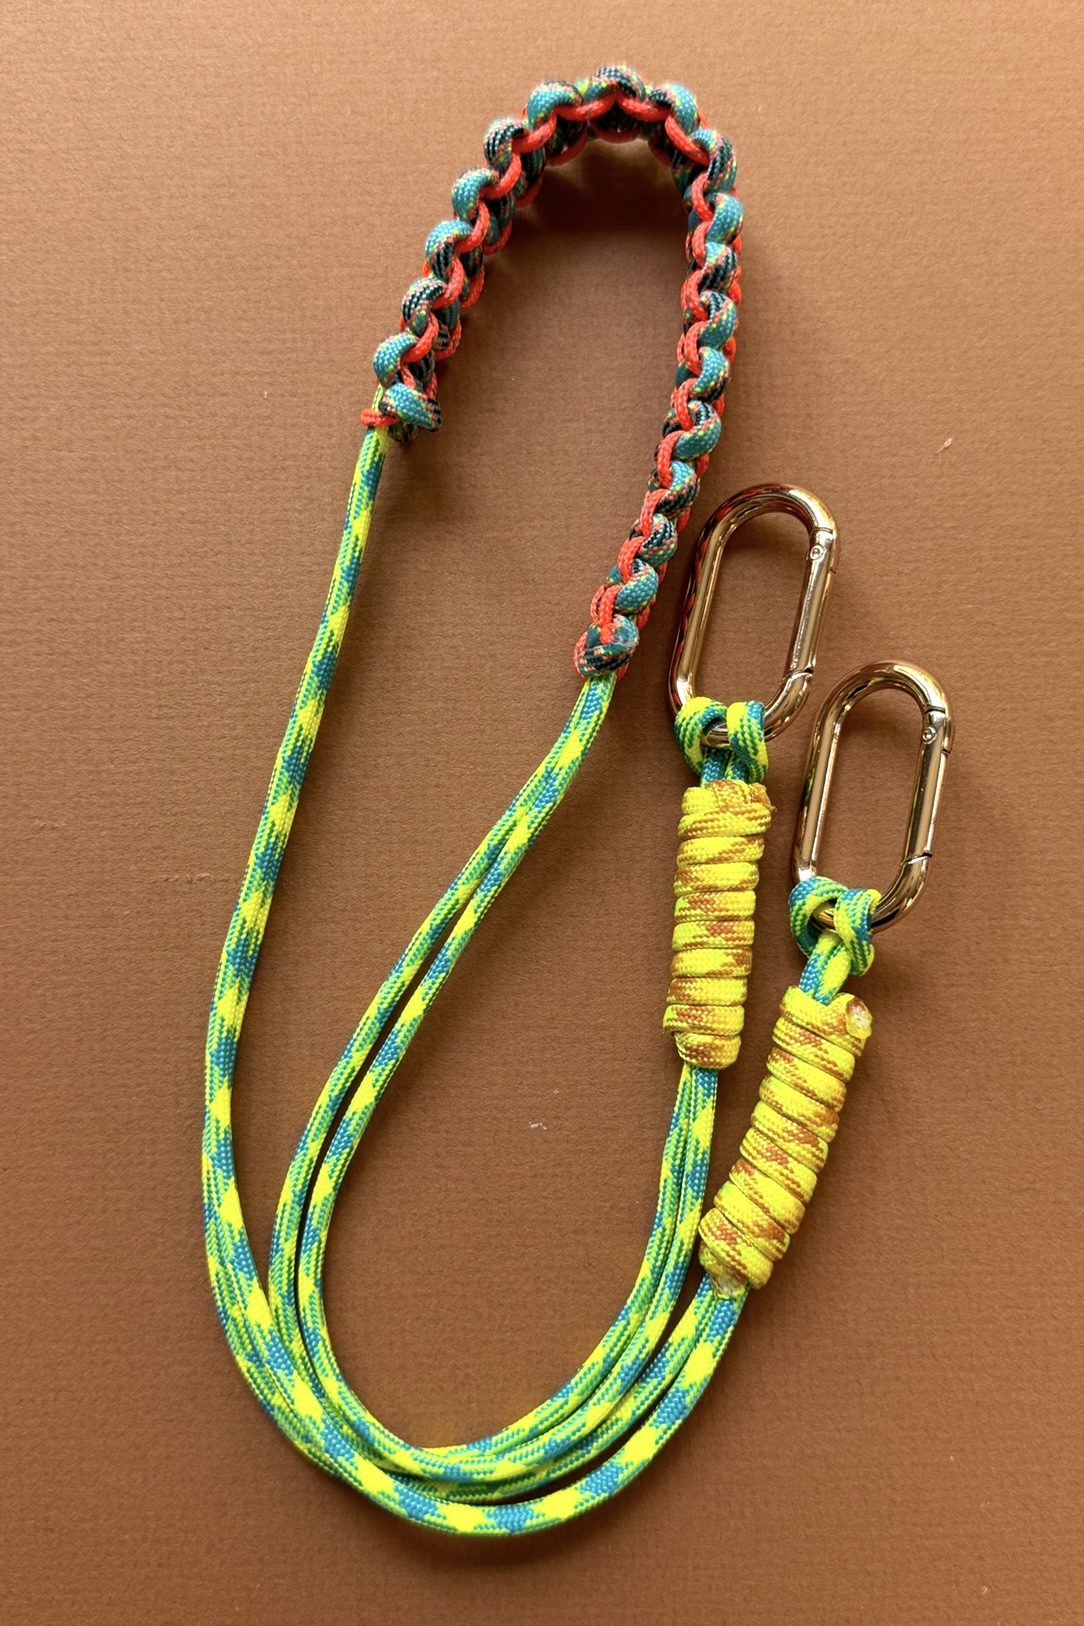
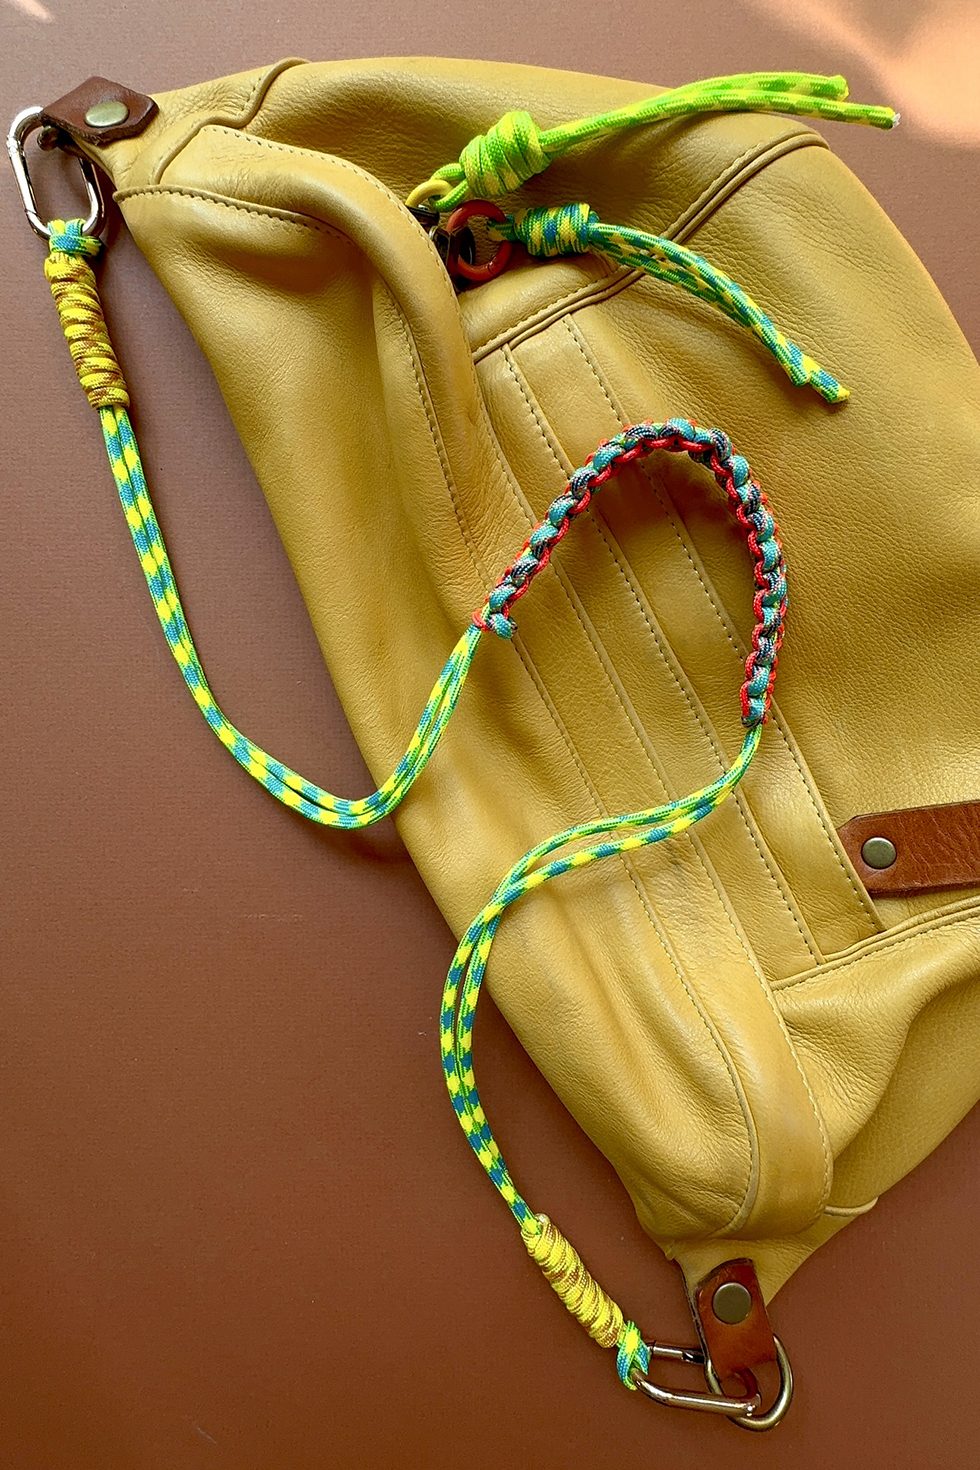
METHOD 2: Shoulder Strap with Tassels
You'll need:
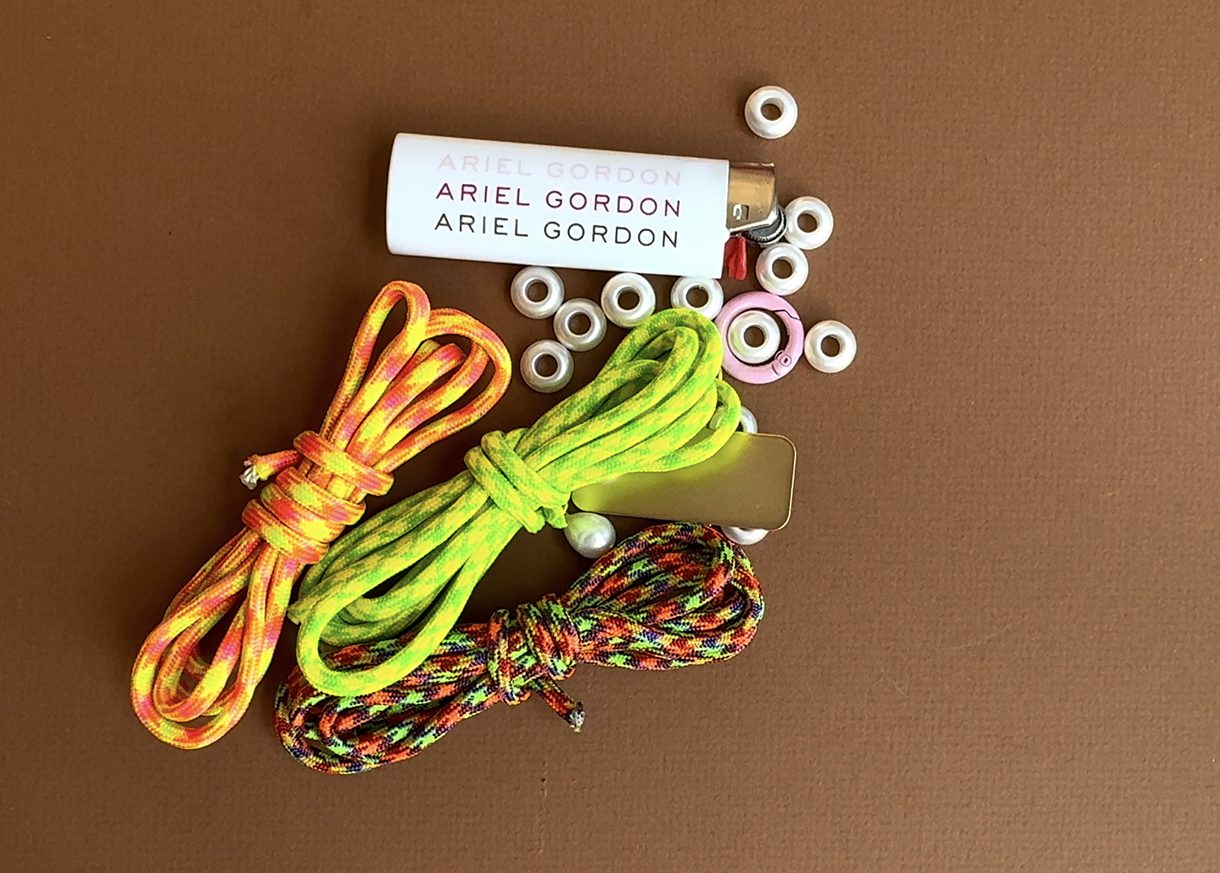
DIY KNOTTY ROPE KIT includes:
- thick rope in 3 colors (5 ft each)
- thin rope in 2 colors (4 ft each)
- large pearl charm
- small pearl charm
- pearl beads
- metal phone insert
- O ring
- lighter
ADDITIONAL SUPPLIES NEEDED:
- 2 carabiners
- scissors
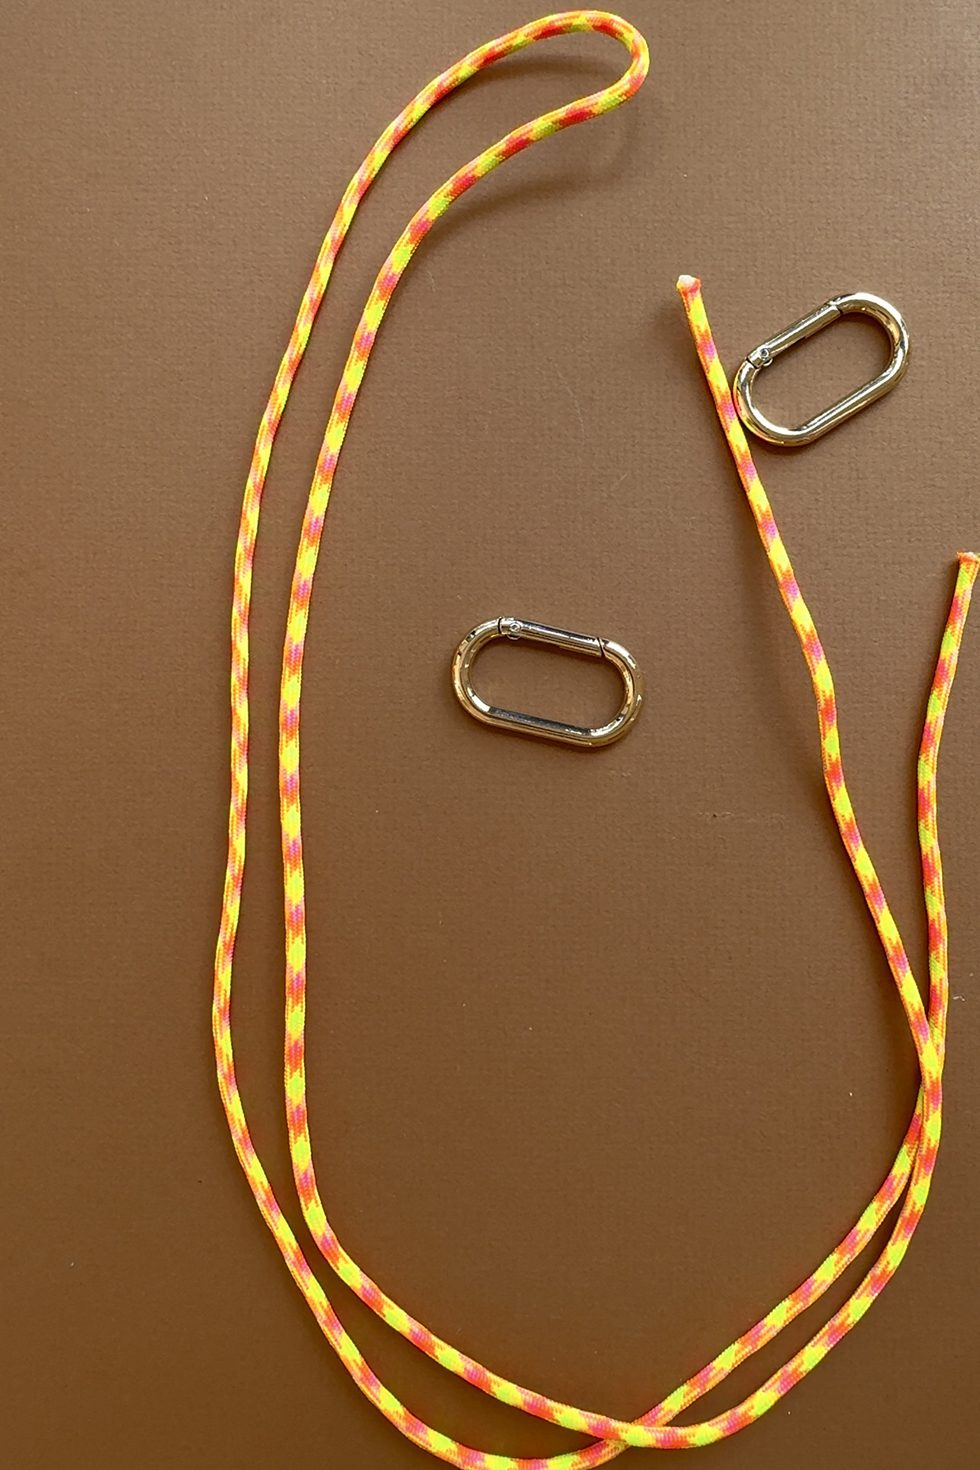
To start, cut lengths of the thick rope according to what you would like to make. Approximate measurements are as follows:
- shoulder bag strap: 3'
- crossbody bag strap: 5'
Trim the ends and lightly burn them. This prevents the inside of the rope from fraying and separating, making it easier to handle.
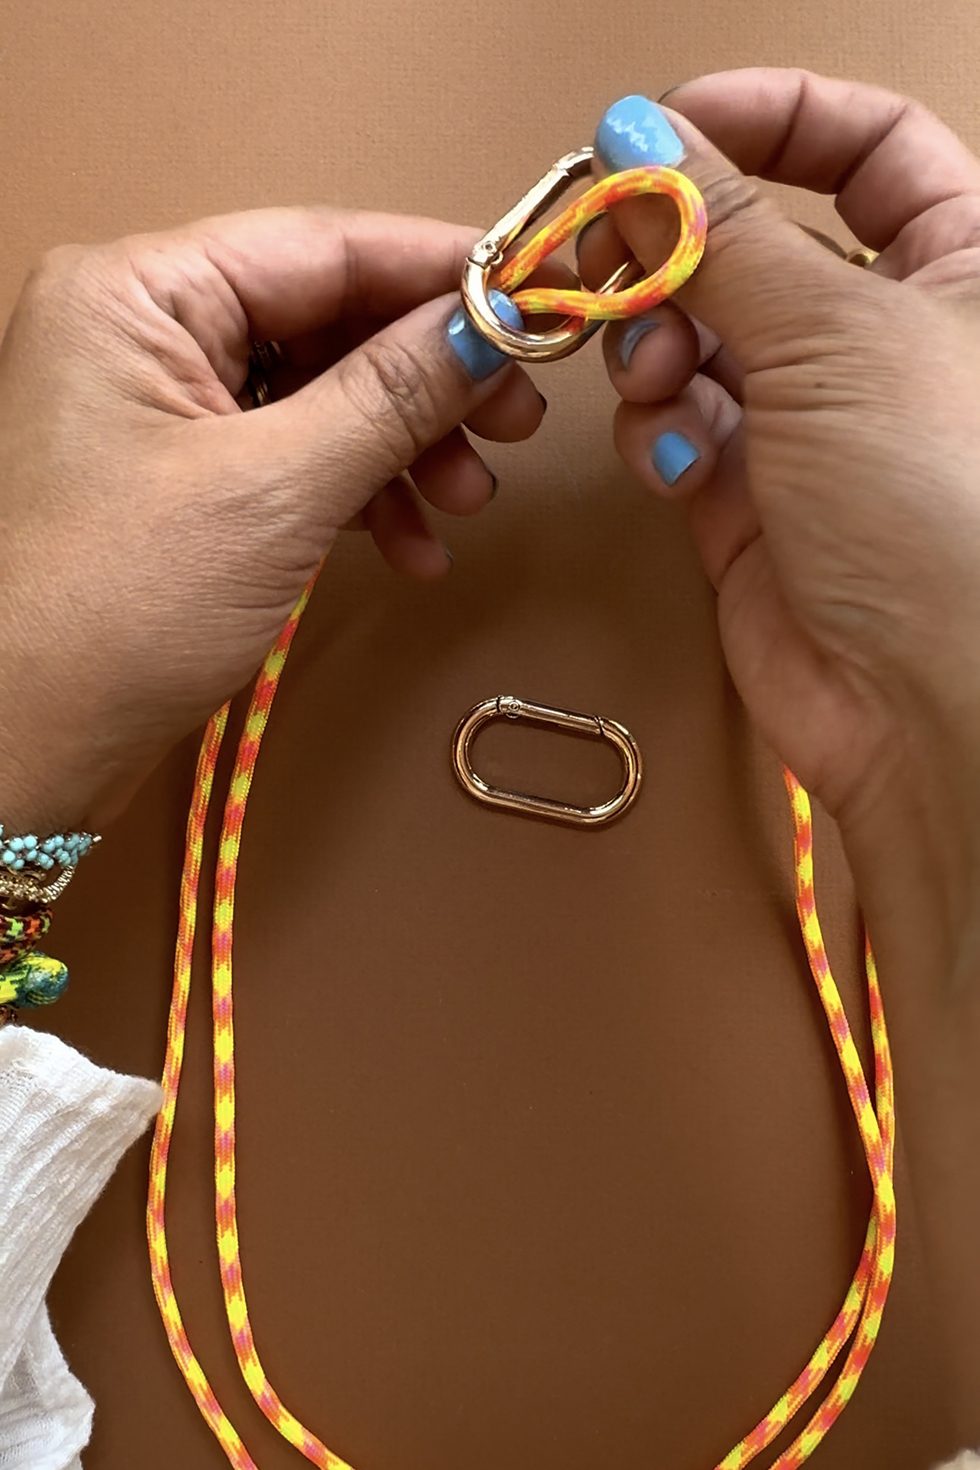
Fold the base rope in half. Take the loop and thread it through a carabiner.
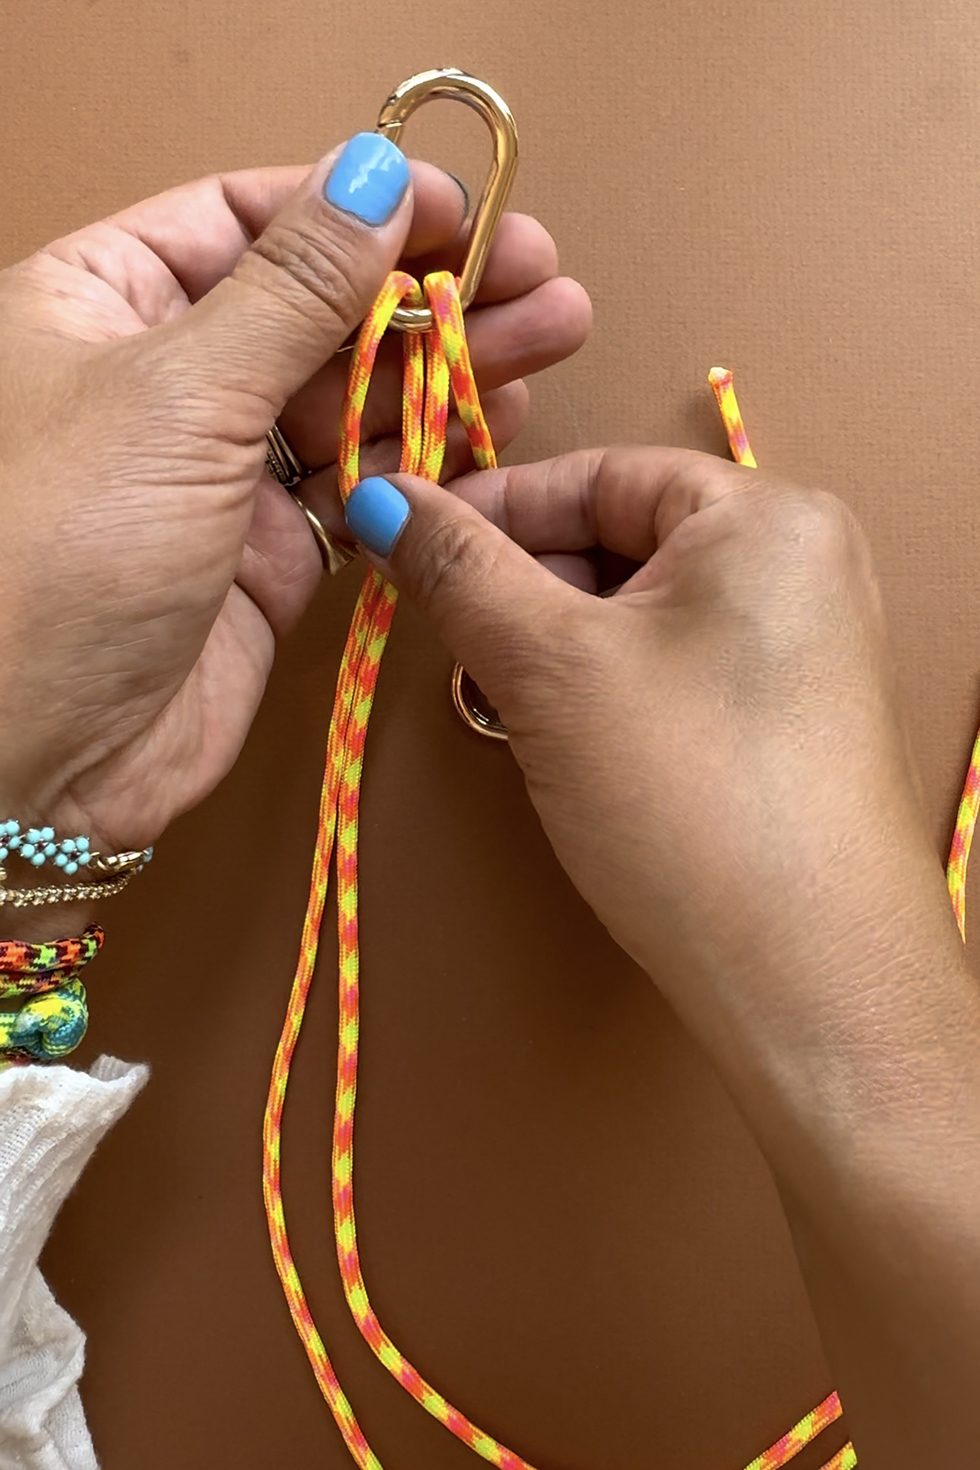
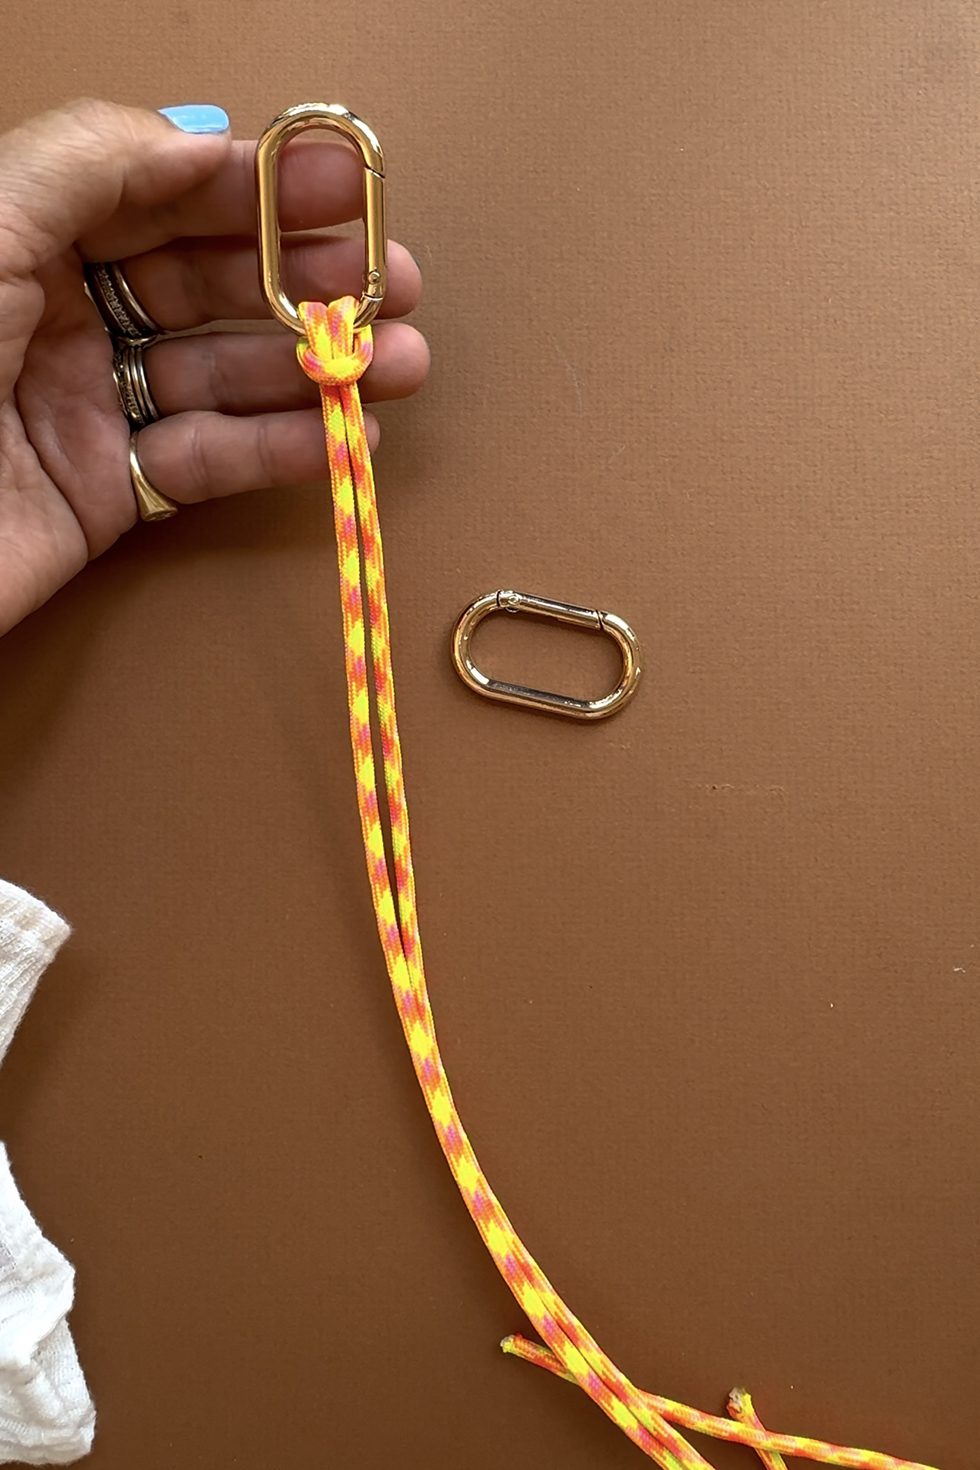
Fold the loop over the carabiner. Pull the set of ropes through the loop and pull tight. This is a cow hitch knot.
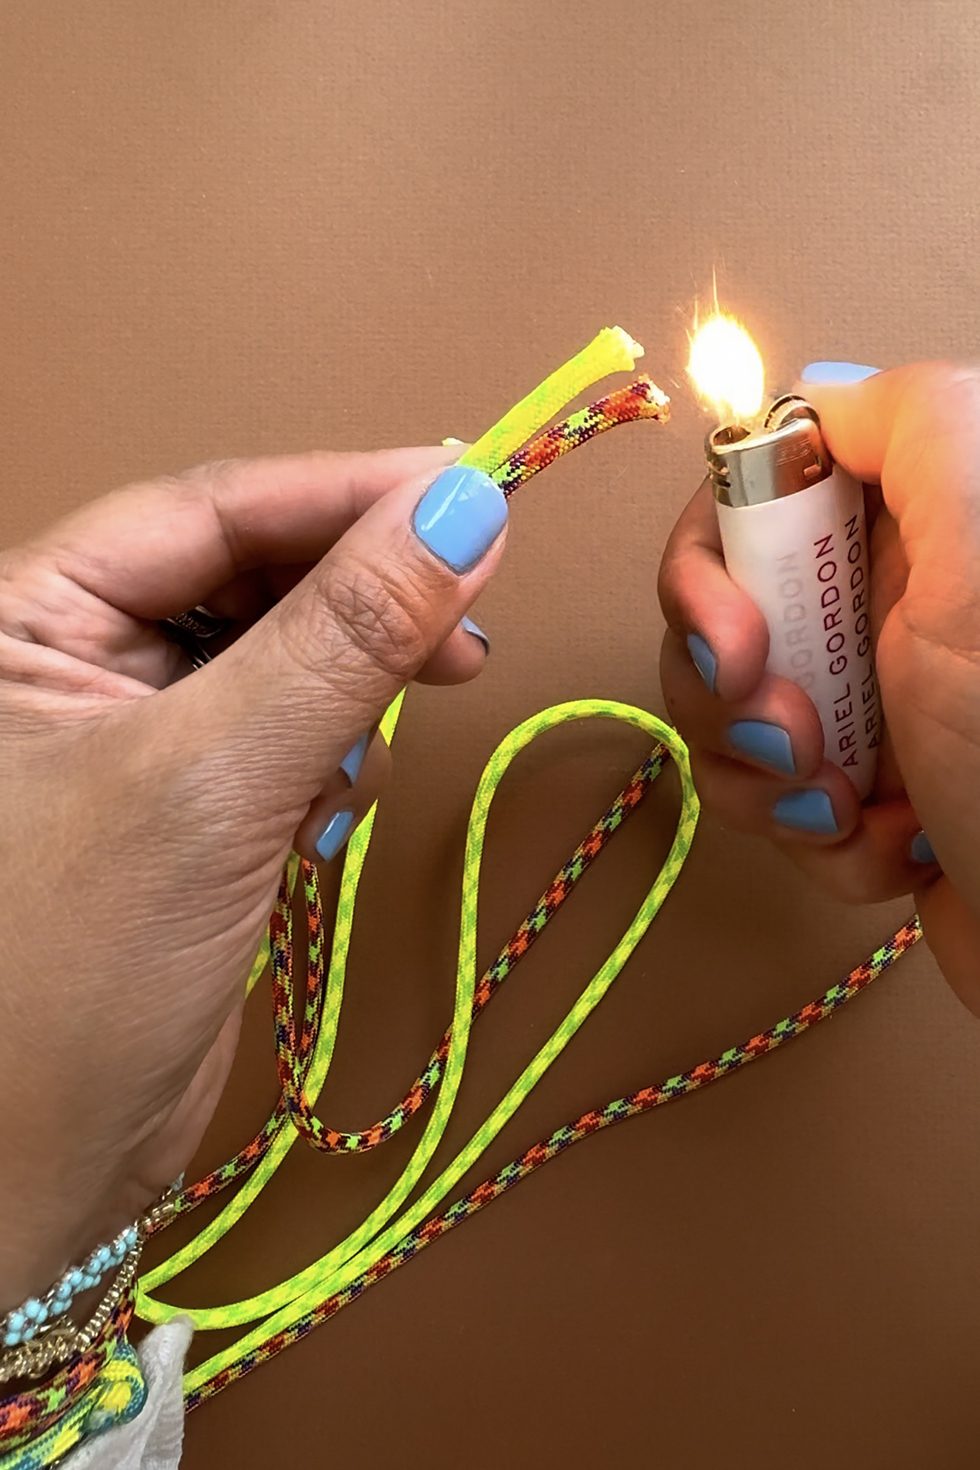
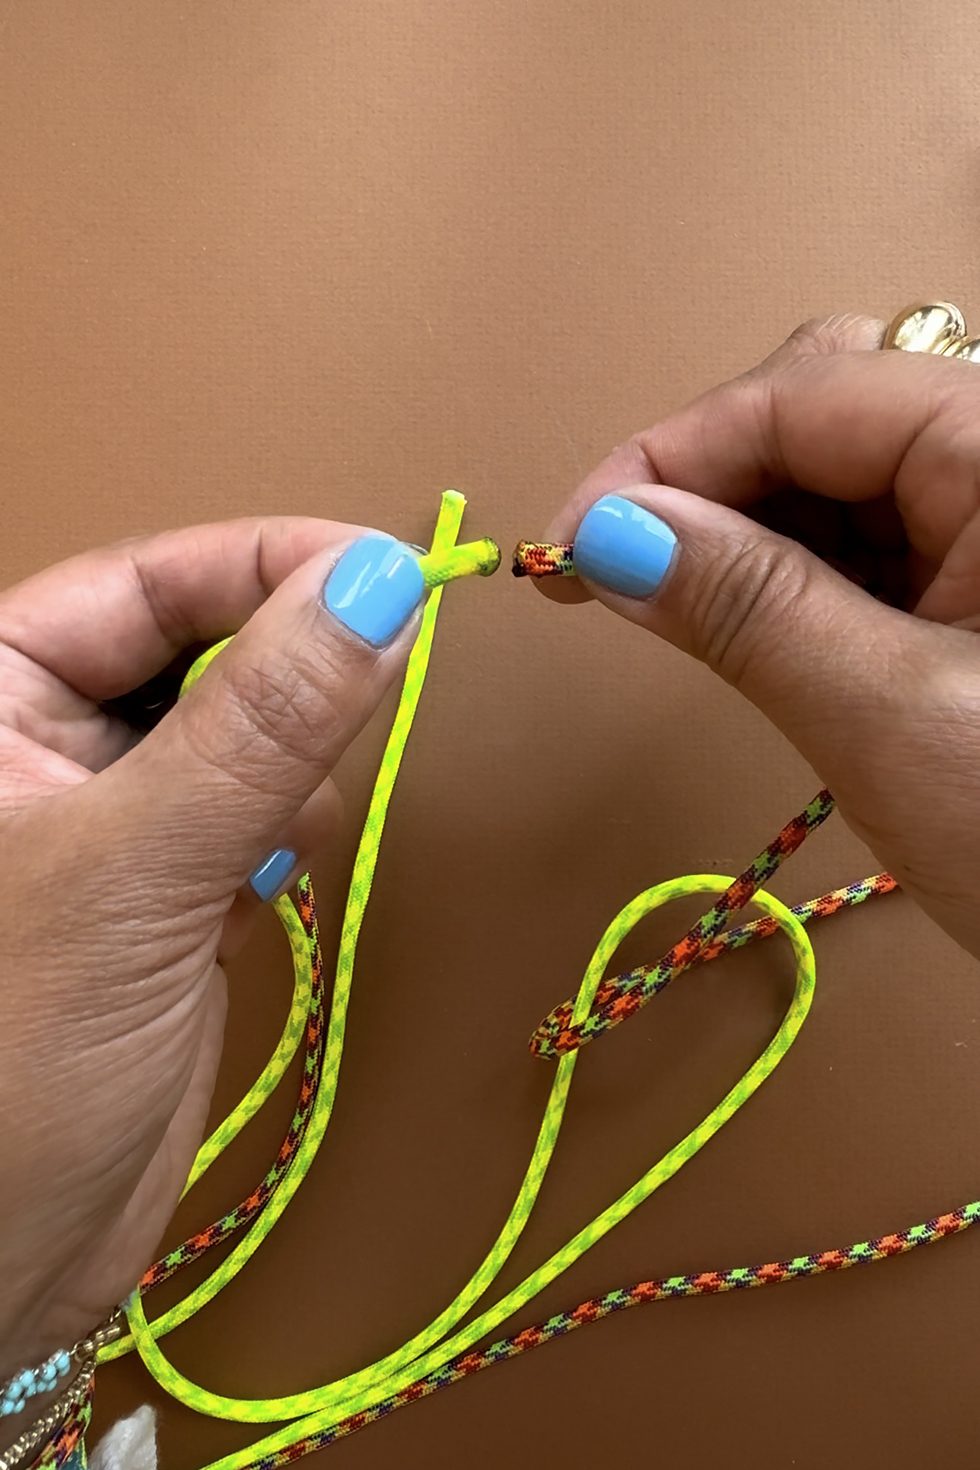
Next prepare the ropes for a bootlace weave. I like to fuse 2 colors together to provide some contrast. Here I'm using about 4' of 2 colors of thick rope. Burn the two ends at the same time until they start to melt but make sure you're not charring or burning them.
**When they turn black, you know you've gone too far. You can always trim and start again.
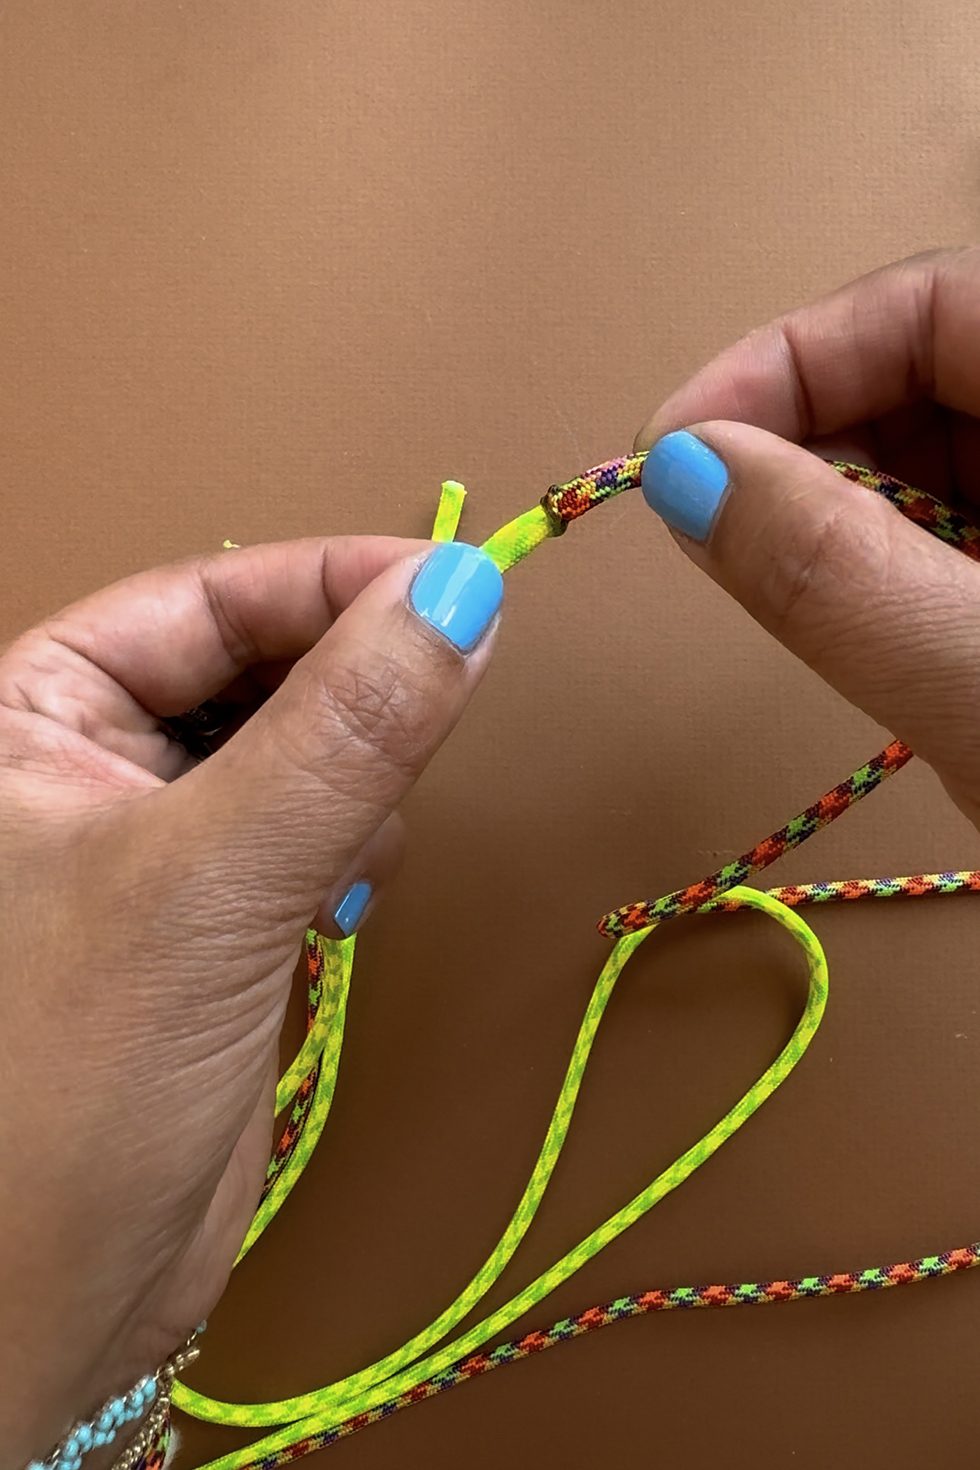
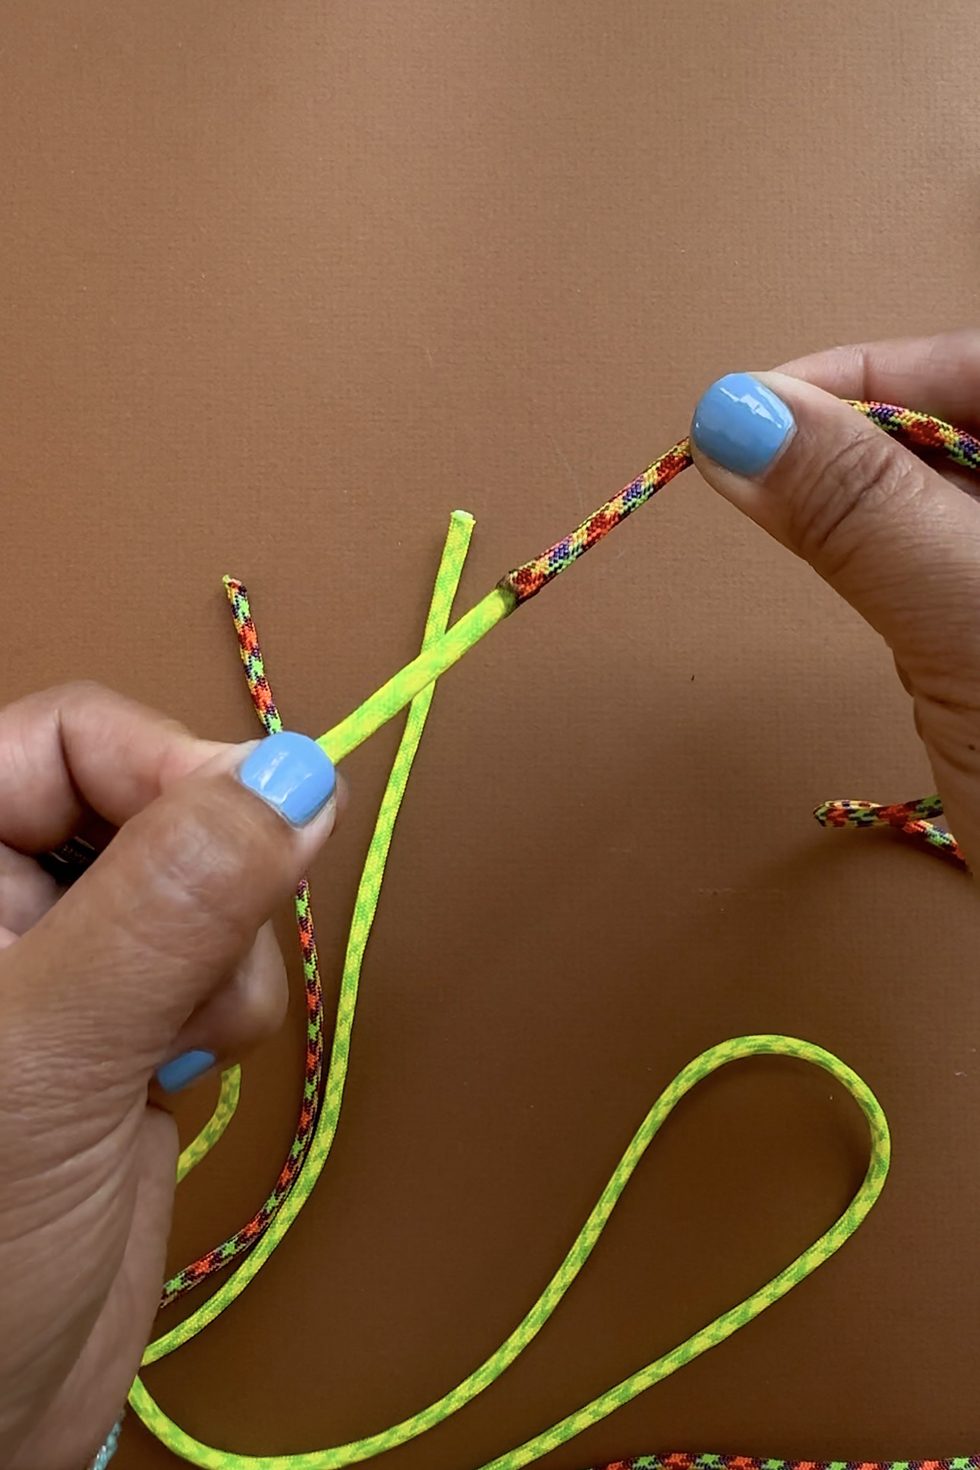
Immediately press the ends together. Wait a few seconds before rolling the seam between your fingers. Be sure not to burn yourself!
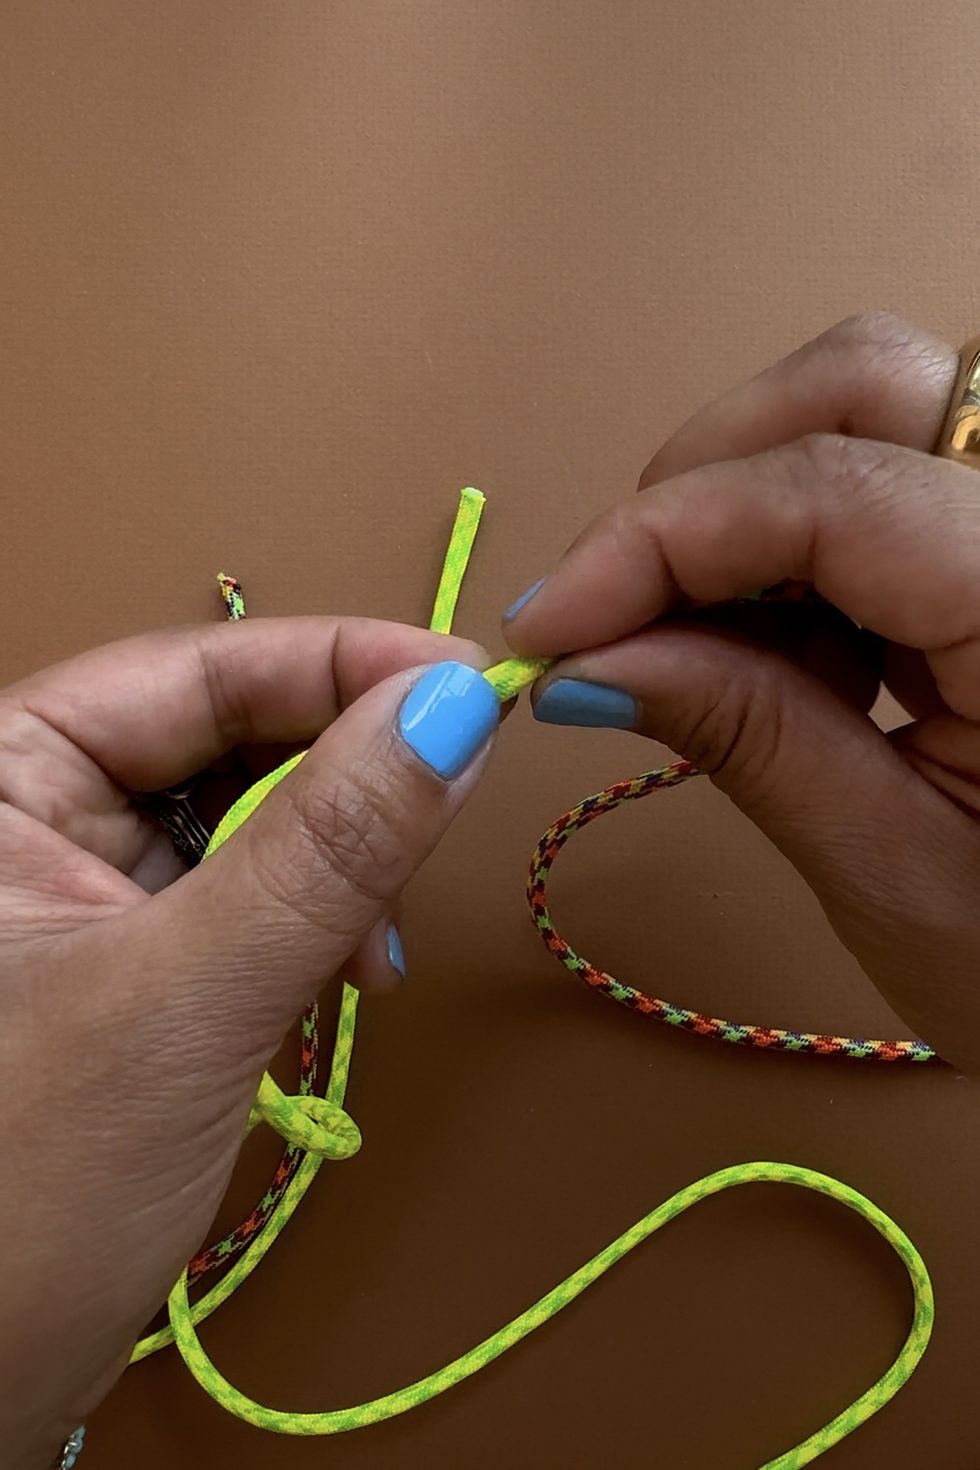
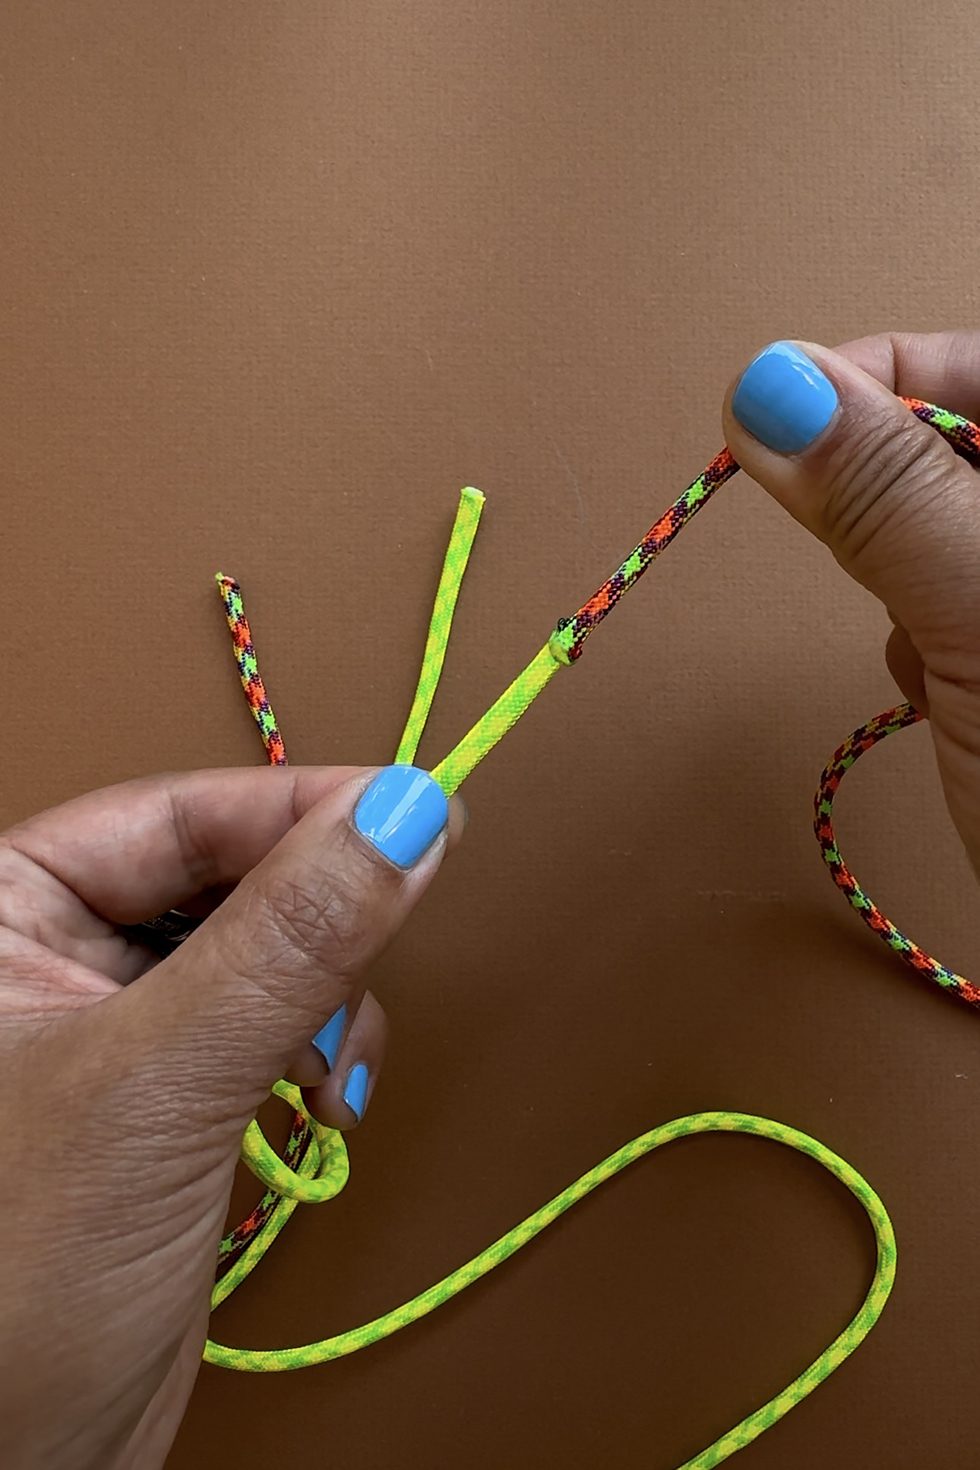
Tug on the ropes to make sure the fuse is strong.
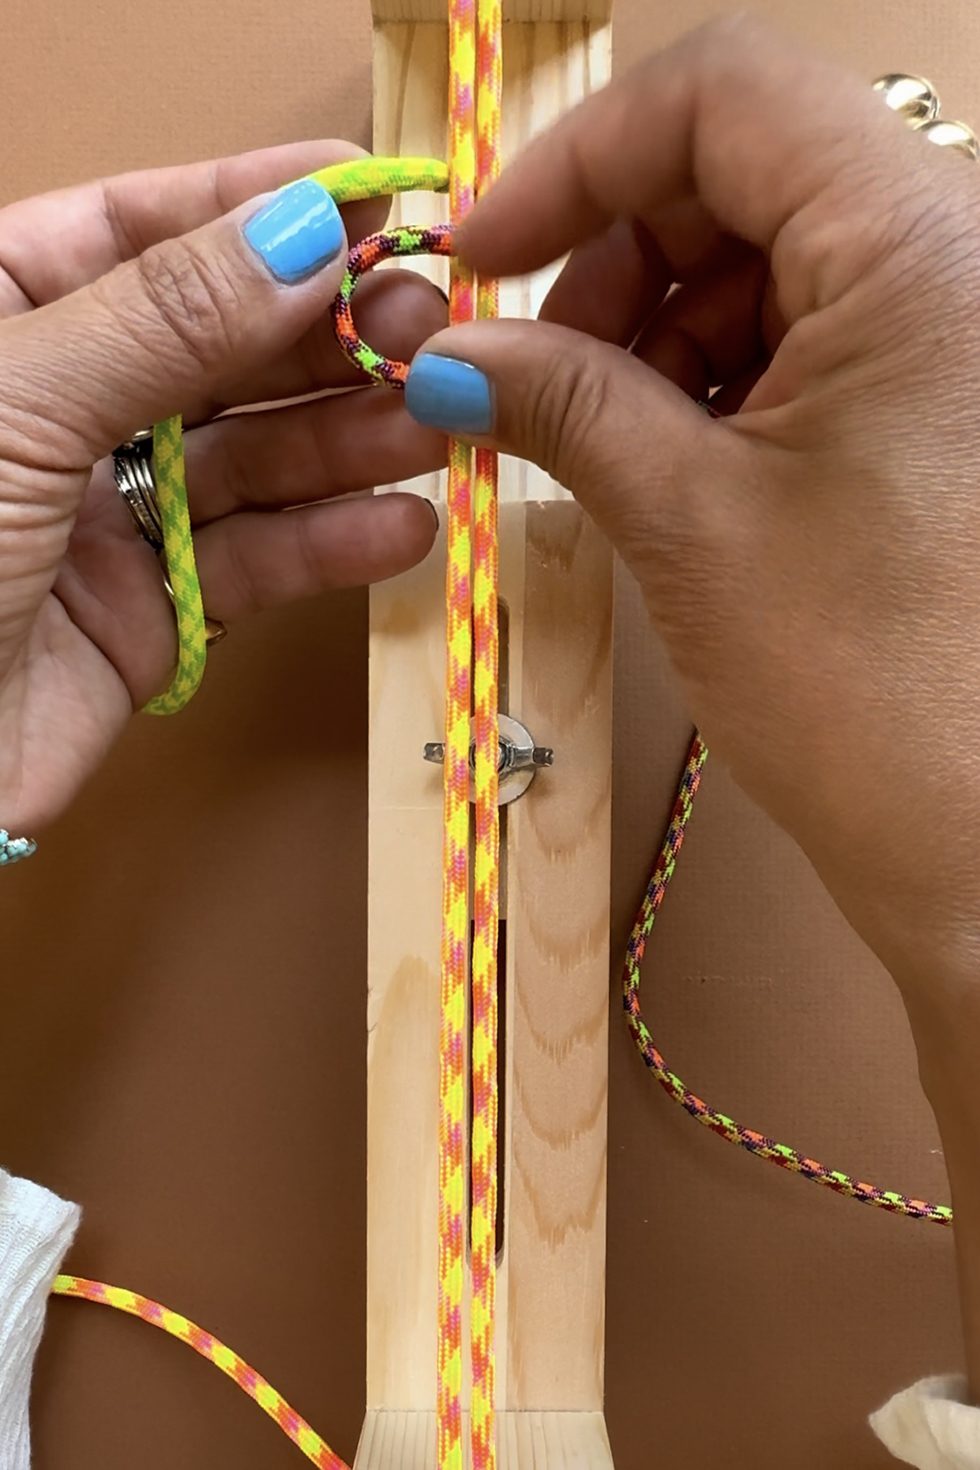
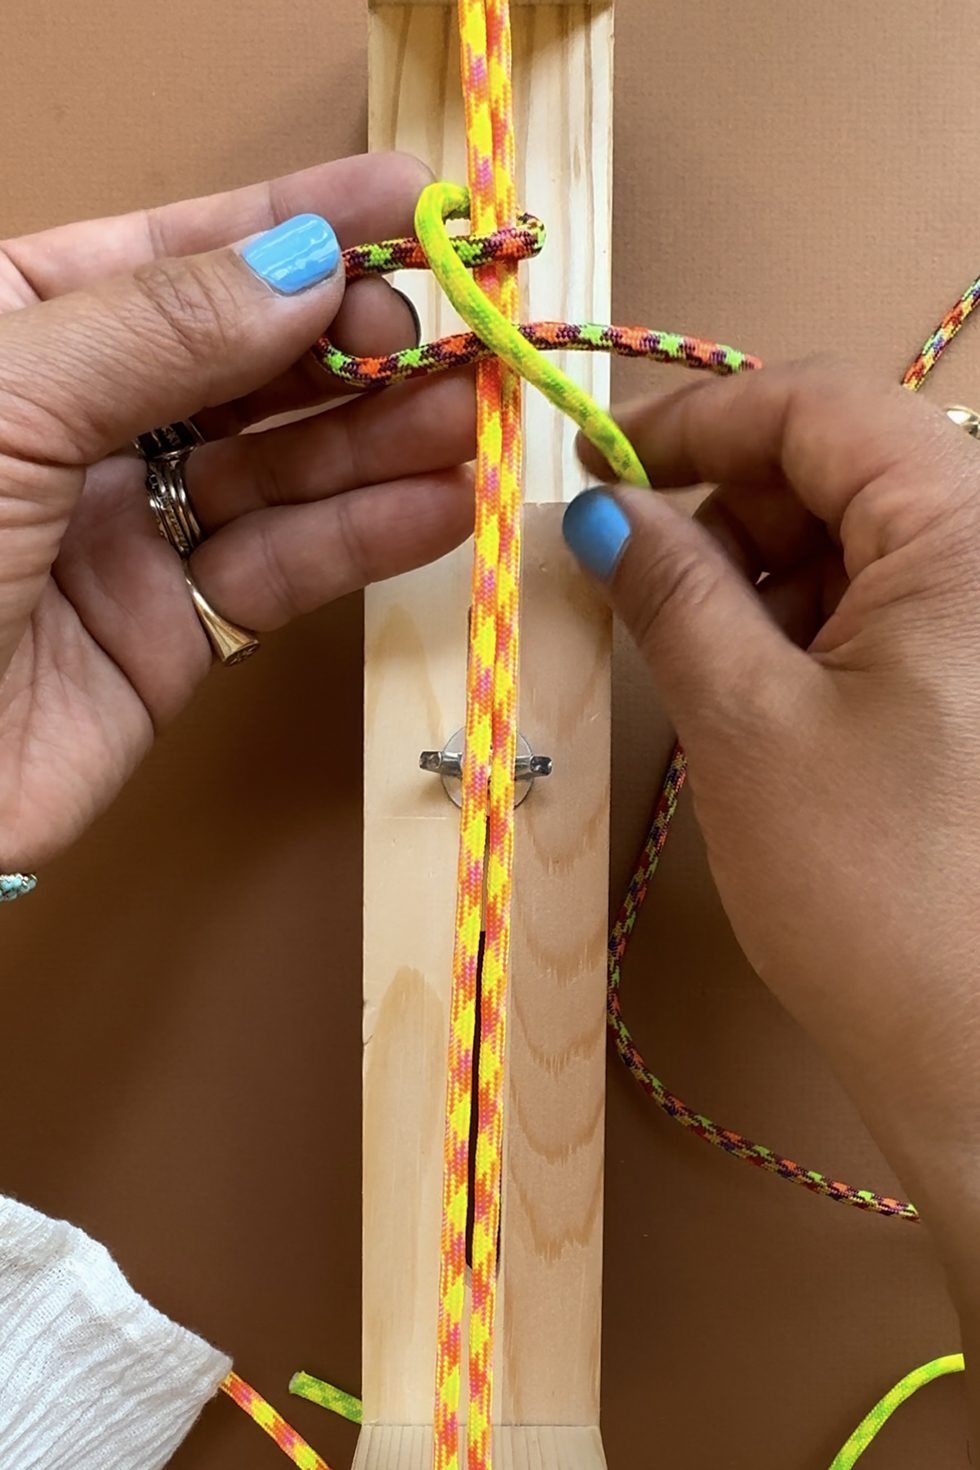
Line the seam up below the base ropes. Fold the right rope over the base ropes, creating a loop on the left side.
Fold the left rope over the loop and over to the right side.
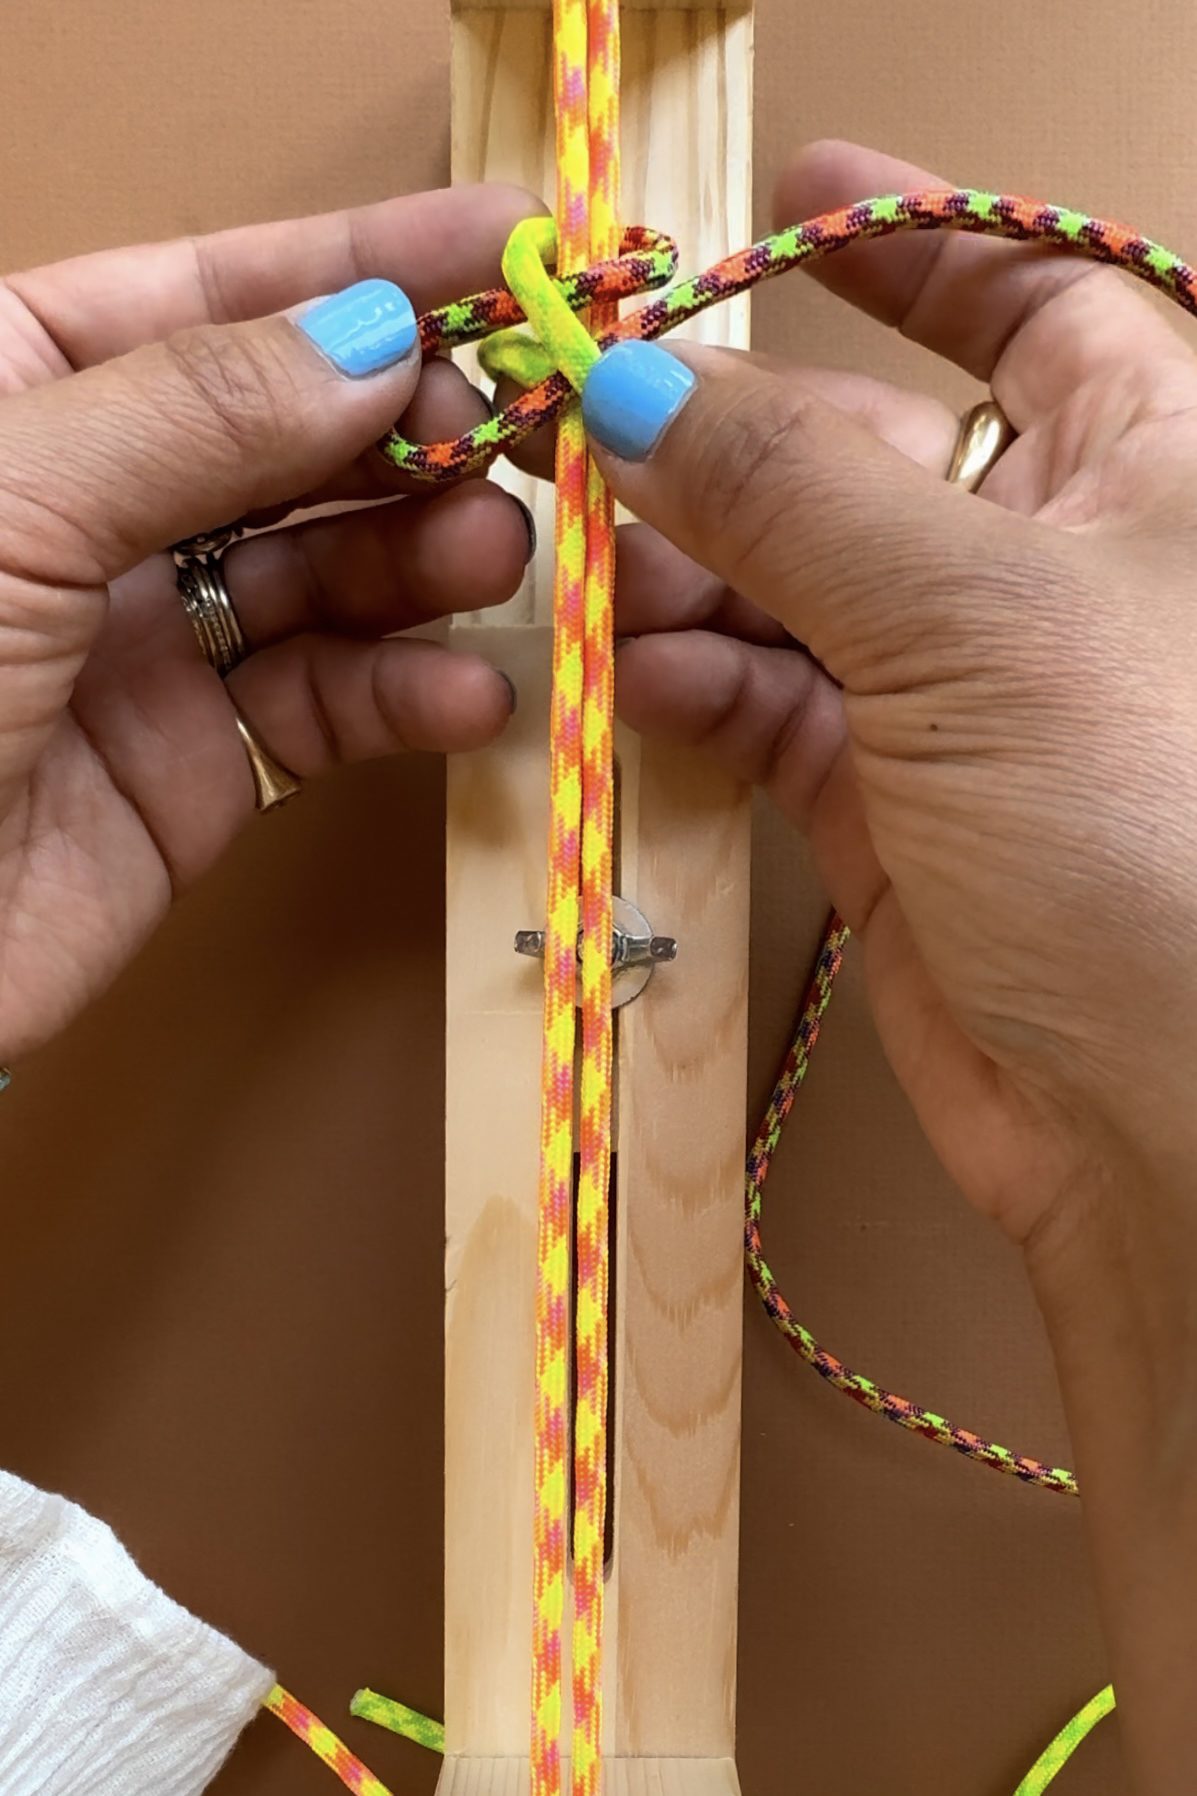
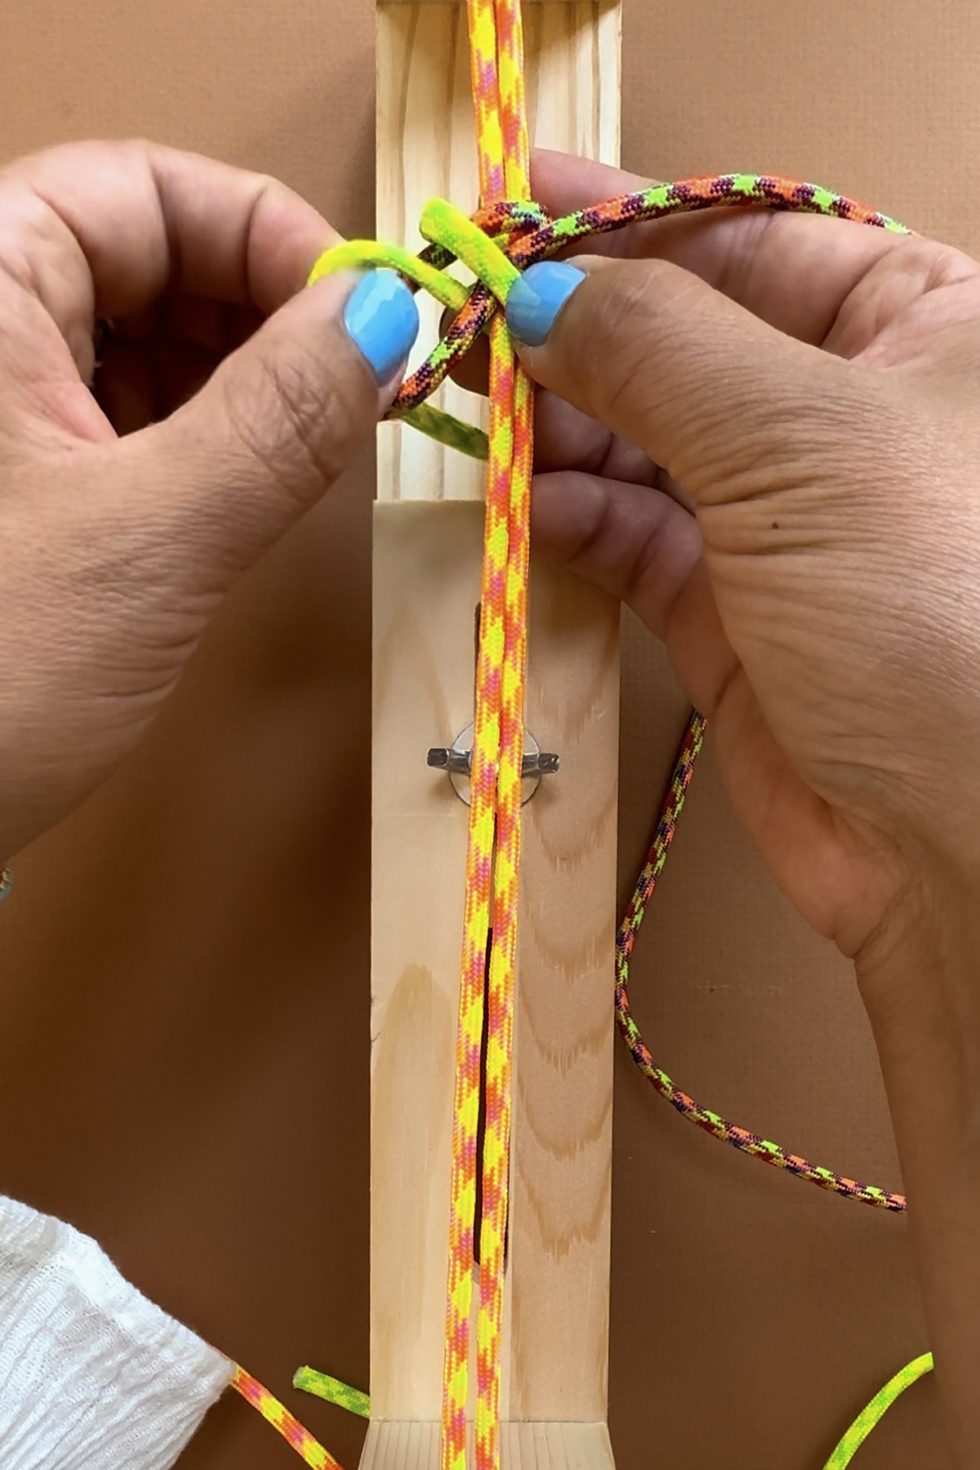
Fold that same rope under the base ropes and through the loop on the left.
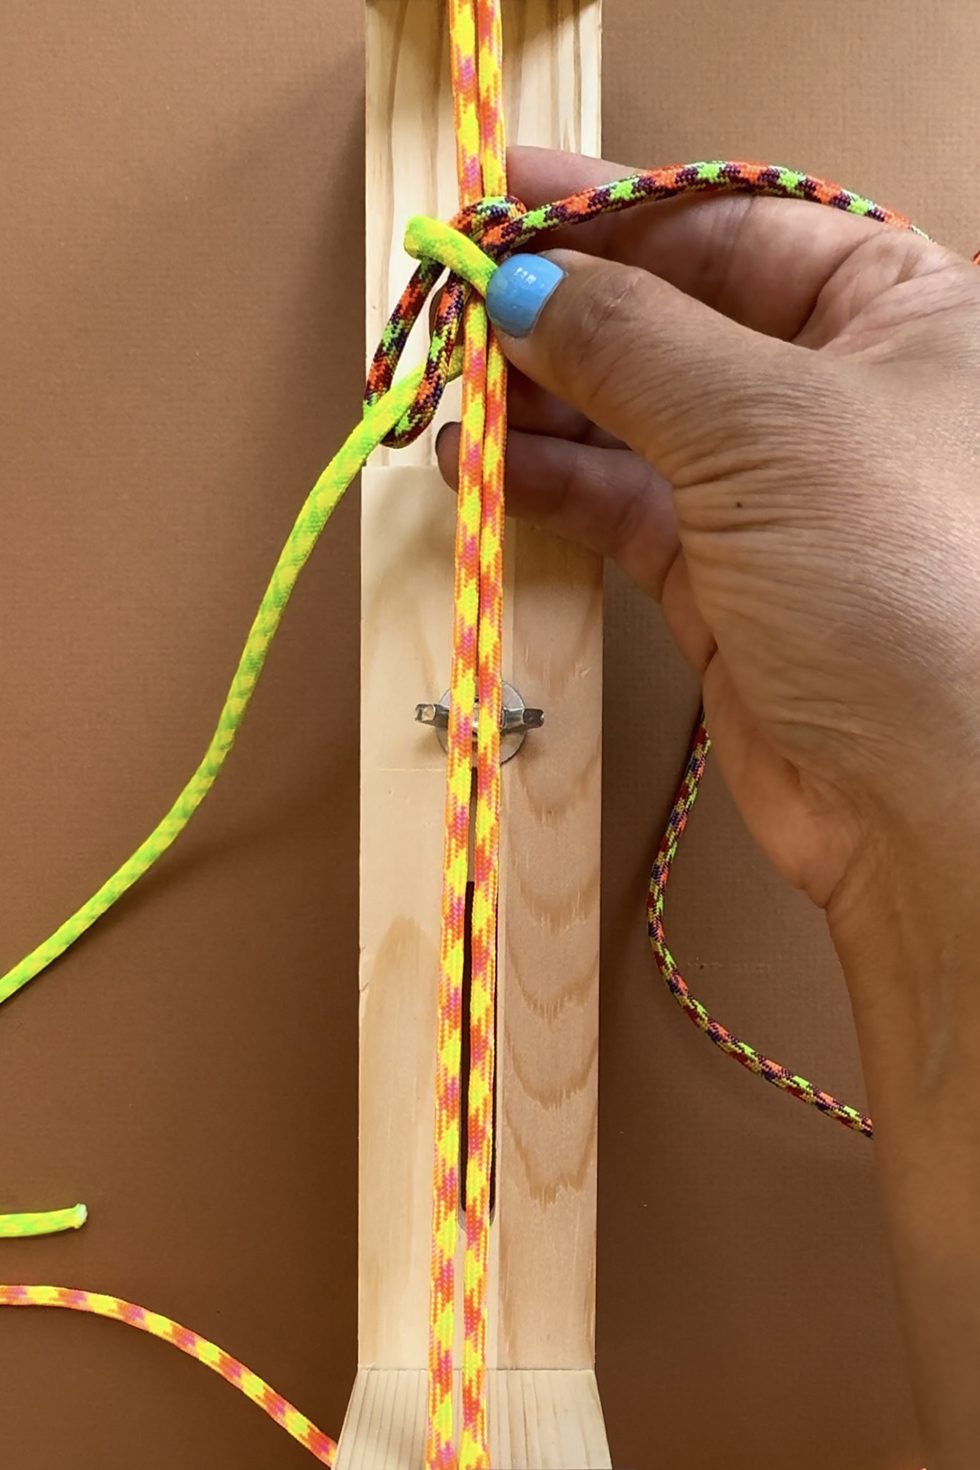
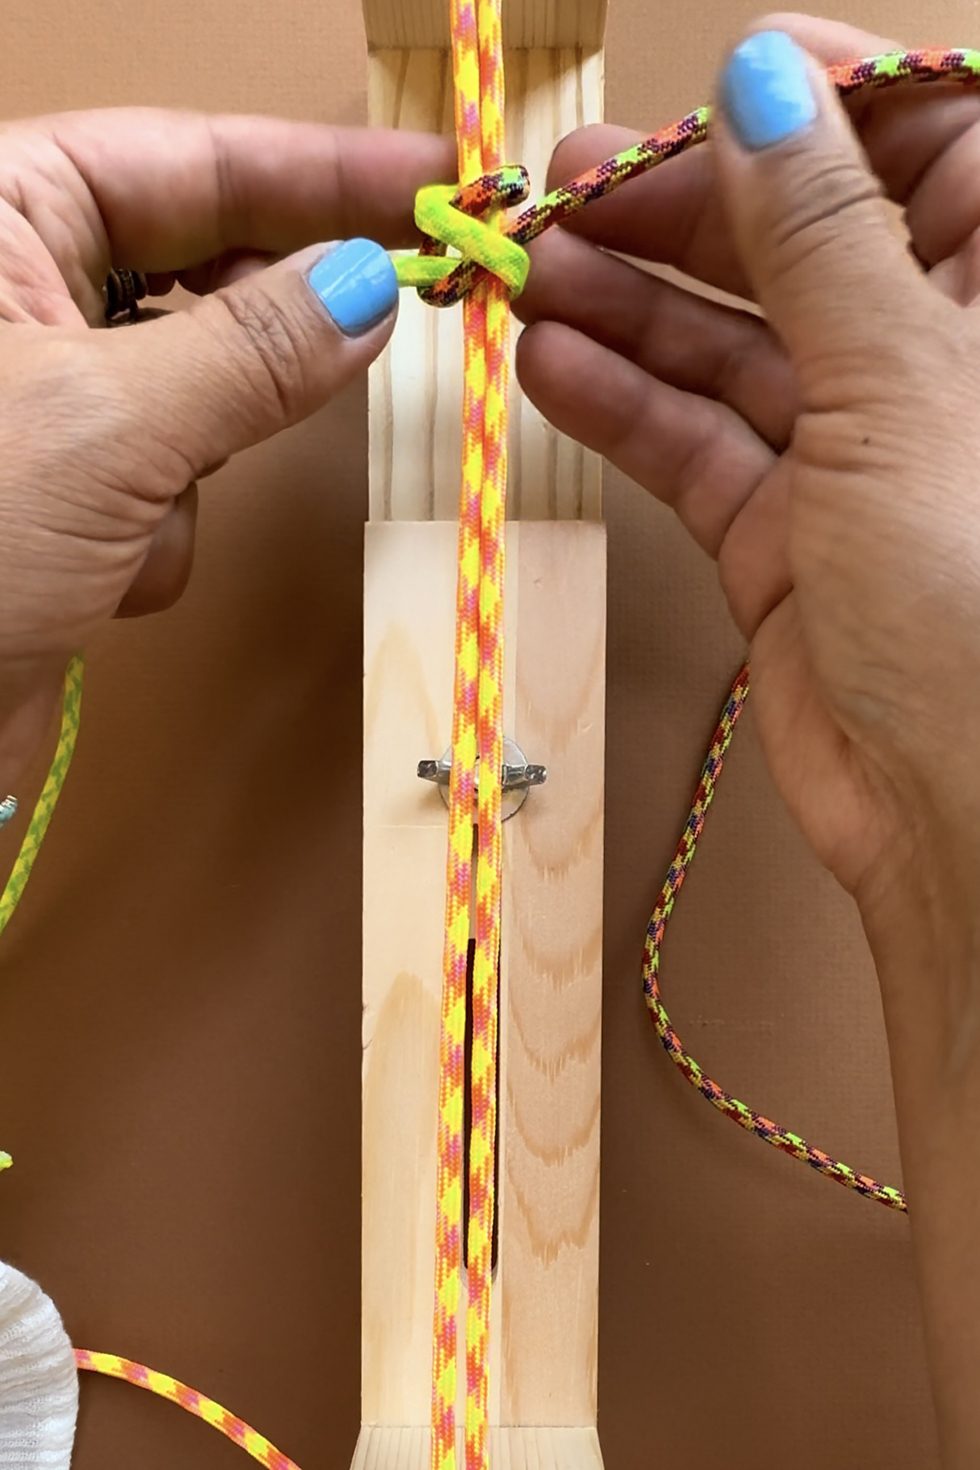
Pull it all the way through and pull tight.
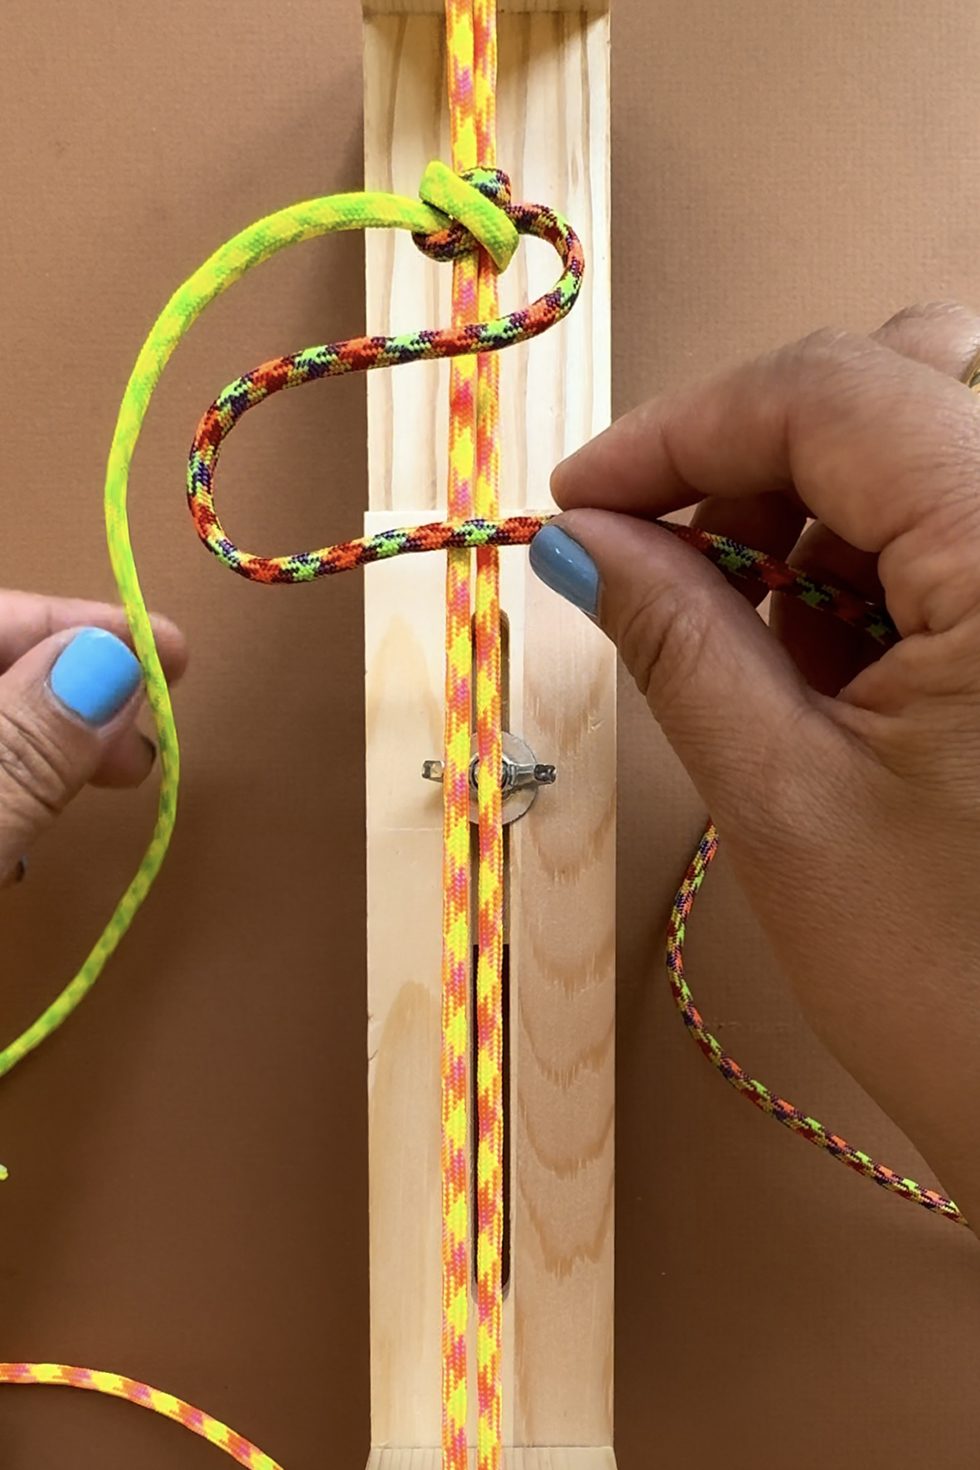
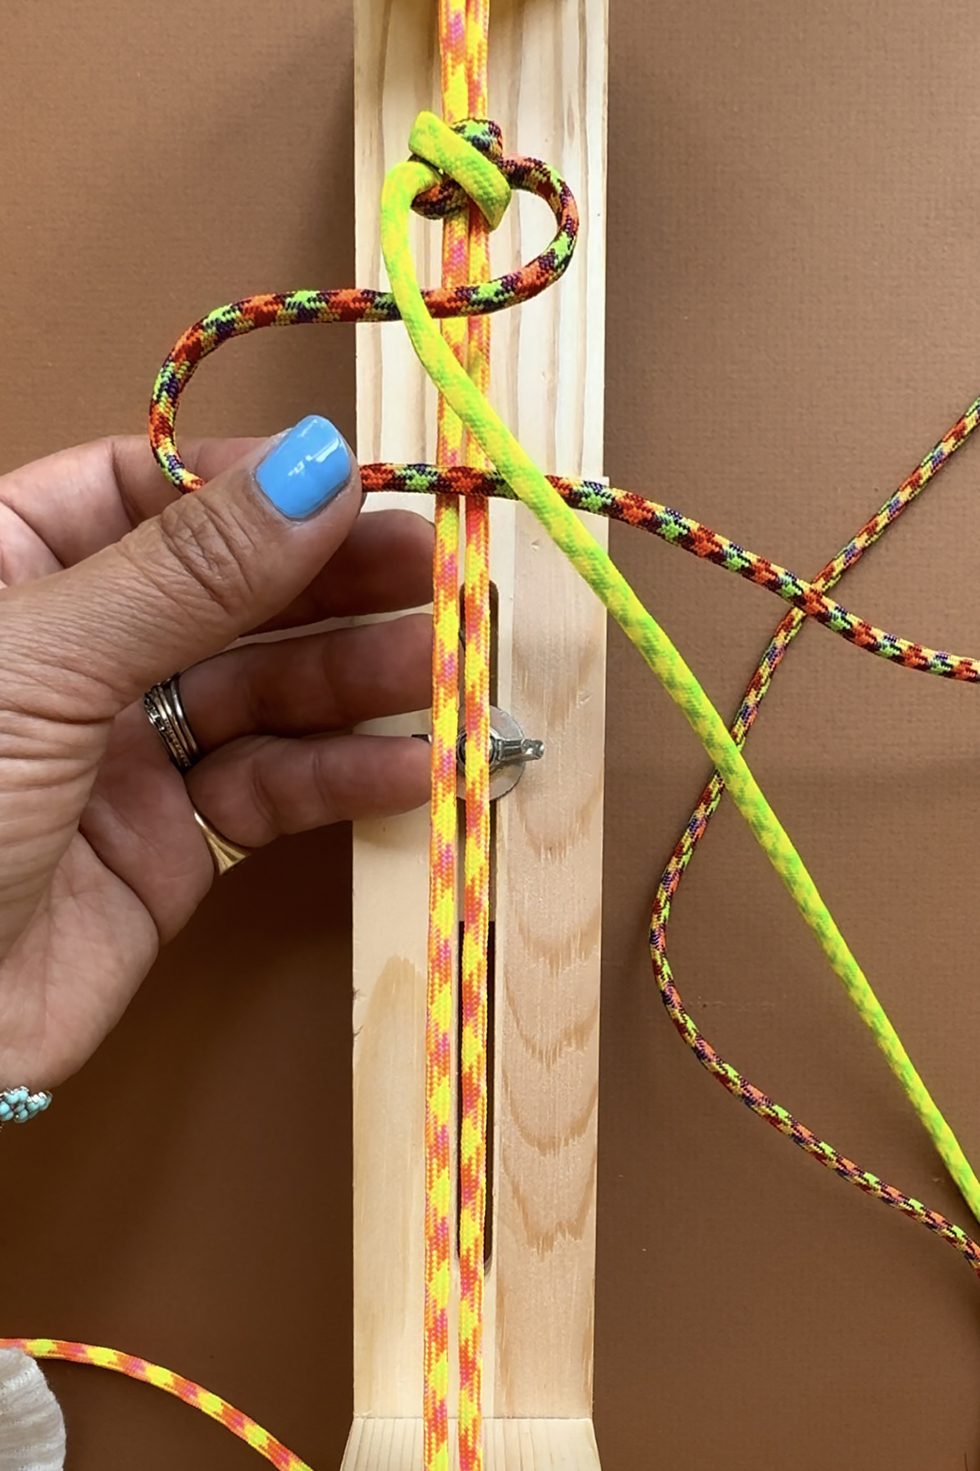
Repeat the same step.
Note that this is different than the macrame knot as you do not alternate sides.
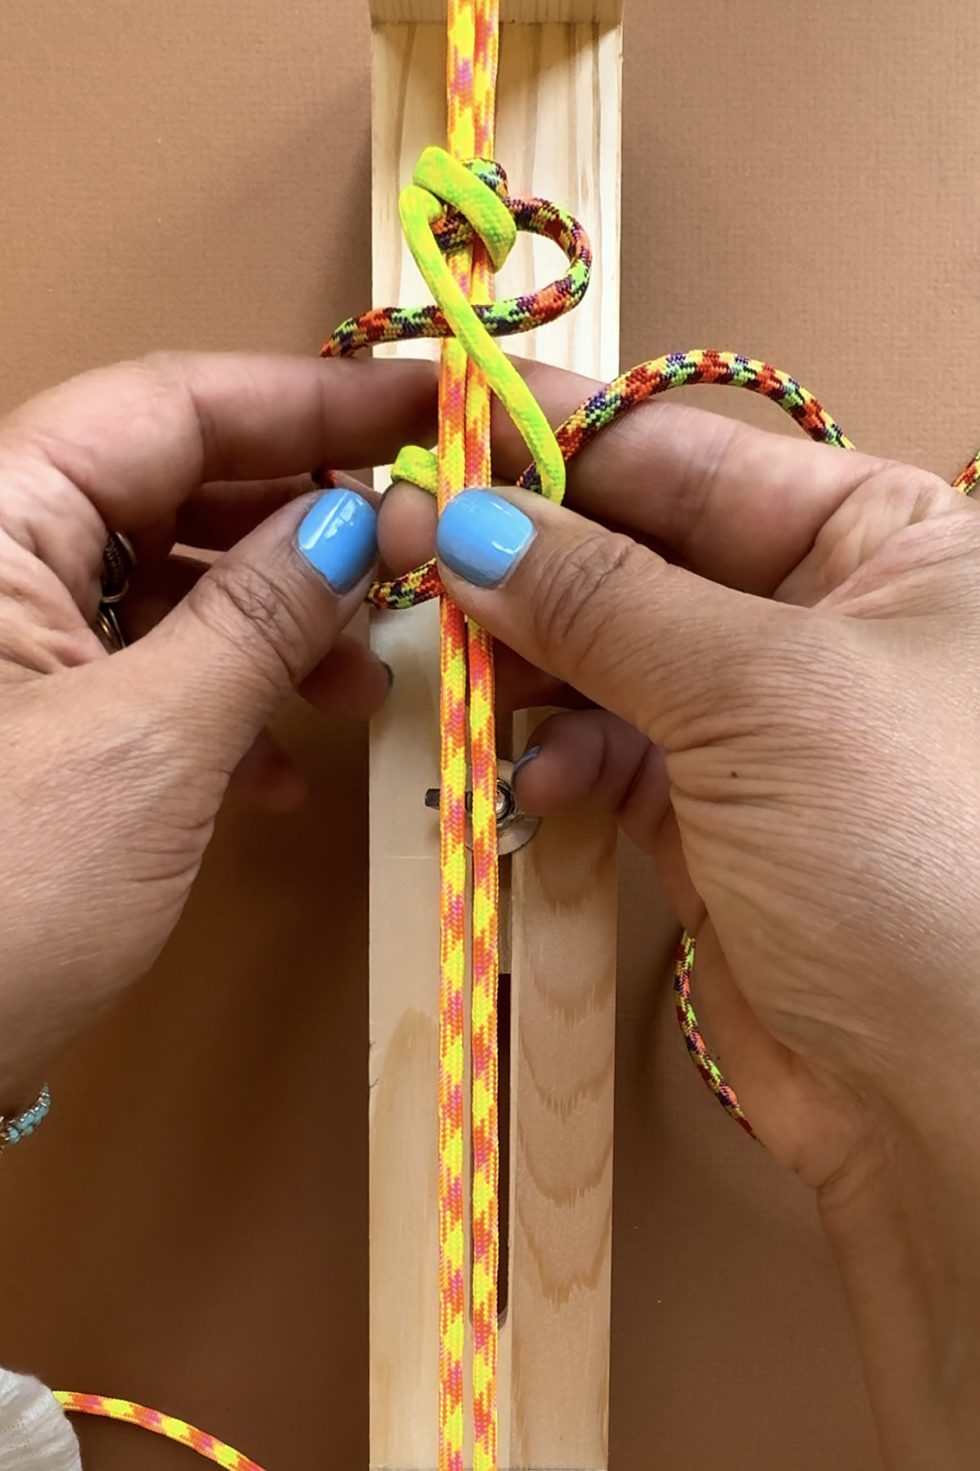
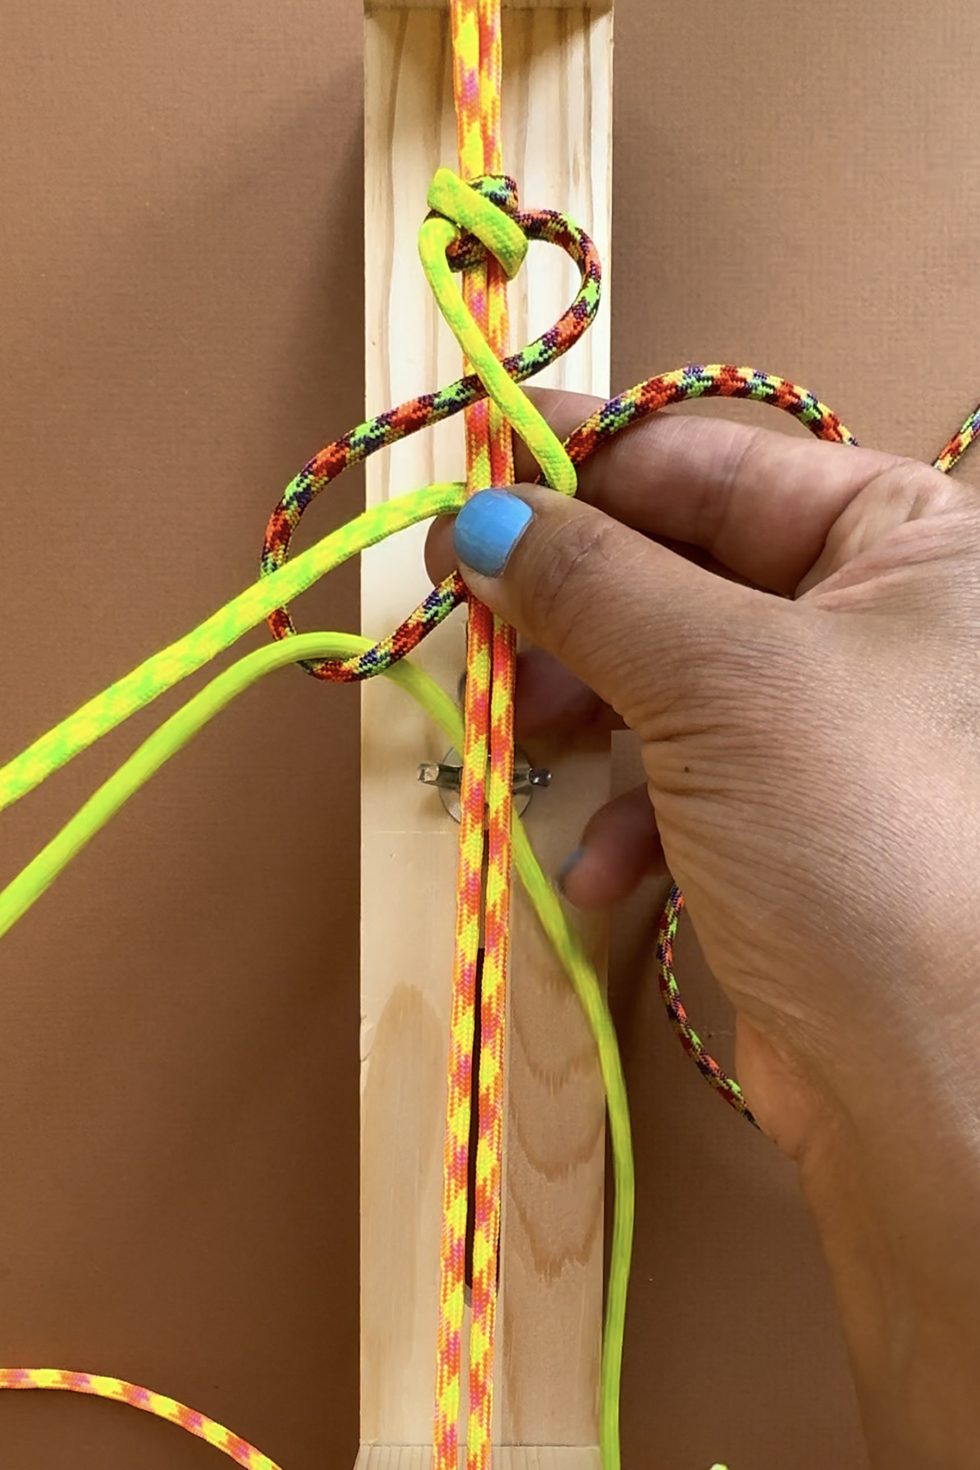
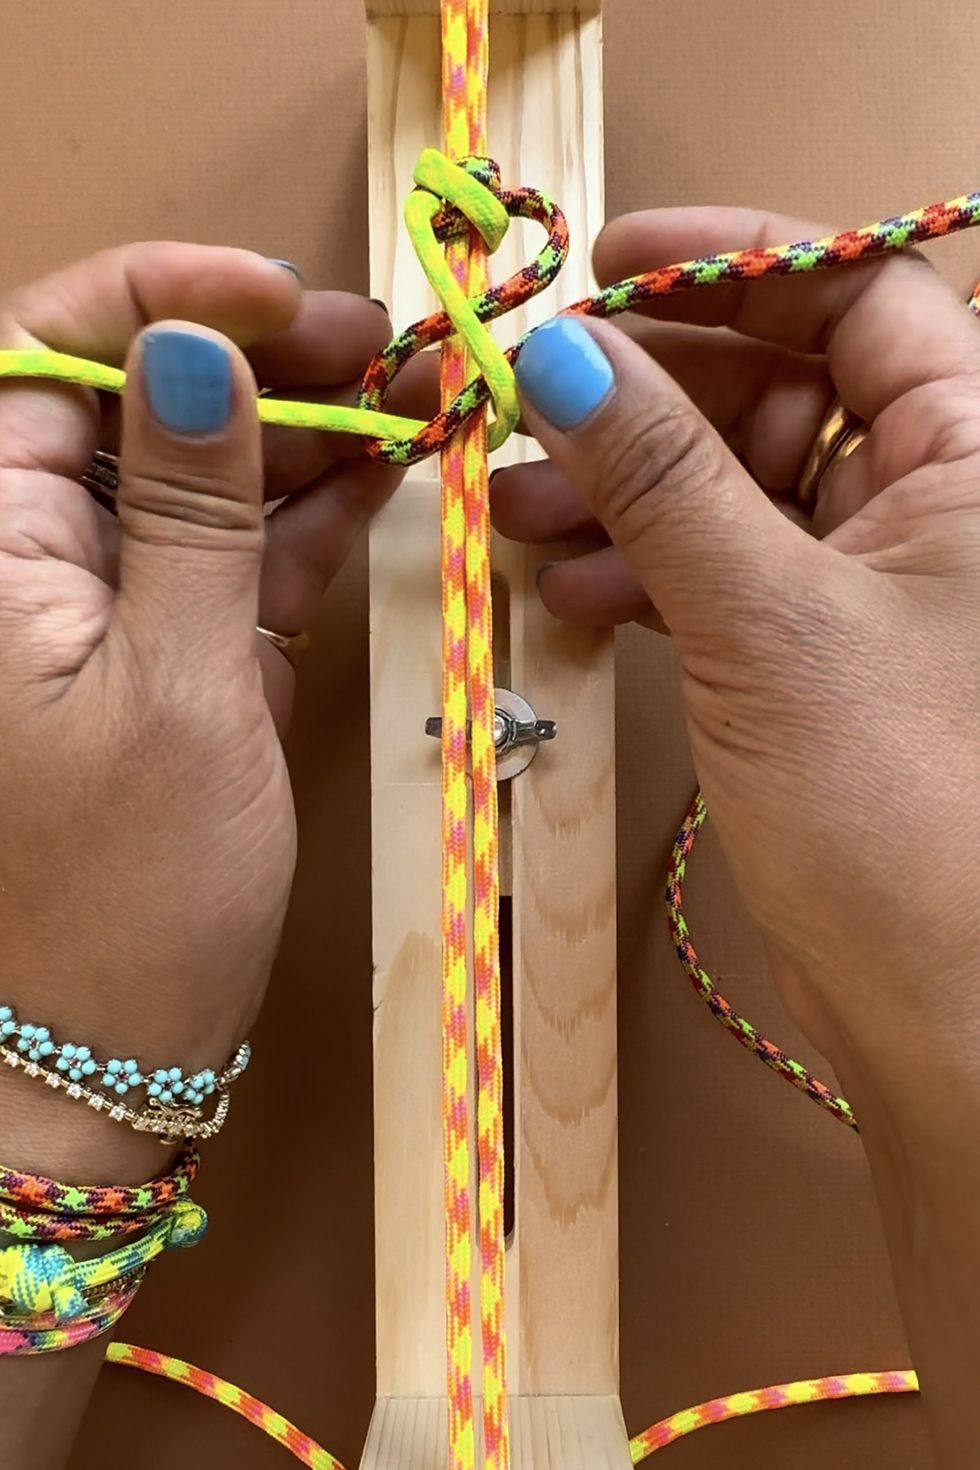
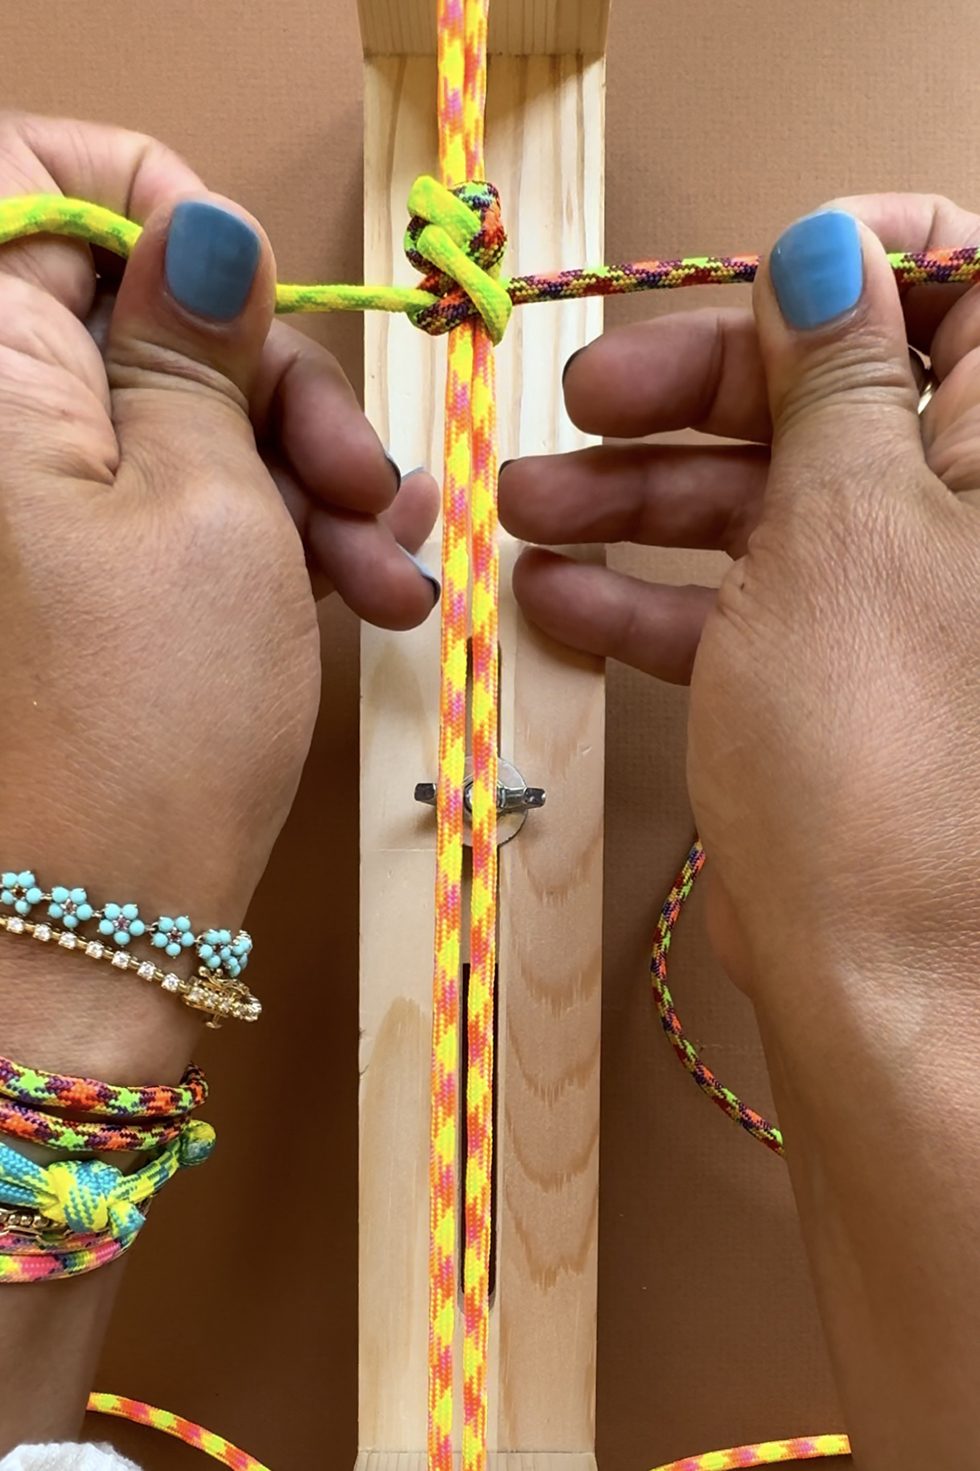
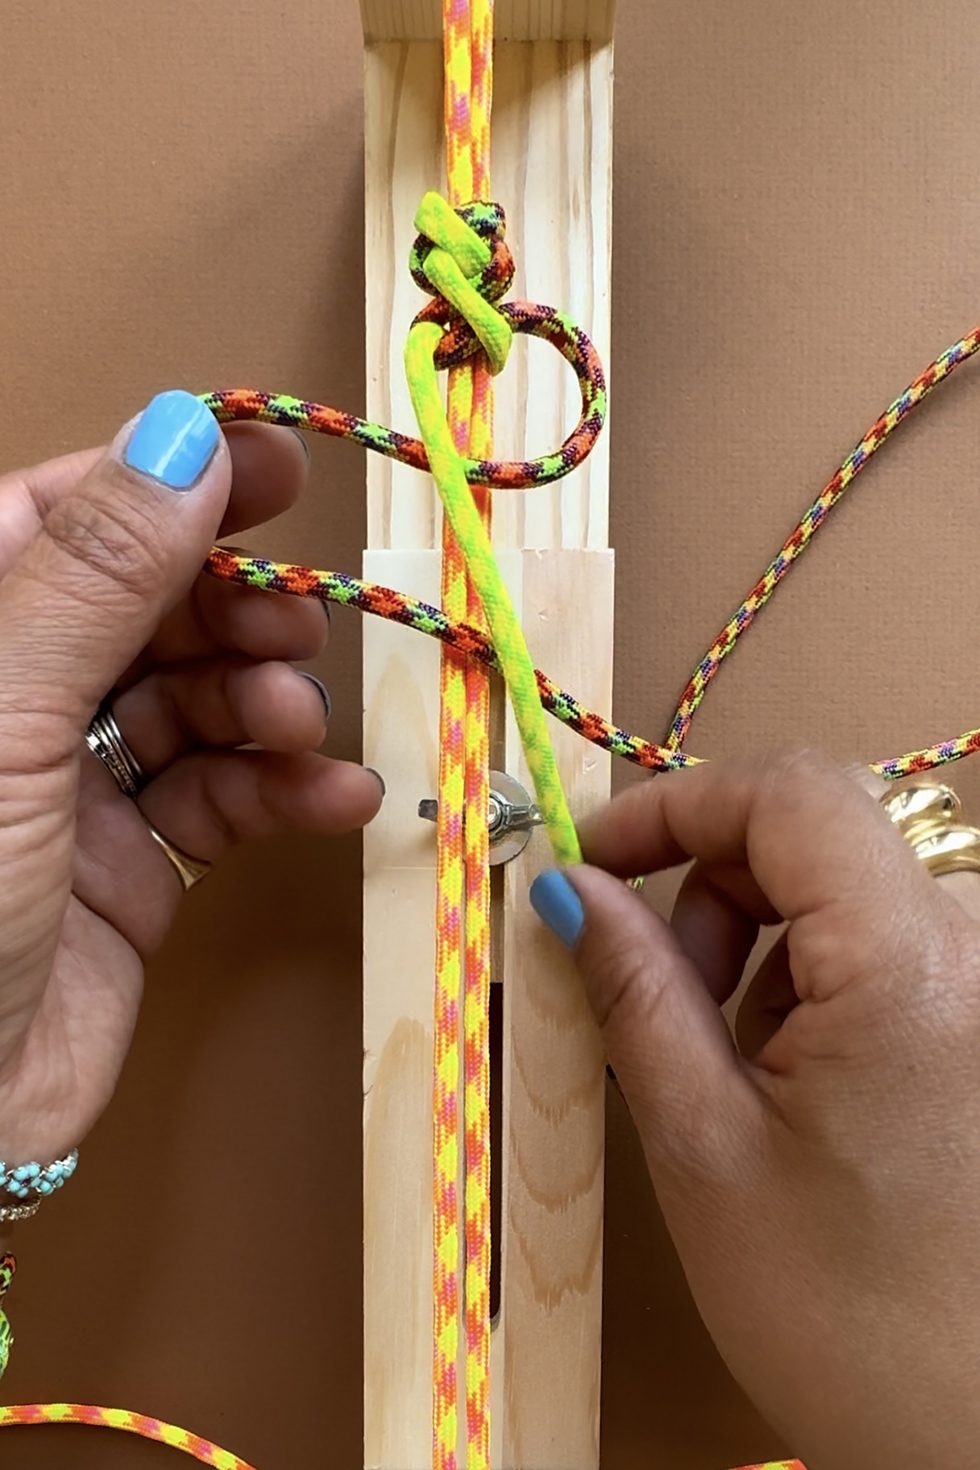
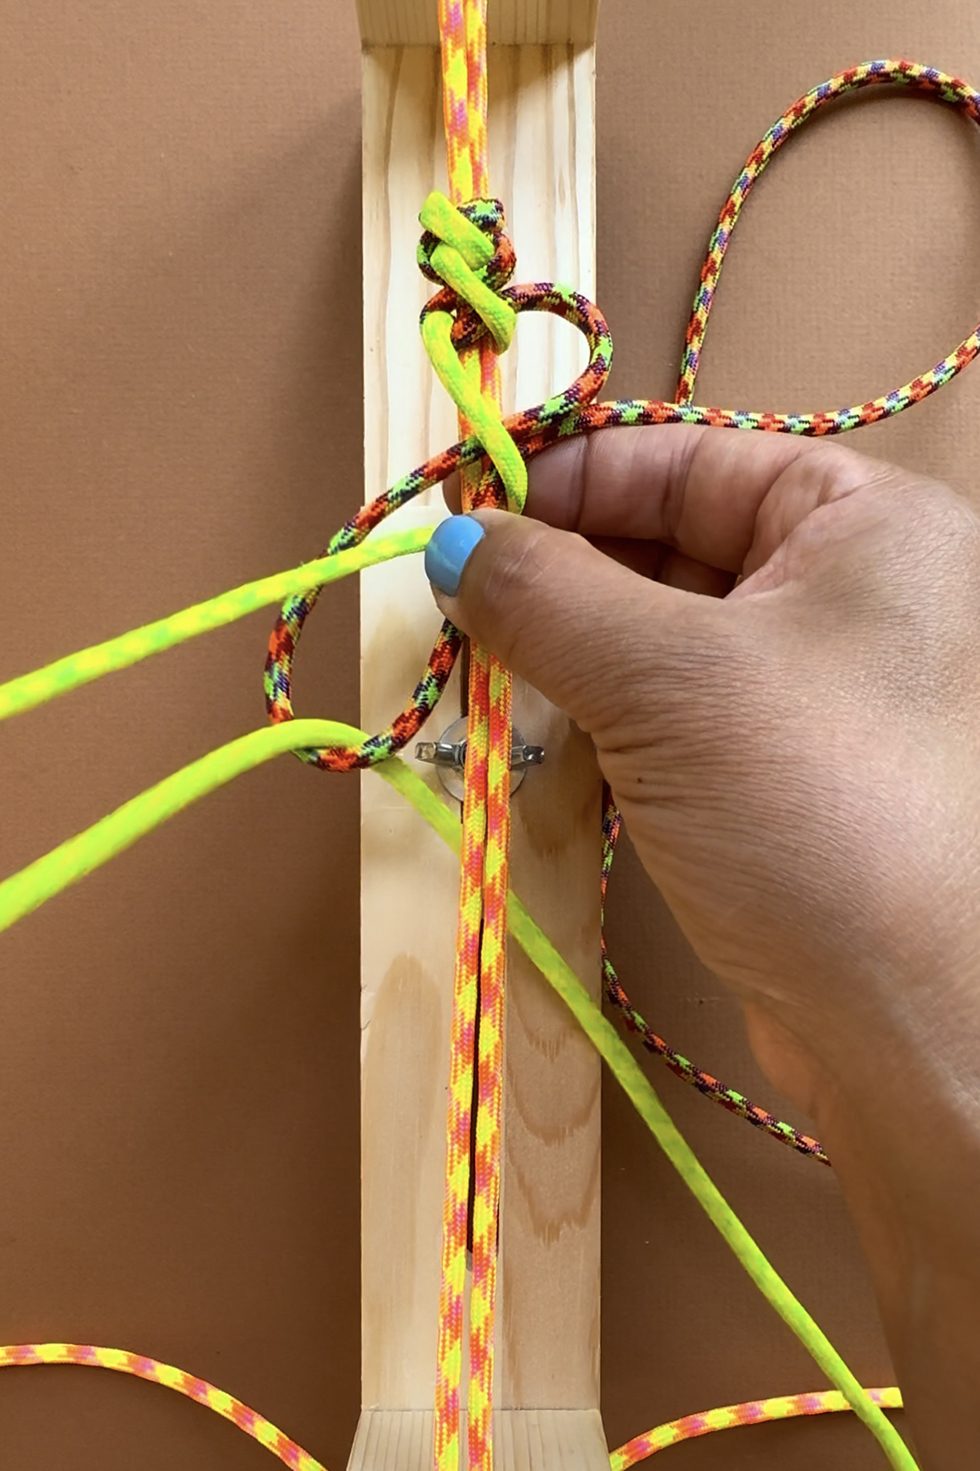
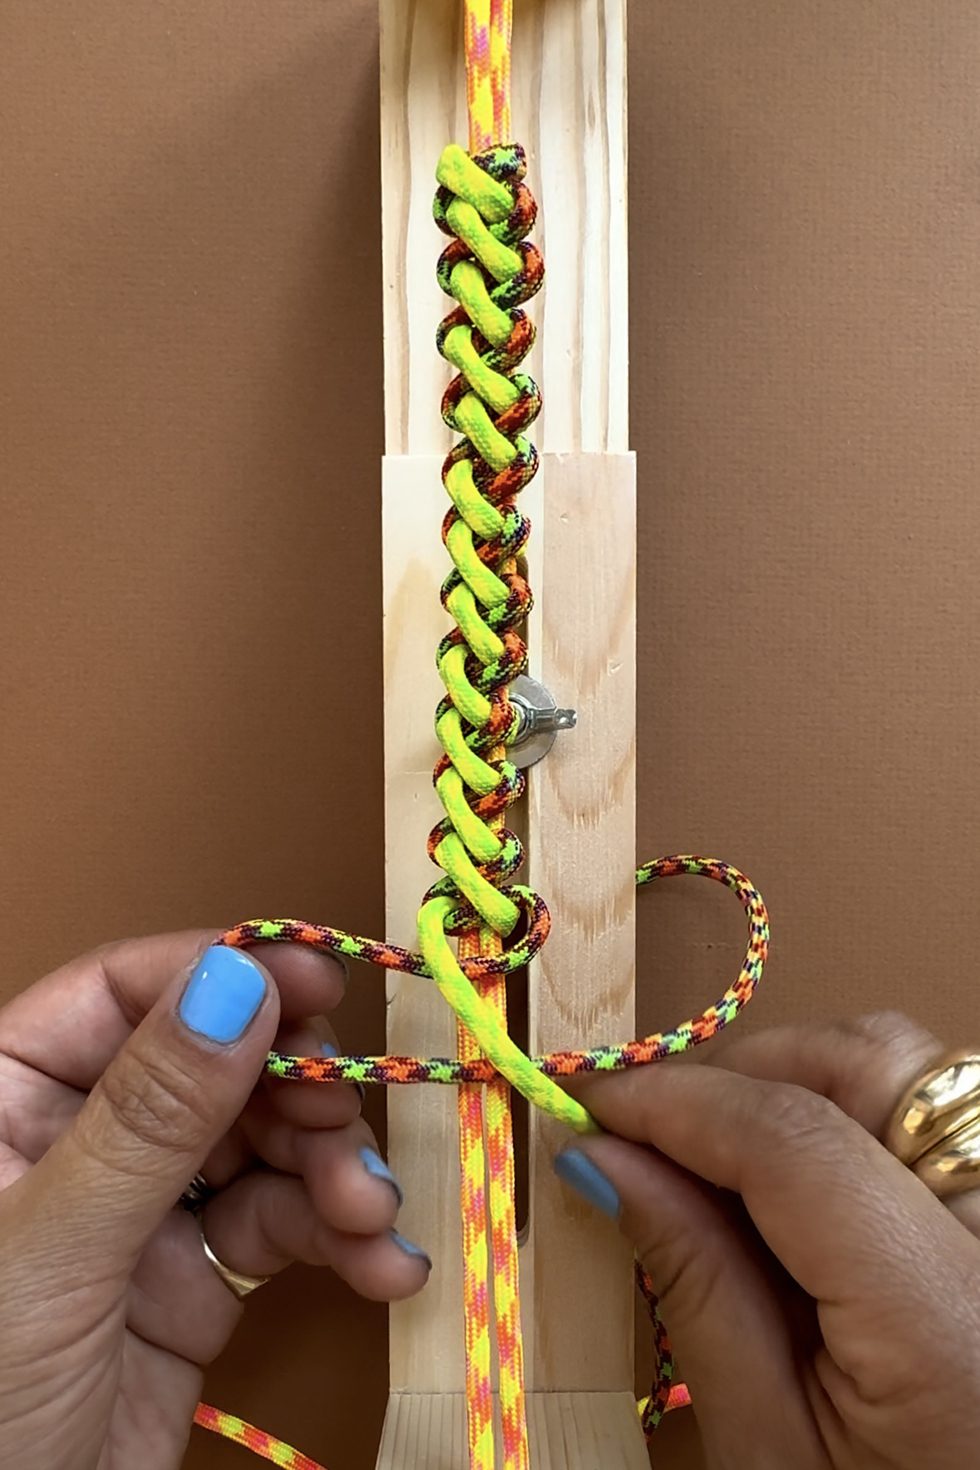
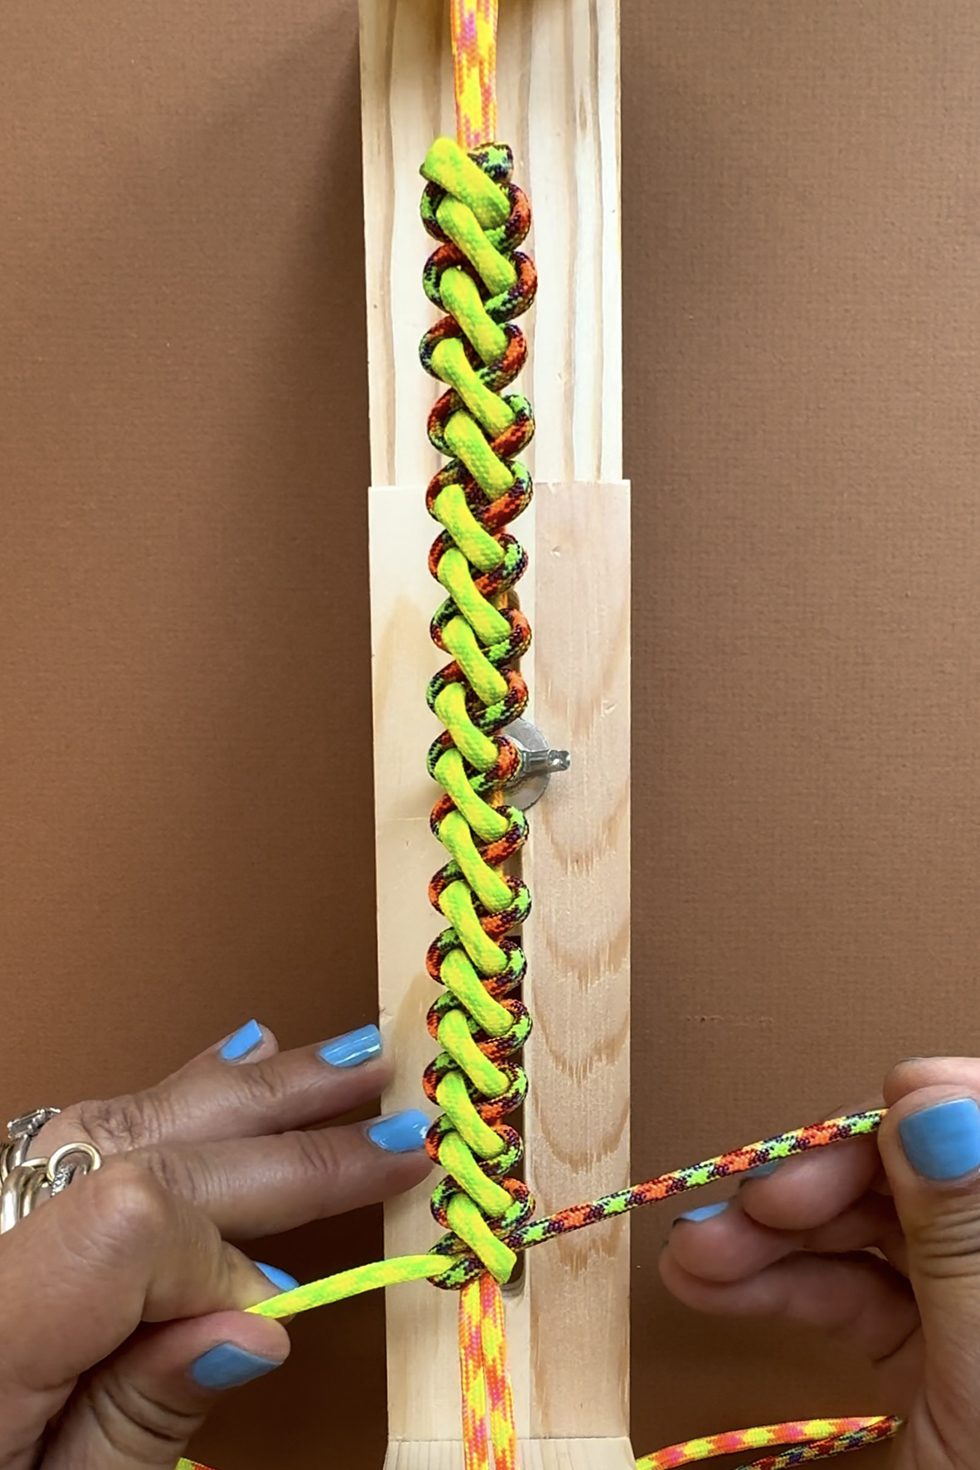
Keep knotting until you run out of rope.
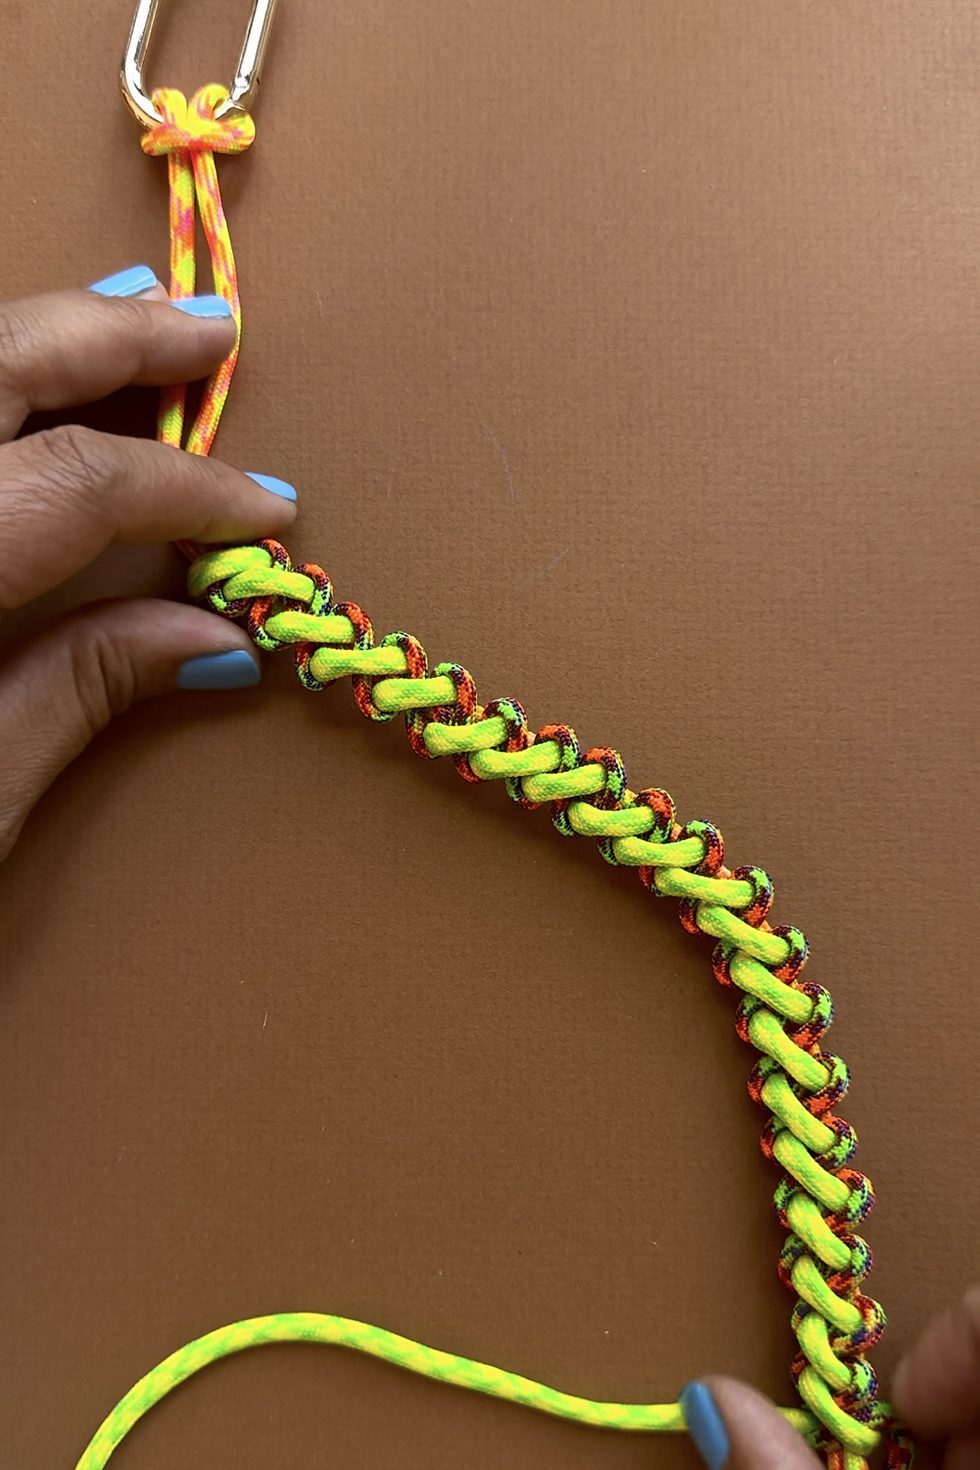
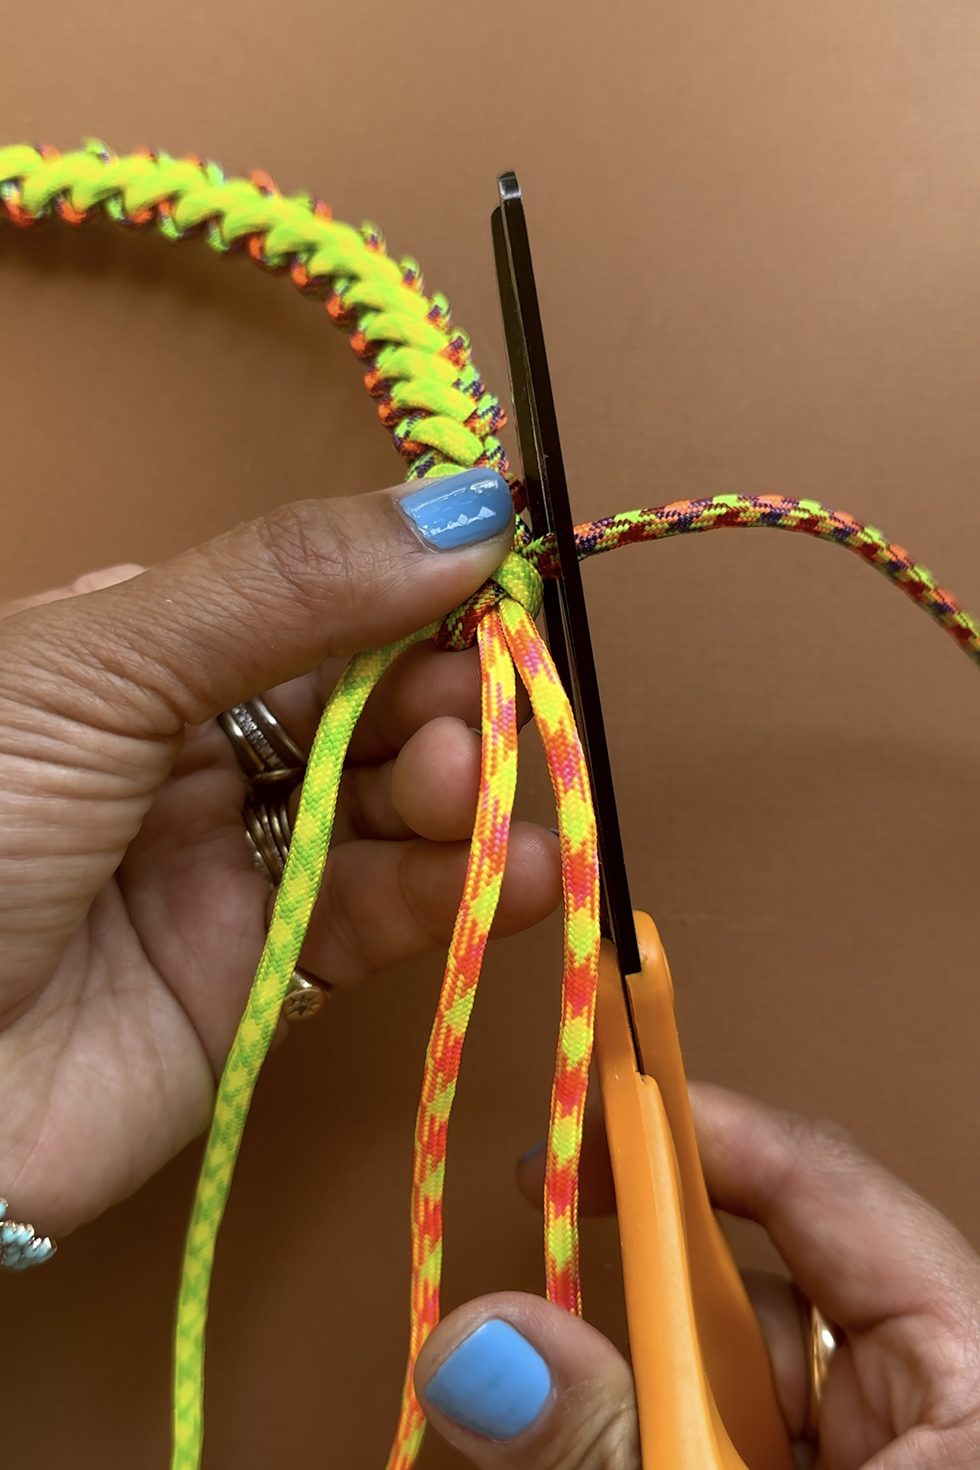
Trim the ends, leaving about 2mm.
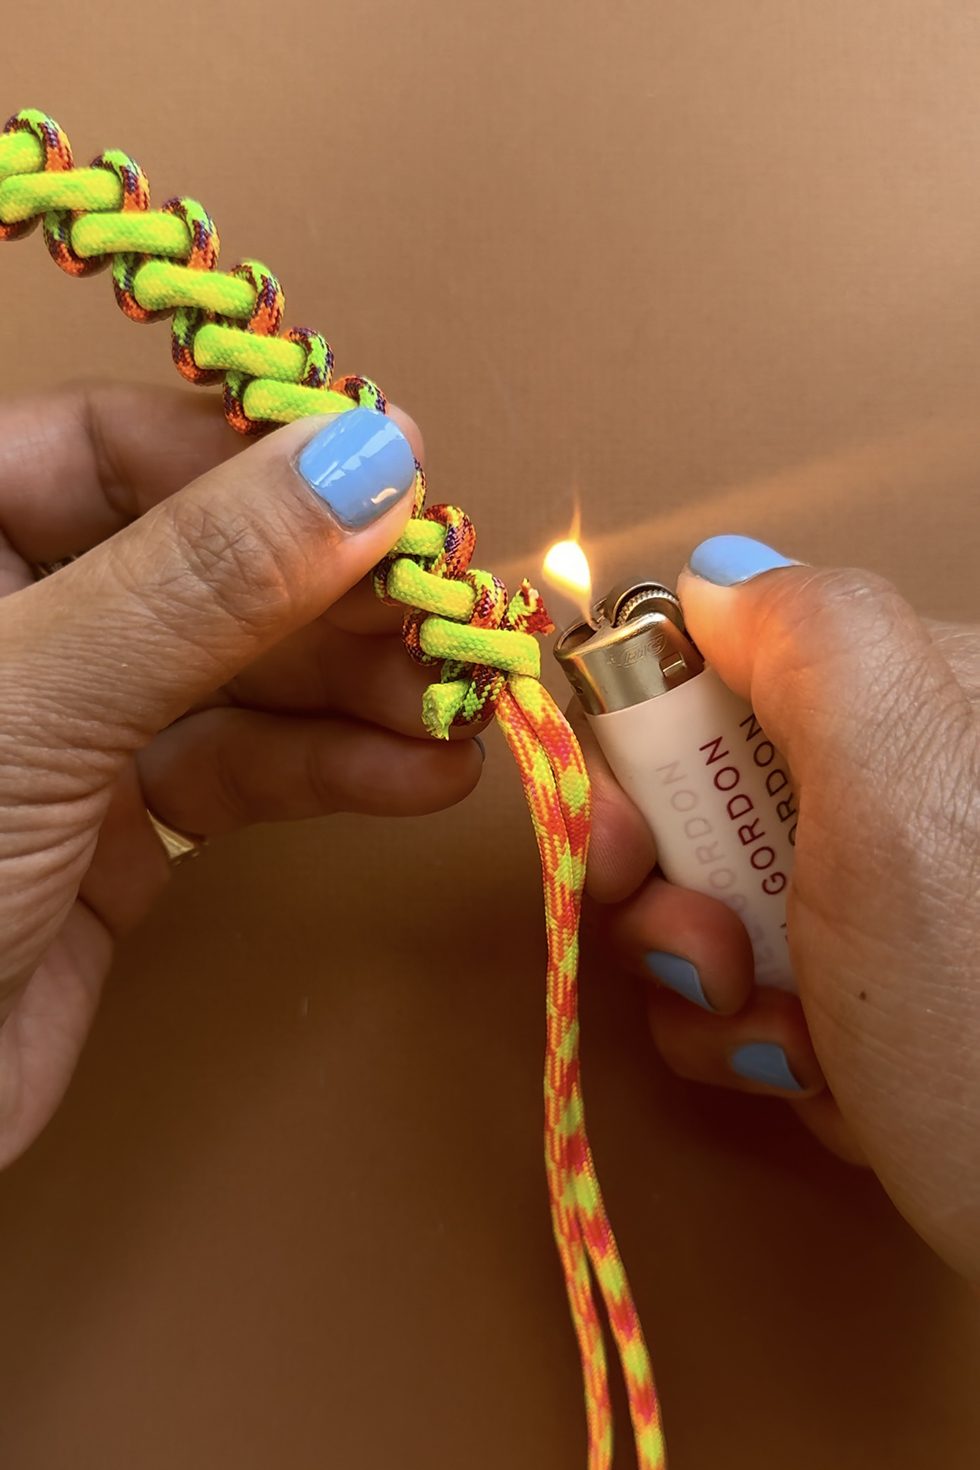
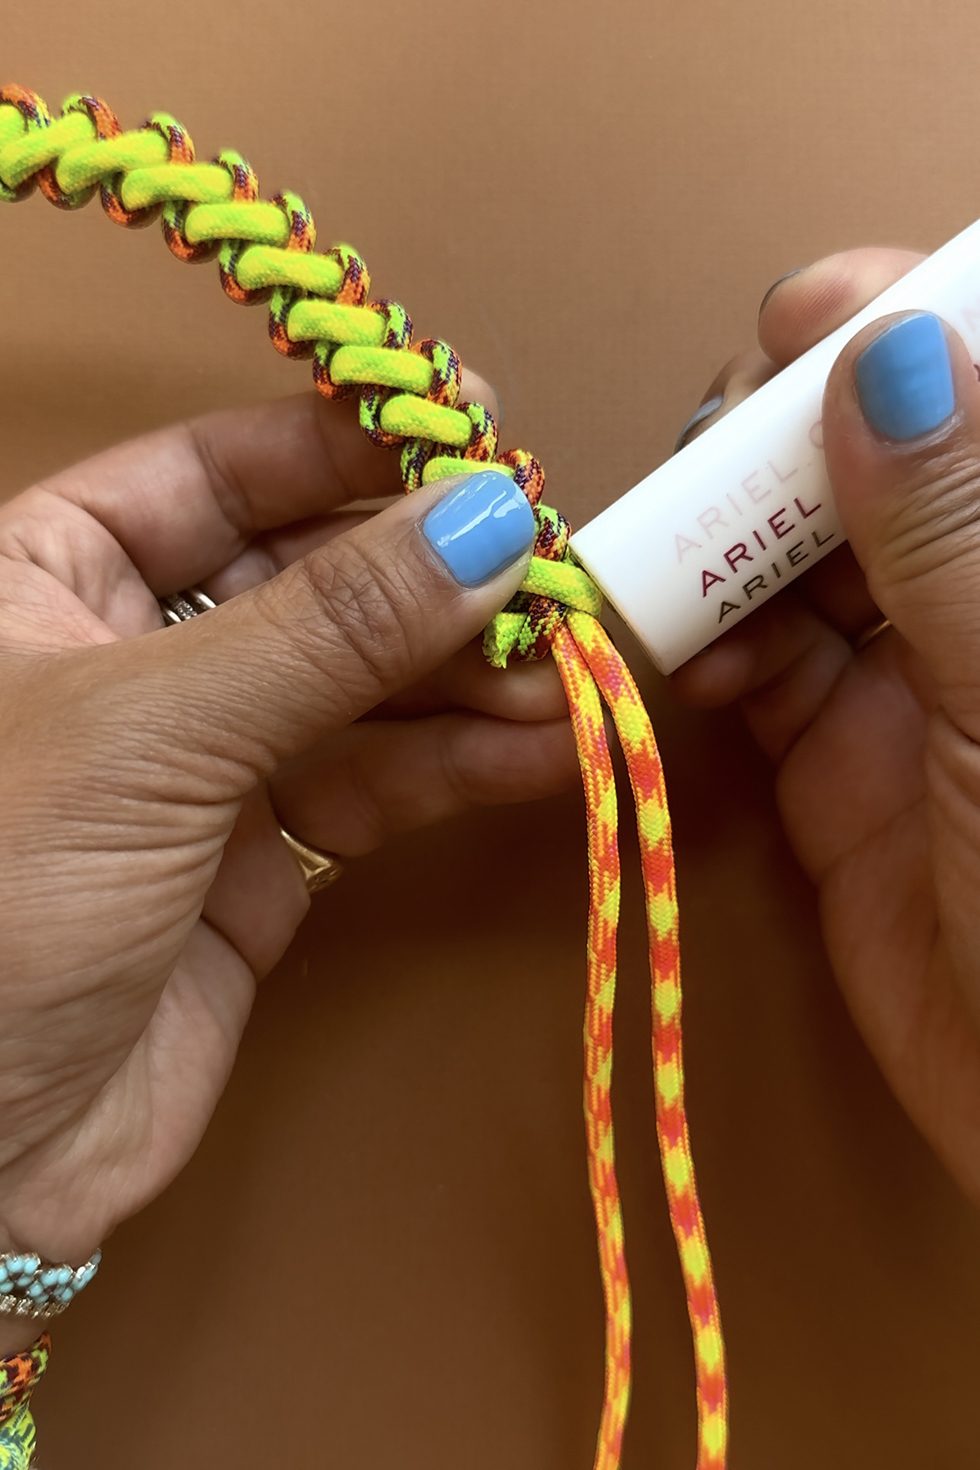
Burn each end and immediately press the ends in into the last knot with the bottom of the lighter. This keep the knot from unraveling.
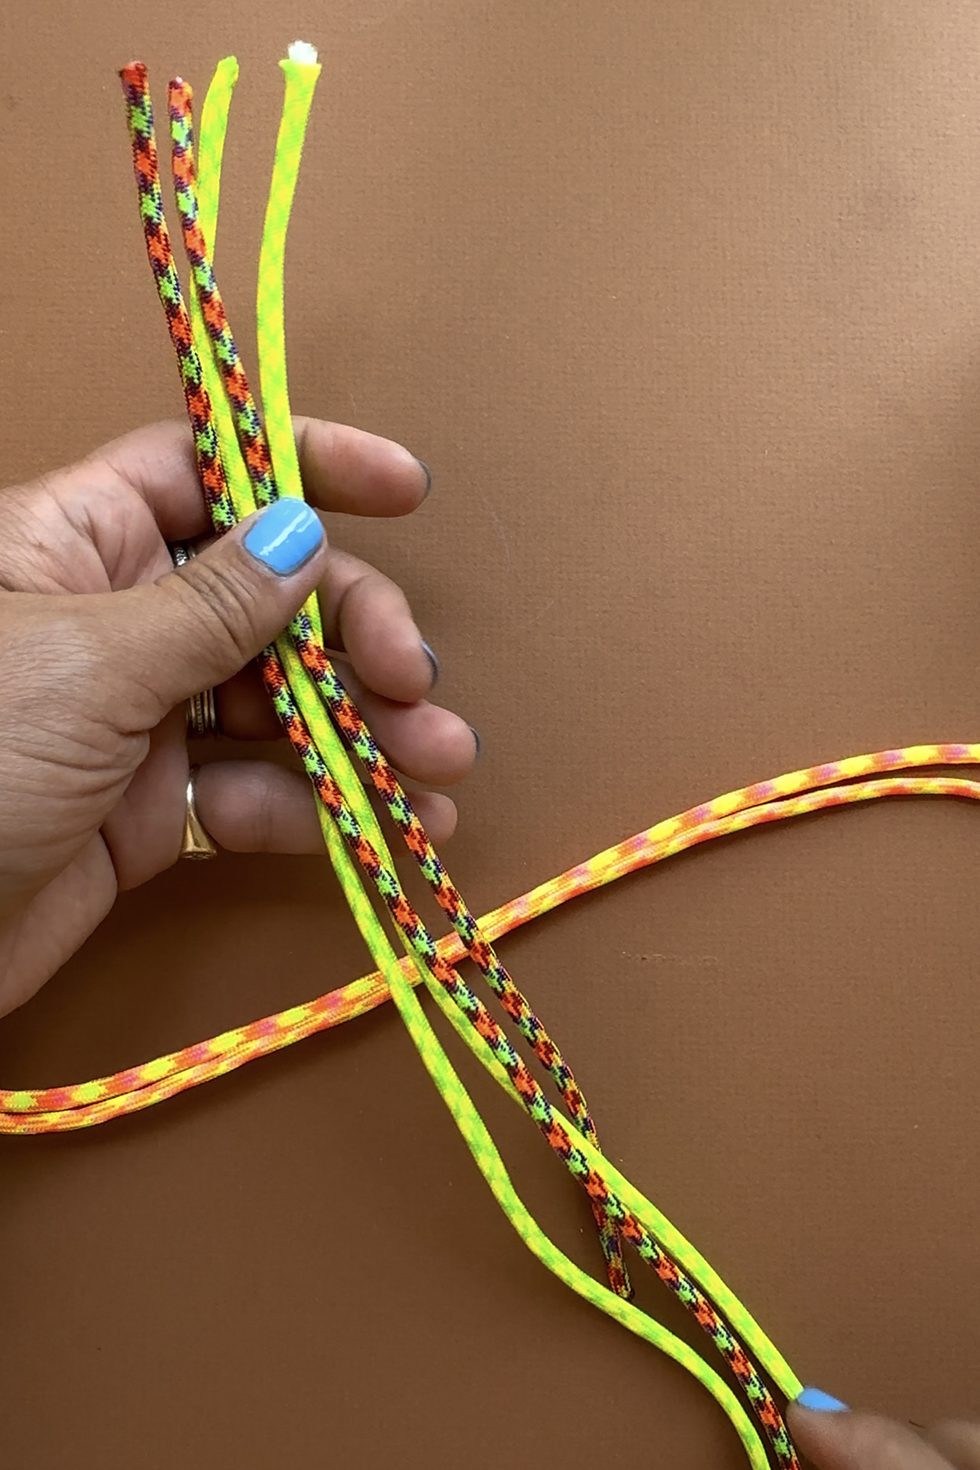
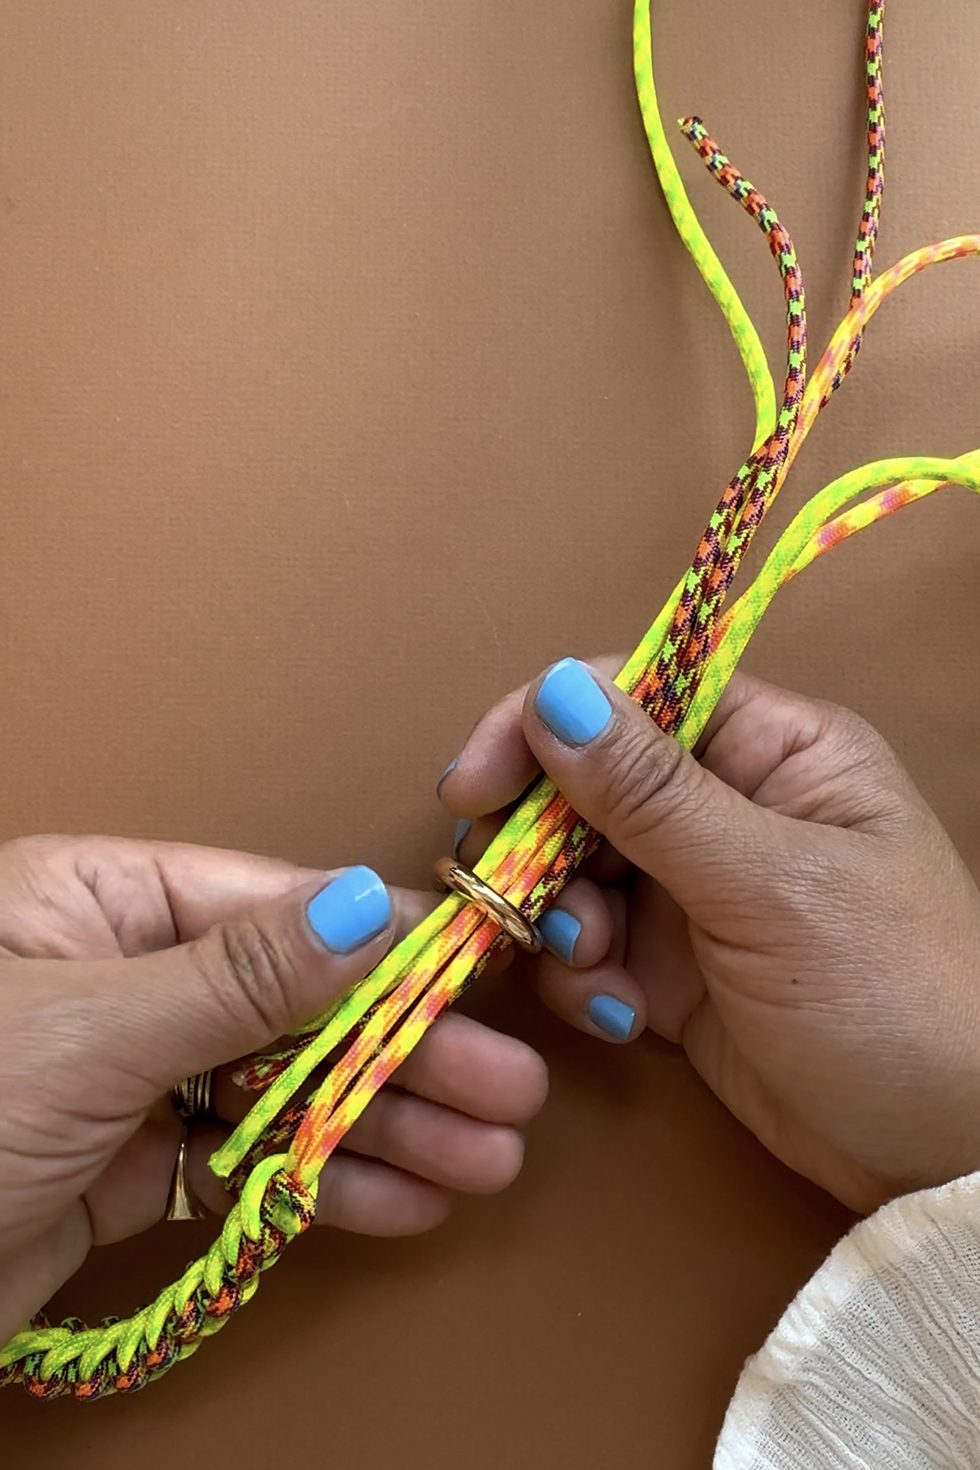
To finish the bag strap with a tassel, cut a handful of ropes in varying lengths ranging from 18-24". Thread them, along with the end of the bag strap, through the 2nd carabiner.
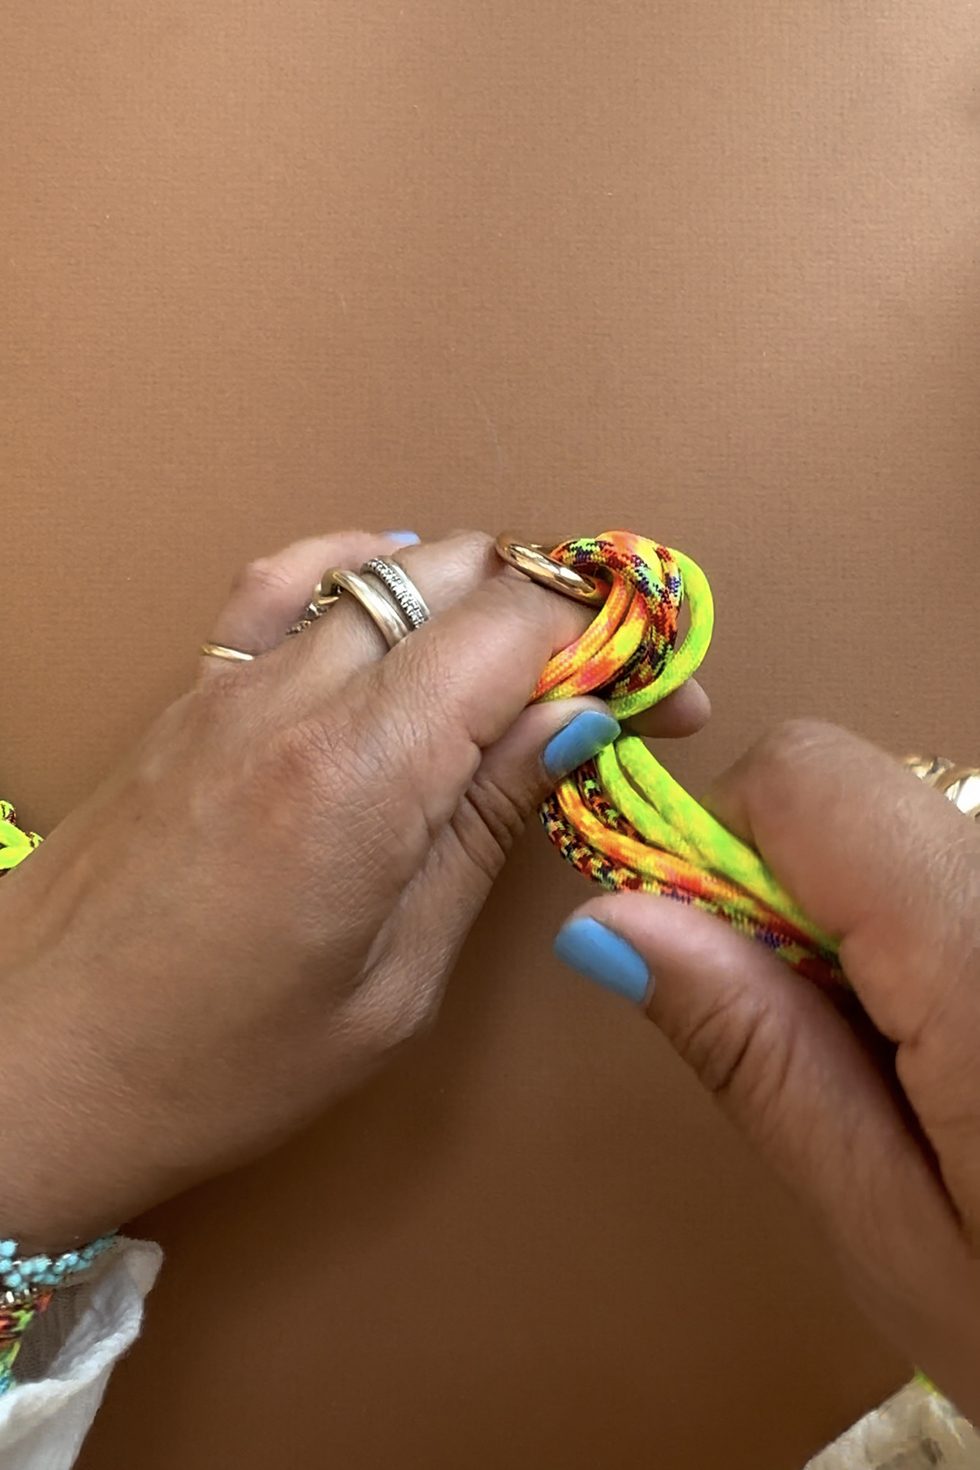
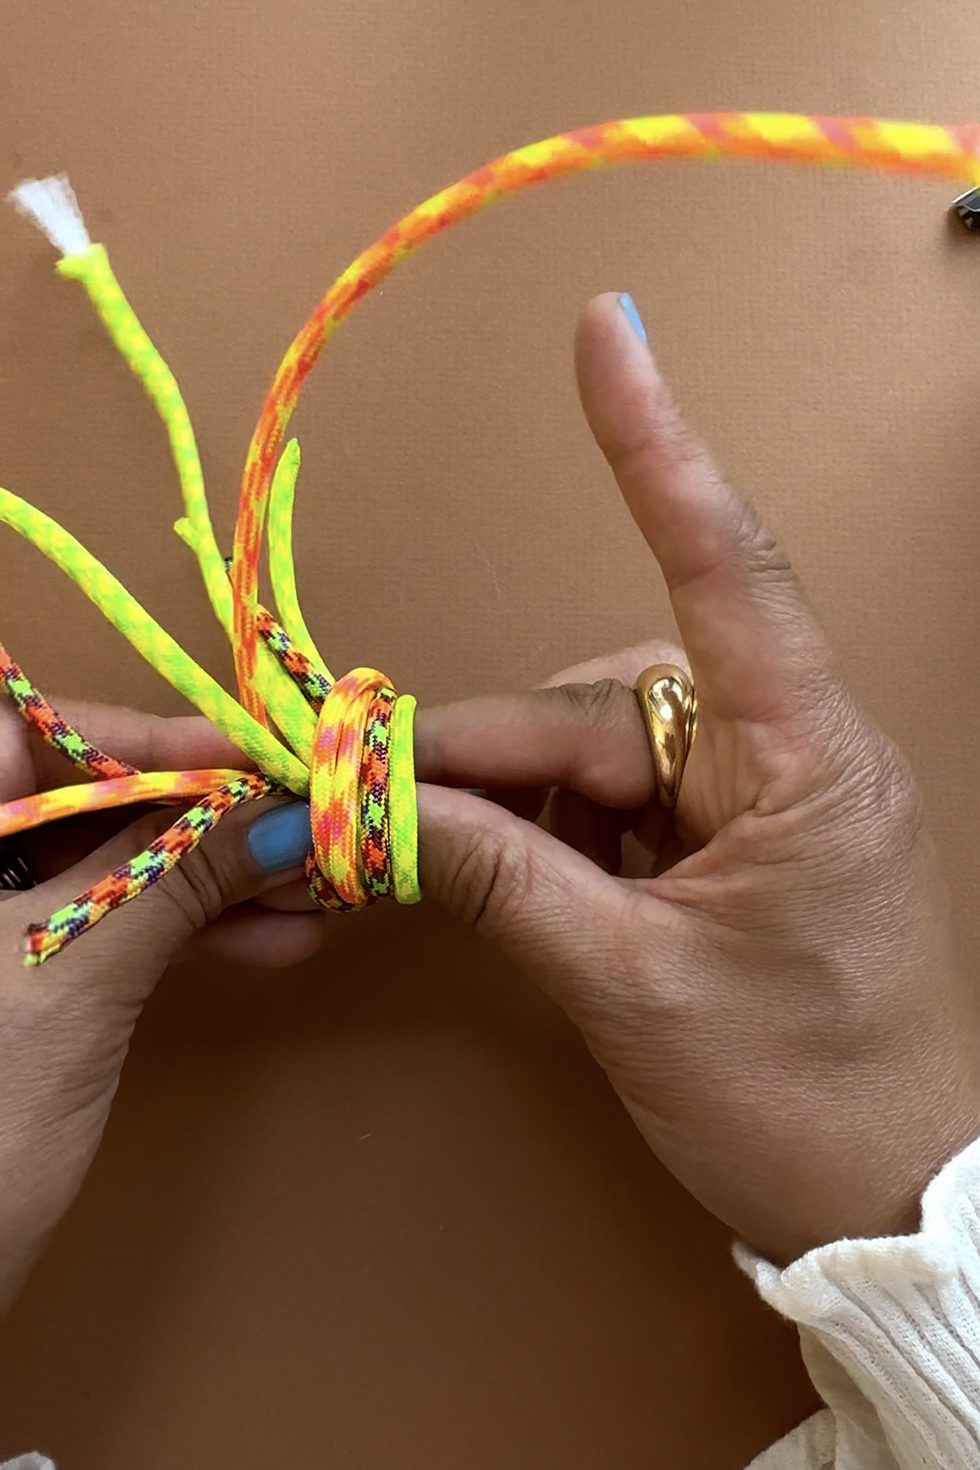
Tie the entire group of rope into a knot.
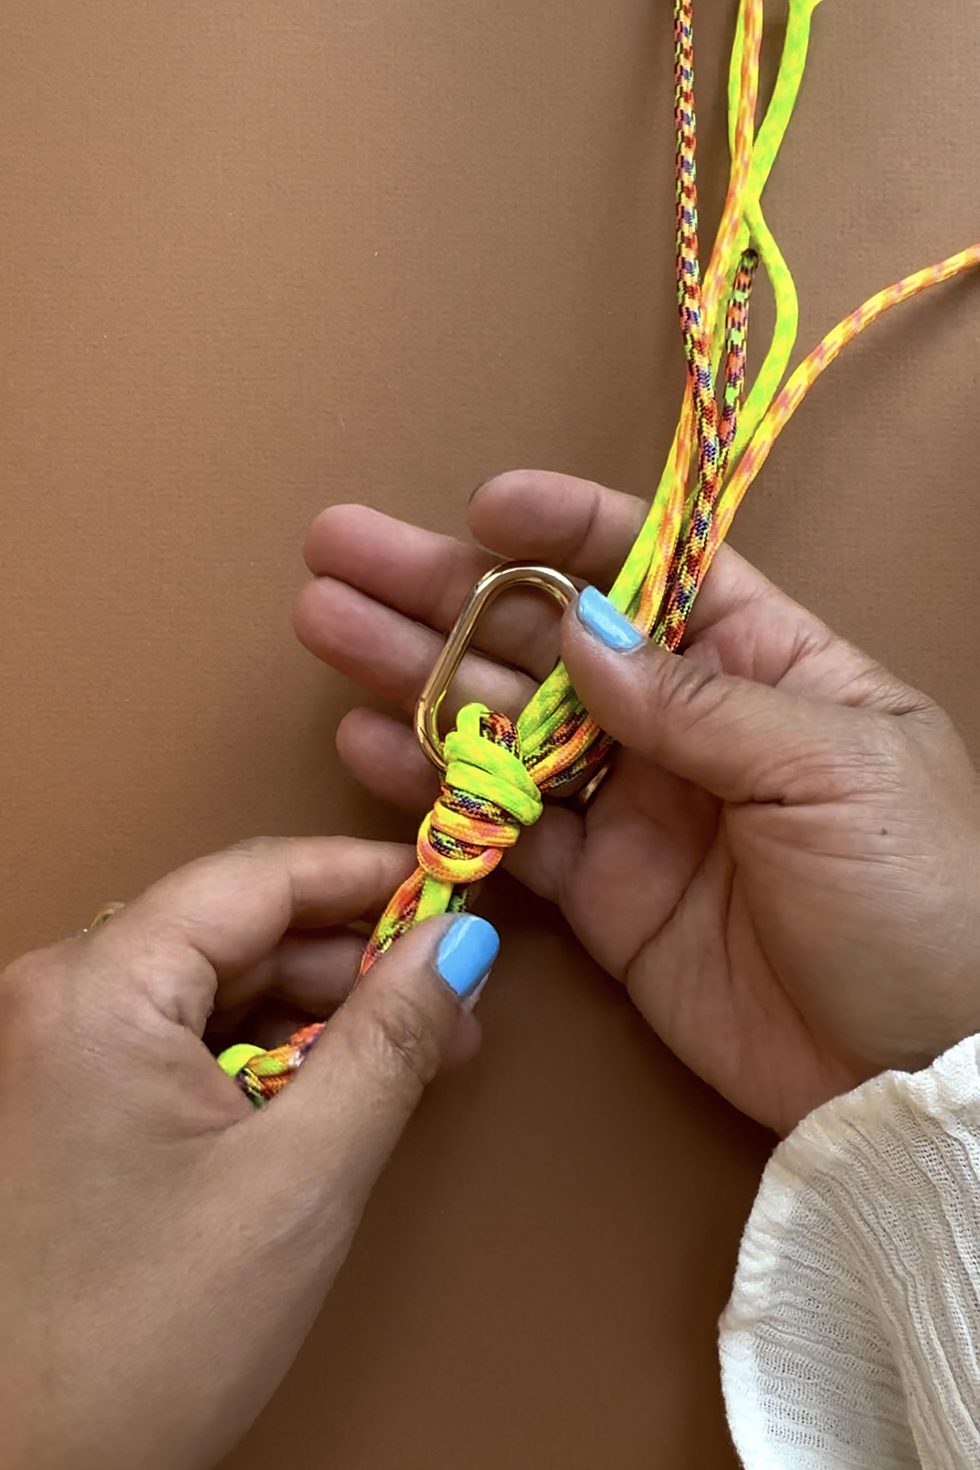
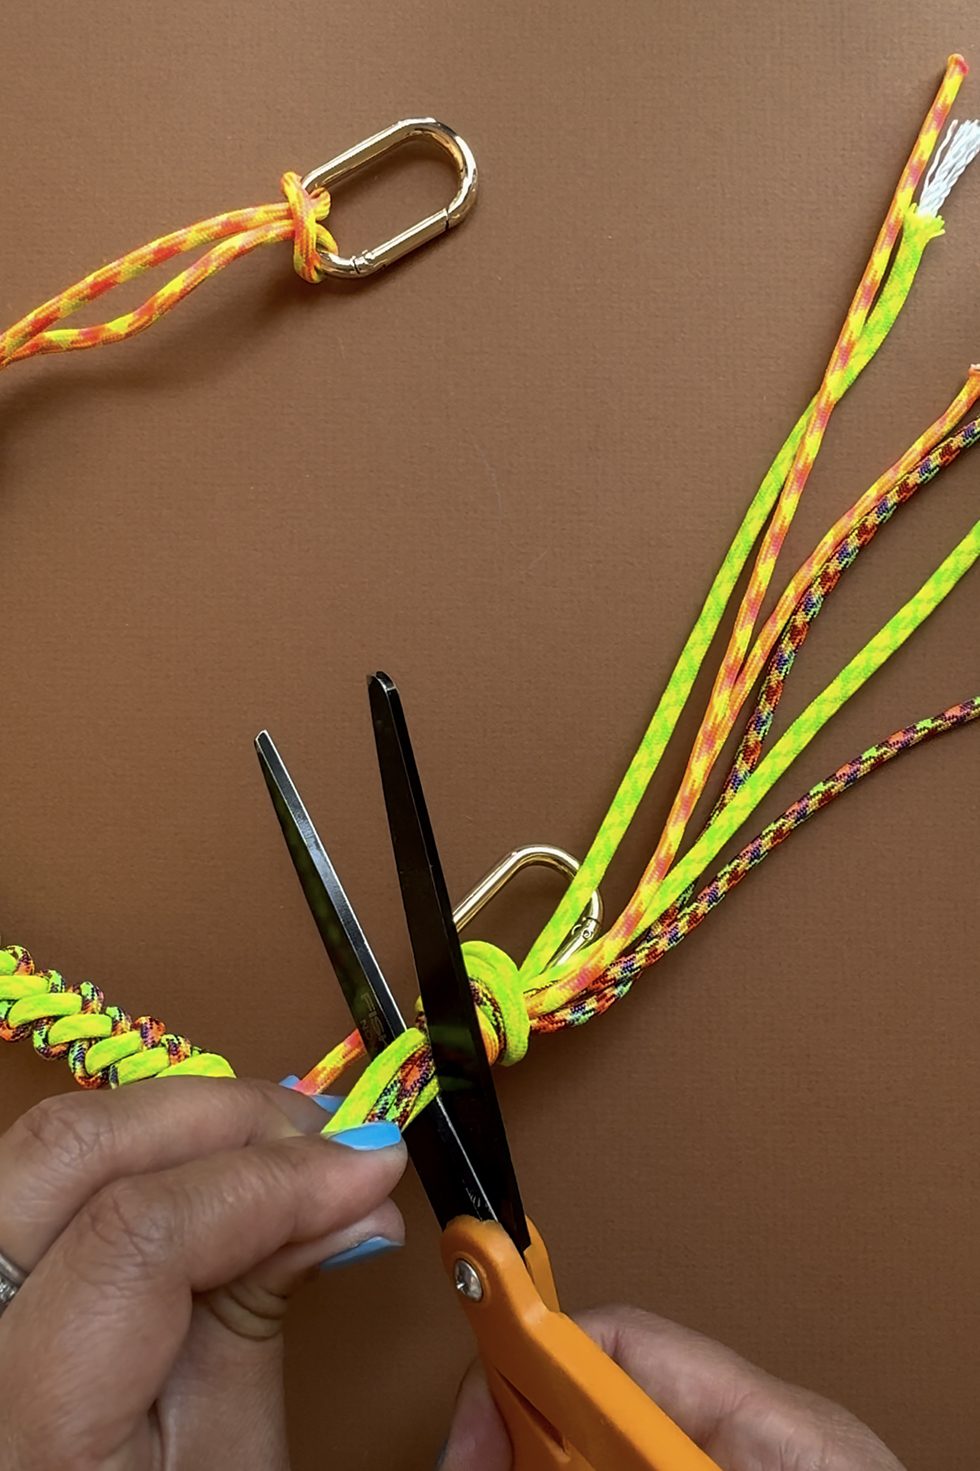
Pull the long ends tight to make sure the knot is secure. Trim the top ends.
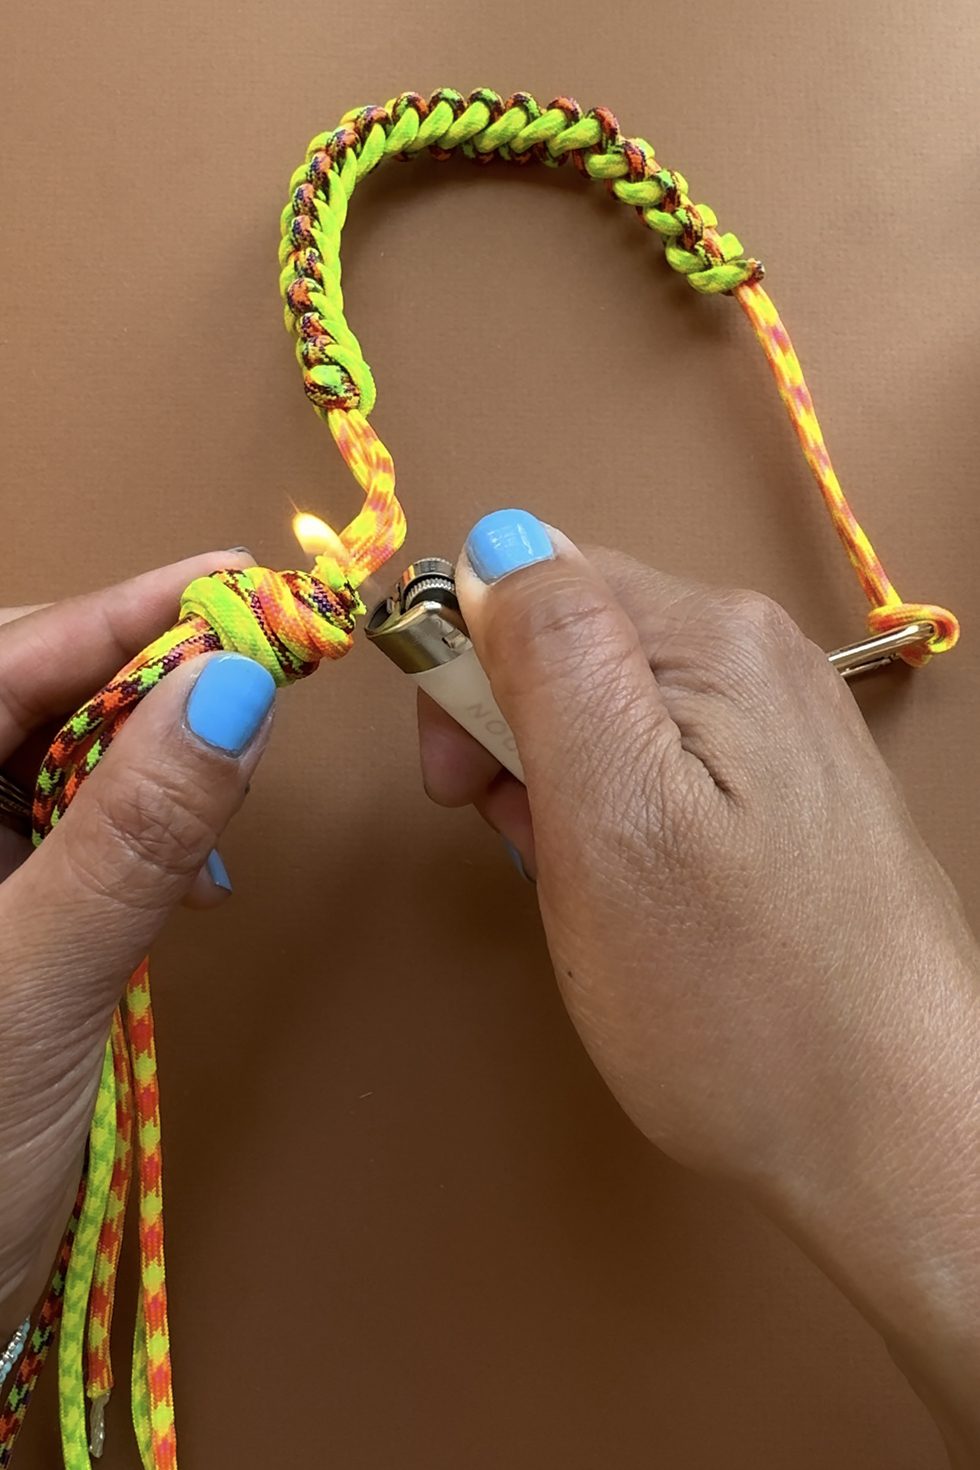
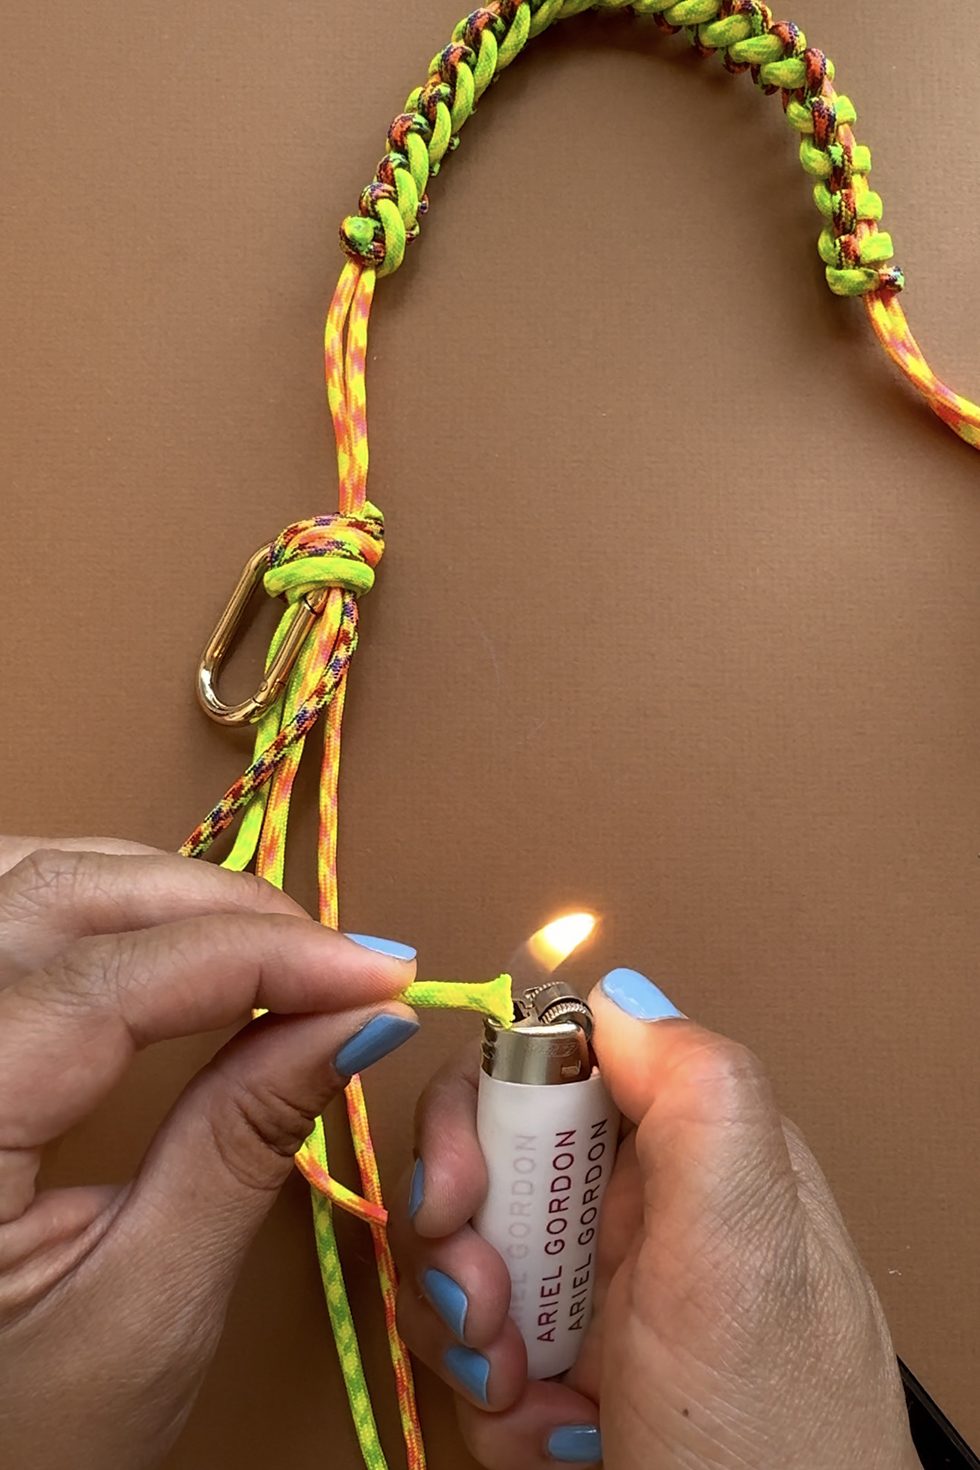
Carefully burn the ends.
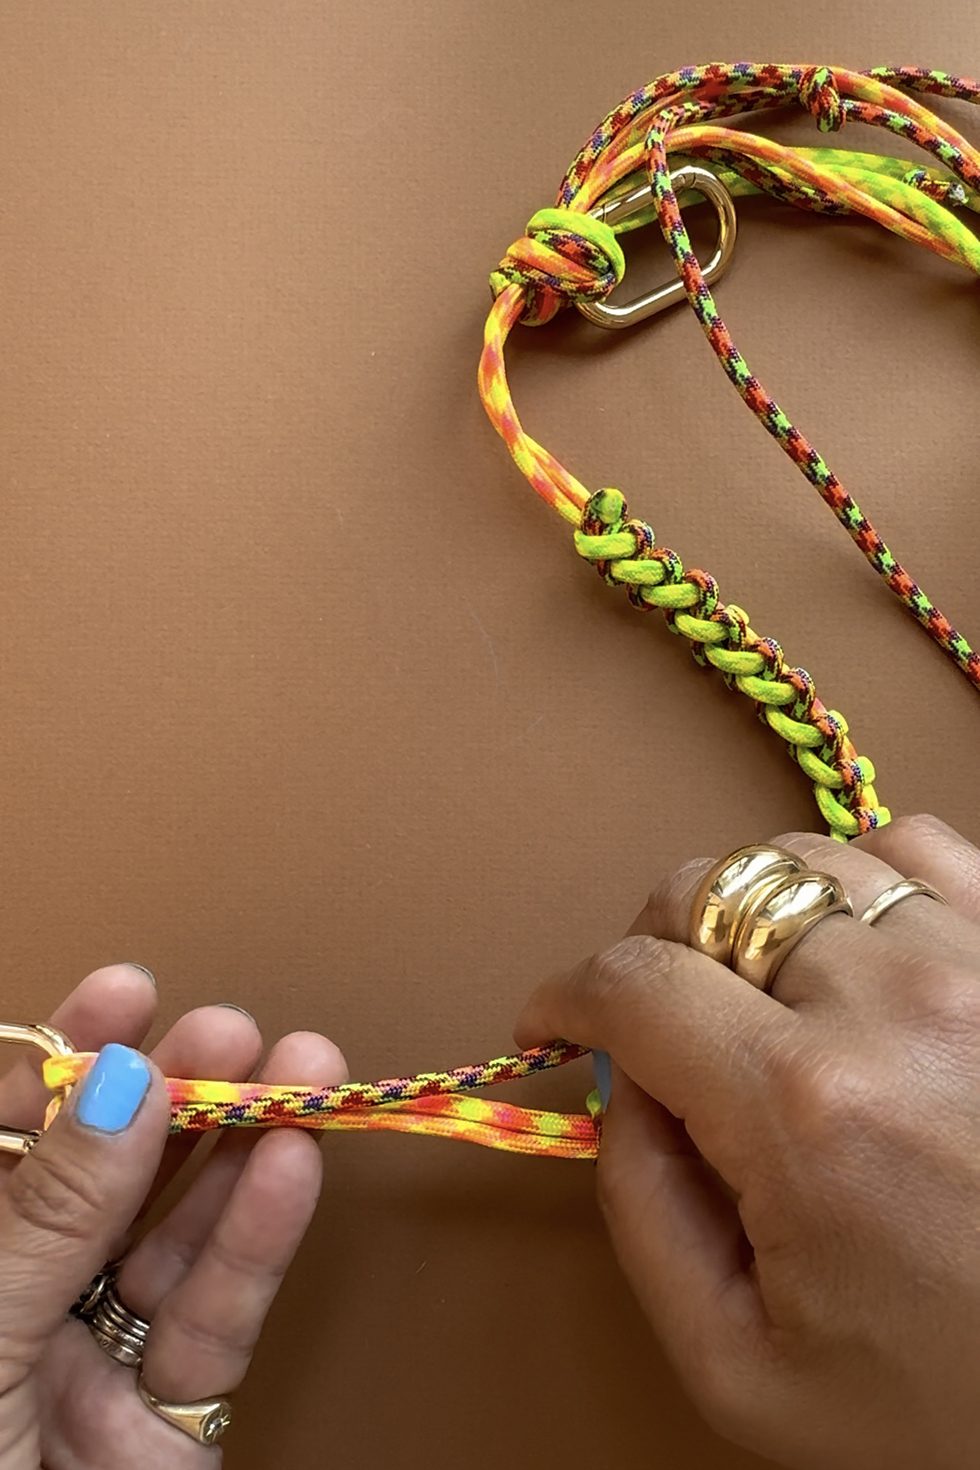
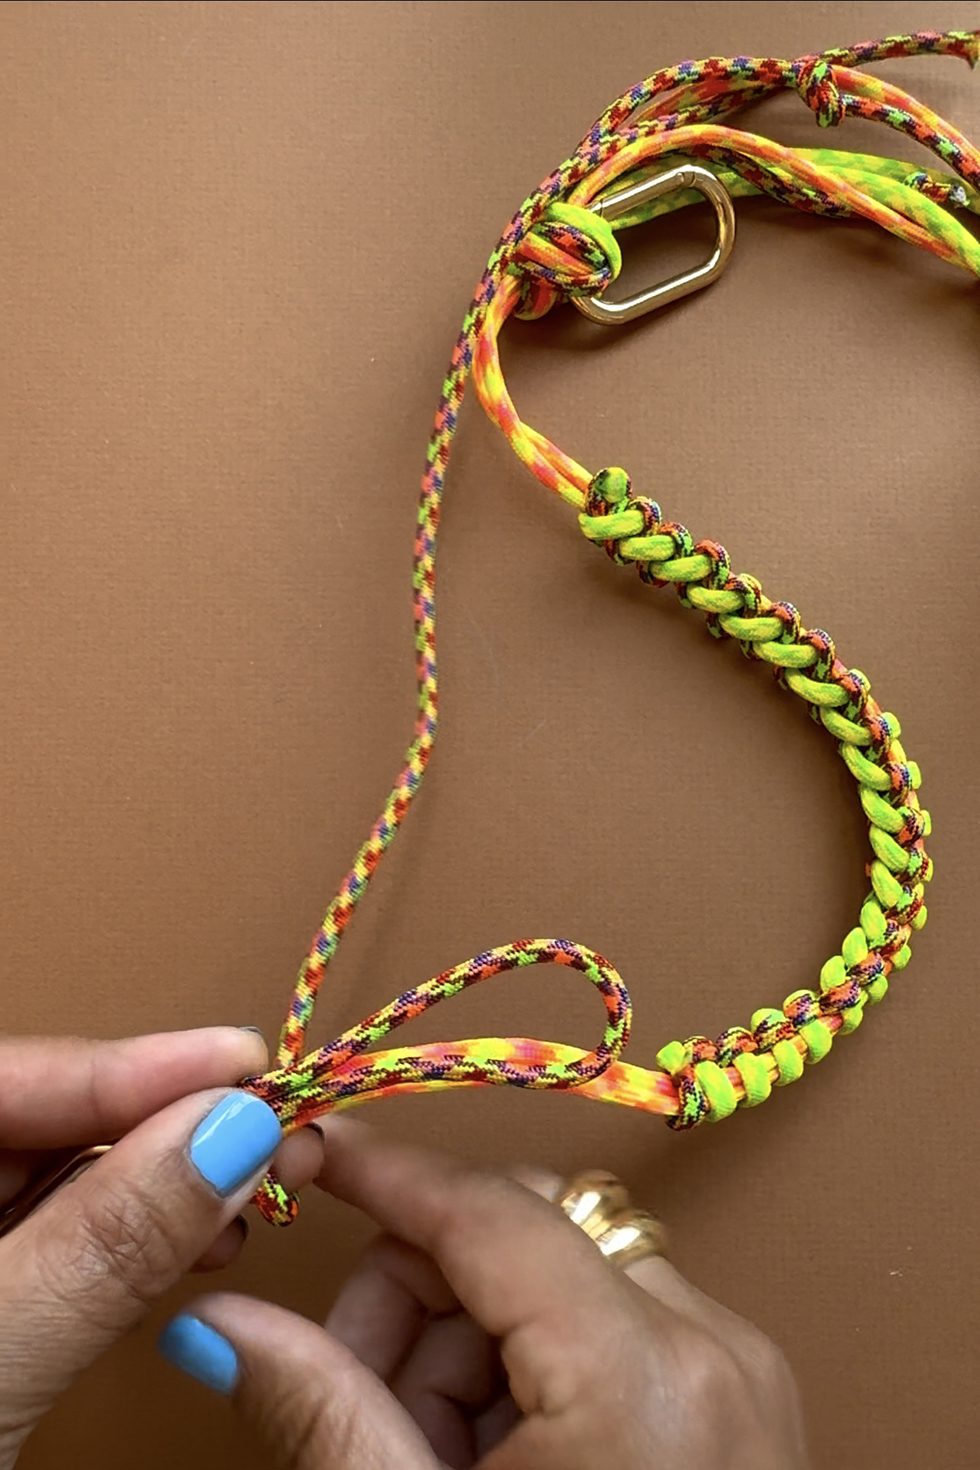
Embellish sections of the bag strap with barrel or macrame knots.
To make a barrel knot, cut about 12" of rope. Lay 3" of rope parallel to base rope. Then fold the rope back over itself. Leaving a 1/2" tail, start coiling the rope.
Make sure to make the coil as tight as possible. Use your left fingers to help keep it in place.
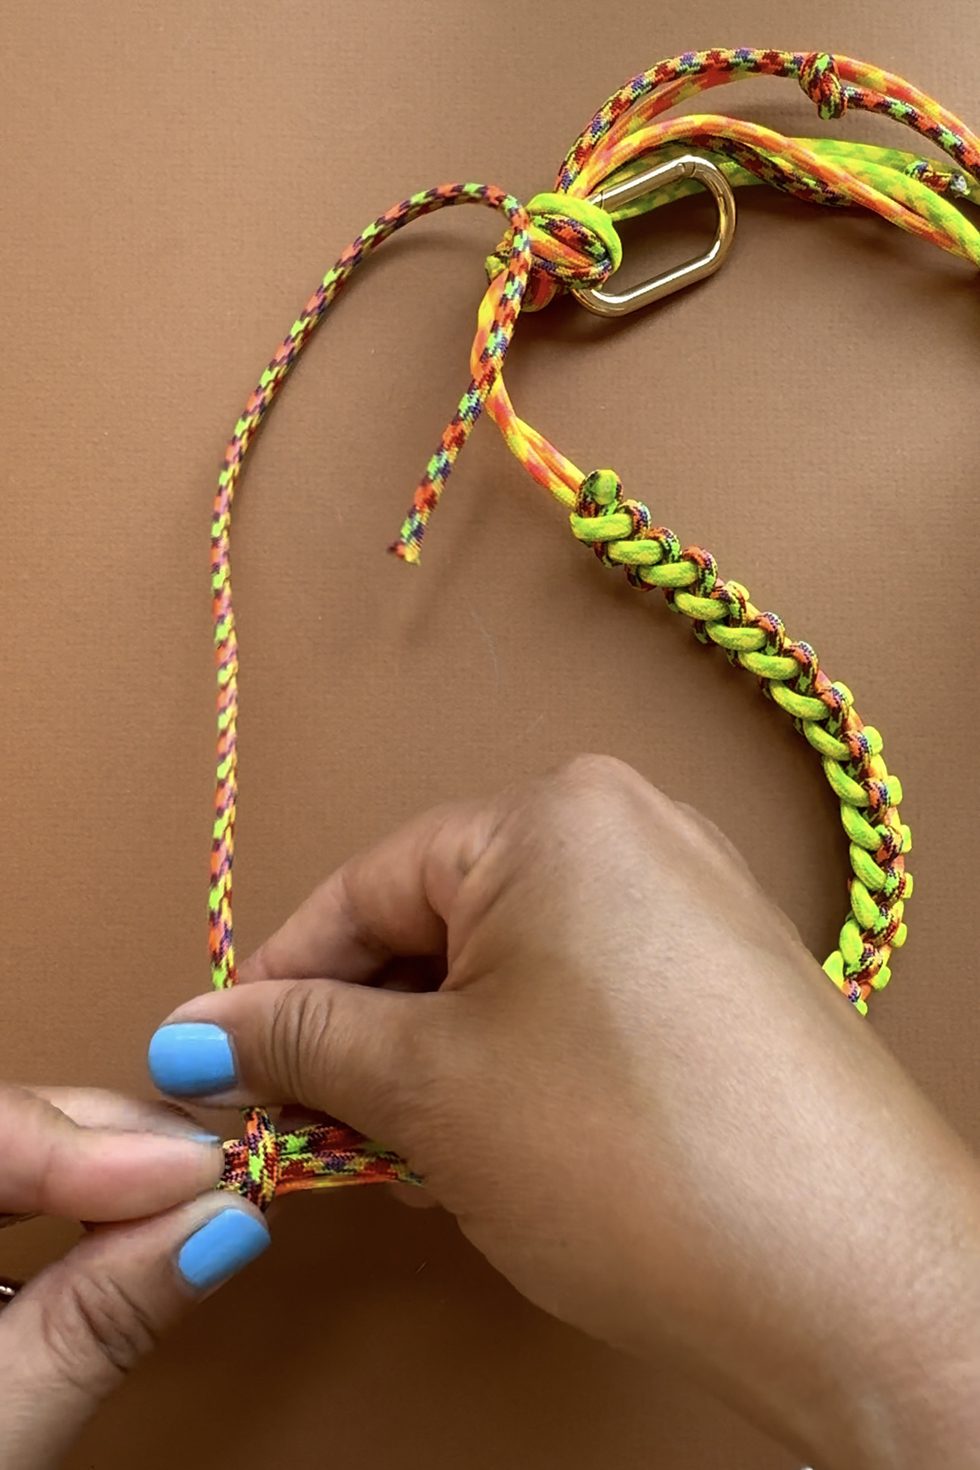
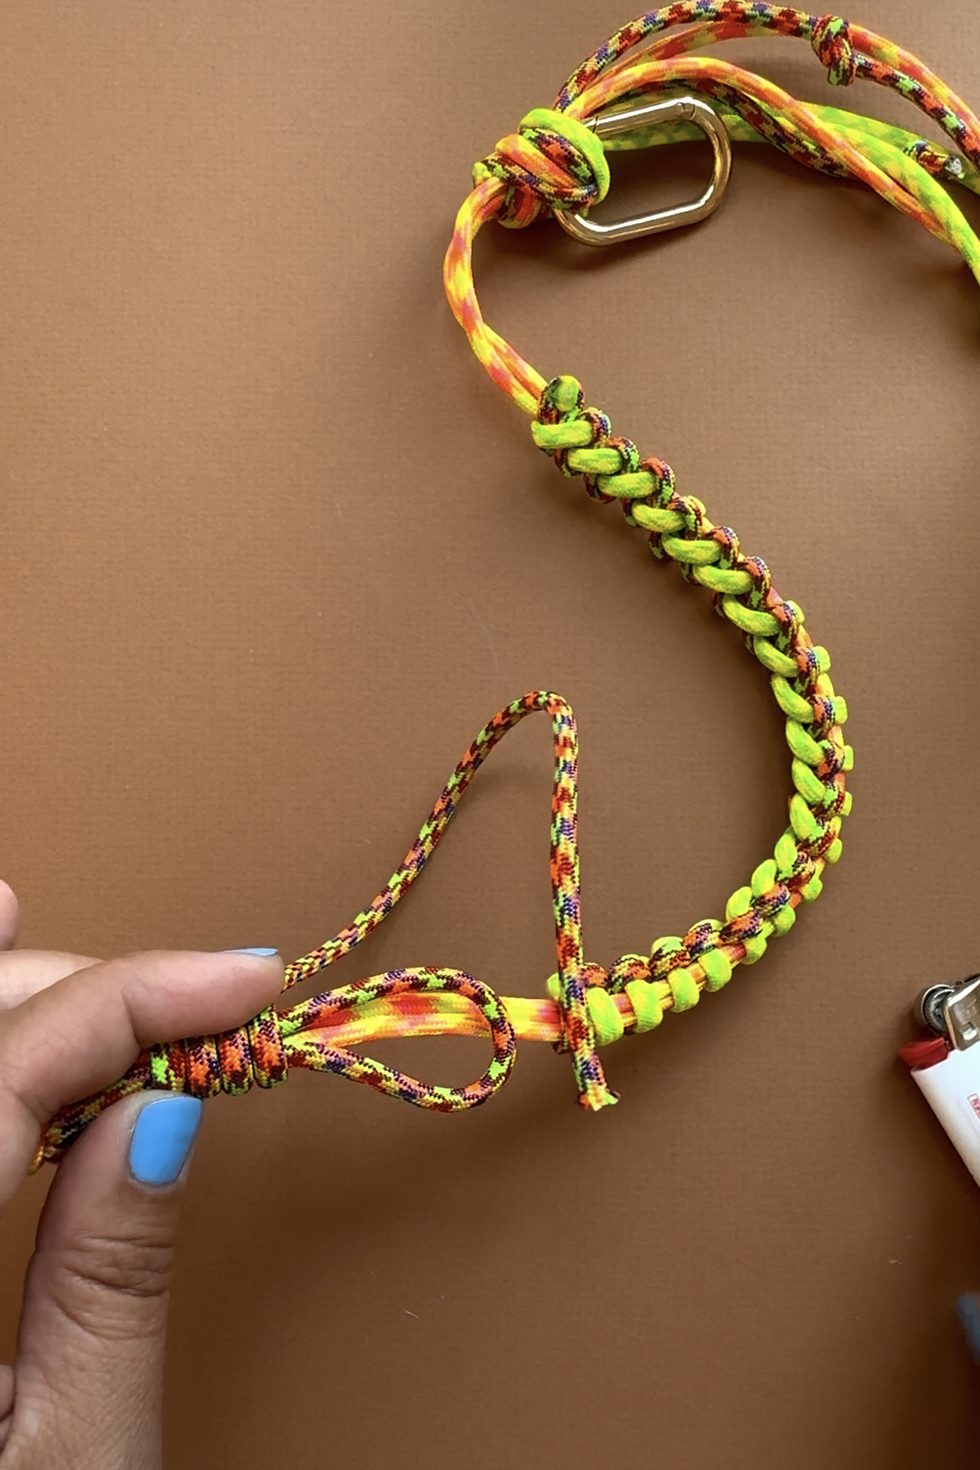
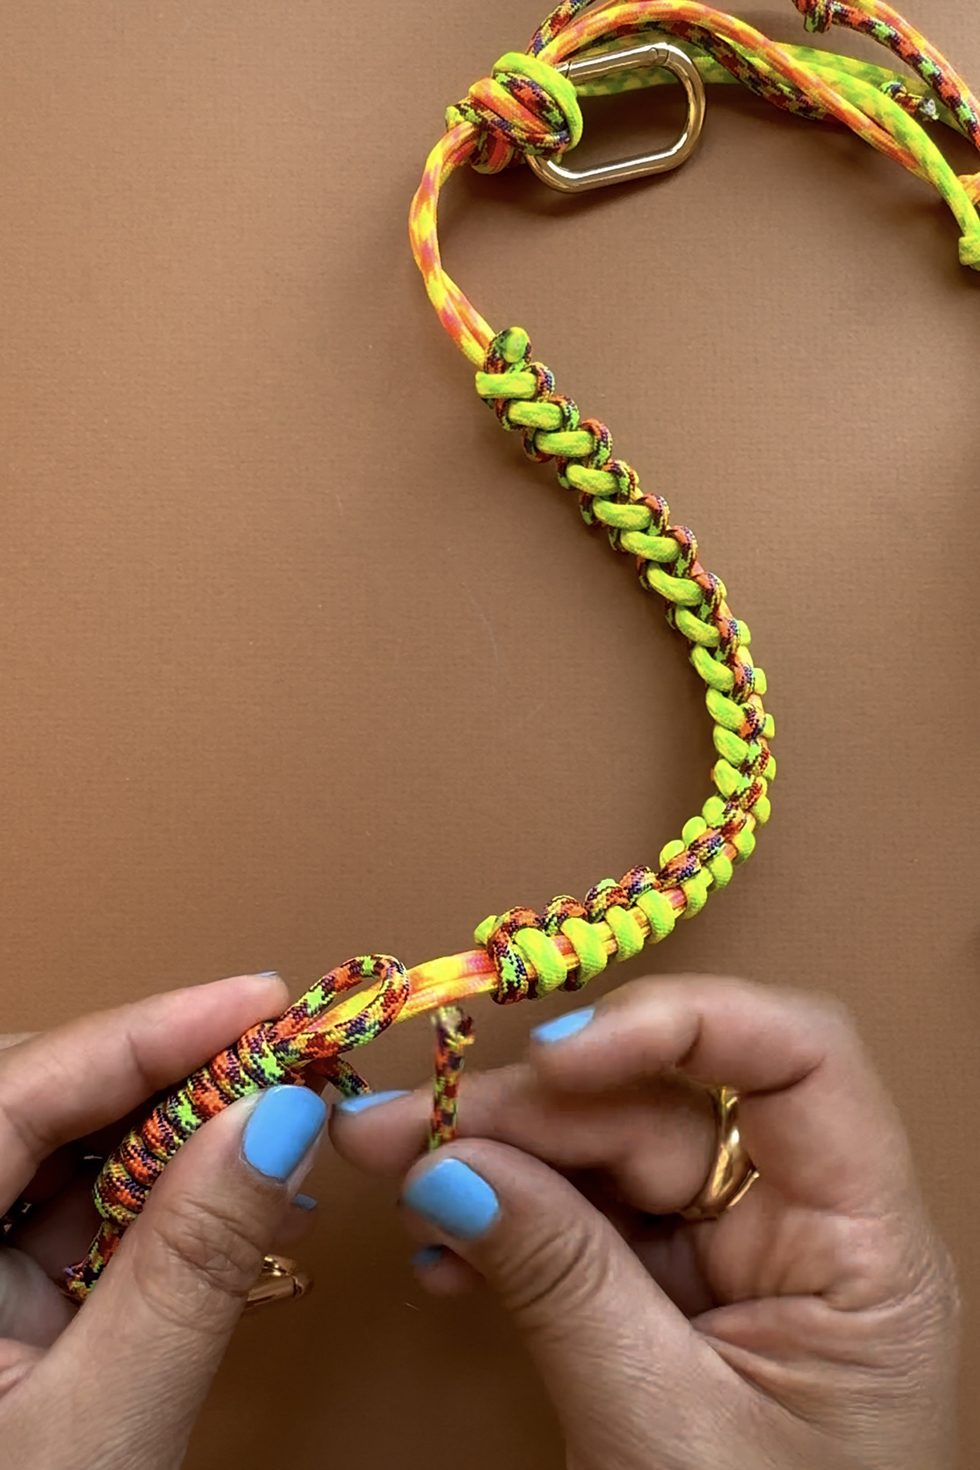
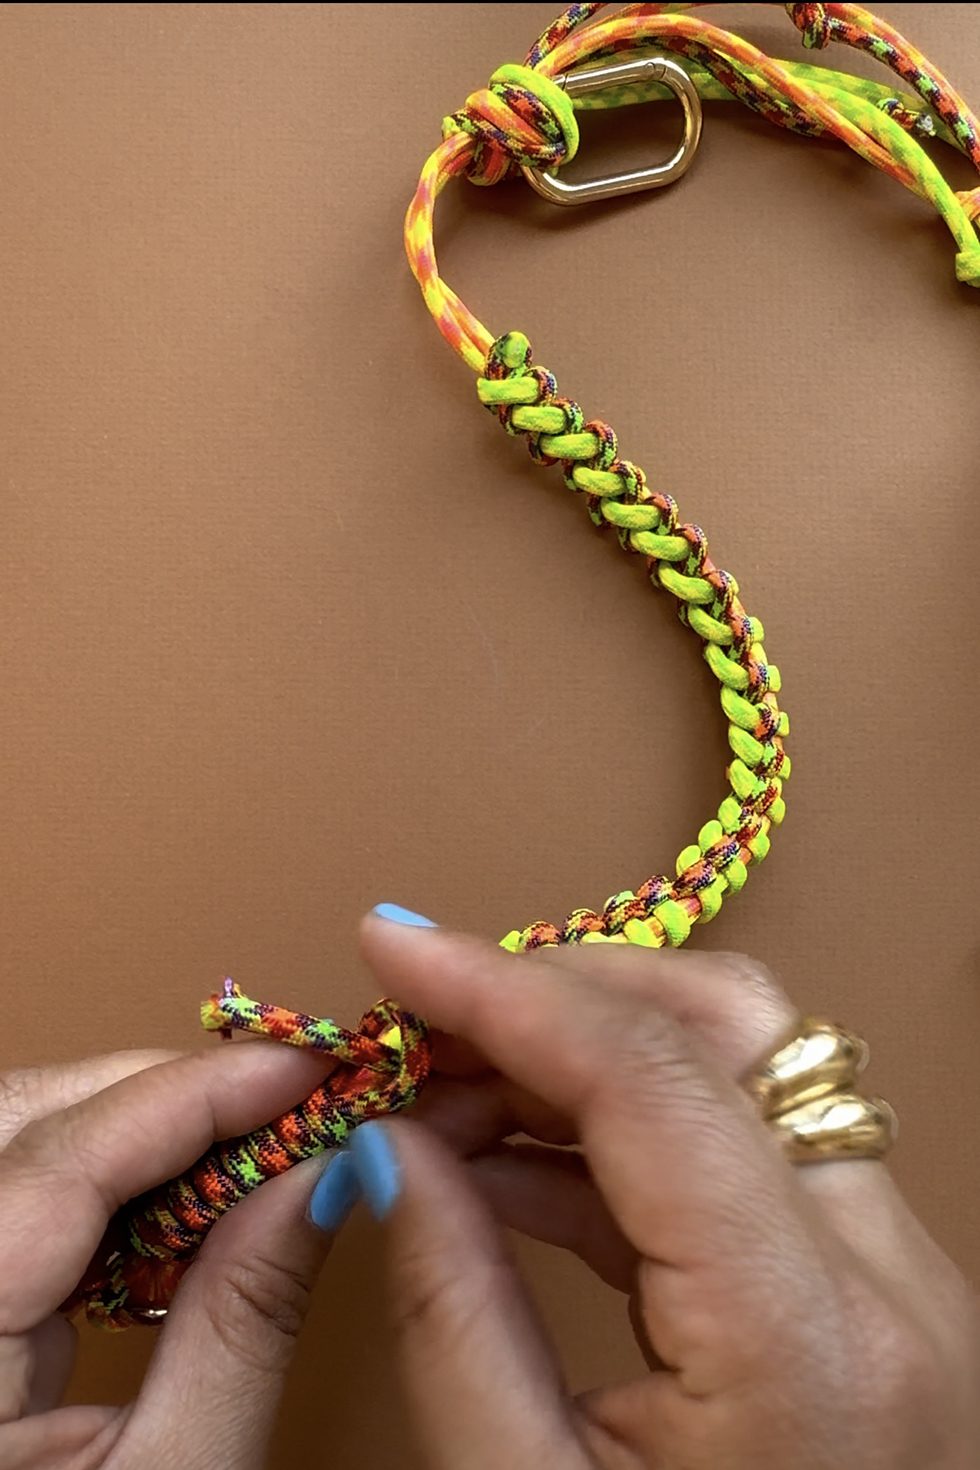
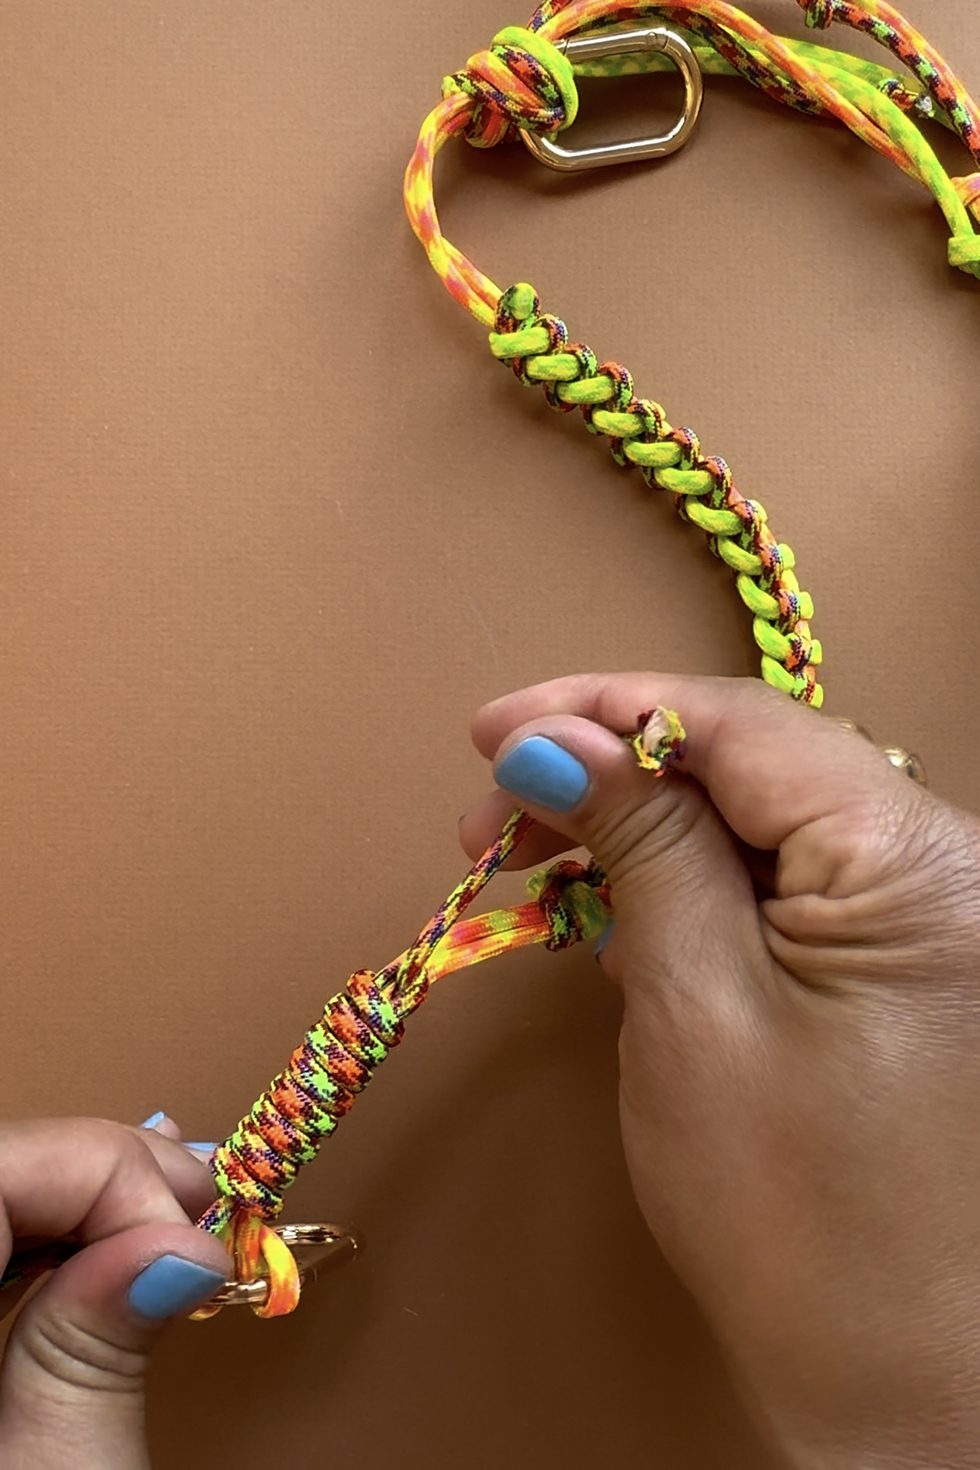
Once you've reached the desired length, pull the end of the rope through the open loop from behind. Pull both ends until tight.
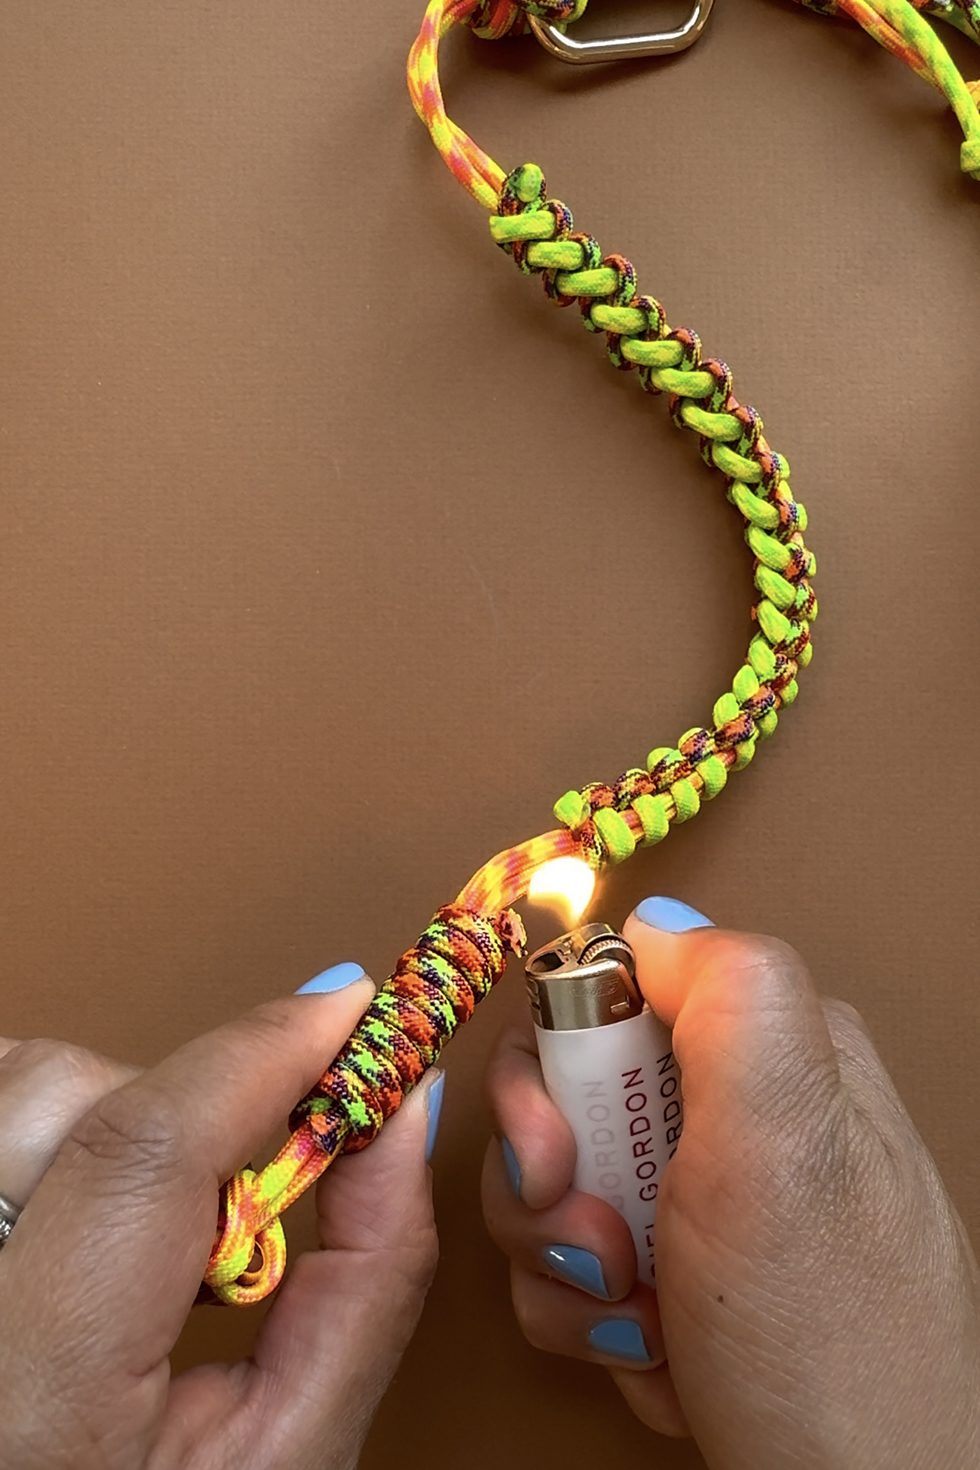
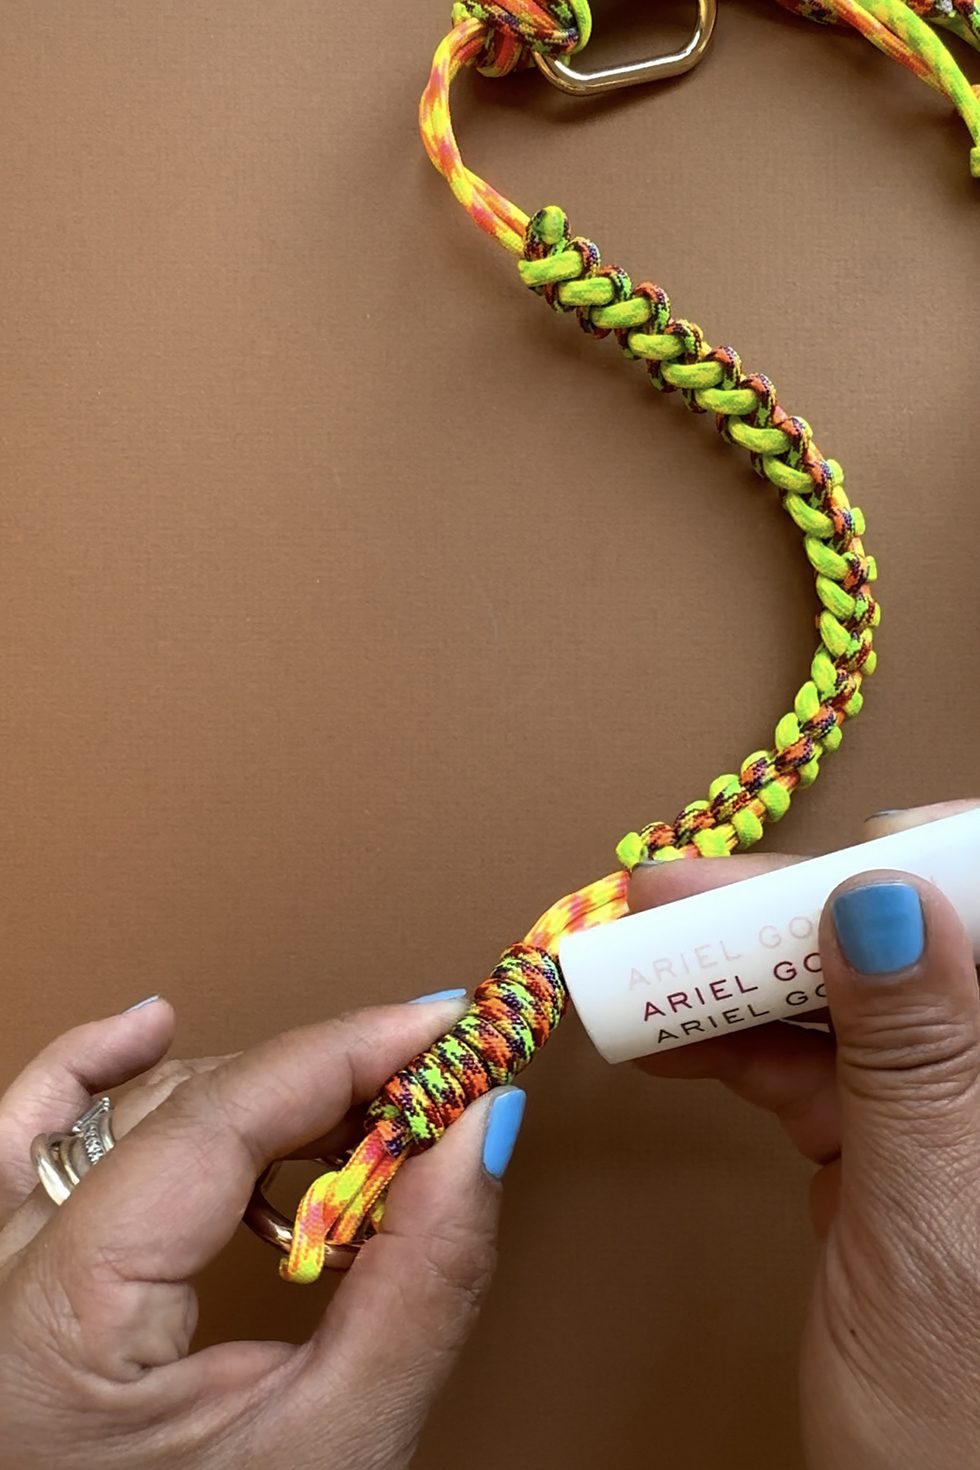
Trim and burn the ends.
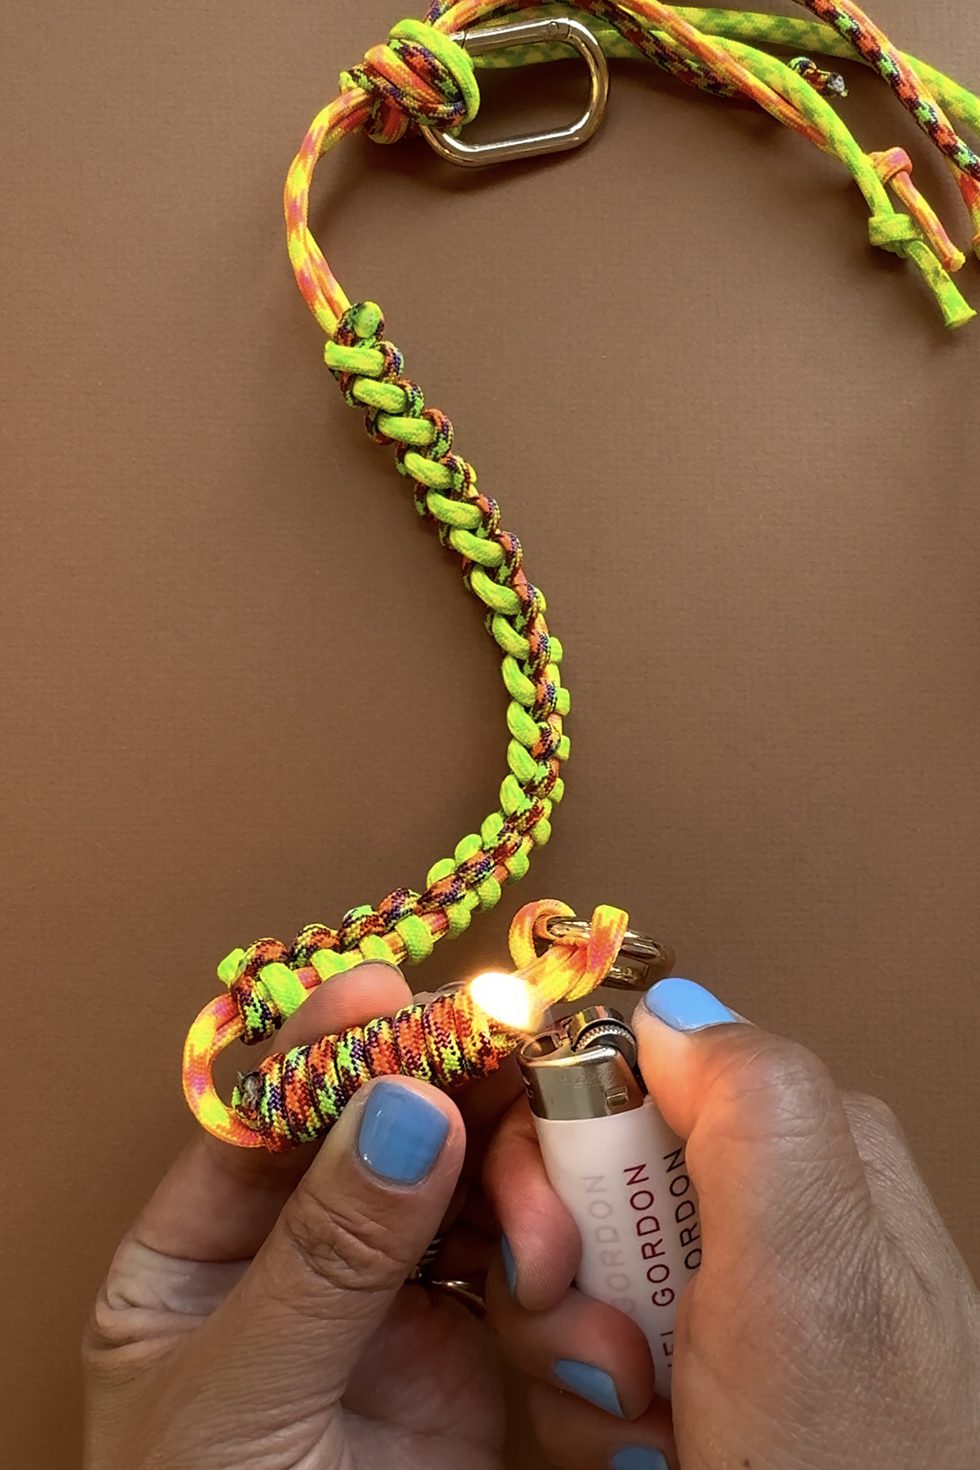
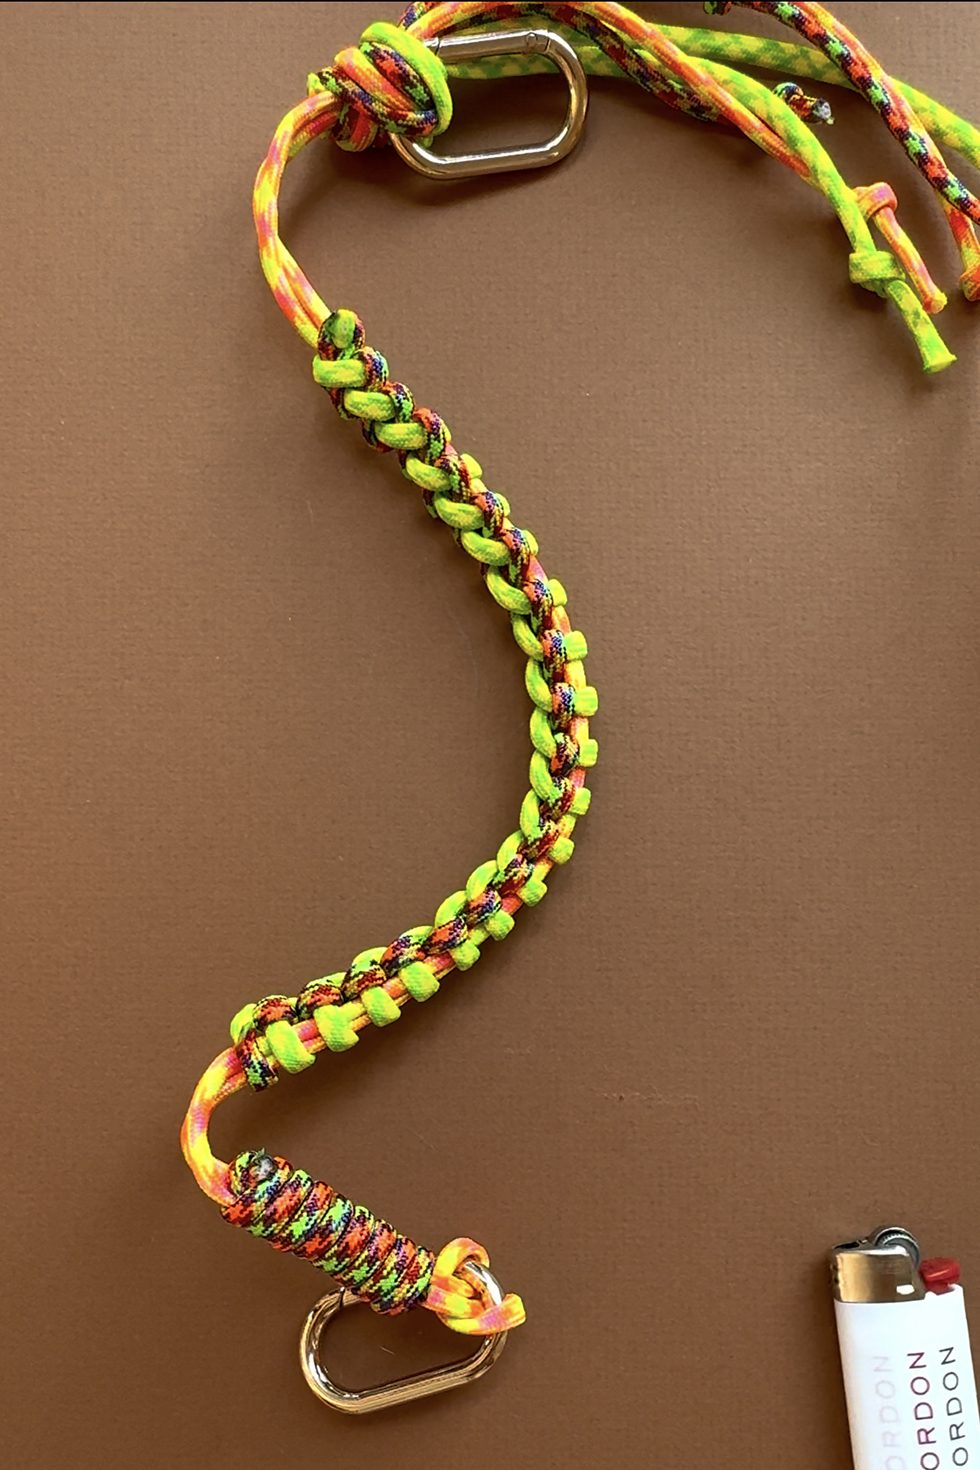
Your bag strap is ready to attach!
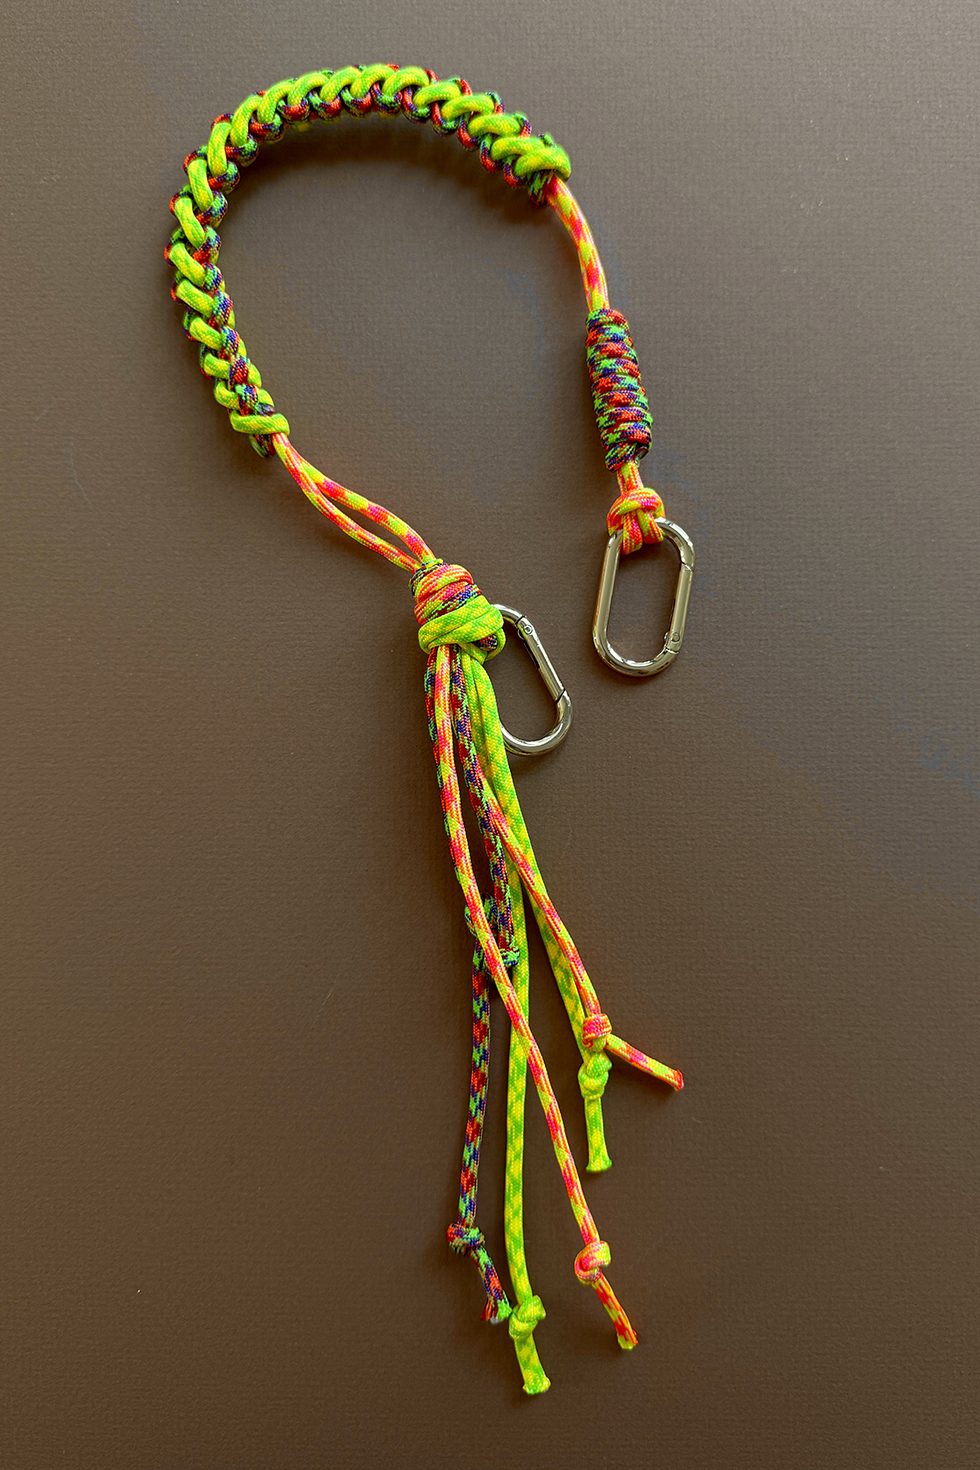
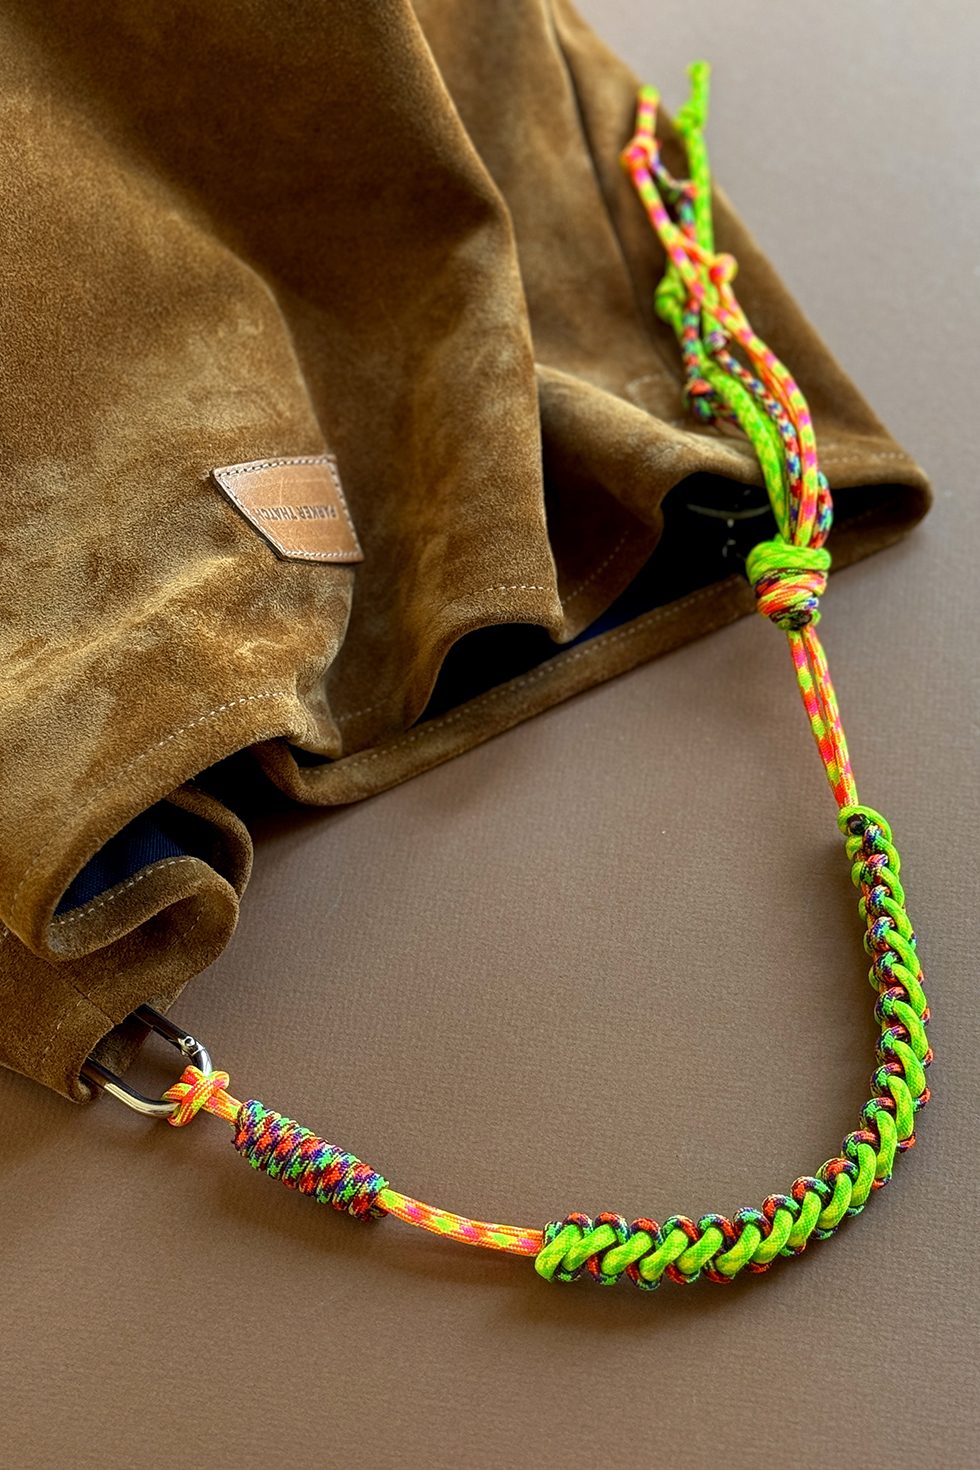
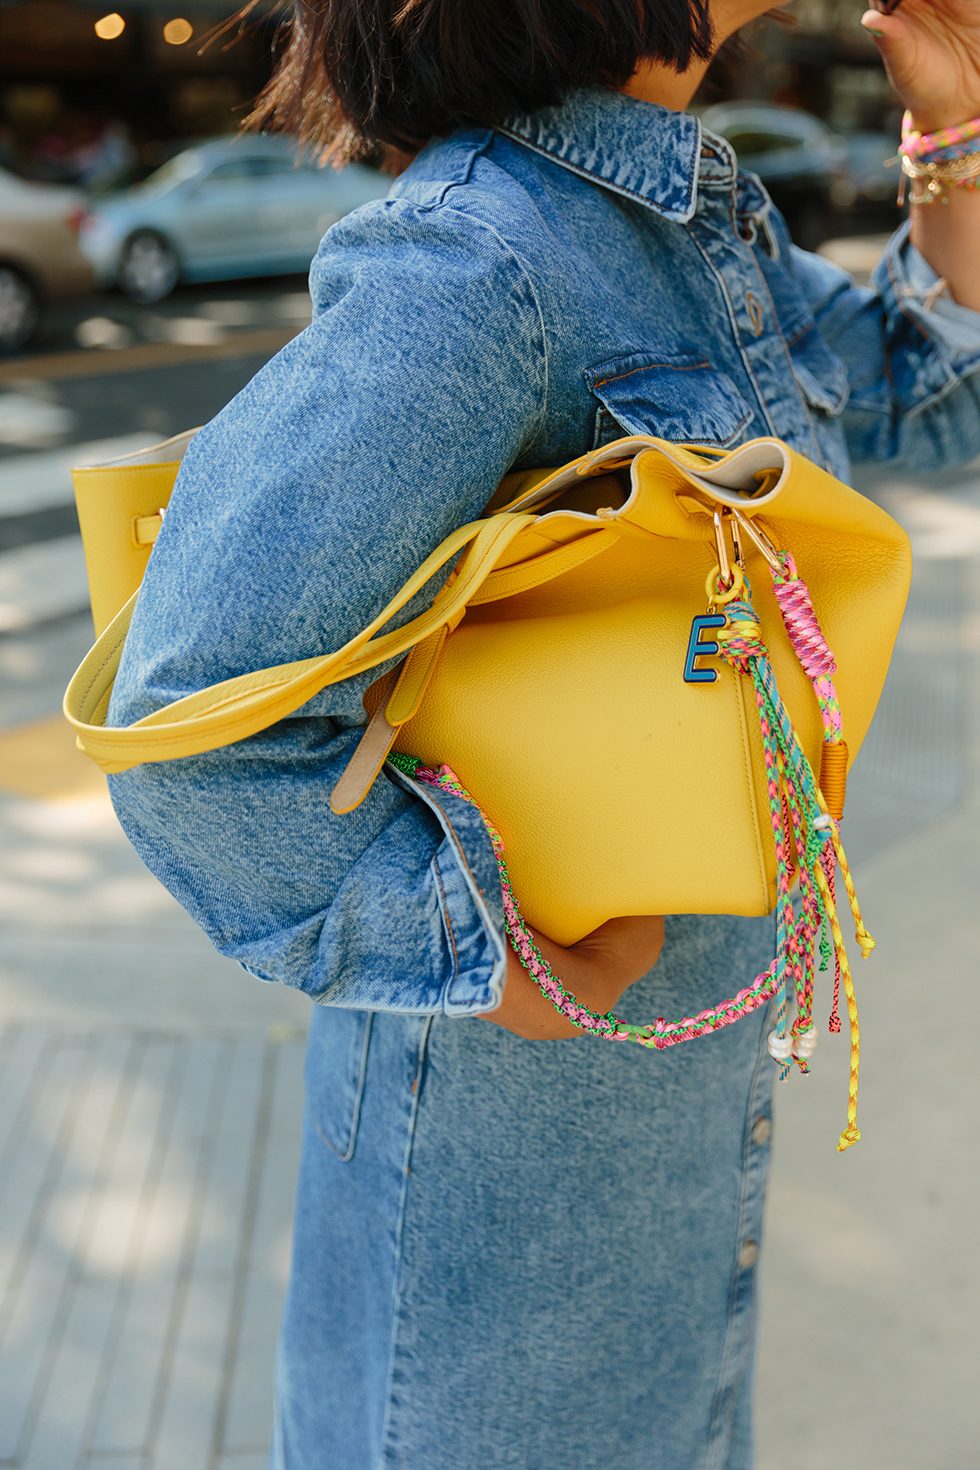

Tutorial in collaboration with Ariel Gordon Jewelry.
AGJ x HWTF DIY Knotty Rope Kit here



My bag’s straps is scratched after a long time, This is definitely what I want to try. Thank you for the tutorial!
Wow, this neat. I actually bought a smilar strap during one of my travels but couldn’t find a similar one around here. Thanks for tutorial. Now I can make one for my other bags!
Choose embroidered ribbon bag straps in two distinct styles: minimalist designs or crossbody straps with leather ends featuring engraved text customization for a unique touch. Our camera straps also include premium leather ends, fully tailored to your vision: https://wellplaylove.com/
where are the Pearls going?
This kind of DIY feels genuinely useful because it adds character to accessories without needing to replace them. I’ve noticed plenty of simple bags available through fashion deals
and sales, and a handmade strap like this can instantly make them feel more unique. It’s a nice way to combine creativity with smart shopping and get more out of pieces already in the wardrobe.