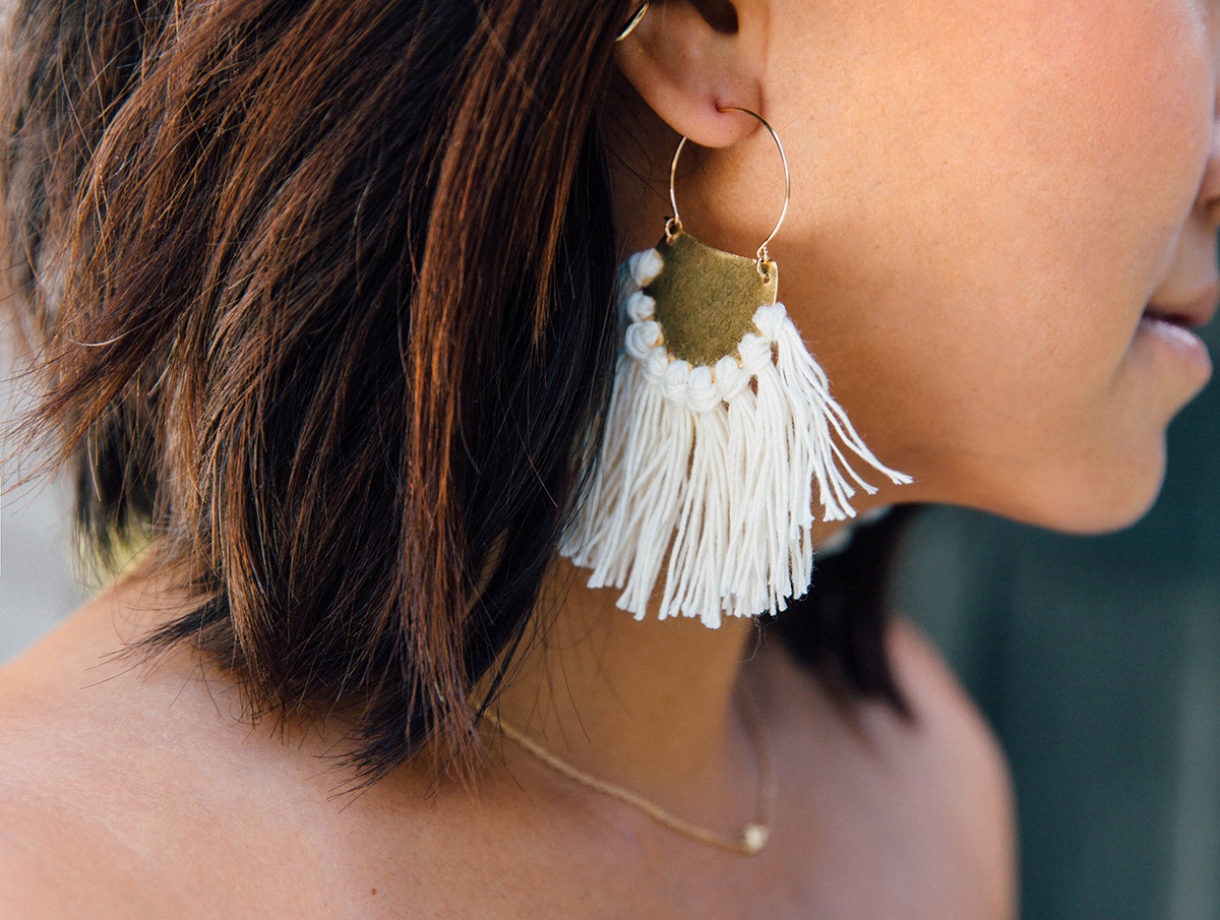
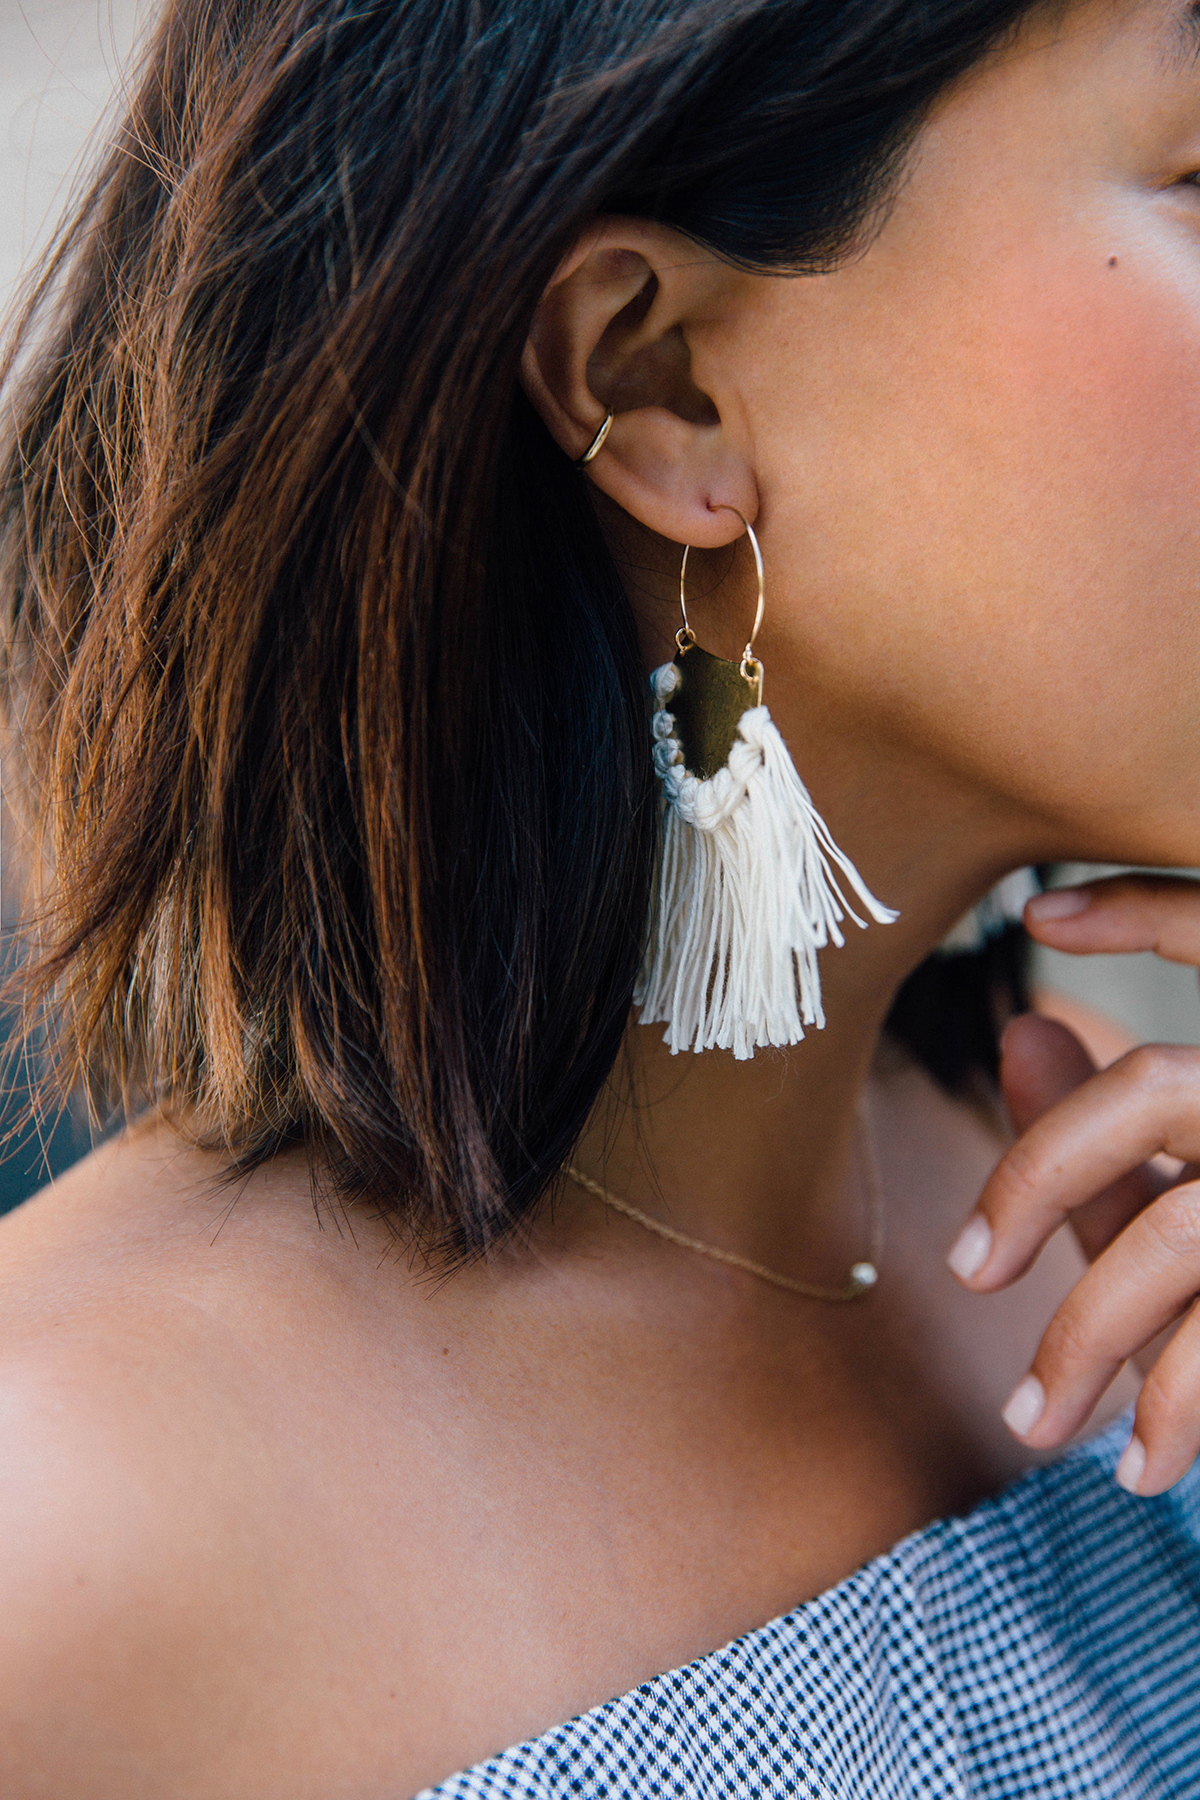
It’s been ages since my last jewelry DIY. It’s been a very busy summer. So I was excited when my friend Grace, of The Stripe, recently came to out to California for a visit and encouraged me to set aside a day dedicated to crafting. Sometimes, you just need that extra motivational push! We both adore Portland designer Hazel Cox‘s brass and silk fringe earrings and were immediately inspired after spotting these perfect little brass discs at my favorite jewelry supply store. With the right tools, these exuberant earrings are so fun to make, I promise you’ll be inspired to make more than a single pair!
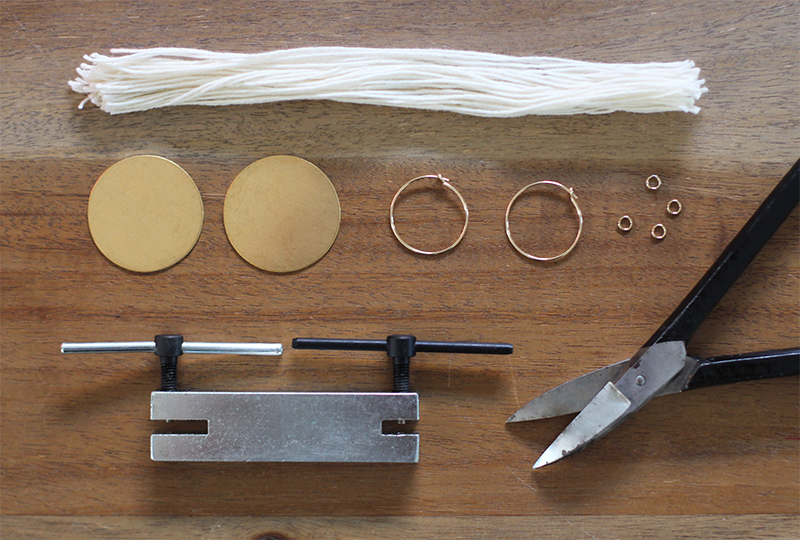
You’ll need:
- 2 1.25″ brass discs
- 2 20mm gold filled hoops
- 4 4mm gold filled jump rings
- 1 big eye threading needle
- metal hole punch
- metal shears
- embroidery floss, cut into 8-10 inch pieces
- emory board
- sharpie or permanent marker
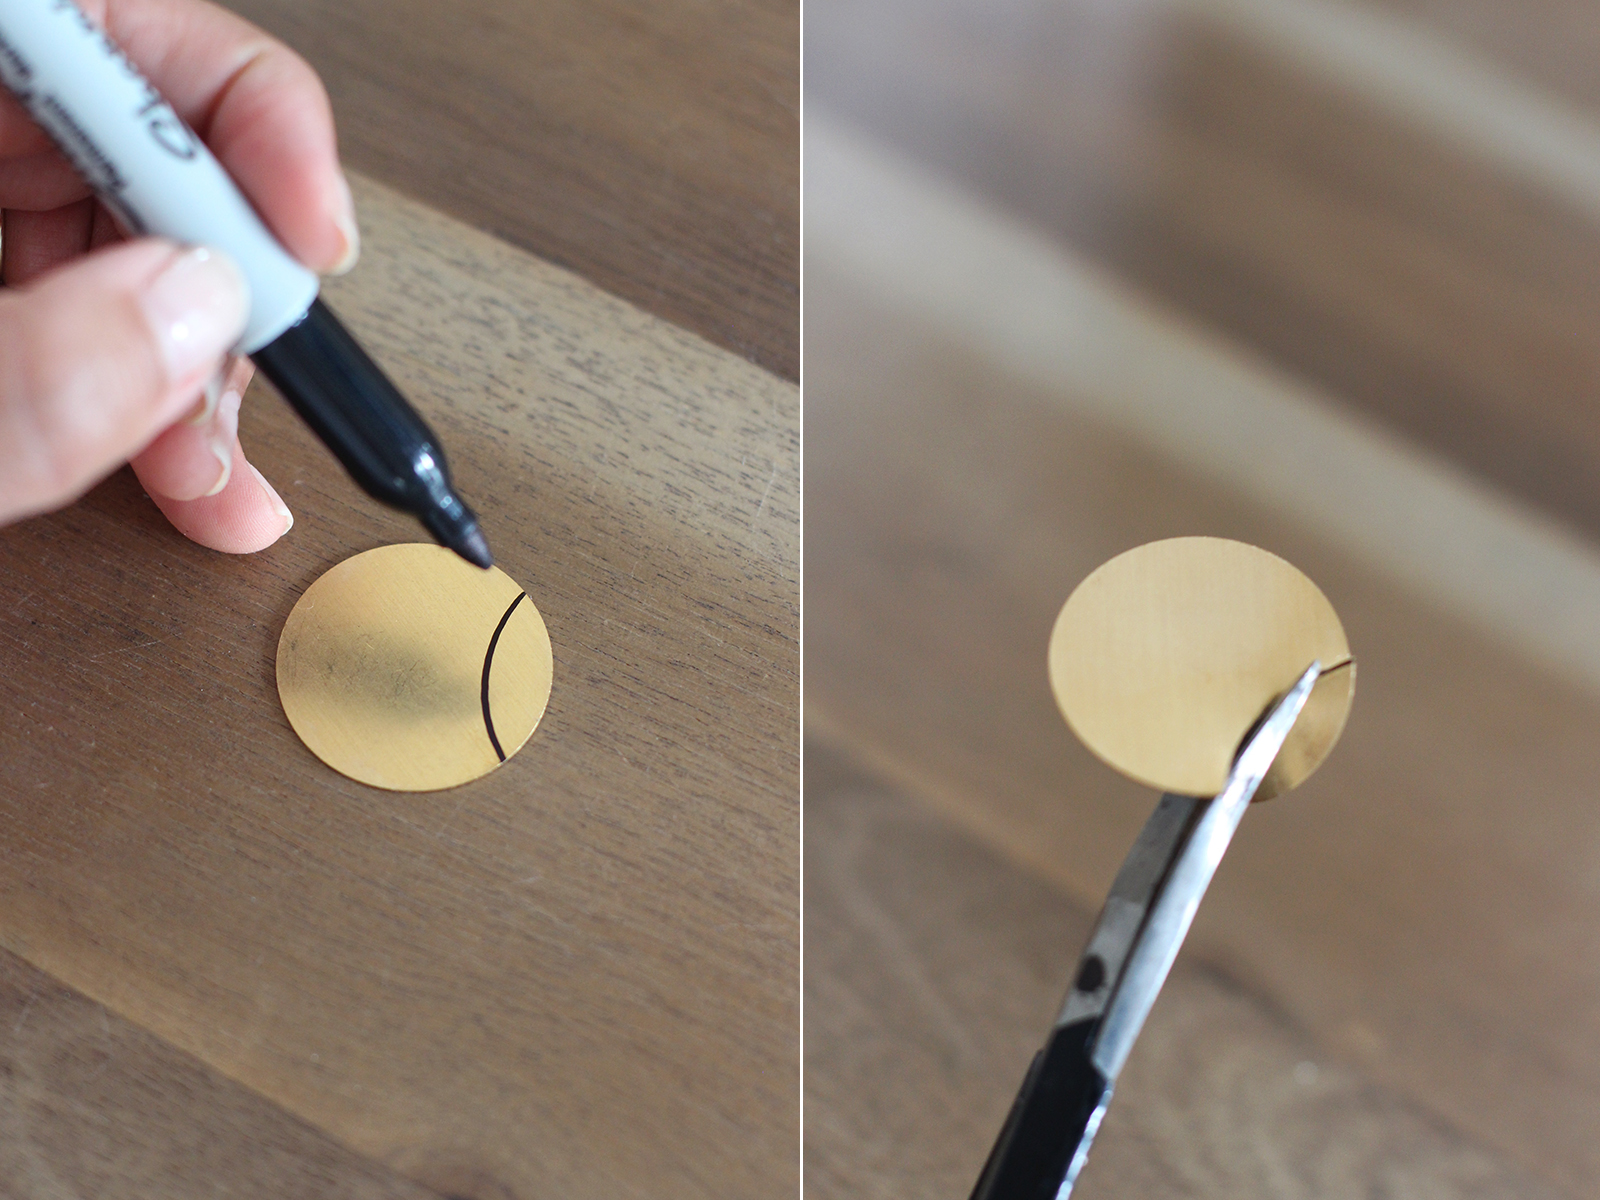
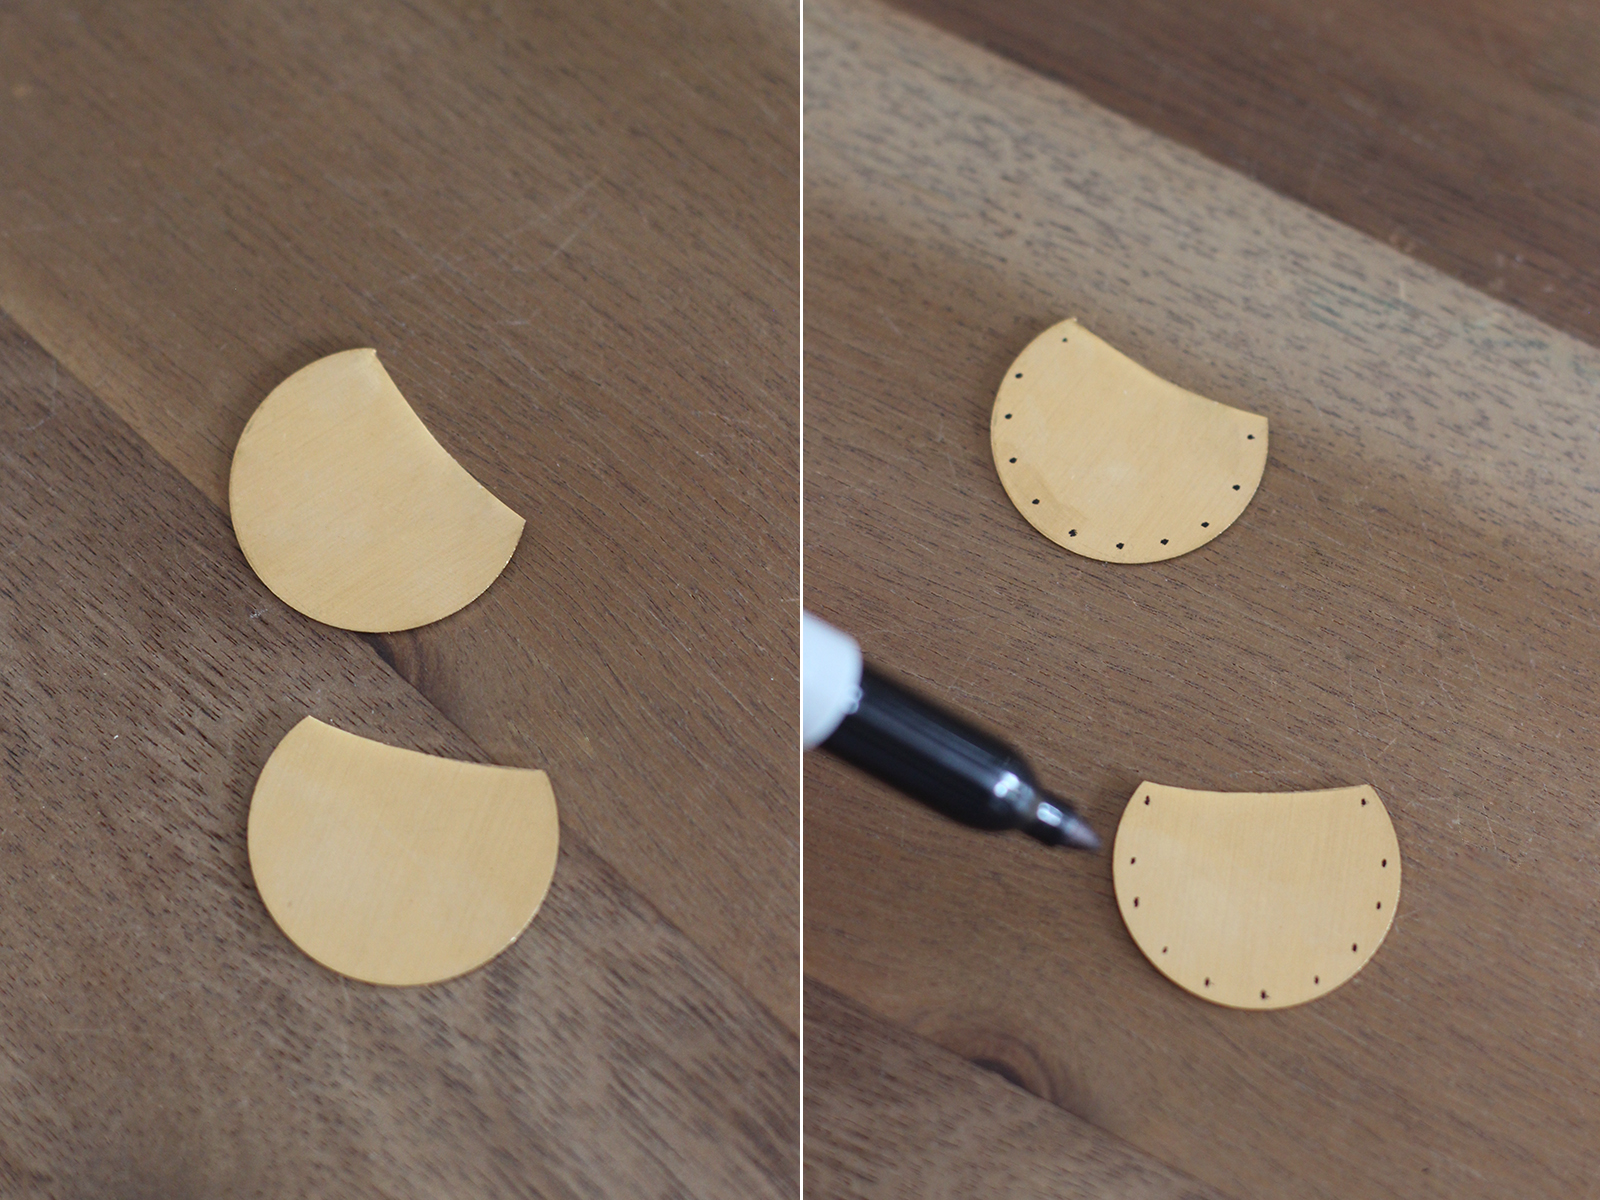
Start by taking a pair of metal shears and cutting off a section of the brass disc. You can cut it in half or do as I did and cut a little curved piece off the top.
After cutting both pieces down to the same size, file down the cut edges with an emory board. With a Sharpie or permanent marker, mark 2 dots at each corner of the cut edge. Then, make a series of evenly spaced dots around the bottom of the circular disc.
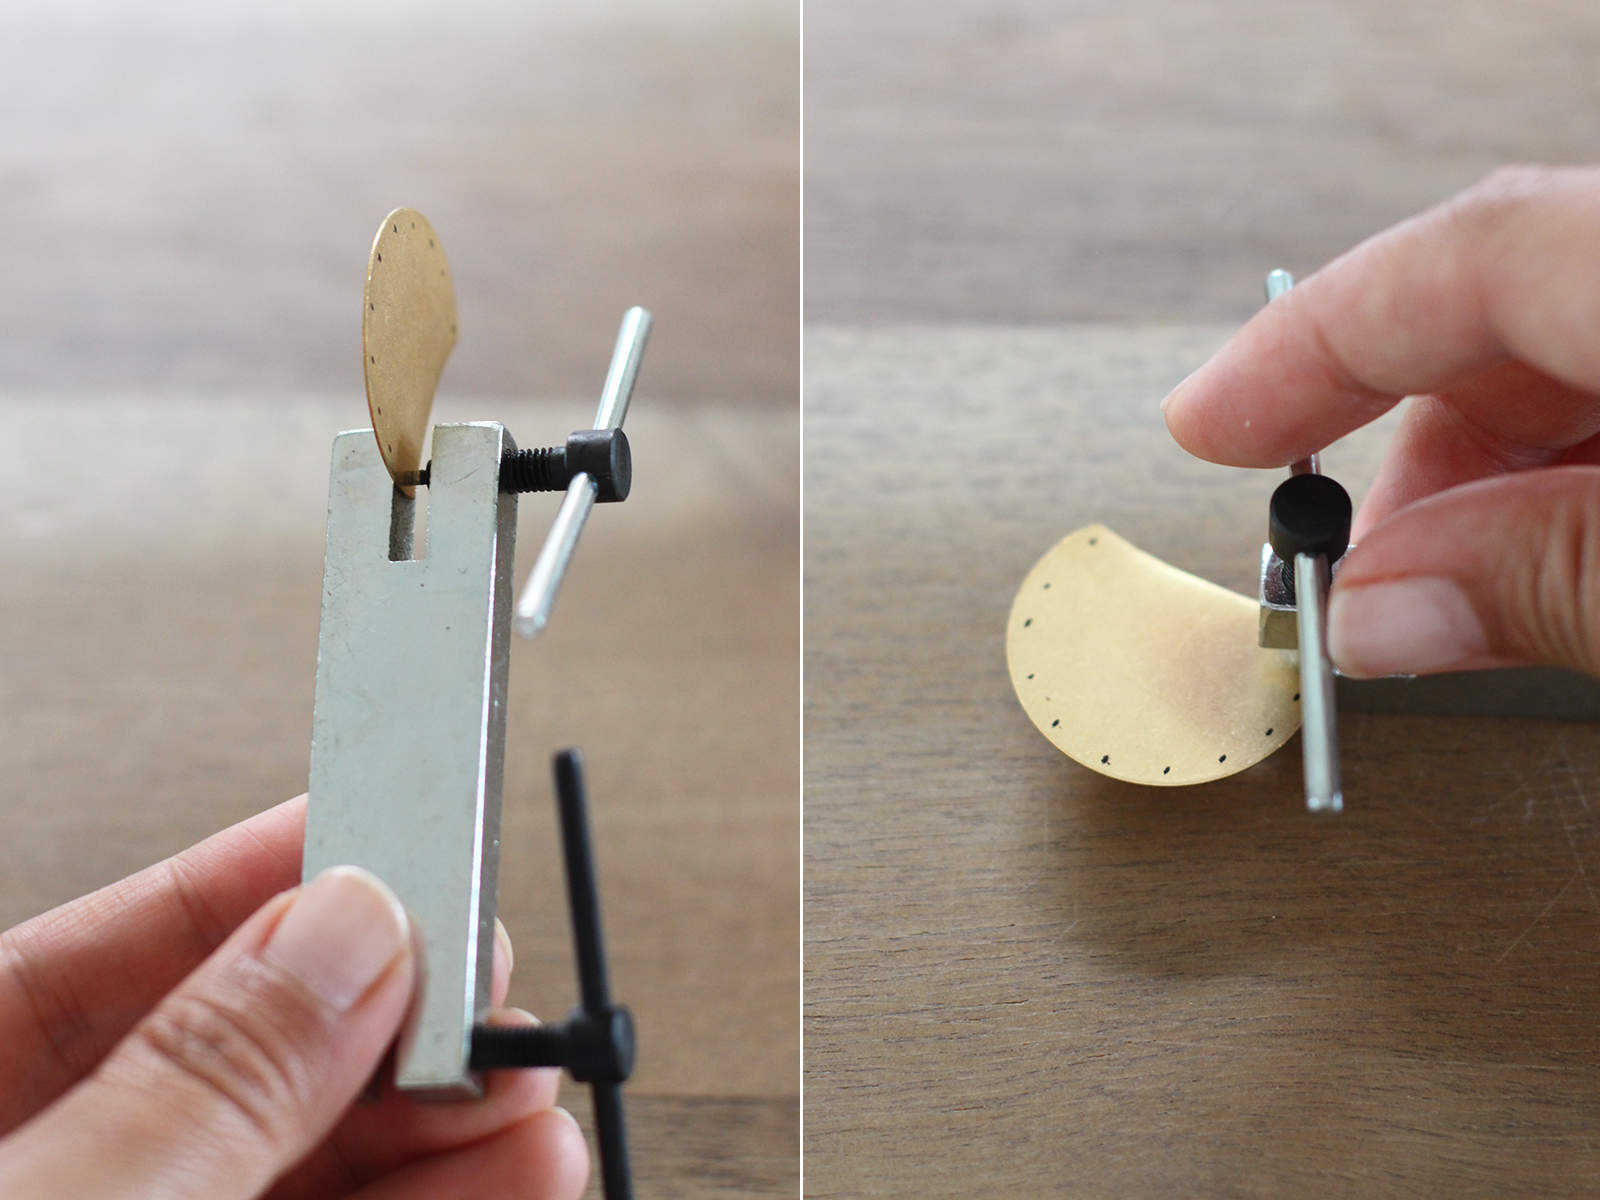
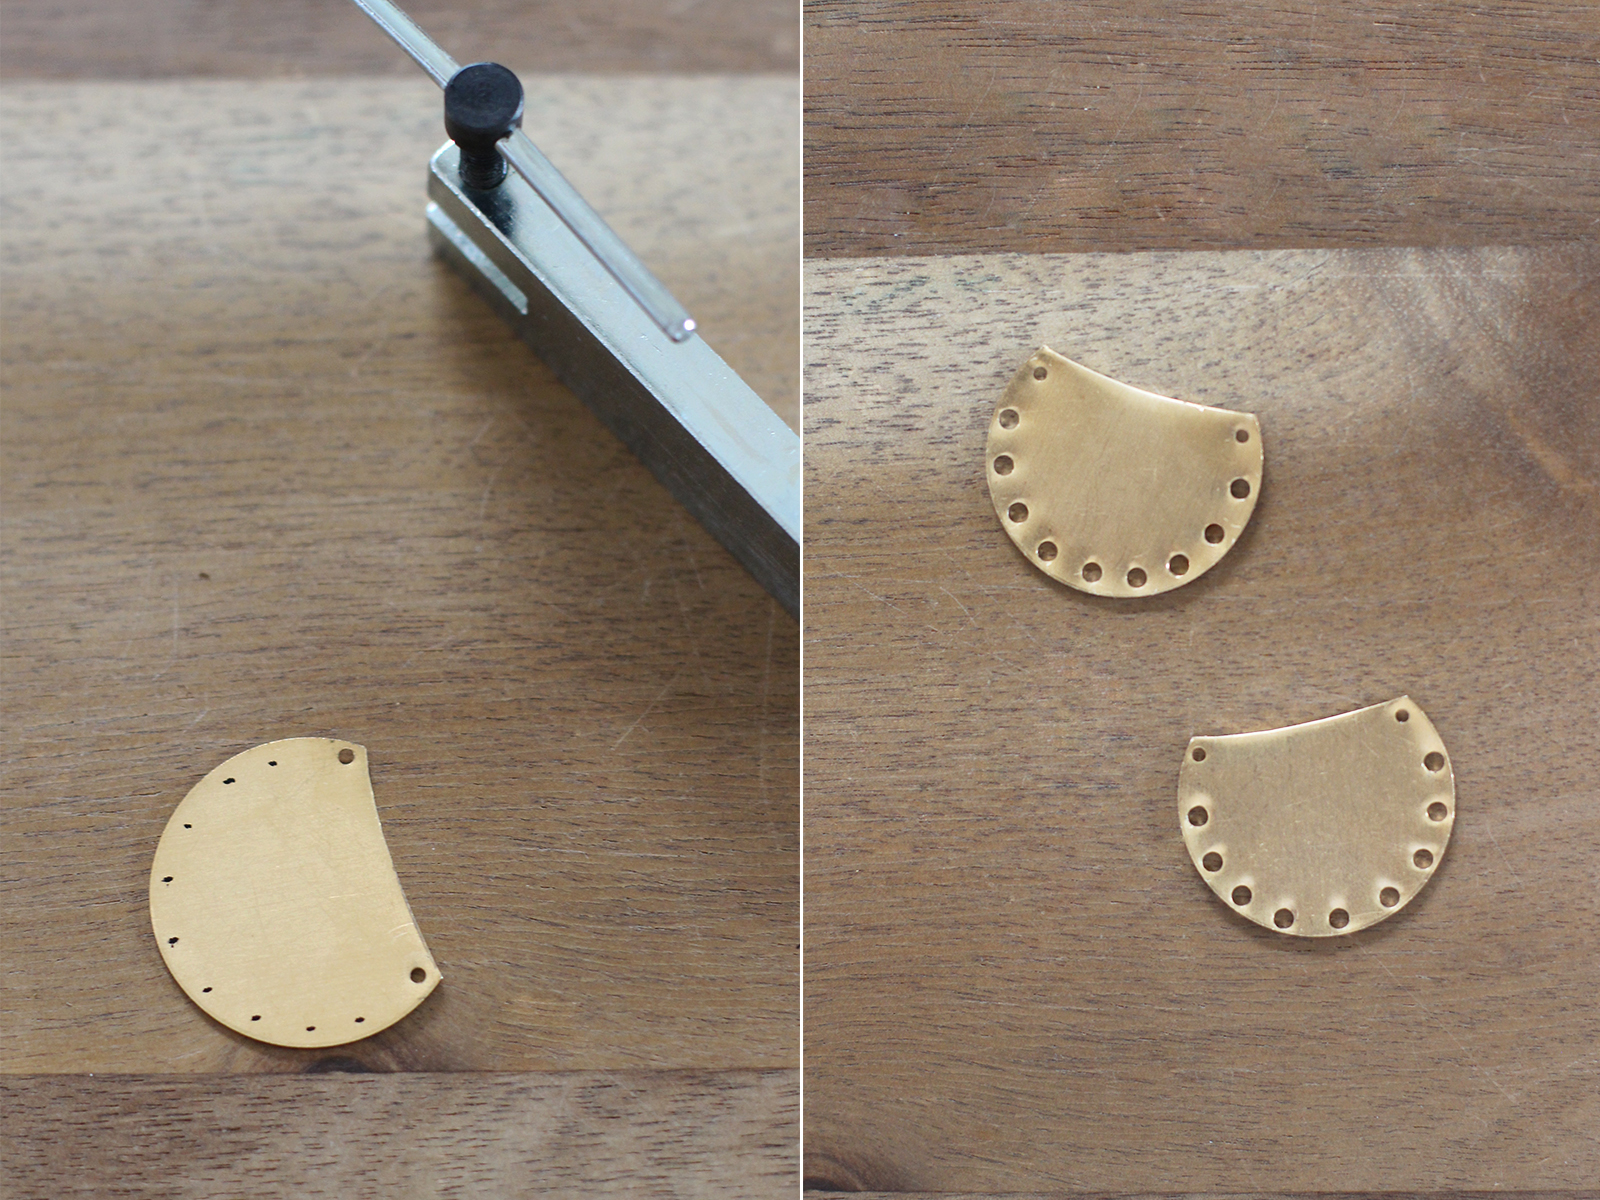
Now comes the best part. I am so happy to have recently discovered this super convenient hole punch. It’s far easier to use than a Dremel, which is normally my tool of choice when drilling holes through metal. All you need to do is slide your disc through one side of the punch (one is a small hole, the other is a medium sized hole), turn the screw until you hear the metal being punctured. Unscrew and voila, that’s it!
I recommend punching two small holes at the very top, where the earring will eventually be attached, and punching large hole around the disc, where the fringe will be attached.
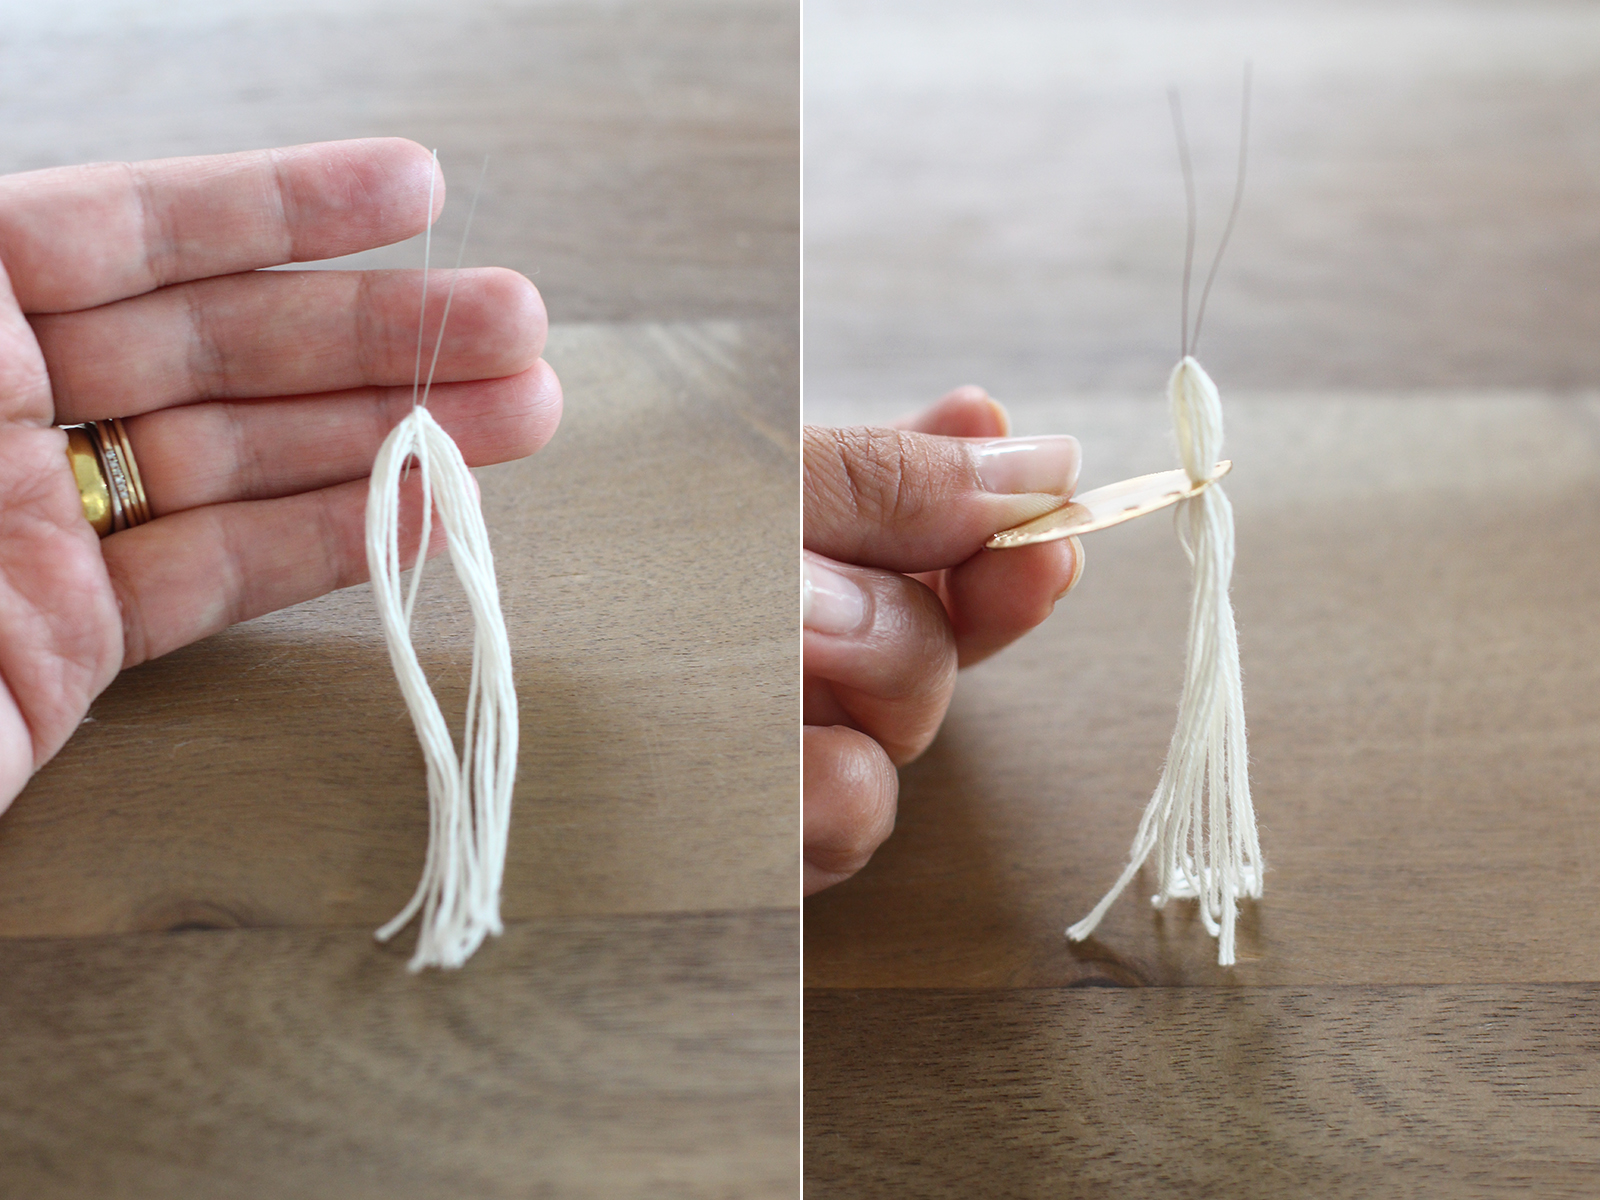
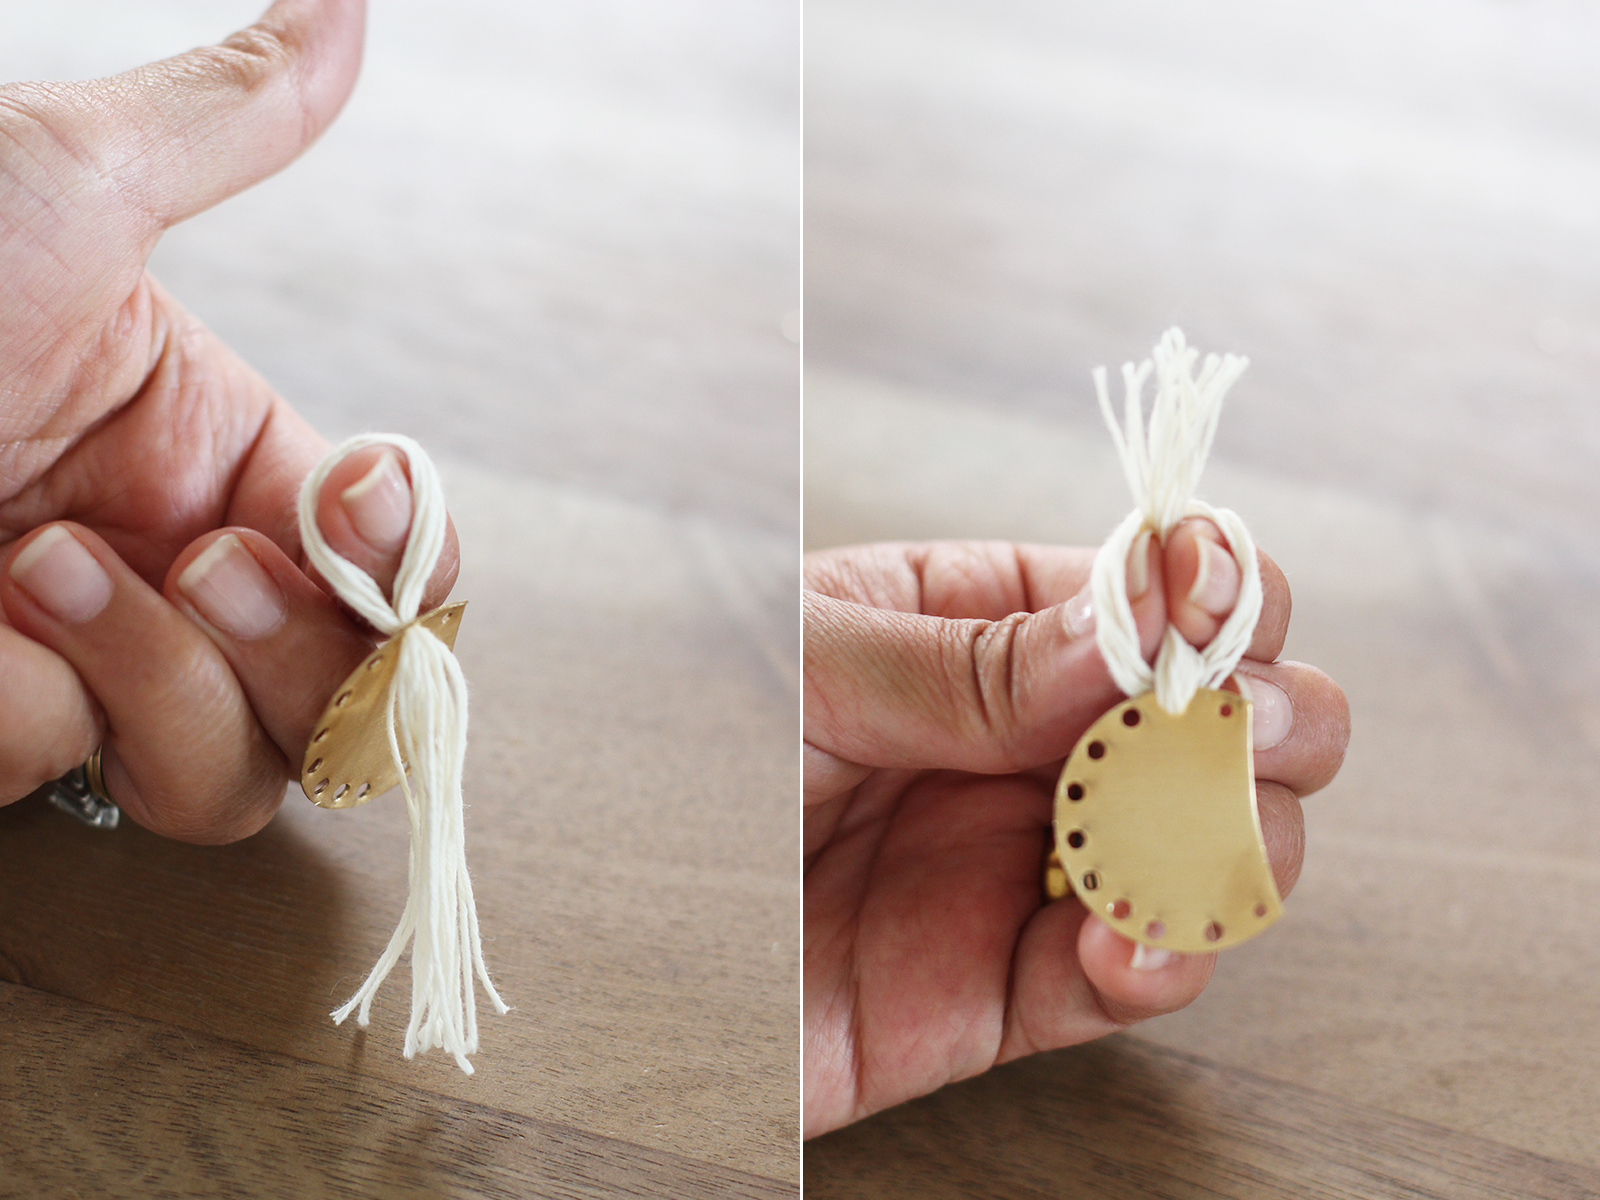
You’ll need a threading needle to fit the thread through each hole. Snip the closed tip off the end of a big threading needle so it opens into a V. Take 5-7 strands of floss or thread, fold them in half over the threading needle and pull it up through the bottom of the disc.
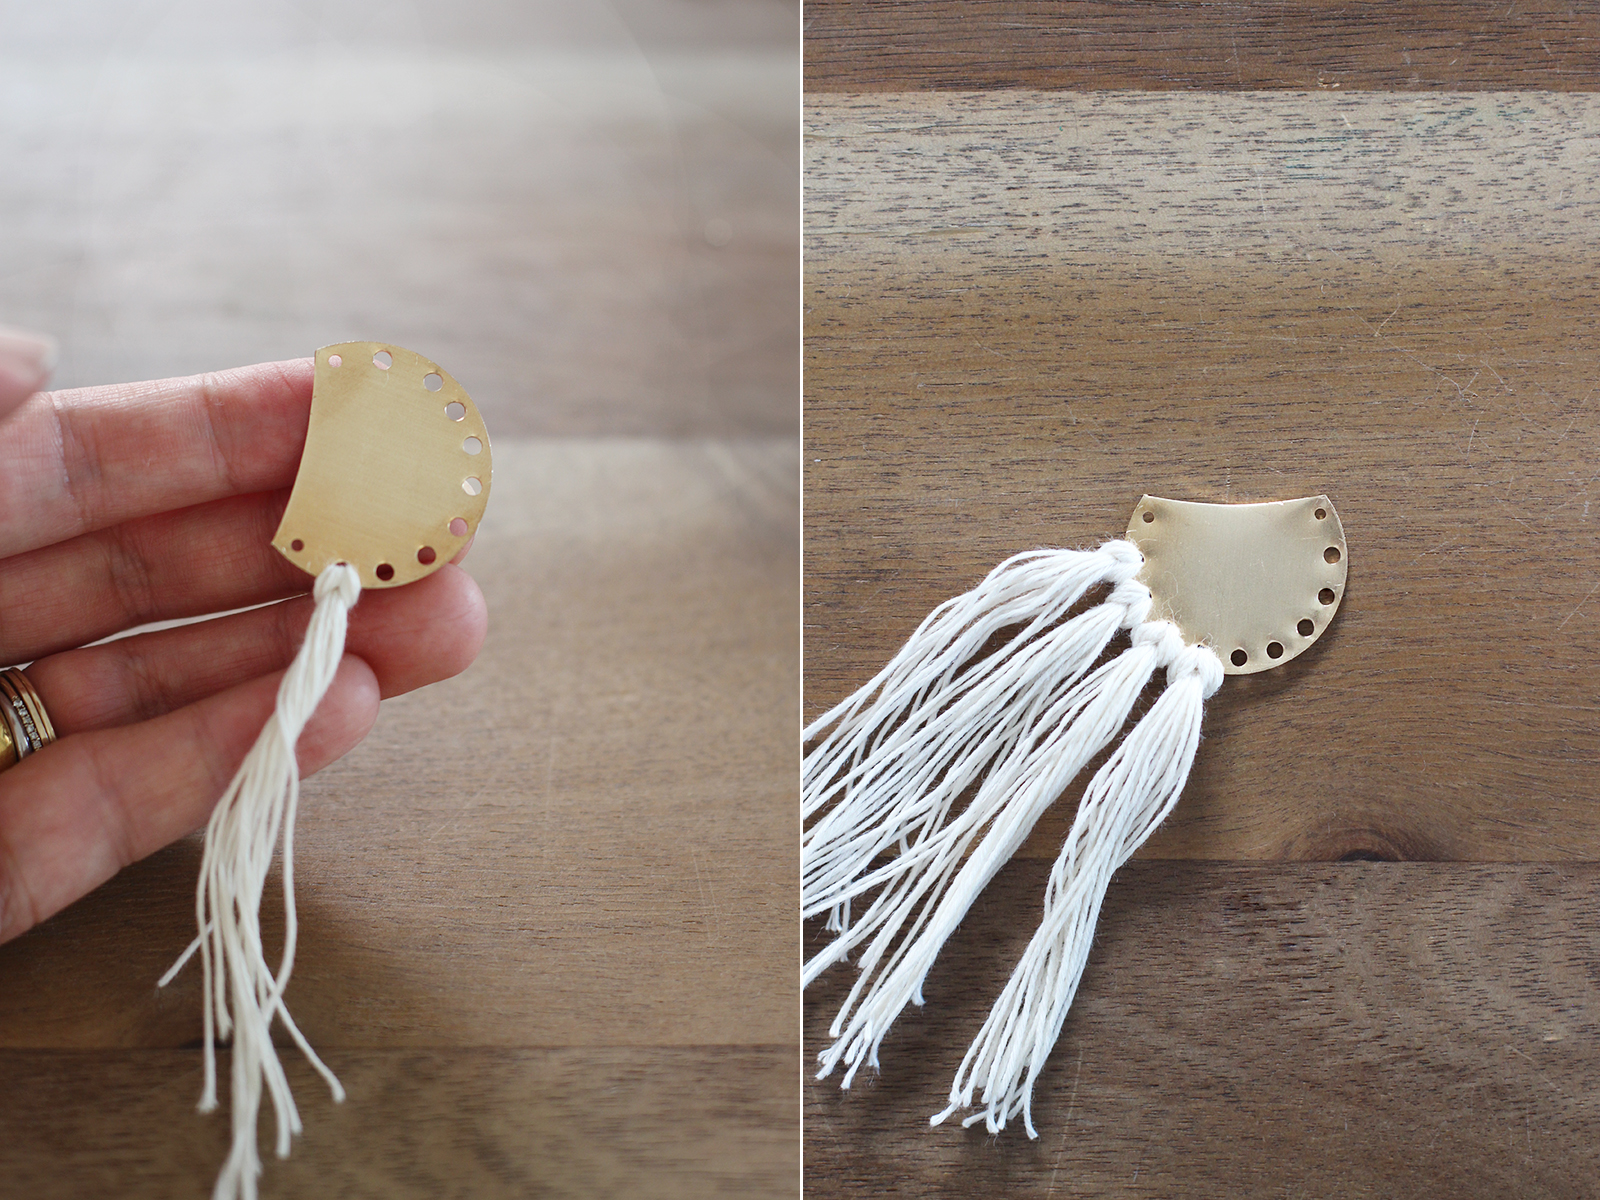
Remove the threading needle, pull the loop up there’s enough room to grasp the bottom of the threads. Pull them through the loop and pull tight.
Continue adding sections of fringe.
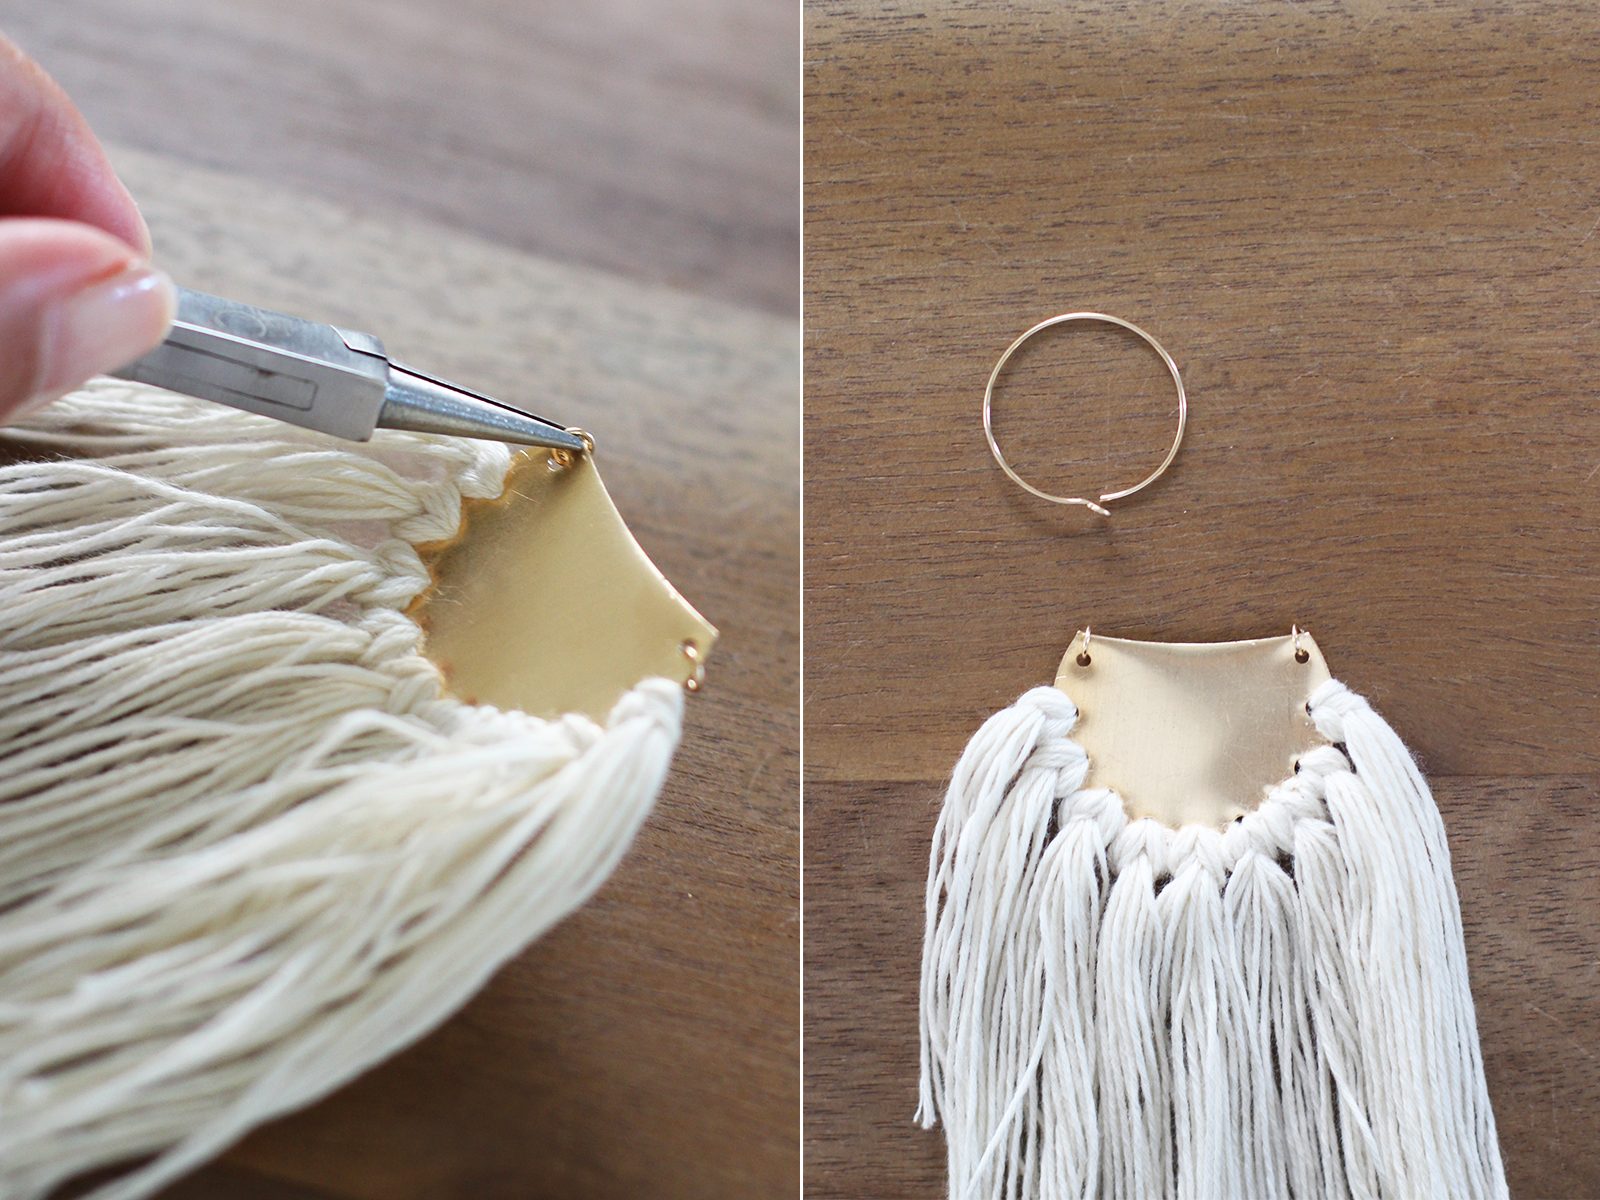
Once all the fringe has been added, just 2 jump rings to the top of each disc with flat nosed piers. Now the hoop earrings will be attached.
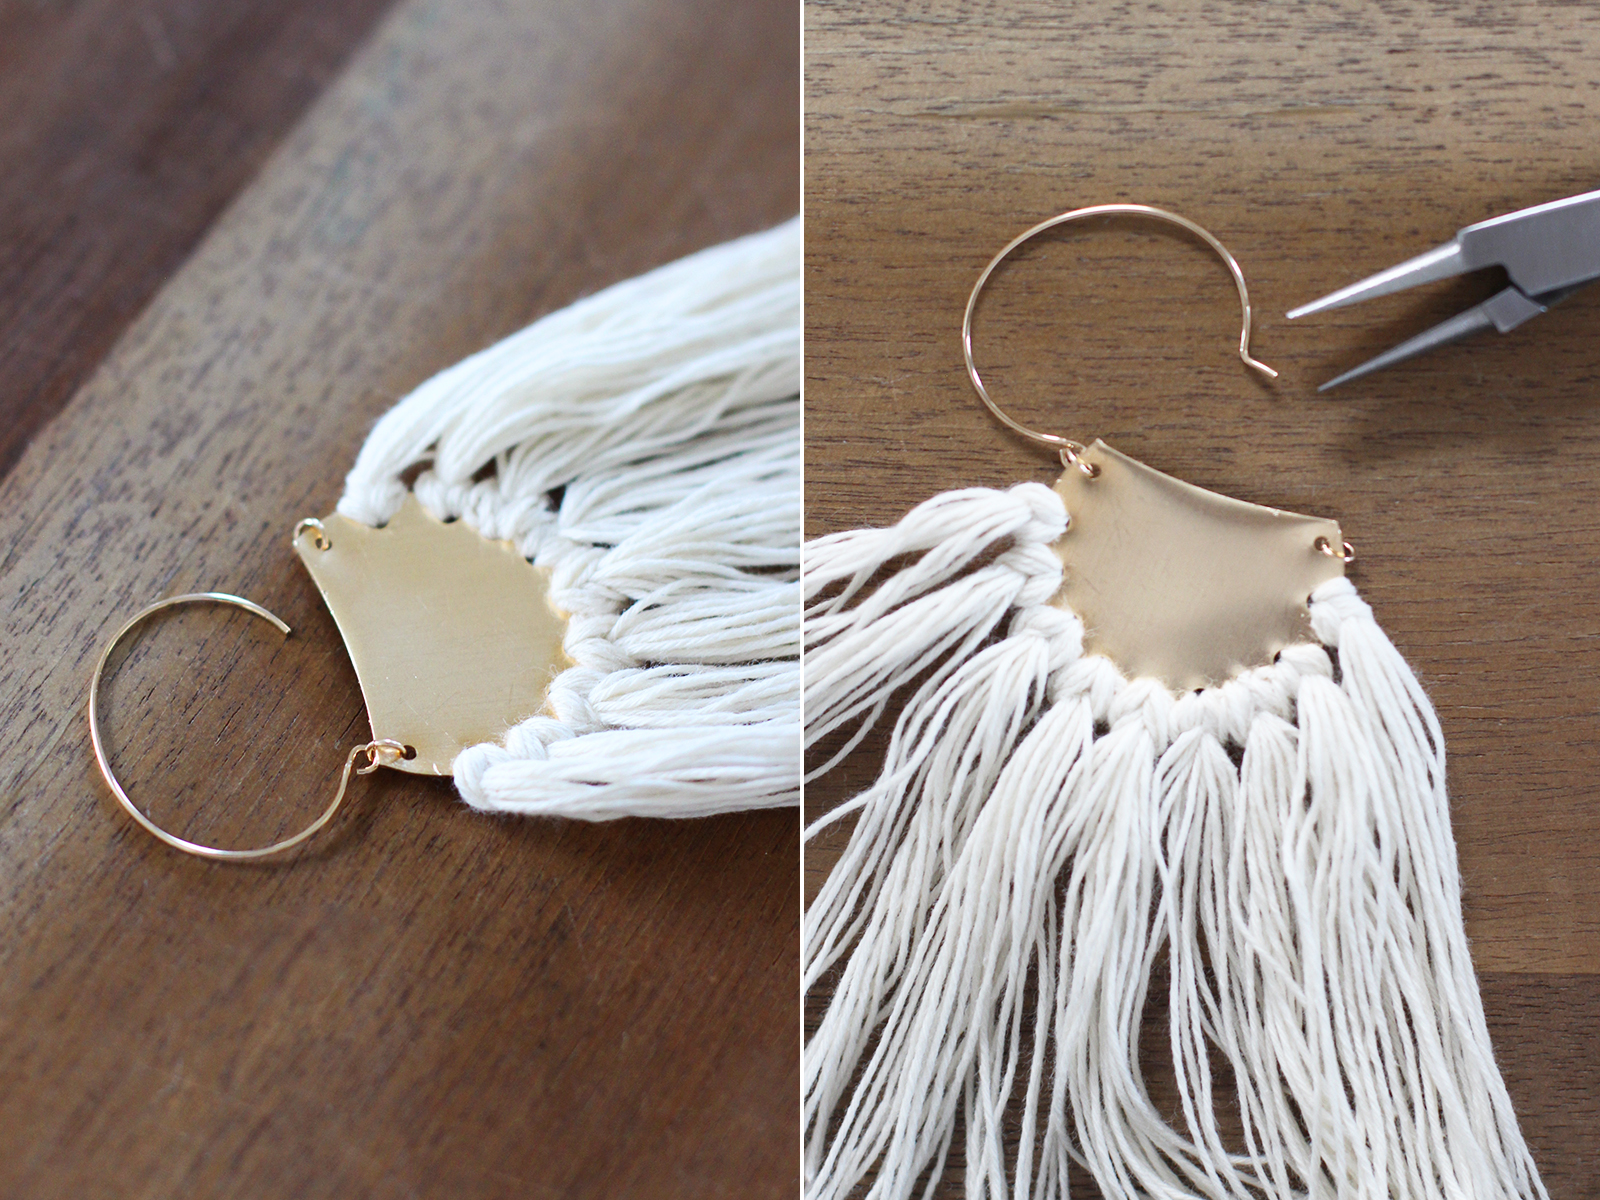
Use the pliers to rotate the loop on the earring 90° and attach it to a jump ring. Slightly bend the other side of the hoop with pliers so they lock inside the opposite jump ring.
Trim the fringe and that’s all folks!
(images by HonestlyWTF & Ashley Batz)
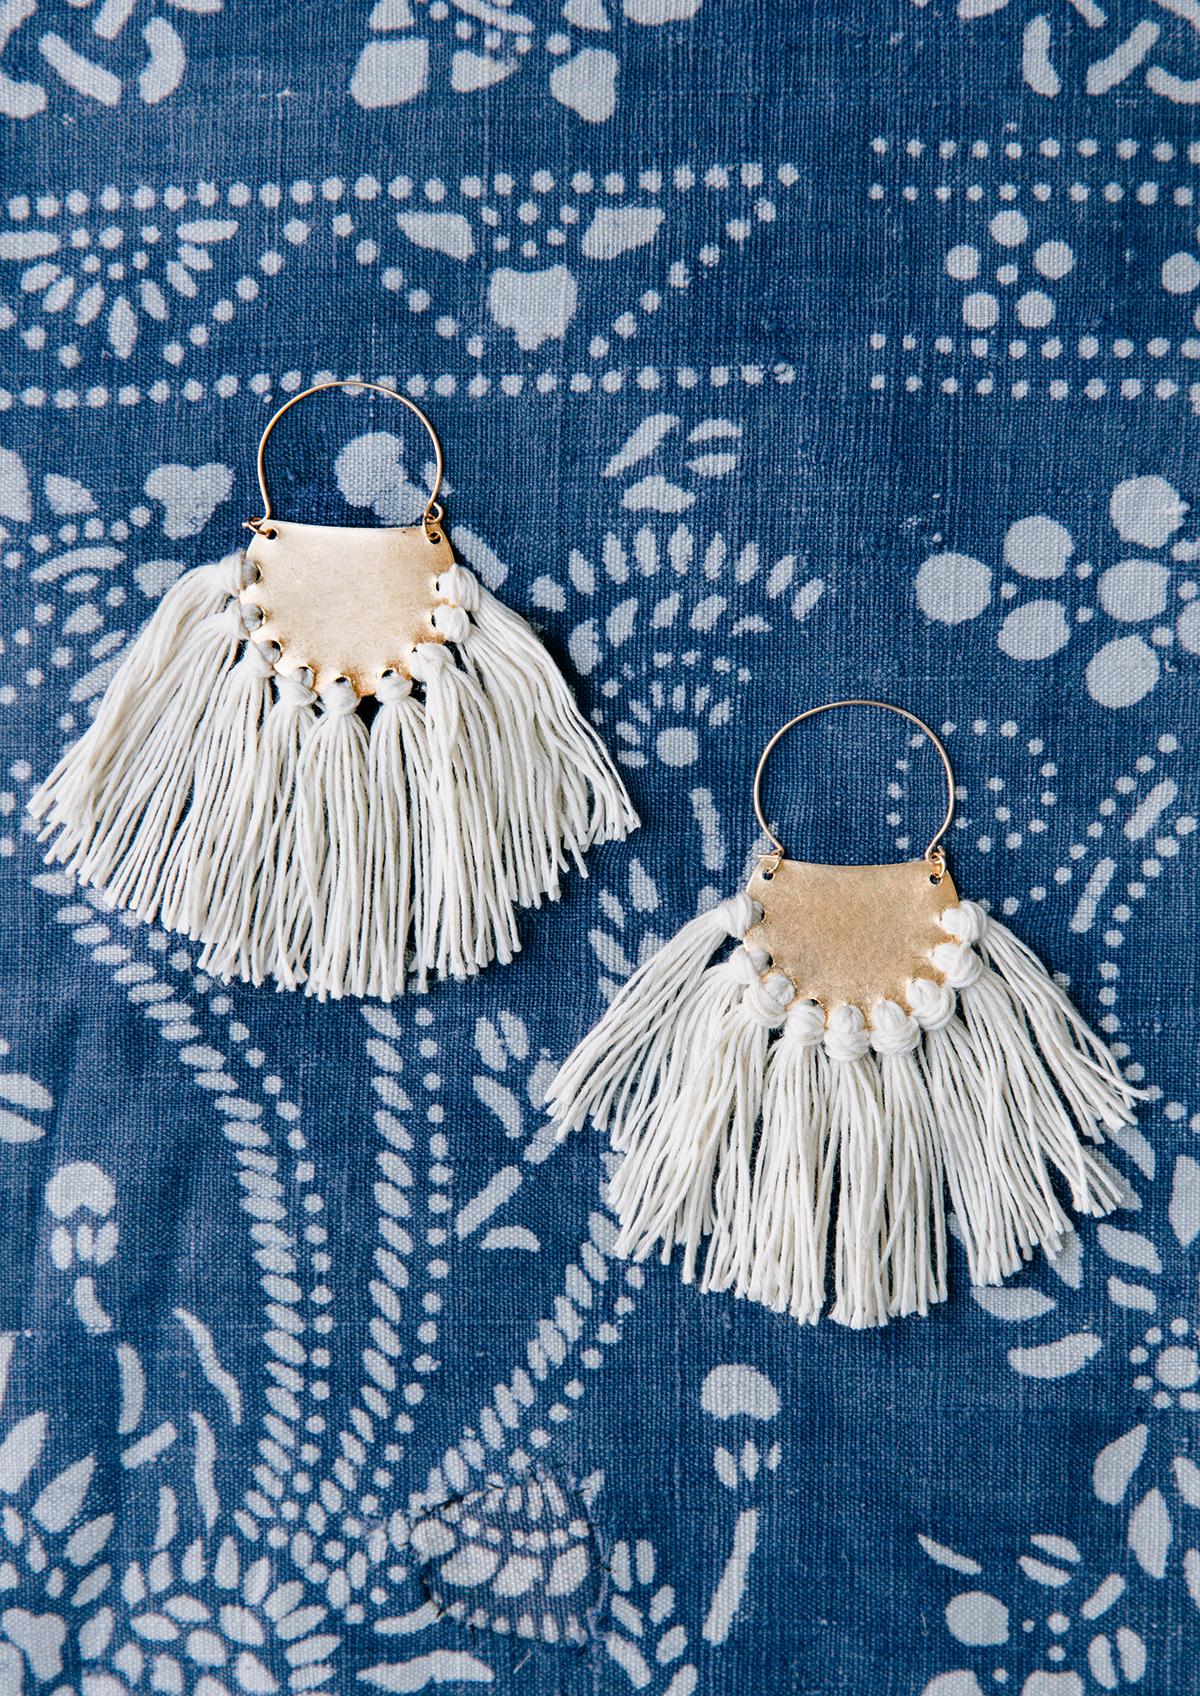
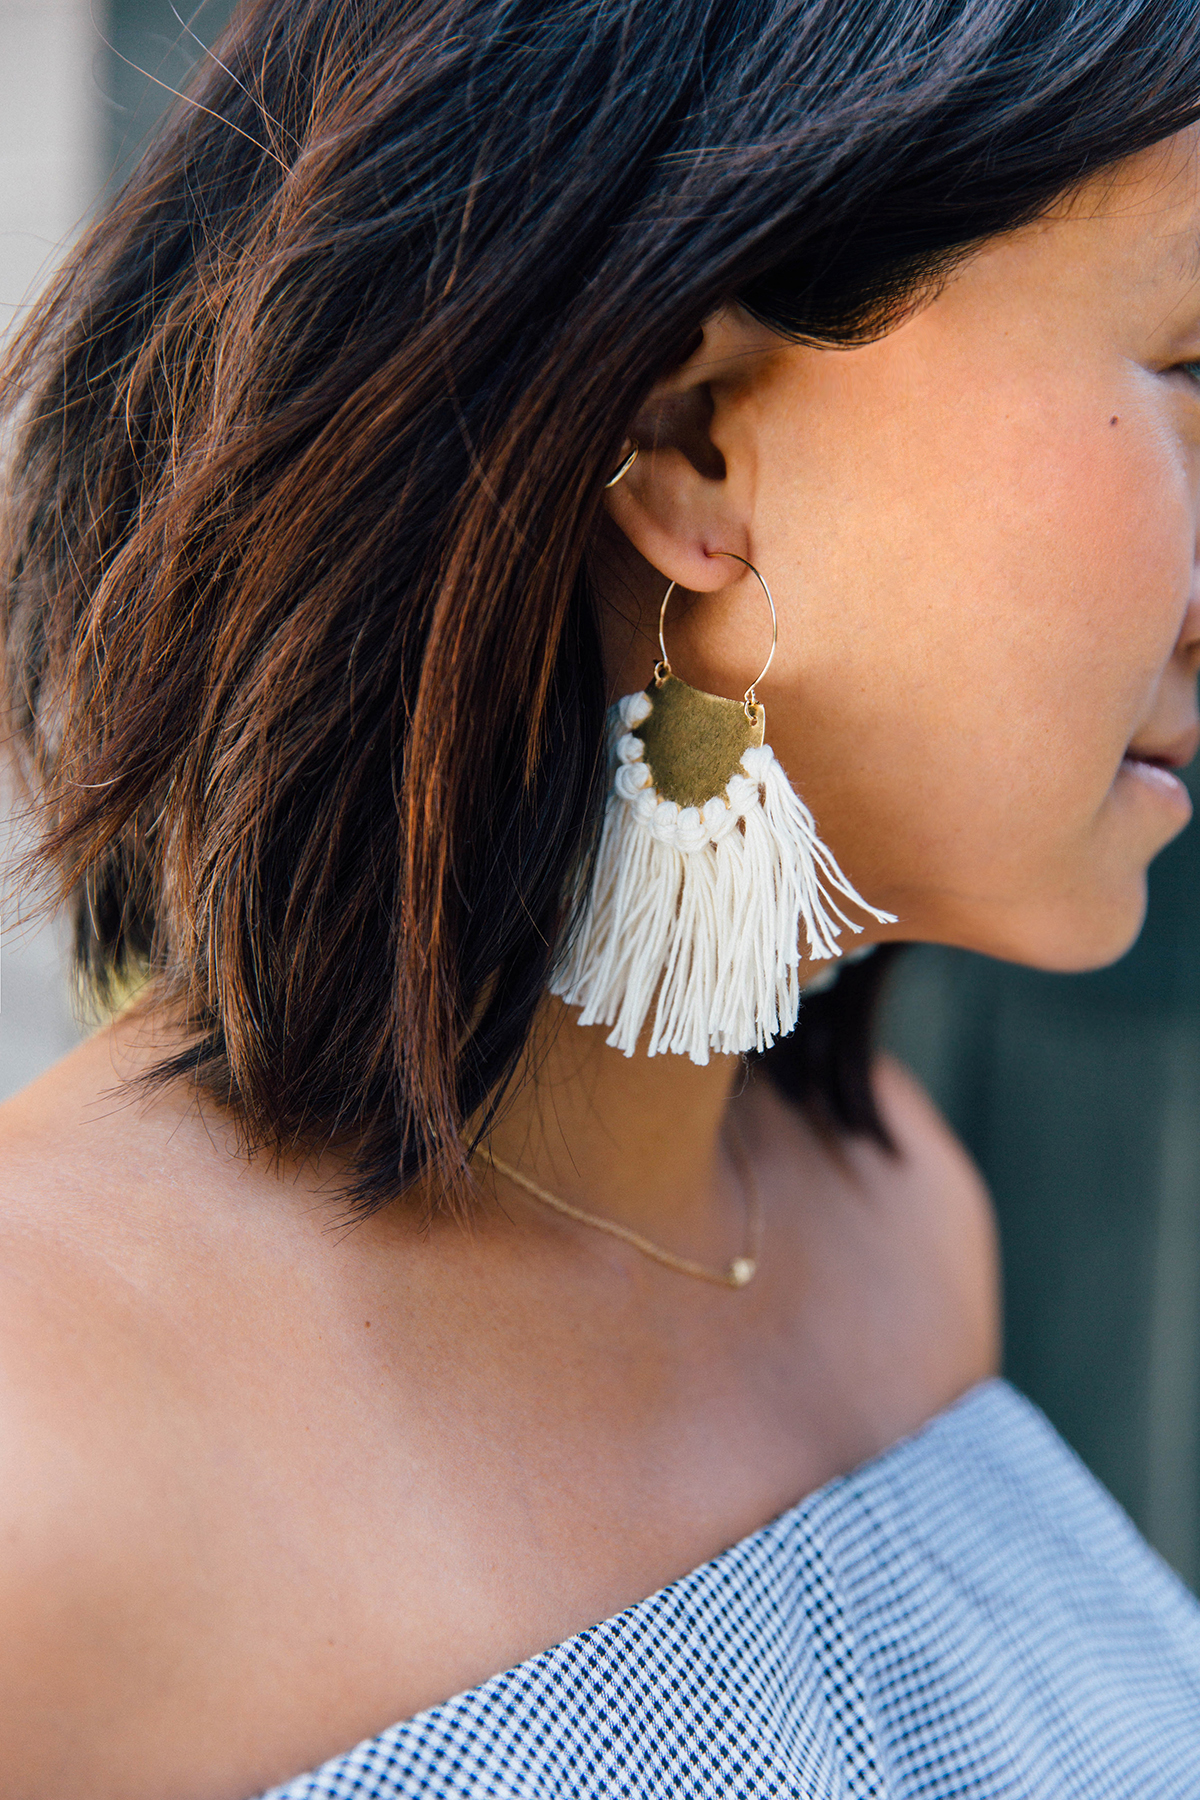


The fringe earrings look so cute!
xx Mira
http://www.glamdevils.com
love it ! Thanks for sharing this DIY post
https://instagram.com/marble_is_the_new_black/
Nica
what a cool idea. it looks super duper pretty
http://www.thefashionfraction.com
I am not very good with DIY but these fringe earrings are definitely so chic! Thanks for sharing!
Prudence
http://www.prudencepetitestyle.com
I would buy it since I am not great with DIY!
http://www.distinguisheddiva.com/2015/08/seventies-polka-dots-mini-dress.html
love love love yours – it was so much fun spending time with you! xo
so clever, they look great!
http://www.wethinkthereforewecreate.blogspot.com
LOVE this DIY. Both The Stripe and Honestly WTF are 2 of my favourite DIY blogs, so happy to see another DIY from you! 🙂 The tools seem a bit complicated in this project though… I wonder if there’s a way of hacking it and not using anything beyond regular plies/ scissors/ glue. Will have a think for my DIY blog hapinesswherever.wordpress.com 🙂
brilliant!
https://carbonconcept.blogspot.com
Always great idea to make something with your own design…….
xoxo
Yael Guetta
http://www.ftwwl.com
love this idea!
http://www.bluelabelsboutique.com
These are pretty damn amazing. I’m not a DIYer at all (I definitely admire a good DIY). I actually want to try this one. Fingers crossed and hoping I can pull it off.
Well done! Love the shape of it.
http://www.dnatheshop.com
http://www.designers-artists.com
Pretty and so different!
https://www.etsy.com/shop/EarthChildArt?ref=hdr_shop_menu
Loving your DIYs (a bigger appreciation for them ever since I started learning how to DIY a few items ;)) xx
I am so gonna try this 🙂
x https://ahsknaka.wordpress.com/
very very nice!!! wow!
these are fab, they do not look like DIY at all! I need to get a metal hole punch to try them
Lauren
livinginaboxx | bloglovin
ORIGINAL GONNA TRY THANK YOU FOR SHARING.
HELLO THERE,
WHY?
THANKS FOR AT LEAST GIVING ME CREDIT FOR MY DESIGNS….
HOWEVER, IT HURTS EVERY TIME I SEE MY WORK TREATED AS A CRAFT PROJECT.
ANYONE WHO IS FAMILIAR WITH MY WORK KNOWS THE ACCURACY AND PRECISION
THAT GOES INTO EVERY PIECE. THESE DIY INTERPRETATIONS ARE HIDEOUS…
I READ THE COMMENTS FROM EVERYONE. THANKS FOR APPRECIATING MY DESIGNS ENOUGH TO WANT TO TRY THIS “DIY PROJECT”. IF YOU WOULD LIKE AN ORIGINAL PAIR MADE BY THE CREATOR OF THESE EARRINGS THEN PLEASE DROP ME A LINE AT hazelcoxaccessories@hotmail.com
I CAN GUARANTEE THAT THE QUALITY OF MY WORK IS OUTSTANDING, REFINED AND ELEGANT.
THANKS FOR READING MY COMMENT.
HAZEL COX
HAZEL COX
Wow! Definitely have to try this one out. Thanks for sharing x
Wow! Definitely have to try this one out. Thanks for sharing x
http://demitra.com.au/
Hi there Just wondering where you bought your hole punch for your DIY tassel earrings ? x
They earrings are adorable! Will definitely be making a pair, thanks for the tutorial!!
-Jenny
http://sweetteal.com
http://xnxxkk.net
Very nice !
http://www.londonwindows.co.uk/