My dear friend Ariel, of Ariel Gordon Jewelry, and I have always shared a love for the ocean. Driven by our passion for the sea and a mutual enthusiasm for accessorizing and crafting, we naturally decided to create a DIY kit inspired by the vibrant and colorful nautical ropes that had always fascinated us. These ropes, with their endless possibilities, were the perfect inspiration for our second collection of DIY kits. We envisioned a series of kits that would allow you to create a variety of accessories, from bracelets and anklets to bag straps and phone lanyards. Ariel and I have experienced so much joy creating these tutorials and kits, we hope you feel the same while experimenting with them!
The second tutorial is how to make a phone lanyard - Ariel's personal favorite! You can make a wristlet or crossbody lanyard - each kit comes with a metal phone attachment insert and an O-ring that allows you to attach your lanyard to just about any phone case. Here, I'll show you how to embellish your wristlet or lanyard with macrame knots and/or barrel knots. Or, you can even embellish your lanyard with a bootlace knot - shown in the subsequent tutorial.
You'll Need:
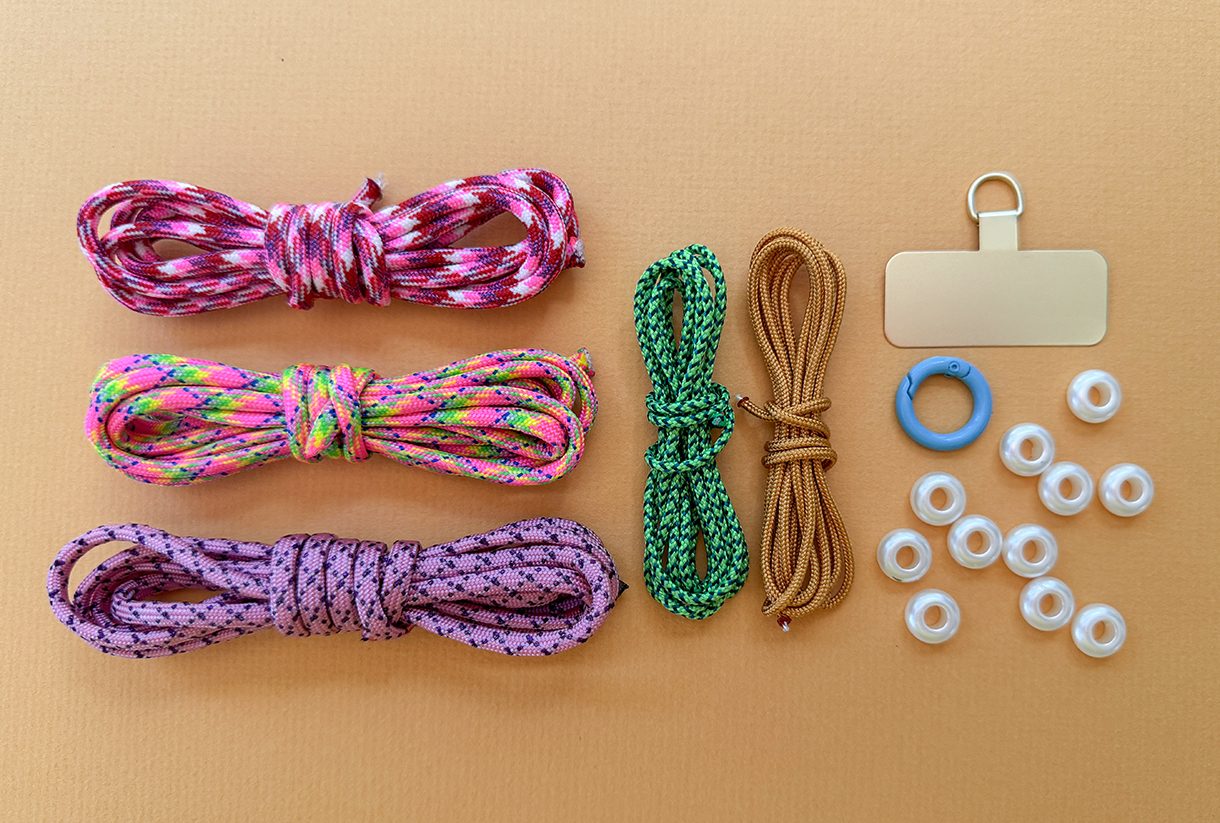
DIY Knotty Rope Kit includes:
- thick rope in 3 colors (5 ft each)
- thin rope in 2 colors (4 ft each)
- large pearl charm
- small pearl charm
- pearl beads
- metal phone insert
- O ring
- lighter
ADDITIONAL SUPPLIES NEEDED:
- scissors
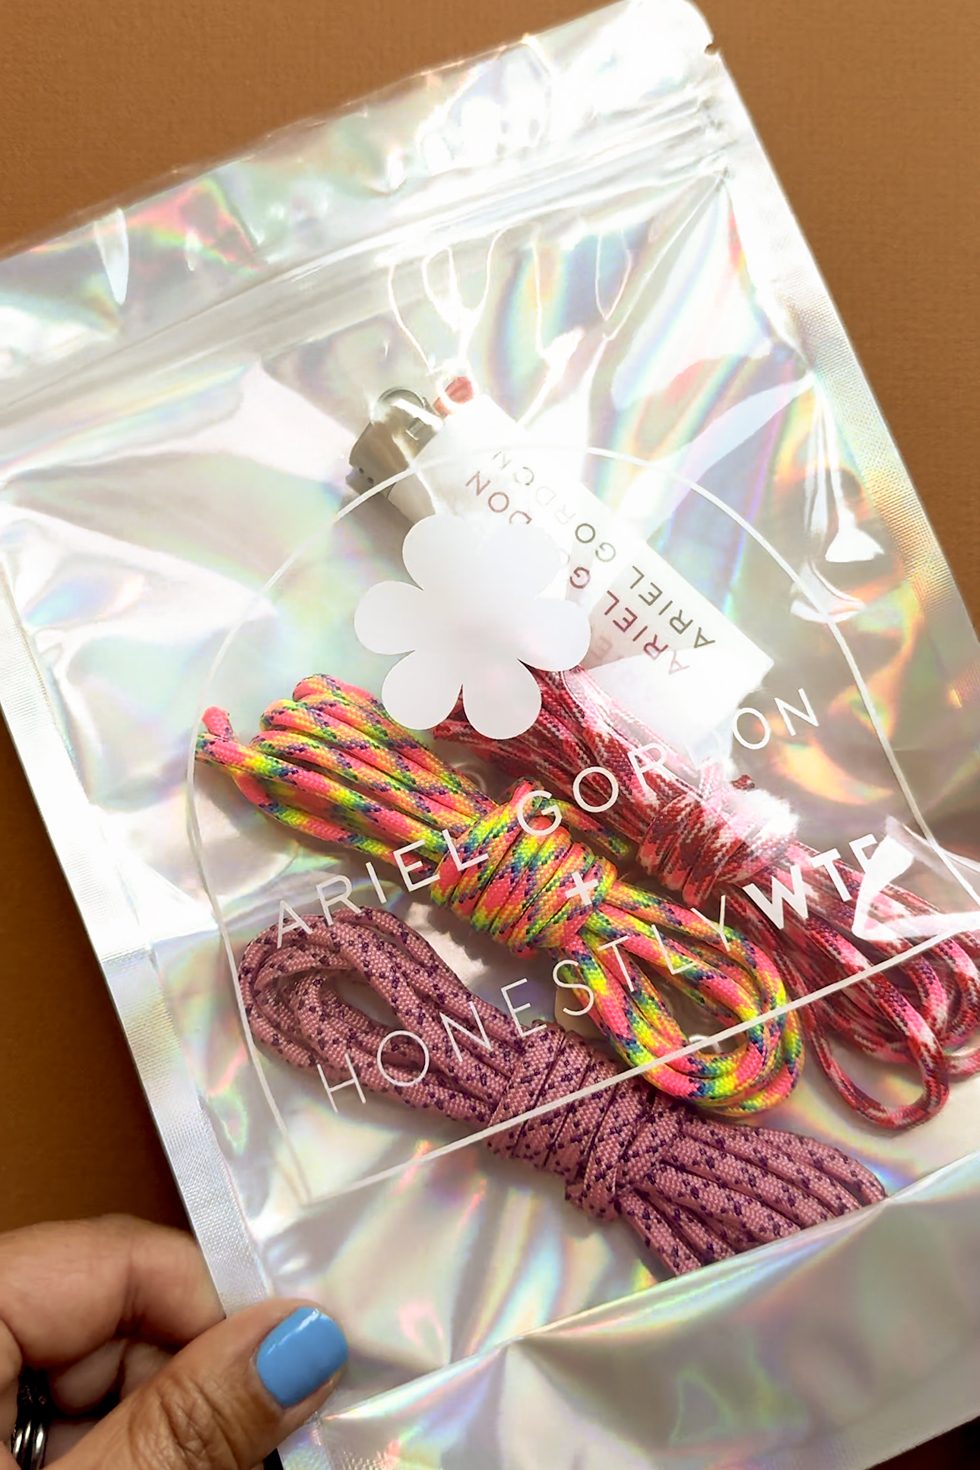
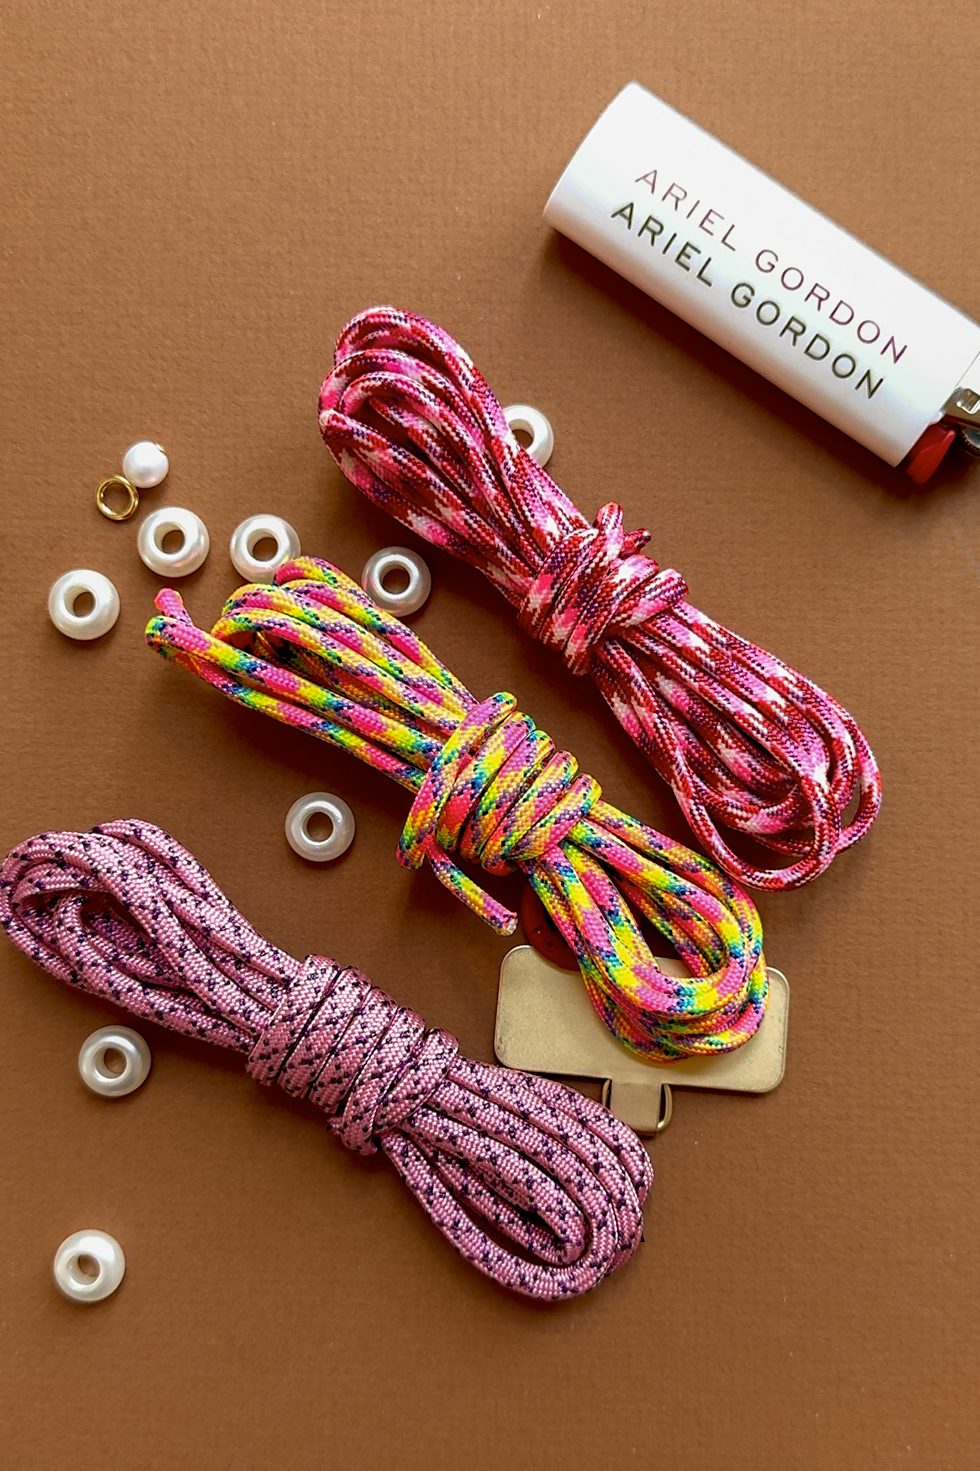
To start, cut the length of the thick rope according to what you would like to make. Approximate measurements are as follows:
- wristlet phone lanyard: 1.5 - 2 feet
- cross-body phone lanyard: 4-5 feet
After cutting, always lightly burn the ends with a lighter. This prevents the inside of the rope from fraying and separating, making it easier to handle.
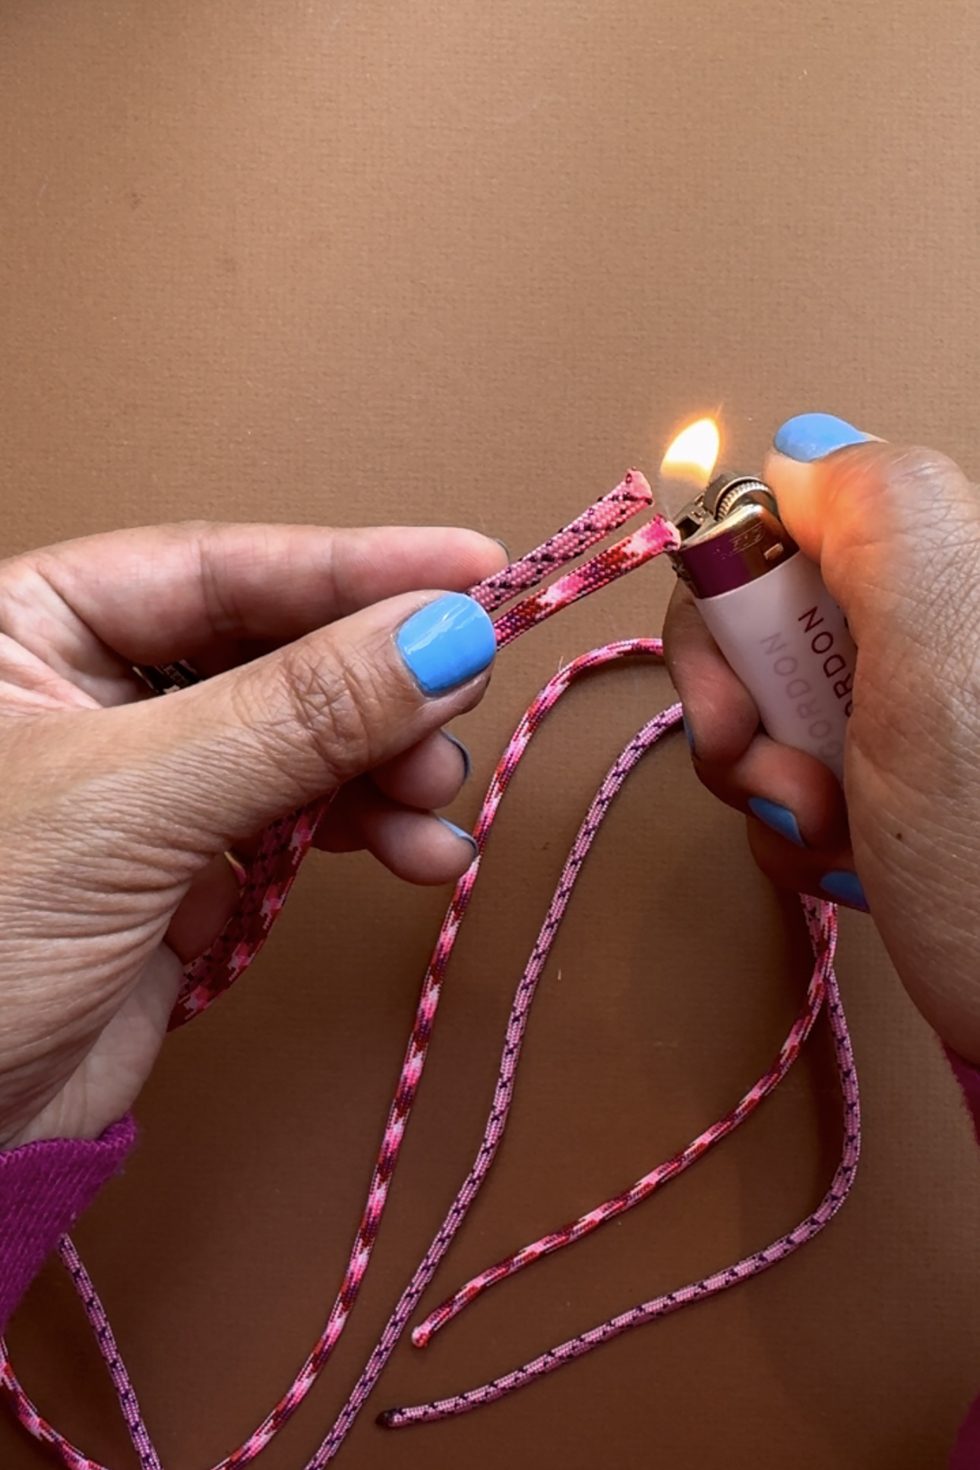
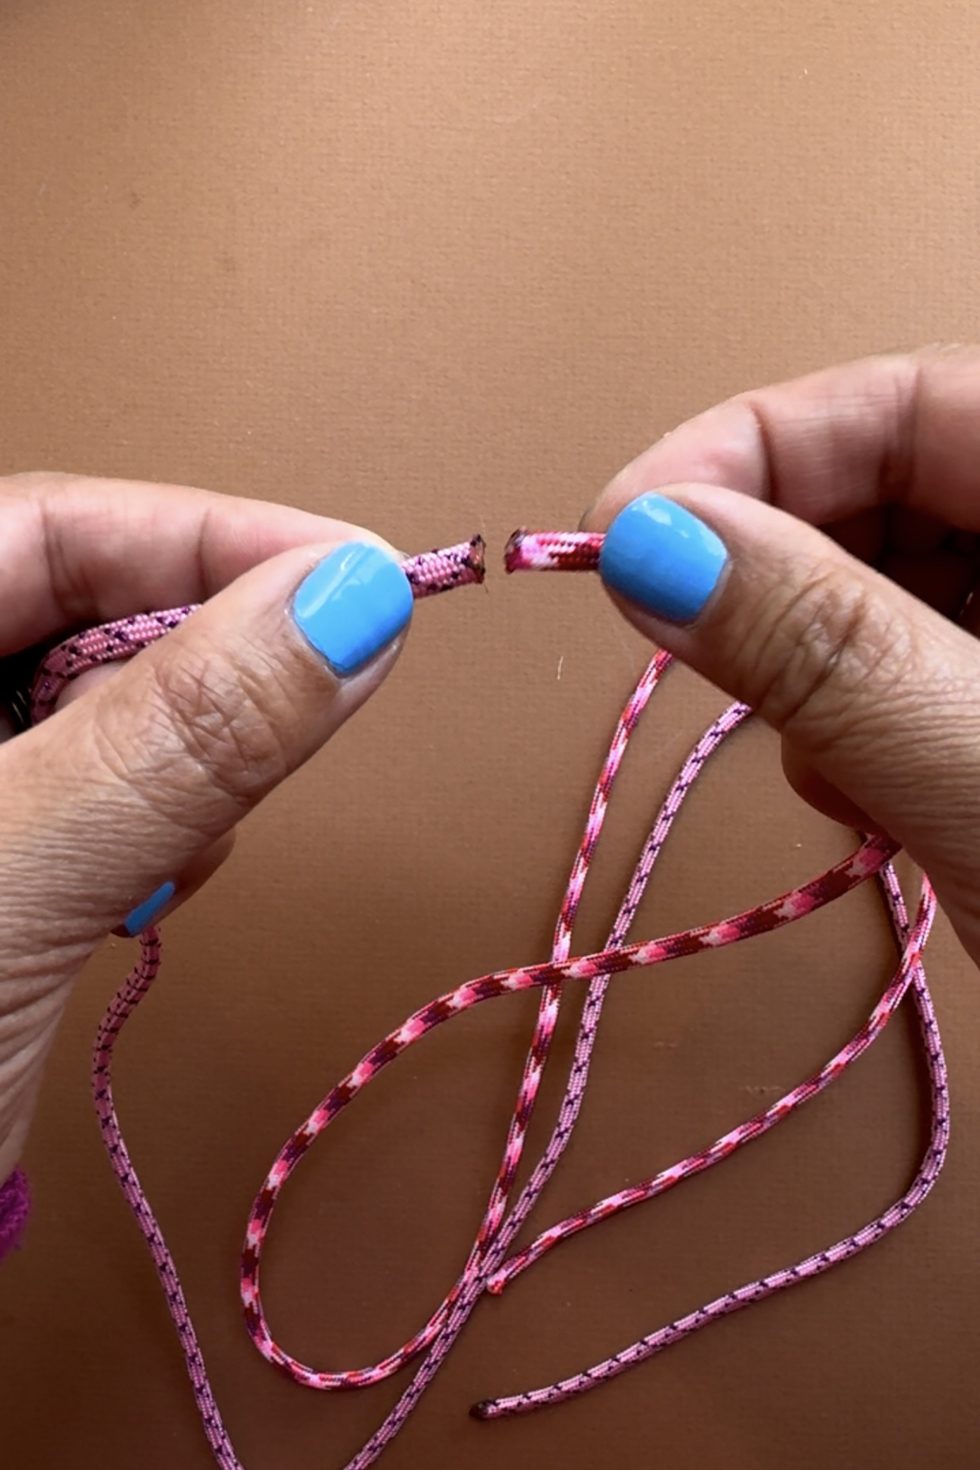
Cut your base rope according to the measurements above. Set that rope aside.
To create a bi-color macrame knot, you can merge two ropes together by burning the ends until they're slightly melted. Quickly connect while they're melted. Here's I'm using about 3.5' of each rope.
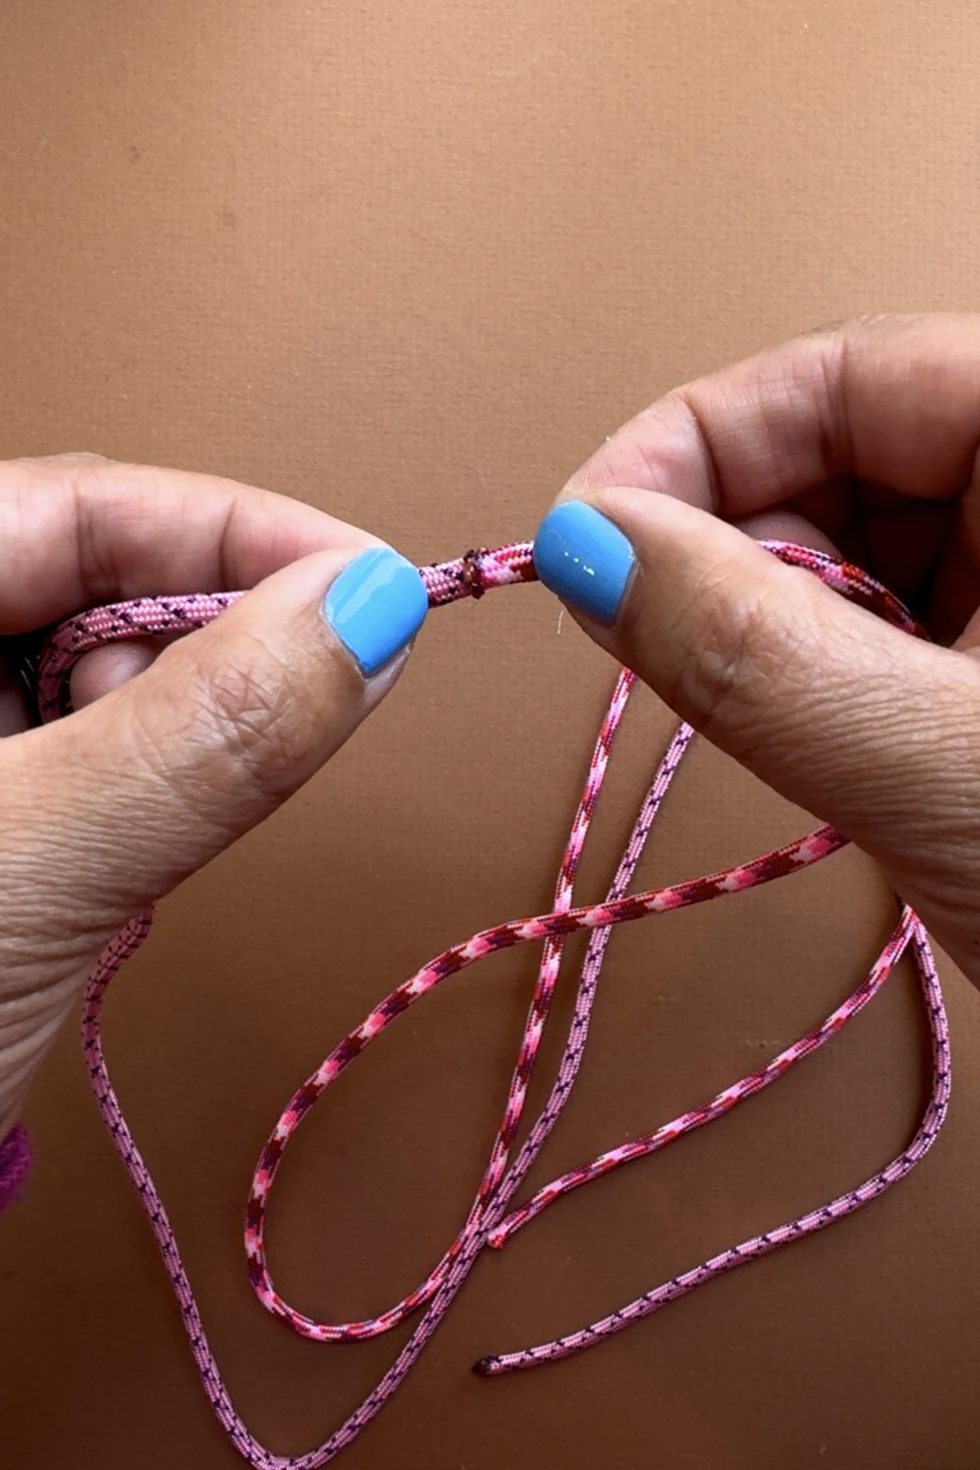
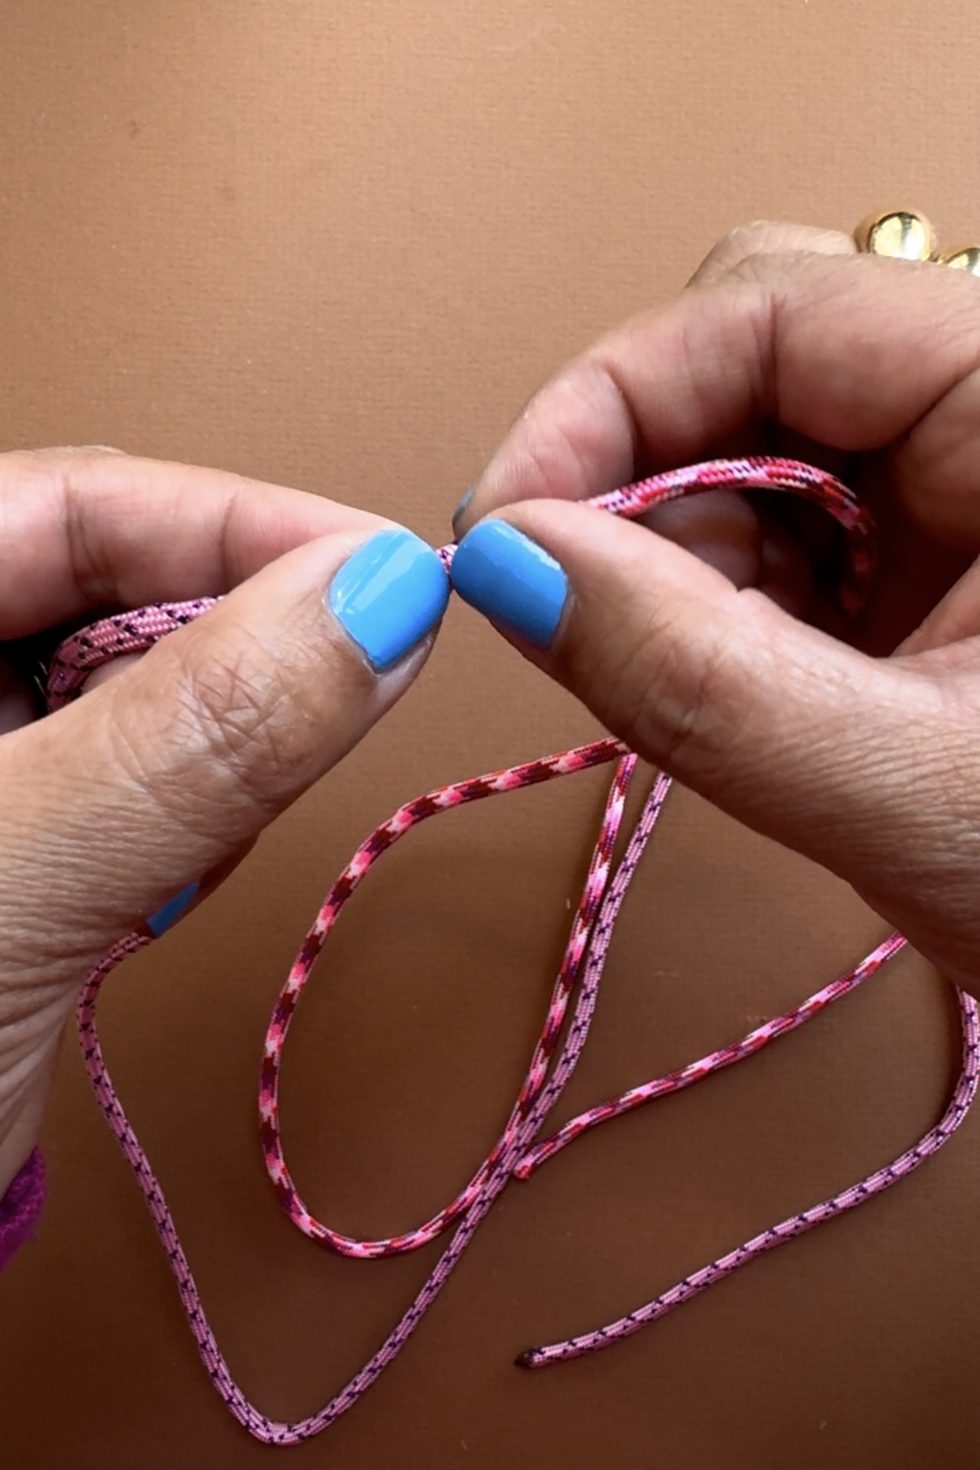
After a couple of seconds, you can use your fingers to press the fused ropes together. Make sure not to burn yourself!
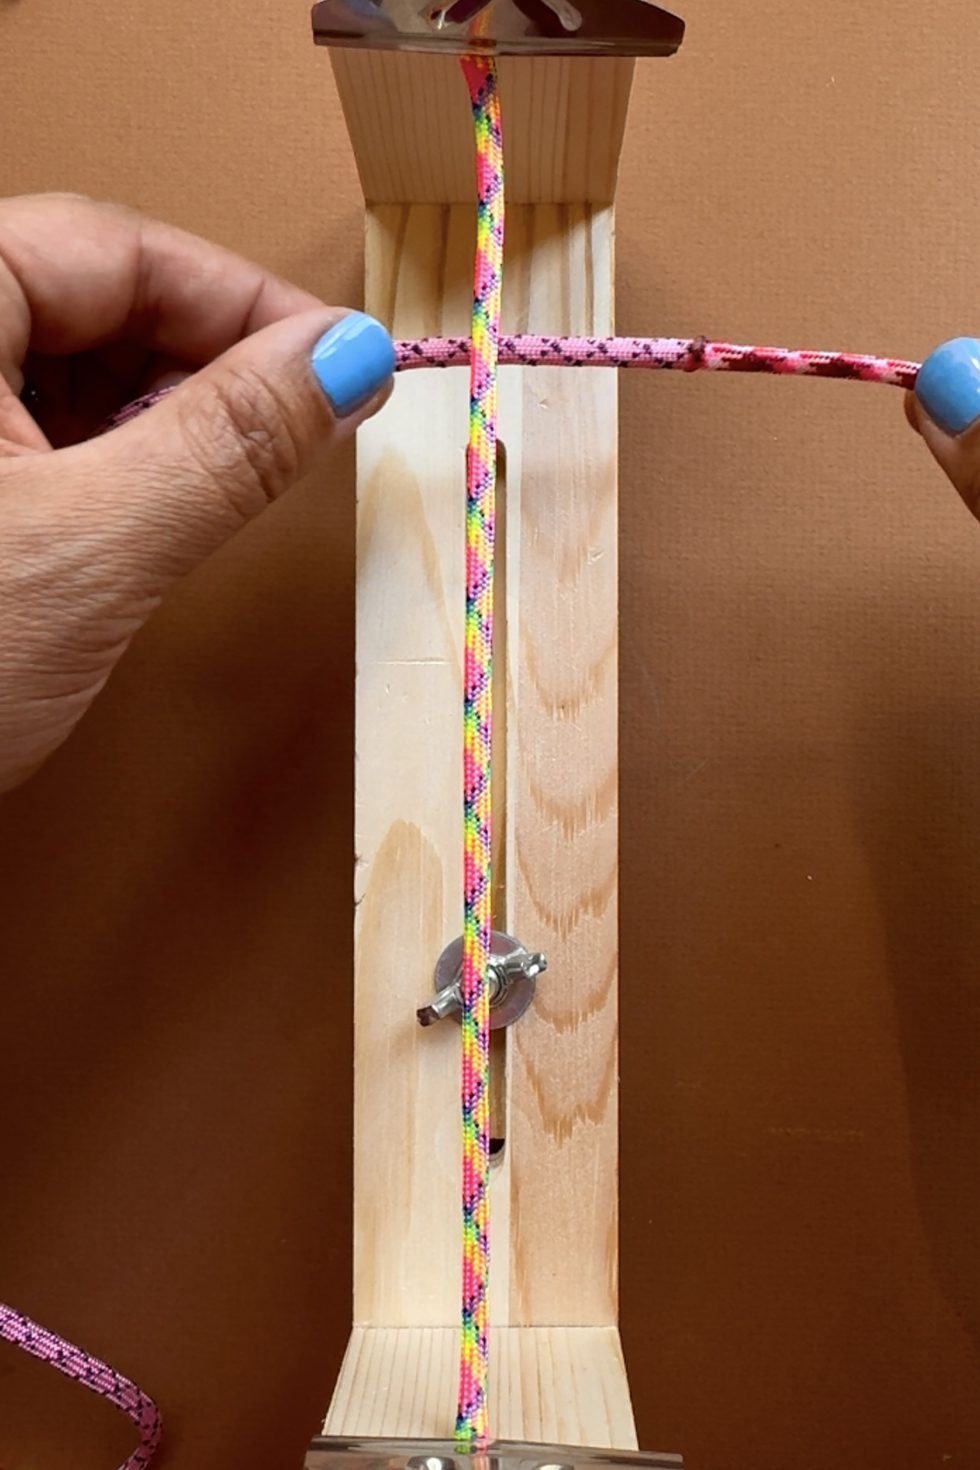
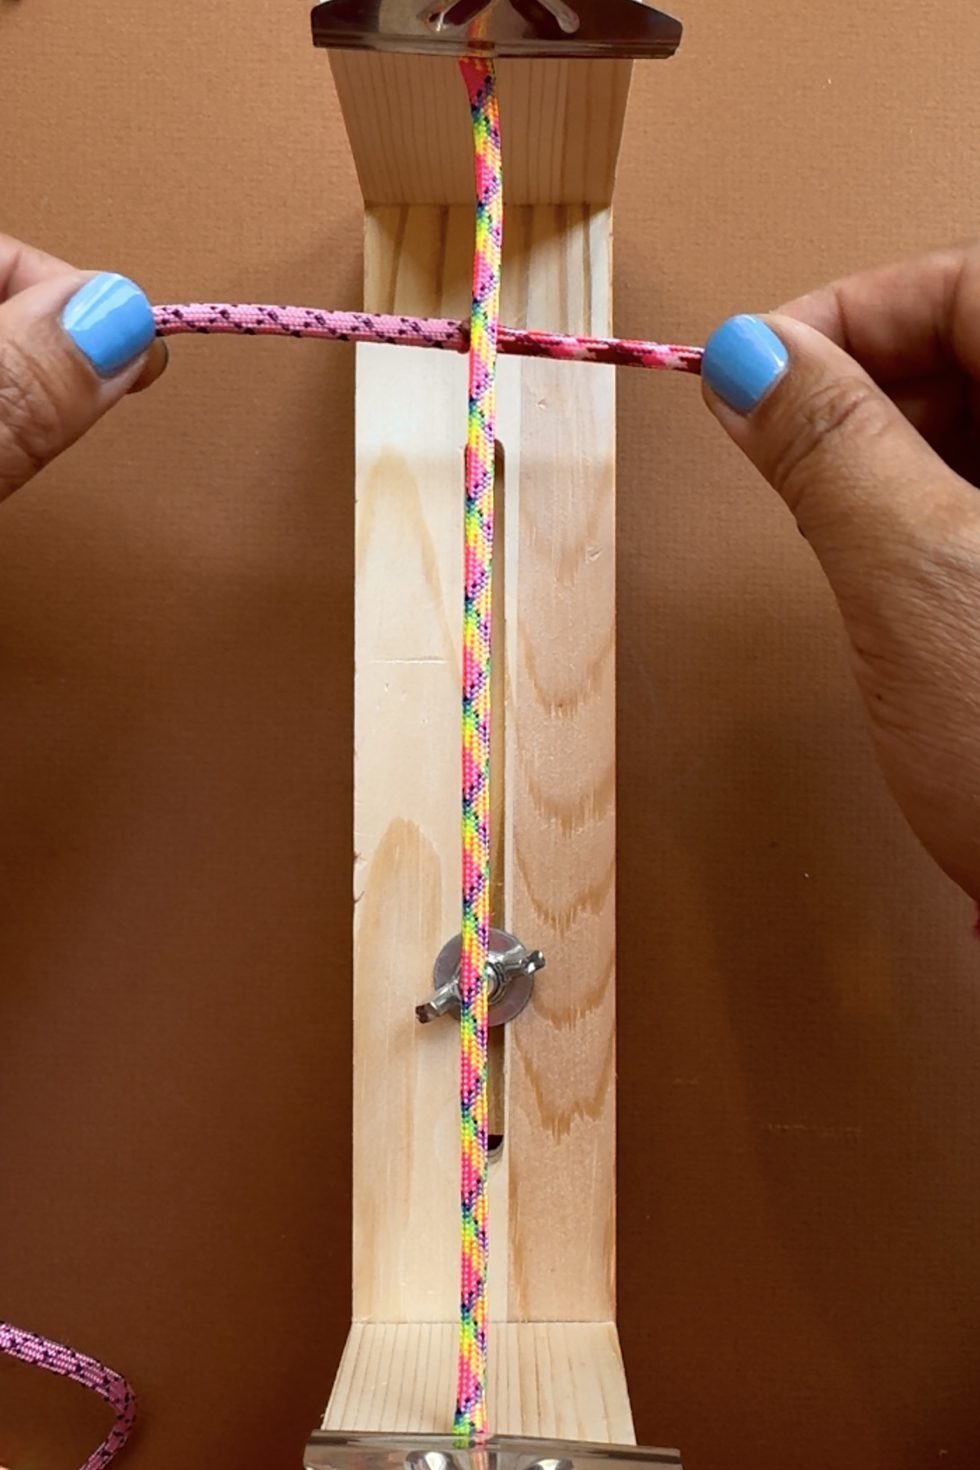
Line the seam under the base rope.
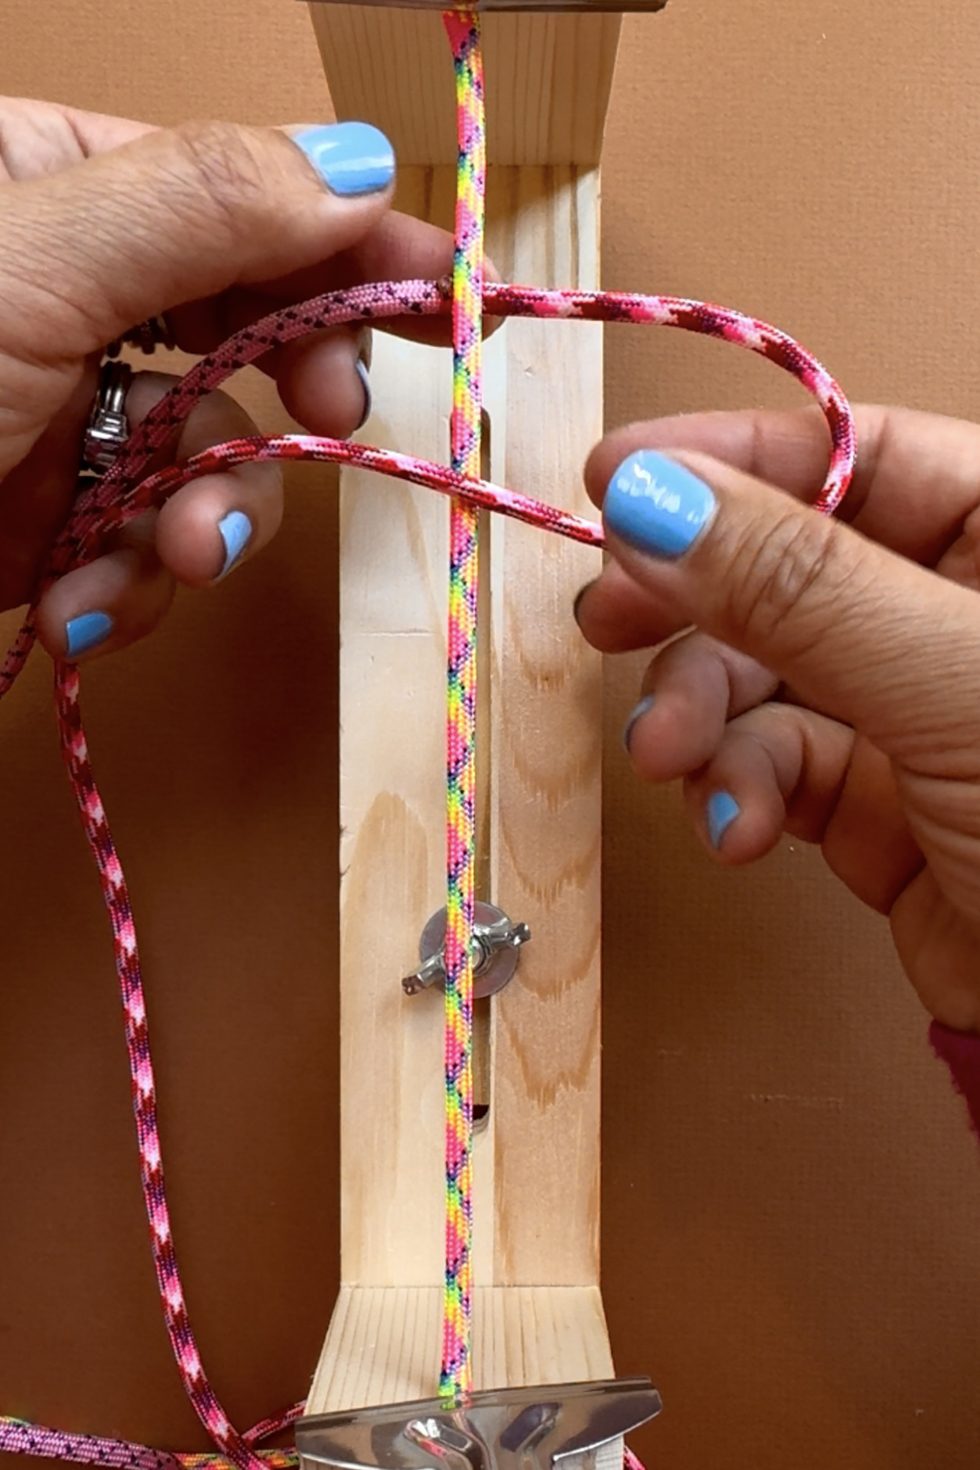
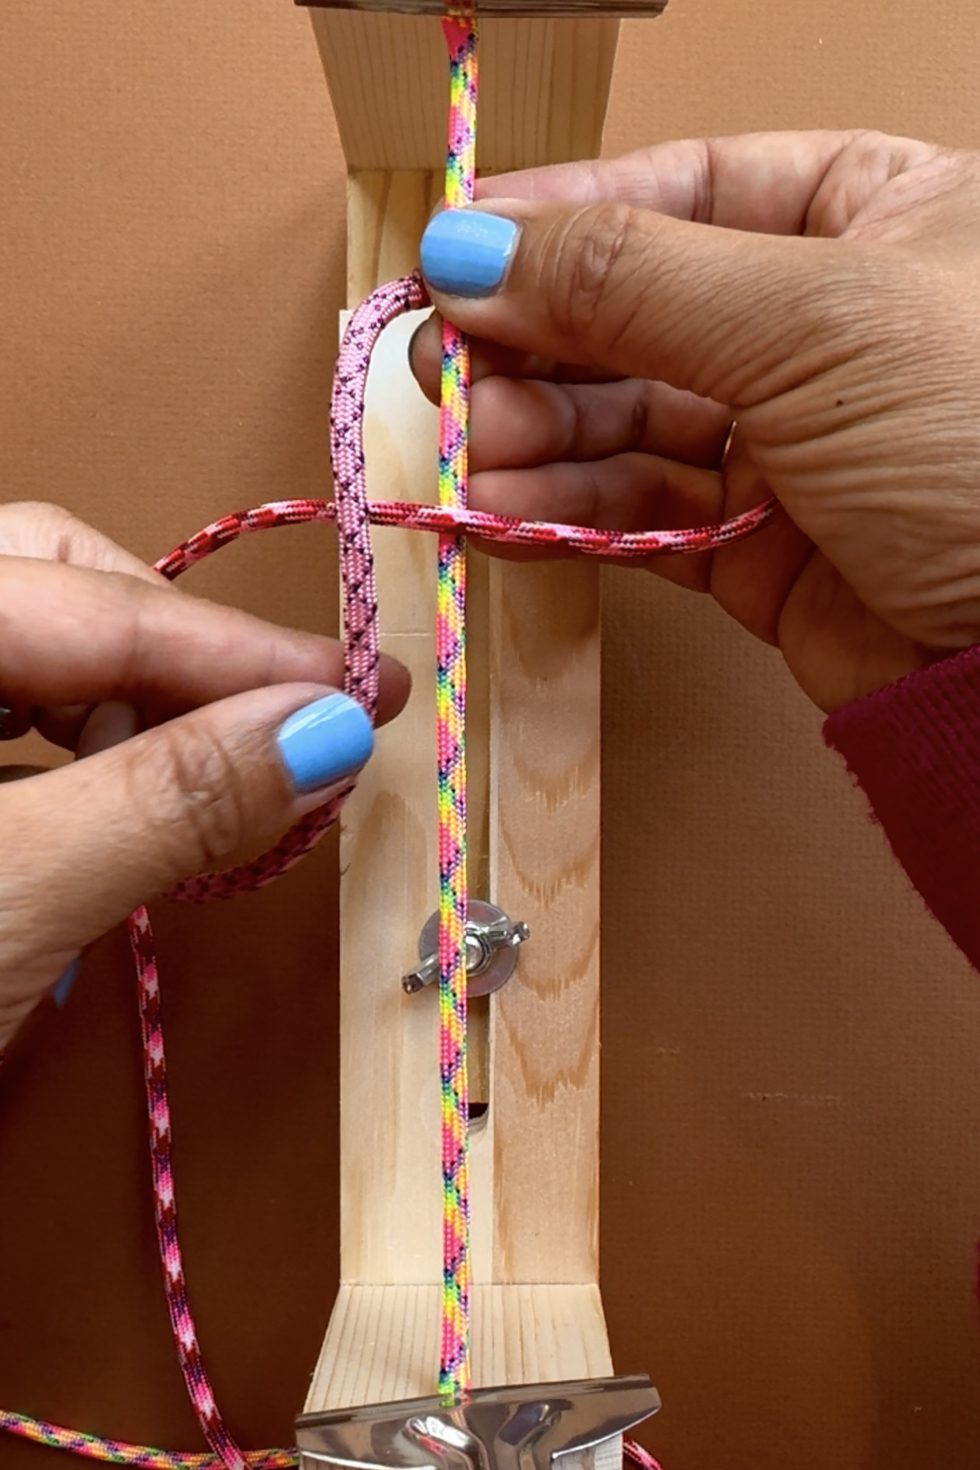
Loop the right rope over the base rope, leaving a loop on the right. Take the left rope and fold it over the right rope on the left side.
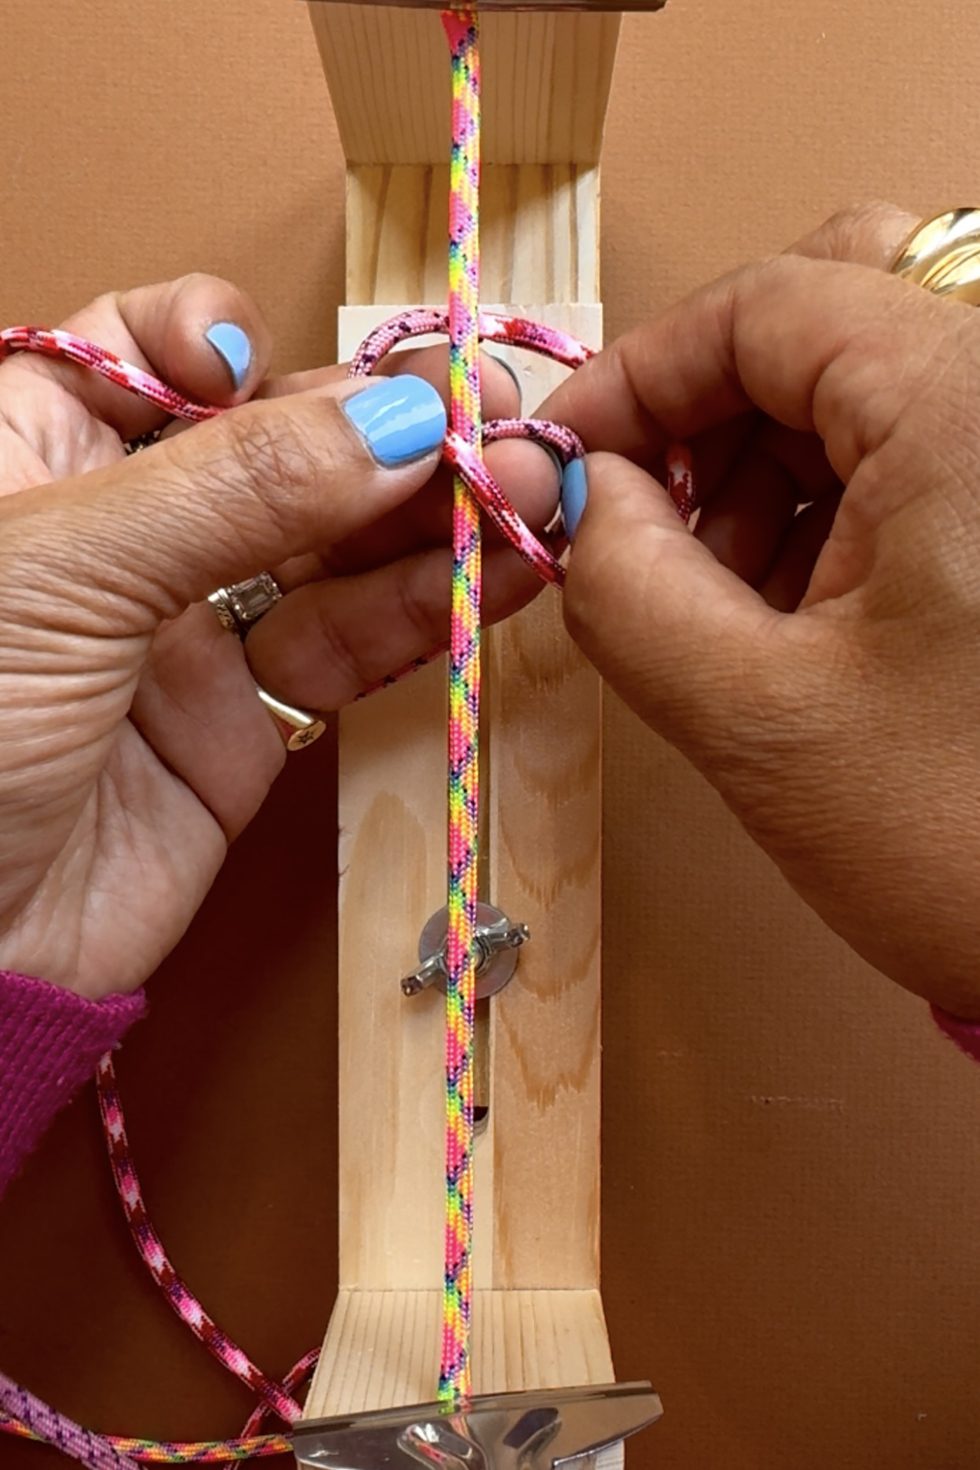
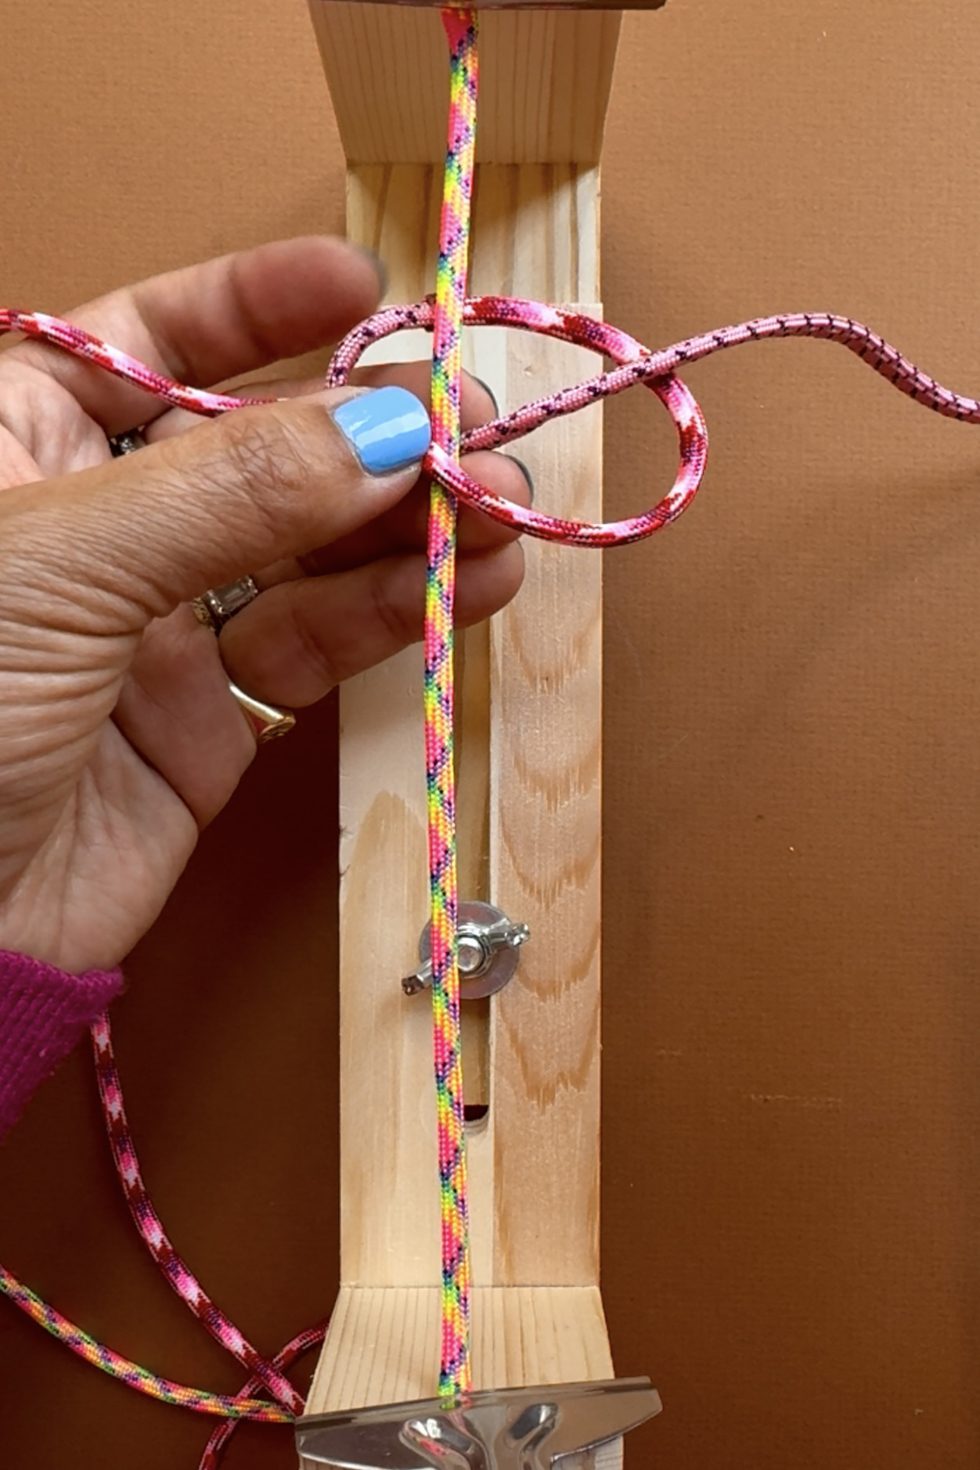
Bring the left rope under the base rope and through loop on the right.
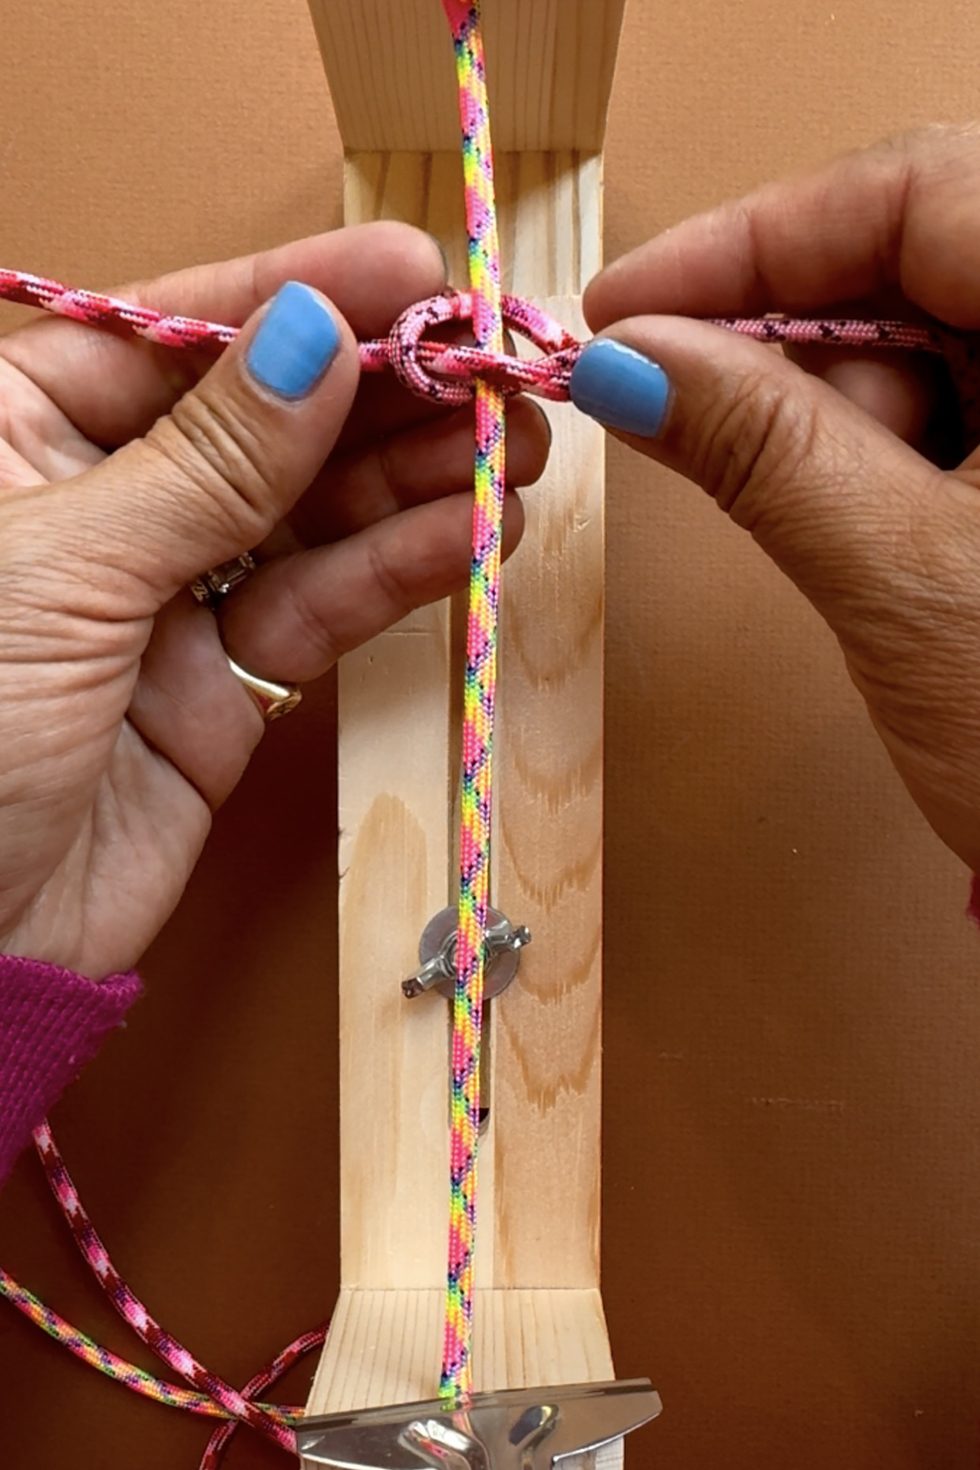
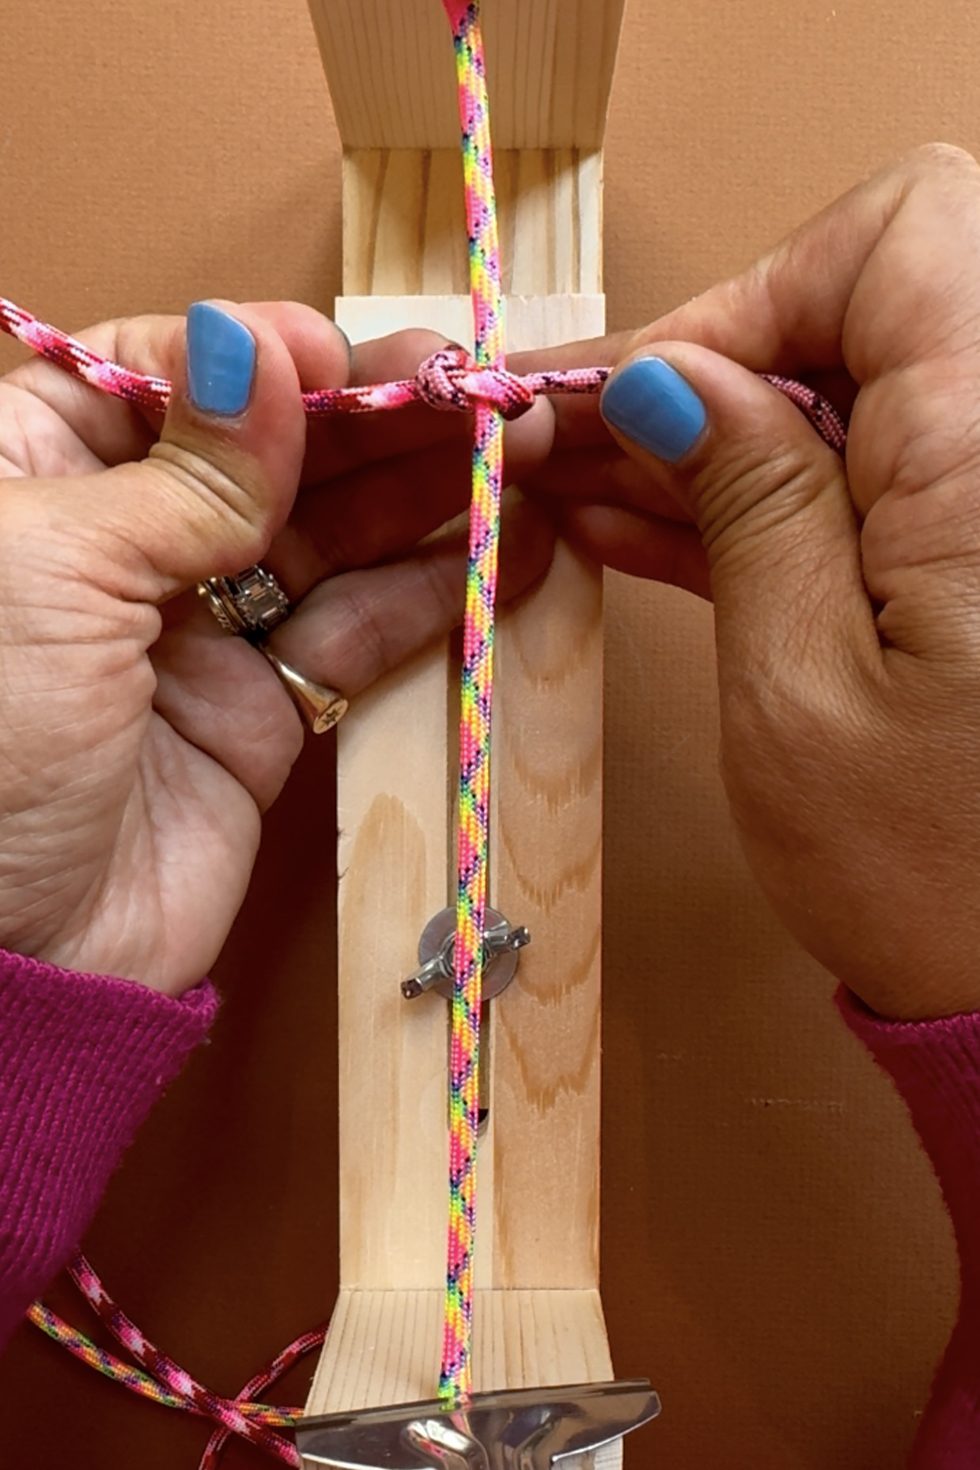
Pull tight to complete the first half of the square knot.
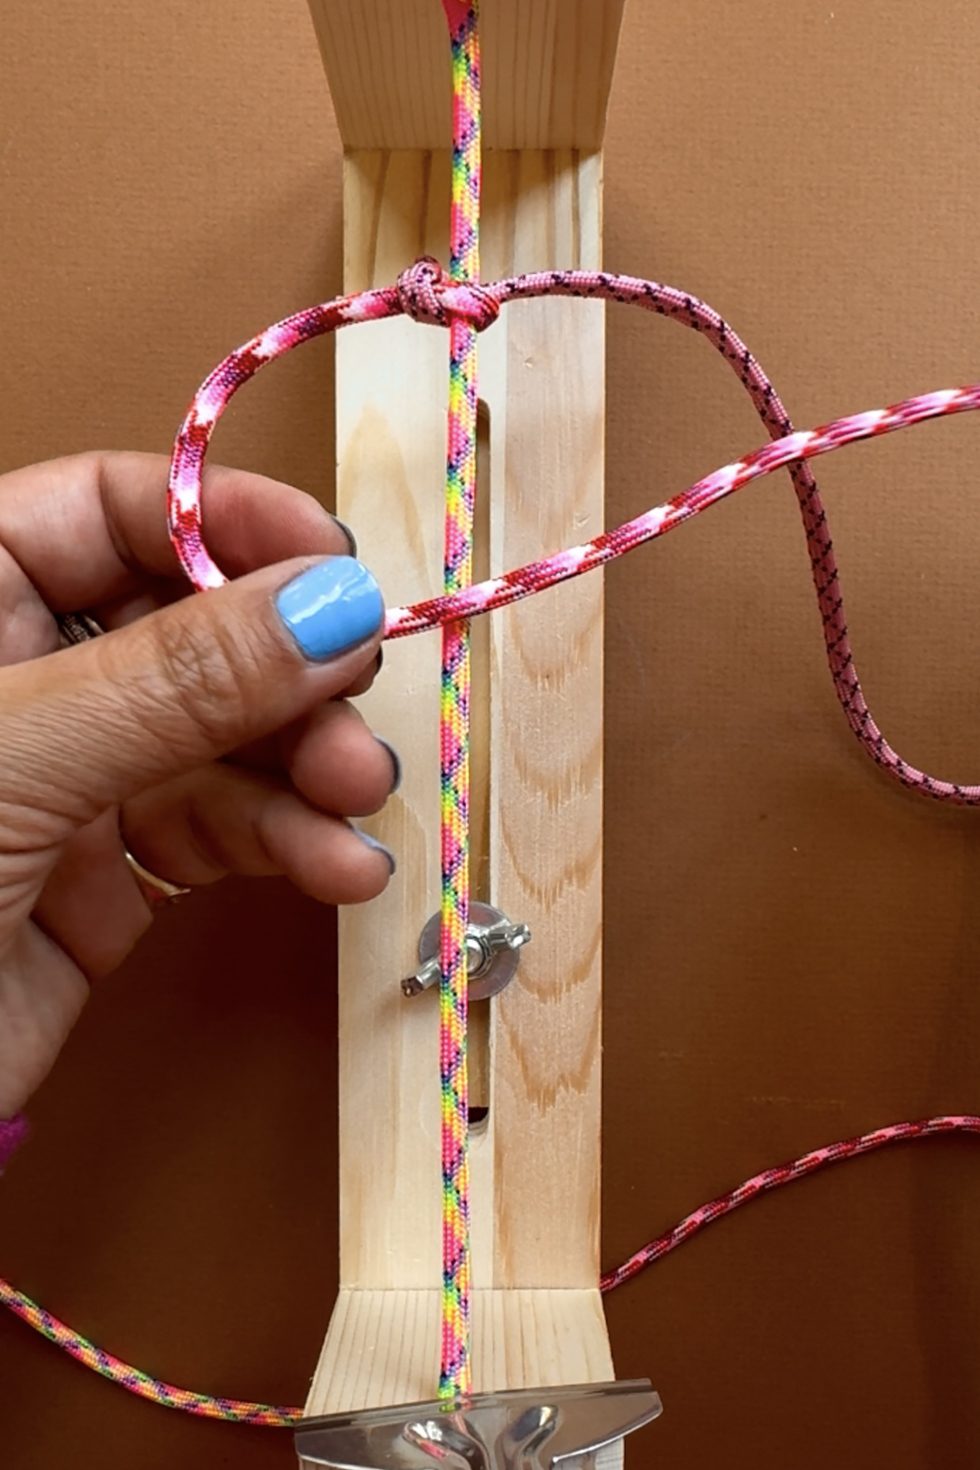
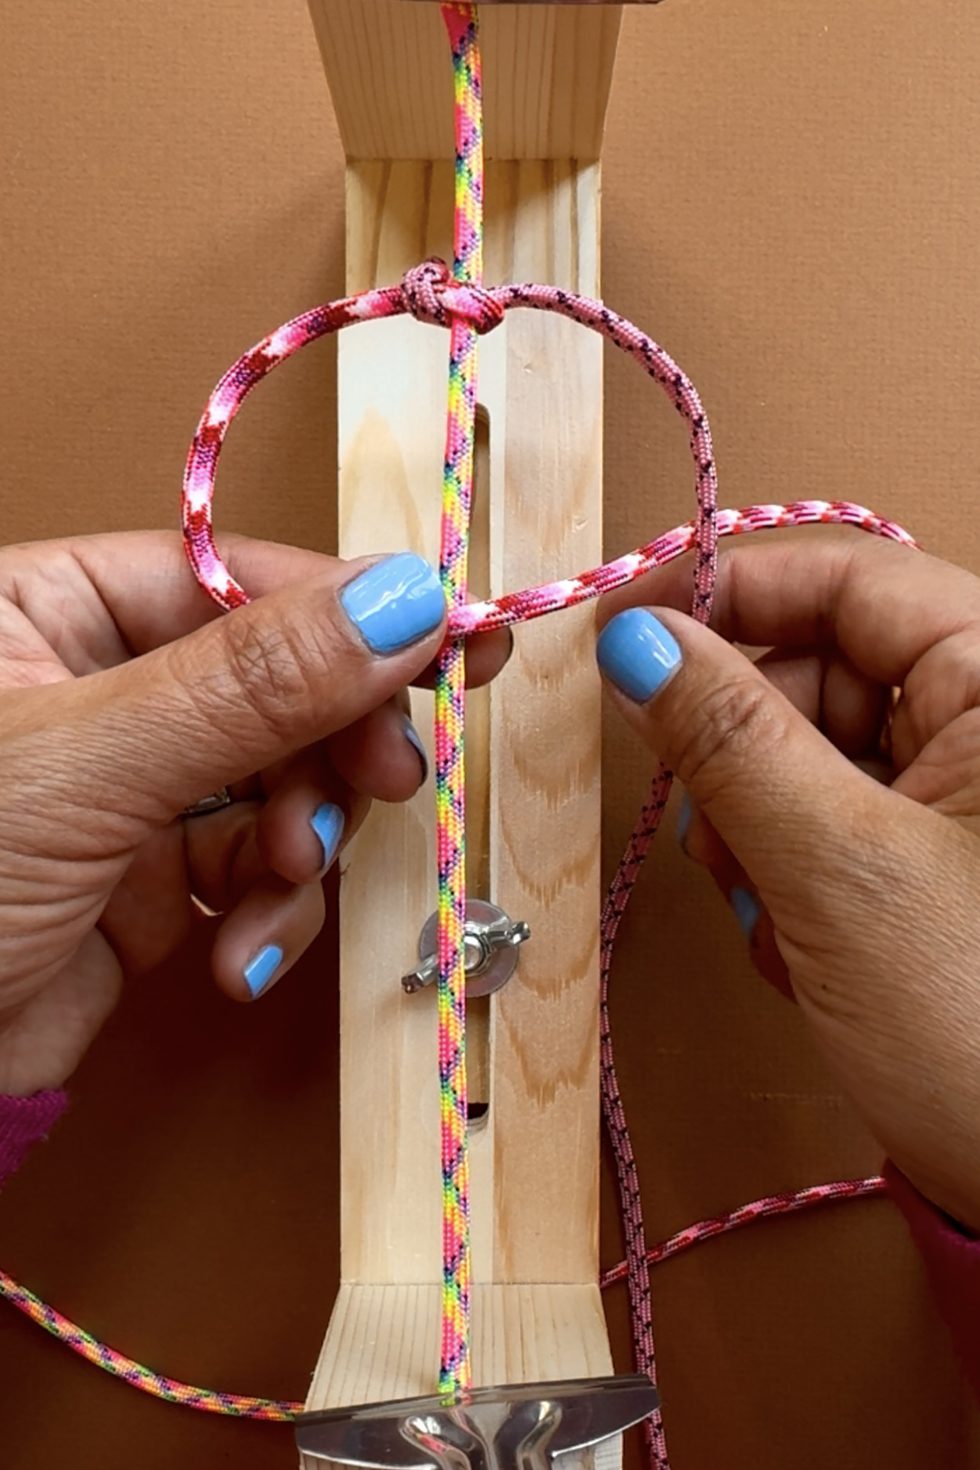
Alternate sides and now bring the left rope over the base rope, forming a loop on the left.
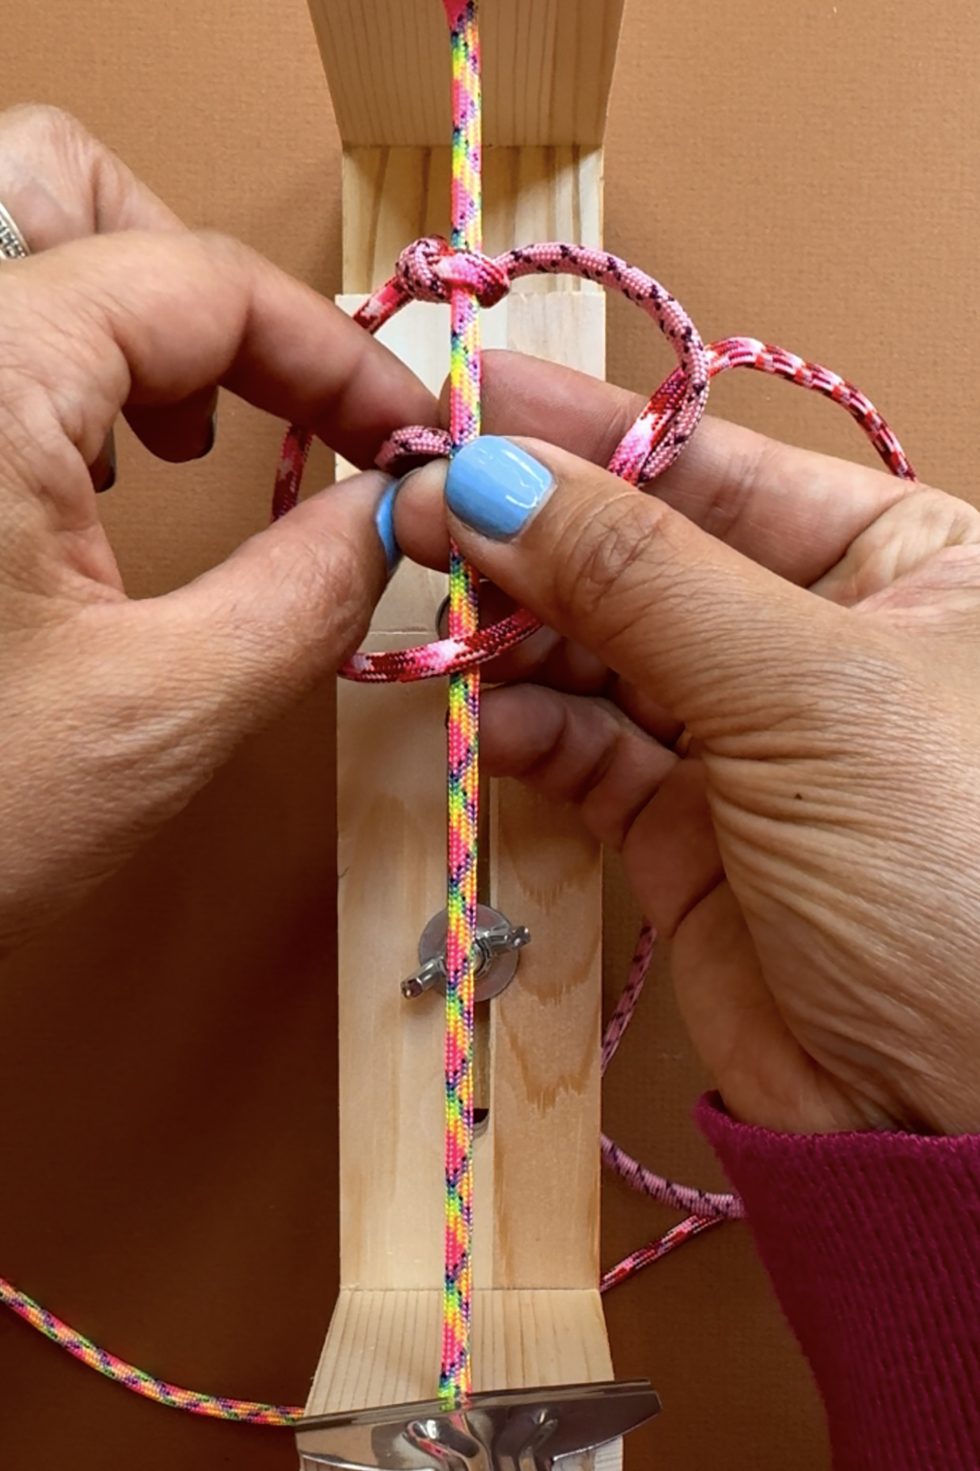
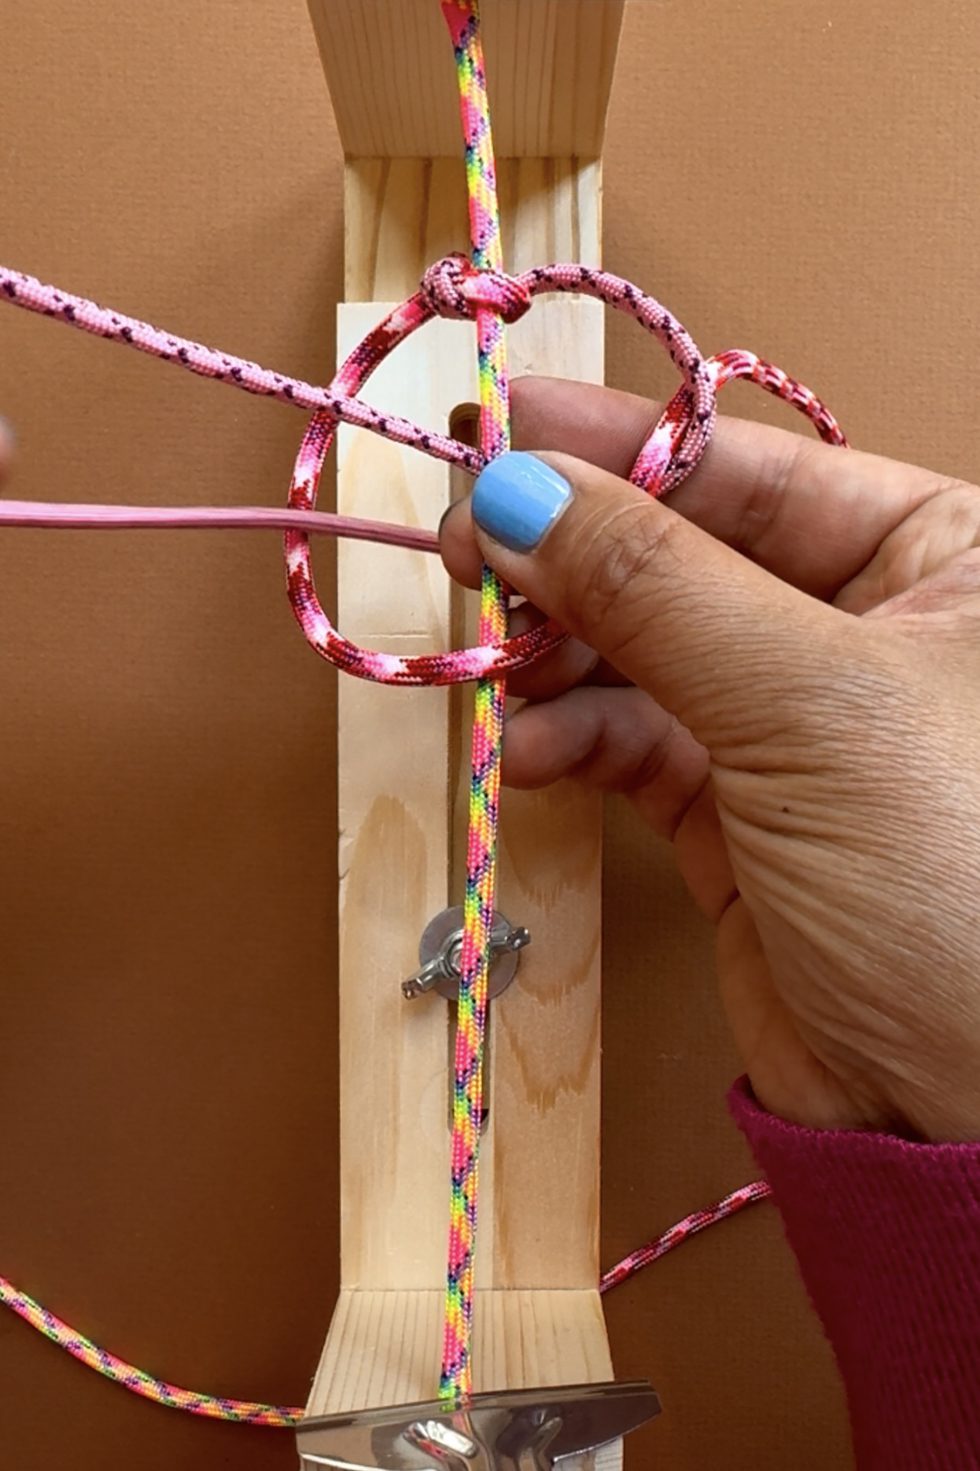
Take the right rope and fold it over the left rope on the right side. Bring the right rope under the base rope and through the loop on the left.
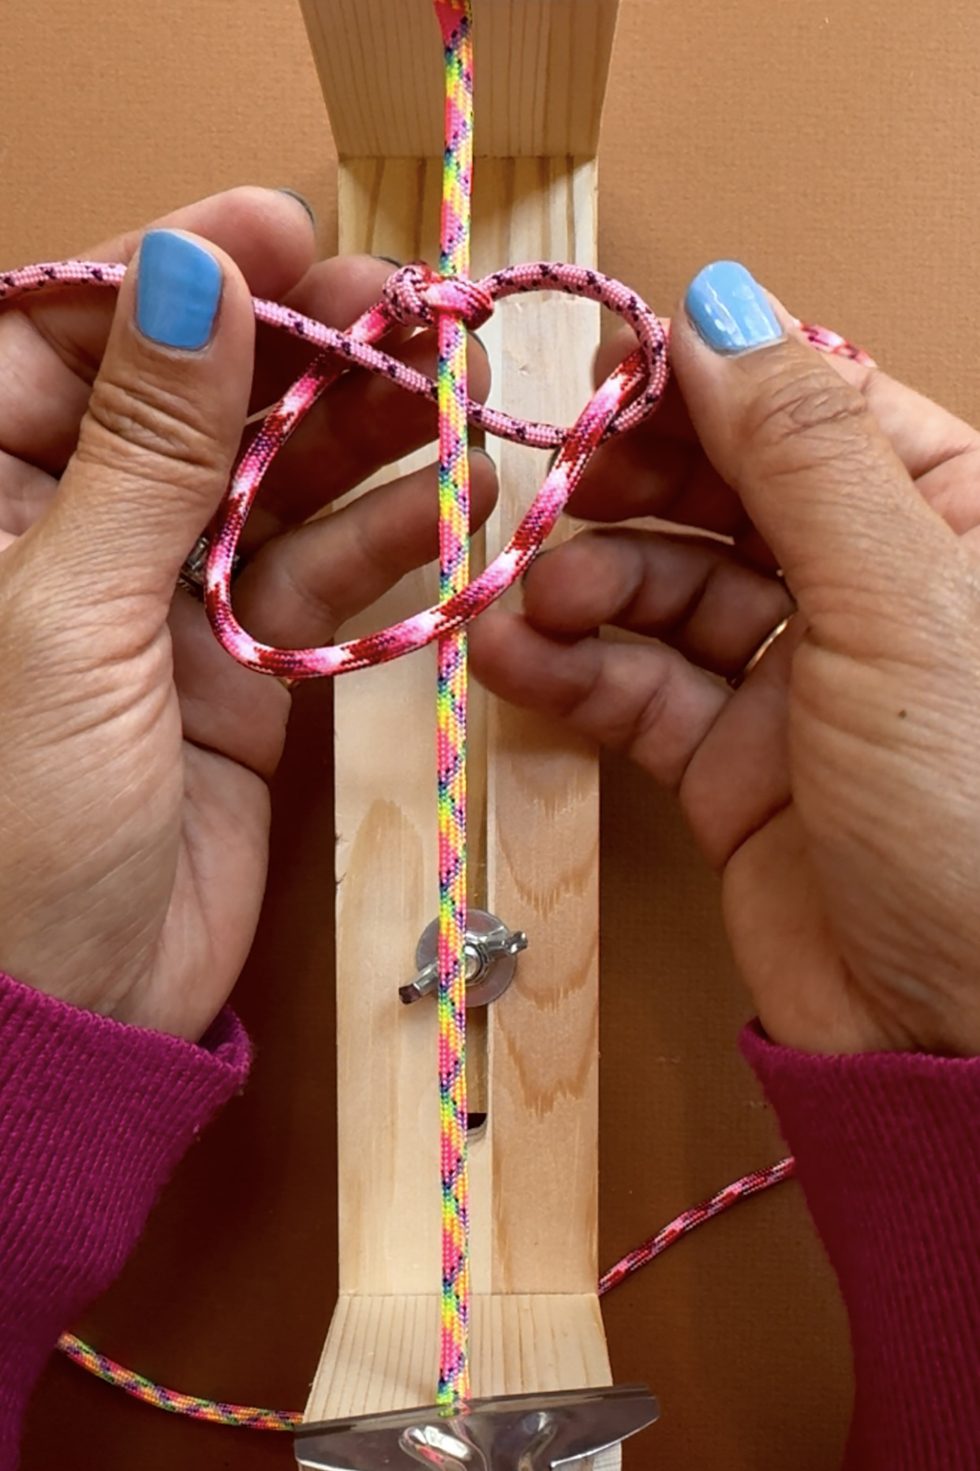

Pull tight. This is a complete square knot.
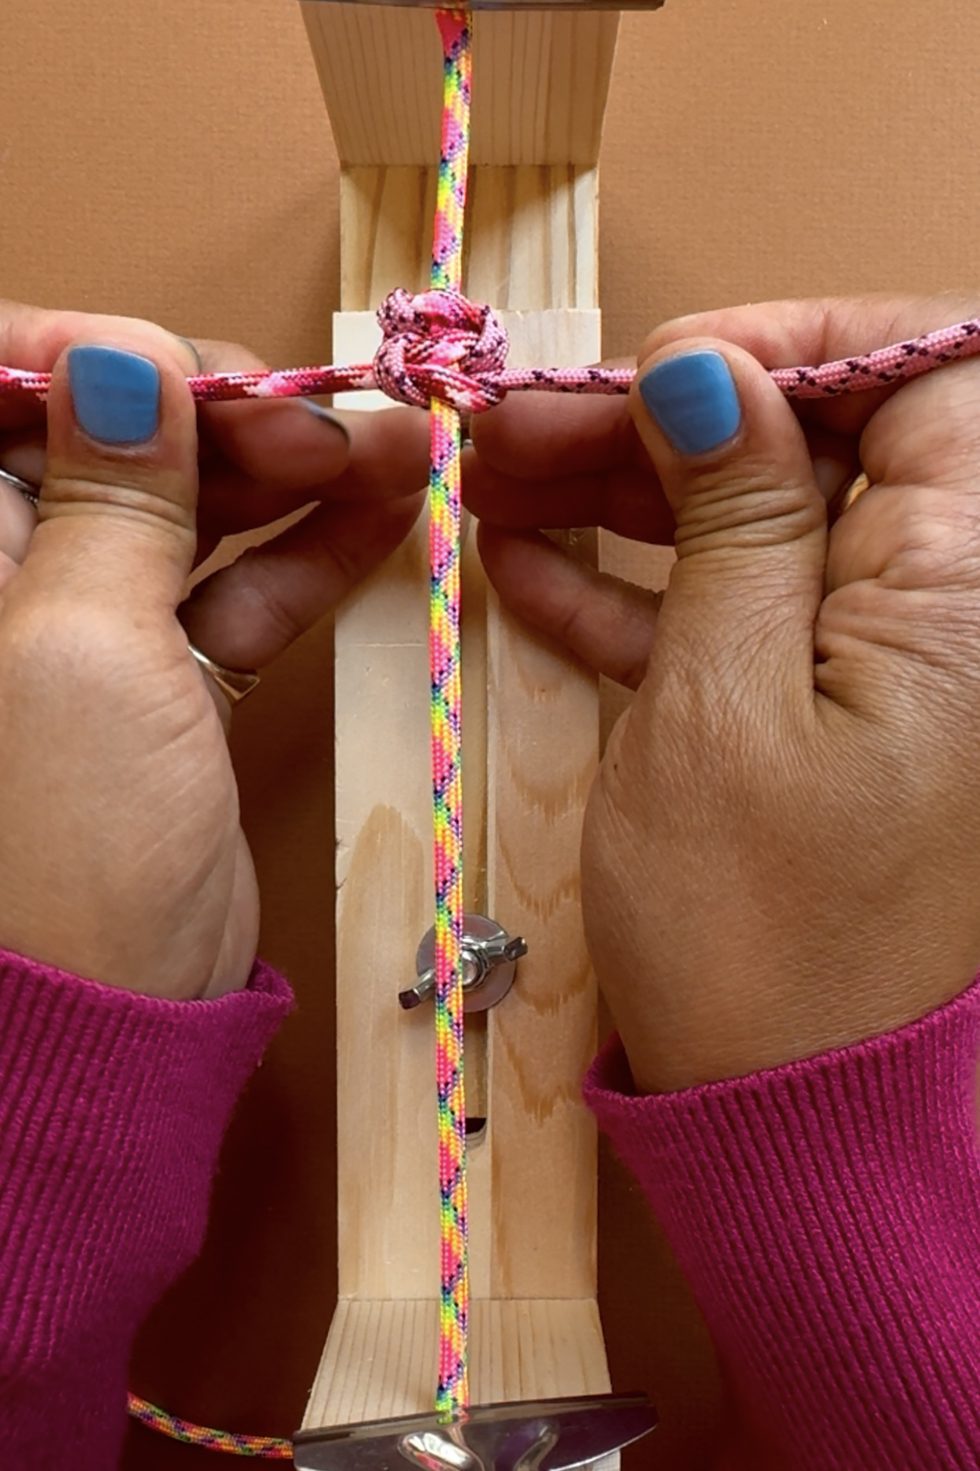
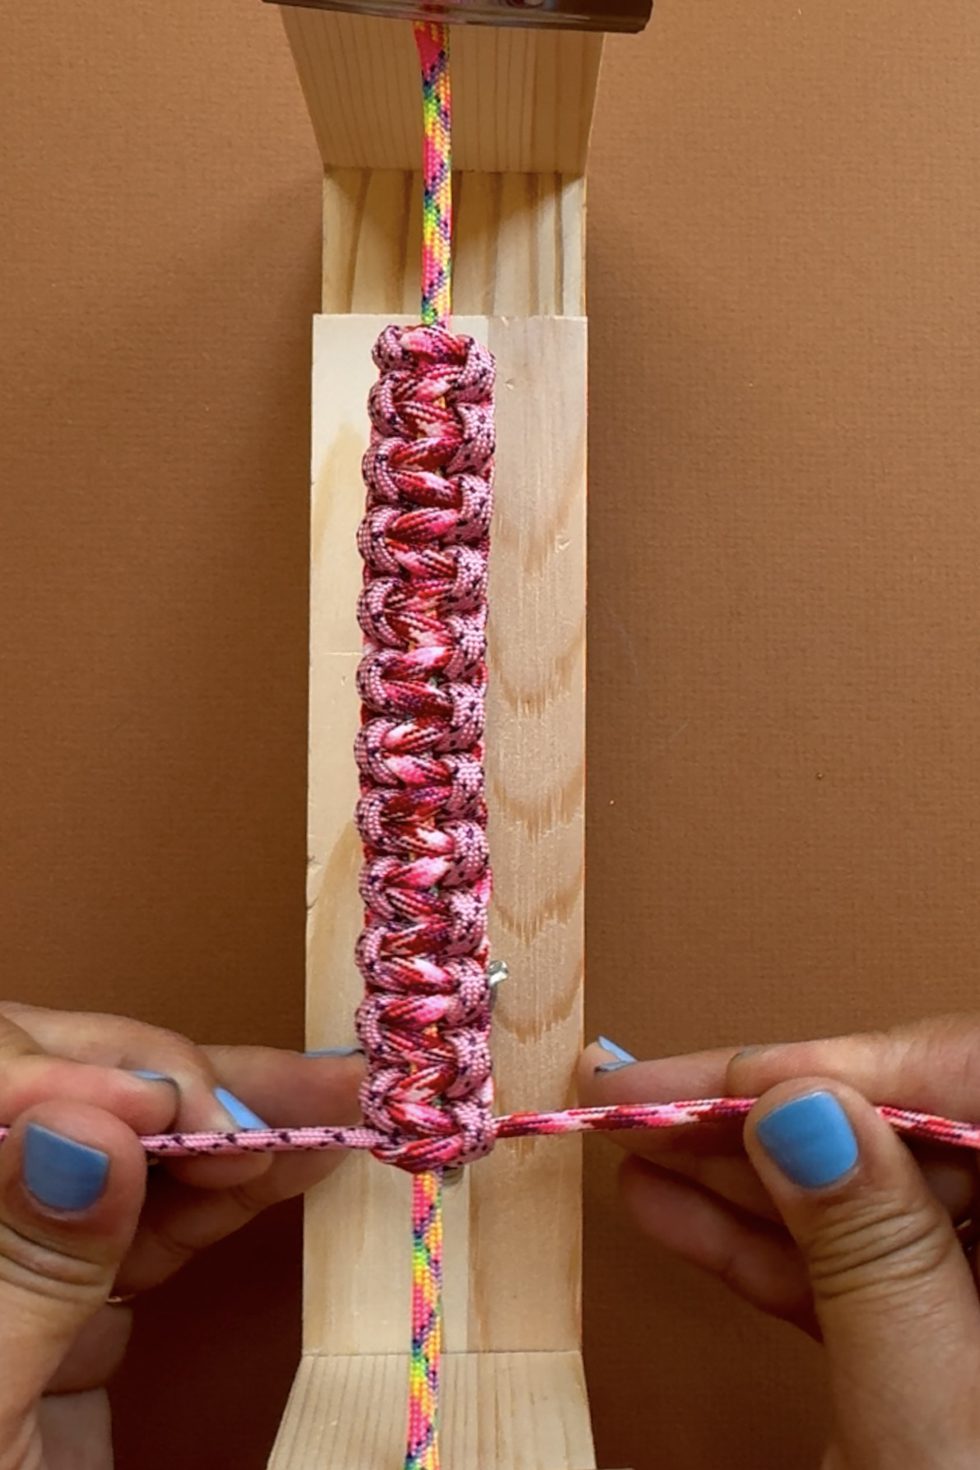
Keep alternating sides and continue the square knots until the rope begins to run out.

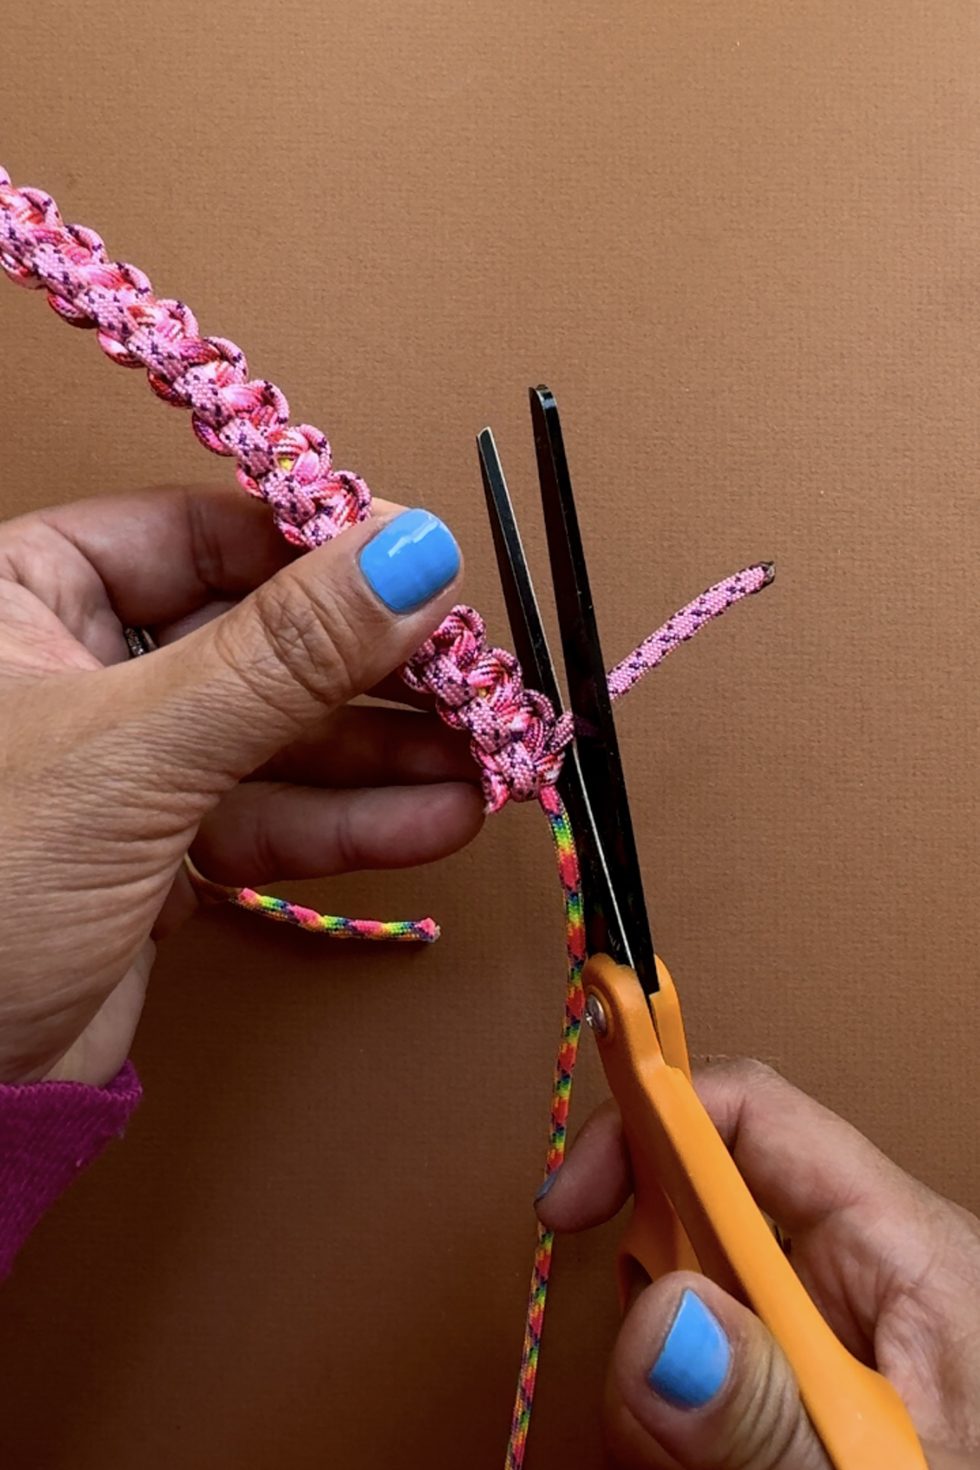
Trim the ends, leaving about 2mm of rope.
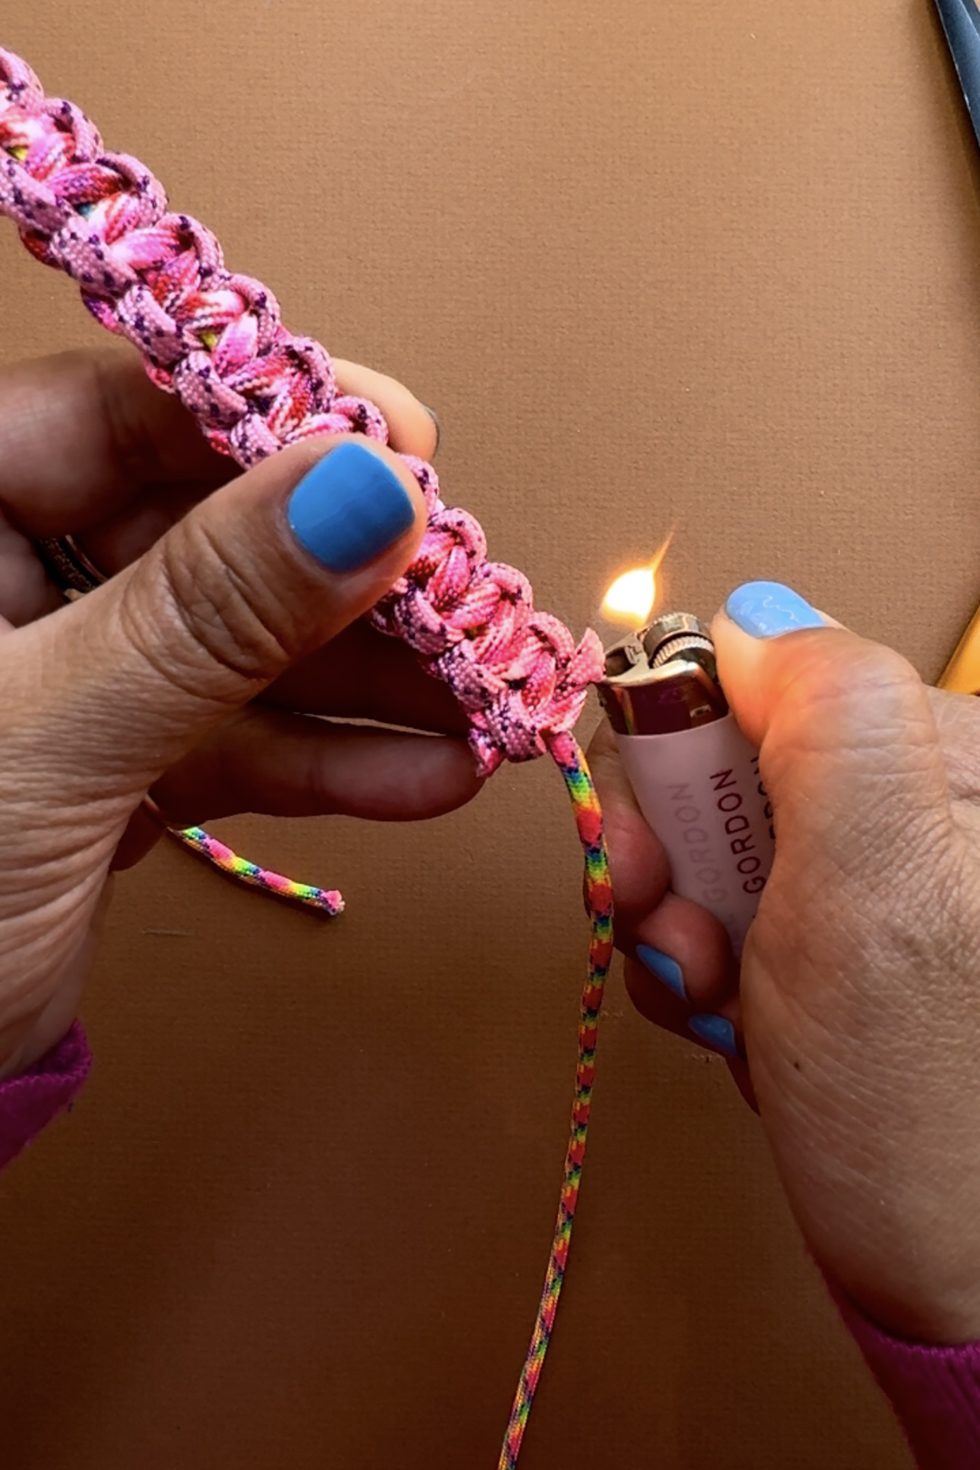
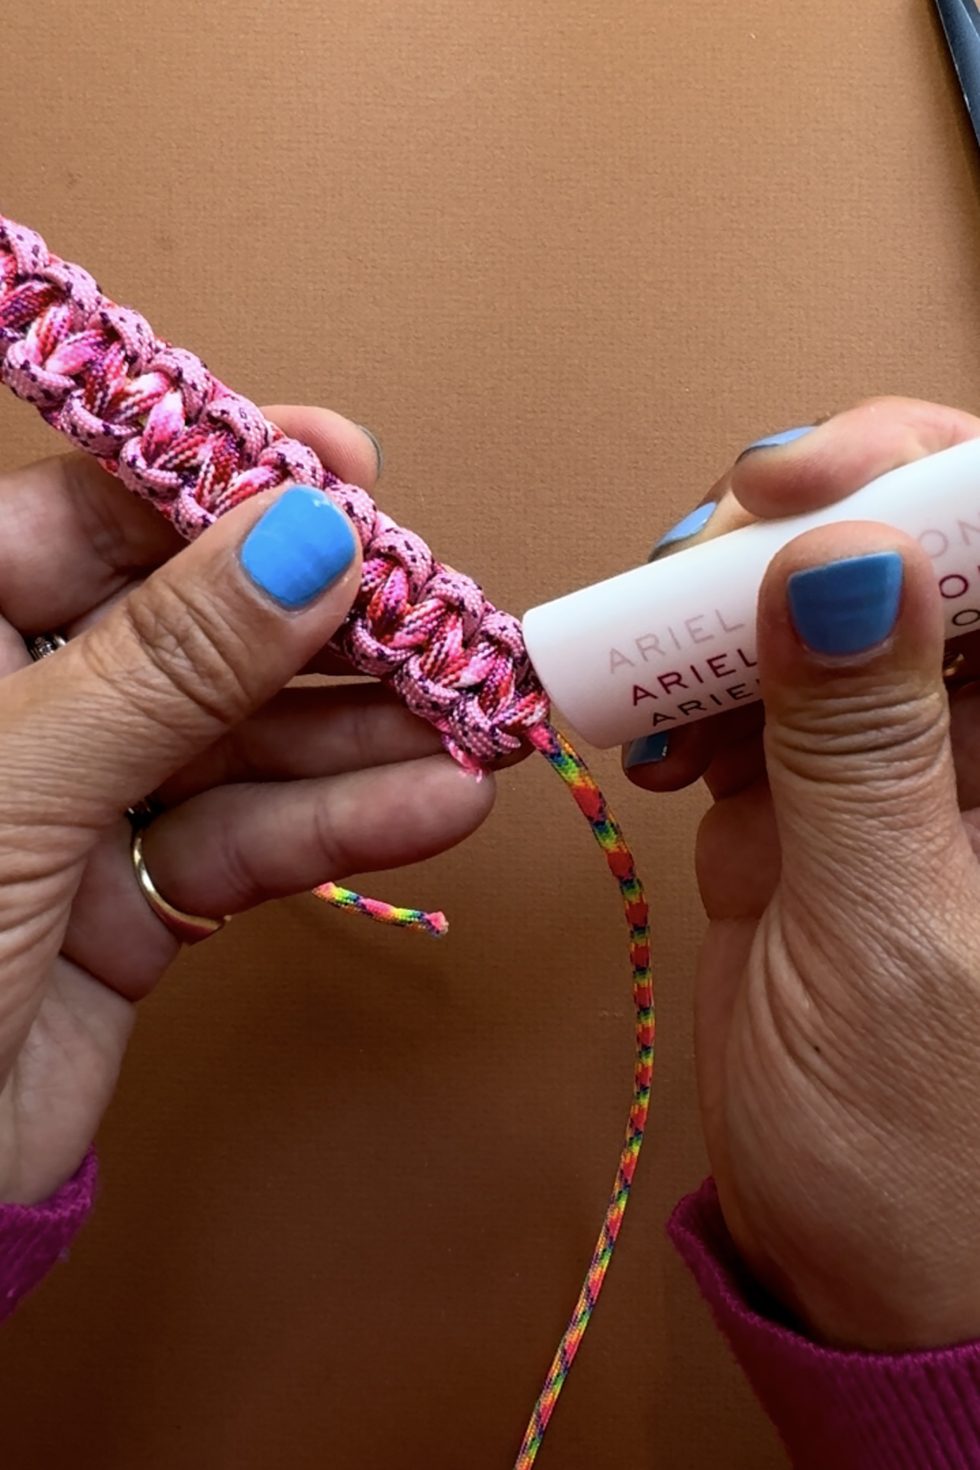
Burn one end until it starts to melt and immediately press the end down against the last square knot with the back of the lighter.
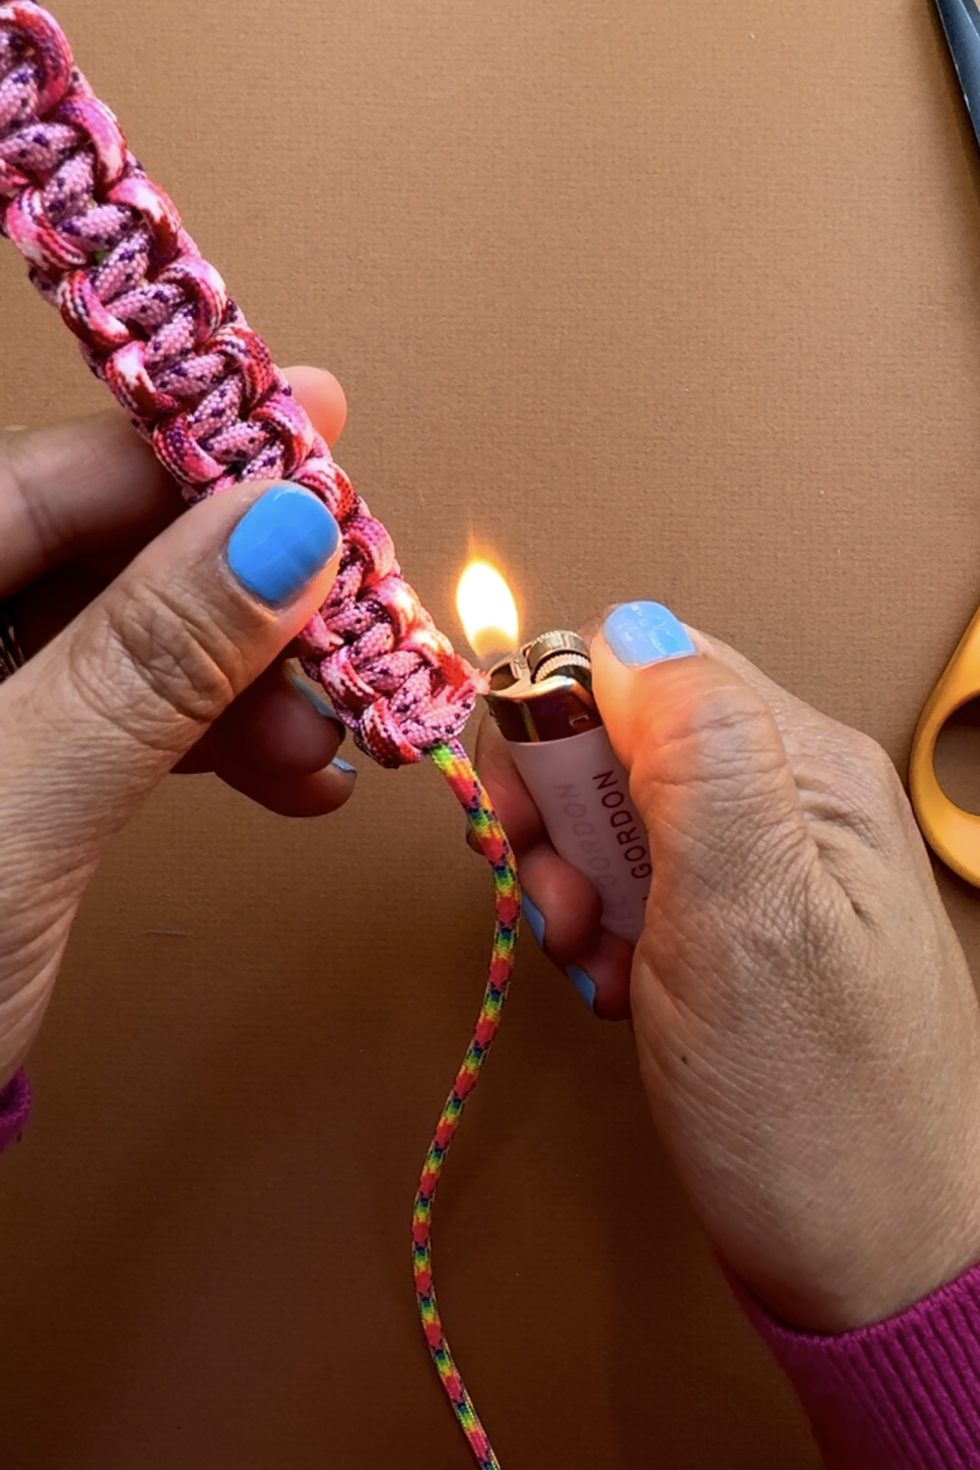
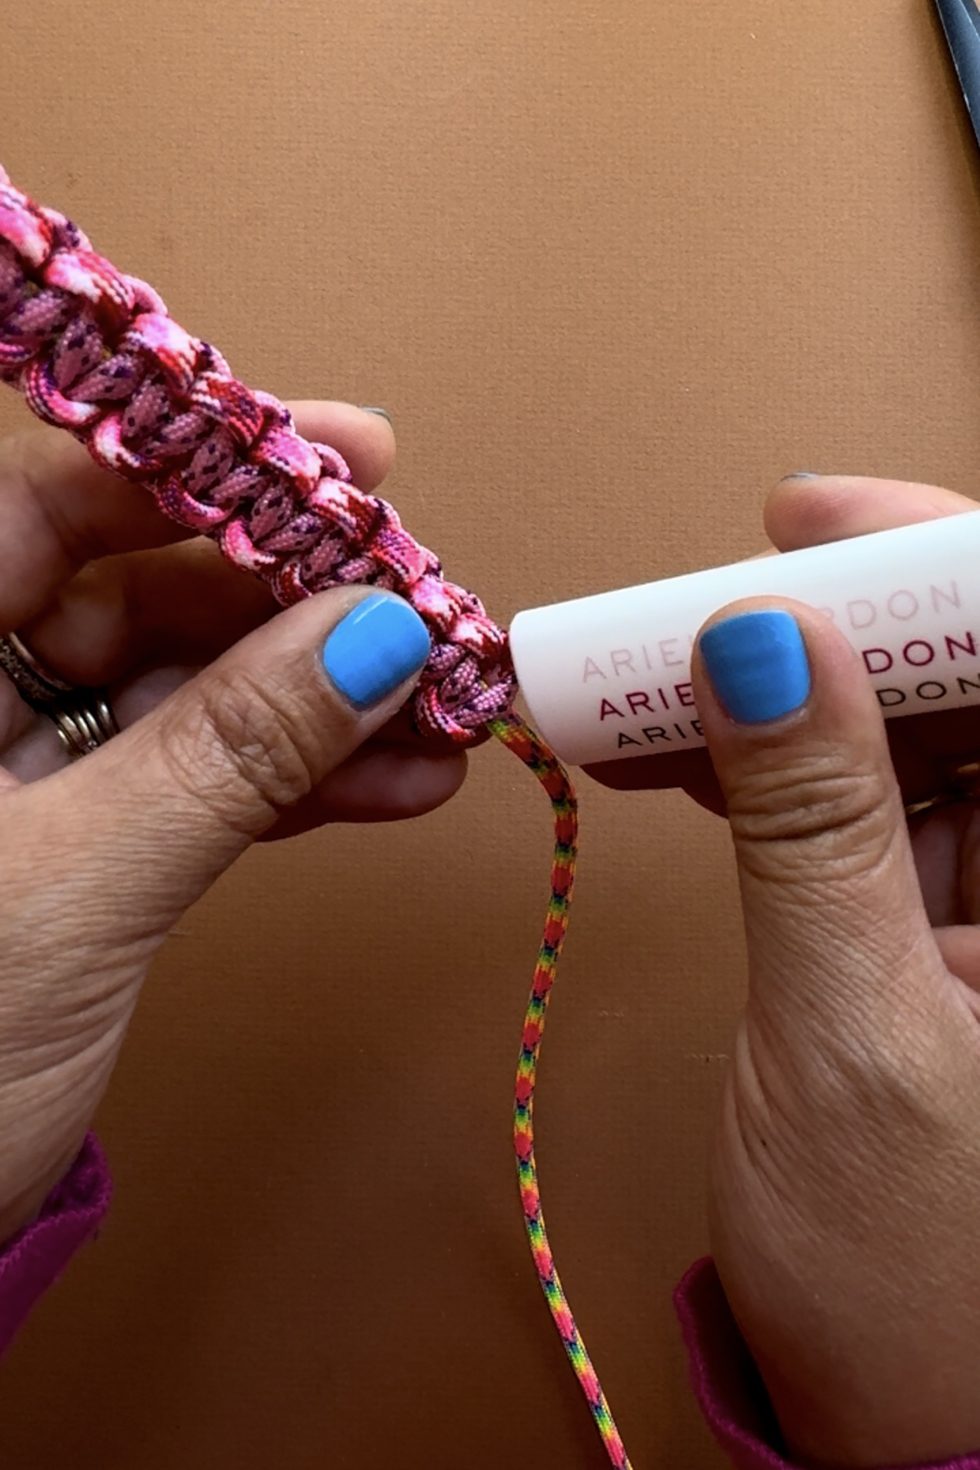
Repeat the step on the other side. Burn one end until it starts to melt and immediately press the end down against the last square knot with the back of the lighter. This keeps the macrame weave from unraveling.
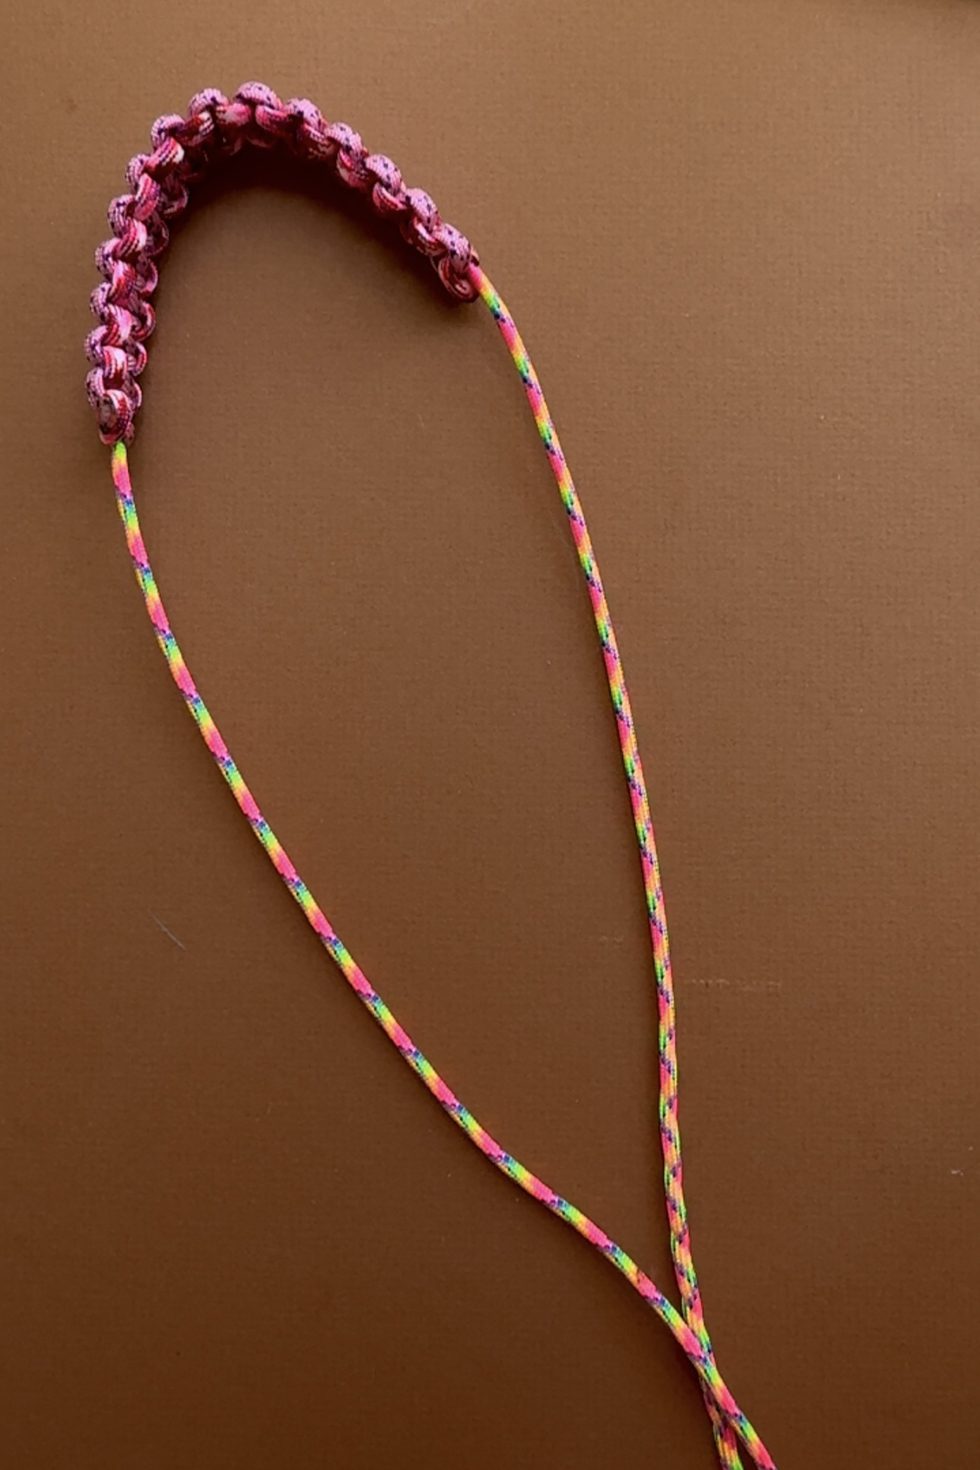
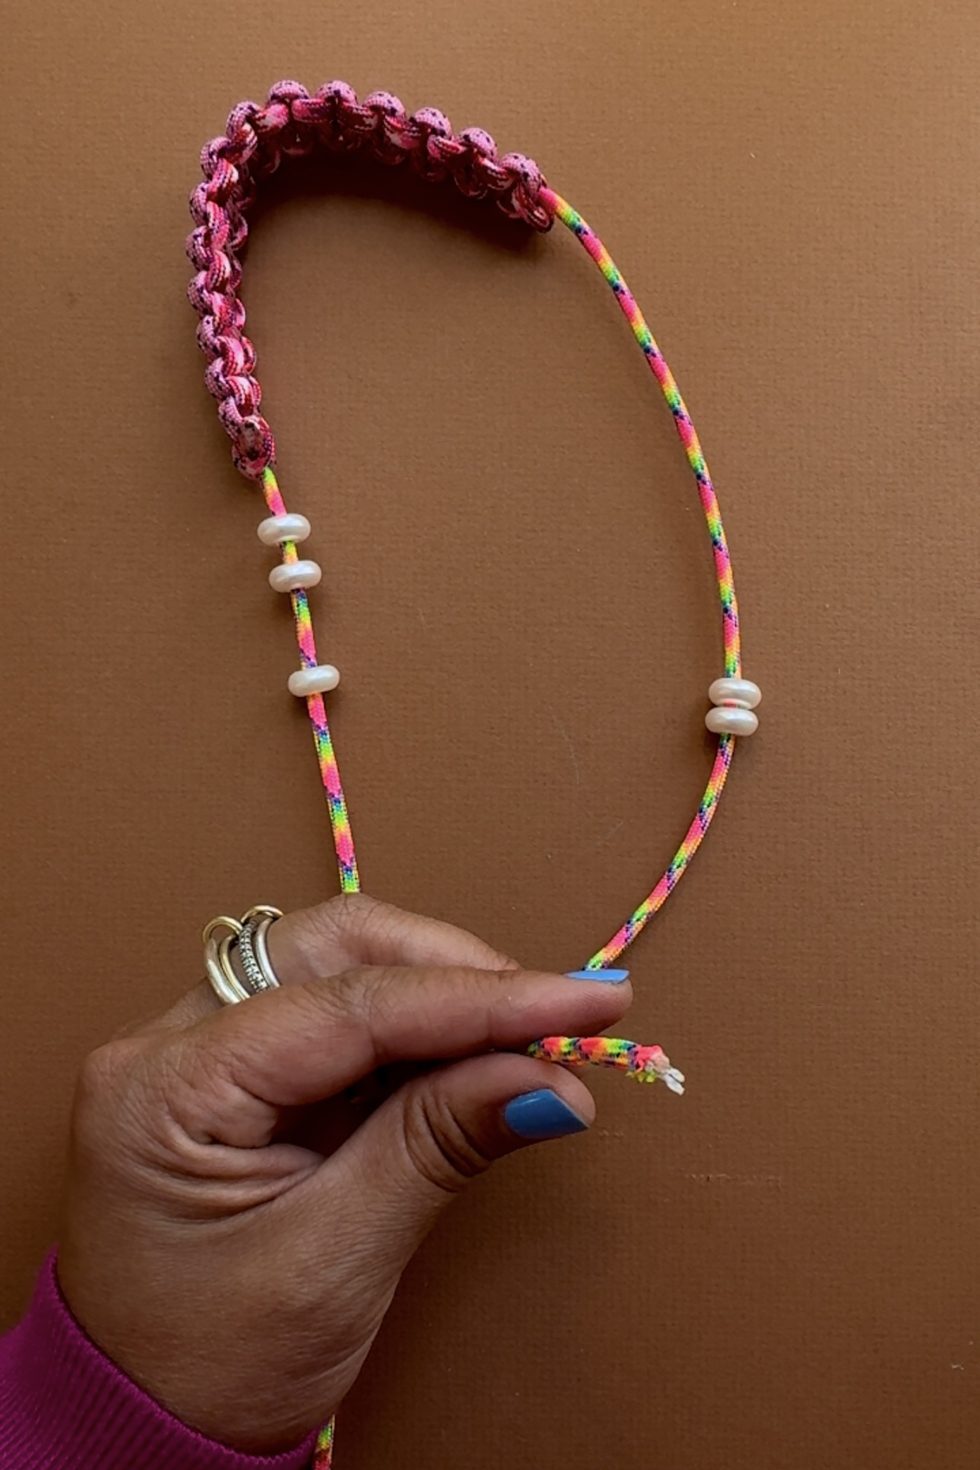
If the macrame knots aren't centered on your base rope, you can push it or pull it along the rope accordingly. Optionally, now is the time to thread on your pearl beads.
Thread both ends of the rope through the O-ring. Fold 2 inches over and burn the ends simultaneously until they start to melt. Immediately use the back of lighter to press the ends flat against the base rope. This helps to keep the lanyard secure.
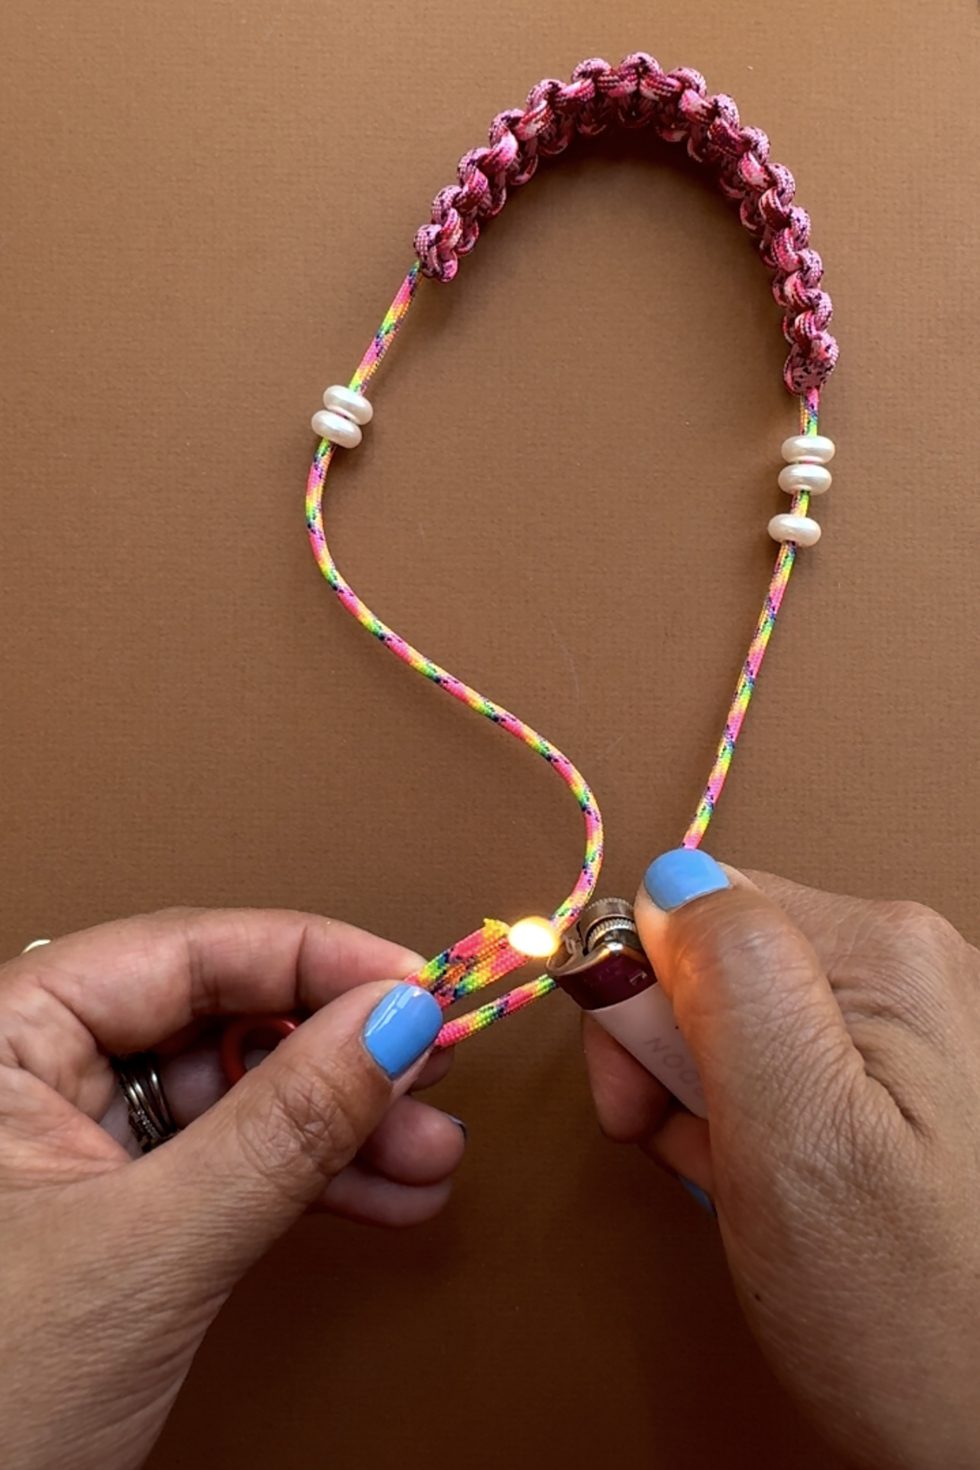
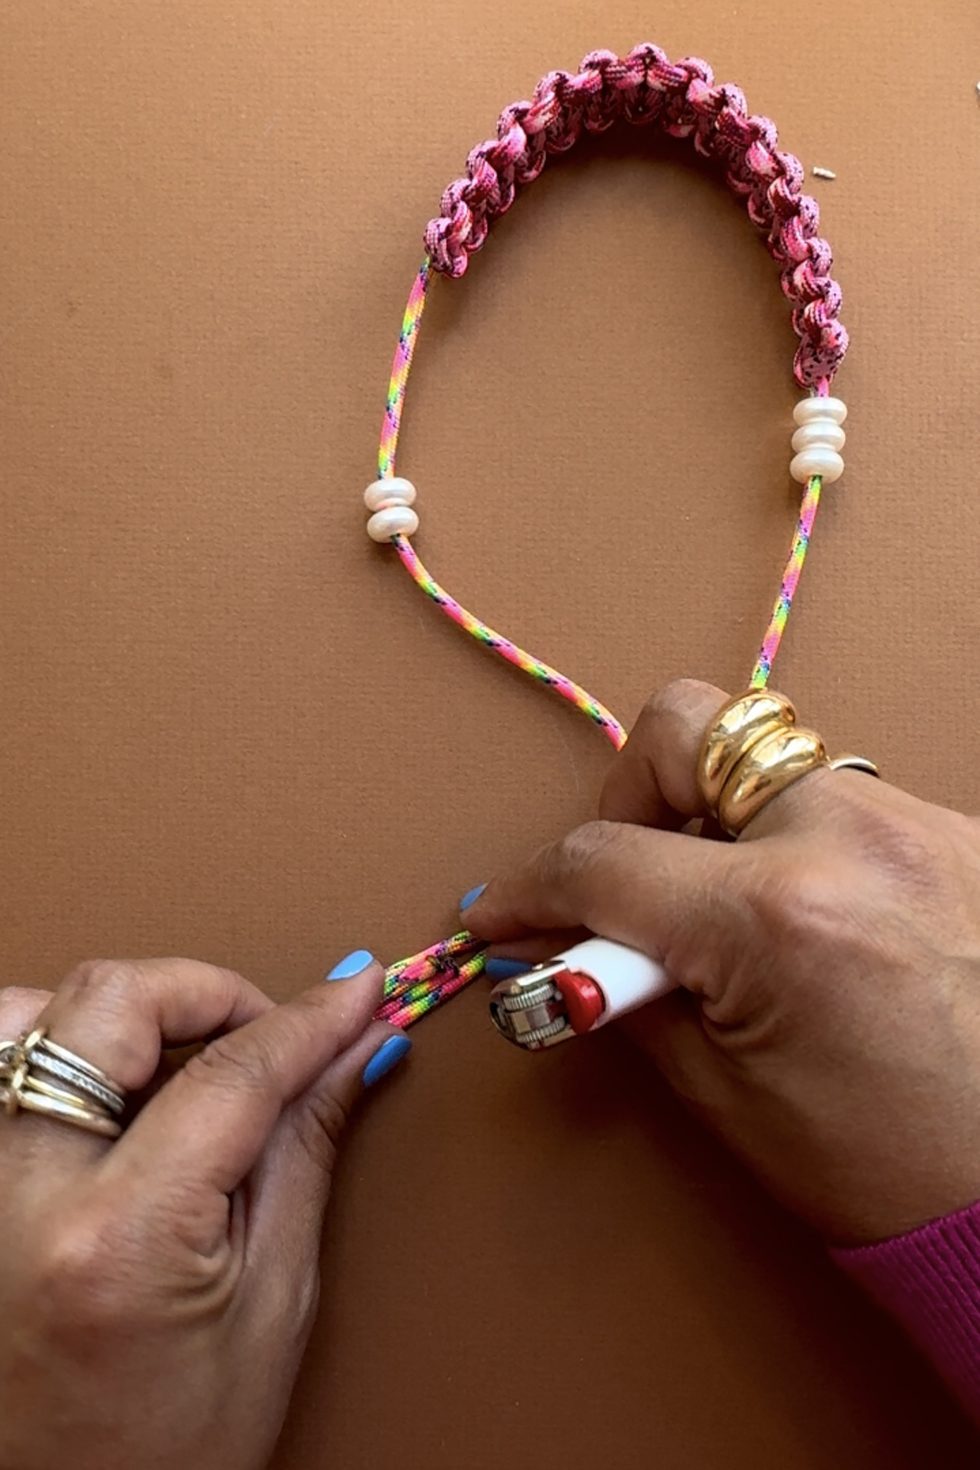
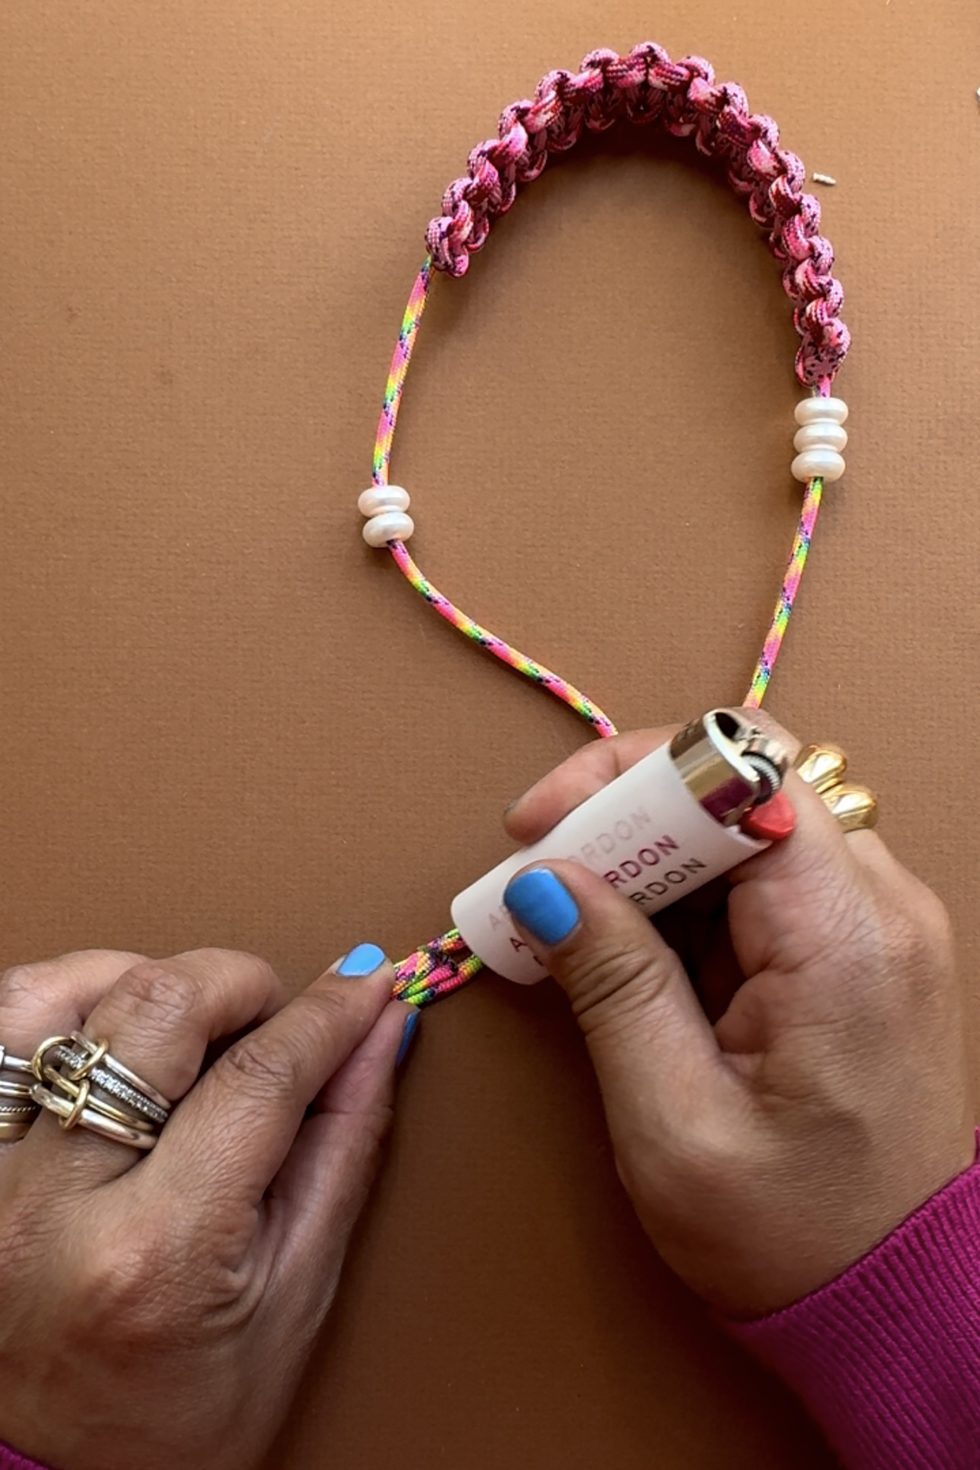
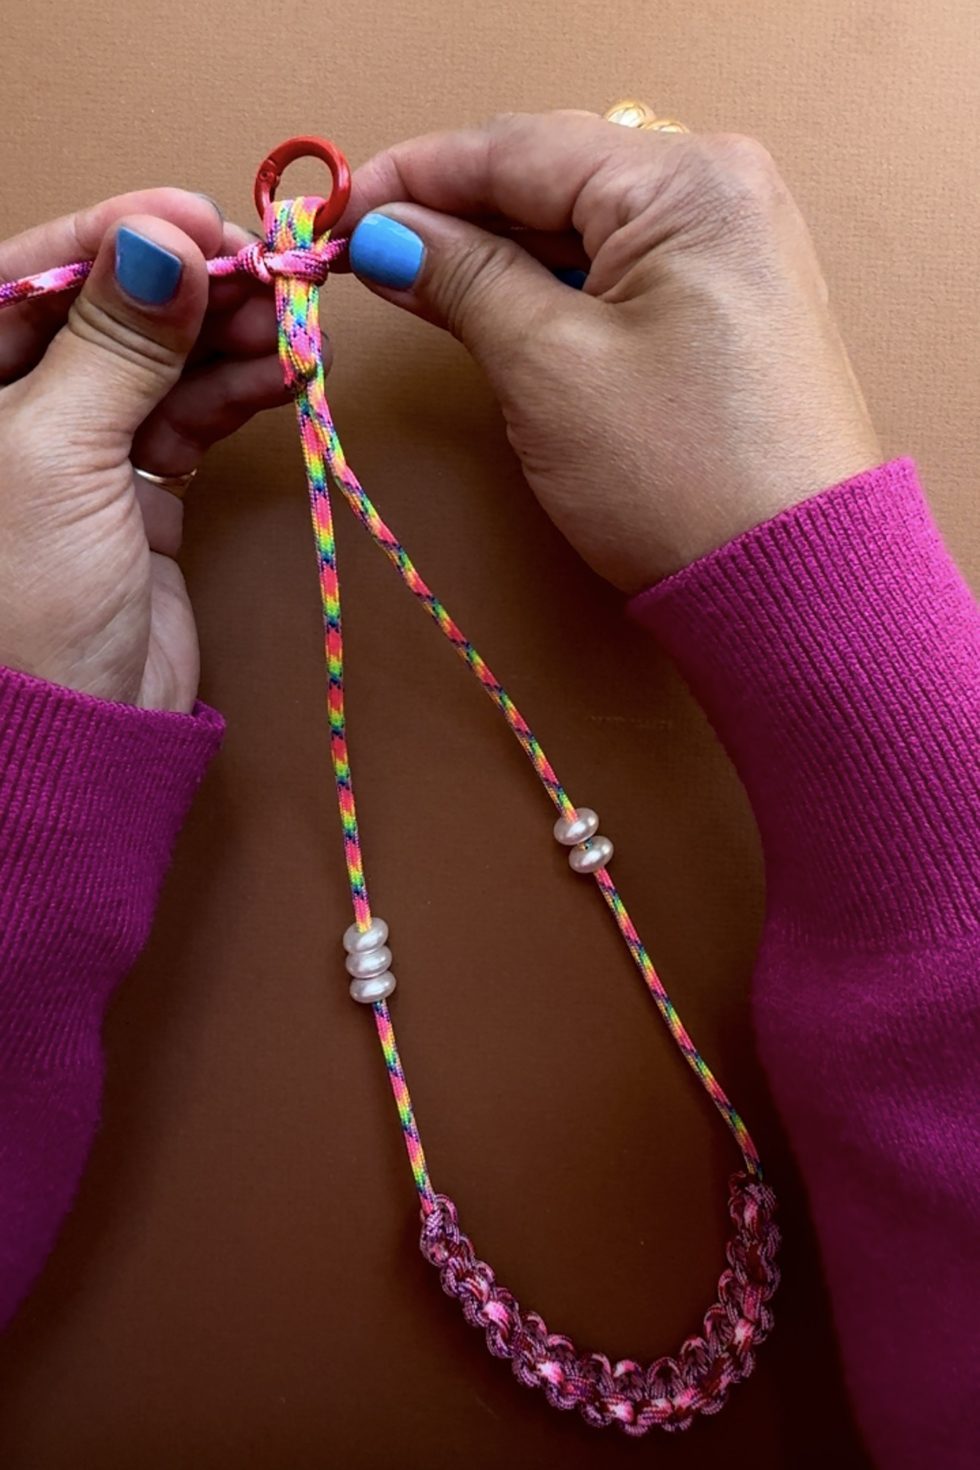
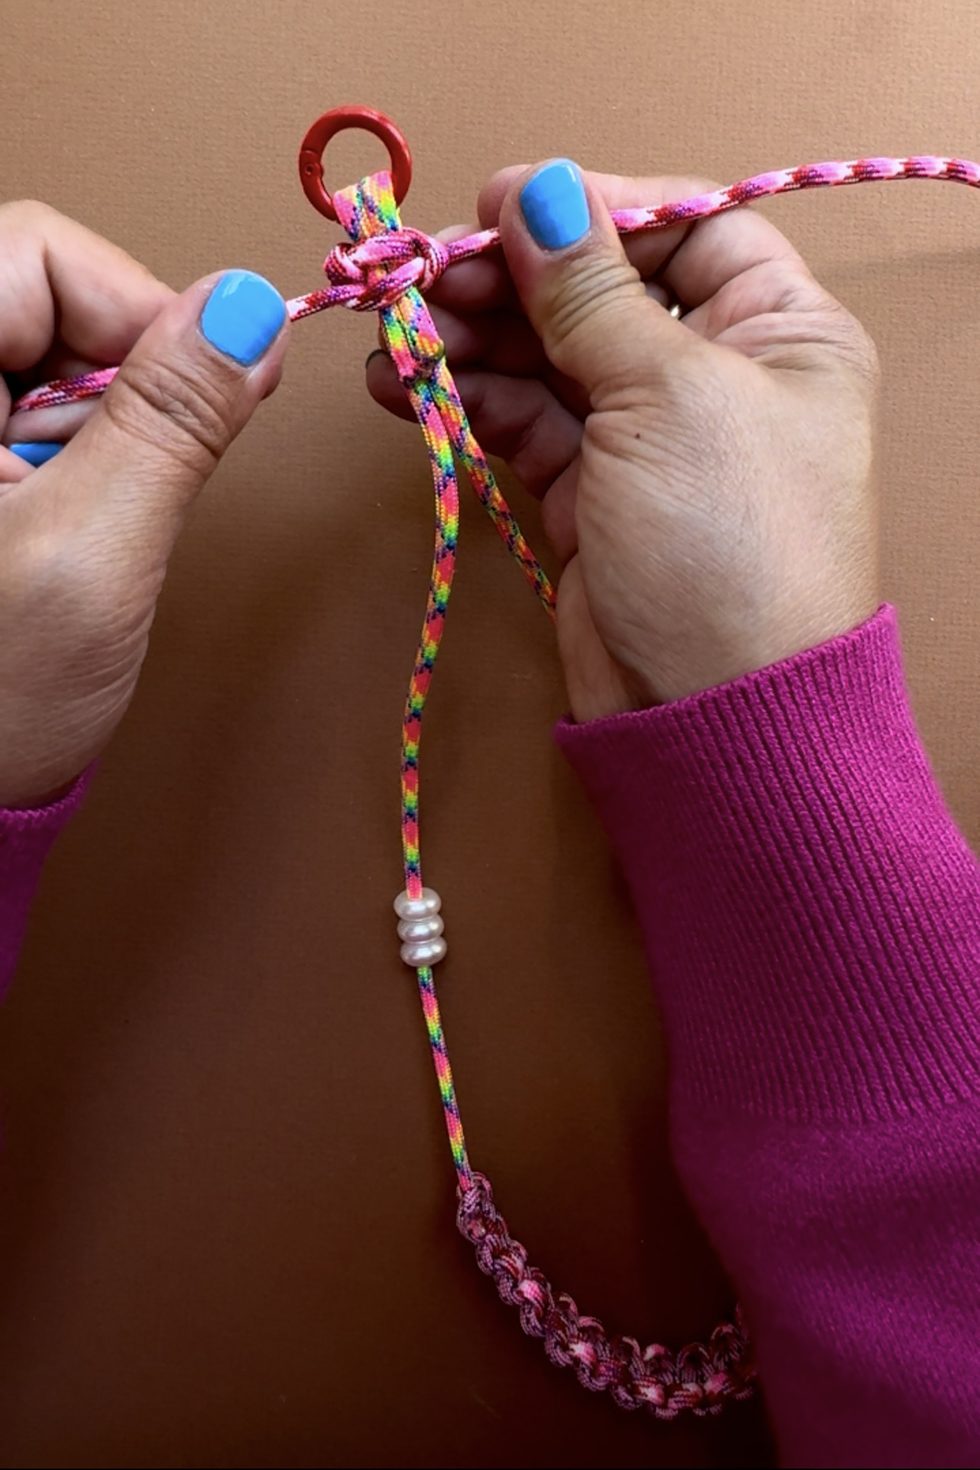
Cut about 14-18" of thick rope and tie a macrame knot over the folded section. Make sure to pull very tight after each half square knot. This enforces the connection and keeps the lanyard secure.
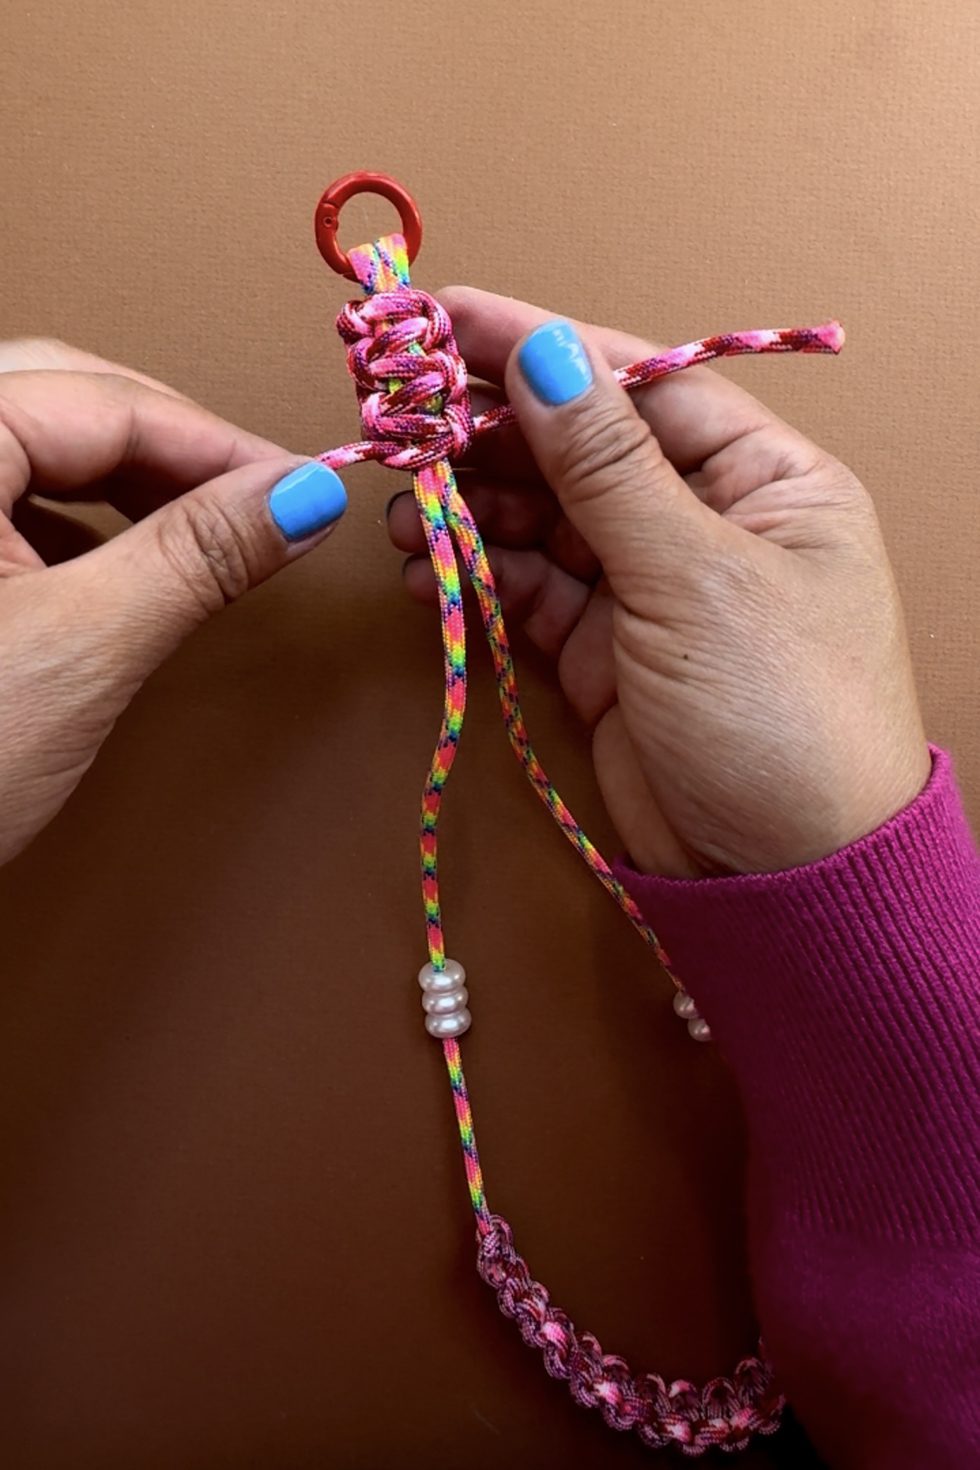
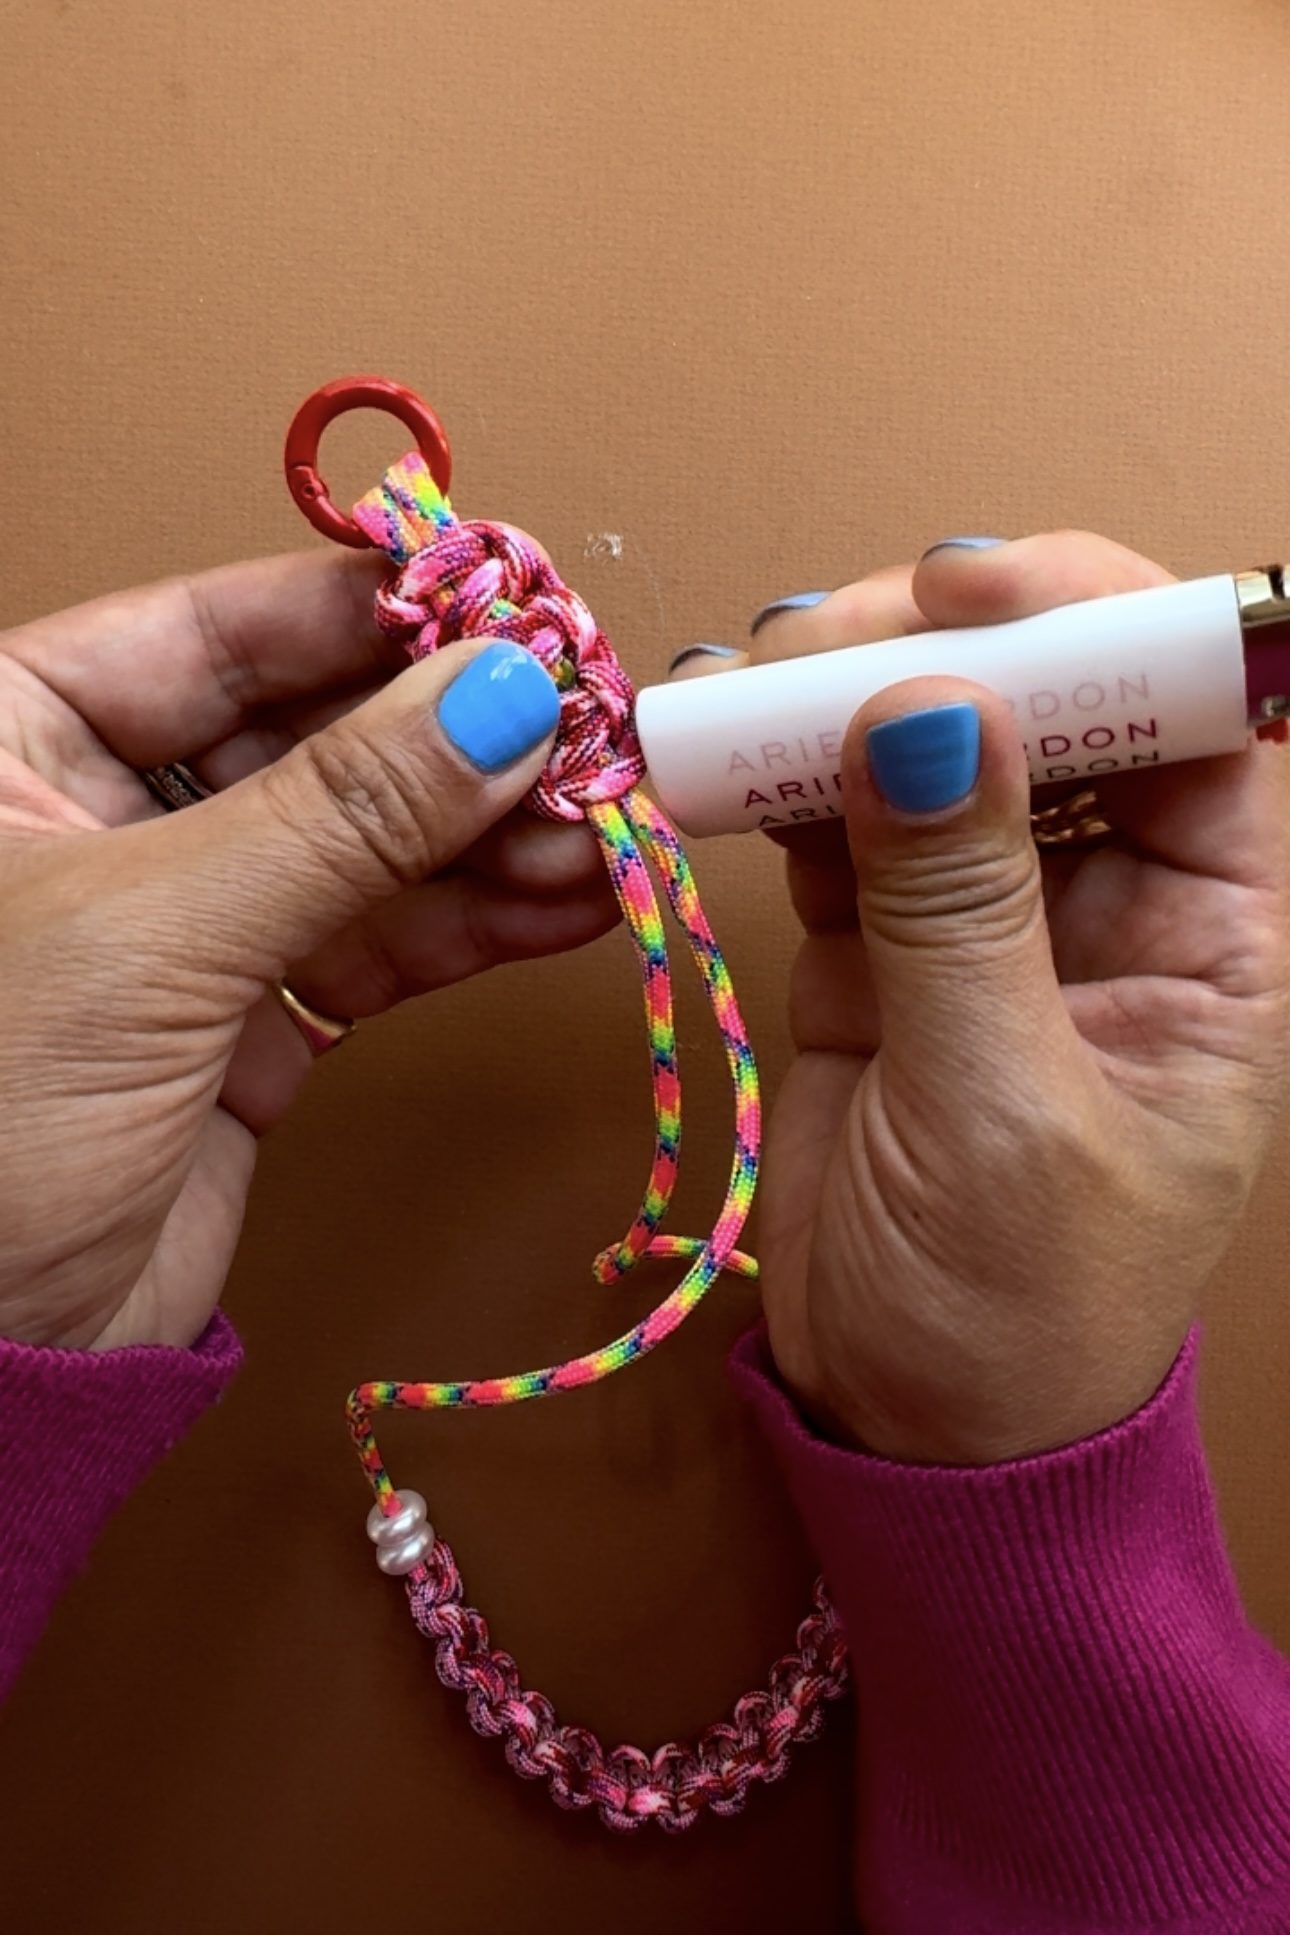
Trim and burn the ends as you did before.
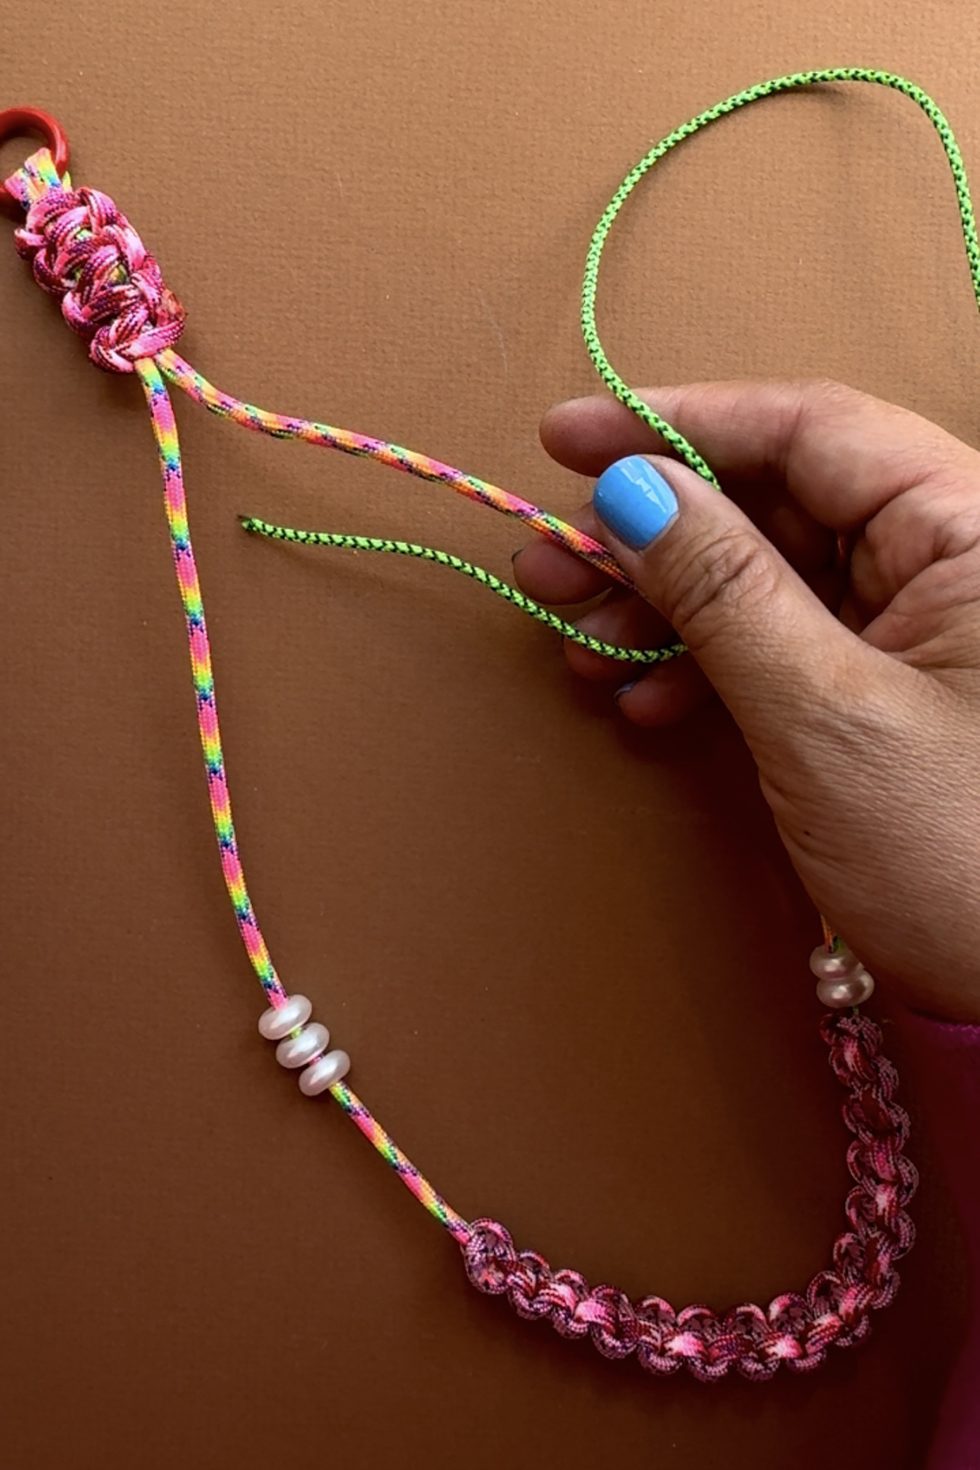
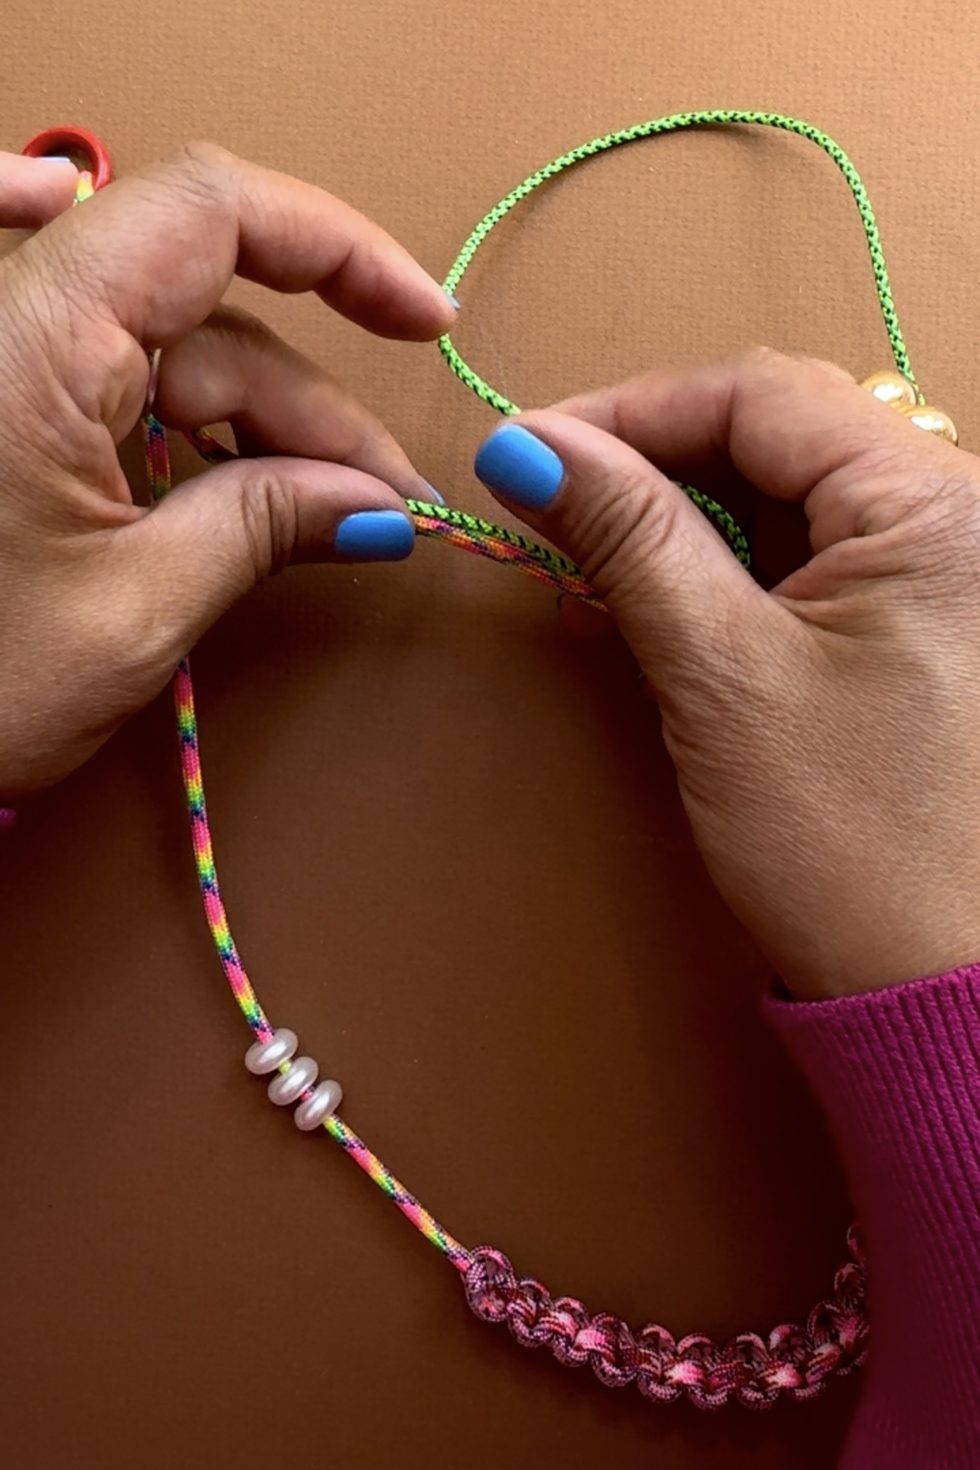
Your phone lanyard is ready to use! Additionally, you can decorate the lanyard with barrel knots using the remaining thick rope or thin rope (as seen in the sliding knot tutorial)
Cut about 12" of rope. Lay 3" of cord parallel to base rope.
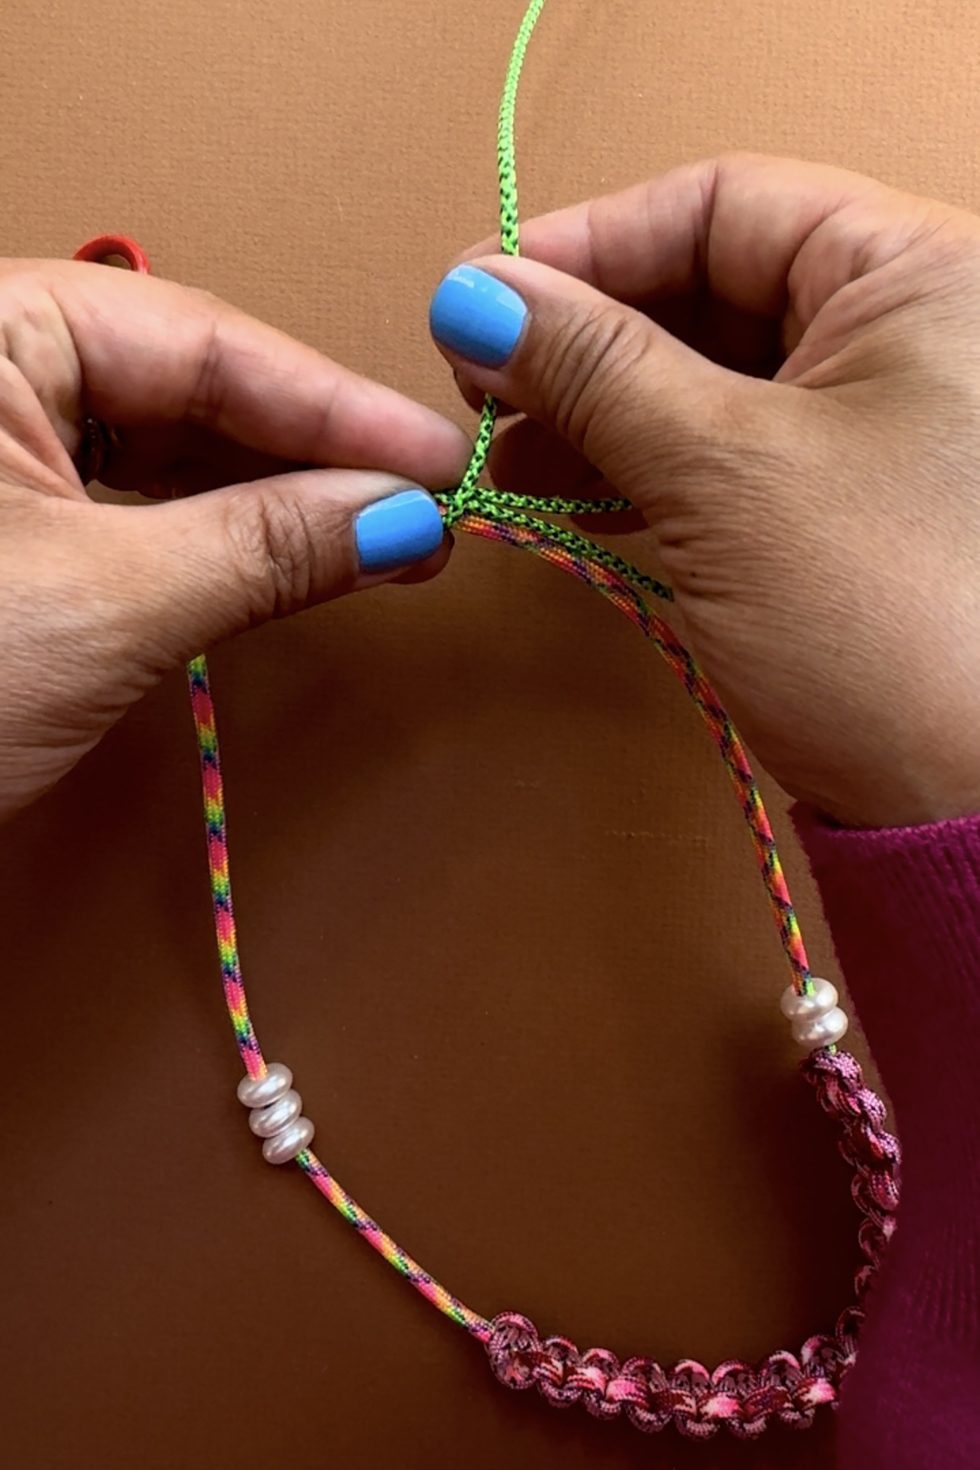
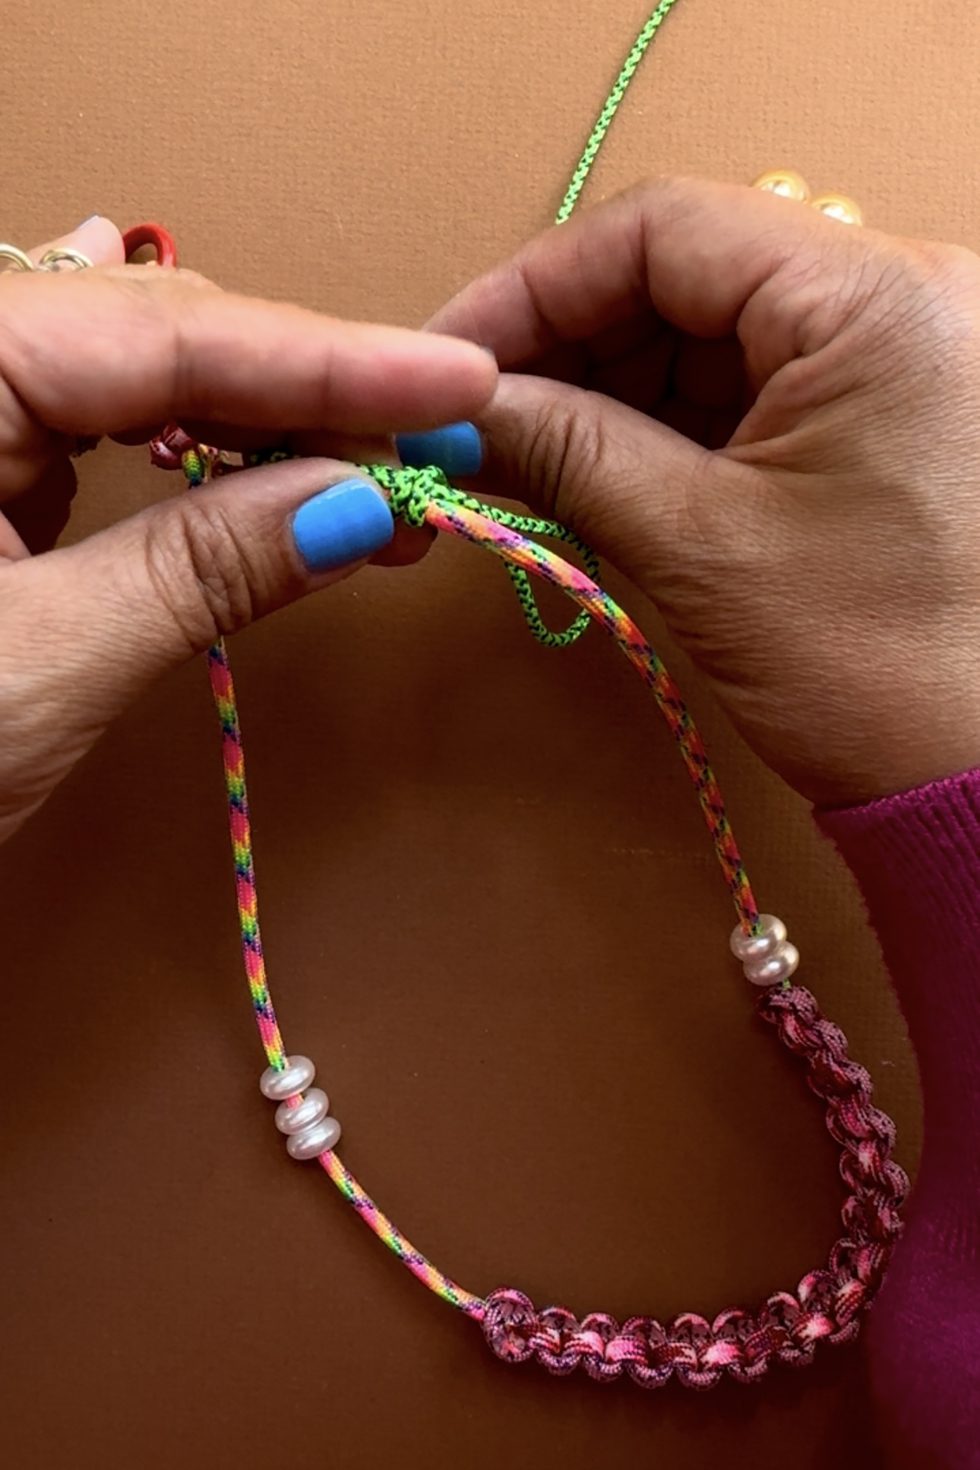
Then fold the rope back over itself. Leaving a 1/2" tail, start coiling the rope. Make sure to make the coil as tight as possible. Use your left fingers to help keep it in place.
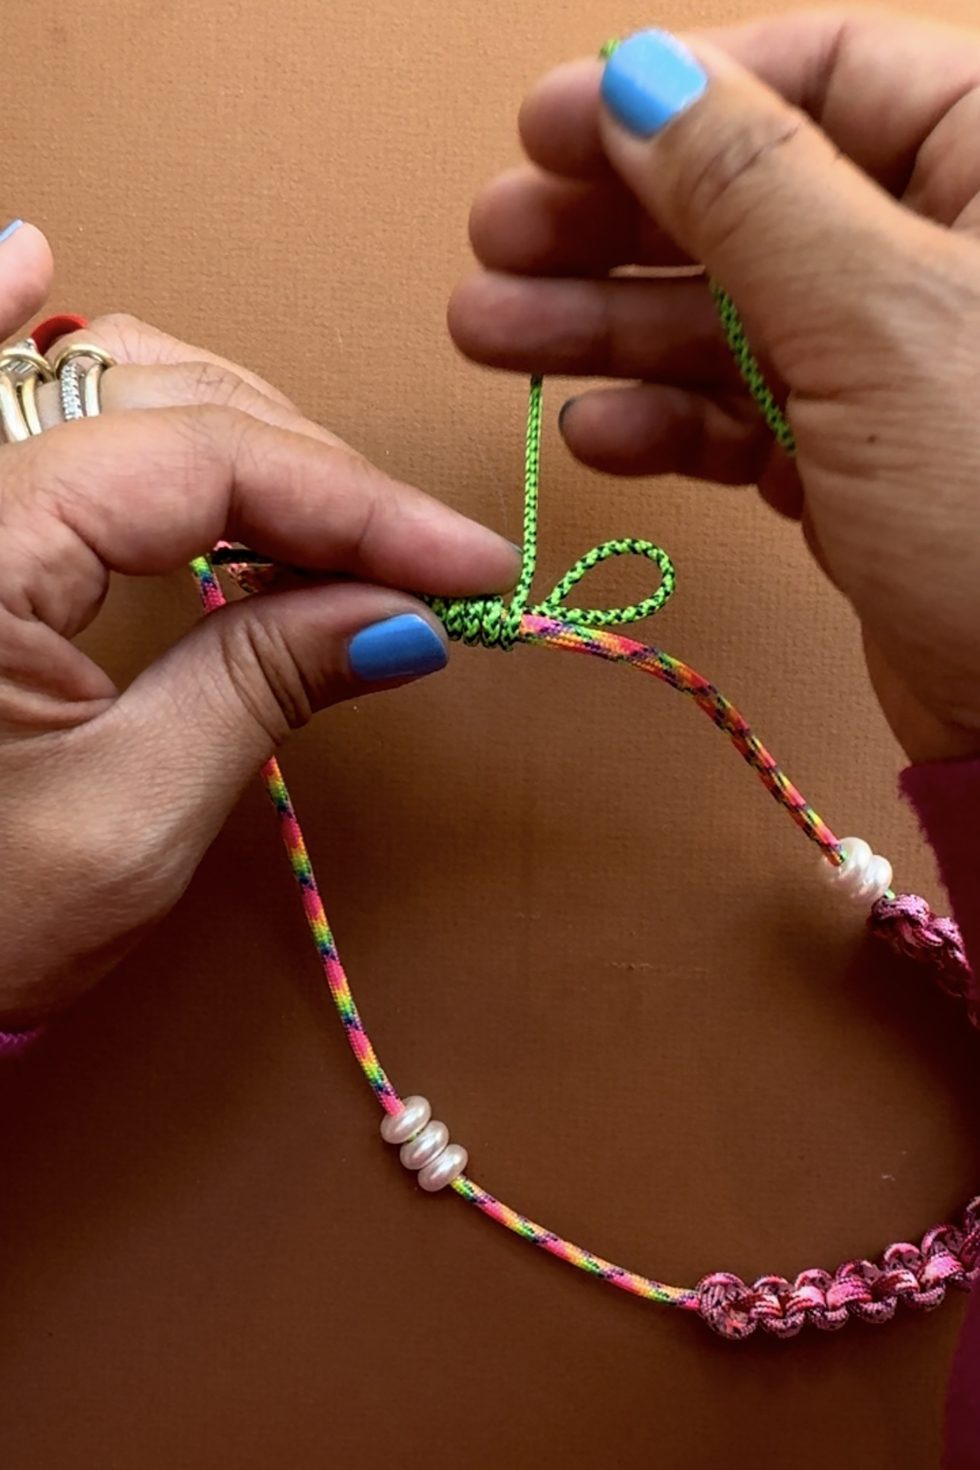
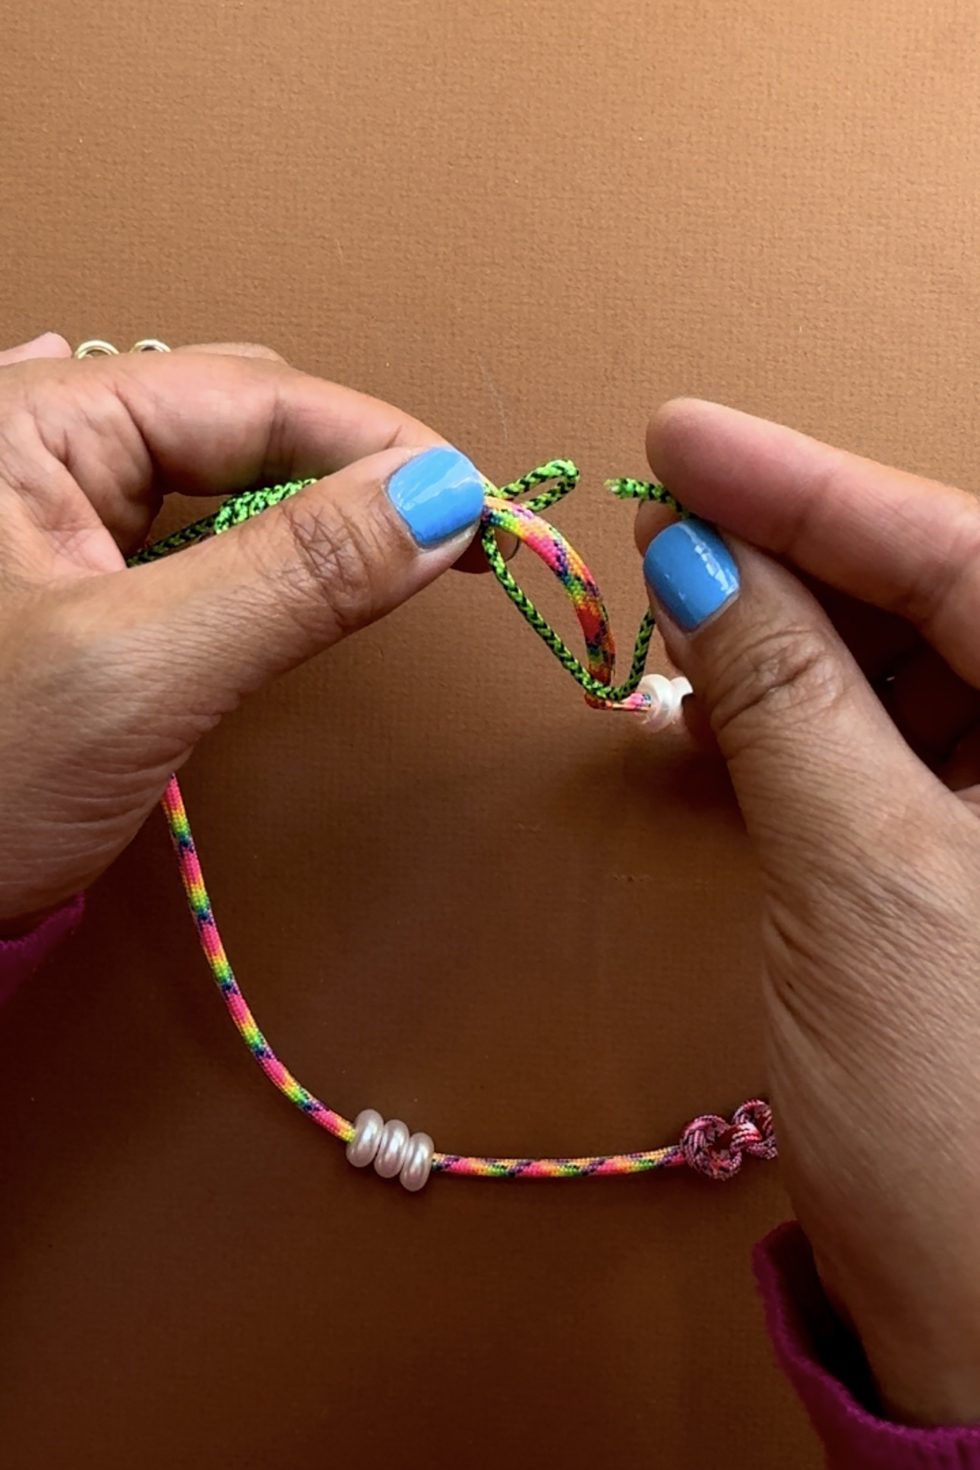
Once you've reached the desired length, pull the end of the rope through the open loop from behind.
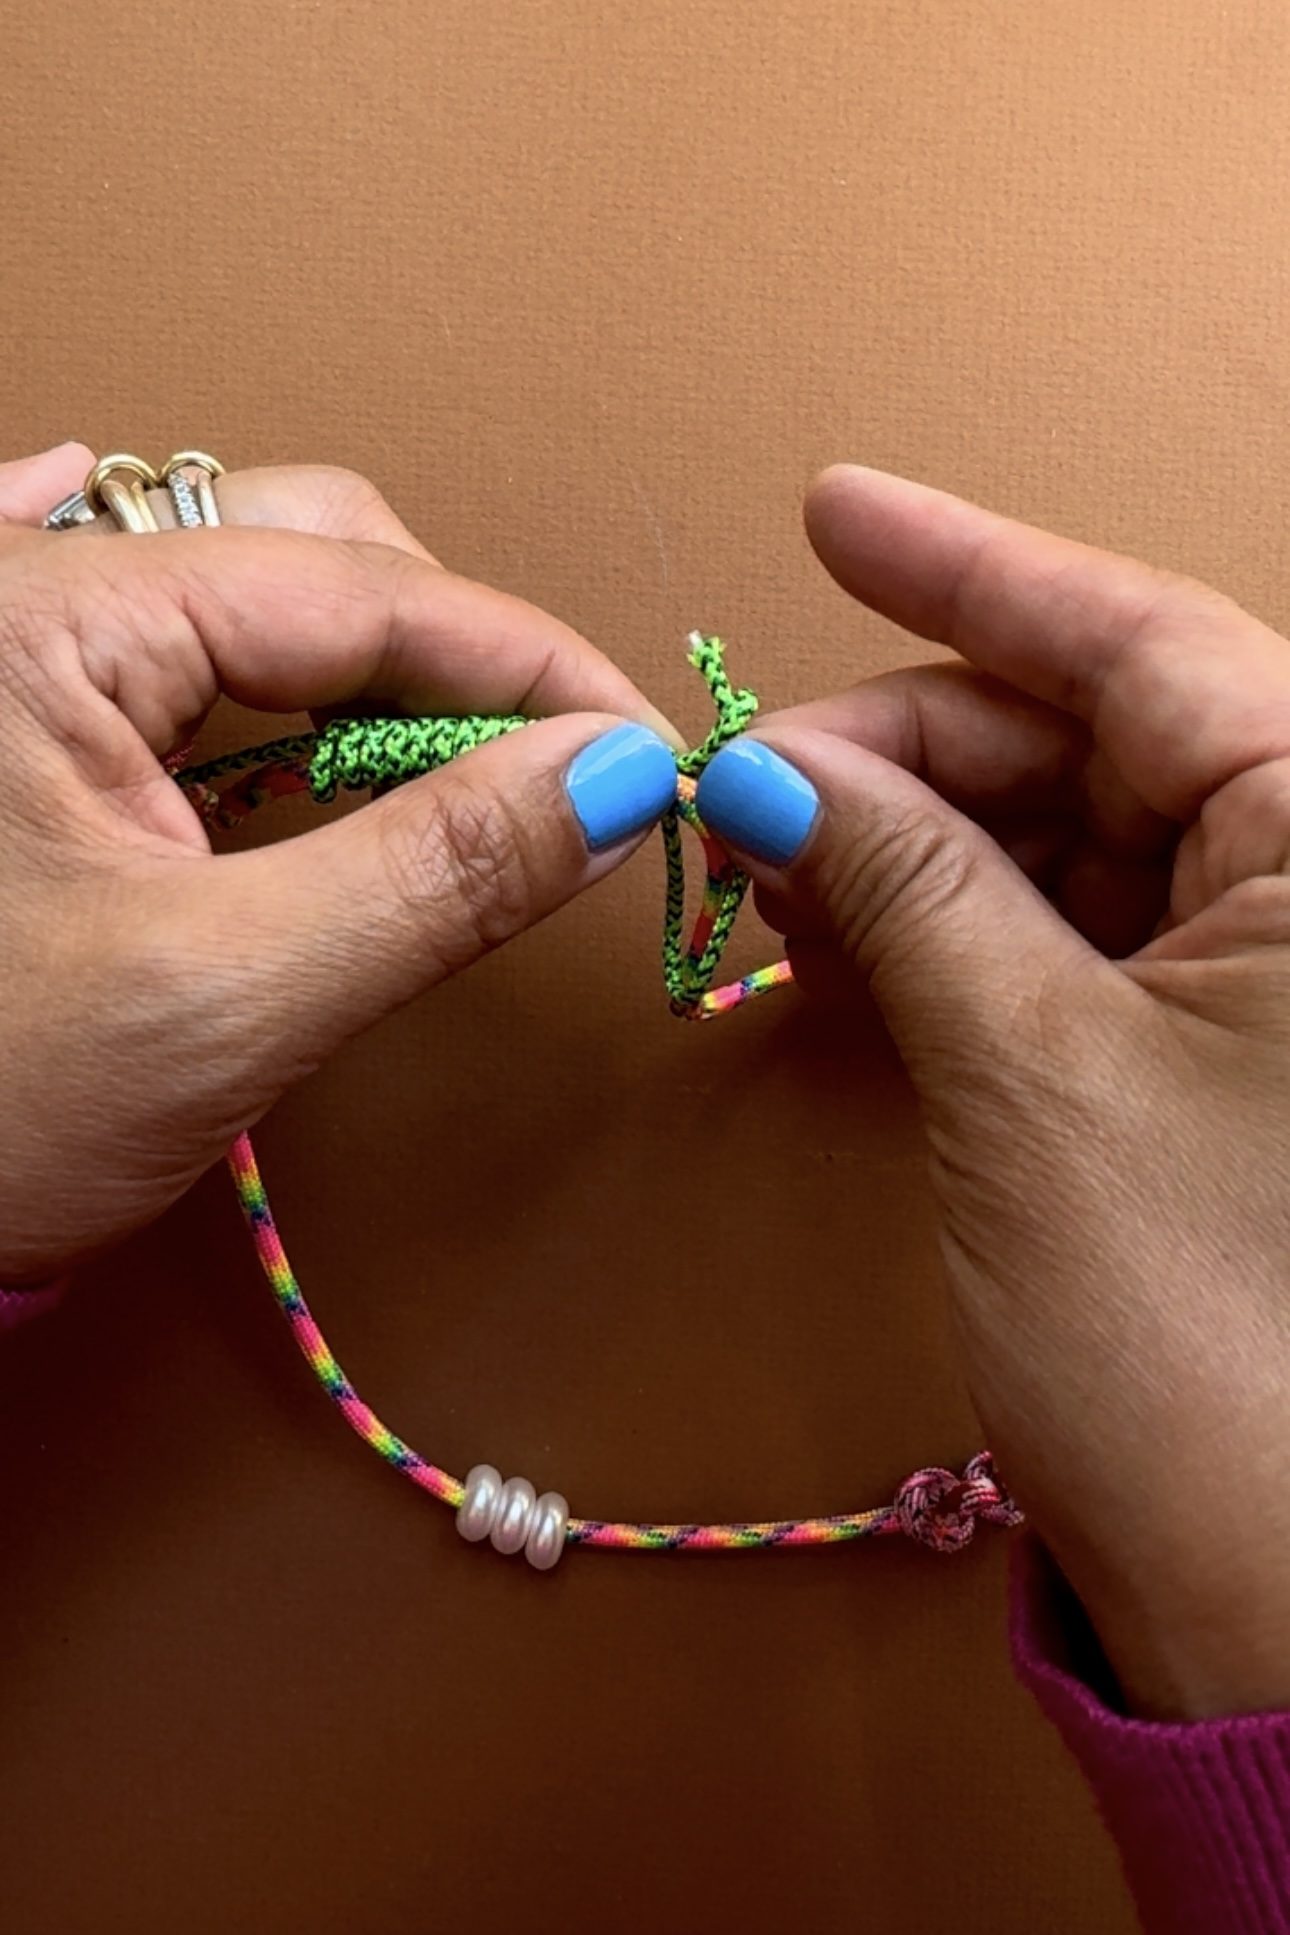
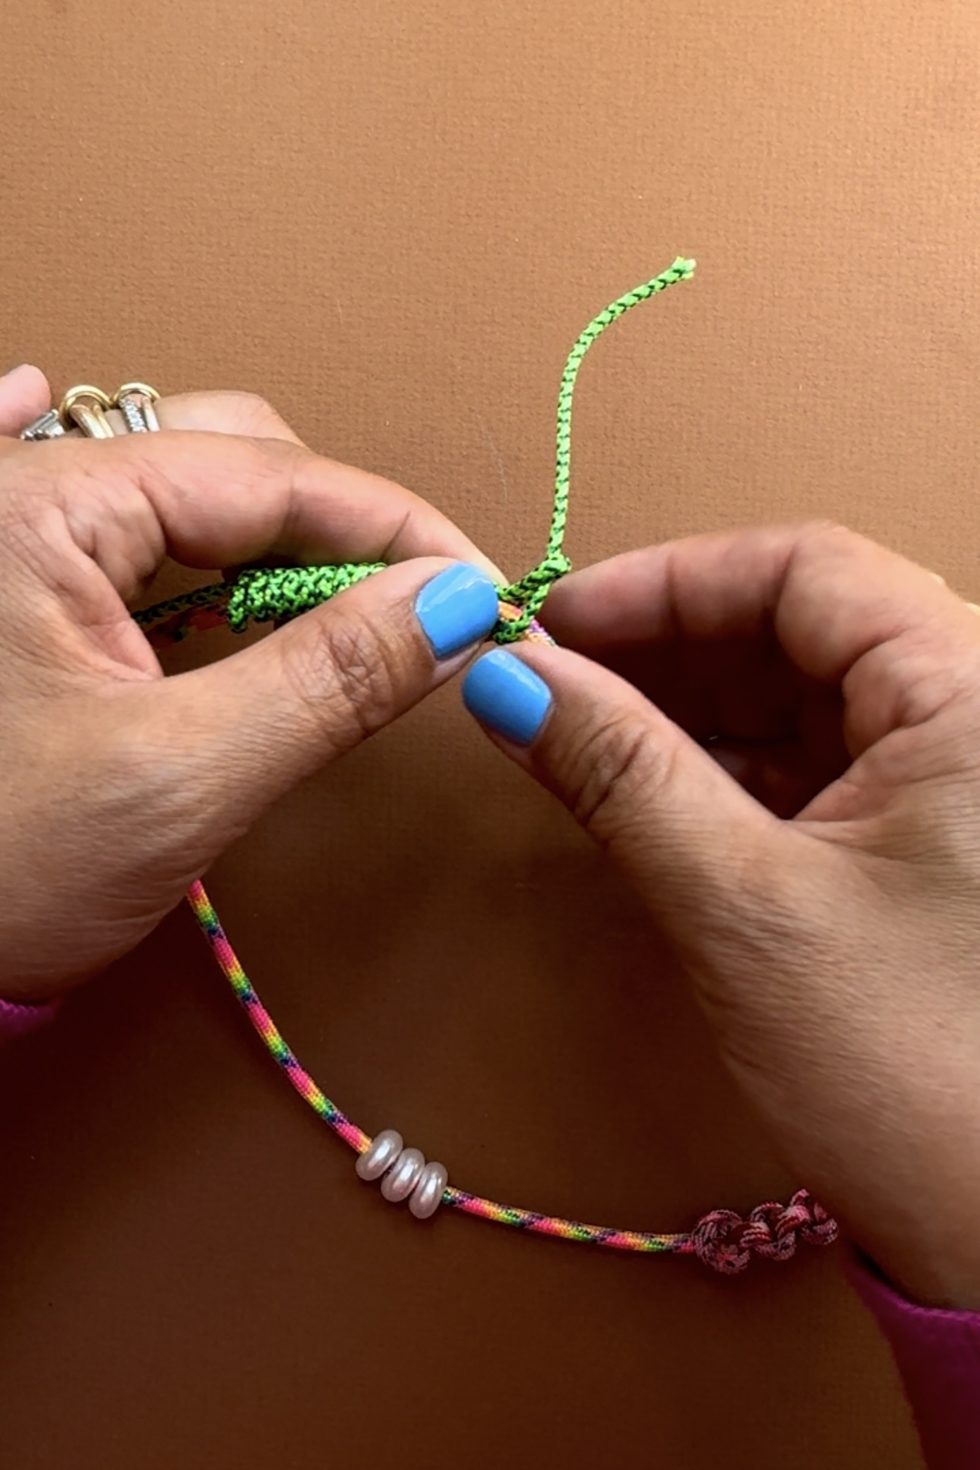
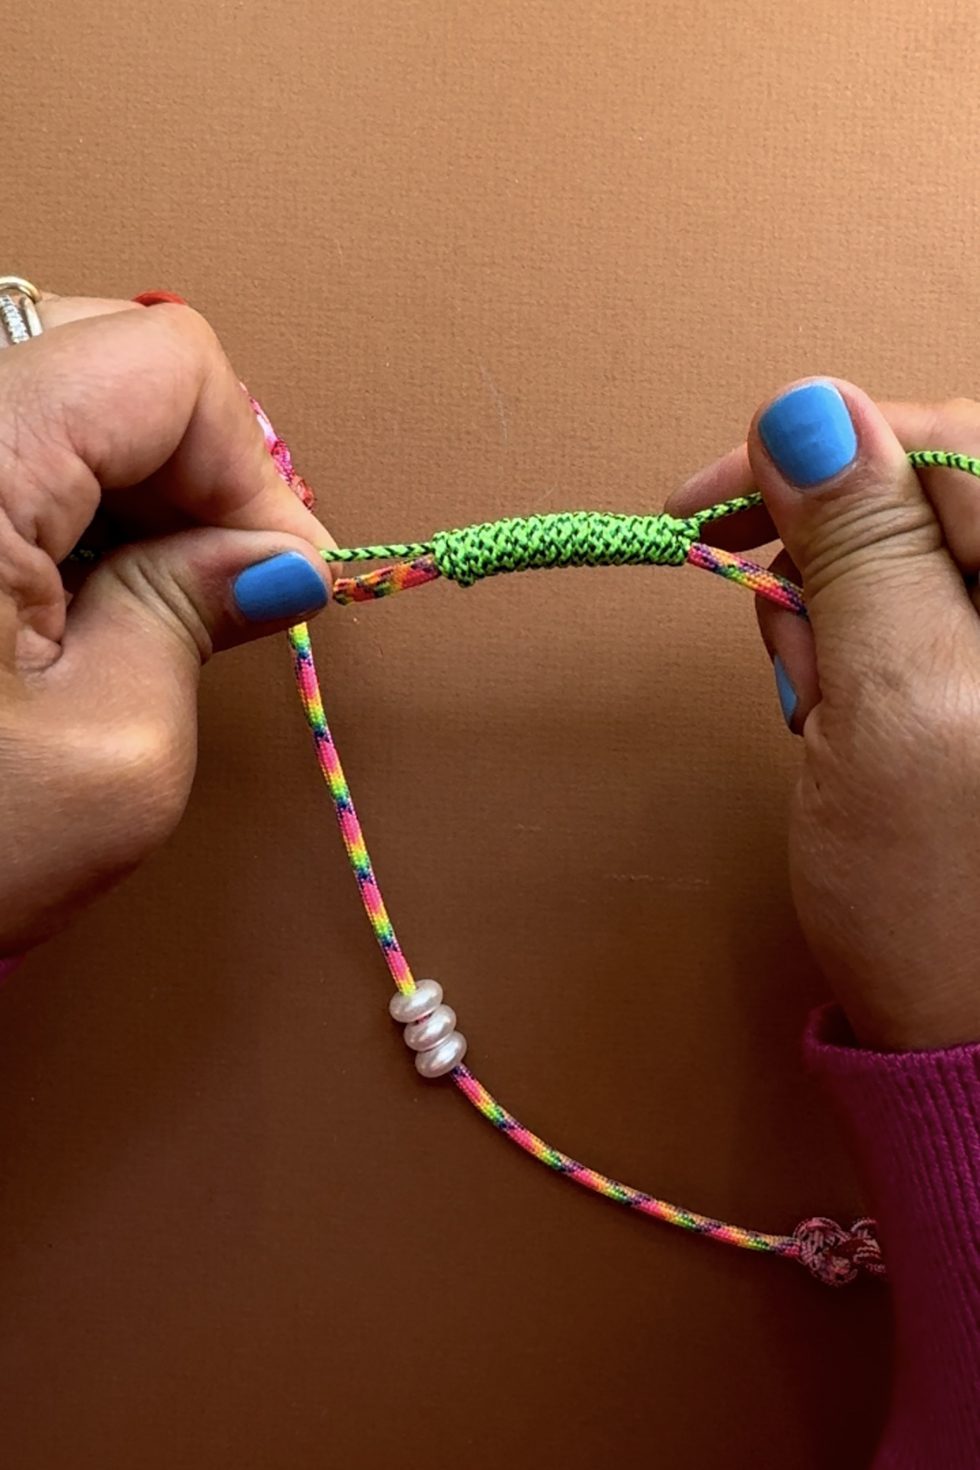
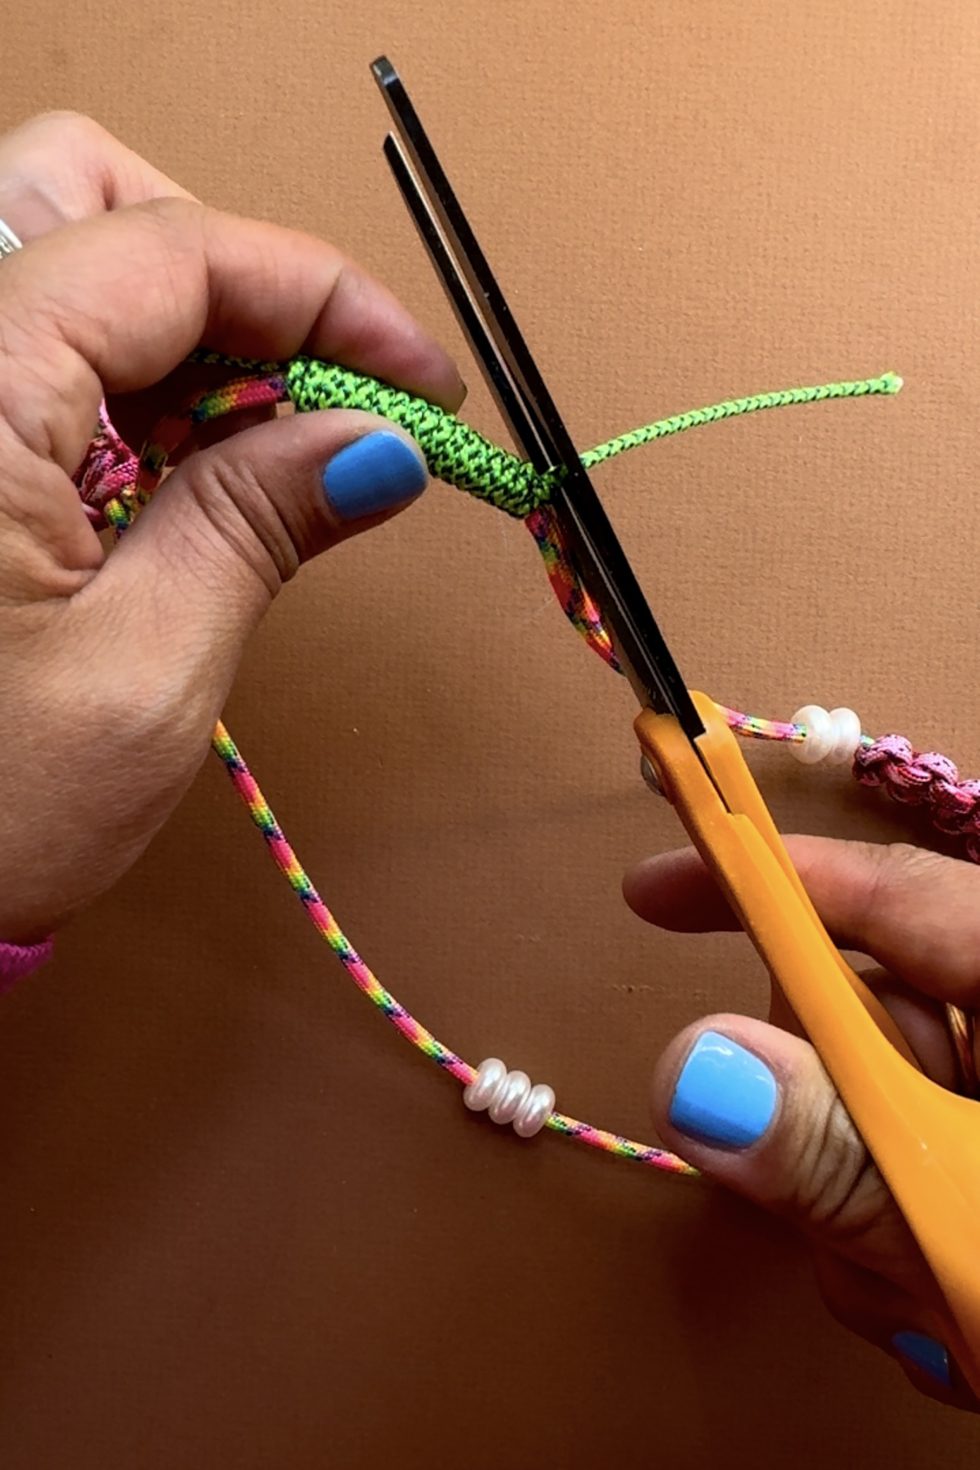
Pull both ends until tight. Trim the ends.
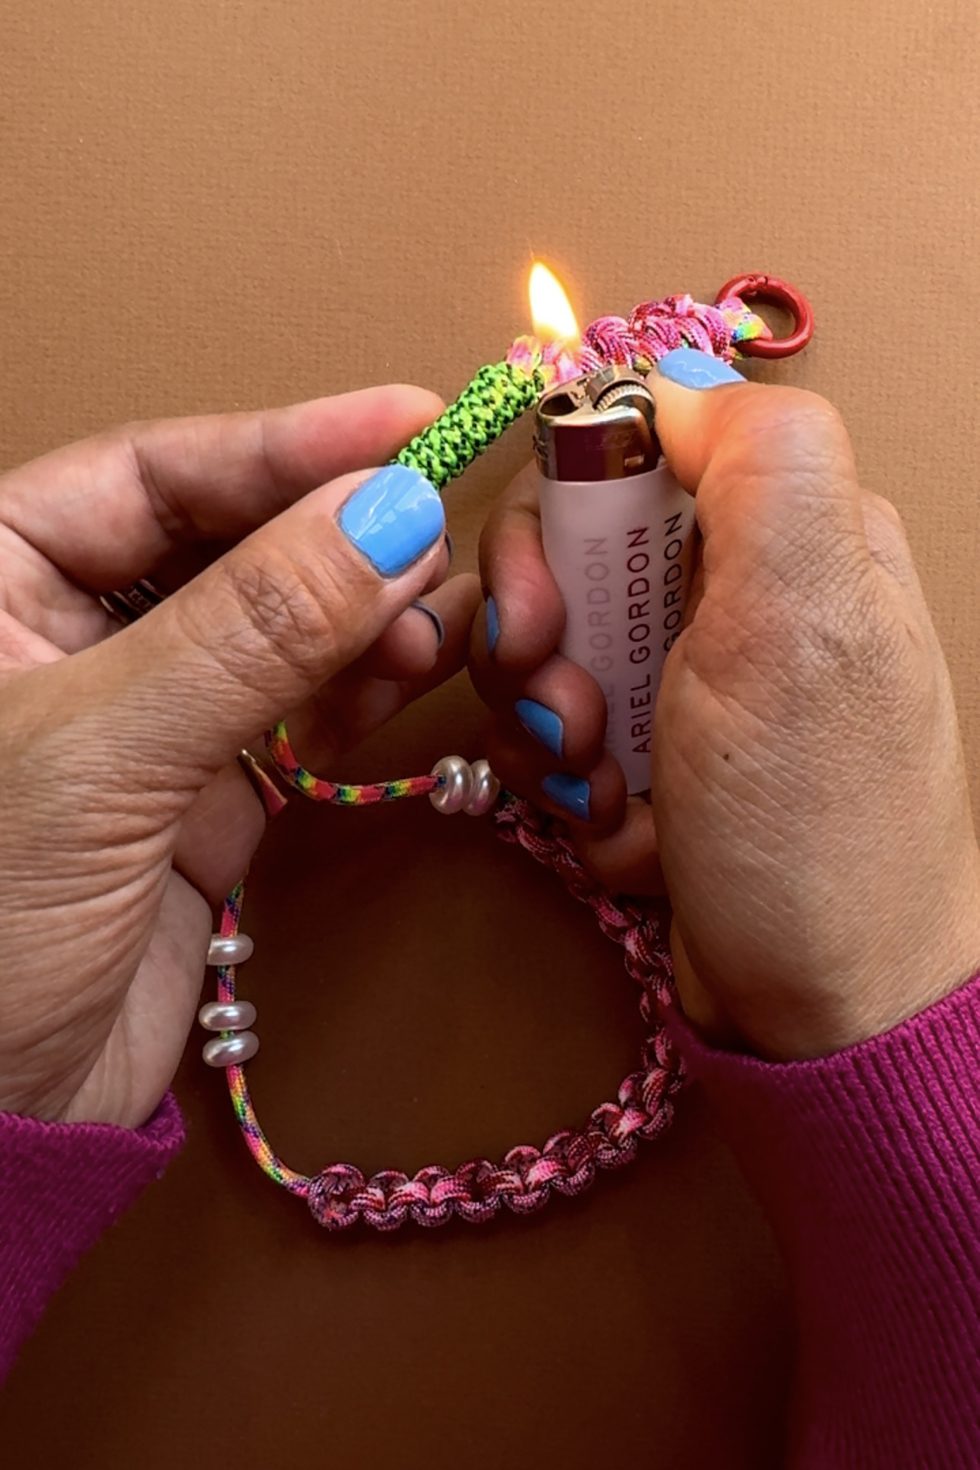
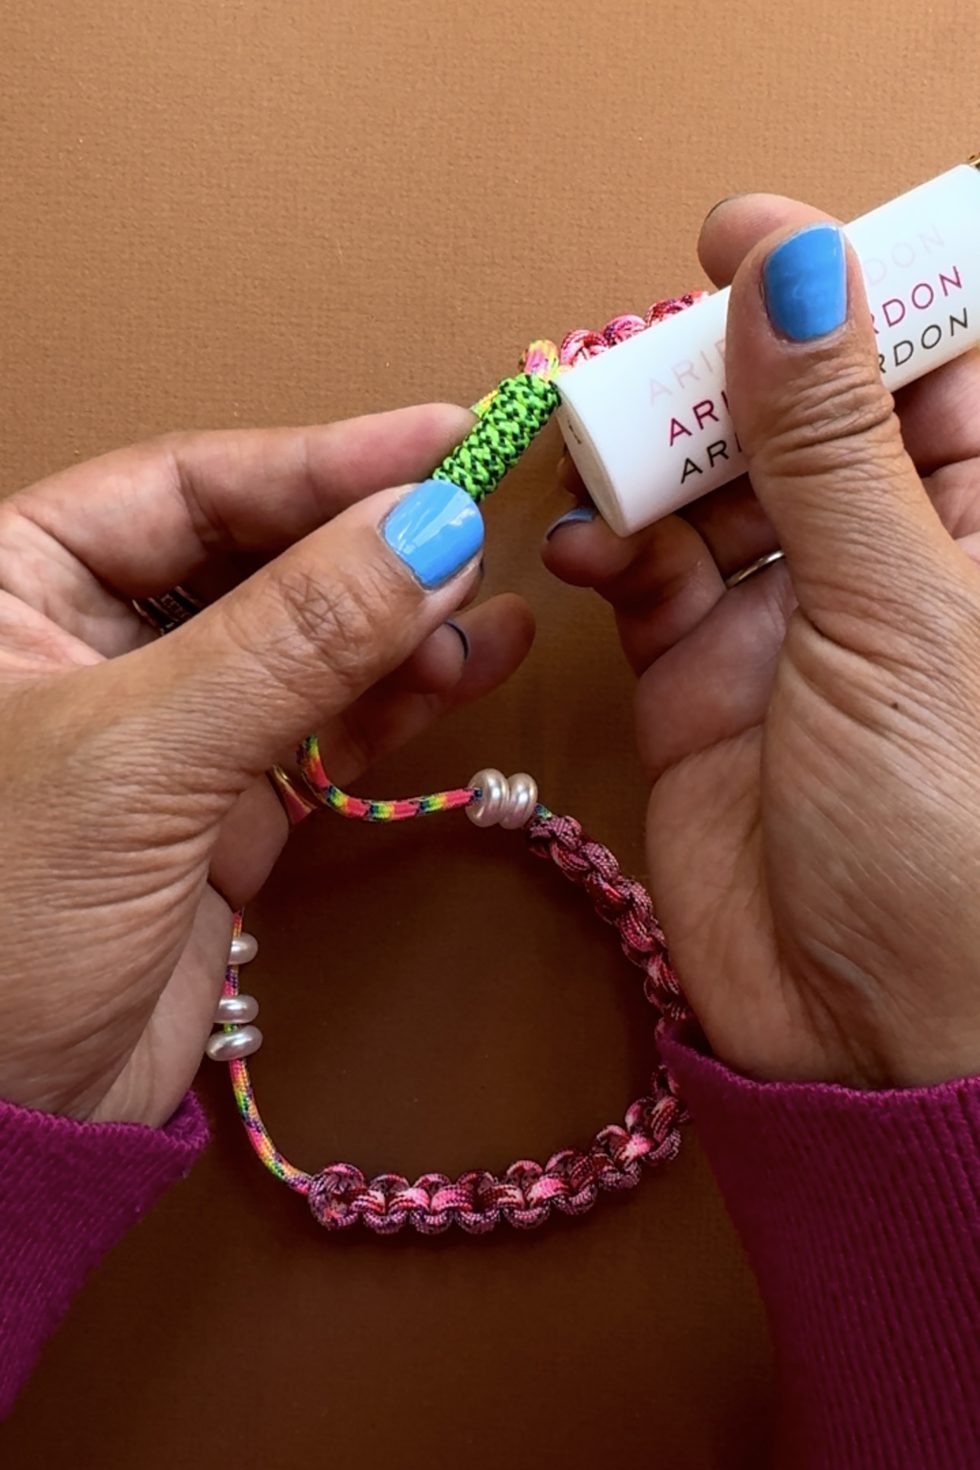
Burn the ends until they begin to melt. Immediately use the back of the lighter and press the ends down onto the knot. This keeps the barrel knot in place. You can slide the barrel knot along the base rope to adjust the placement.
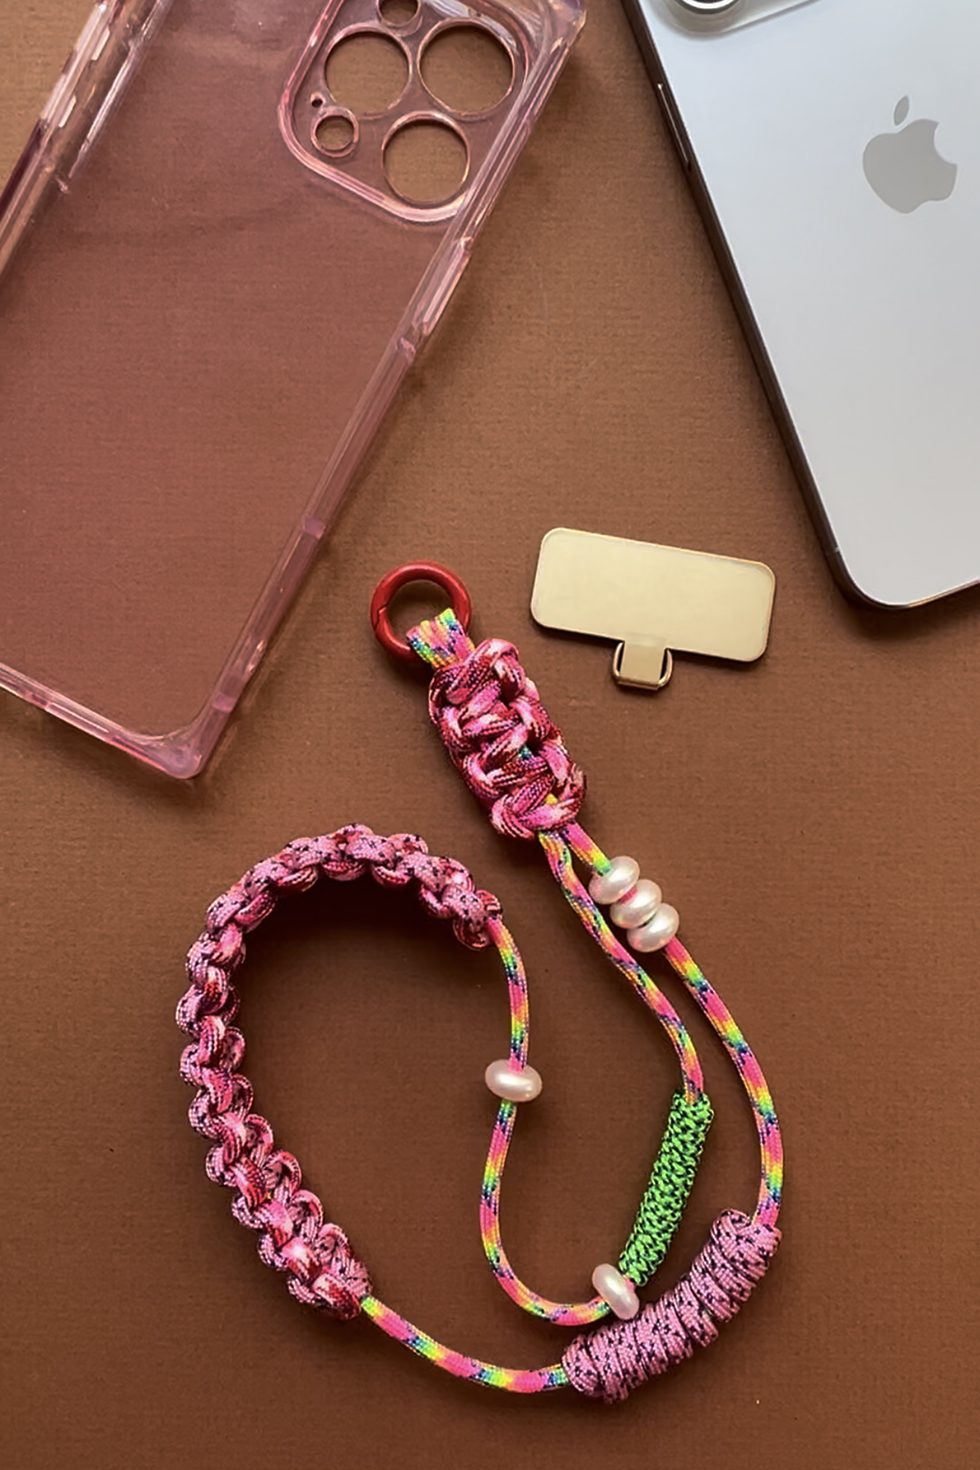
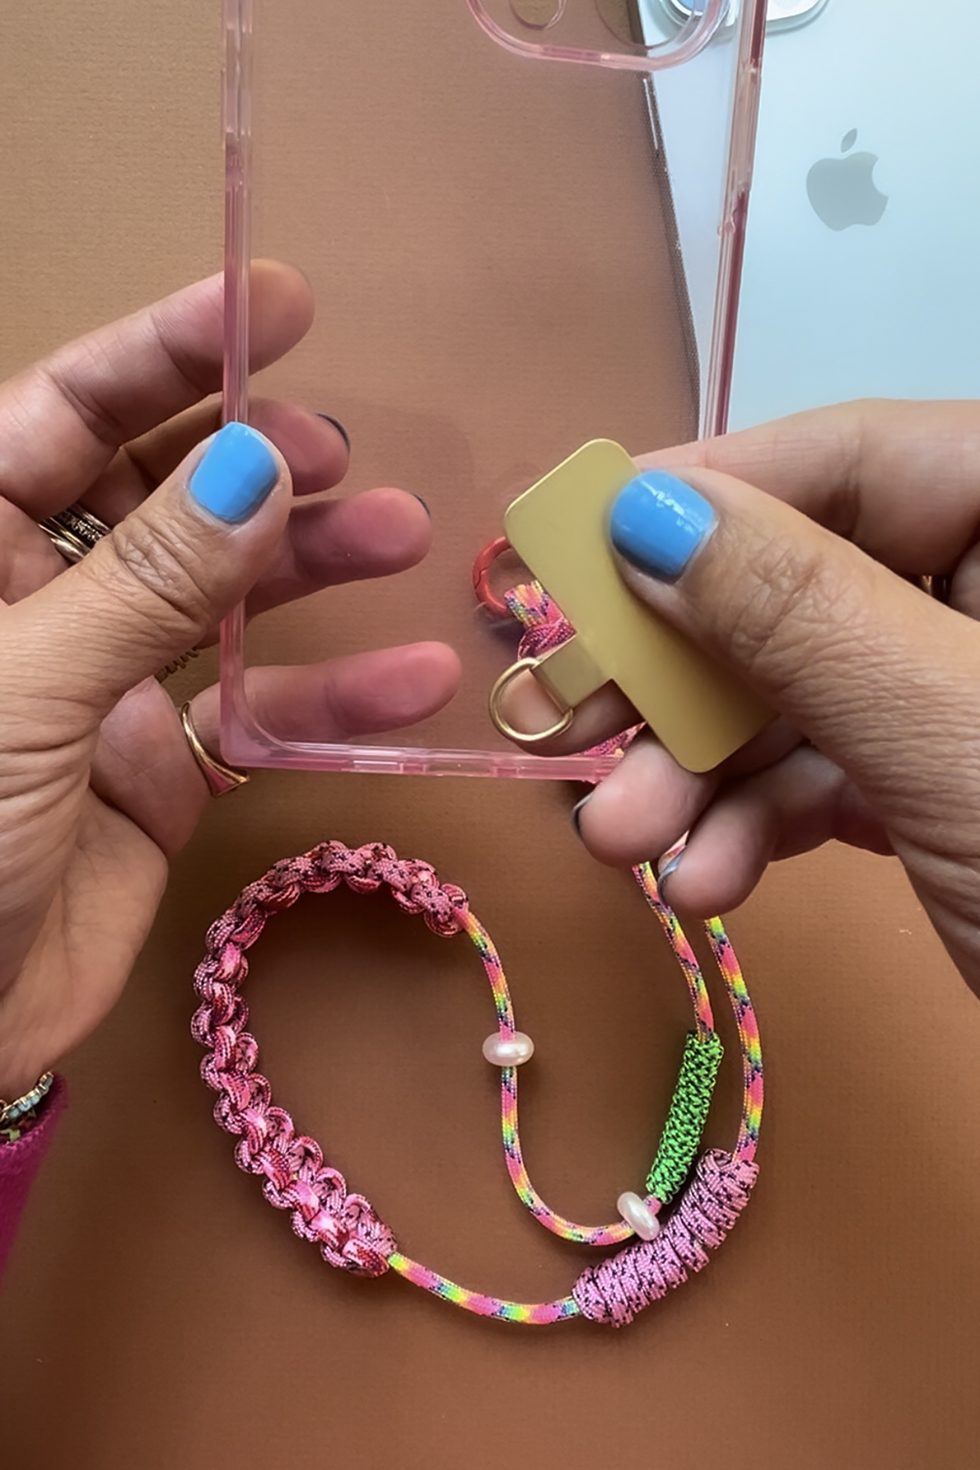
To assemble, take the metal phone insert and insert it into the bottom opening of your phone case.
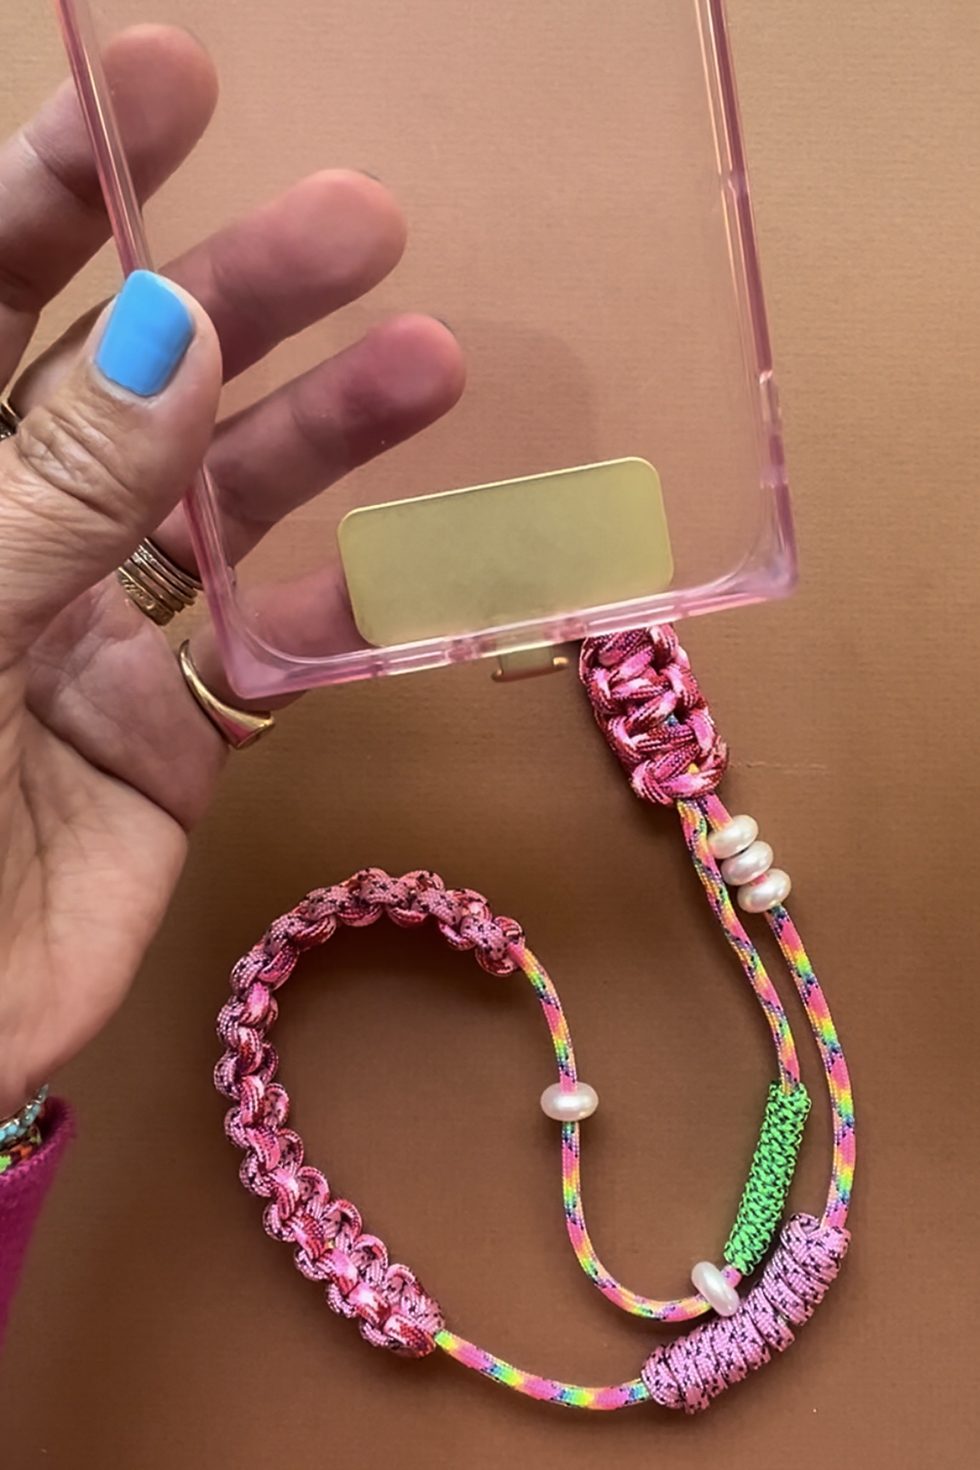
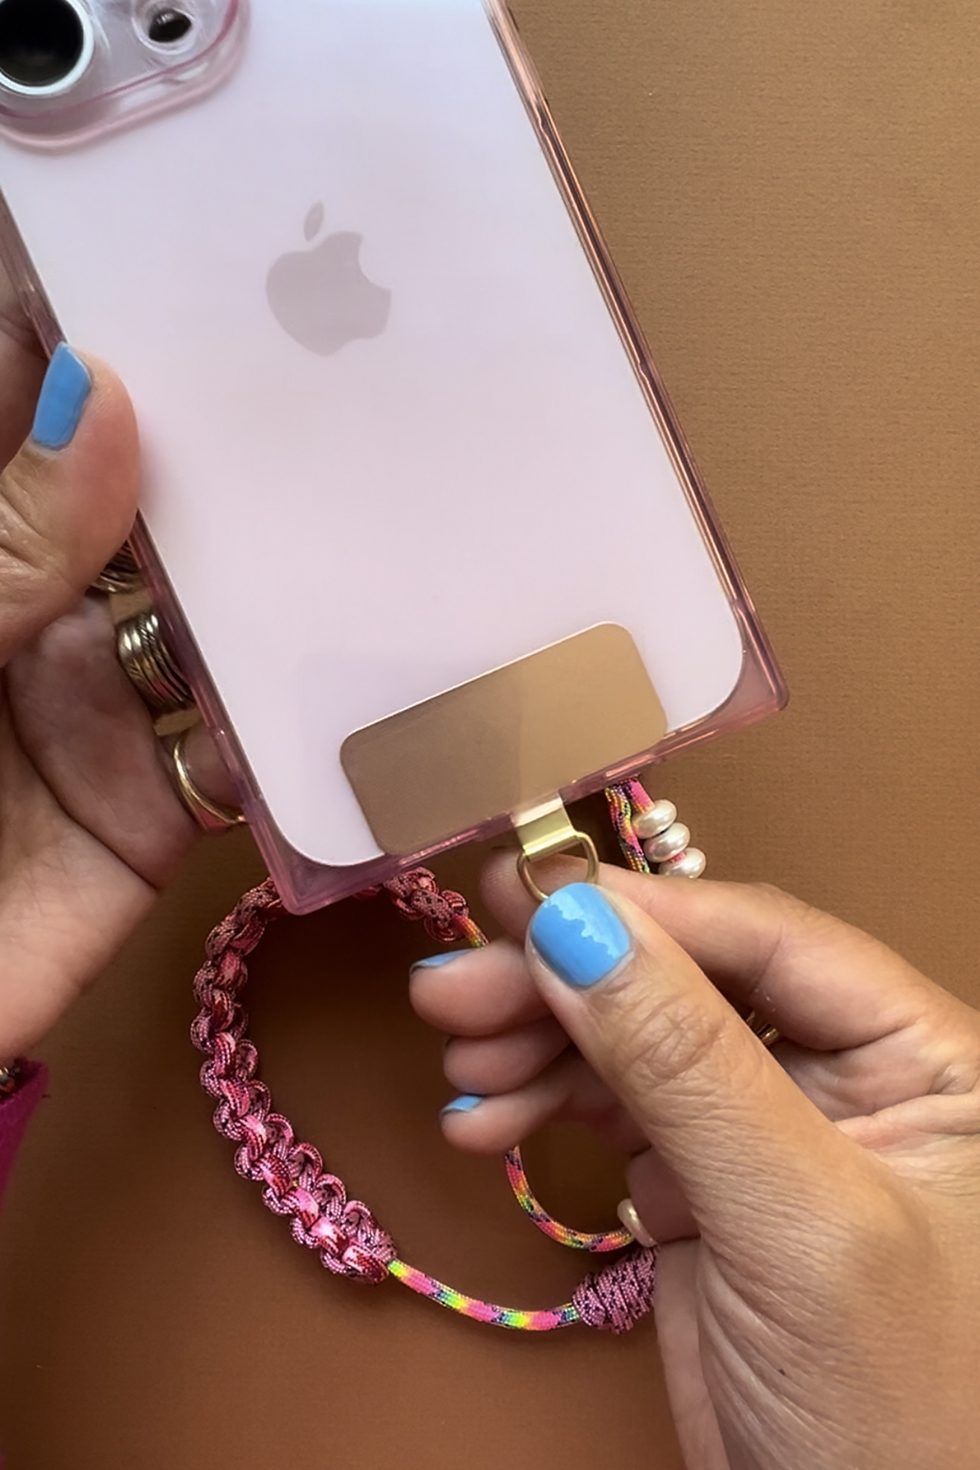
Place your phone into the phone case.
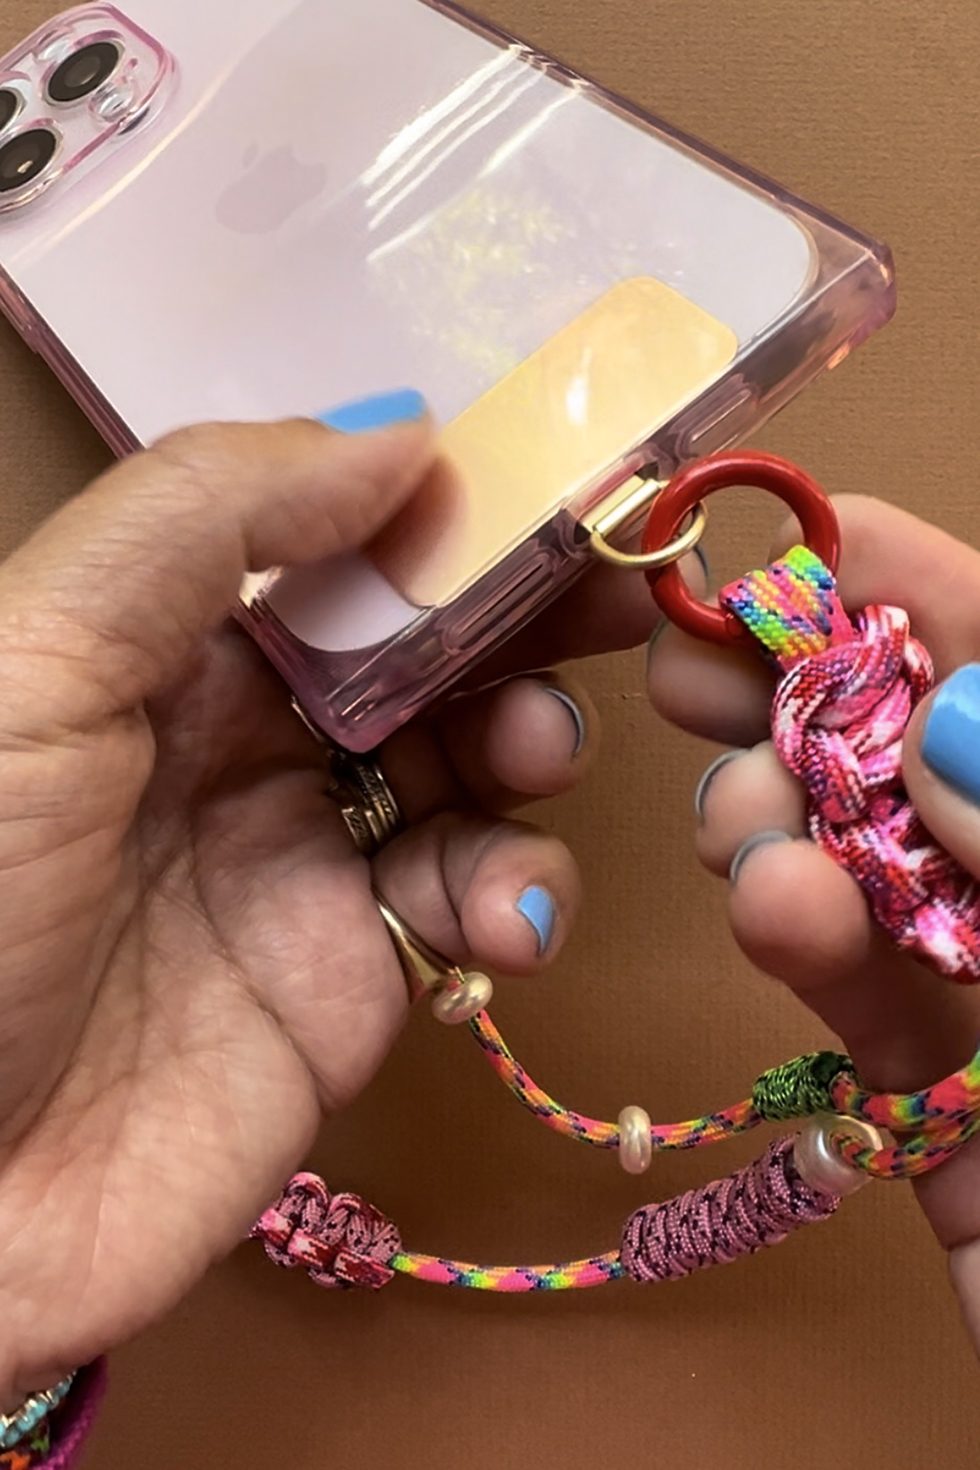
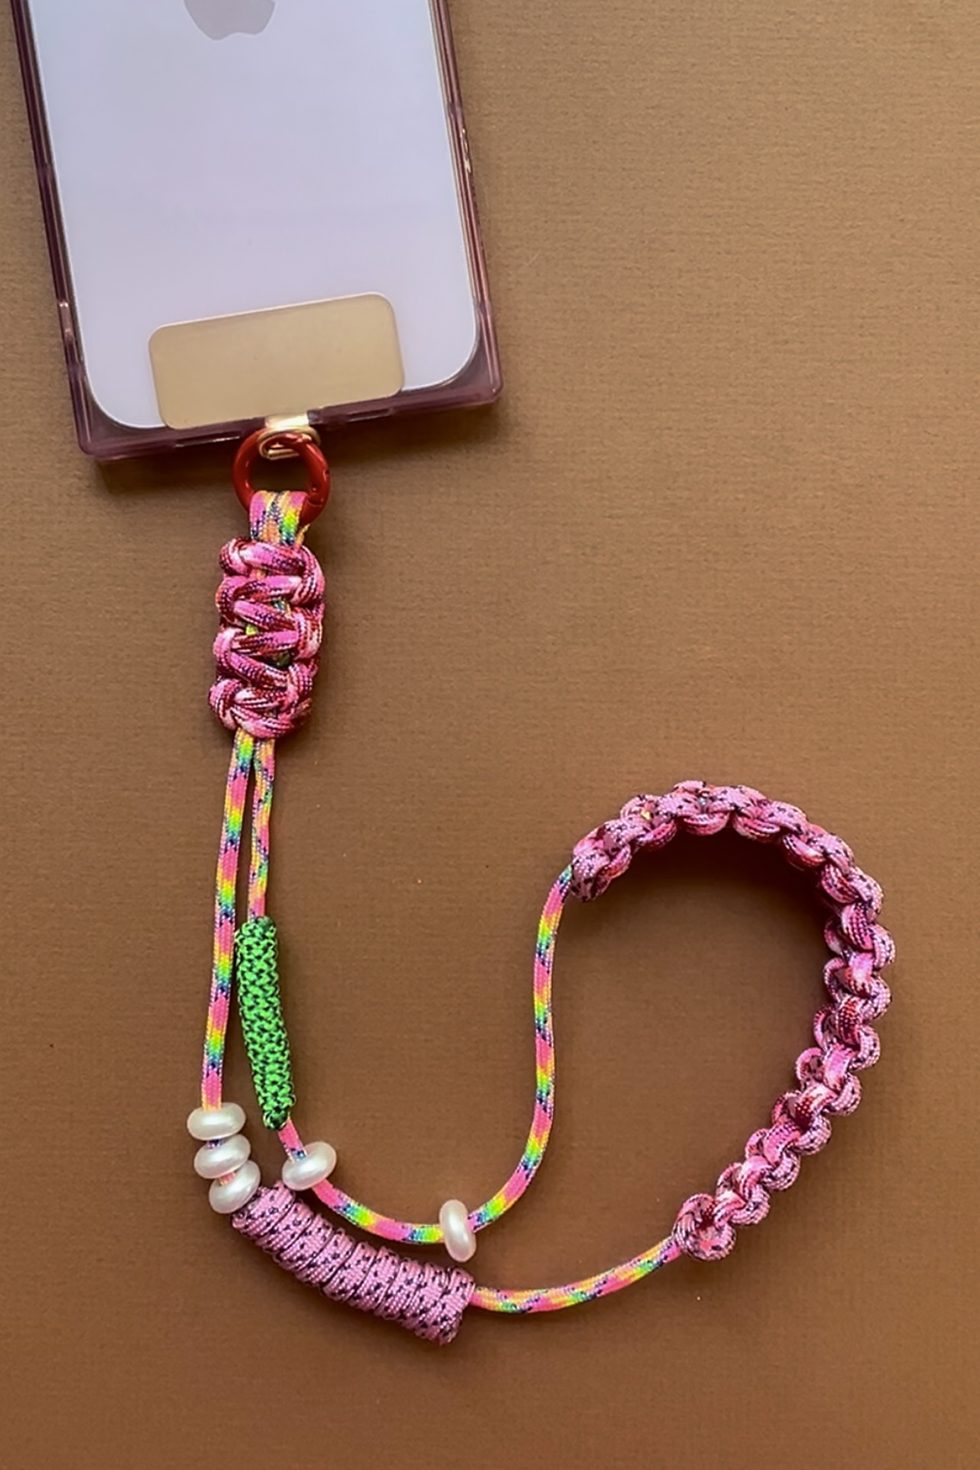
Snap the O-ring onto the ring of the metal phone insert. Your phone lanyard is ready to use!
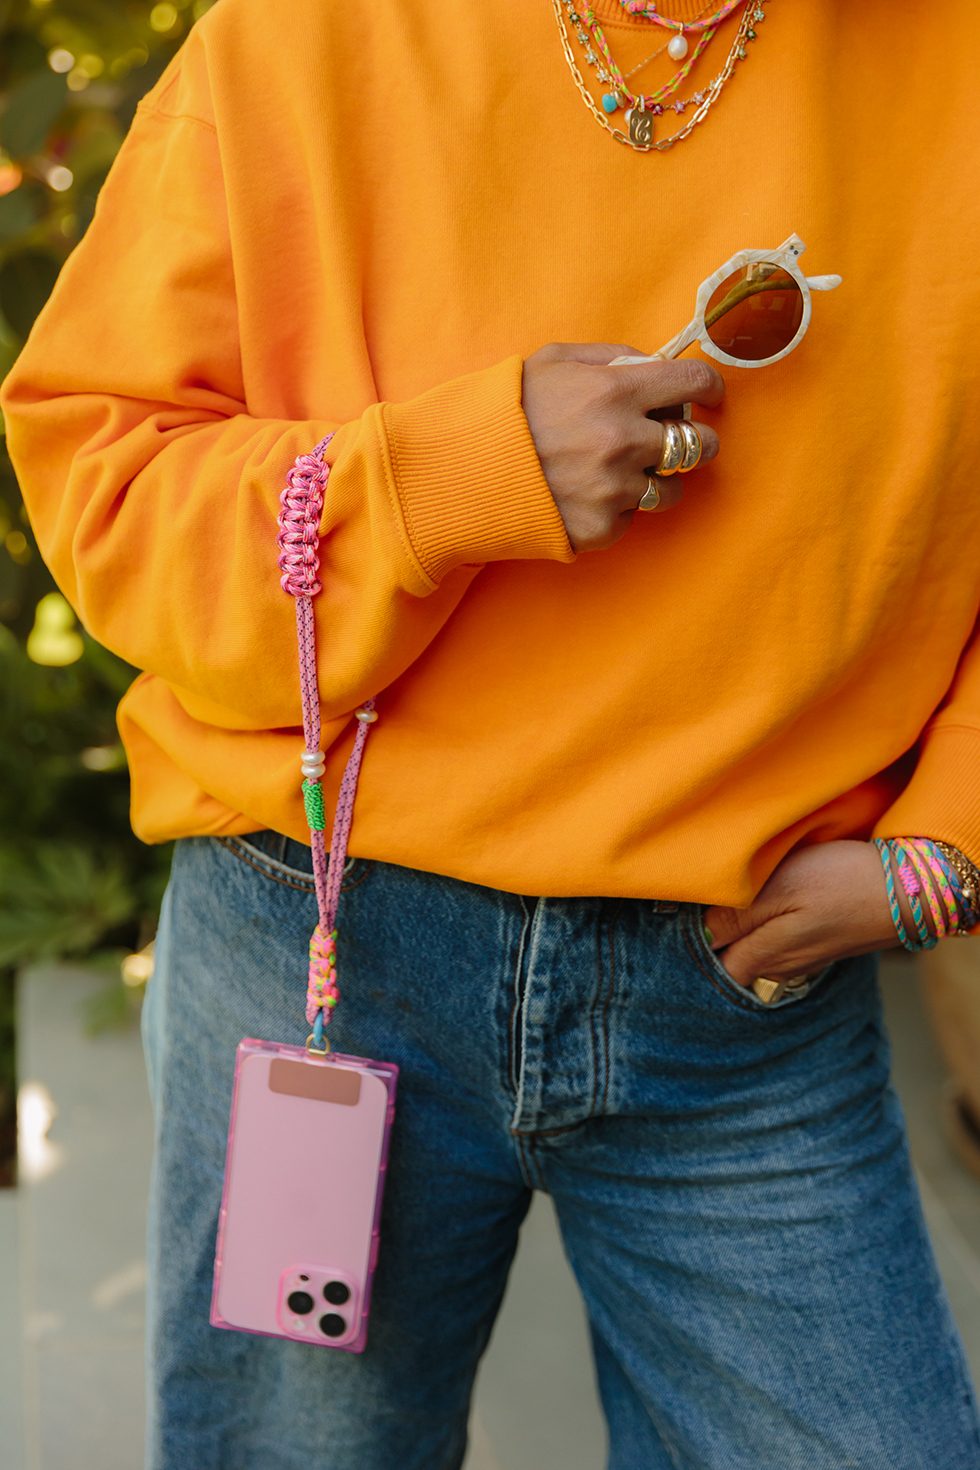
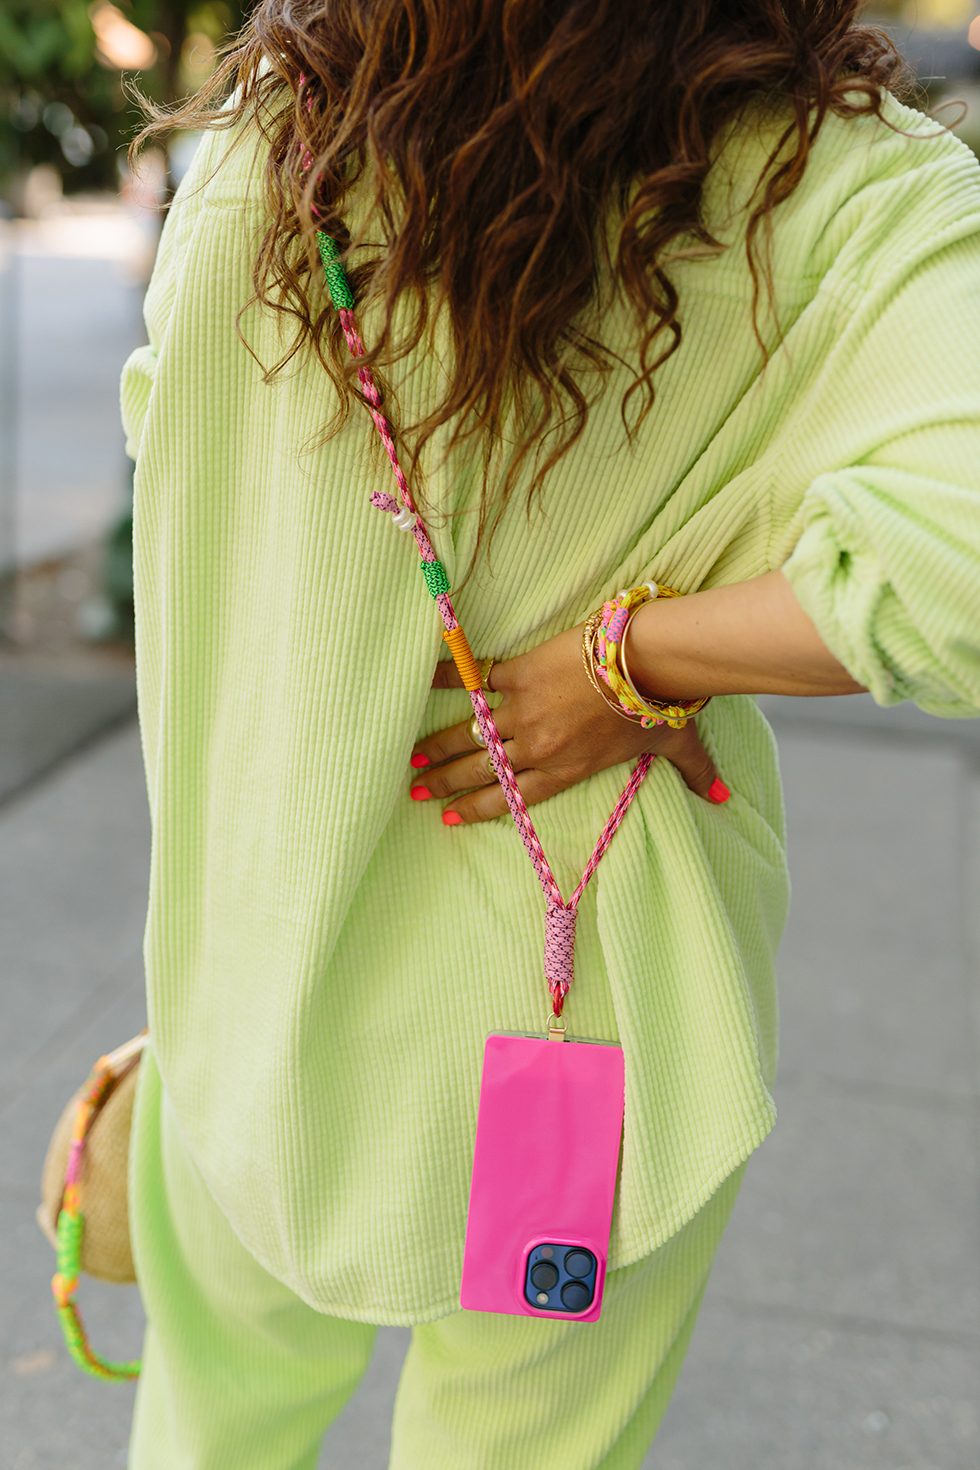
Tutorial in collaboration with Ariel Gordon Jewelry.
AGJ x HWTF DIY Knotty Rope Kit here





Can you describe how to make the keychain I on the bag with multiple cords hanging off. How are those attached at the top?
Love how they replied
Oh I am absolutely in love with these! I will definitely be making one as a gift over the holidays!