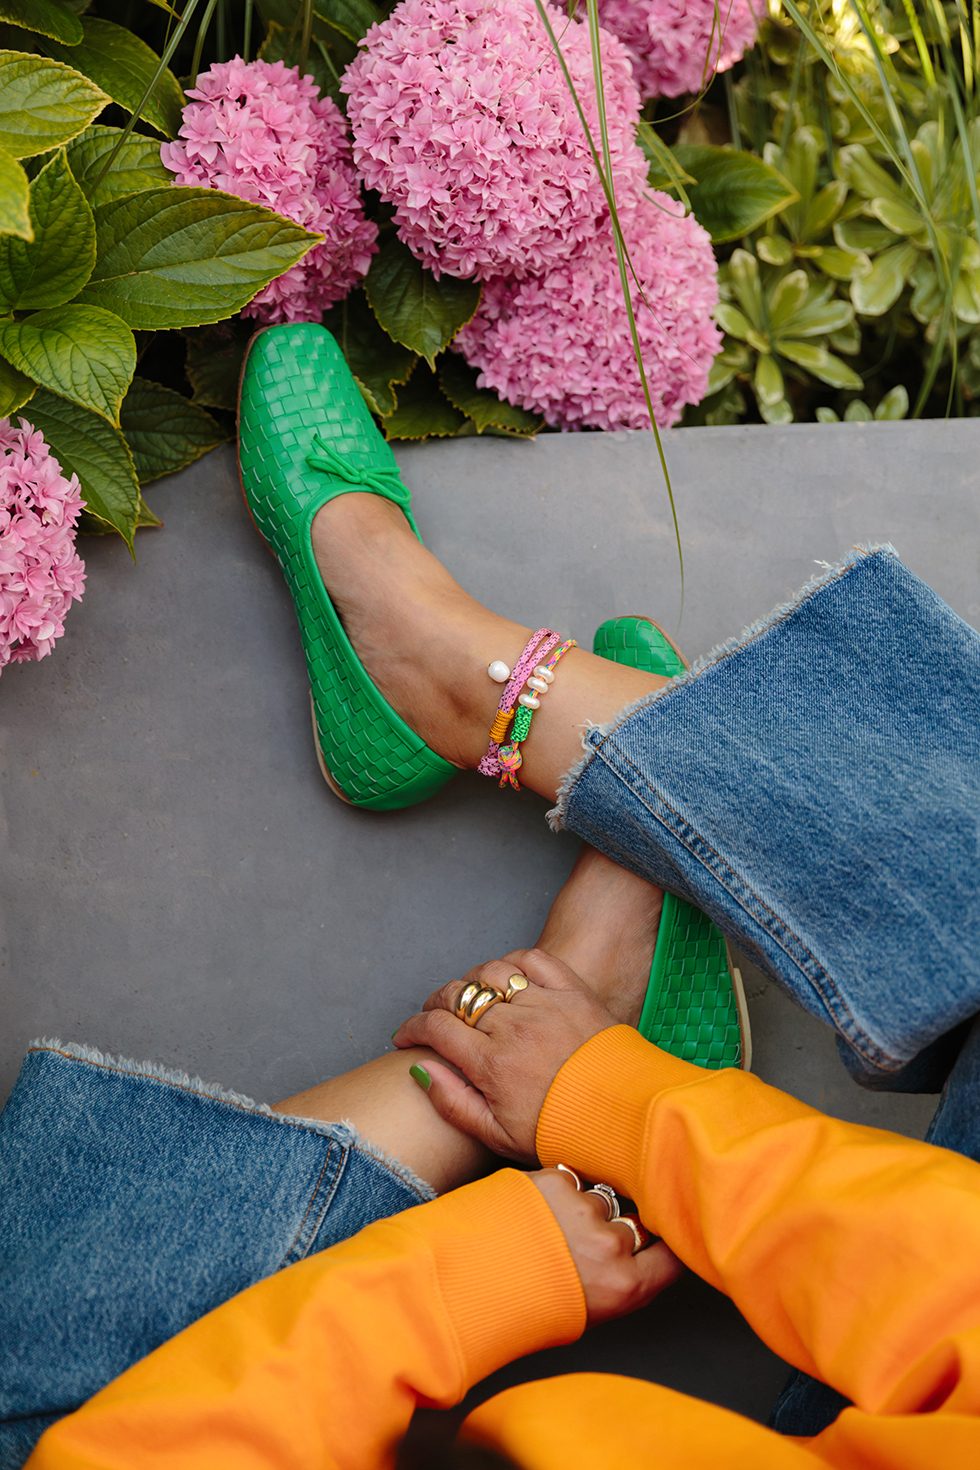
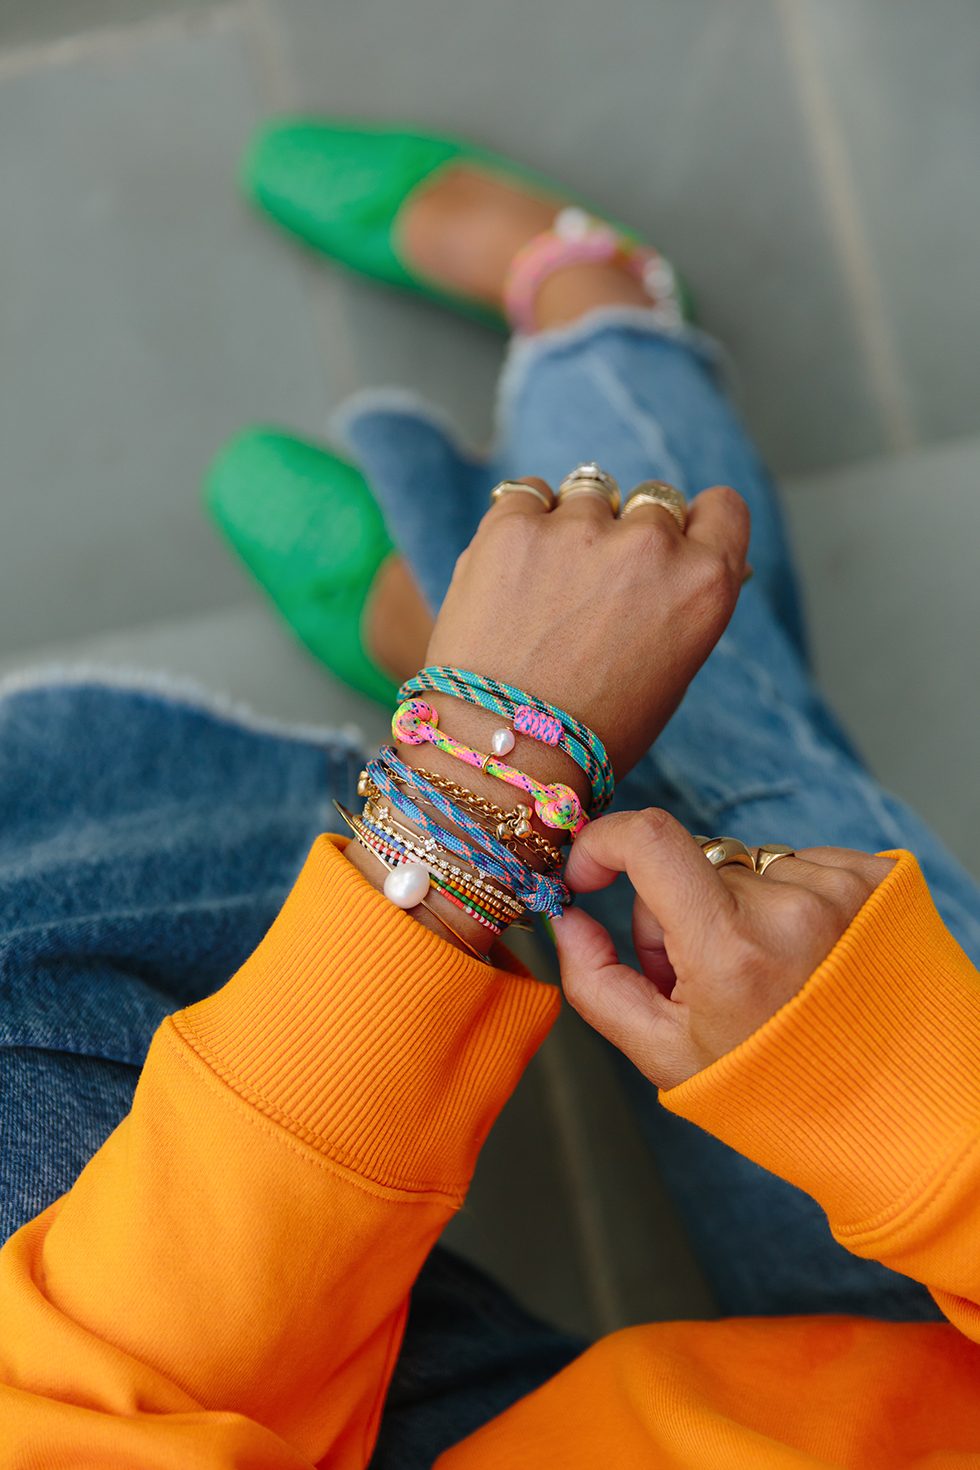
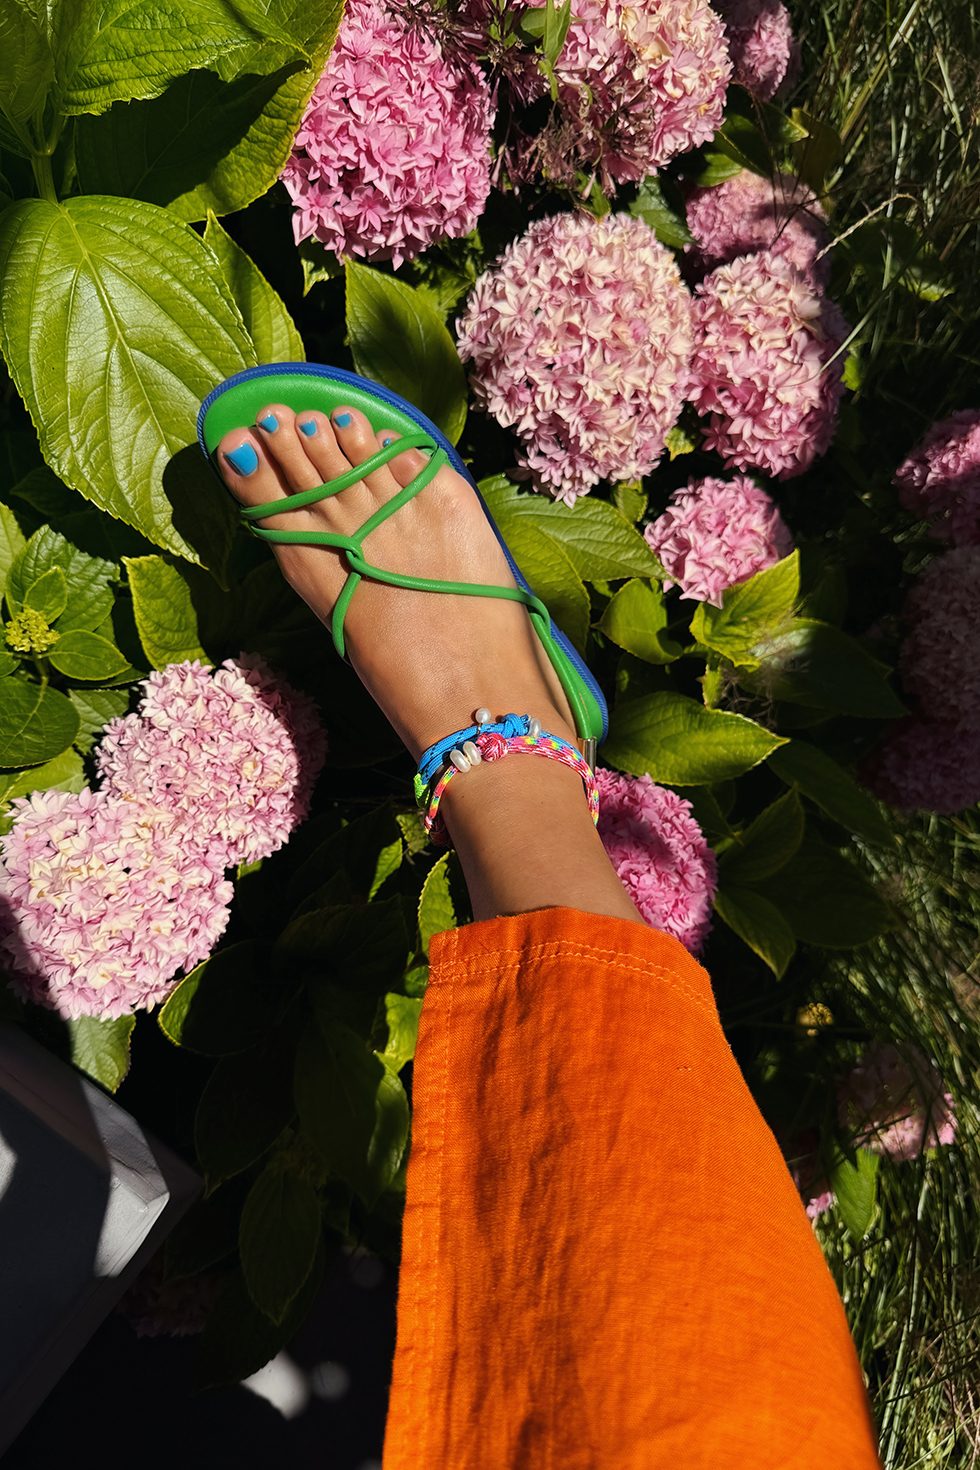
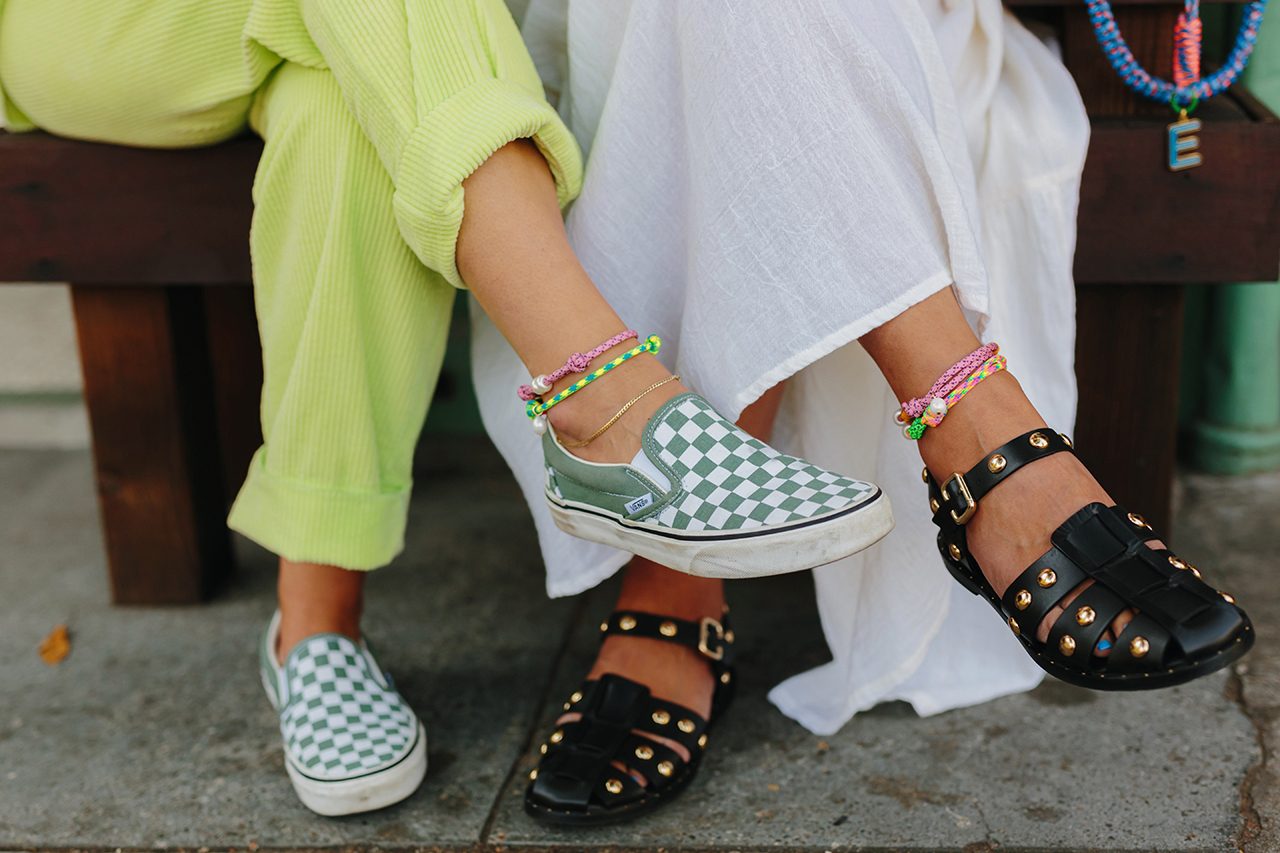
My dear friend Ariel, of Ariel Gordon Jewelry, and I have always shared a love for the ocean. Driven by our passion for the sea and a mutual enthusiasm for accessorizing and crafting, we naturally decided to create a DIY kit inspired by the vibrant and colorful nautical ropes that had always fascinated us. These ropes, with their endless possibilities, were the perfect inspiration for our second collection of DIY kits. We envisioned a series of kits that would allow you to create a variety of accessories, from bracelets and anklets to bag straps and phone lanyards. Ariel and I have experienced so much joy creating these tutorials and kits, we hope you feel the same while experimenting with them!
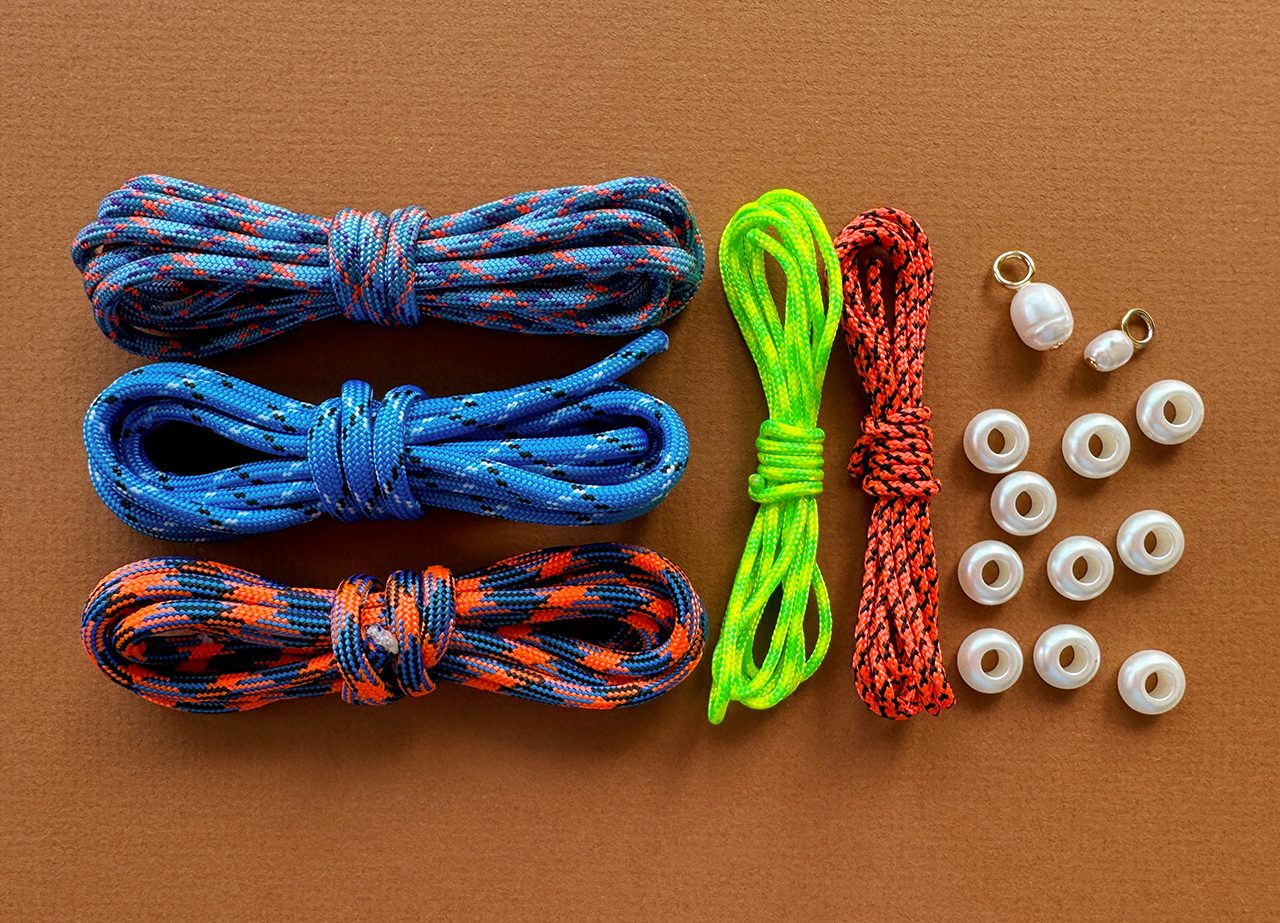
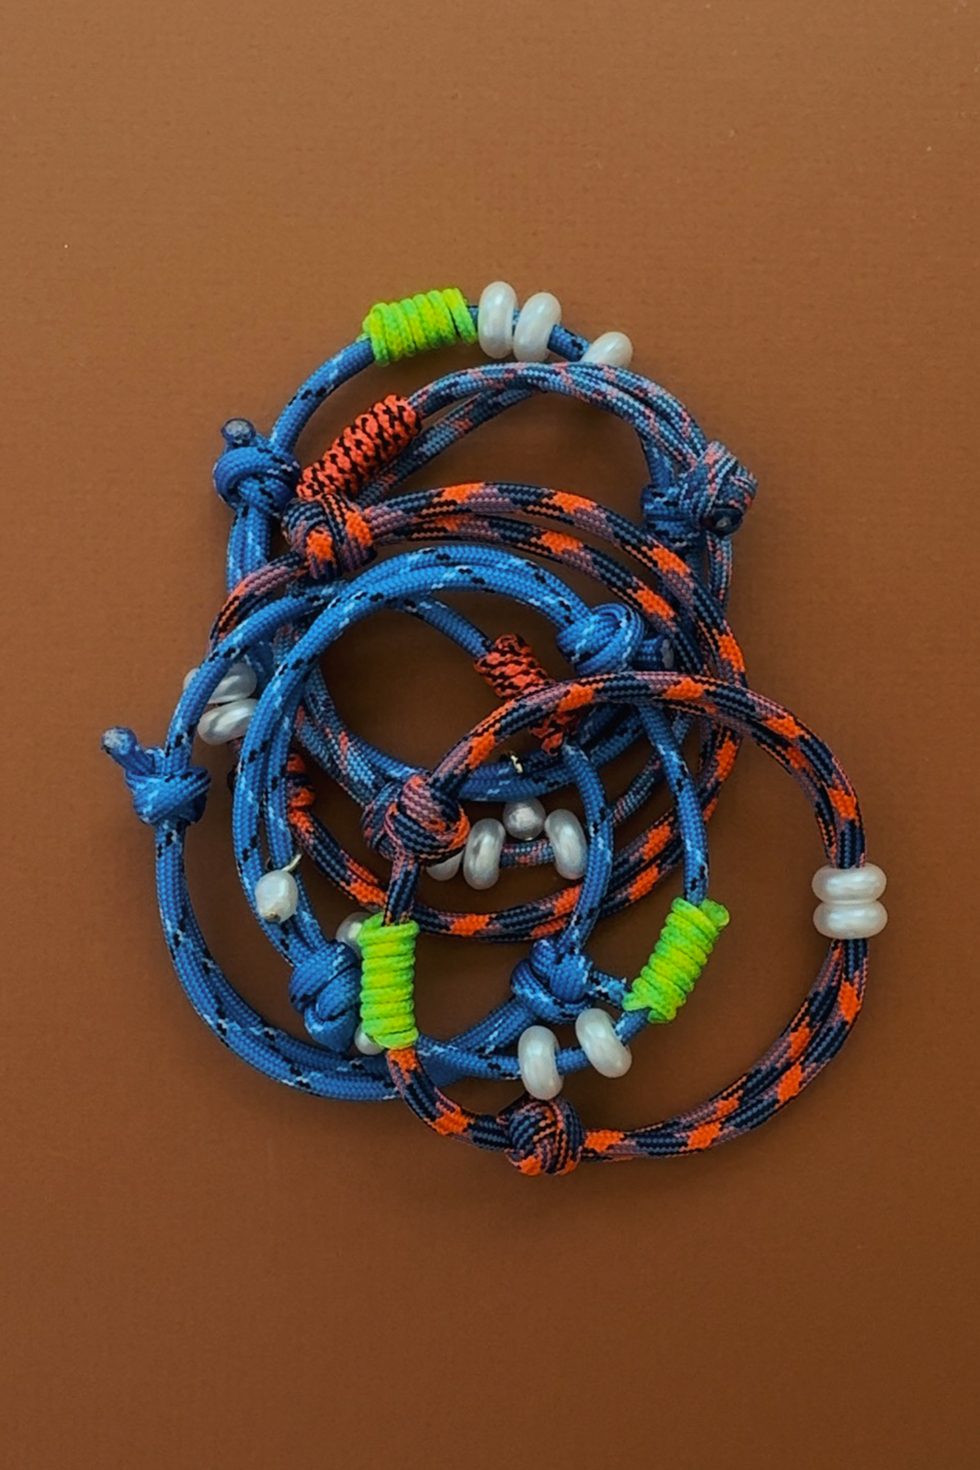
The four kits consist of a variety of thick and thin rope, along with pearl charms, beads, clips and a lighter - each with a different color scheme. We'll start the first series of tutorials with the most basic and simple: a sliding knot. This method of creating an adjustable closure can be applied to bracelets, anklets and necklaces. If you've been following the blog, you'll know it's a technique I've used time and time again. So, if you need a refresher, read on. And if you're ready to move on to something a bit more challenging, head to the next tutorial!
You'll need:
DIY Knotty Rope Kit includes:
- thick rope in 3 colors (5 ft each)
- thin rope in 2 colors (4 ft each)
- large pearl charm
- small pearl charm
- pearl beads
- metal phone insert
- O ring
- lighter
ADDITIONAL SUPPLIES NEEDED:
- scissors
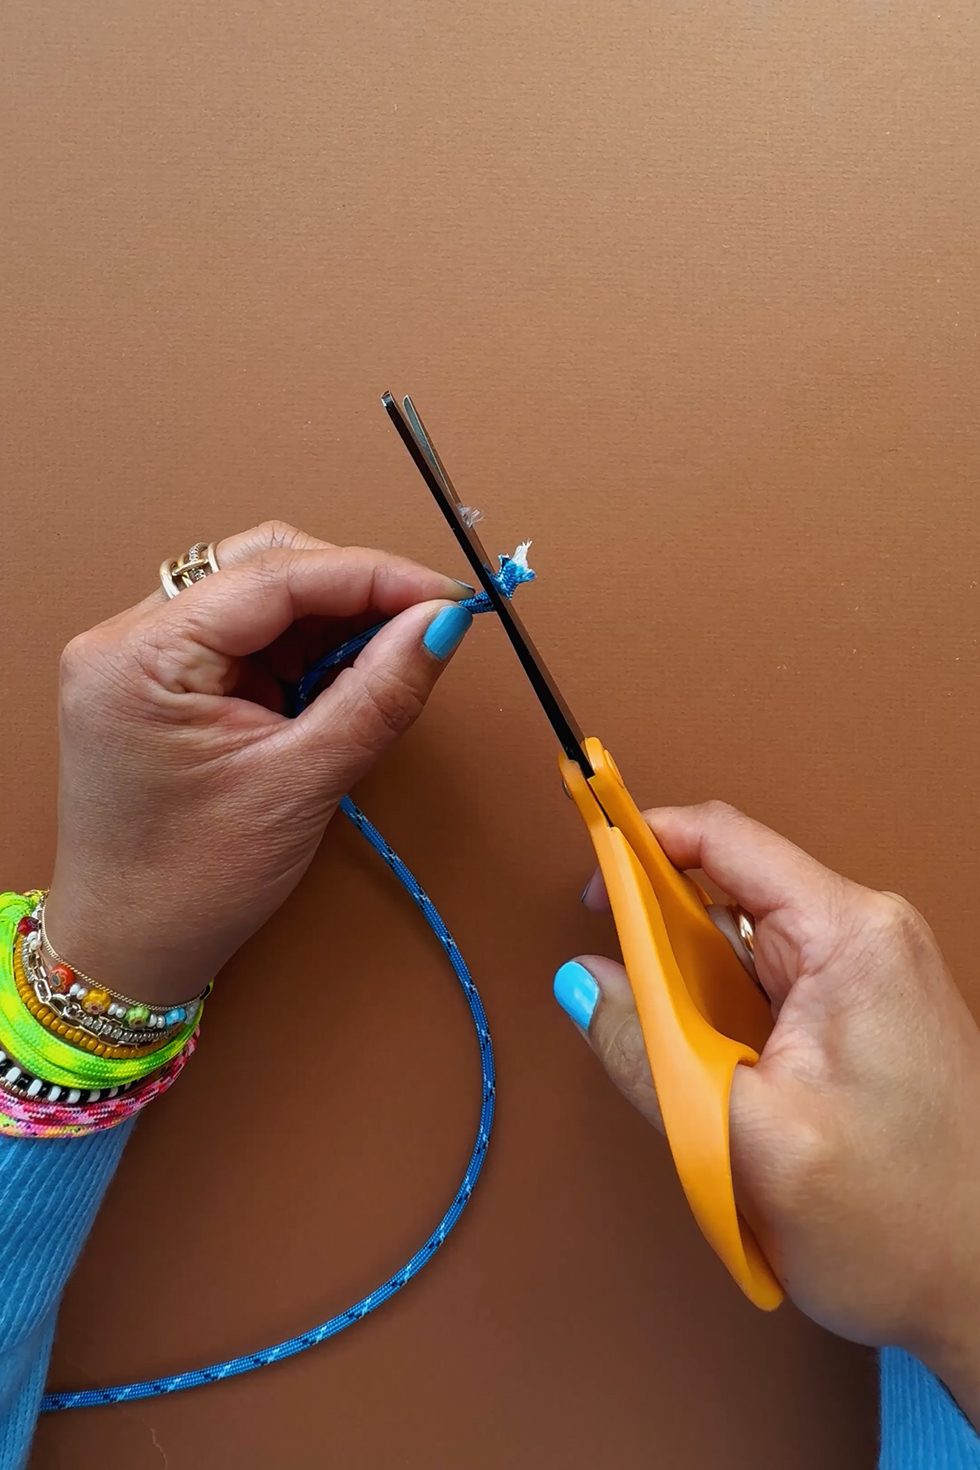
To start, cut lengths of the thick rope according to what you would like to make. Approximate measurements are as follows:
- bracelet: 14-16 inches
- anklet: 16-18 inches
- necklace: 24-36 inches
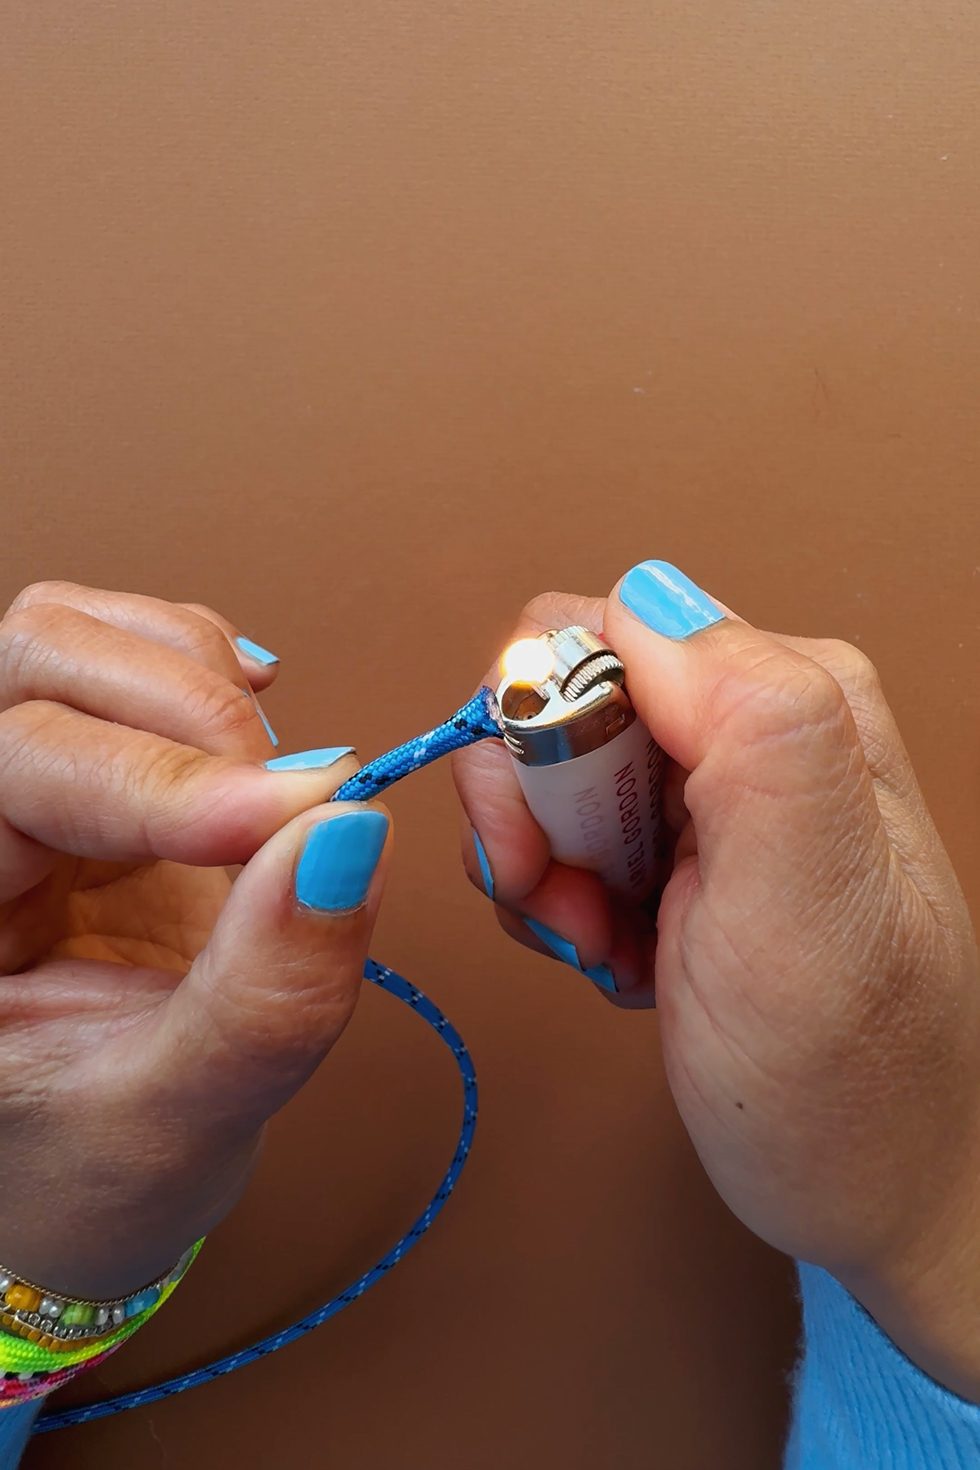
Trim the ends and lightly burn them. This prevents the inside of the rope from fraying and separating, making it easier to handle.
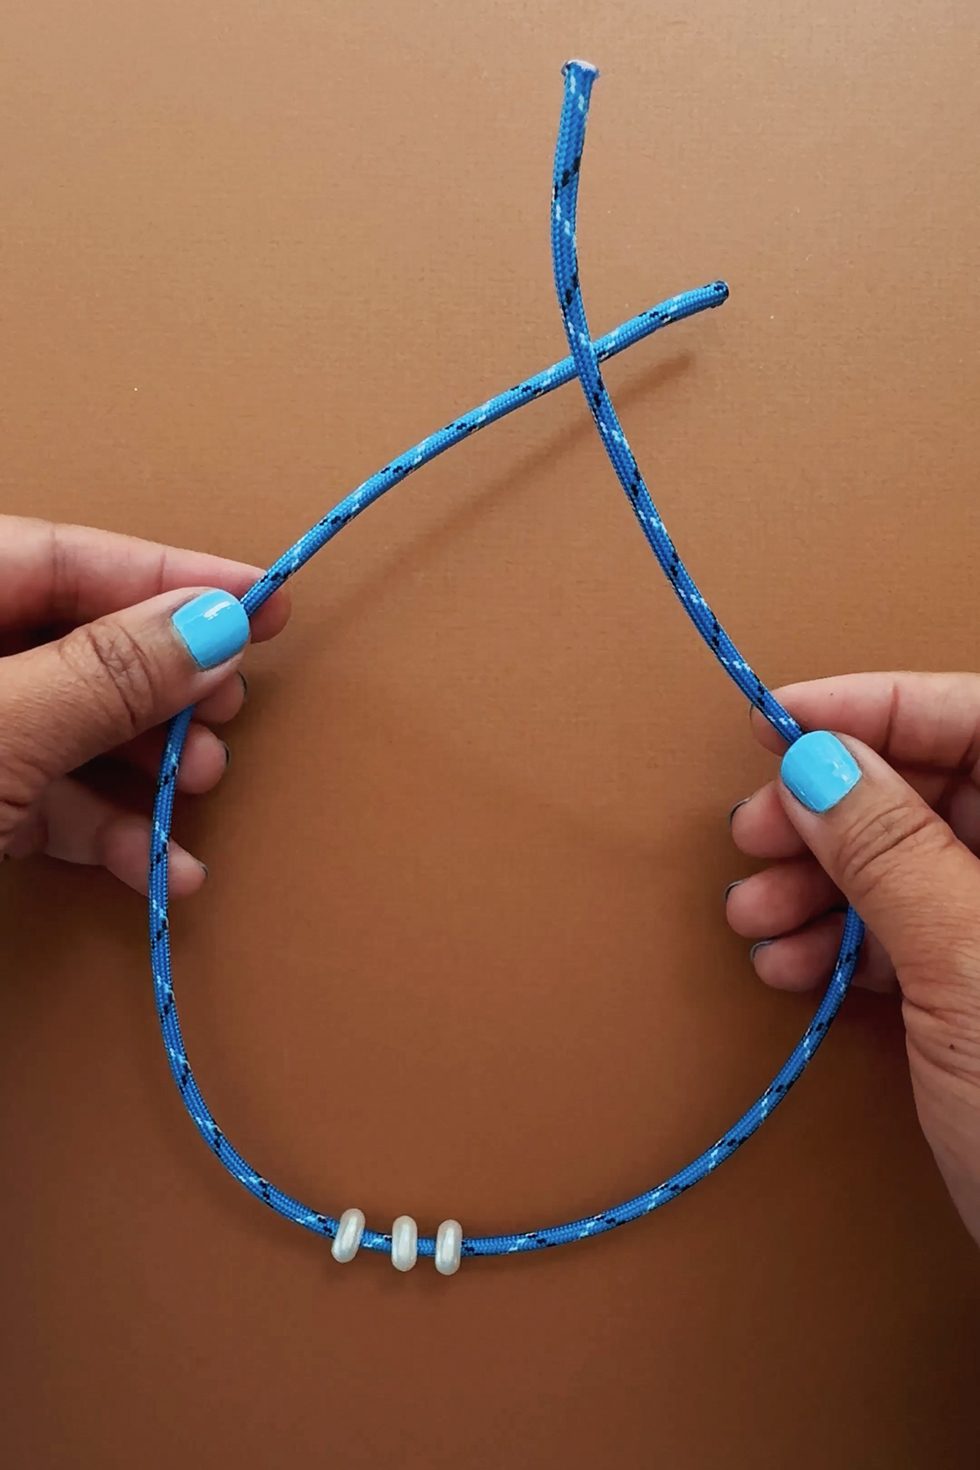

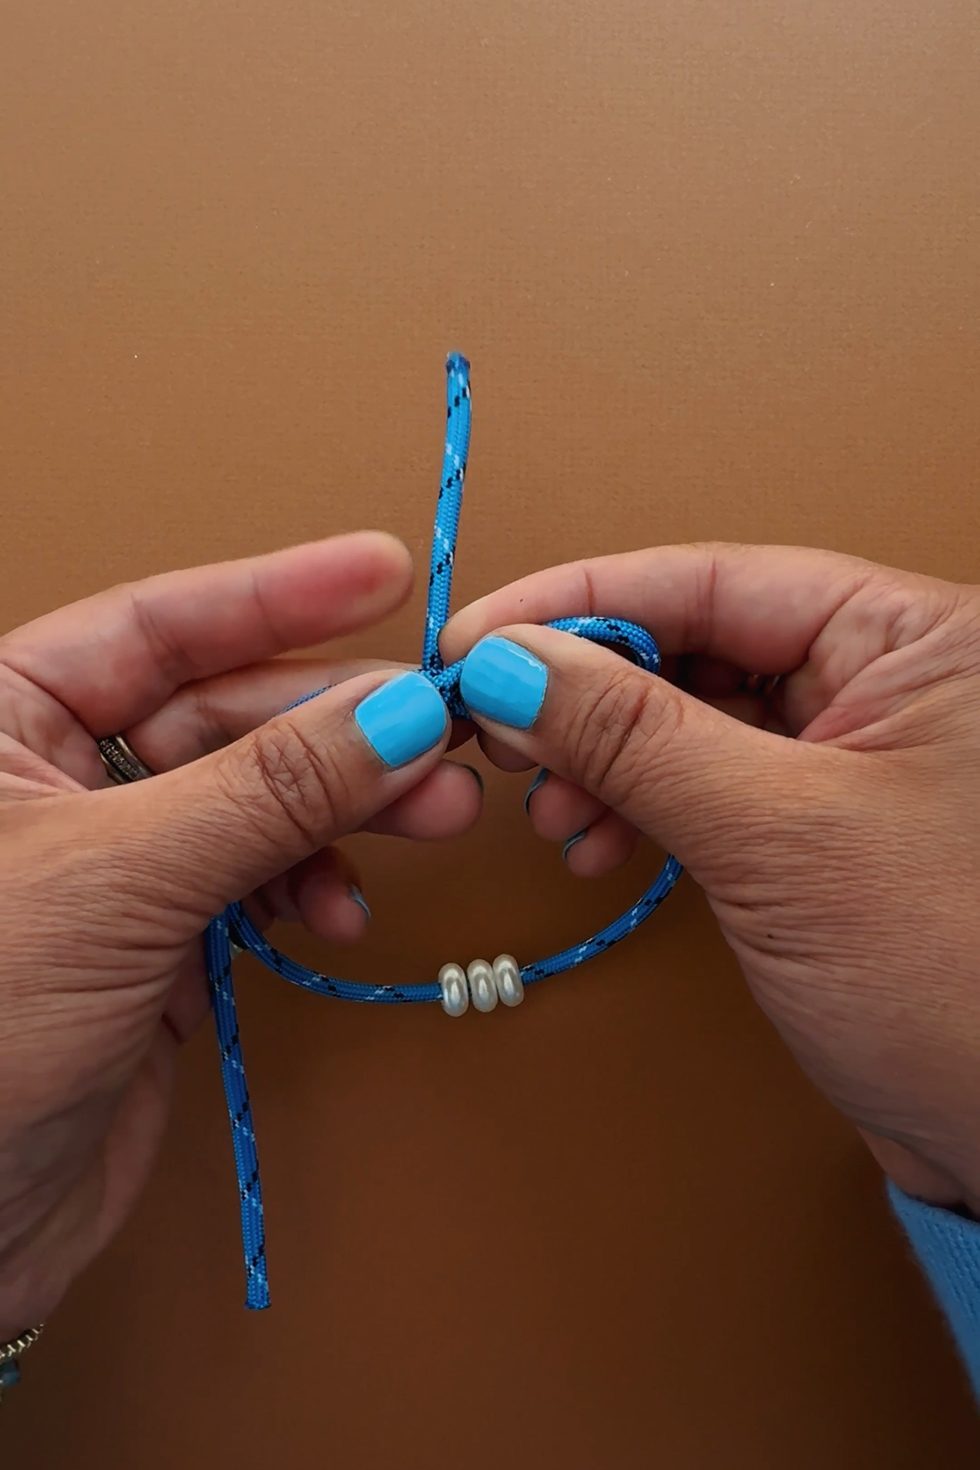
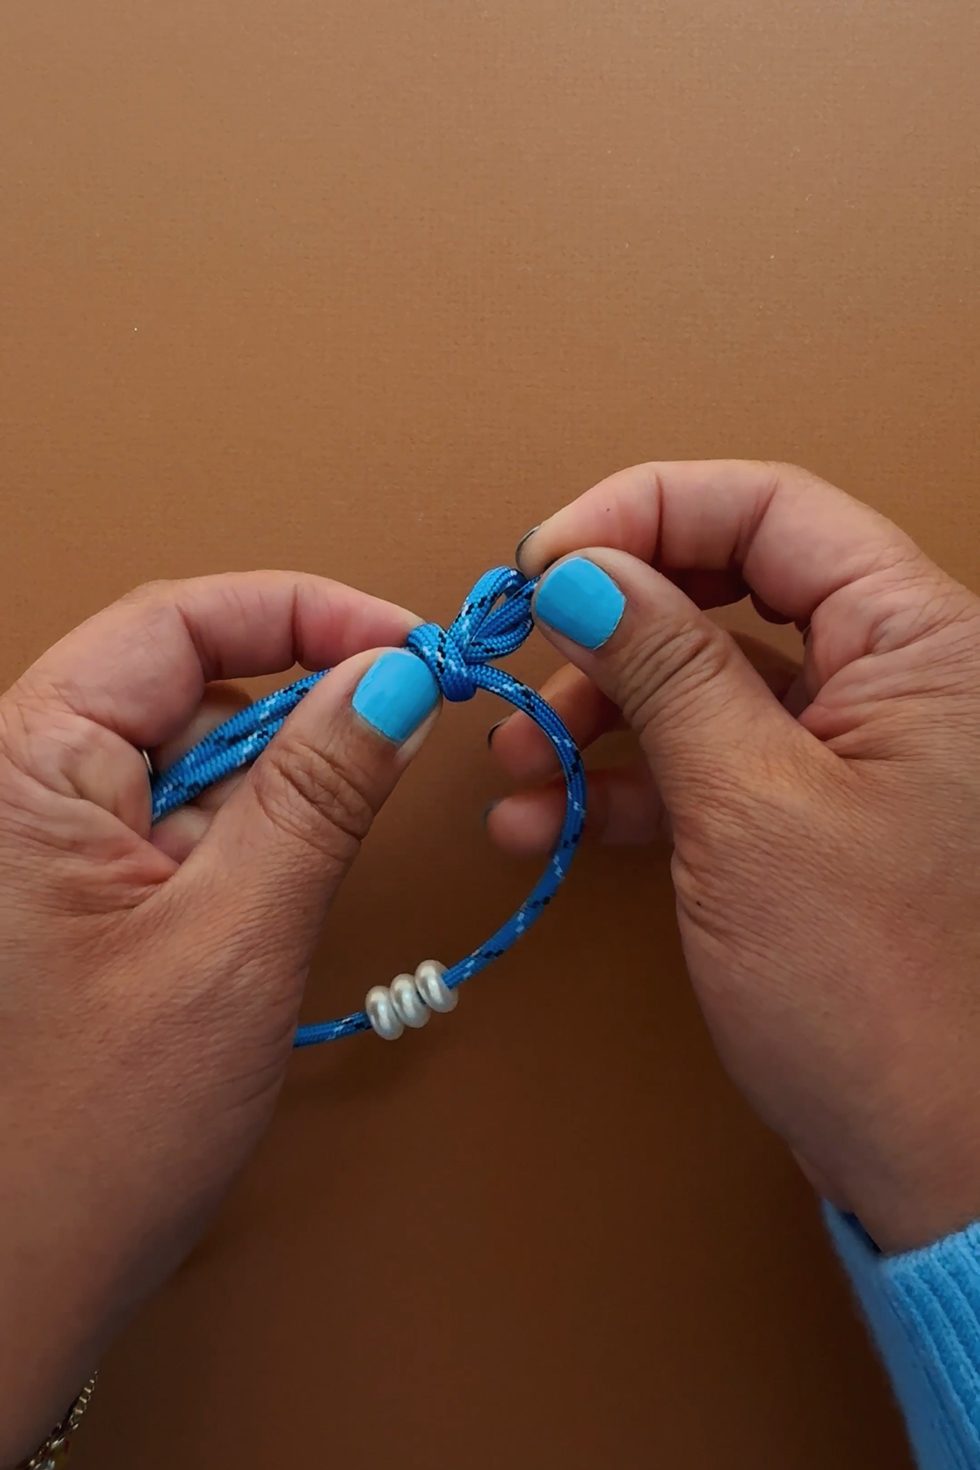
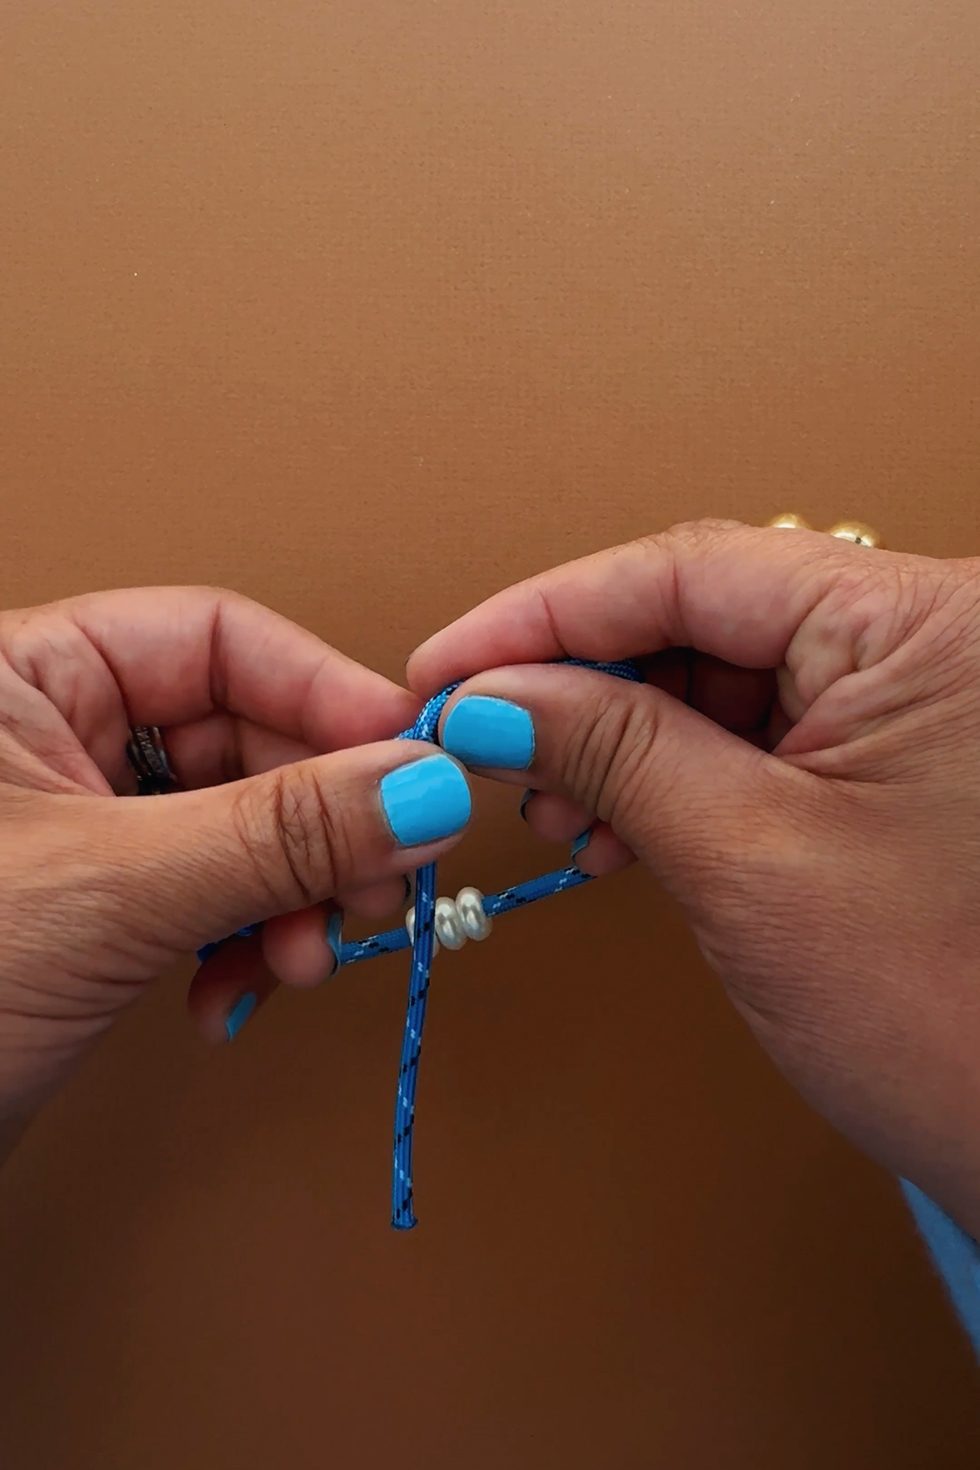
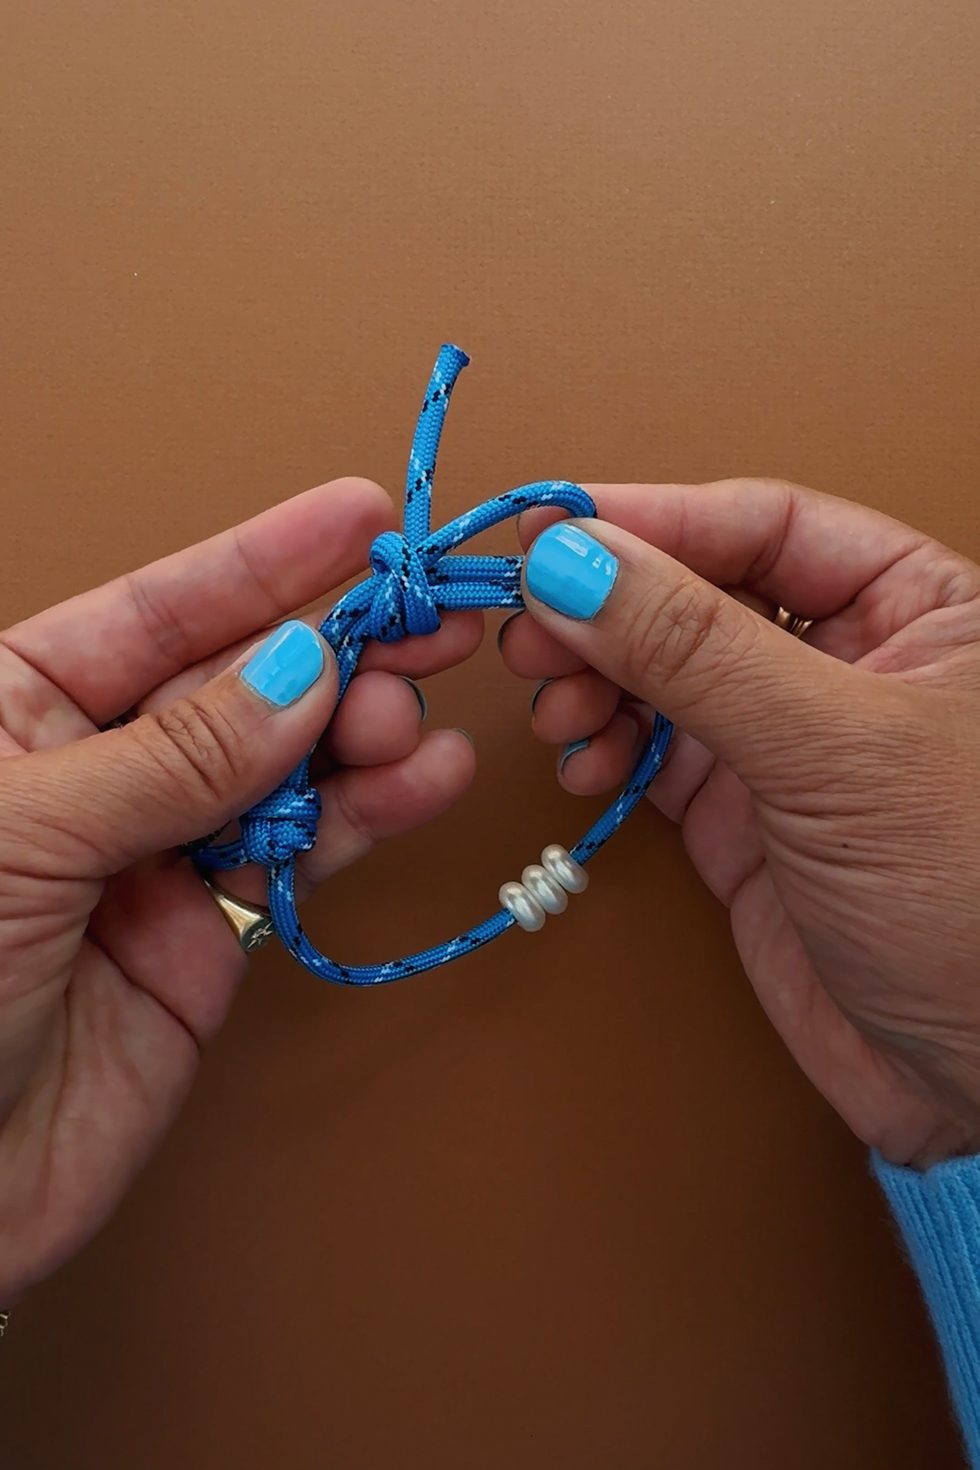
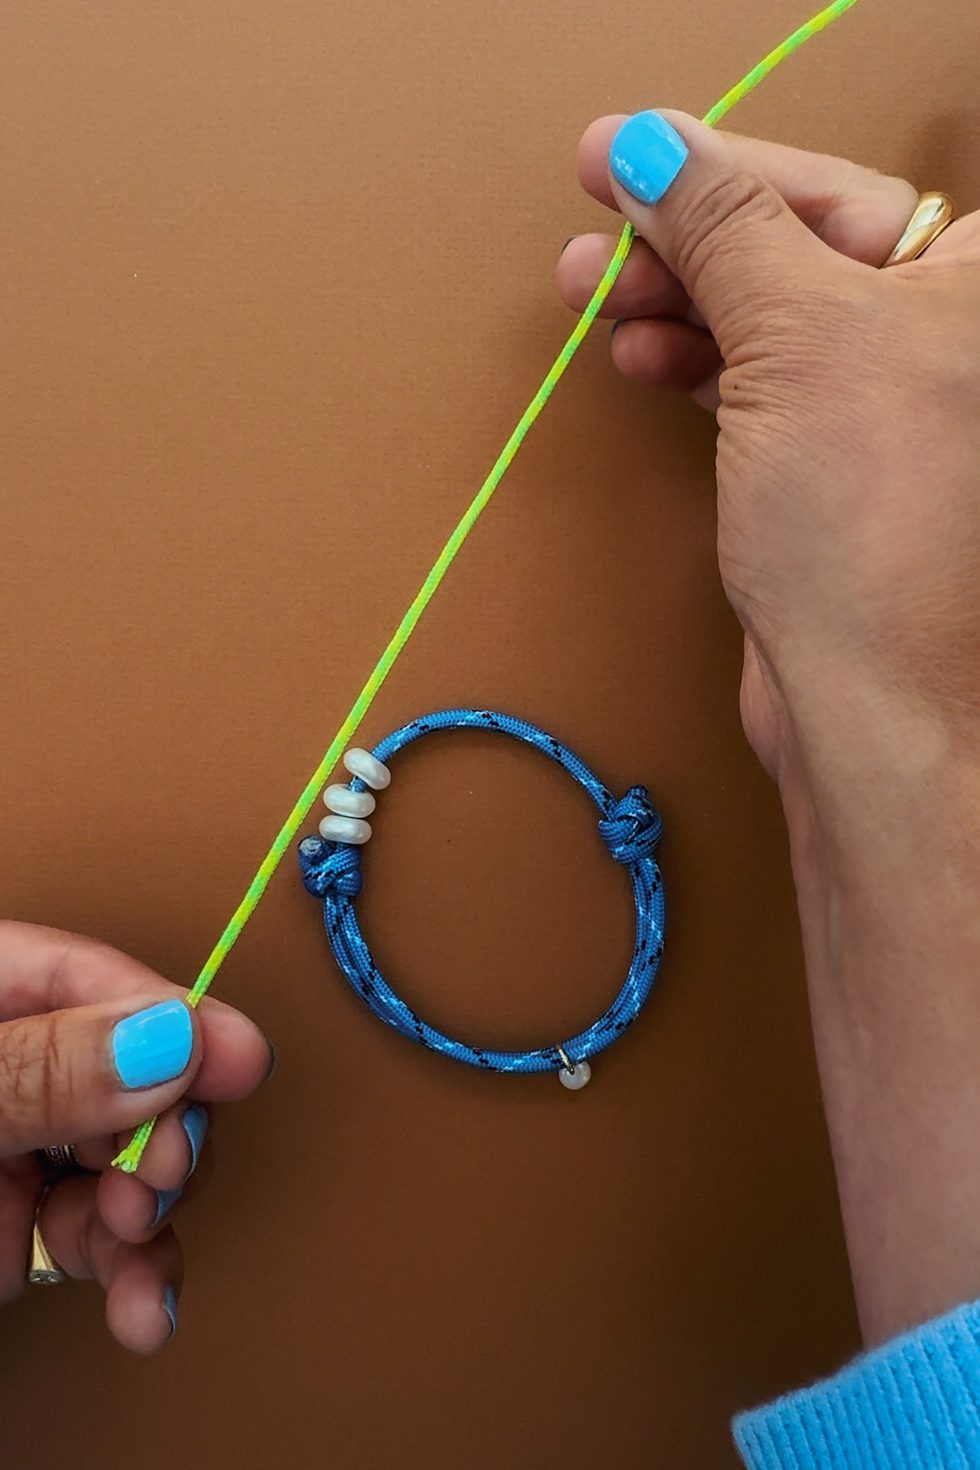
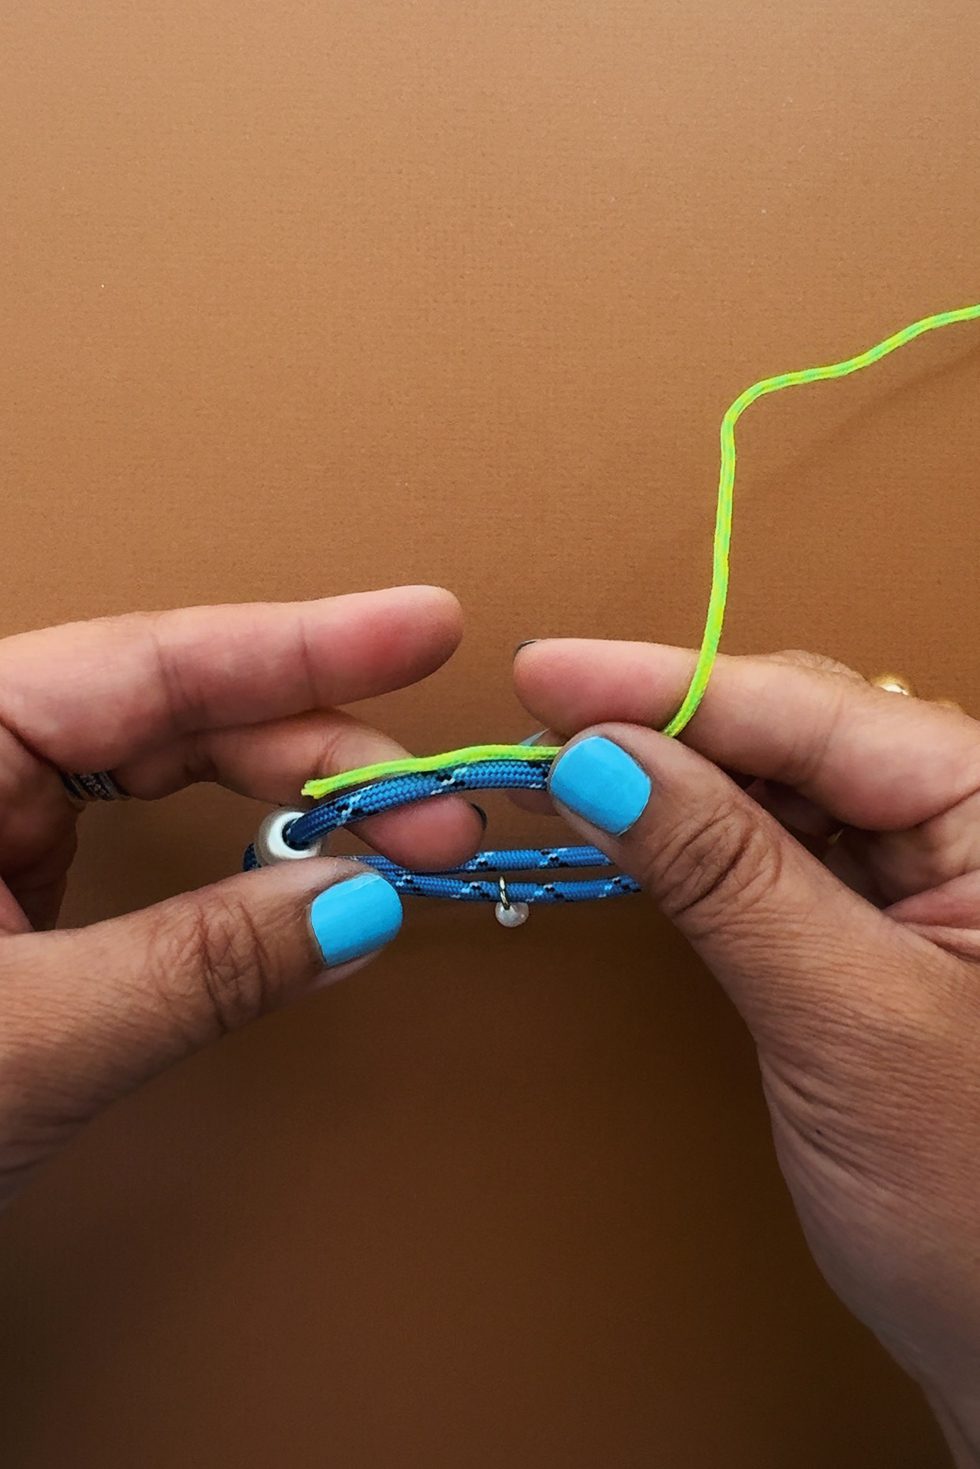
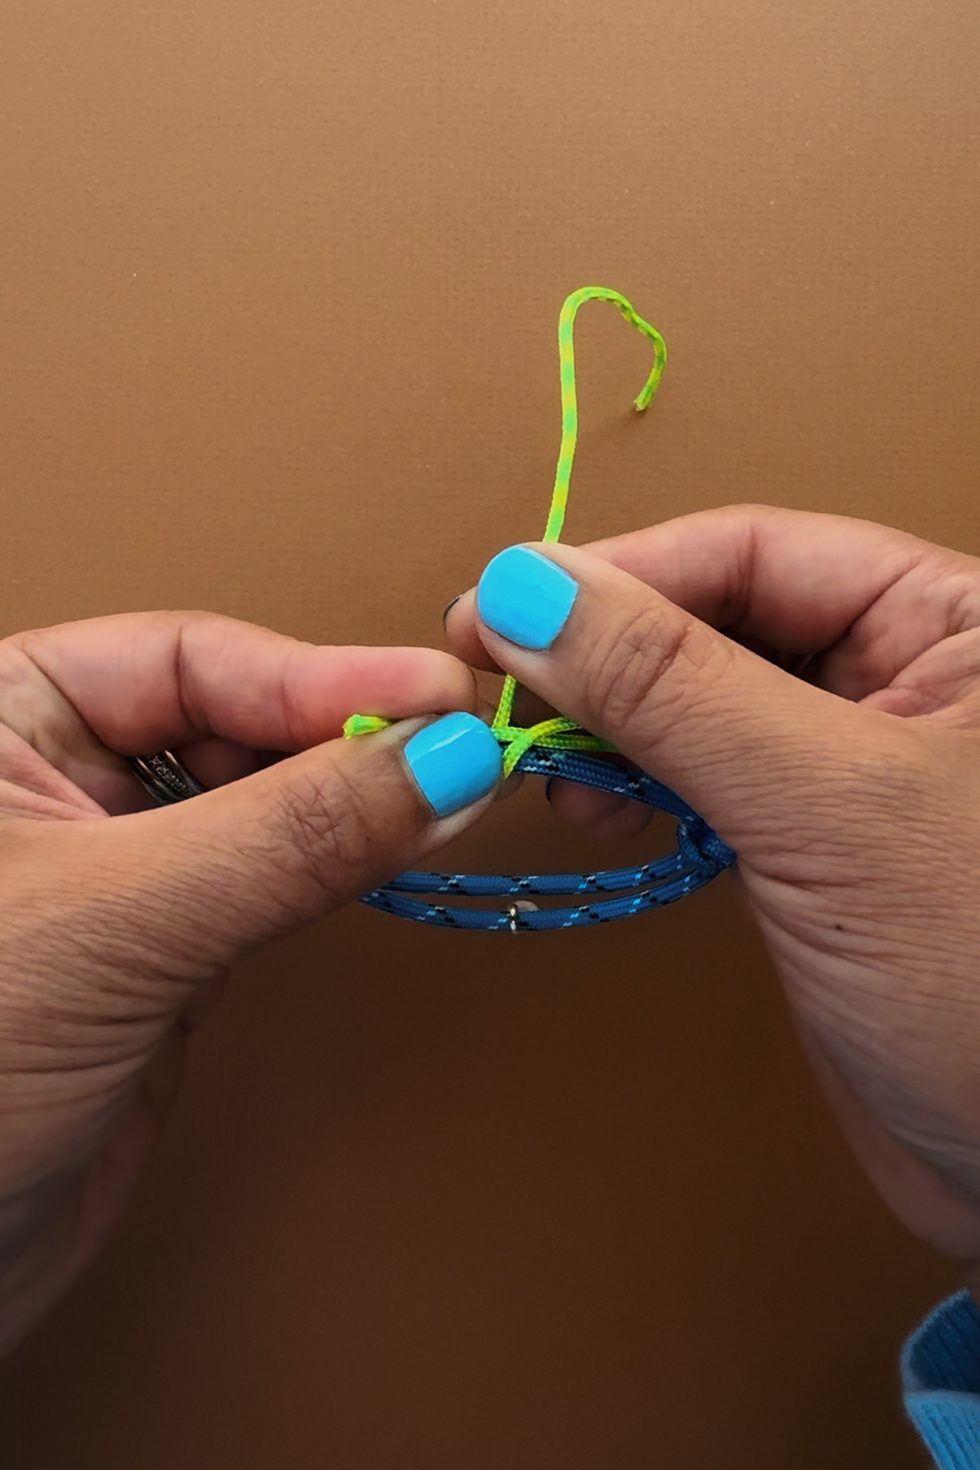
Thread on the pearl beads (optional). Overlap the rope with the left rope above the right rope.
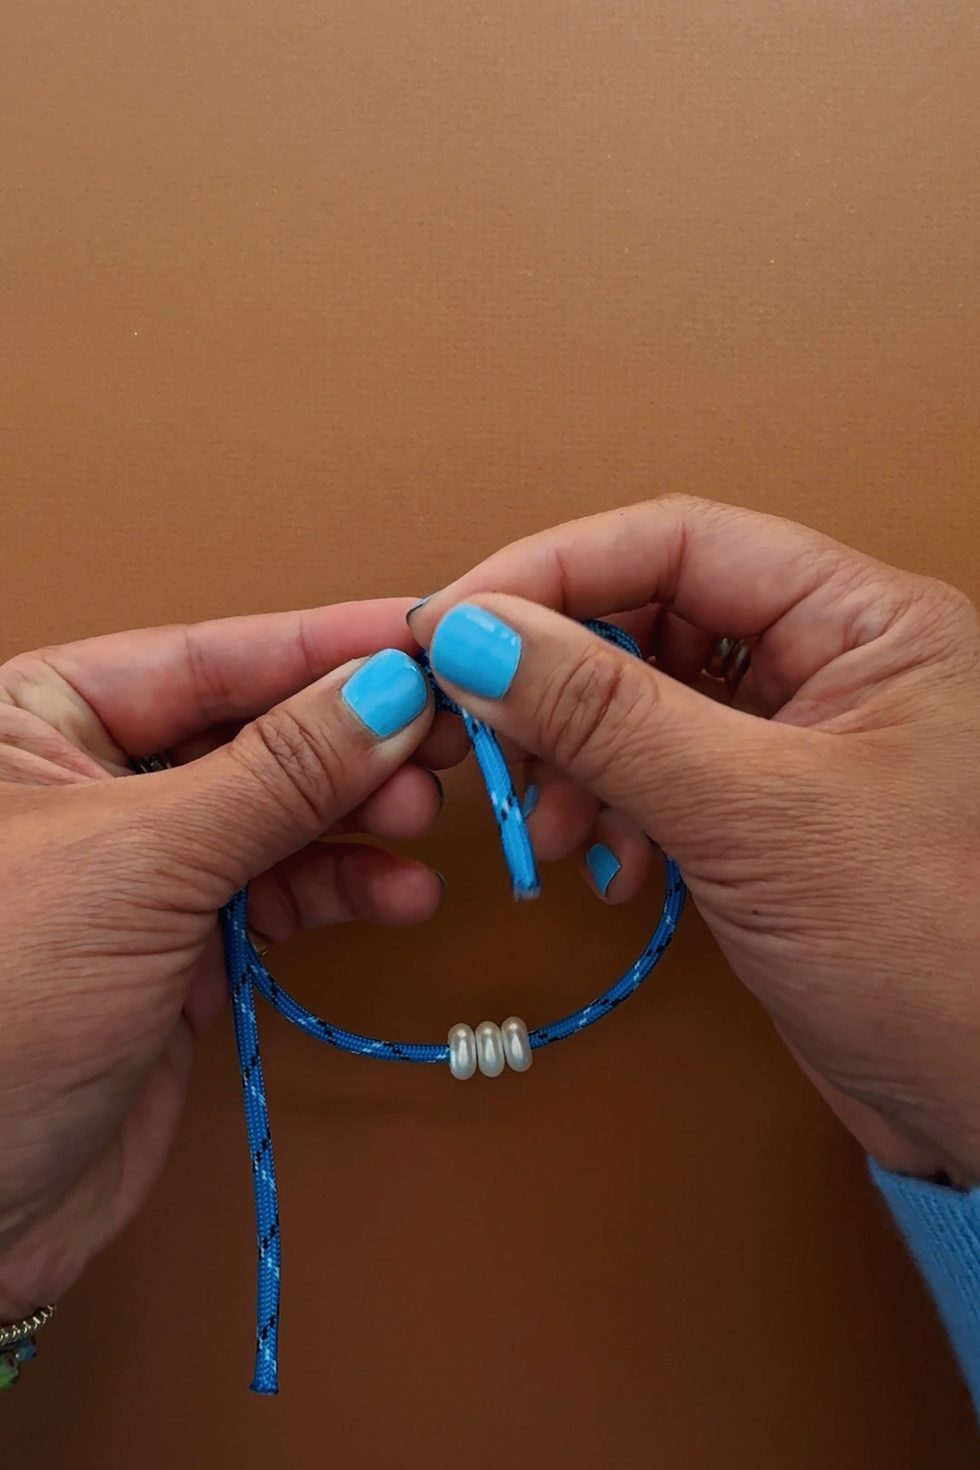
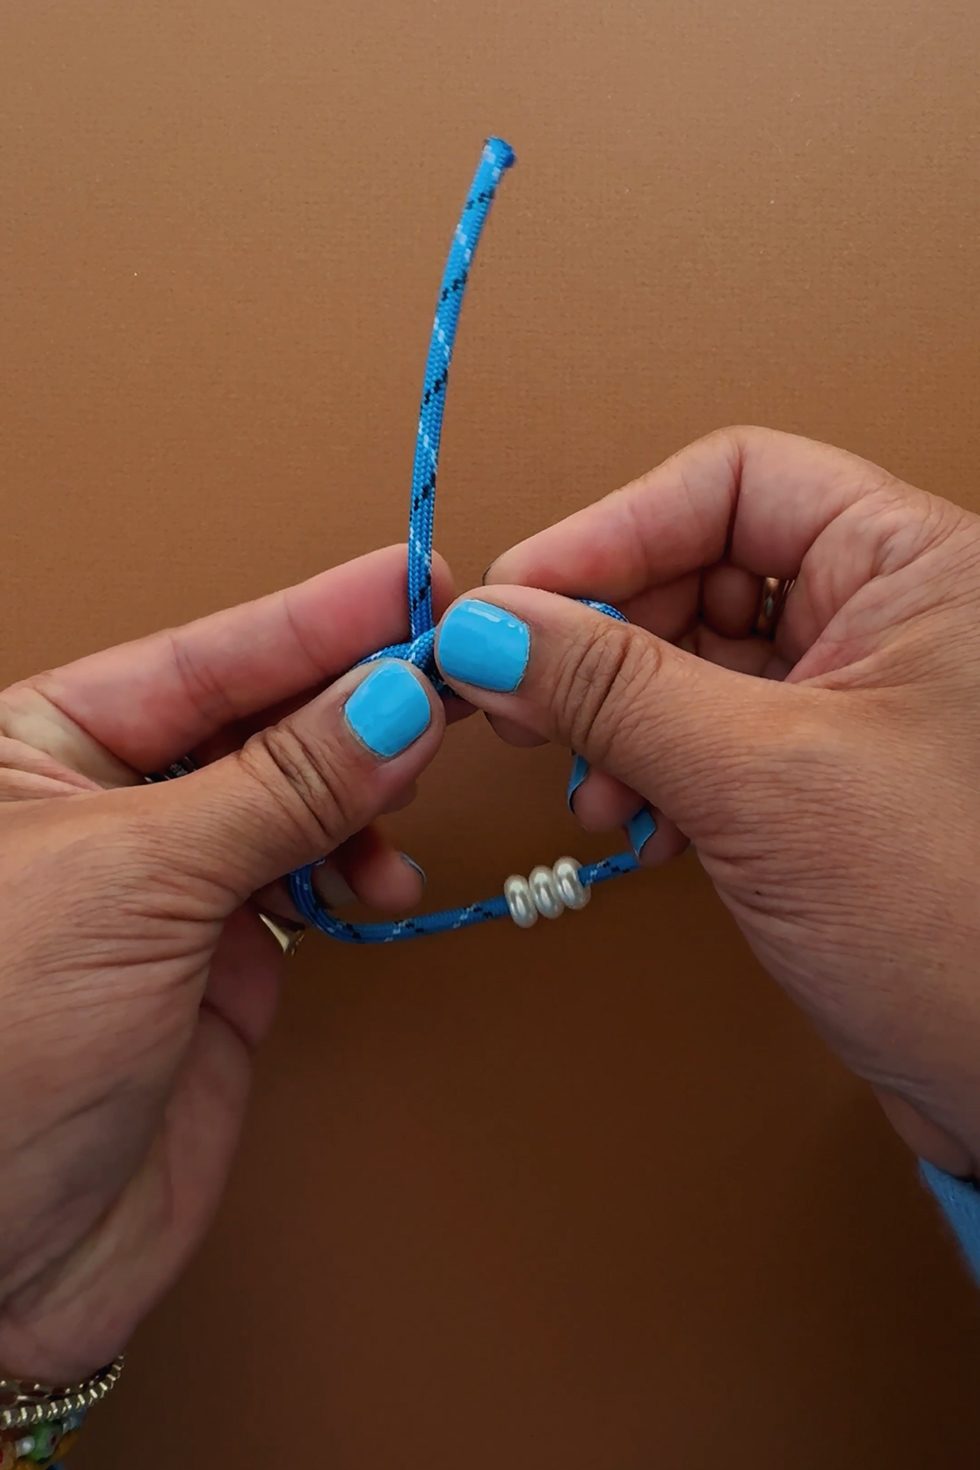
Fold 3" of the left rope (top) back onto itself. Fold the last 2" of rope down over the overlapping ropes. Let's call this the "tail".

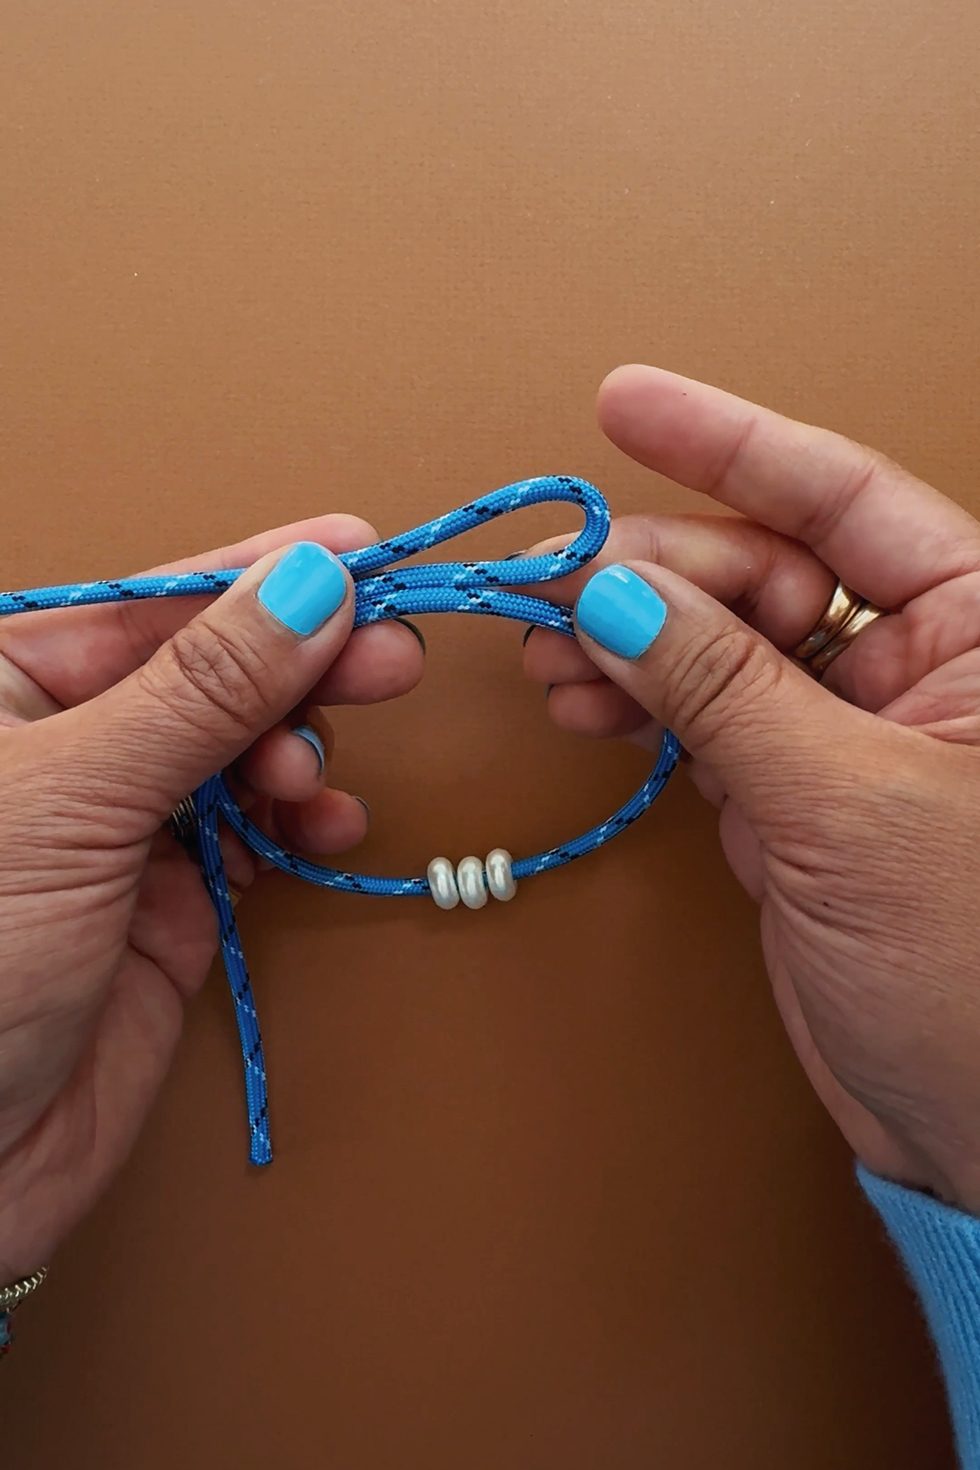
Tightly coil the tail around the ropes.
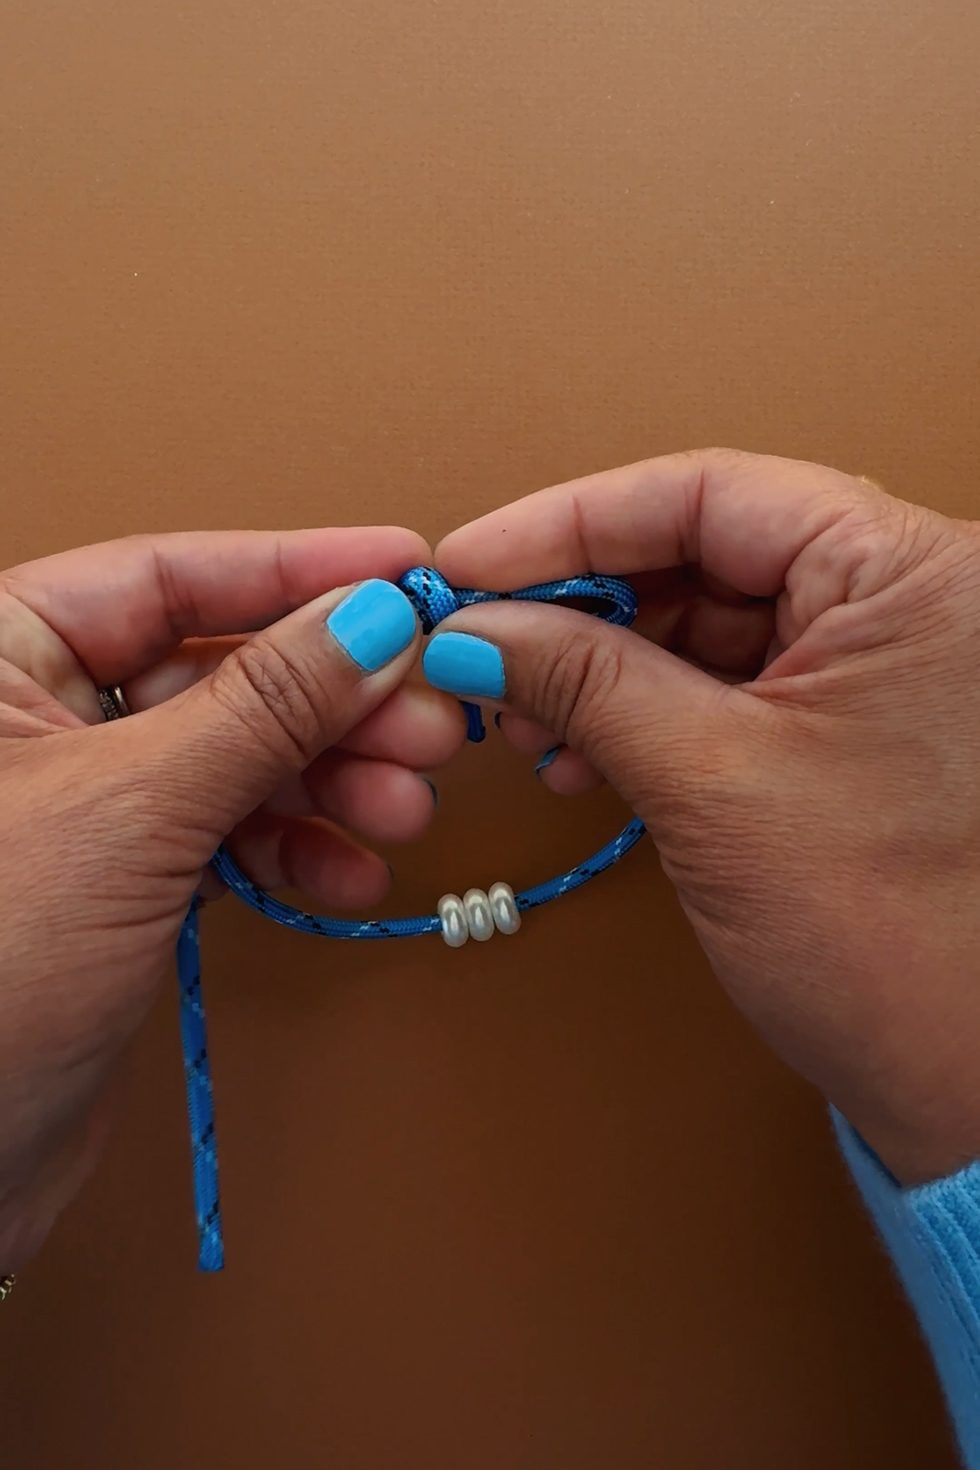
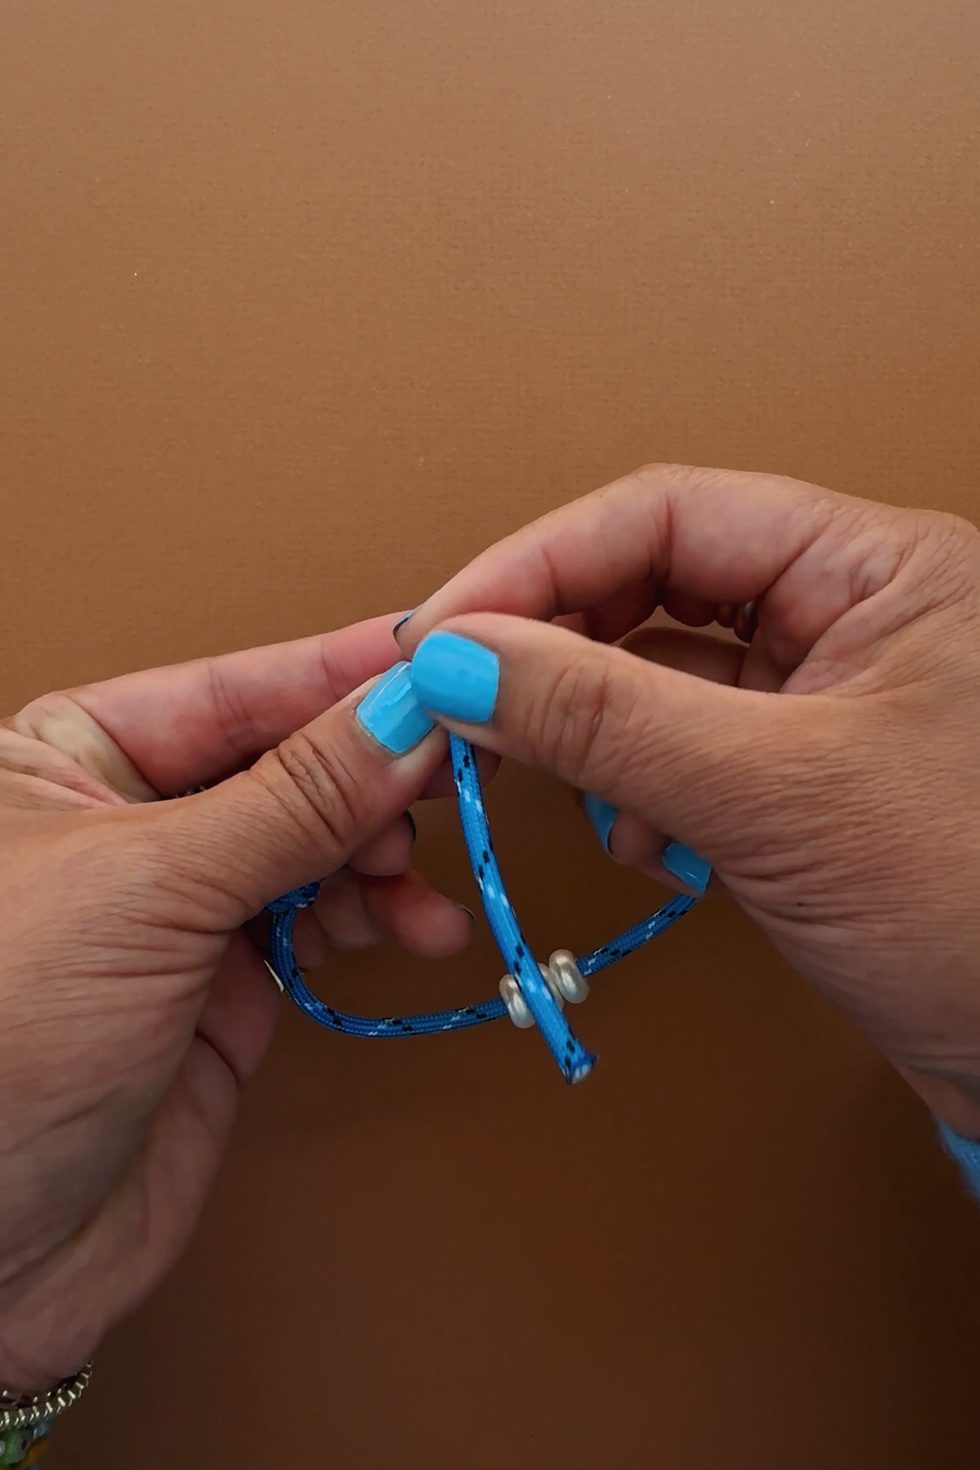
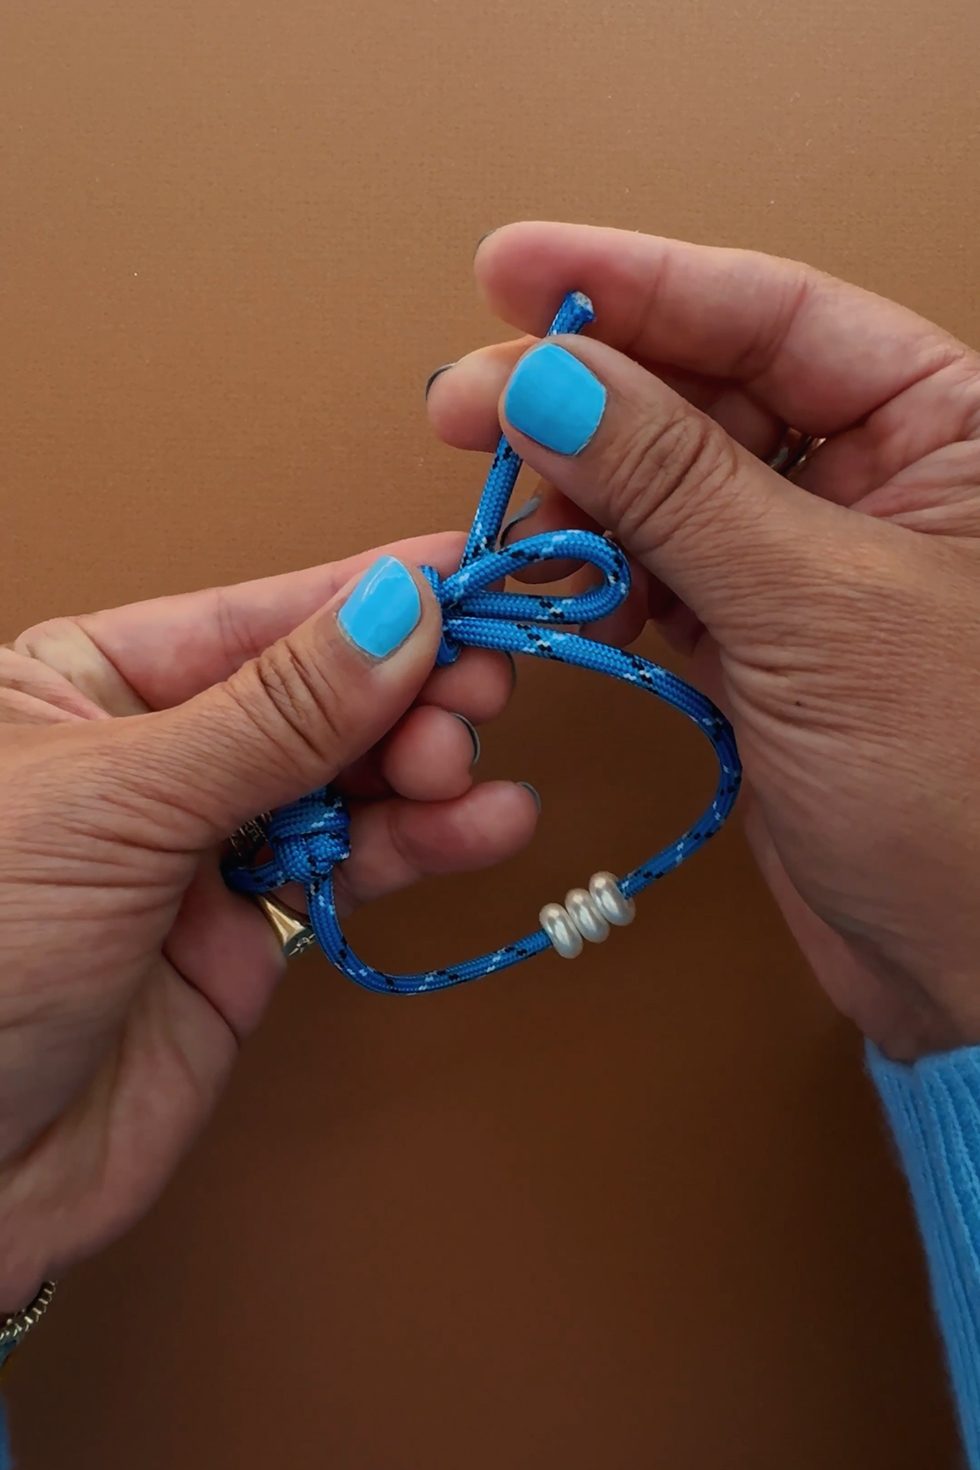
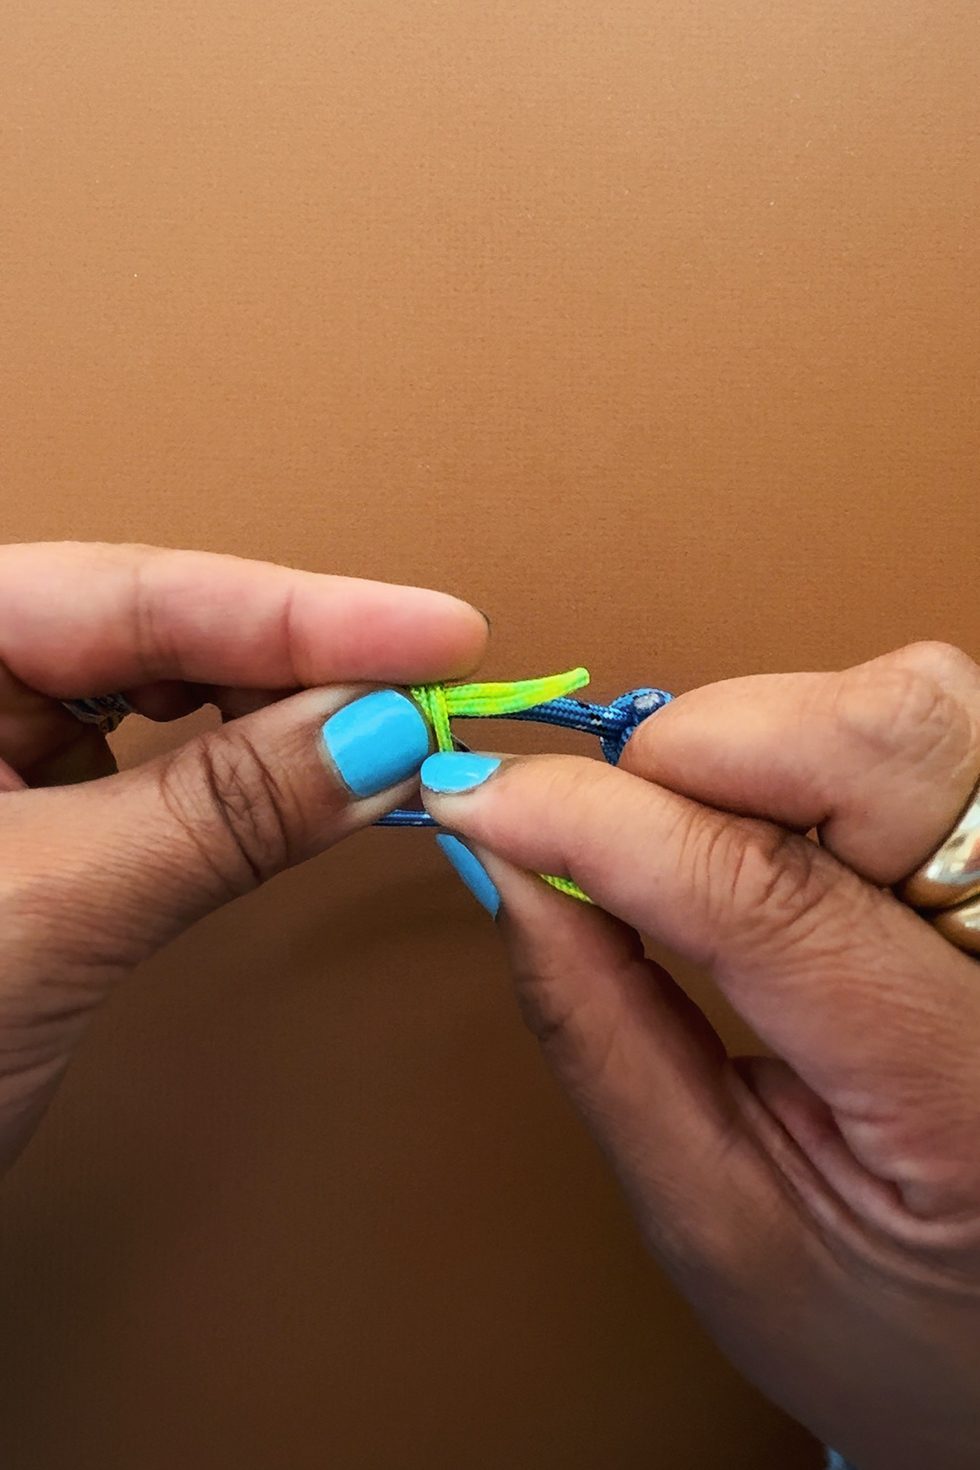
You can do one full rotation or two. I like to do one for bracelets and anklets.


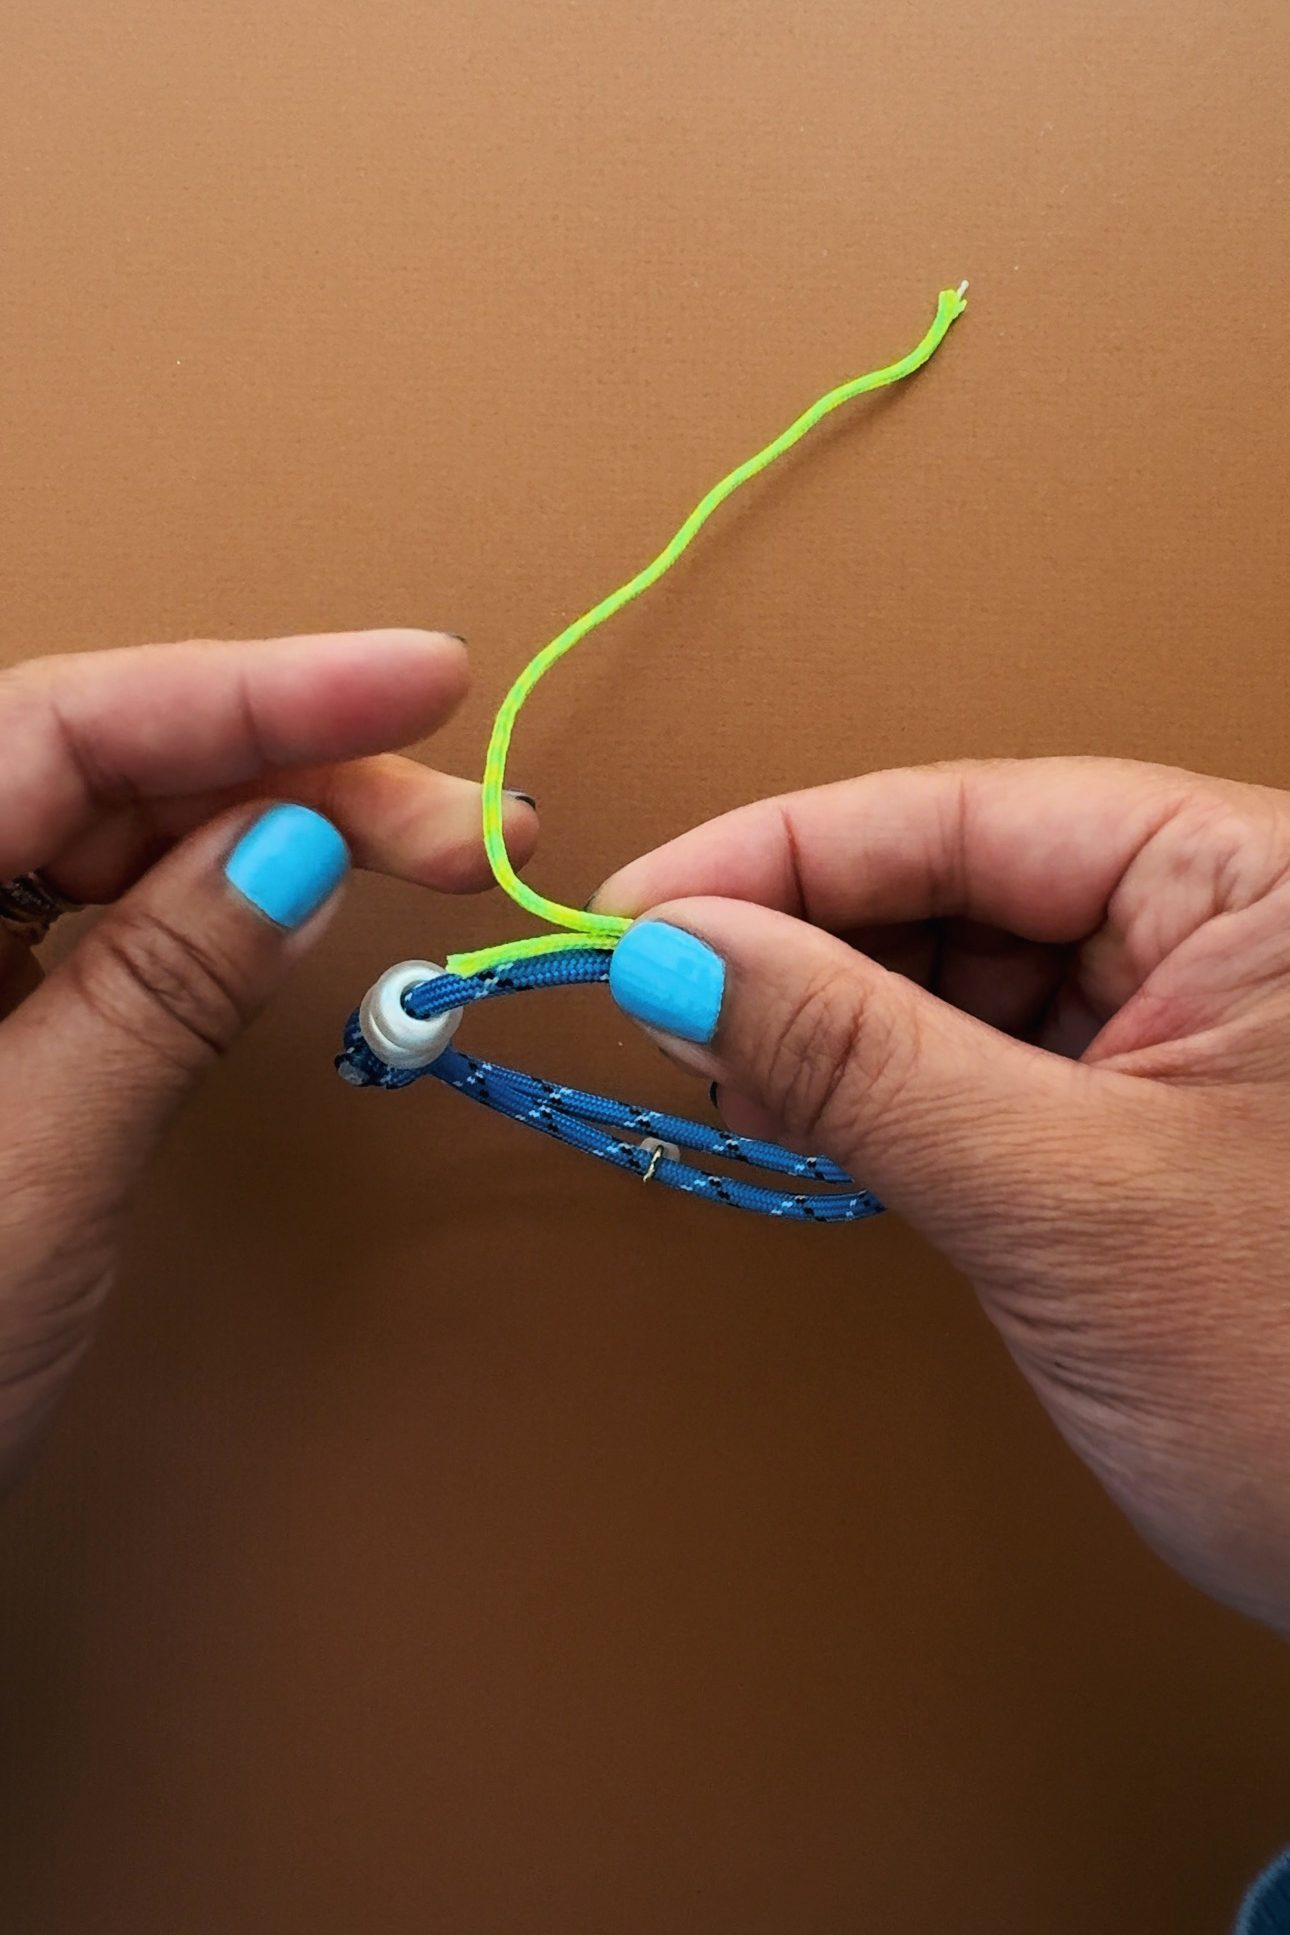
After one full rotation, take the tail's end and thread it through the open loop from behind.
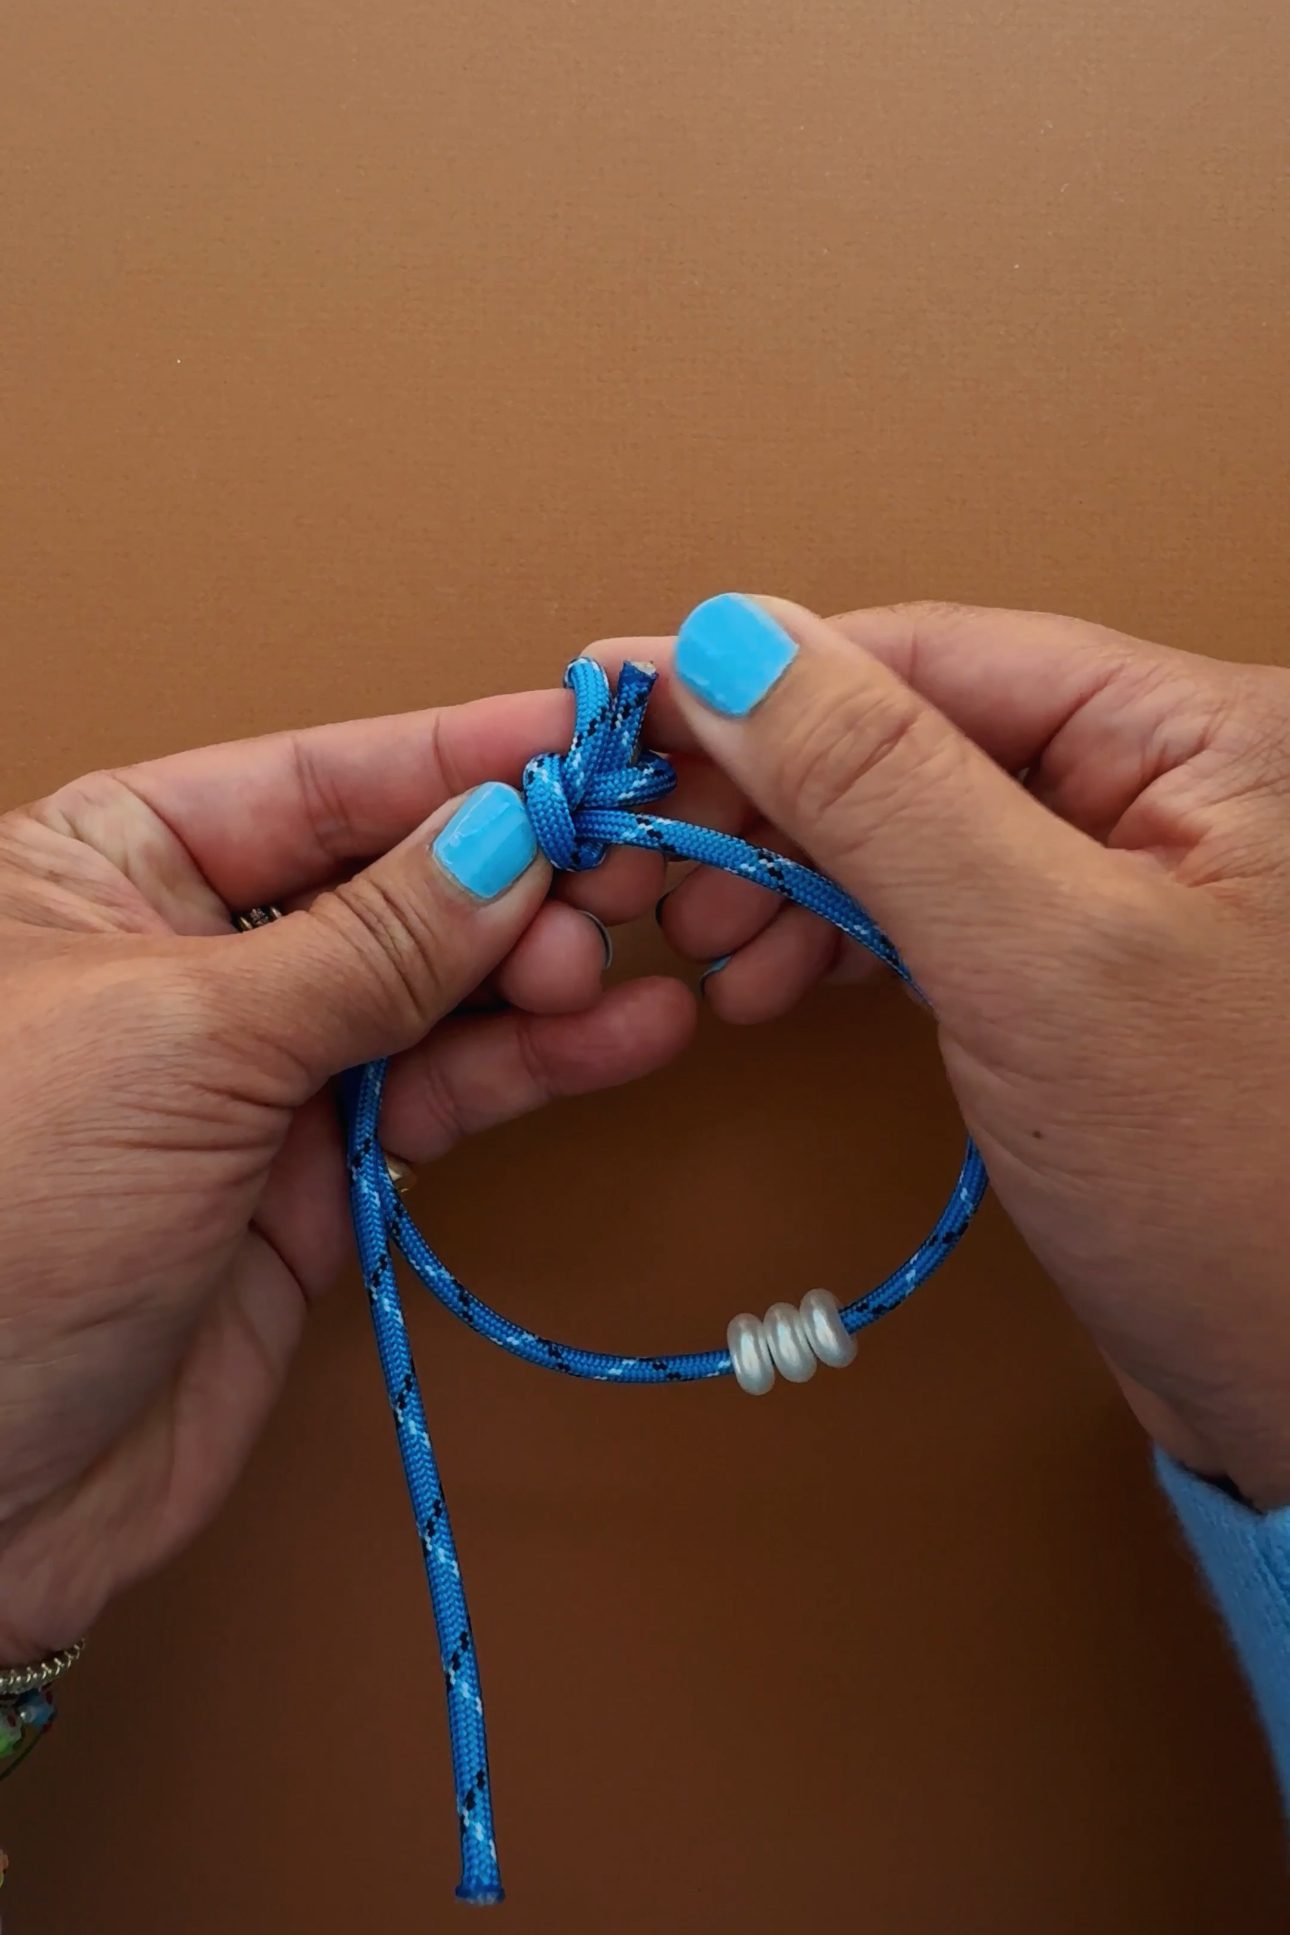
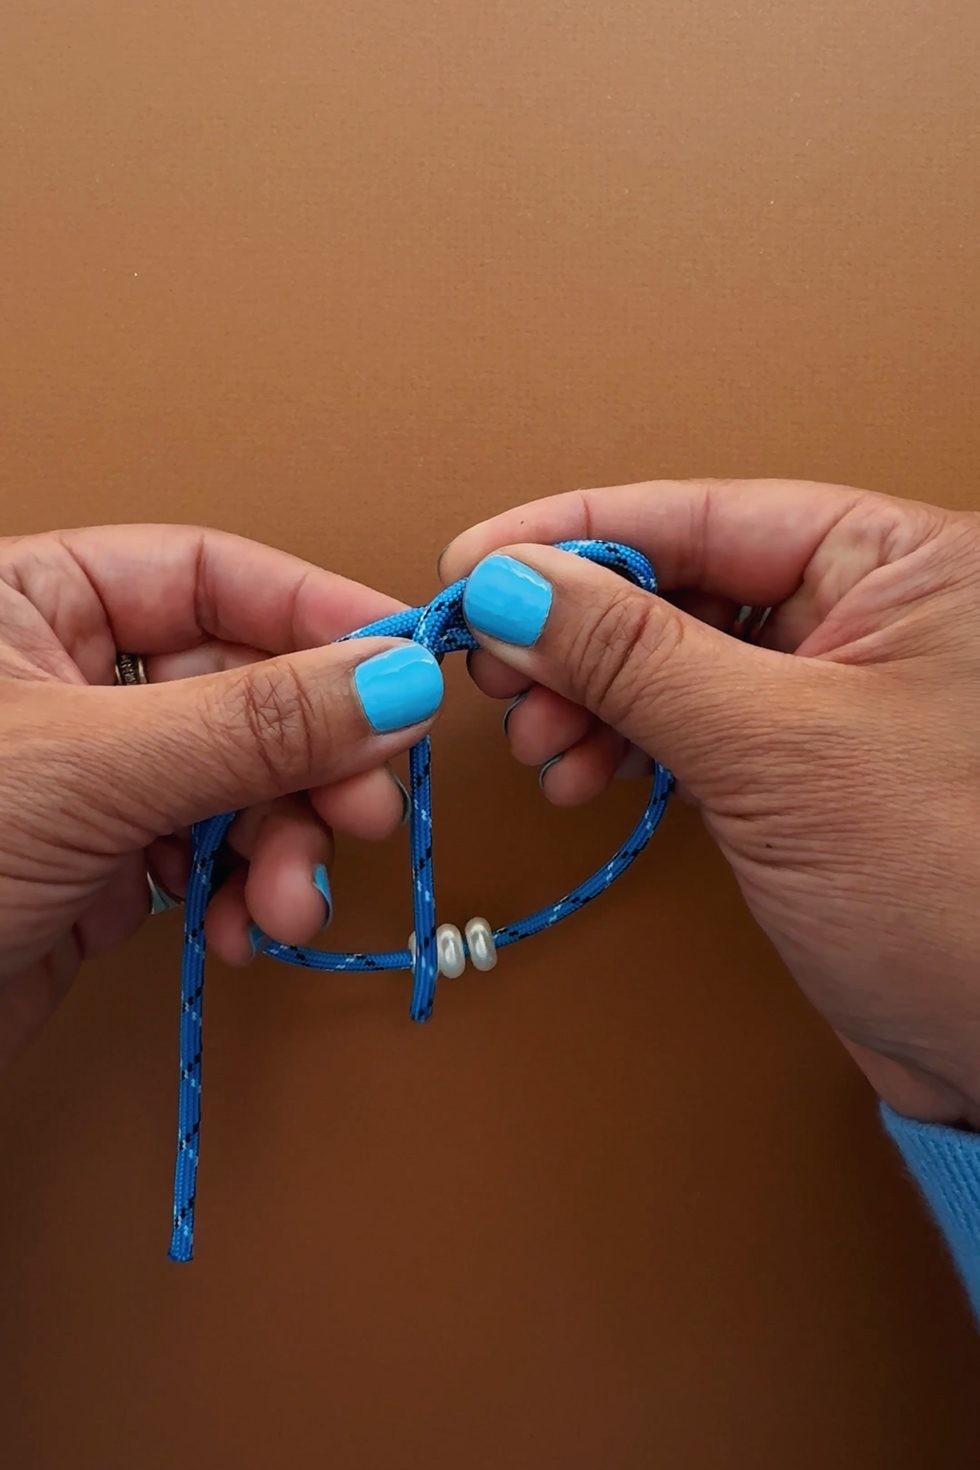
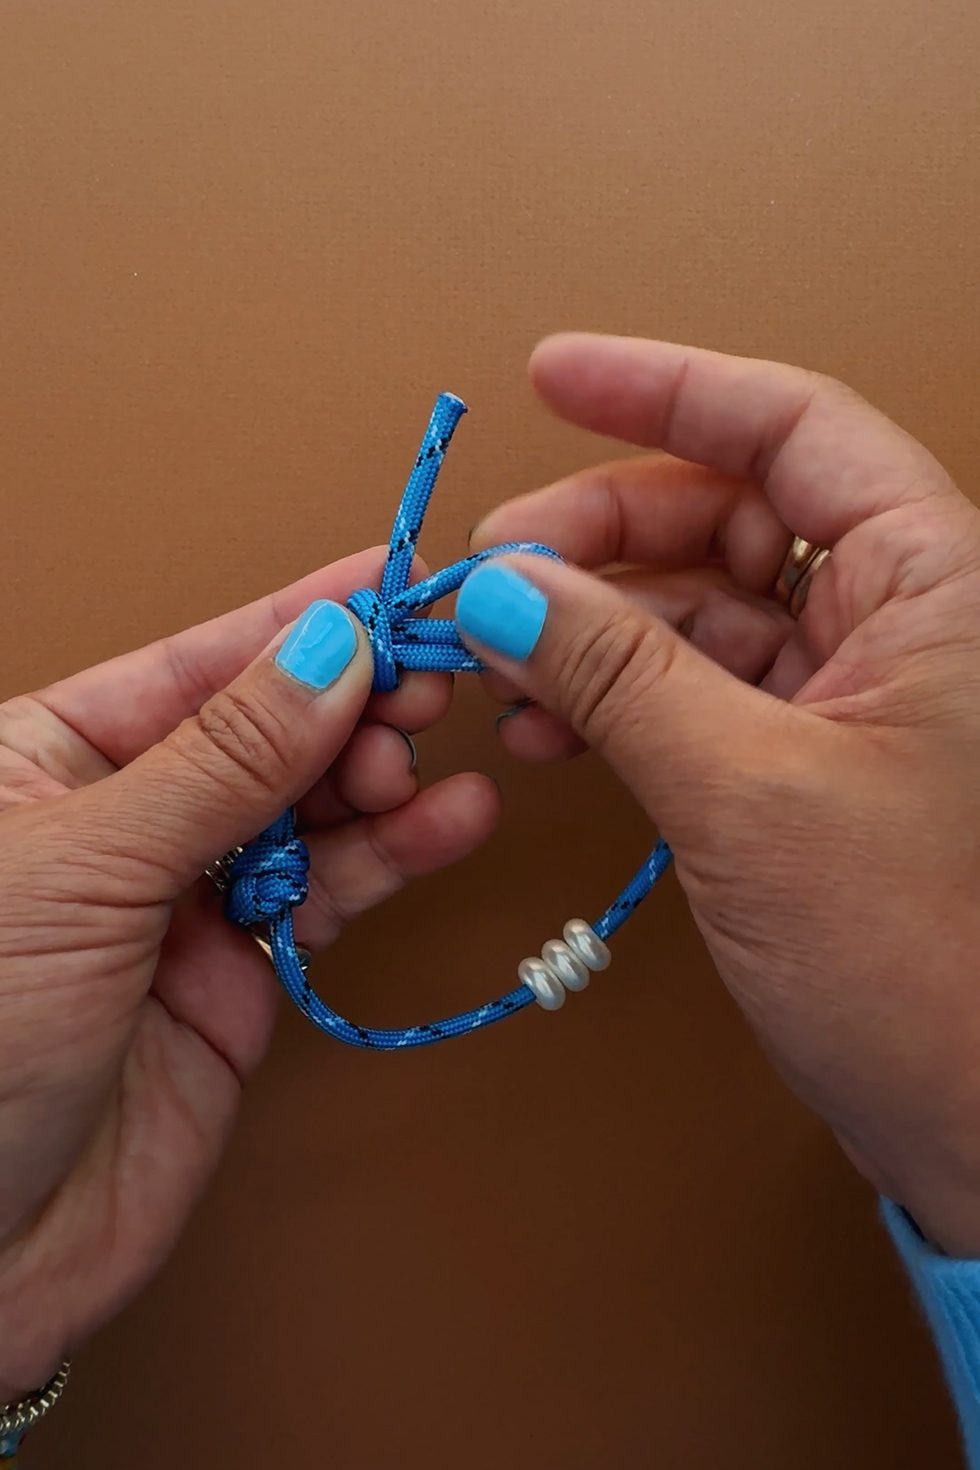
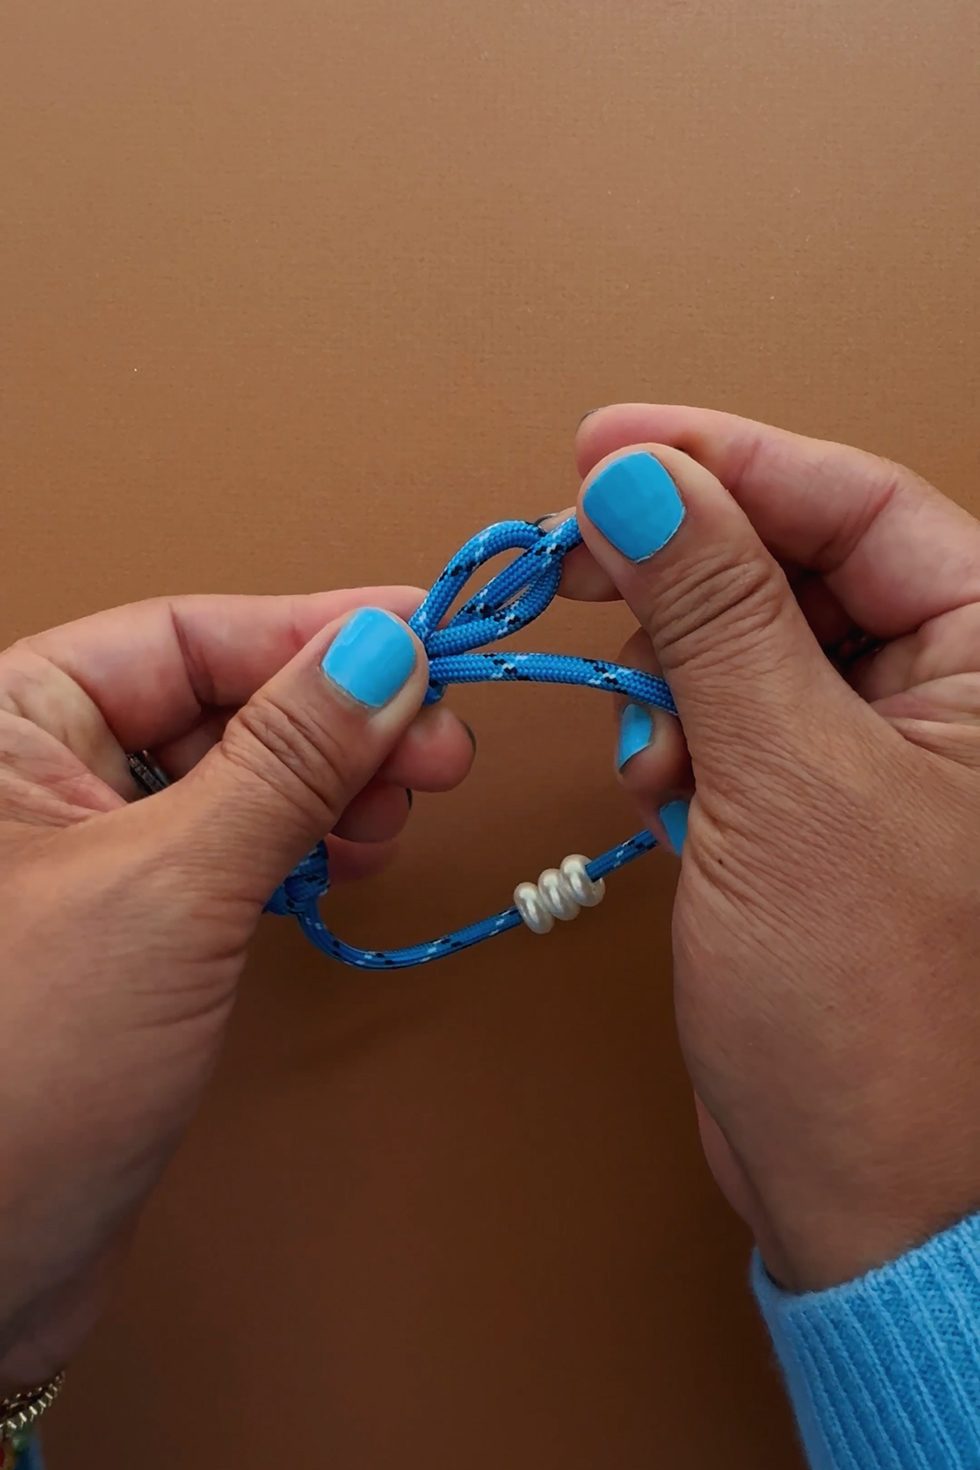
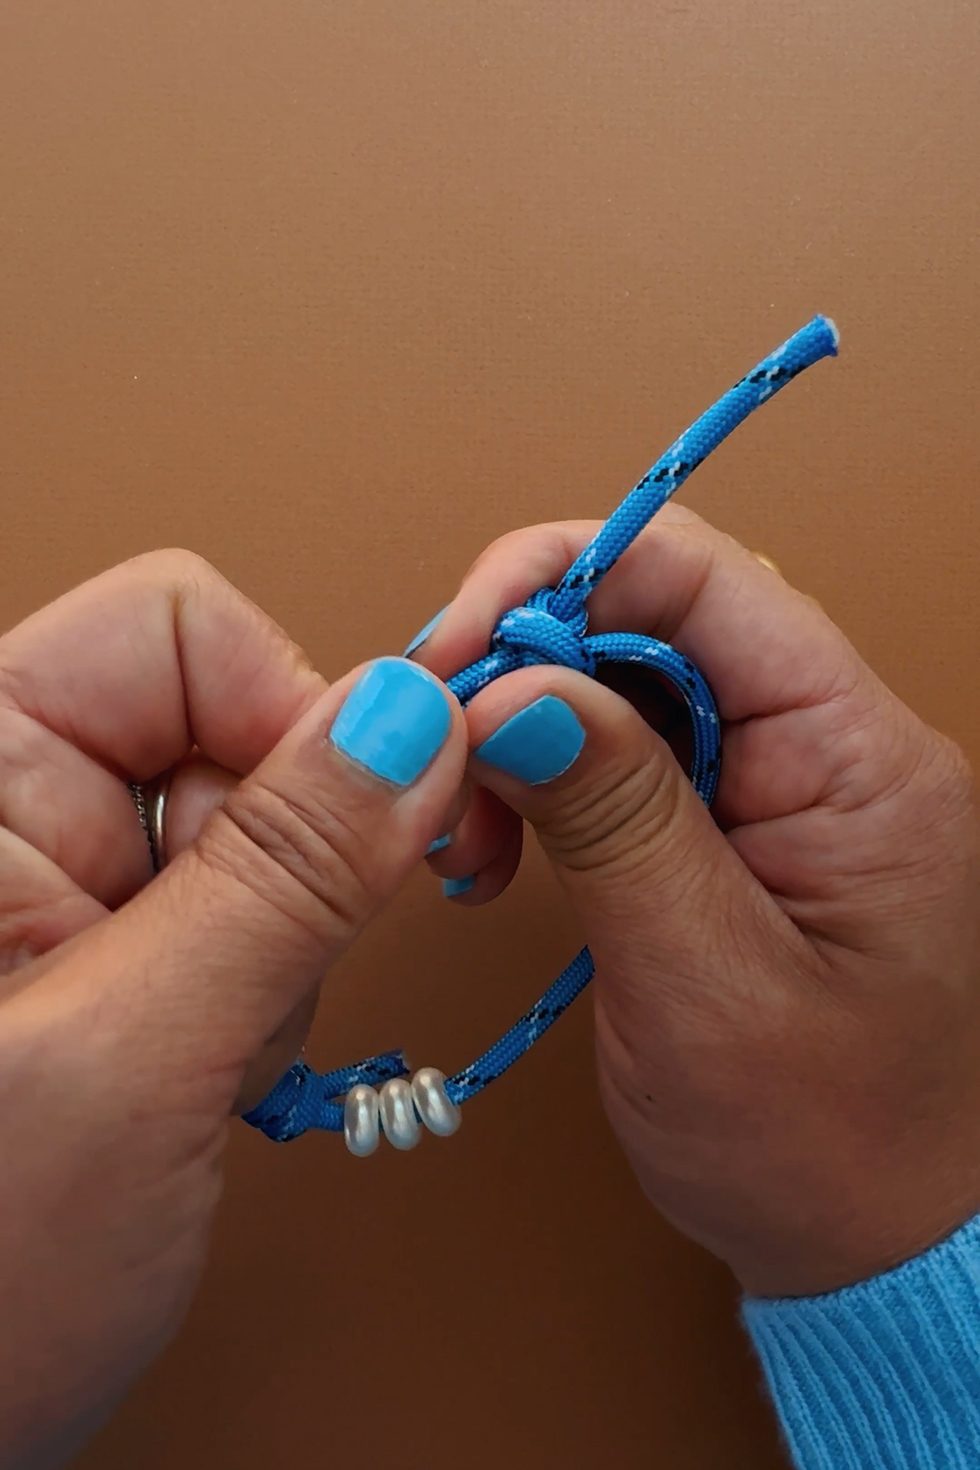
Grab onto the tail end with your right hand and use your left hand to push the knot to the right - towards the tail end.
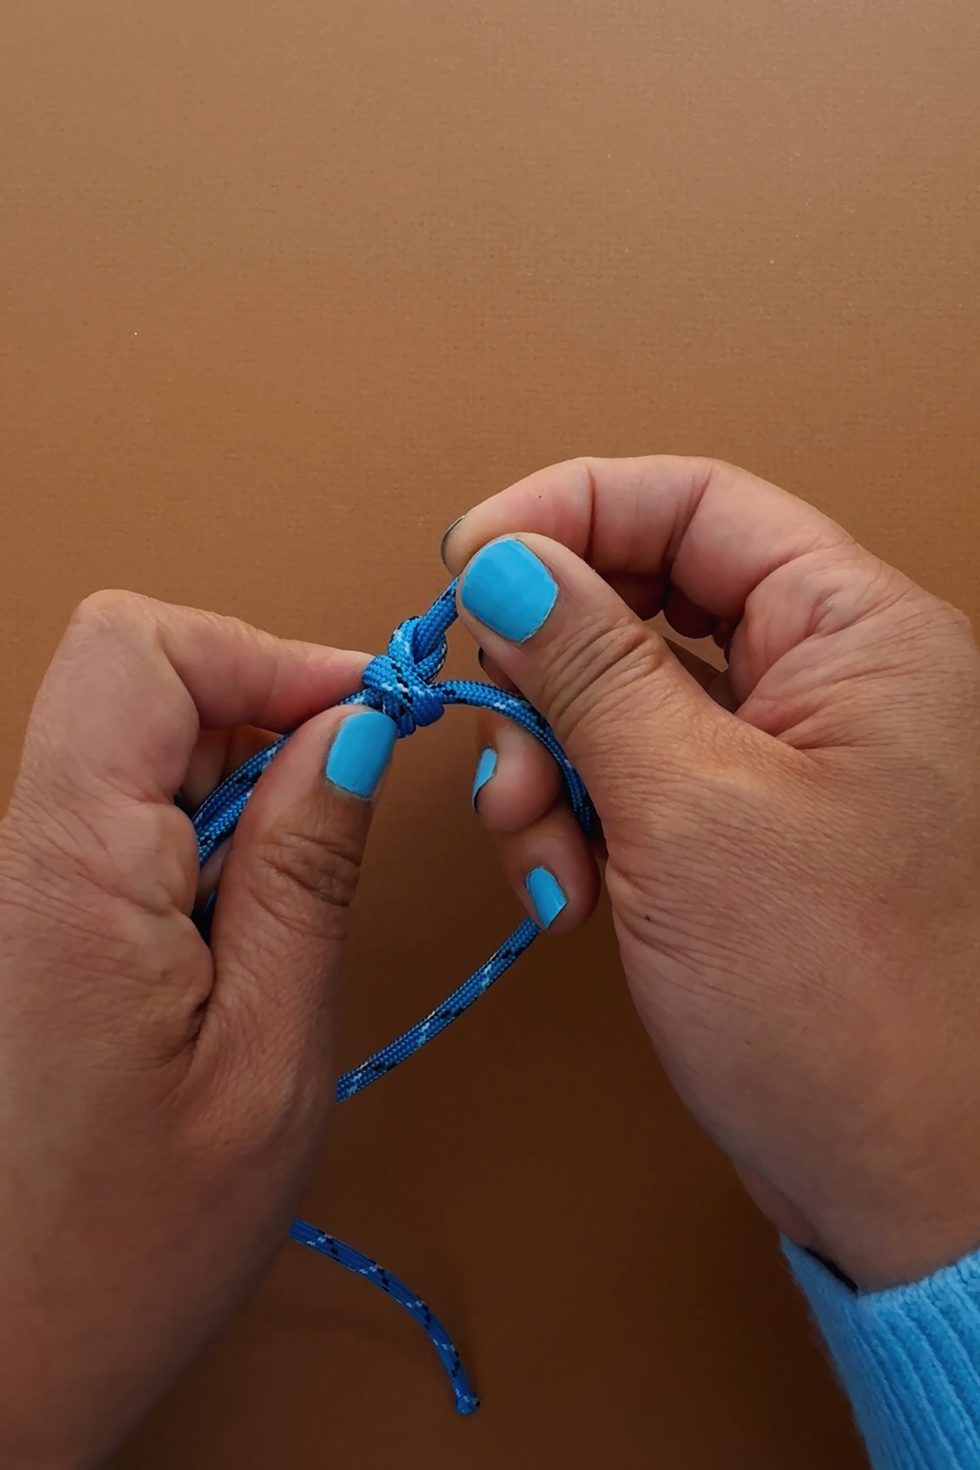
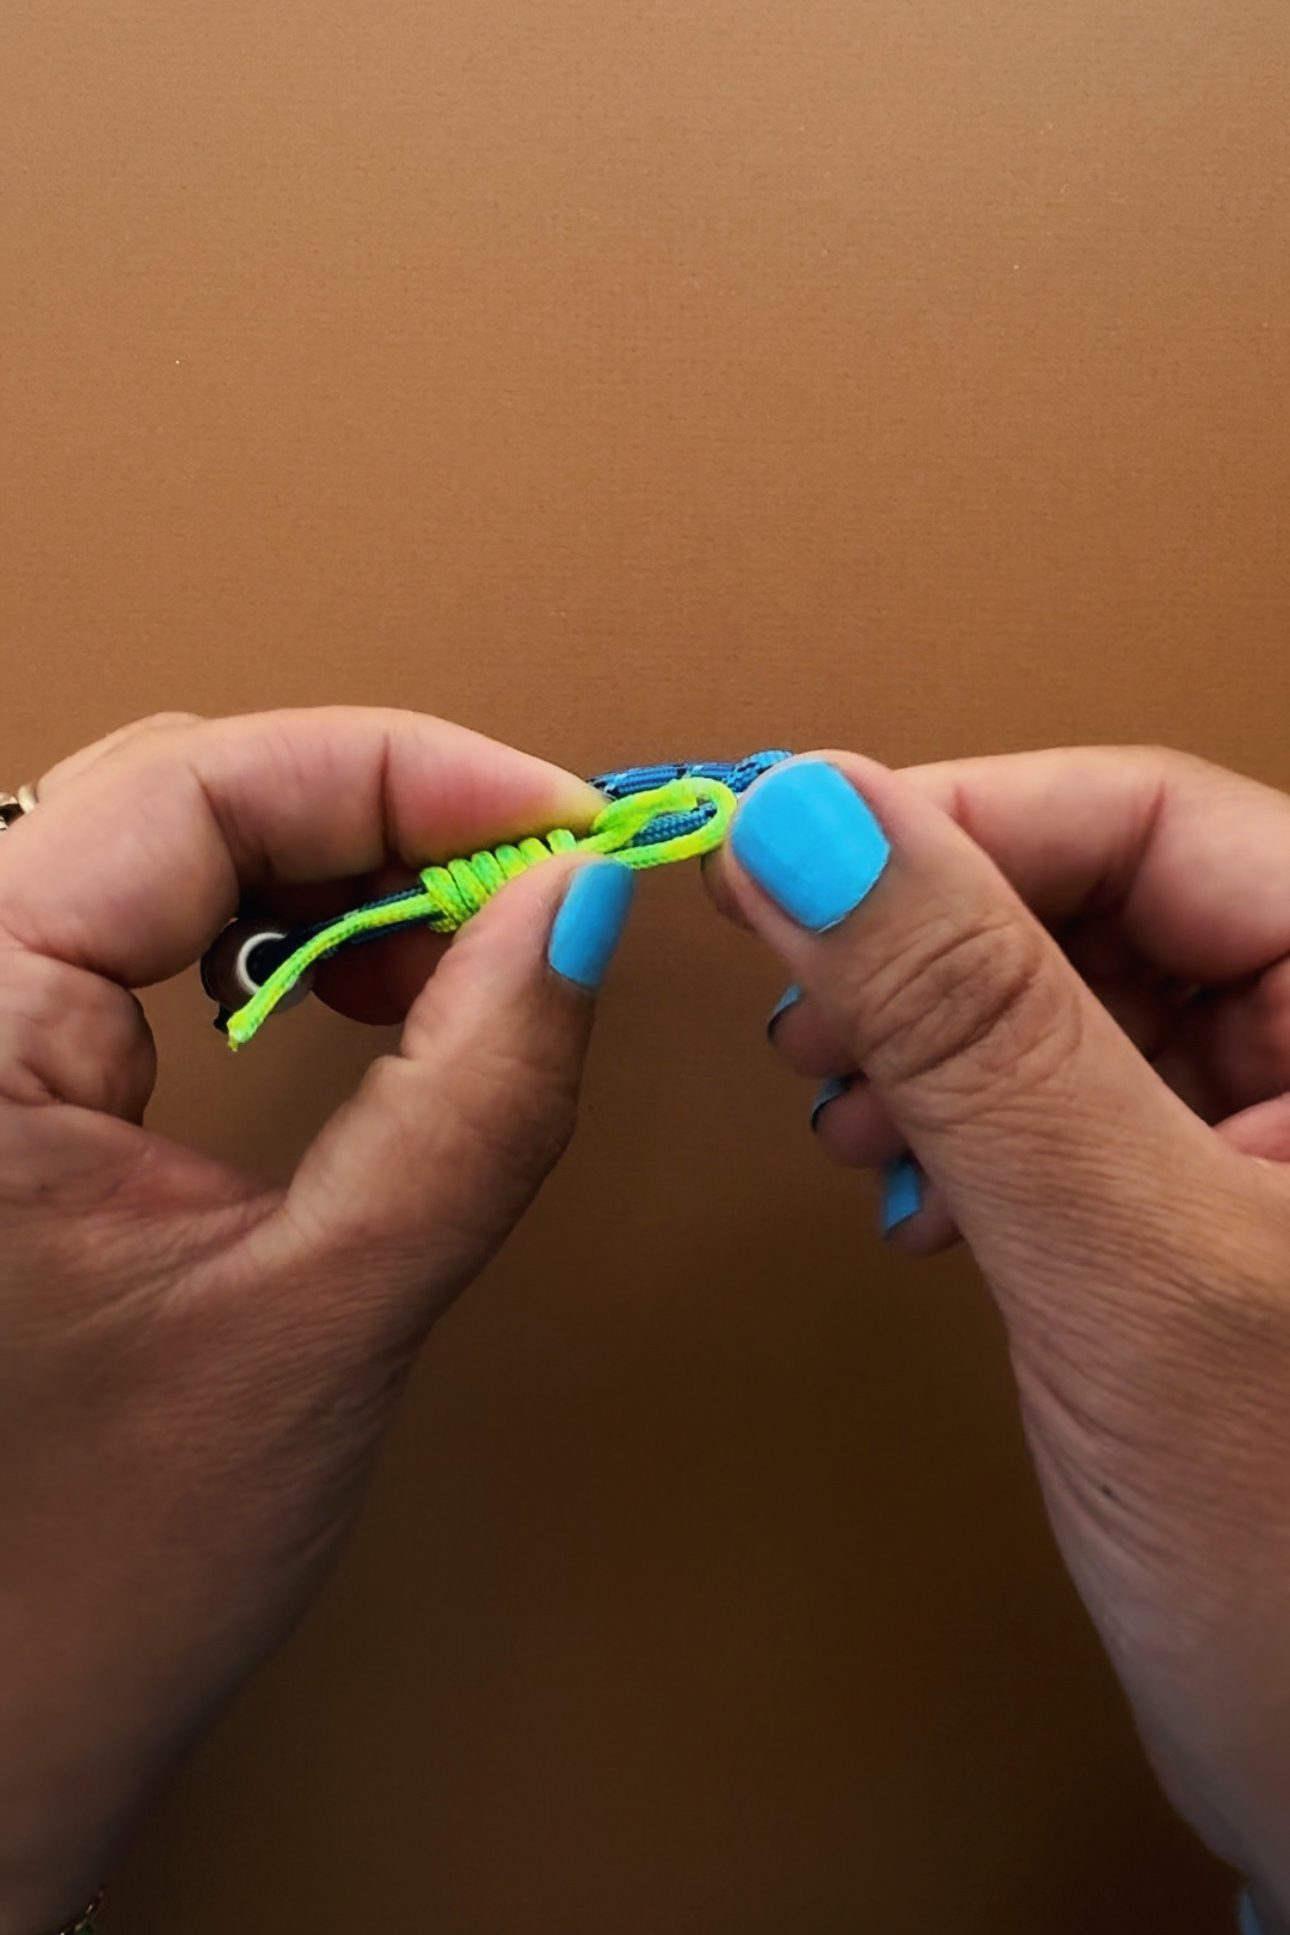
Keep pushing with your left fingers and pulling with your right fingers until the knot is as tight as it can get.


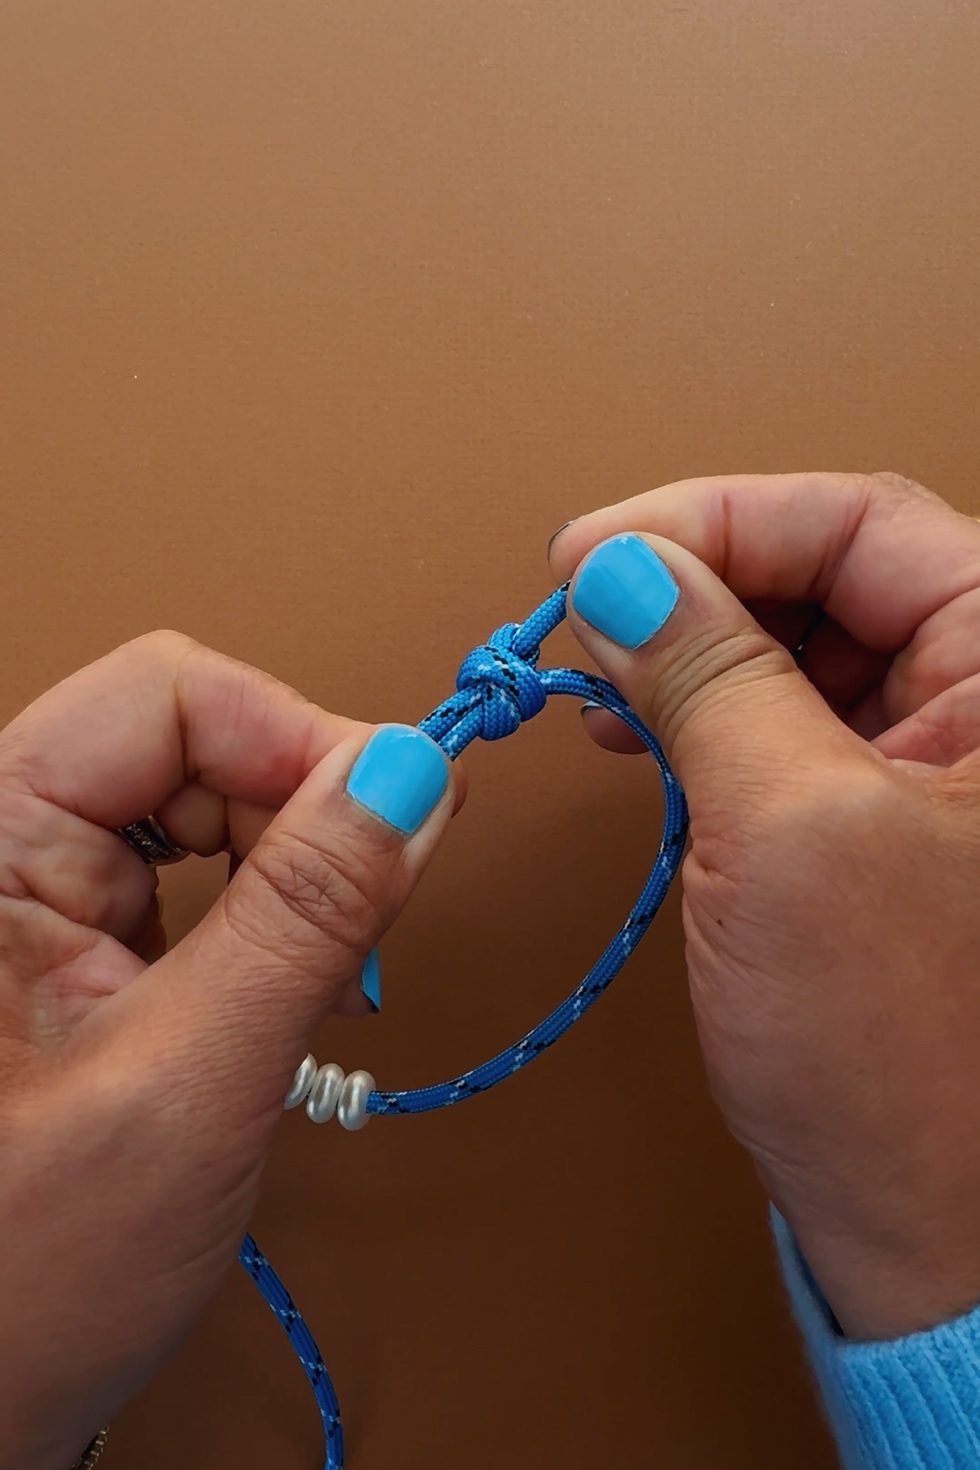
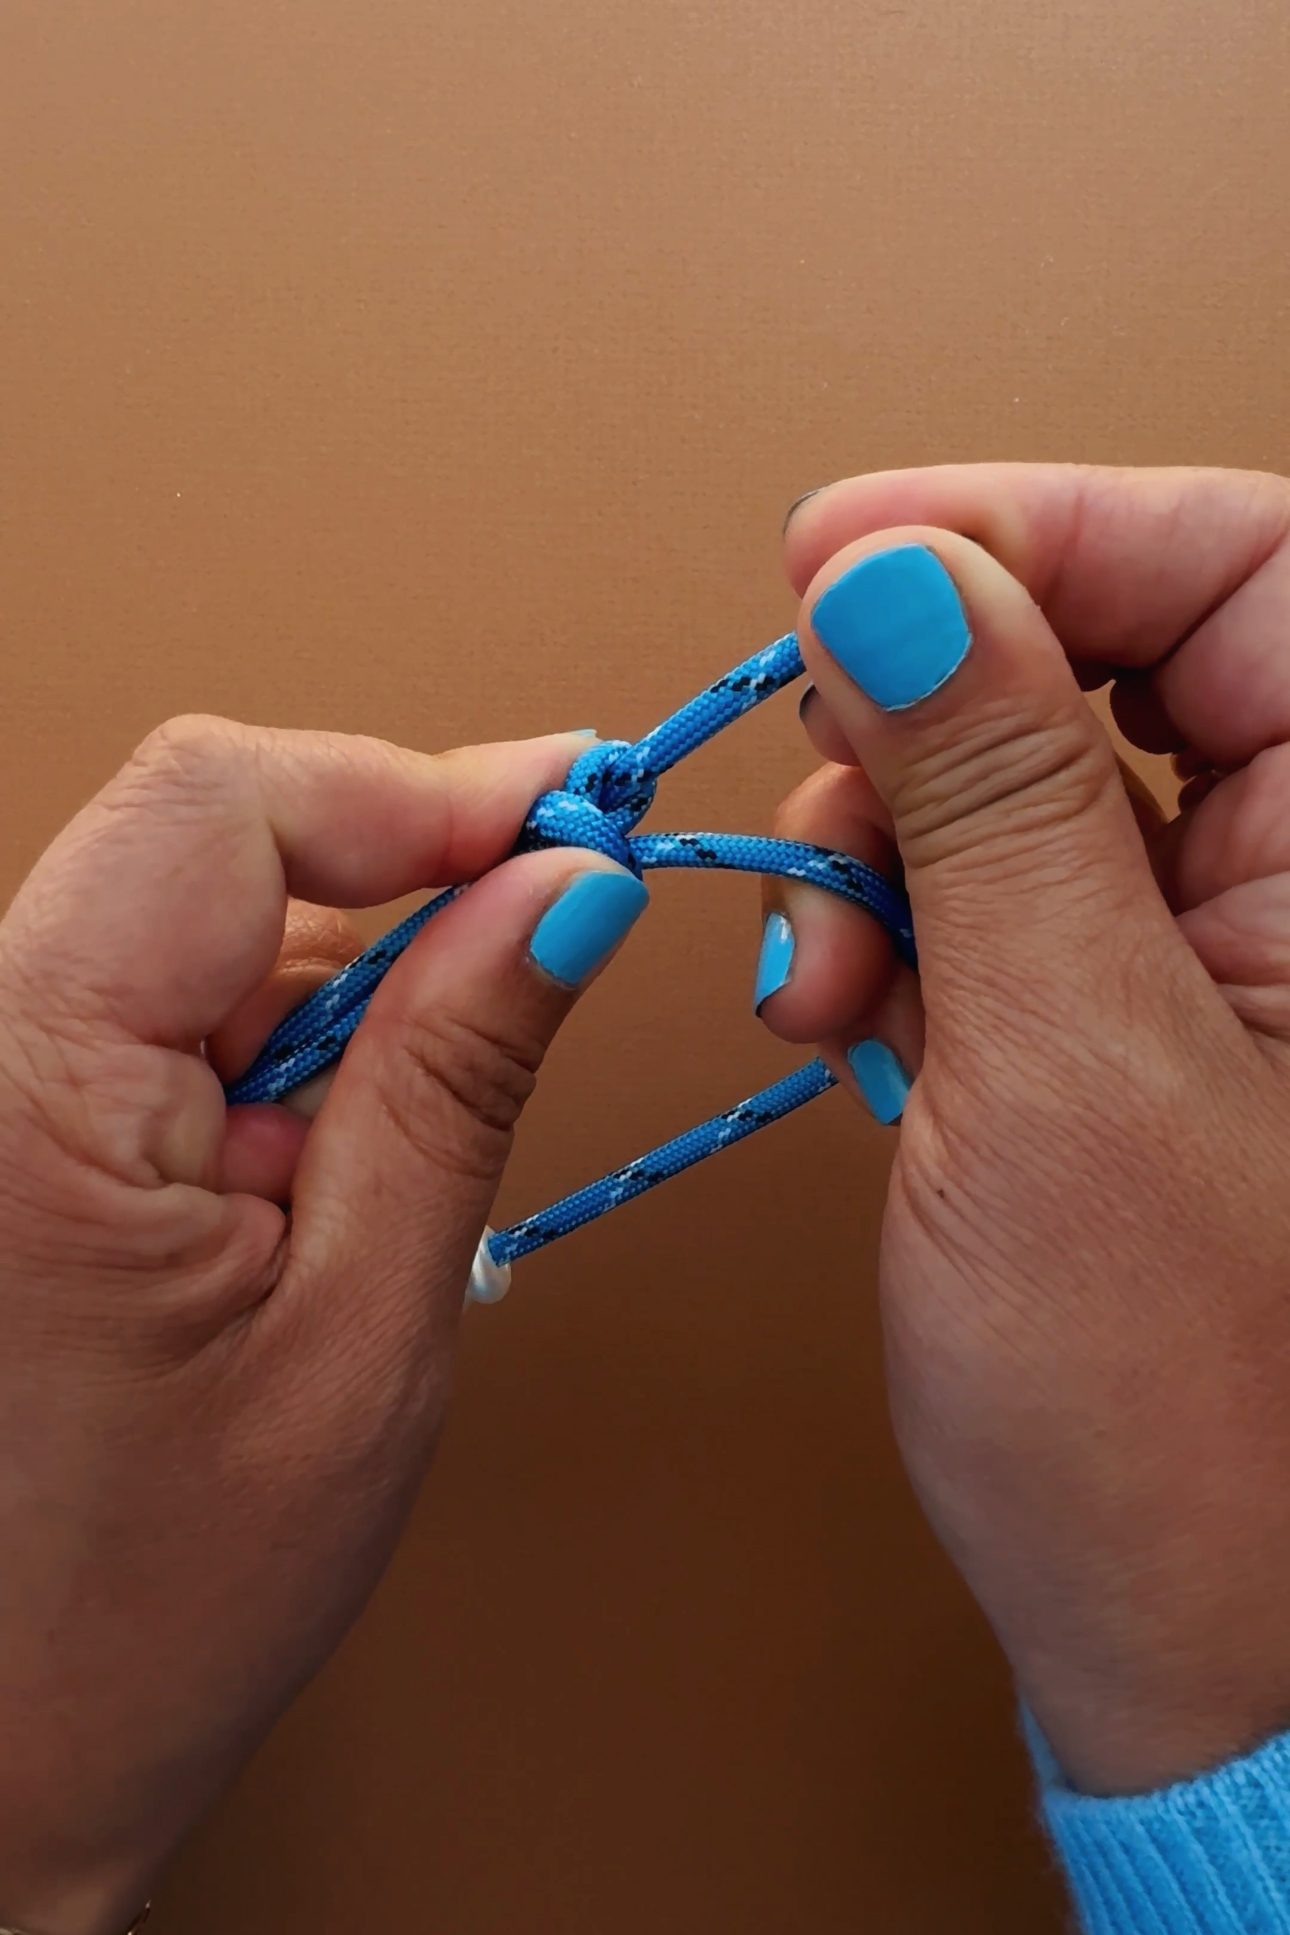
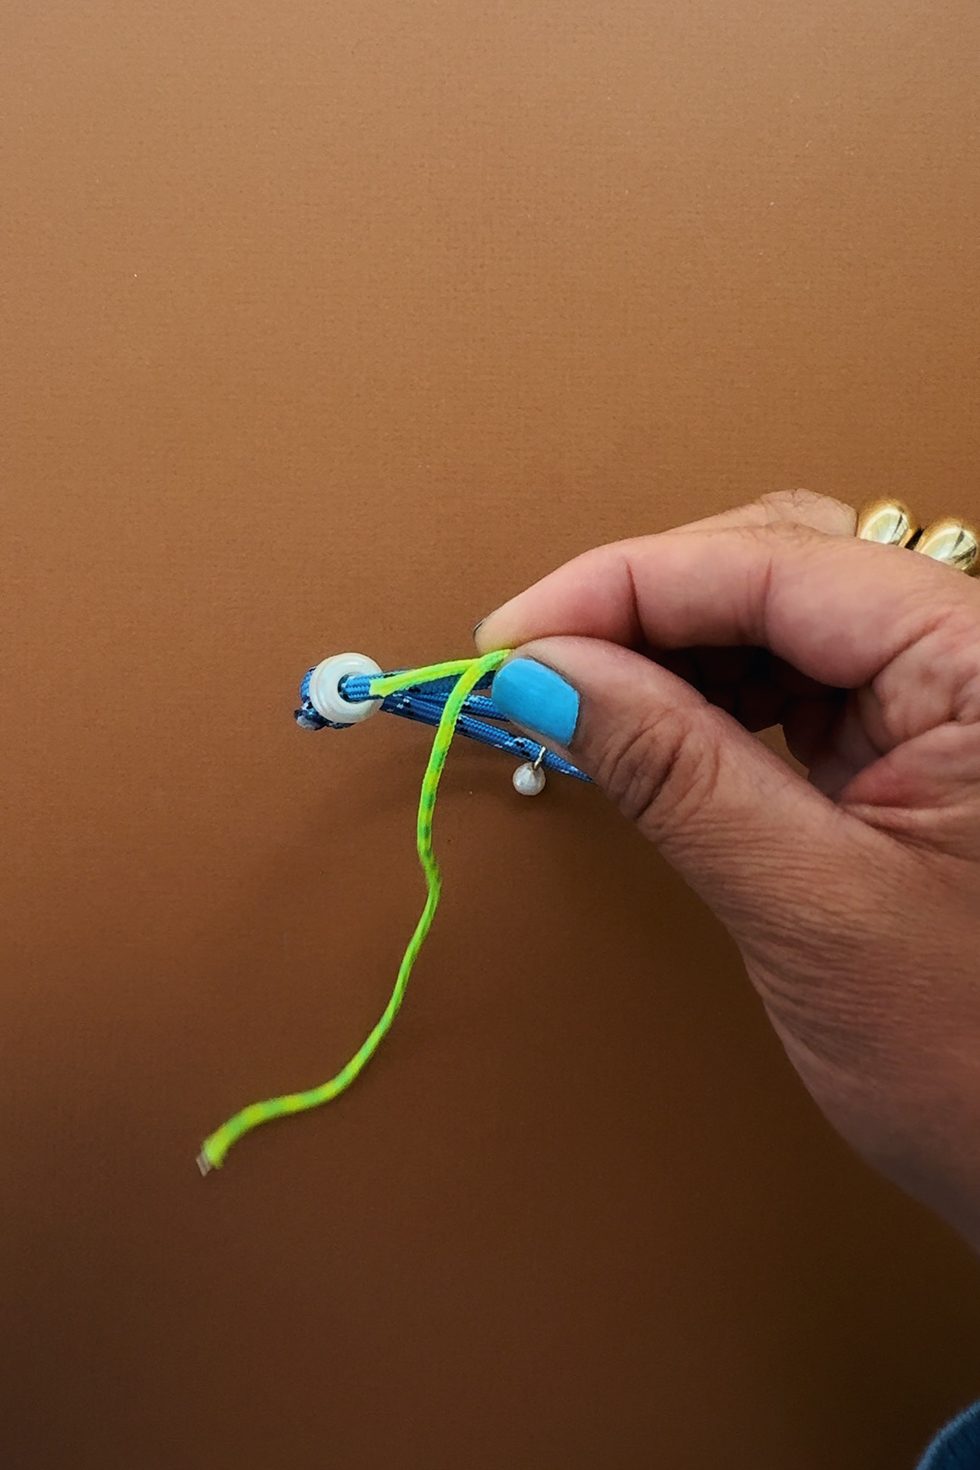
Flip the bracelet around so the loose rope is now on top. Thread on the pearl charm (optional).
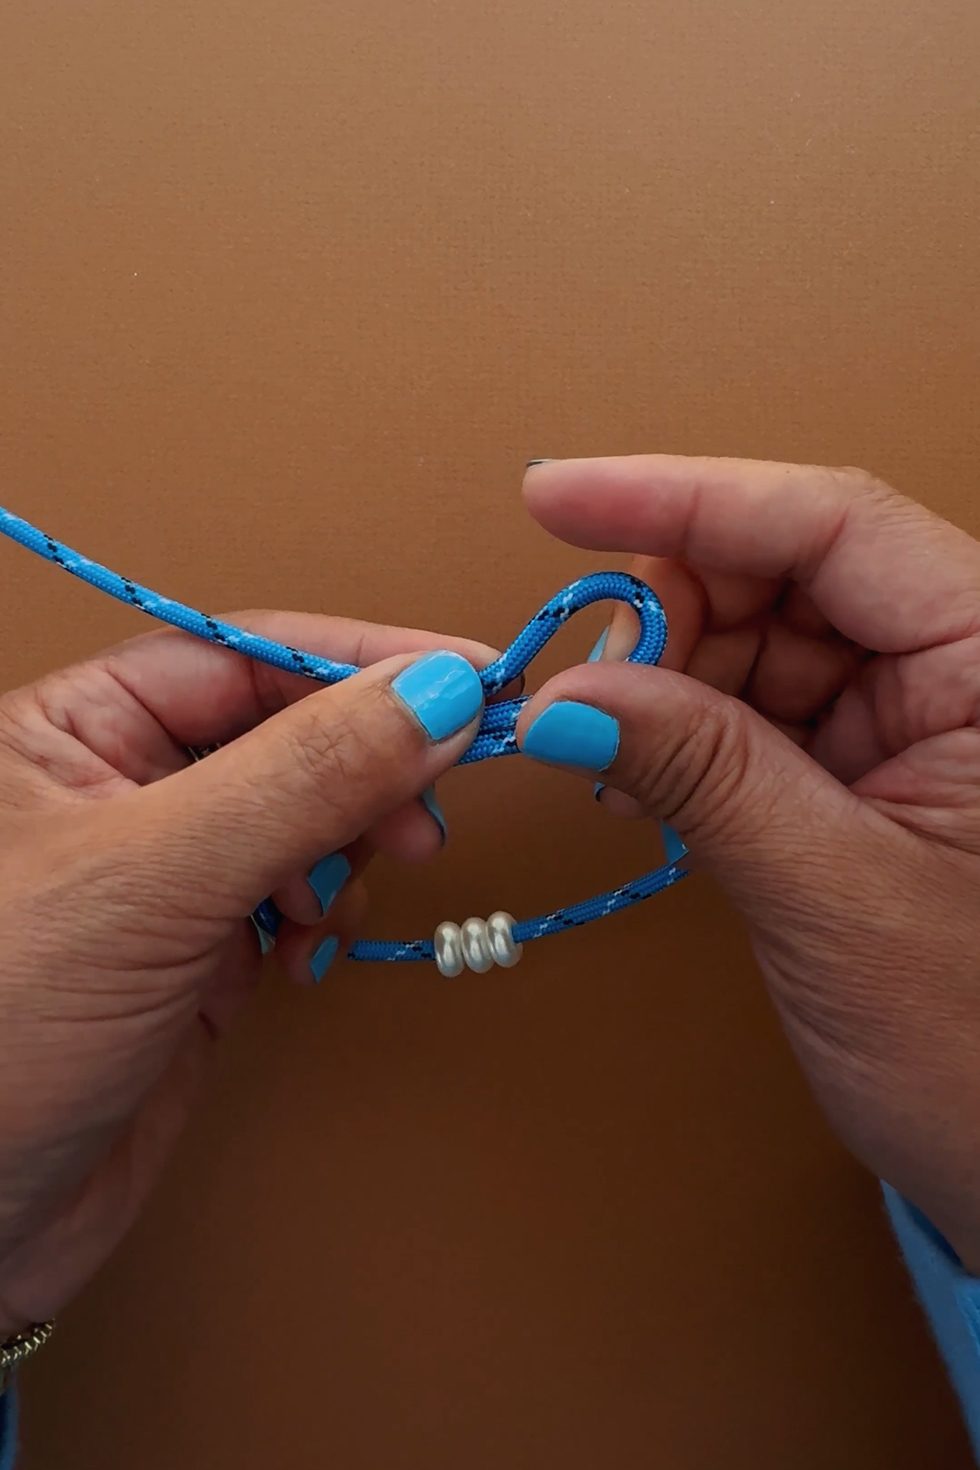
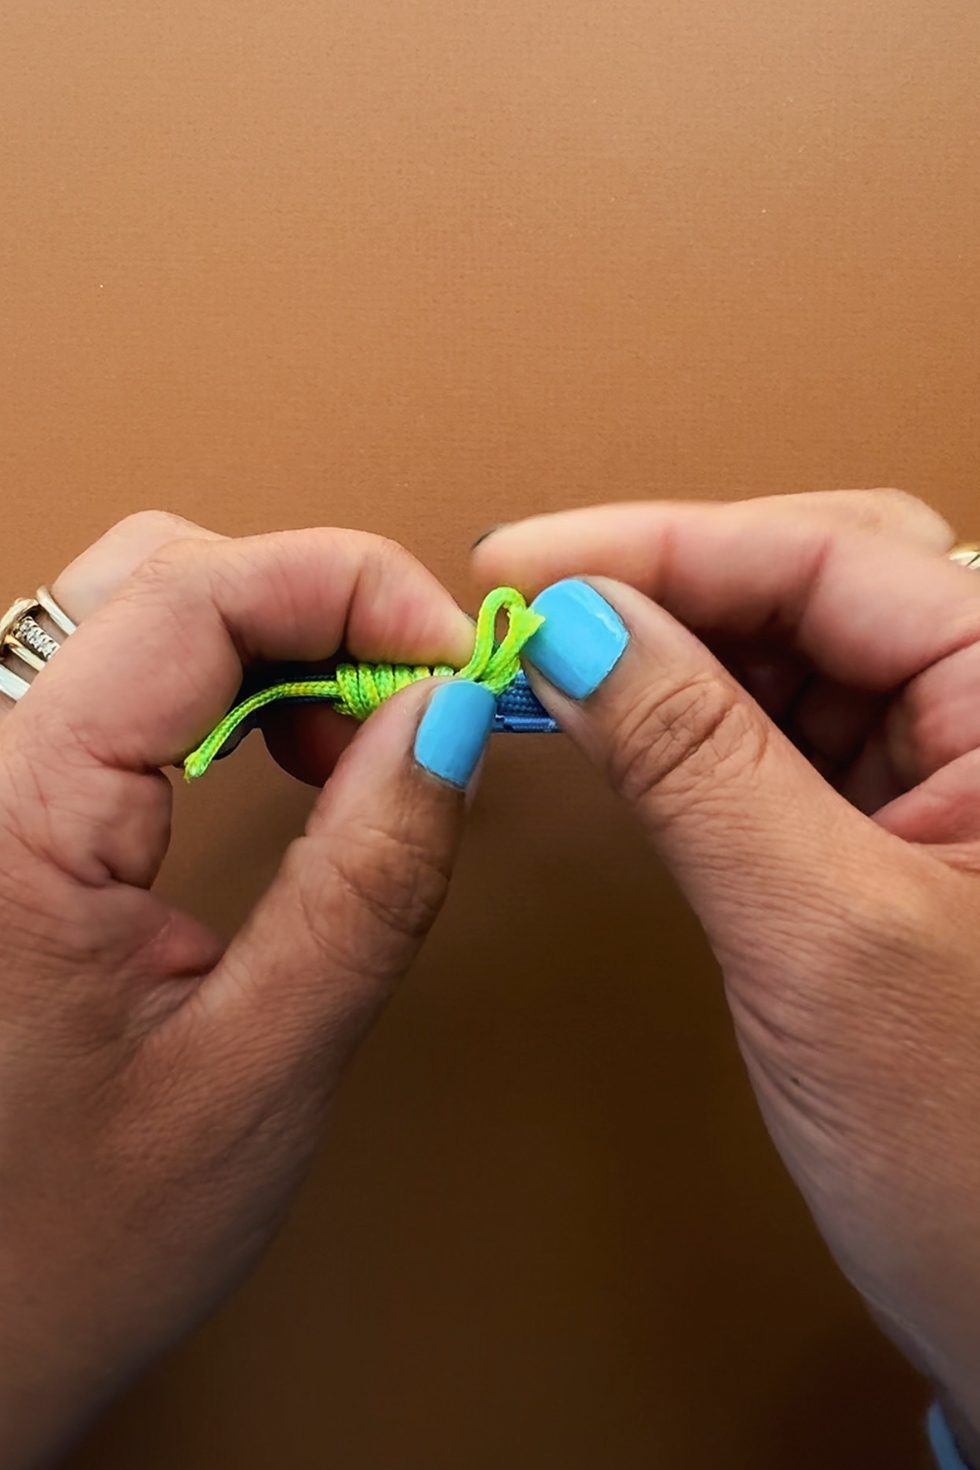
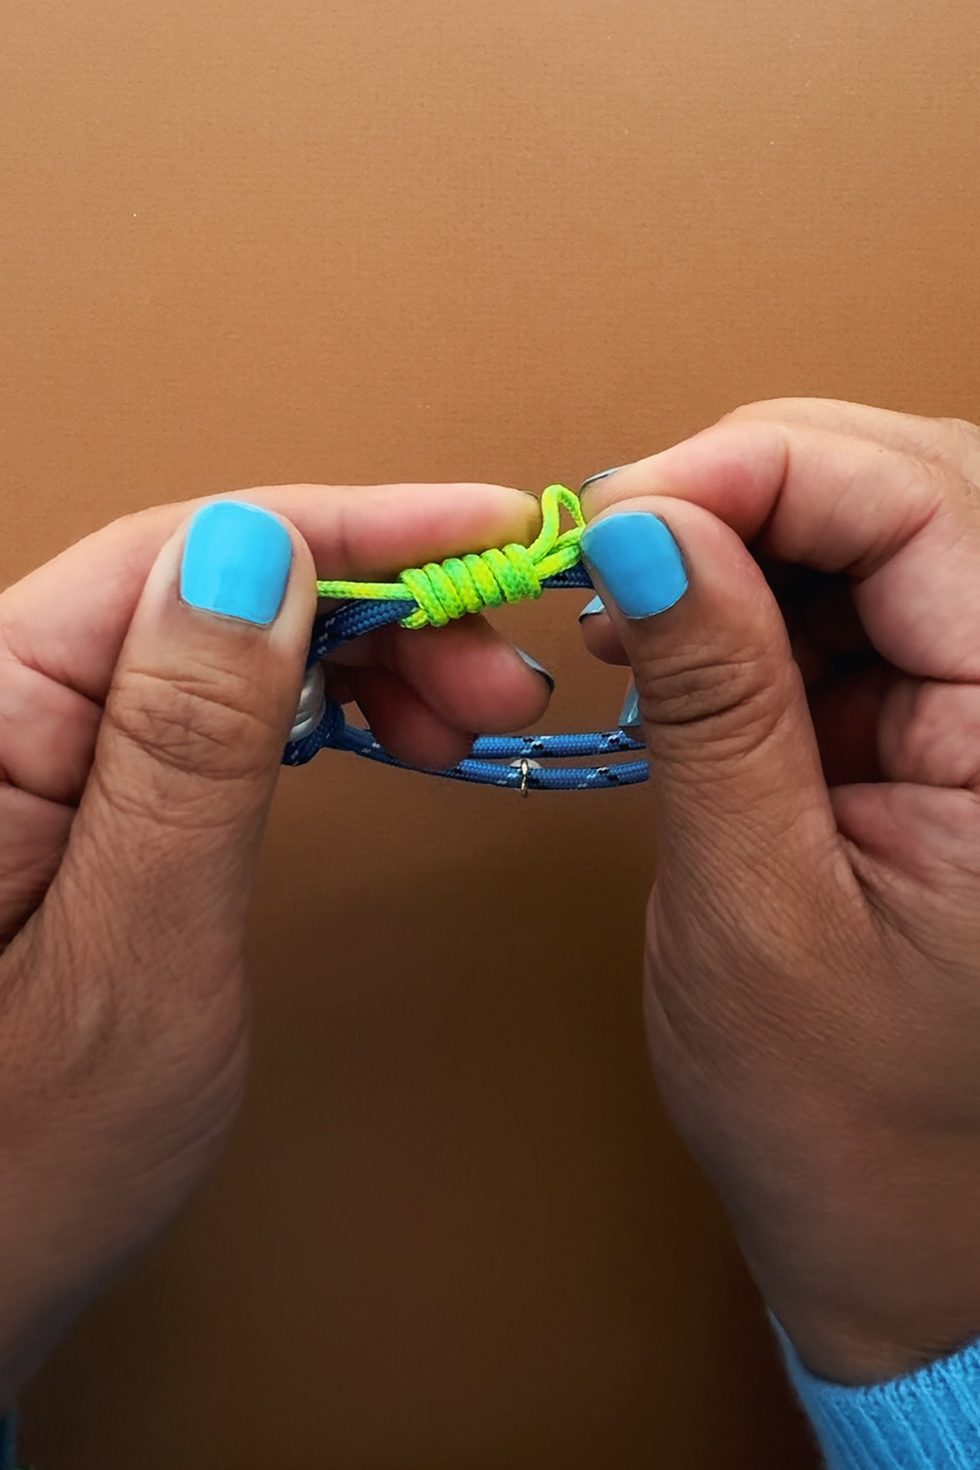
Repeat the same step as before. Fold 3" of the left rope (top) back onto itself. Fold the last 2" of the tail over the overlapping ropes.
Coil the tail around the ropes.
Make one full rotation.
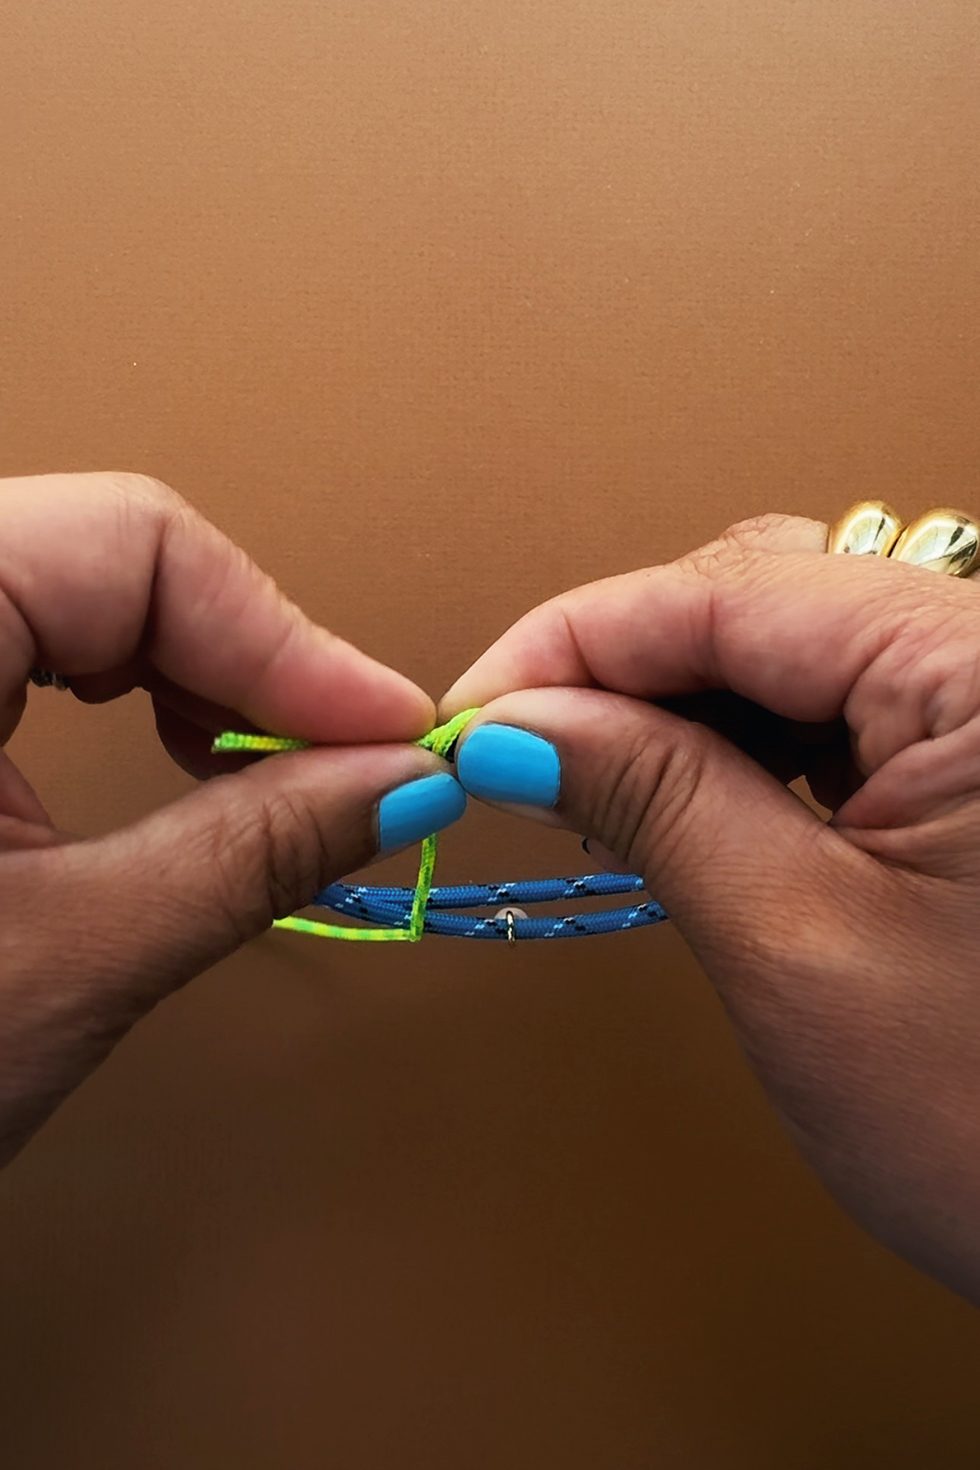
Take the tail's end and thread it through the open loop from behind.
Grab onto the tail end with your right hand and use your left hand to push the knot to the right - towards the tail end. Keep pushing with your left fingers and pulling with your right fingers until the knot is as tight as it can get.
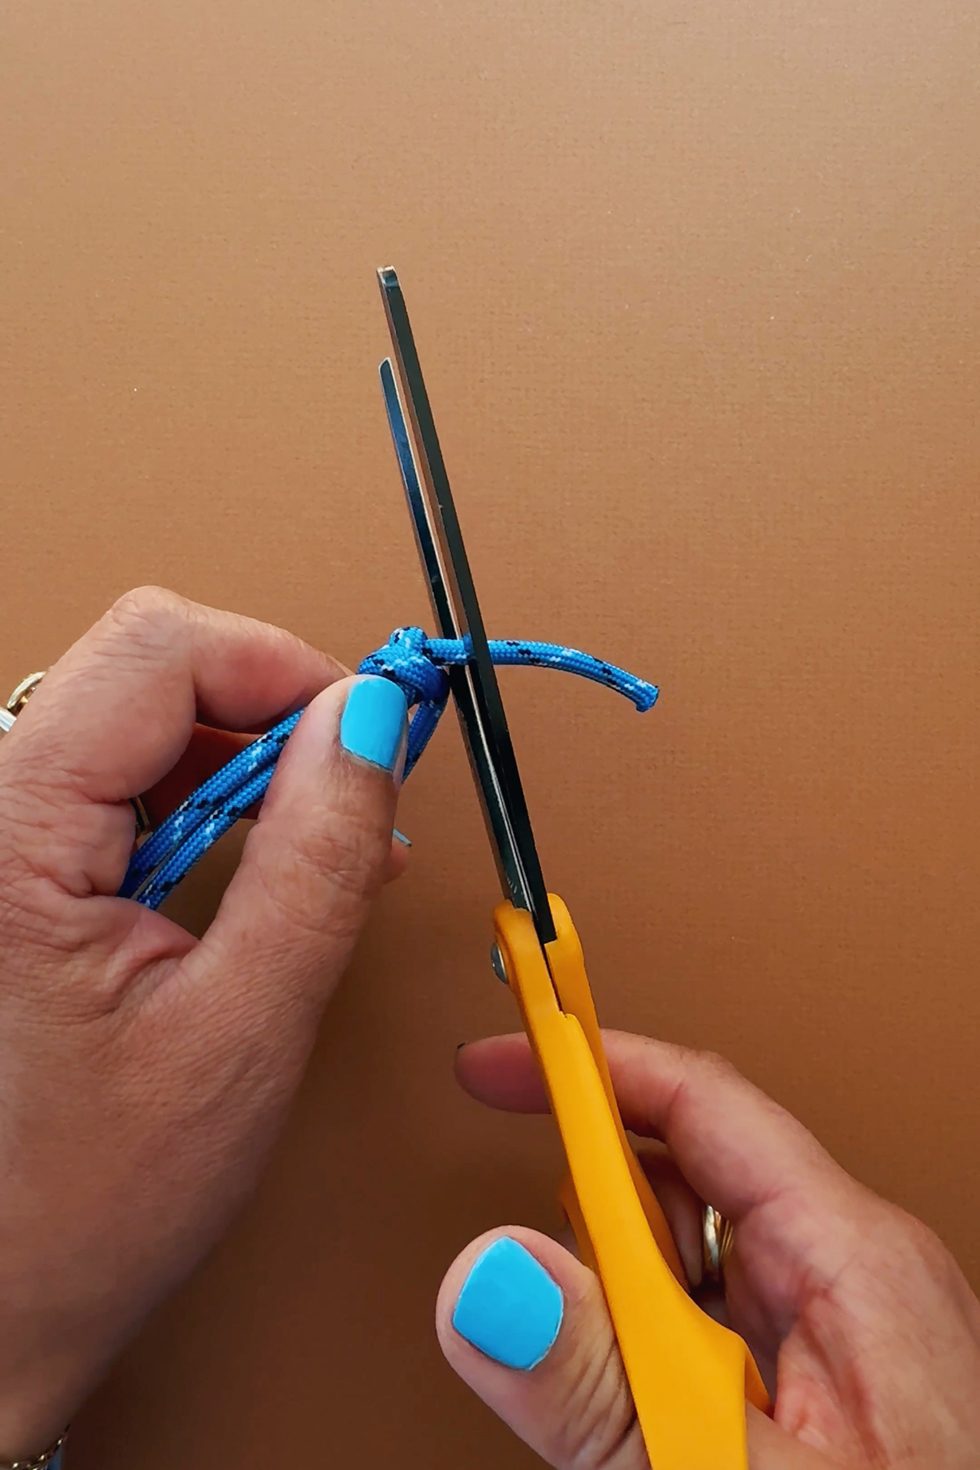
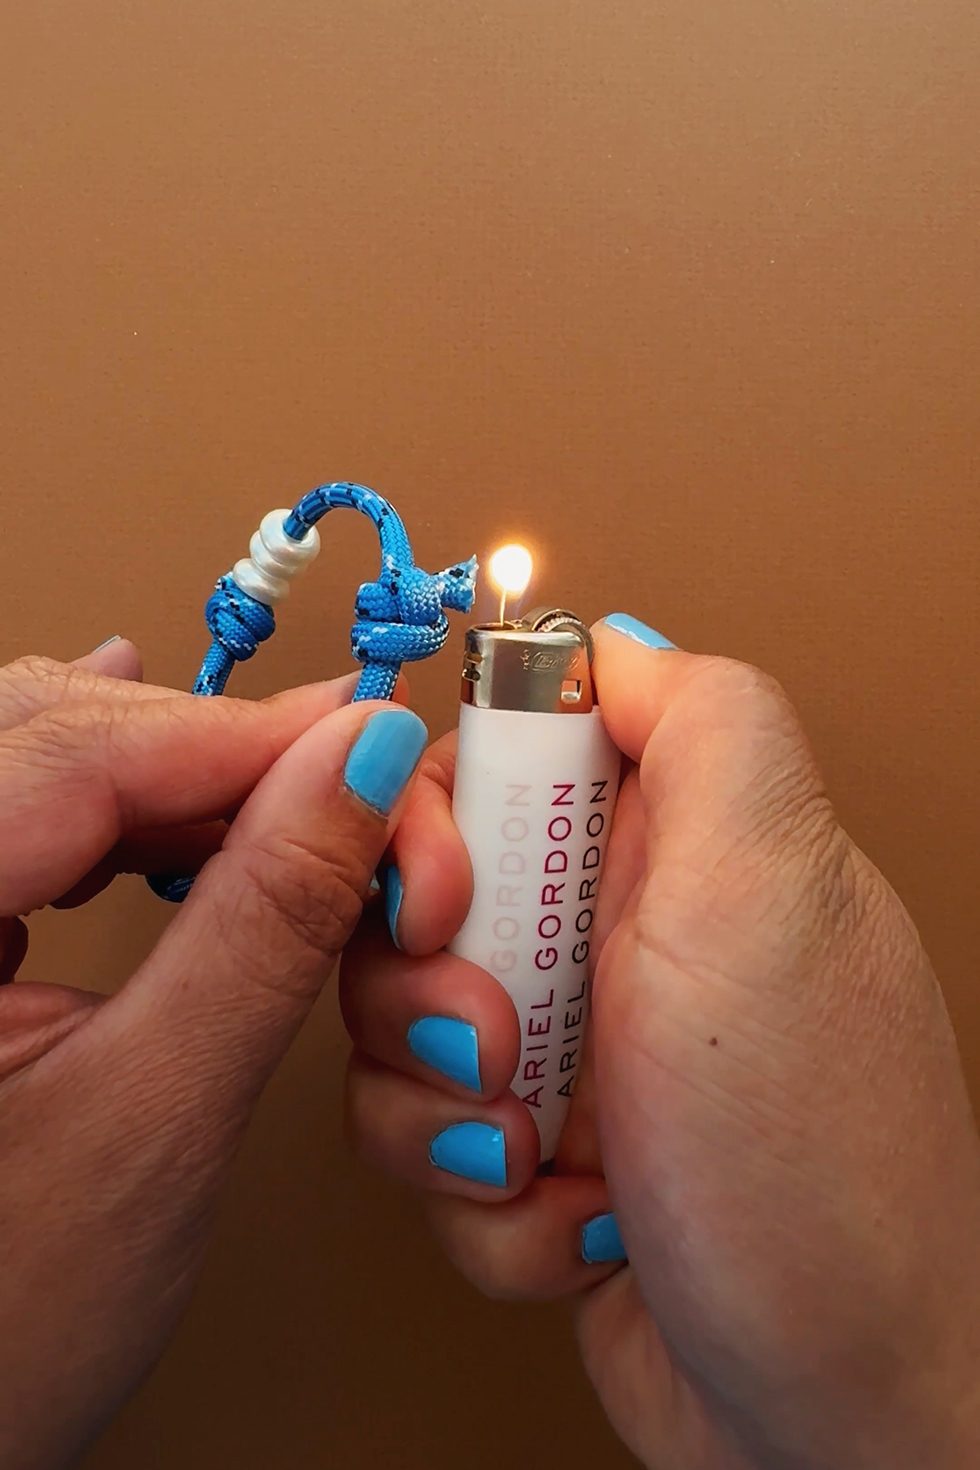
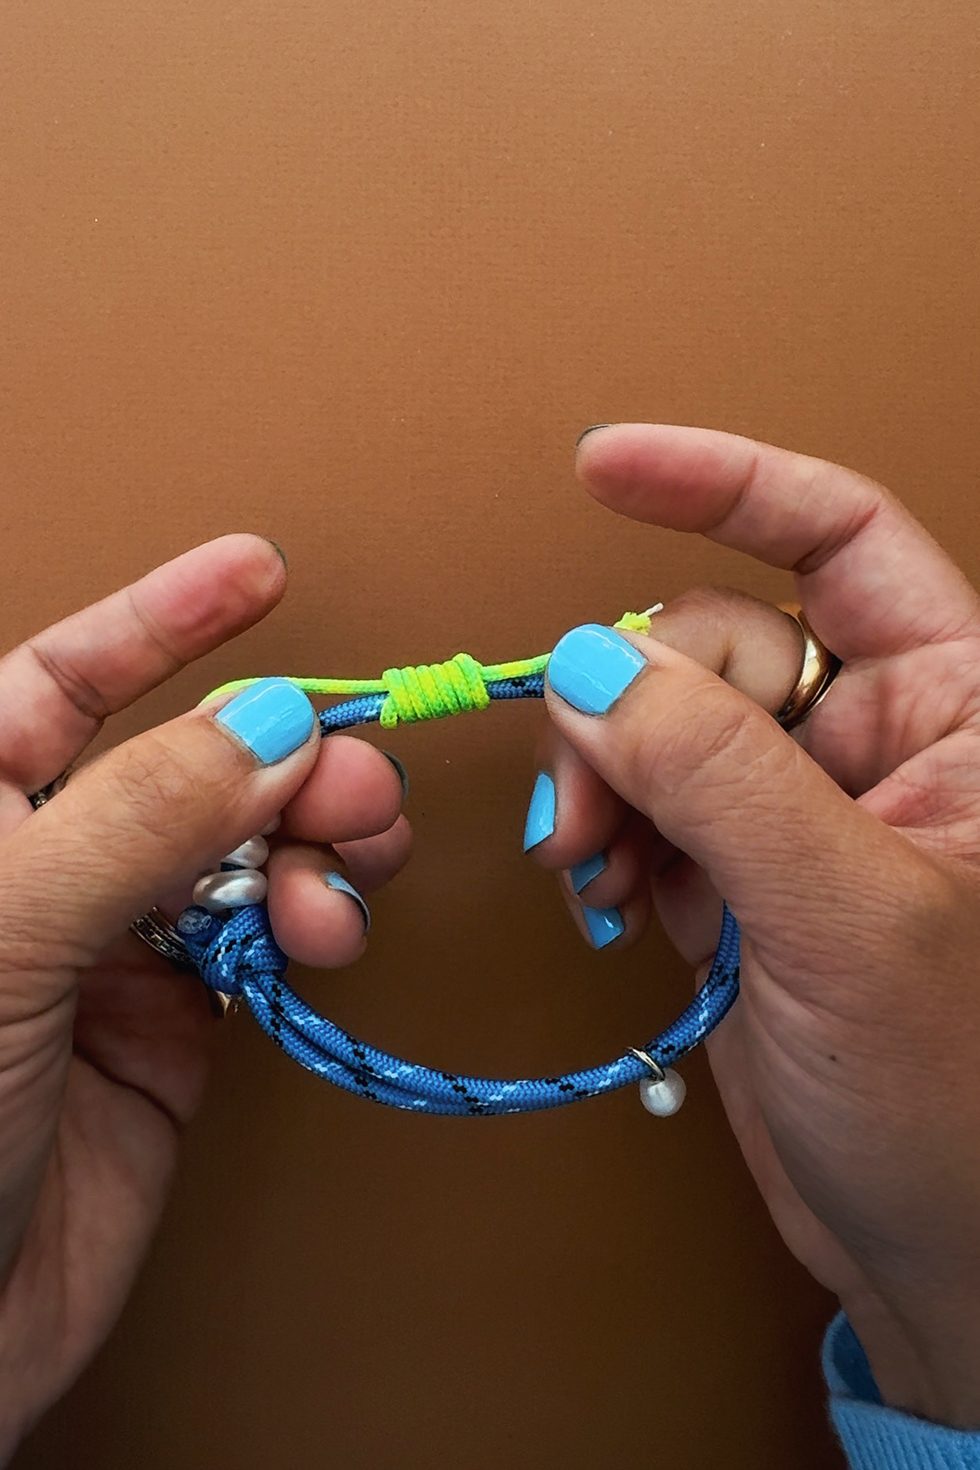
Trim the ends, leaving about 3mm of rope. Using the lighter, burn the ends until you see them melt slightly.
Next is a barrel knot - this can be used decoratively and is very similar to the sliding knot. You can choose to do this with the thicker rope or the thinner rope.
Cut about 12" of rope. Lay 3" of rope parallel to the anklet or bracelet.
Then fold the rope back over itself.
Leaving a 1/2" tail, start coiling the rope.
Make sure to make the coil tight. Use your left fingers to keep it in place.
Once you've reached the desired length, pull the end of the rope through the open loop from behind. Pull both ends until tight.

Trim the ends.
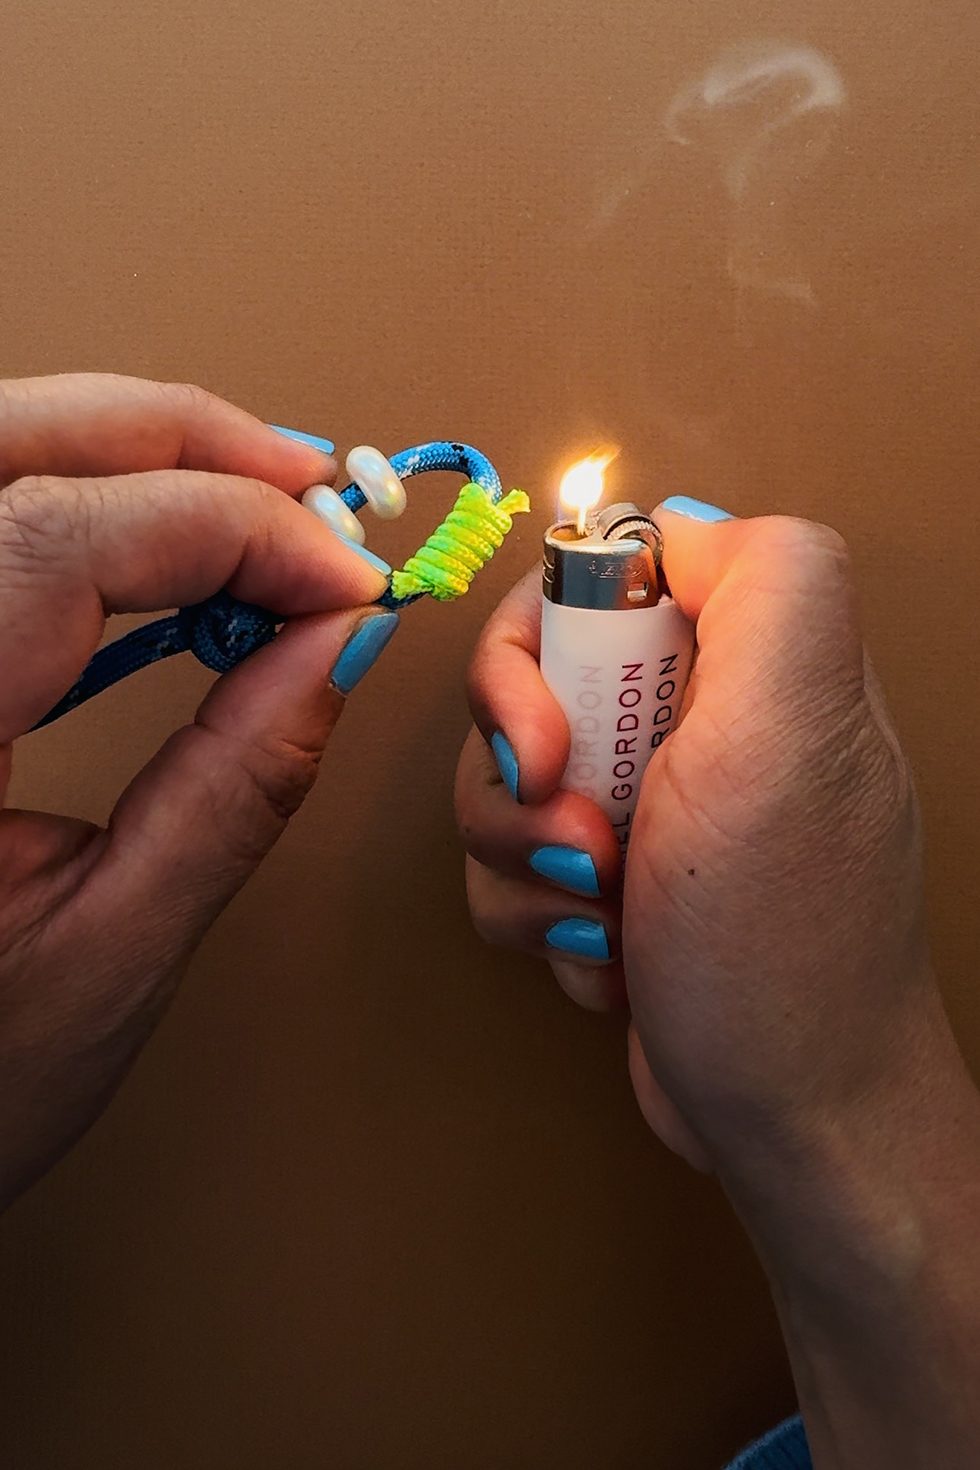
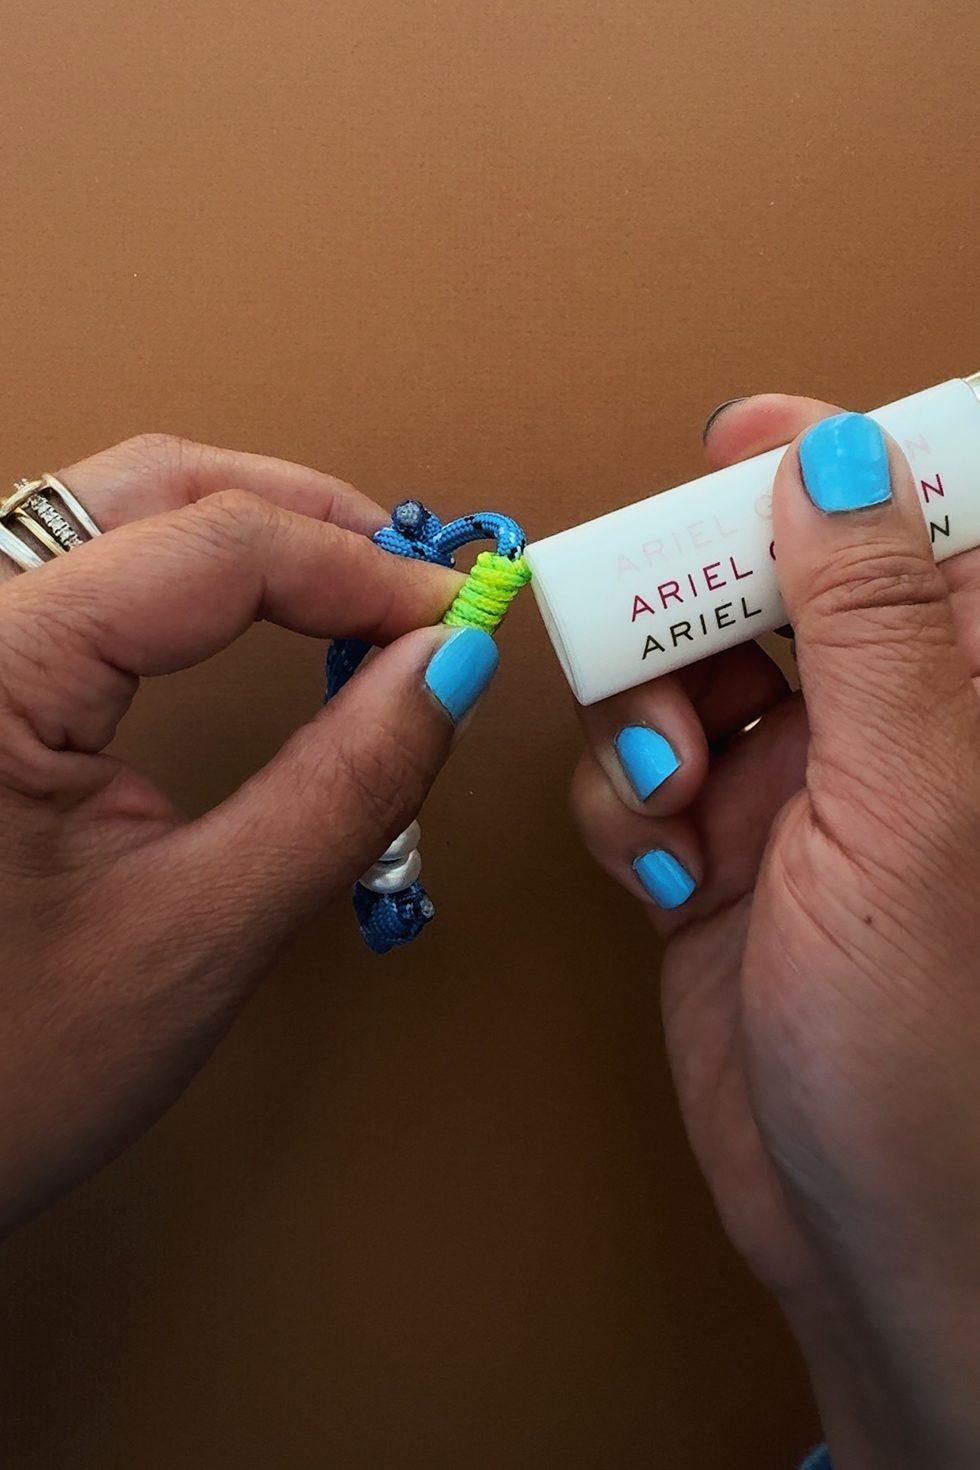
Burn the tips until they're melted. Quickly apply the backside of the lighter against the melted end and press it against the knot. This allows the knot to stay put.
Tutorial in collaboration with Ariel Gordon Jewelry.
AGJ x HWTF DIY Knotty Rope Kit here