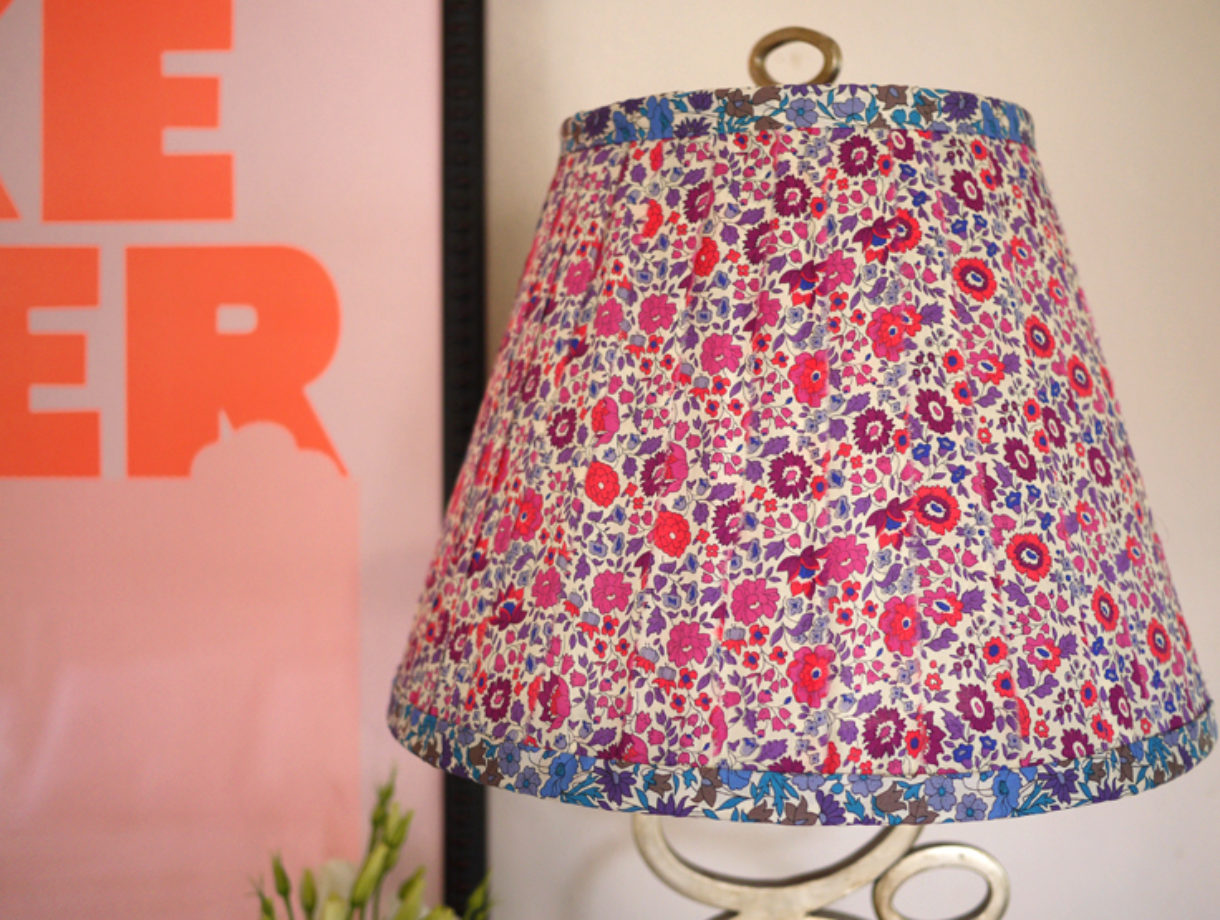
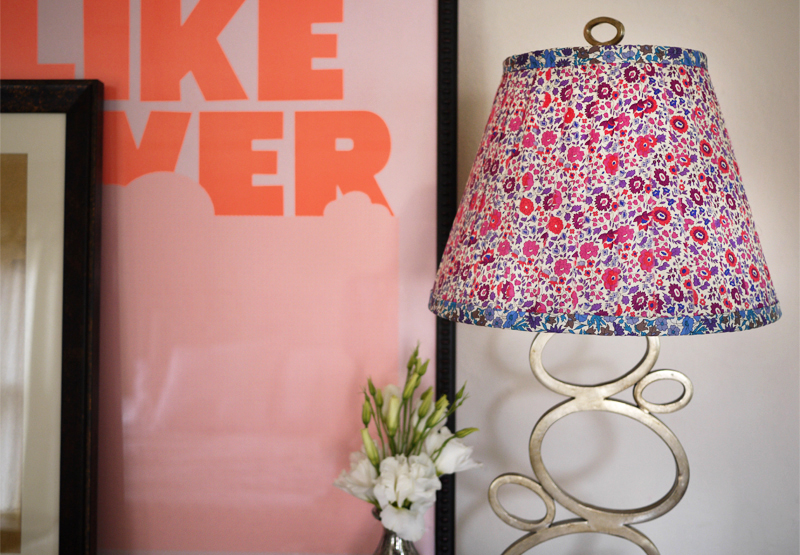
A couple of weeks ago while in London, I paid an obligatory visit to the third floor my favorite and one of the most iconic stores in the world: Liberty of London. After pulling bolts and bolts of Liberty fabric from the shelves, I eventually walked away with enough DIY supplies and material to hold me over until my next British stopover. It also didn’t take me long to whip together an incredibly simple DIY, upon my return, using a couple of sweet floral prints. This floral lampshade is a breeze to make and a fantastic way to utilize fabric without having to use a sewing machine!
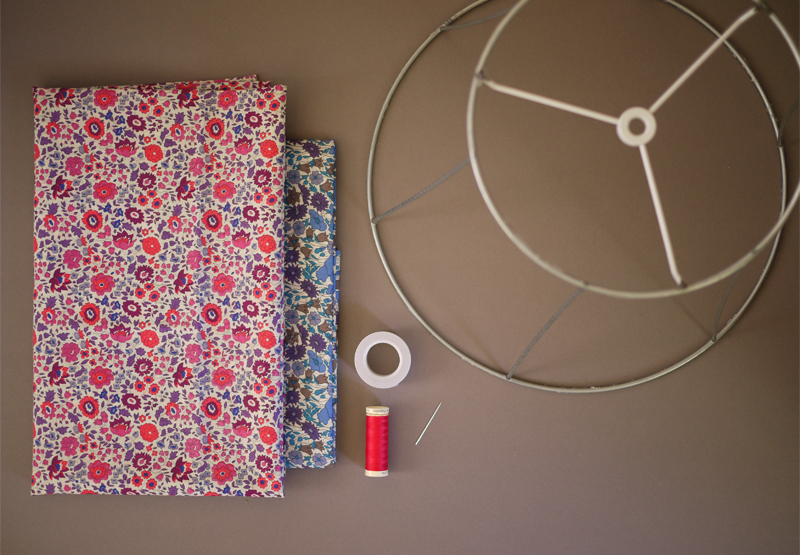
You’ll need:
- one yard of floral fabric plus 1/6 yard of fabric for trim
- a metal lampshade frame
- double sided fabric tape
- needle & thread
- scissors
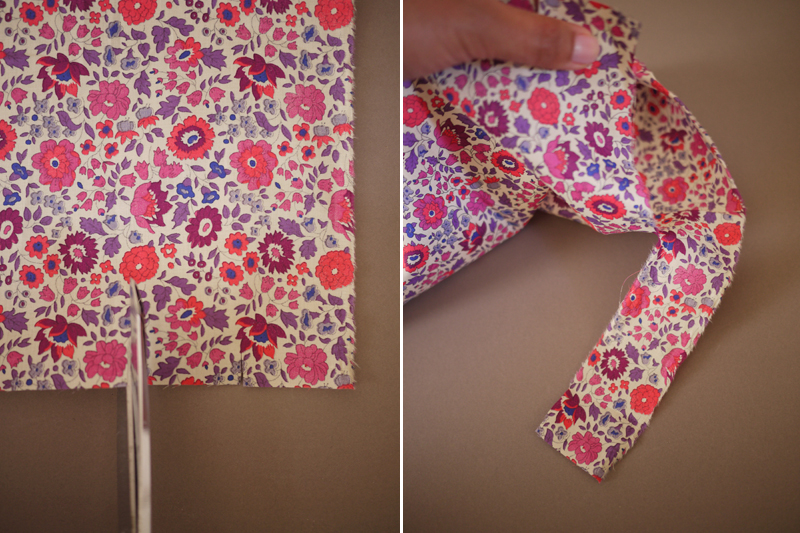
Start by finding the crosswise grain of the fabric, which is perpendicular to the selvedge edges, which are always the outside edges. Make half inch slits into one side of the selvedge edge every 1.5 – 1.75 inches or so. Then rip! Ripping the fabric crosswise will tear nice, even strips of fabric. (Click images to enlarge)
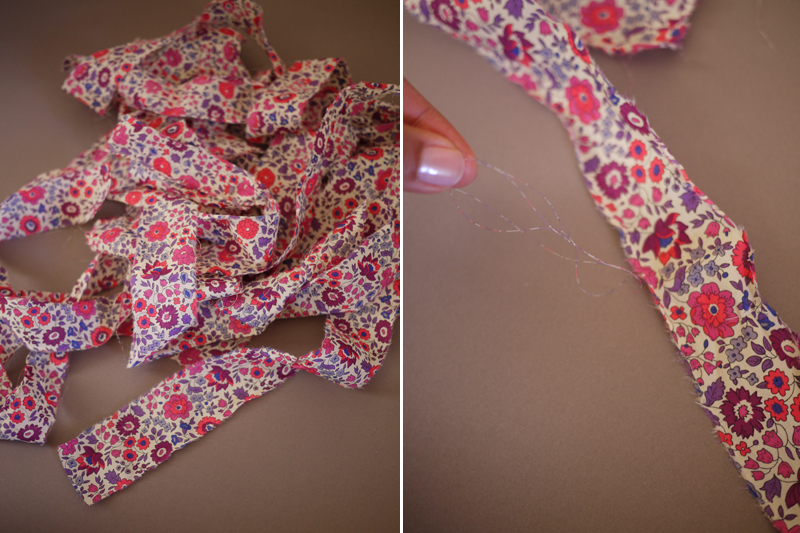
The lampshade frame used in this tutorial measures 8 inches in top diameter, 14 inches in bottom diameter, and 11 inches in slant height. I’ve used approximately 25 33 inch strips of fabric. Remove any excess threads from the edges and iron the strips flat if necessary.
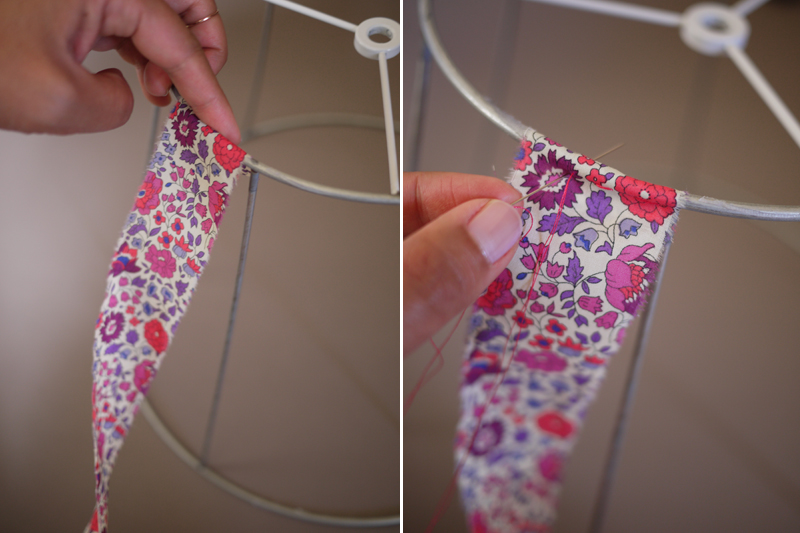
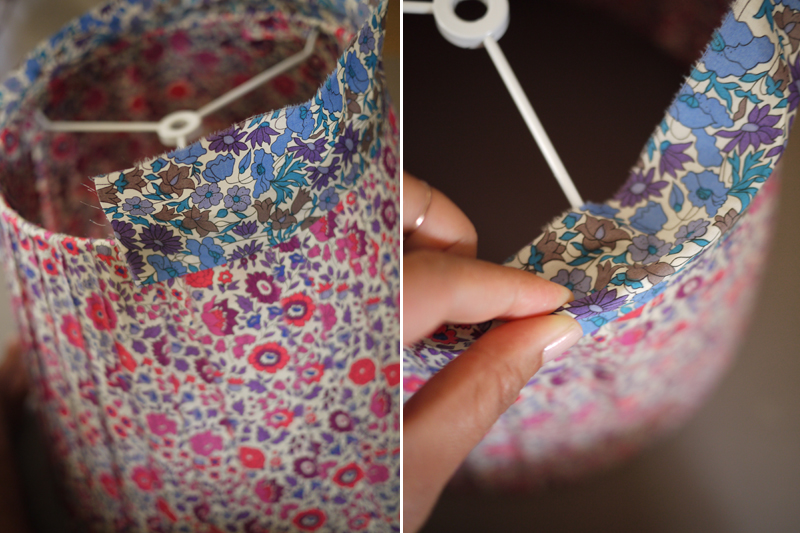
Fold the end of the first strip over the top ring of the metal lampshade frame and with a needle and tread, secure it in place with a few stitches.
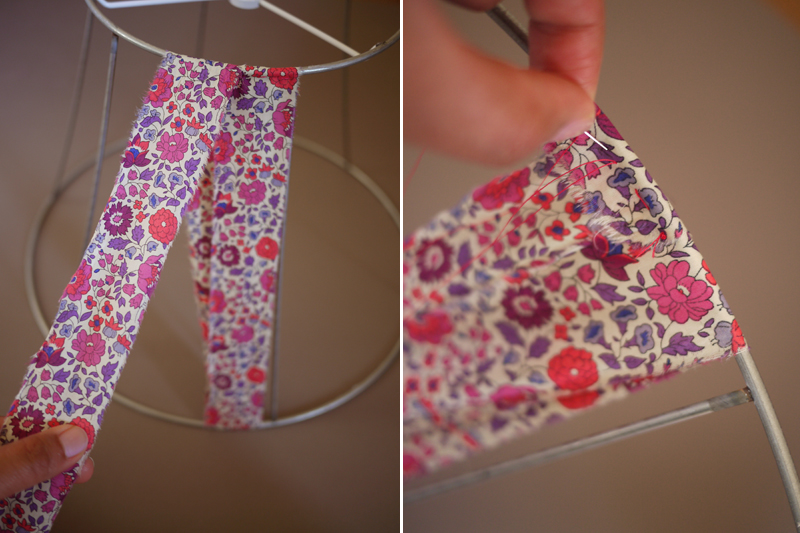
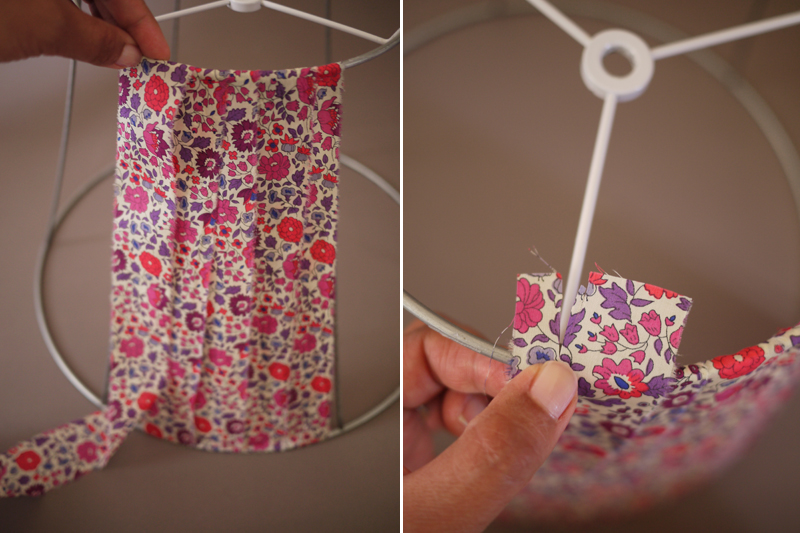
Take the strip down over the outside of the frame, then inside the frame and back over the top. Because the top diameter is smaller than the bottom, I’ve overlapped the top section approximately 3/4 of an inch and the bottom approximately 1/4 of an inch. Trim the edge of the strip once it has run out and stitch it closed. Sew on the next strip at the same point and continue binding.
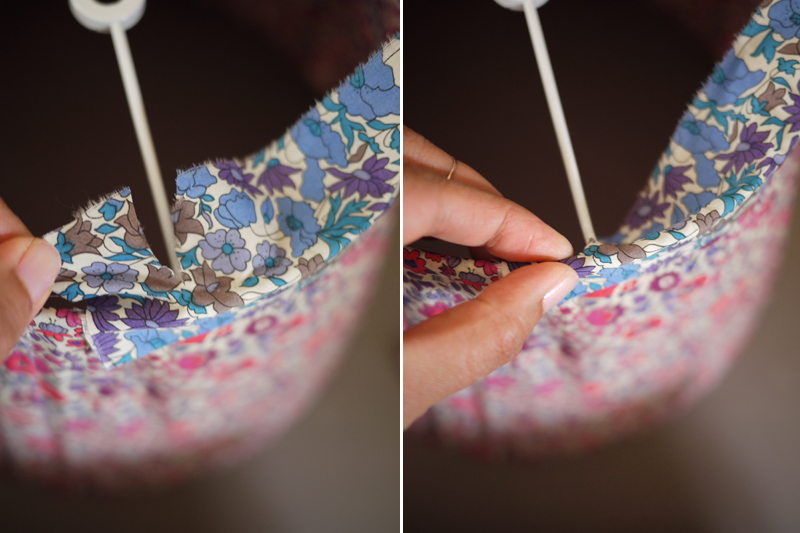
To get around the horizontal struts at the top of the metal frame, simply make a small slit in the edge of the fabric.
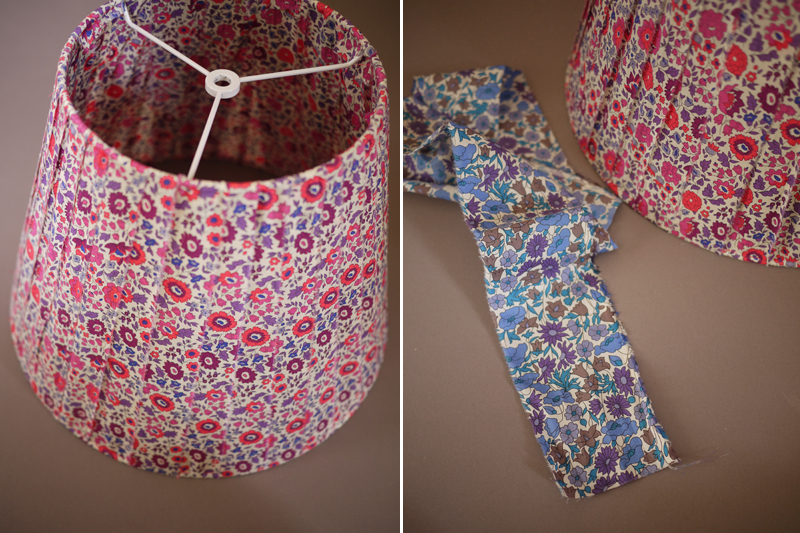
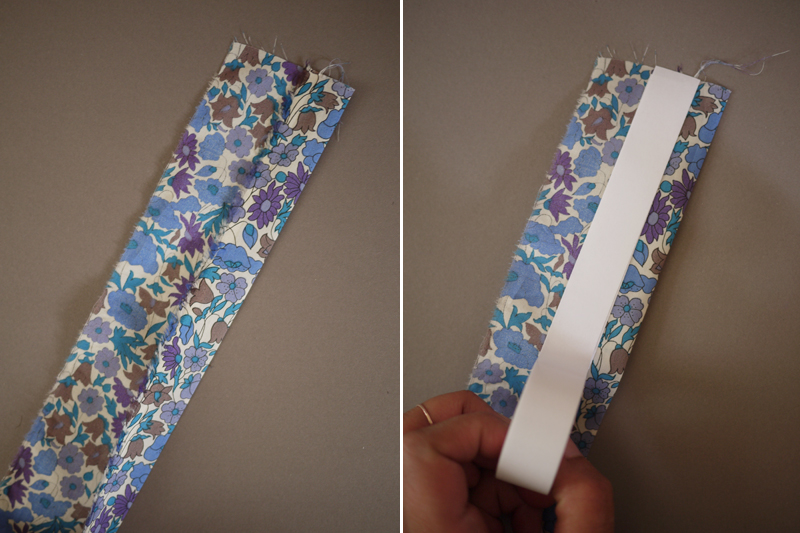
Once the binding is complete, either use the same fabric to bind the edges or use a contrasting color and pattern. For the binding edge, tear two 3 inch strips crosswise.
Fold over an inch of the fabric, pressing it flat with an iron. Adhere the double sided tape along the inside hem.
Start sticking the tape around the top edge of the lampshade, peeling off the paper backing little by little. Fold the tape over the edge.
Make small slits to work around the horizontal struts.
Repeat the same step around the bottom edge. If the fabric isn’t long enough to go around the bottom ring, two strips can be hand-stitched together before folding.
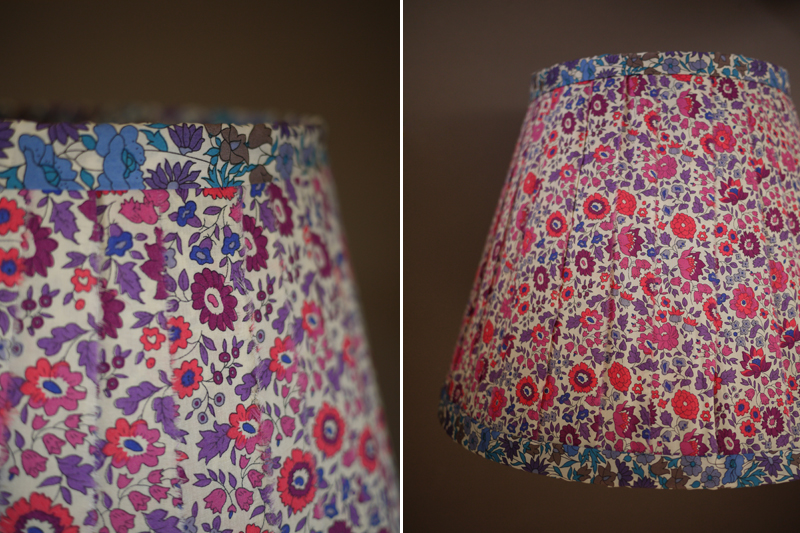
Your Liberty of London lampshade is finished. Try adding some pom pom trim or fringe to the bottom of the shade for some more pizzaz! Remember that fabric shades should always be used with a low wattage light bulb, which emits a low level of heat. xx
(all images by HonestlyWTF, tutorial adapted from The Liberty Book of Home Sewing)

Gorgeous! I love the choice of fabric you’ve used.
Love these quick & easy projects!
http://aclosetintellectual.blogspot.com/
This is so charming.
~Natasha Fatah~
~Natasha Fatah~
such a fabulous idea! love it! http://www.fashionifancy.com
Oh pretty nice… this can also be made from different strips of fabrics (alw leftover form other DIY). Love it.
http://lovelaughliveme.wordpress.com/
What an awesome idea! Great for old clothes made out of cool fabric.
What a great project! I adore the fabrics you chose – I swear I’ve got a dress that’s got accents of that blue one! wild! This is definitely on my projects to try list!
x
http://www.iloveublank.blogspot.com
This so cute and girly!!!
http://lovelittlelulu.blogspot.gr/
great idea!
I have to try it:)
greetings
This is an amazing DIY!
backtofive.blogspot.combacktofive.blogspot.combacktofive’s twitter
xoxo backtofive
It’s so cute! Still so jealous that you made it to Liberty – dying to go someday! xo
Good idea!
Tanks and kisses
http://blog.justwm.com/
really pretty!
truly lovely! thanks for the tutorial.
NIce DIY!!!
http://thestelstyle.com/
So sweet and cute. Love it!
And btw a snazzy fabric lampshade can really give a room an extra oomph, like a great belt or scarf can do for an outfit.
I loved it!
I’m posting looks from Los Angeles and amazing accessories:
http://www.thegavlaks.com
Incredible! You are soooo meticulous at your DIY’s, I’m really envious of all that attention to fine detail! The subtle pleating is really what makes this shade stand out…such a high-end look for a fraction of the cost! Love this idea since I’ve got tons of scrap materials leftover from client projects! Brilliant!
xo-Julie
Peace. Love. LOL!
Haute Khuuture Blog
Very cute! Won’t the strips fray, though?
This reminds me of my Liberty of London lamp shade
I am definitely going to try this! Thanks!
http://www.suspironews.blogspot.com
brilliant!
Bises,
monkeyshines
monkeyshines-monkeyshines.blogspot.com
great idea!
my DIYs —-> gkdone.blogspot.com
Love this!
Ooohhh! Can’t wait to try this!
So creative! Thanks for sharing!
Chelsea
heelsandsunkissedcurls.com
lucibelldesigns.storenvy.com
liberty print lighting… genius.
http://www.prettydinos.com
Hi!
I’m from Brazil and i saw your blog on signature9 and i’ll be really glad and honor if you check my website and give your opinion! I’m on this blog thing for 3 years.
Congrats for your blog btw, it’s awesome!
XOXO
tomaraquecaiaagora.com
@blogTQCA
facebook.com/tomaraquecaiaagora
This is such a cute idea! The finished product is quirky but elegant at the same time.
wow very inspiring! this makes me want to make one! 🙂
xo
turquoiseinlove.blogspot.com
I truly admire people who can make things….like a lampshade and it looks good! I am not one of those people who have that talent but give me a credit card…………..
THIS is amazing!!
🙂
Allison
P.S. I’m having an INTERNATIONAL $75 Shopbop giveaway on my blog, so don’t forget to enter! 🙂
A’s Fashion Files
$75 Shopbop Giveaway!
Looks amazing,i love it!
http://unasrandomfashion.blogspot.com/
http://unasrandomfashion.blogspot.com/
http://unasrandomfashion.blogspot.com/
oh!! thats simply beautiful!!
aonecentlife.blogspot.com
Very cool!!!!
http://bonnieclydemarni.blogspot.gr/
Wicked DIY idea Emma Louise Layla Xx
Love it!!!
The DIY is awesome!!
http://theprintedsea.blogspot.de/
Great DIY! Looks really beautiful!!!
It a wonderful project, i love this lampshade, is perfect for my house!
http://lesjolieschosesbypaulette.blogspot.it/
thats a gorgeous DIY!
Hi,
I love the fabric so much 🙂
http://cempakasartandcraft.blogspot.com
x
I truely appreciate this info. Great job . Creativety really works.
What a lovely idea, and looks much easier to do than at first glance!
Bug @ STYLEoverSENSE
tried with a square lampshade and it looks awesome!!! great diy
my Zara necklace DIY ——> http://gkdone.blogspot.com/2012/08/inspiration-zara-necklace.html
Wow so pretty I love the material used they complement each other really well.
my DIYs———–> http://www.facebook.com/doneGK
like plz:)
so cute….
so cute flowers 🙂 I’d like to do it 2…
Nice diy;)
Thank you for sharing:)
http://www.ccchinachic.com/products/fashion/fashion-accessories/diy-jewelry/c-180/
This looks amazing. However, I’m probably being paranoid but I’m scared about the fire safety implications? Is it safe? Is normal lampshade fabric treated to make it fire-proof? Because if it’s safe I’d love to try it 🙂
QUESTION: Fabric and heat from light bulb (75-150 watt)…would that be safe? Seems the material might be a fire hazard???? Otherwise, awesome, quick n simple idea…using material of one’s choice n decor
Awesome DIY… if you can’t find the same type of lampshade frame that Erica used, try a DIY lampshade kit which has everything you need to make a drum lampshade from scratch using your own fabric. http://www.ilikethatlamp.com/kits/
Question on the final step. Taped piece is secured around outside of lamp, folded over, then what? Do you add more tape so the folded piece lays flat and snug? Especially on the bottom, seems like it would just unfold and flop down.
Looks very nice
Thanks
Hi, love the idea of using material. I have used string and wool before to revamp old lampshade frames. Thay works just as well. Thanks for sharing your idea.
I have same concern as some of the girls… Isn’t the material a fire hazard?
This lamp is too beautiful, perfect and simple work. Thank you for sharing knowledge.
I have a lampshade that was wrecked and is not replaceable now I can repair the shade and use my favorite lamp again.
This is the best site I’ve ever seen! Most detailed I’ve ever seen. Great!!
If you’ve got any resources to hekp learn how to sow lampshades, please let me know. Thank you for your precious advice and example.
This seems like the level of project I can do! Is it safe fire wise though to simply wrap cotton round? Bought lampshades tend to have a fire retardant layer.
I love this idea! This will be a great way to bring my room colors together — plus, I have multicolor 2-1/2″ jellyroll quilting fabric that I can combine. Can’t wait to get started!
This floral lampshade DIY is so cute and looks easy! What a smart way to use pretty fabric without needing a sewing machine. I love that you can make it your own with different flowers and bits!