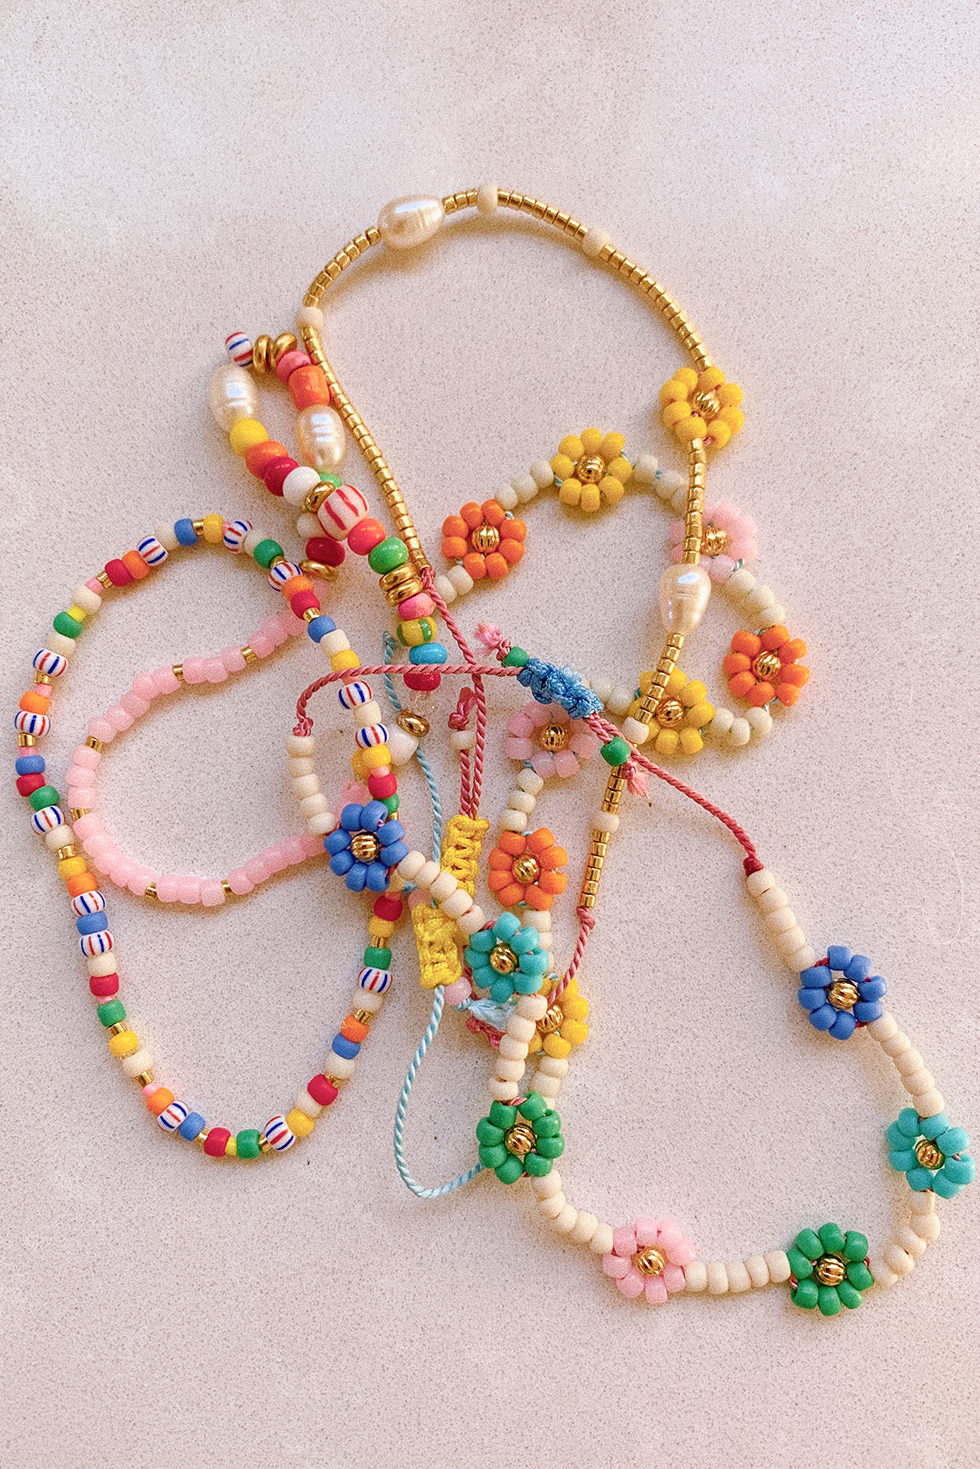
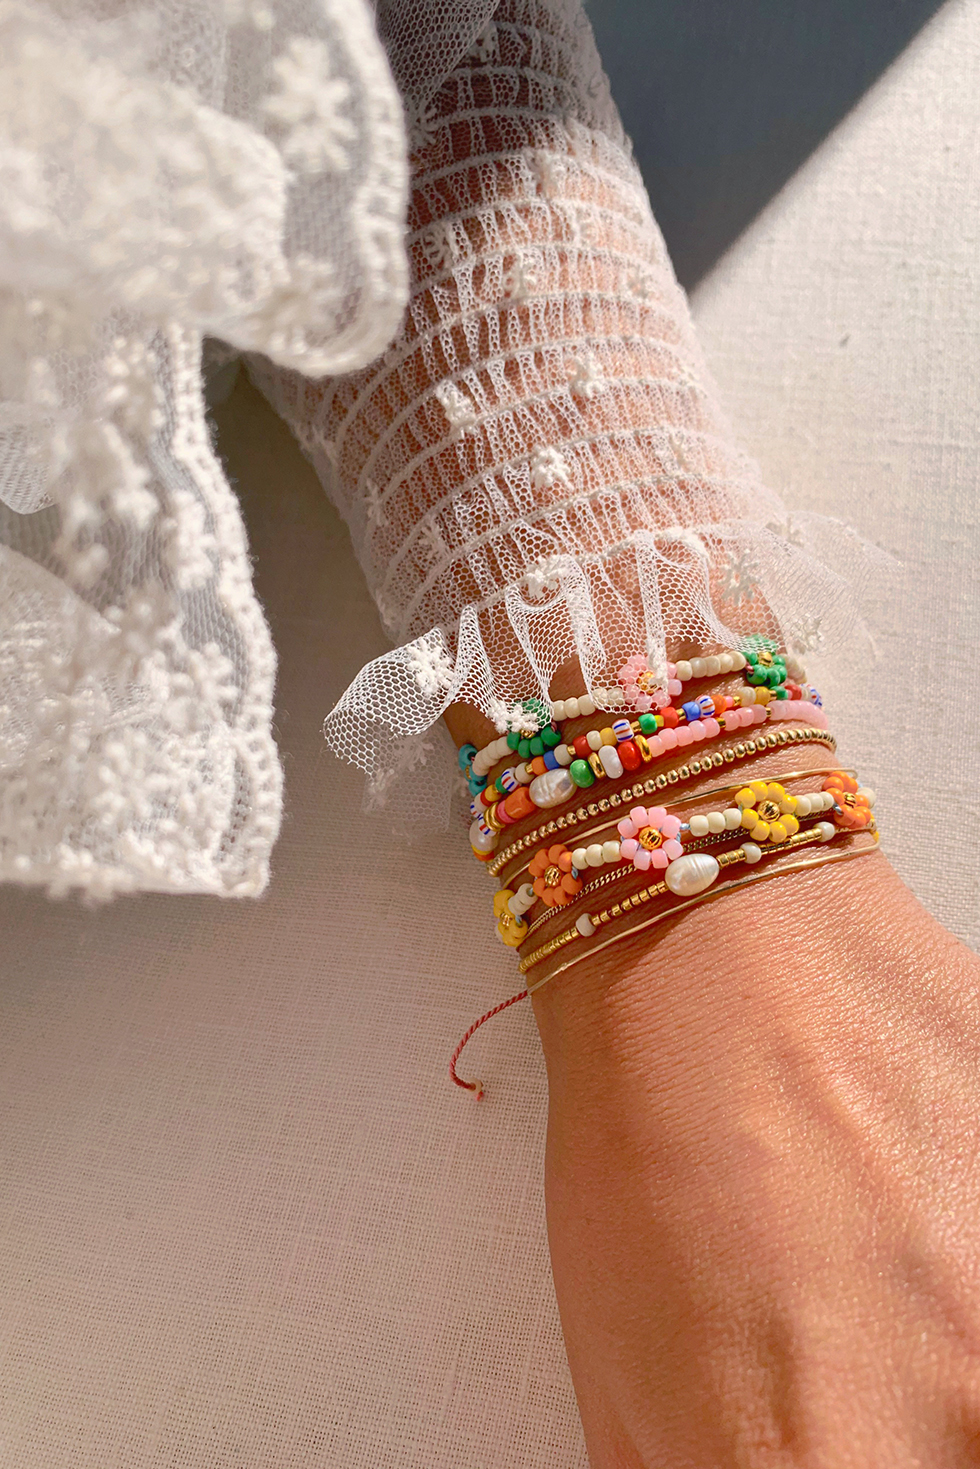
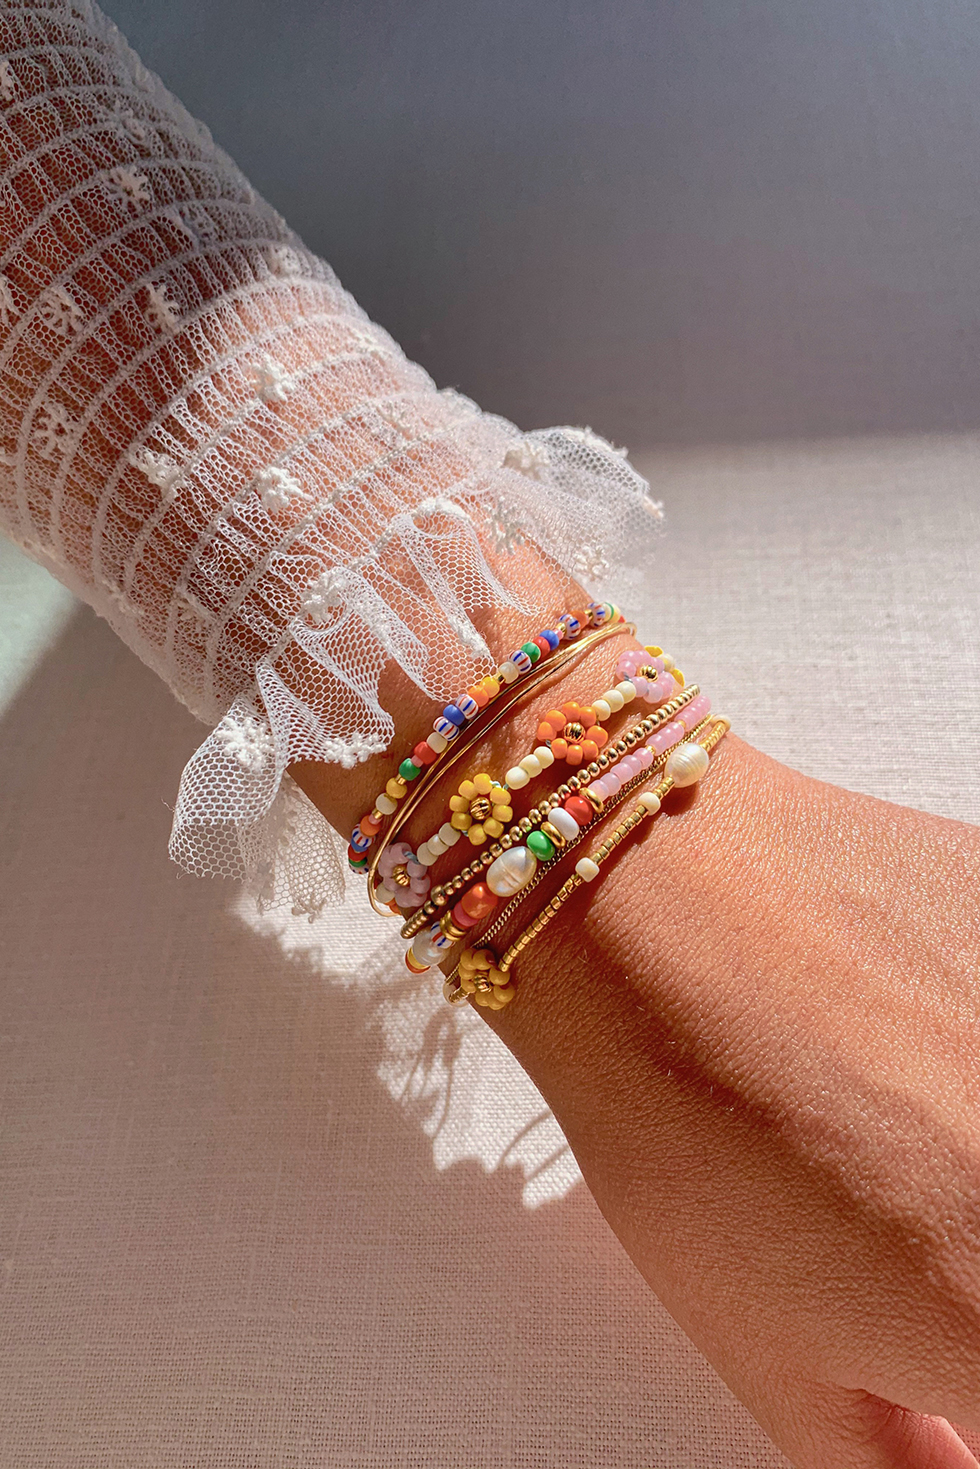
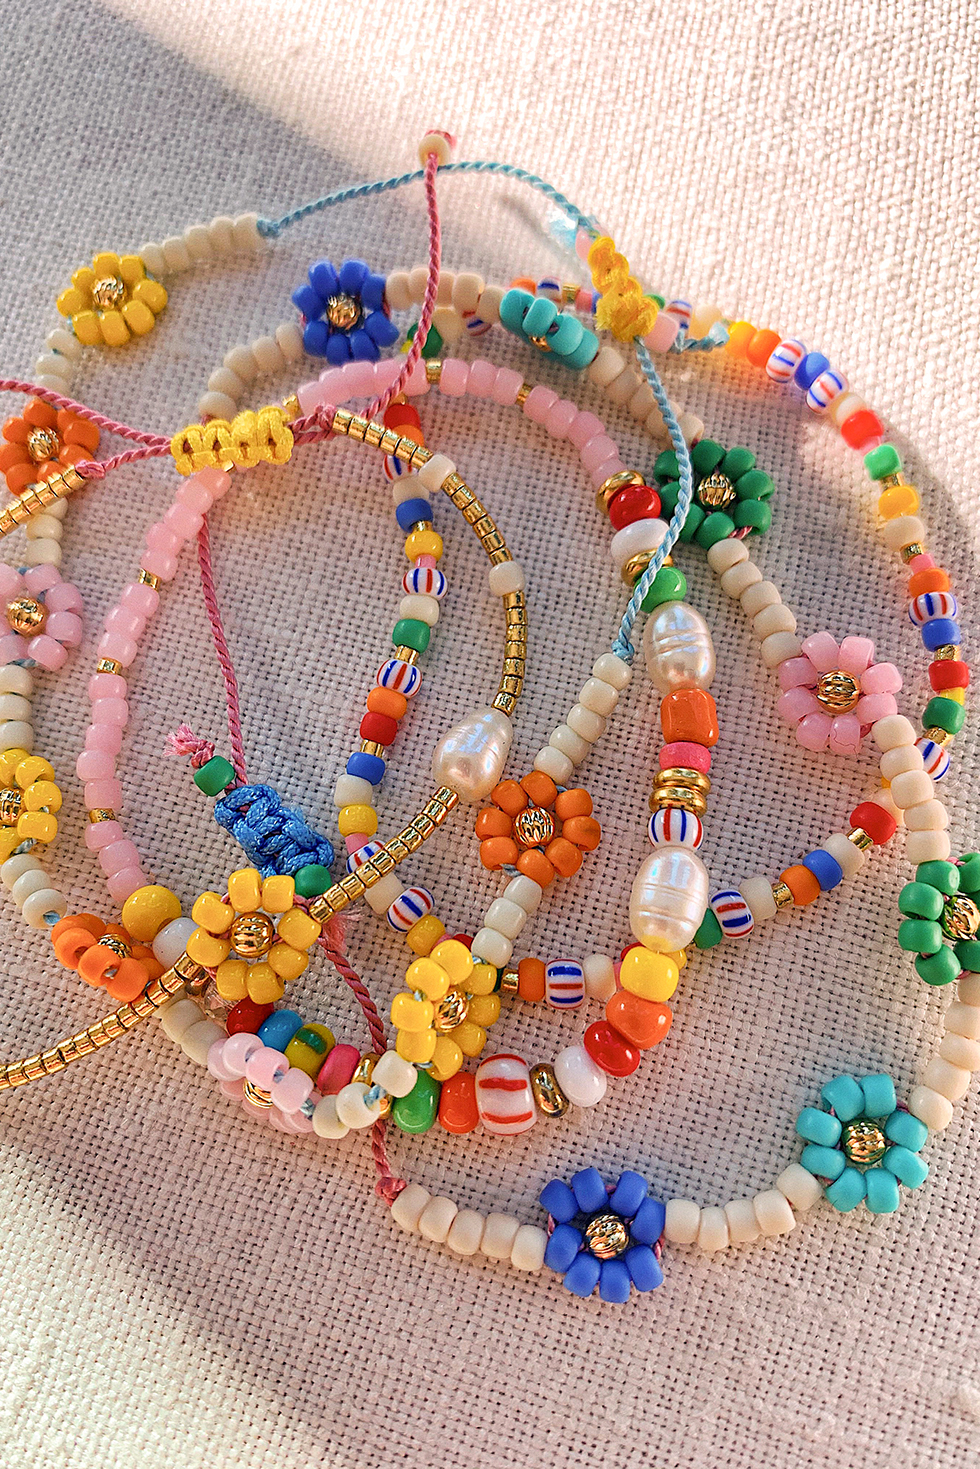
Honestly, is there anything happier than daisies?! I was desperately needing a dose of happy over the weekend and whipped up a few colorful bracelets to soothe the soul. Making daisy chains from seed beads might look complicated but honestly, it's not difficult at all! It's a cinch as long as you have the right materials. I dare you to stop at one, it's that addicting. Just be sure to pay attention to the size of the beads and stringing cord before you purchase the supplies. Have fun!
You'll Need:
- 8/0 seed beads, assorted colors (I used frosted innocent pink, frosted cantelope, opaque sunshine, frosted shamrock, frosted turquoise, frosted periwinkle and frosted light beige); more seeds beads available here and here
- no.8 Griffin silk thread with needle
- 3mm brass bead (optional)
- no.10 Griffin silk thread or 0.8-1mm Chinese knotting cord (for closure)
- scissors
- pliers (optional)
- materials for other bracelets
- freshwater pearls
- African beads (found here and here)
- Czech beads
- 0.5mm elastic string
- 11/0 gold seed beads
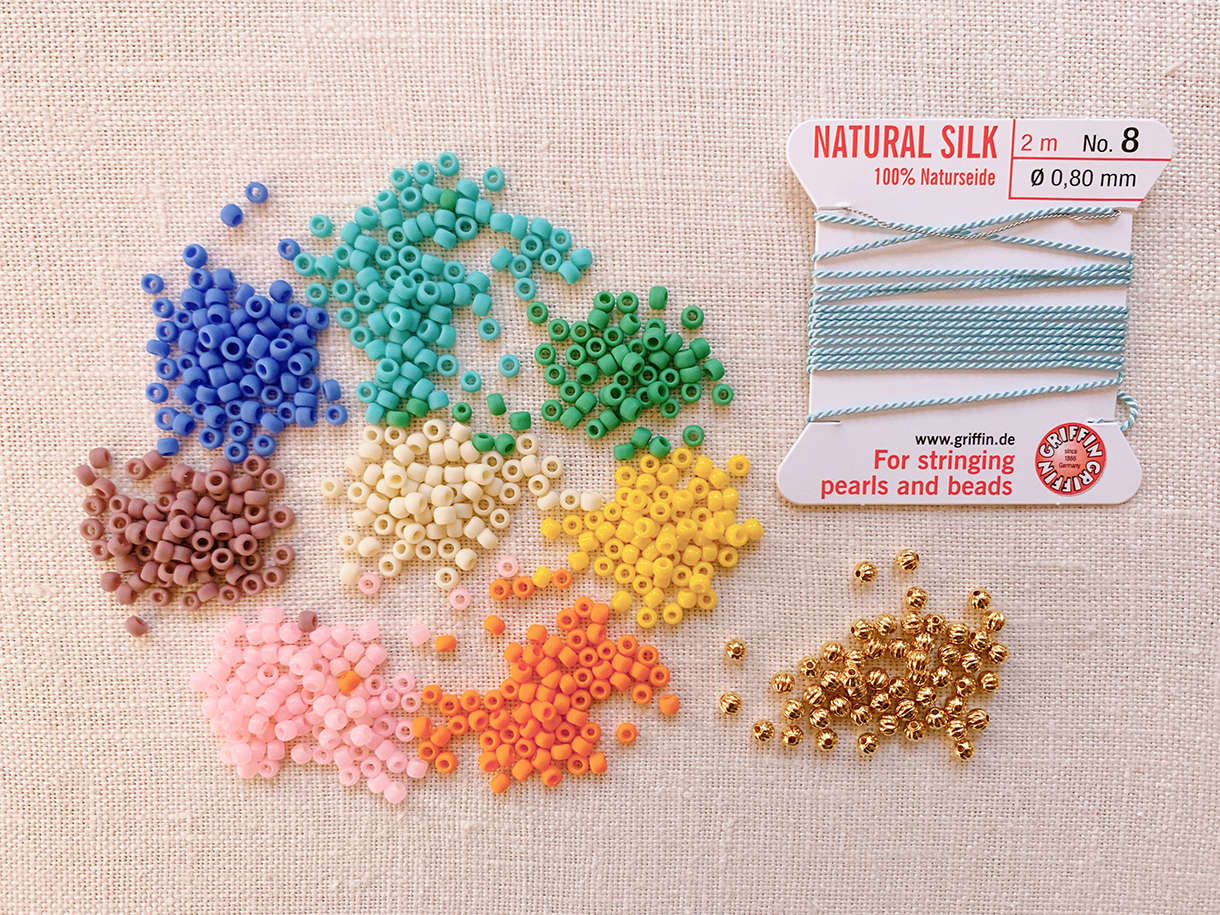
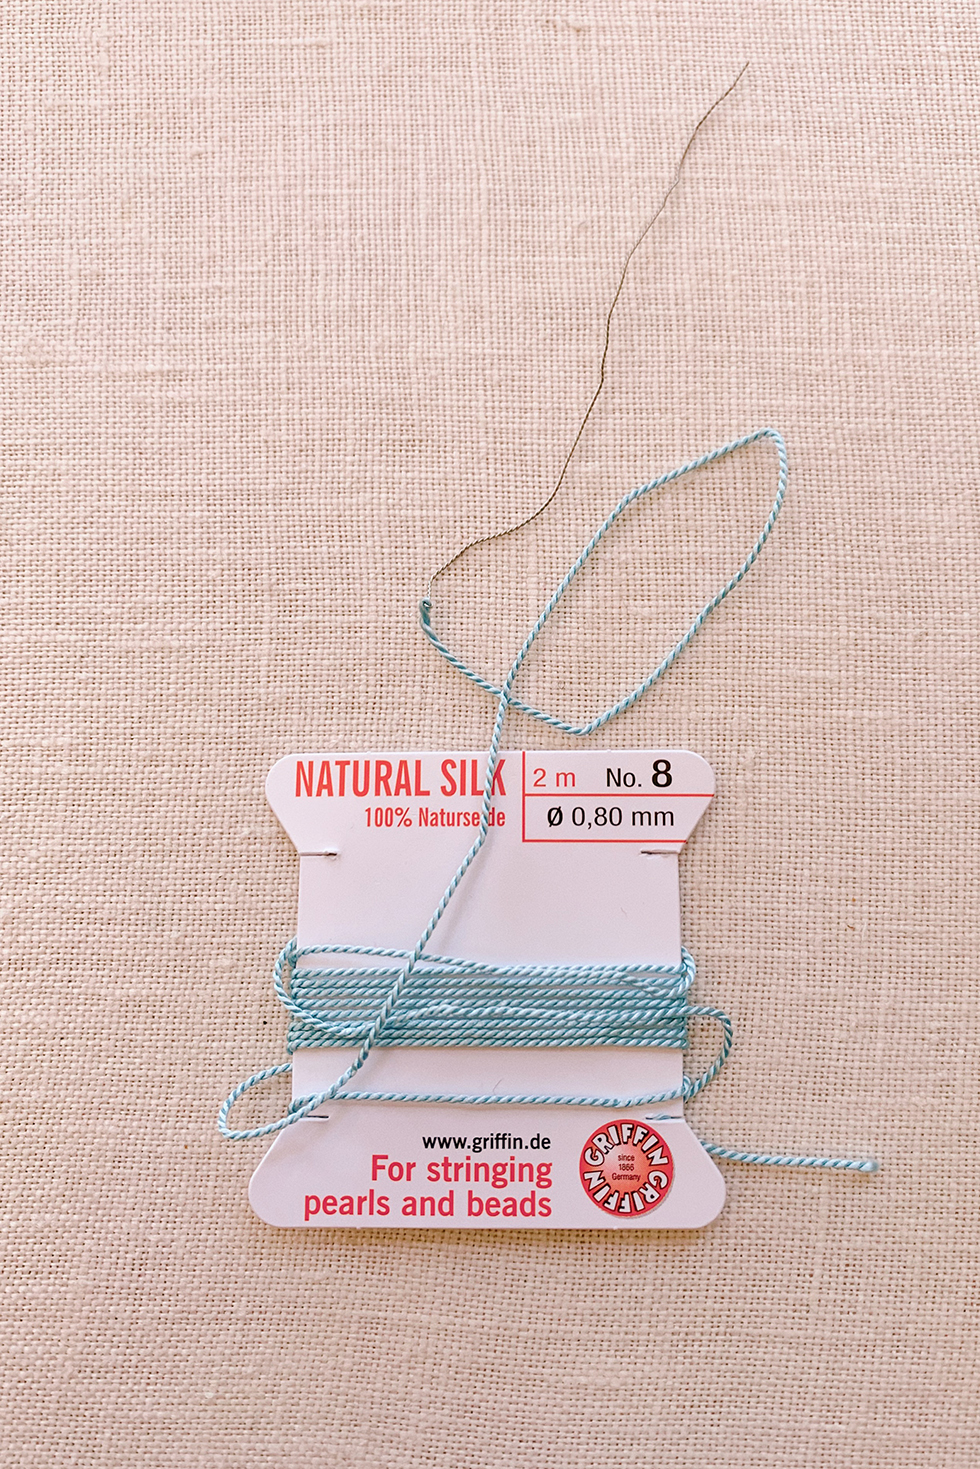
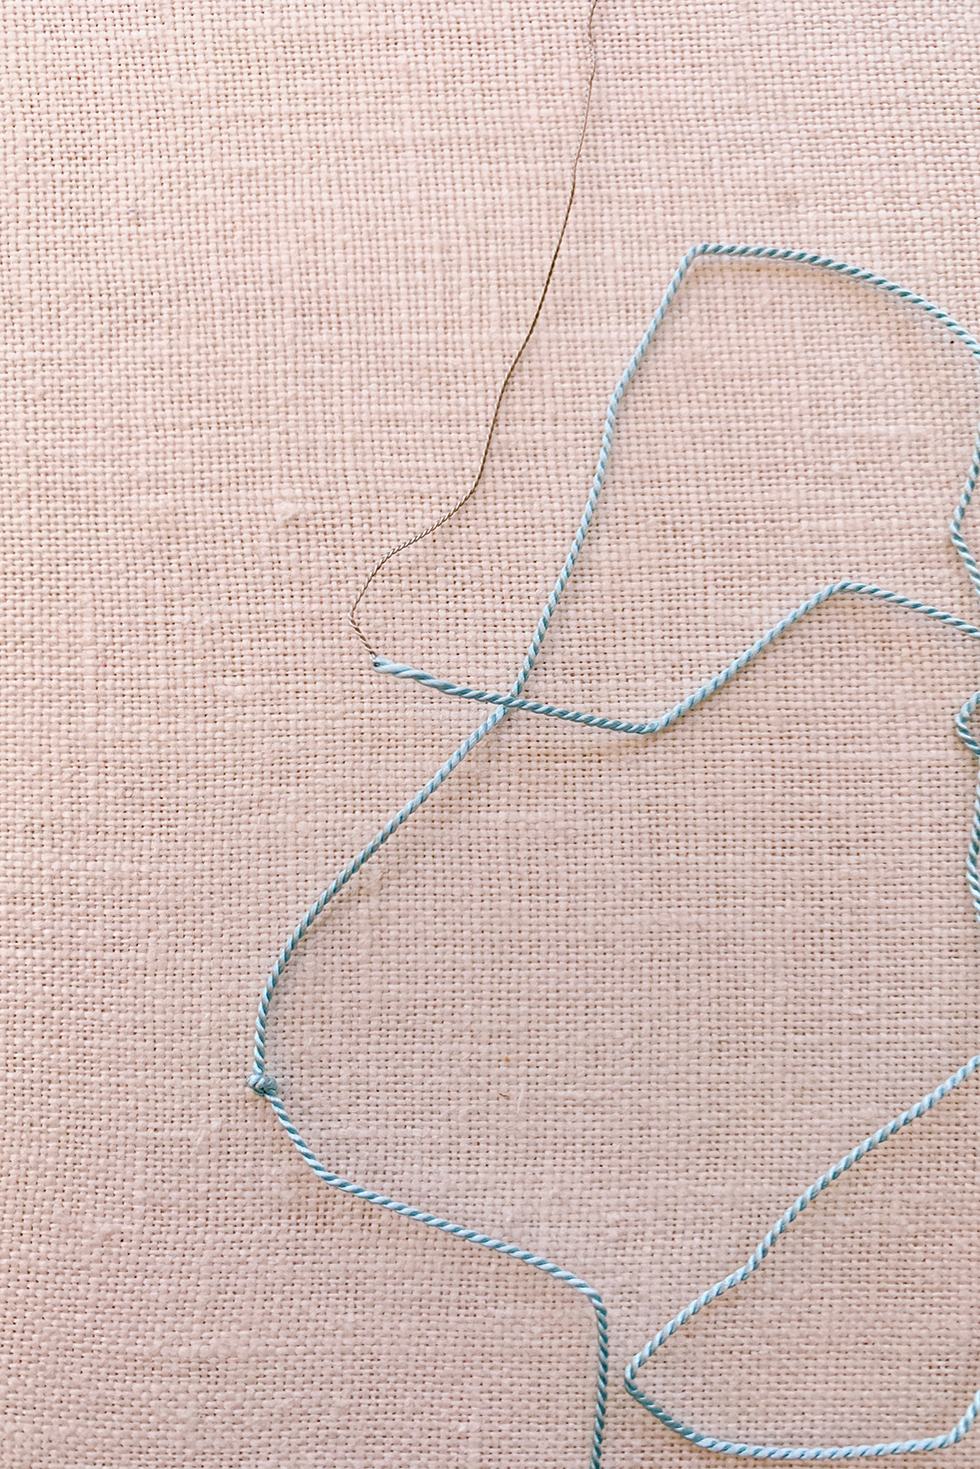
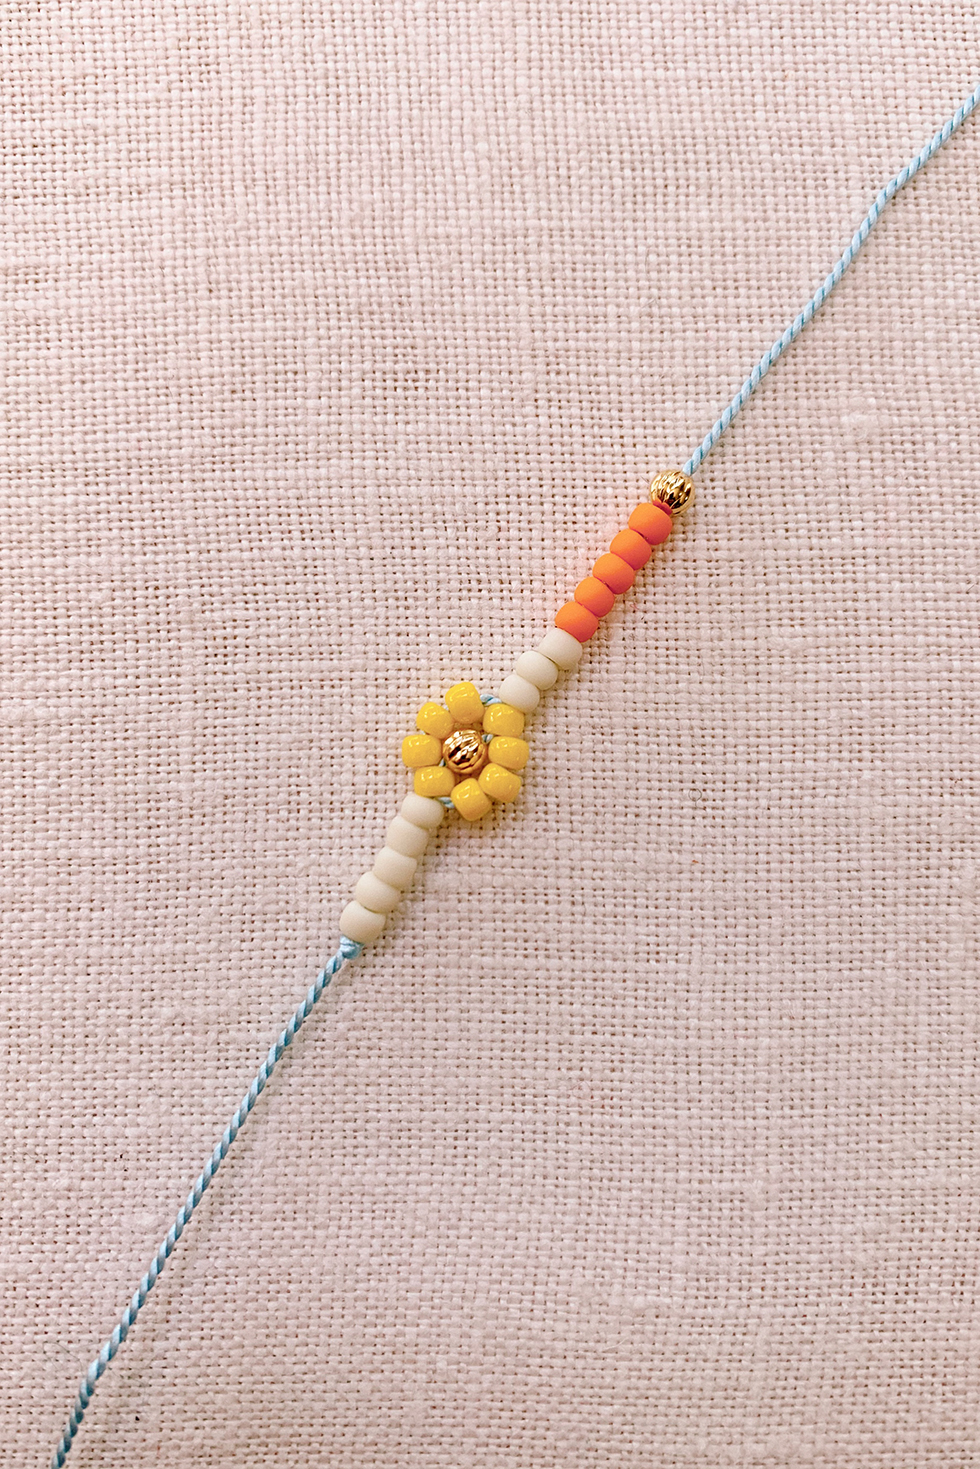
Using the right thread or cord is important here. My favorite thread for the daisy chain is Griffin's twisted silk thread. It comes with an attached needle which makes threading through the tiny seed beads seamless, especially since you'll have to double up the thread through some seed beads. Unravel the entire card and double knot the end. You'll want to leave about a 3-4" tail.
Note: You definitely don't want to use elastic cording here. It's too difficult to get a tight weave on the daisy.
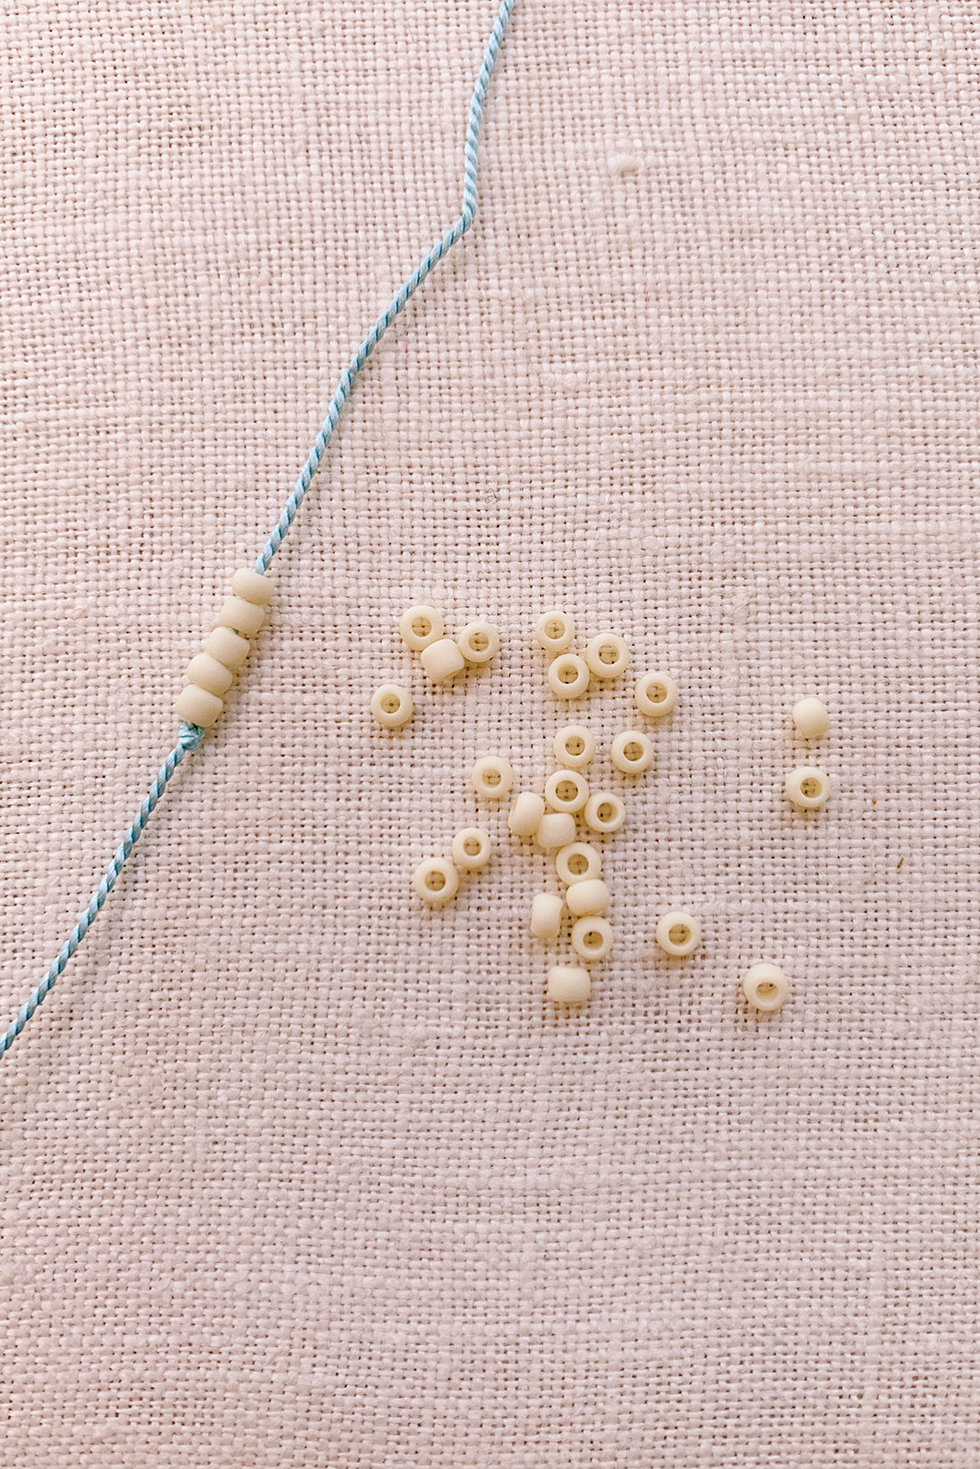
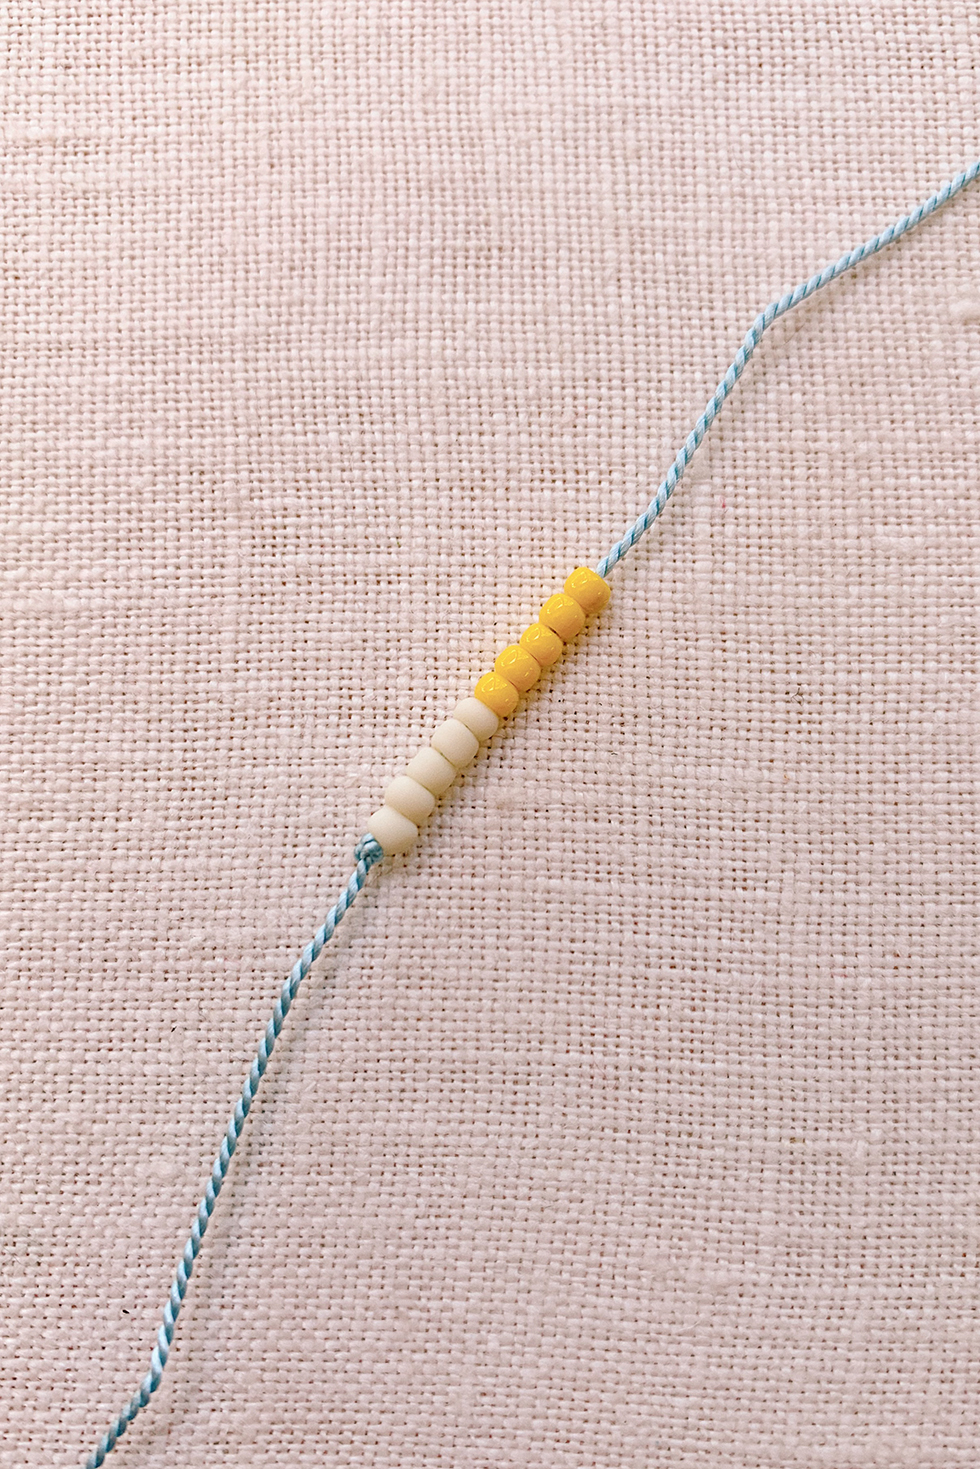
Thread on a few seed beads. Then, you'll add the daisy petal colors and form the top half portion of the flower. Because I'm using a slightly larger center gold bead here, I'm adding 5 beads here. If you were to use a smaller center bead (like a 8/0 seed bead), then I'd add 4.
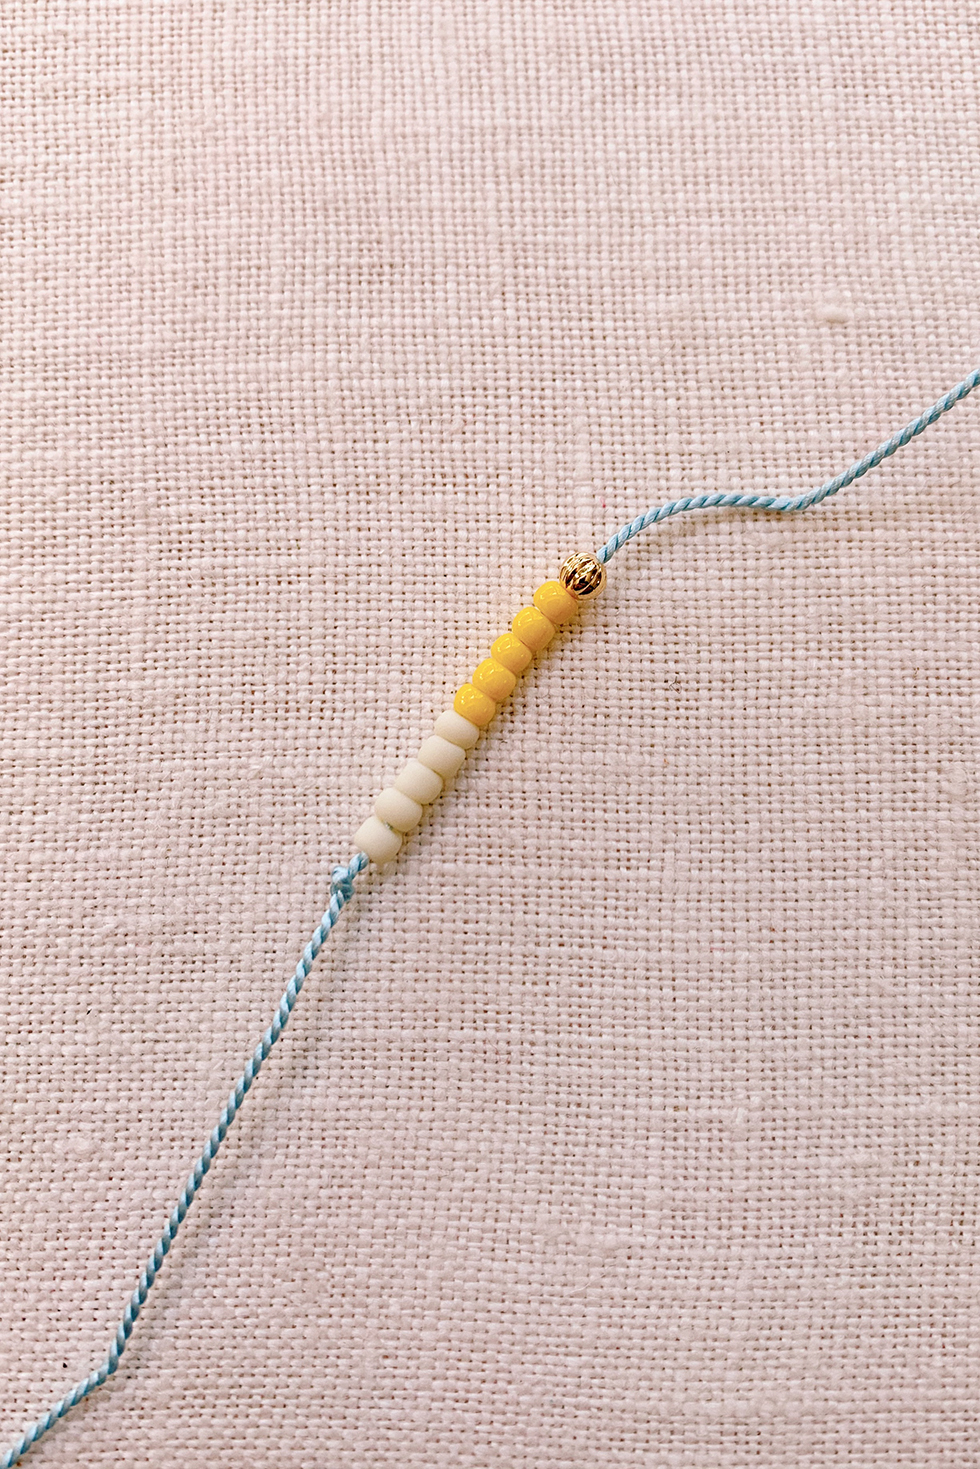
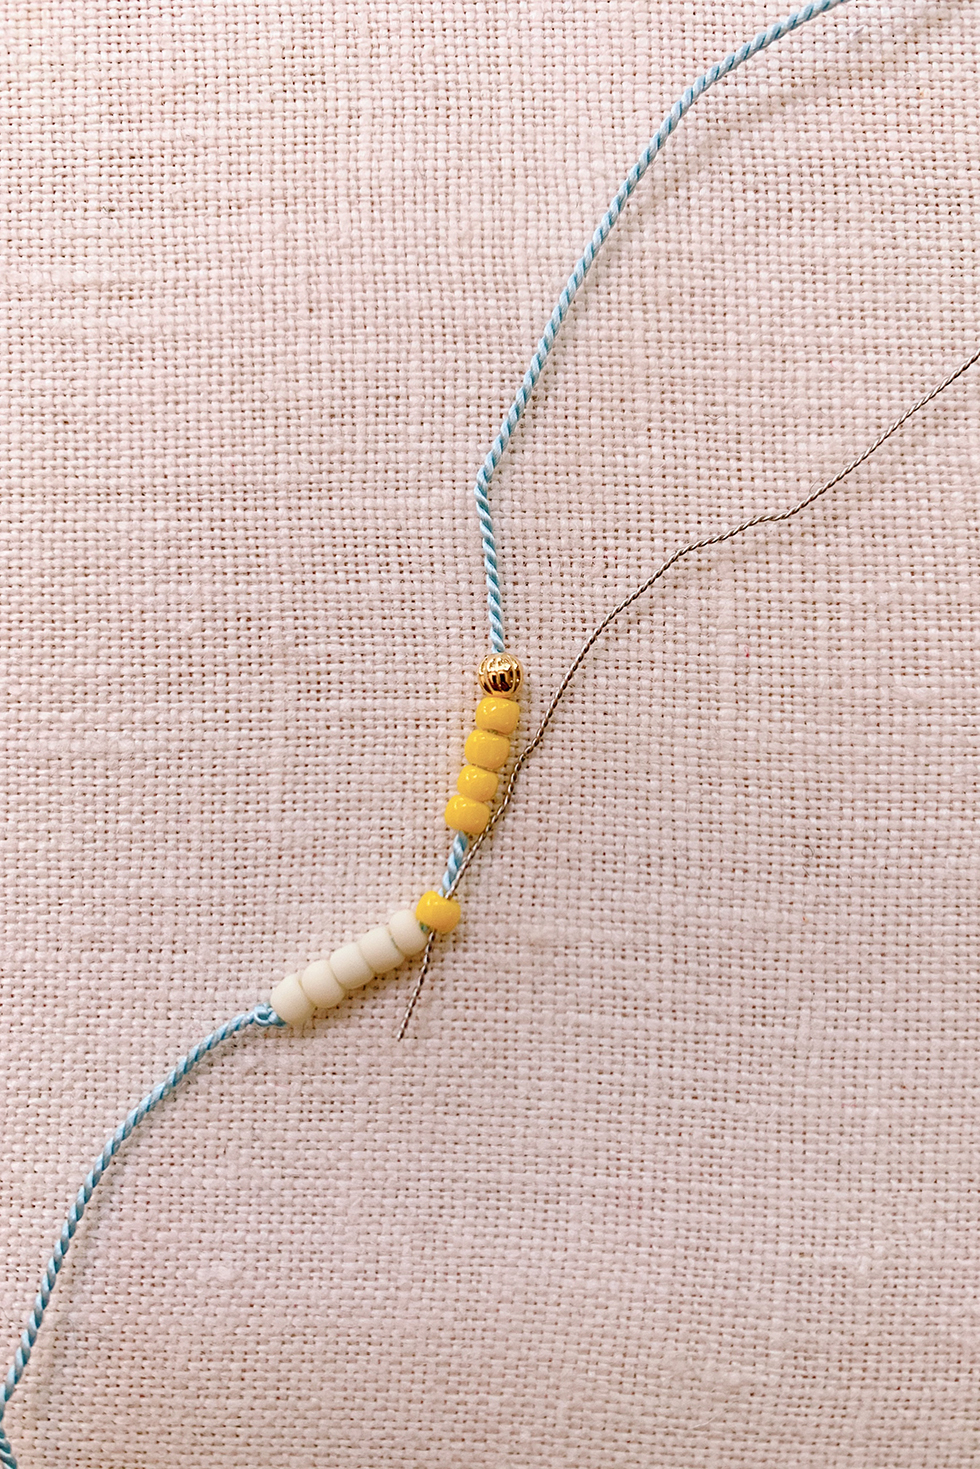
Add the center bead. Again, I'm using a 3mm gold bead here but you can sub any sized bead. Take the needle and thread it through the 1st colored bead, towards the knot/end of the bracelet.
Note: See how it's important to have a cord or thread that can pass through your seed bead twice? Size and material is crucial!
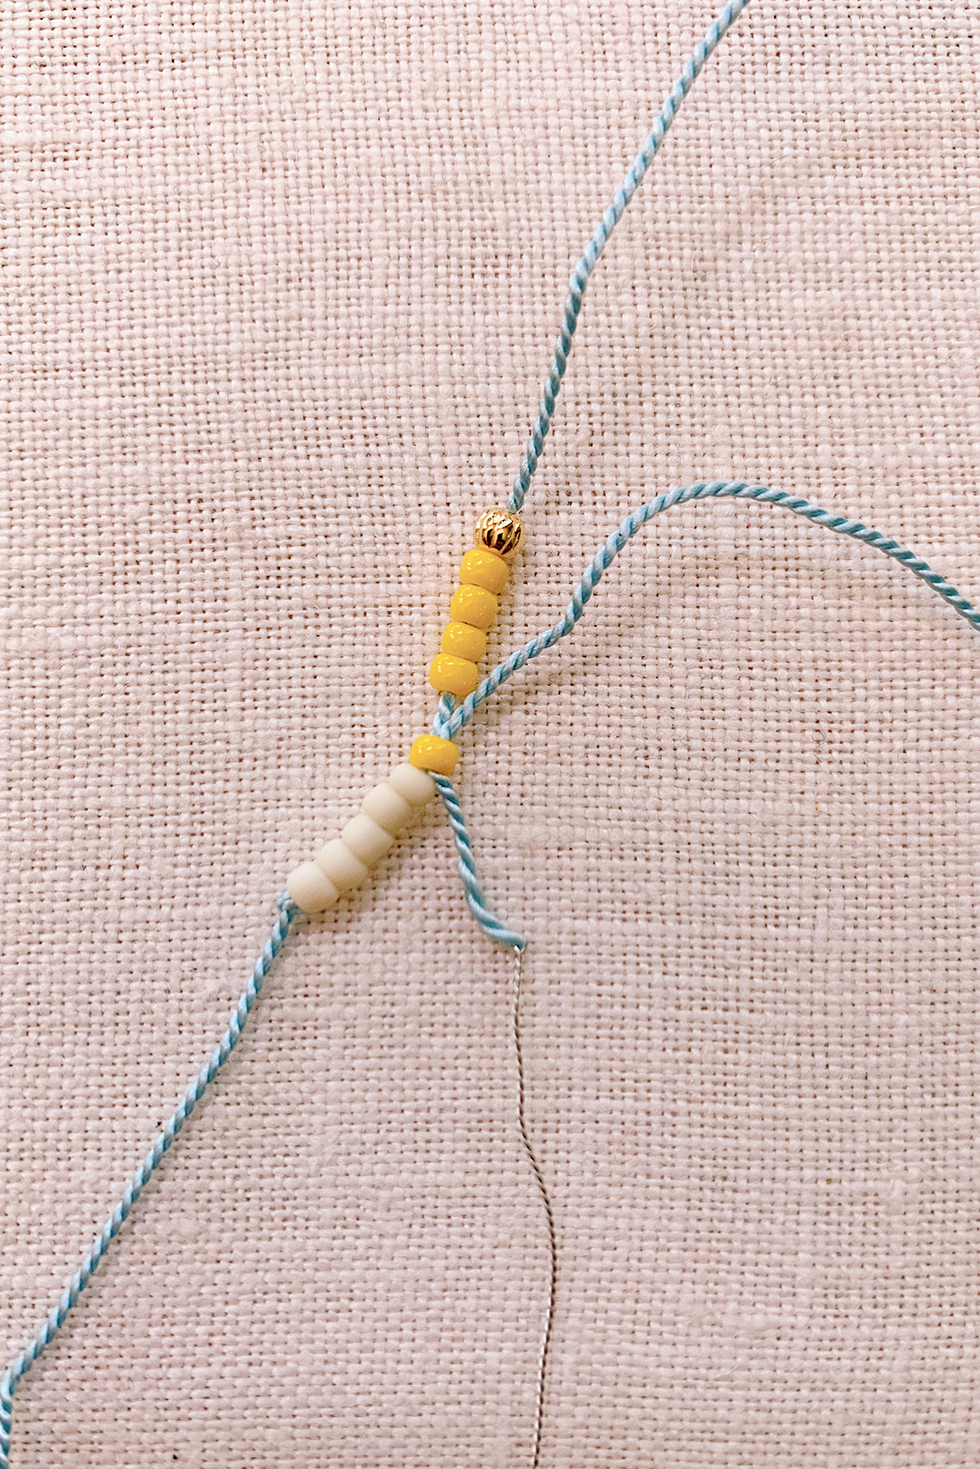
Pull the thread all the way through. You'll want everything pulled together as tight as possible.
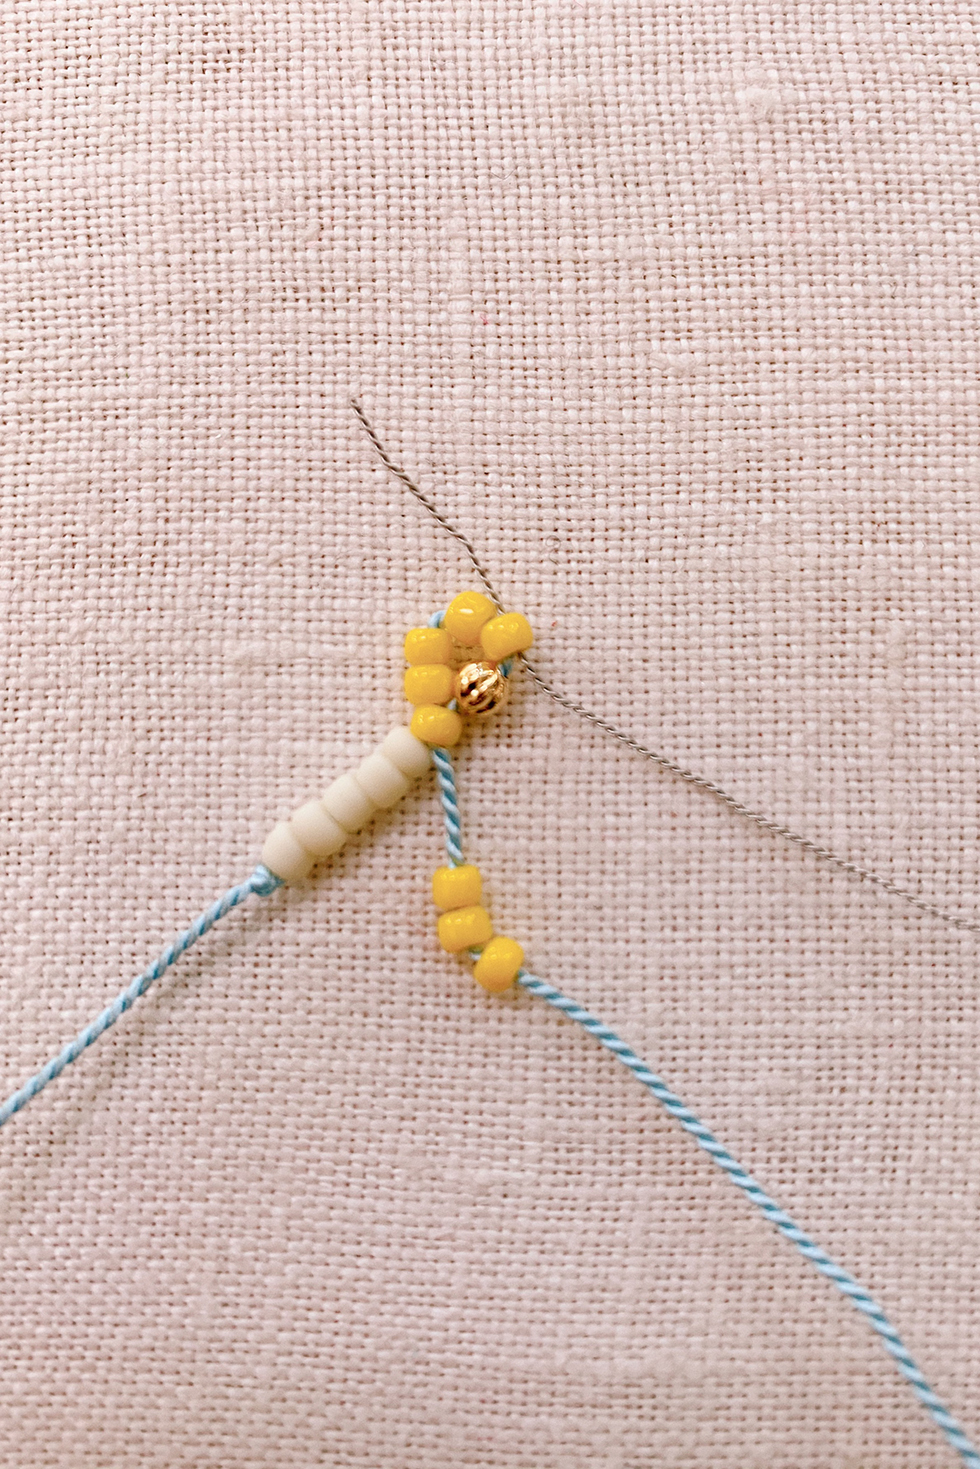
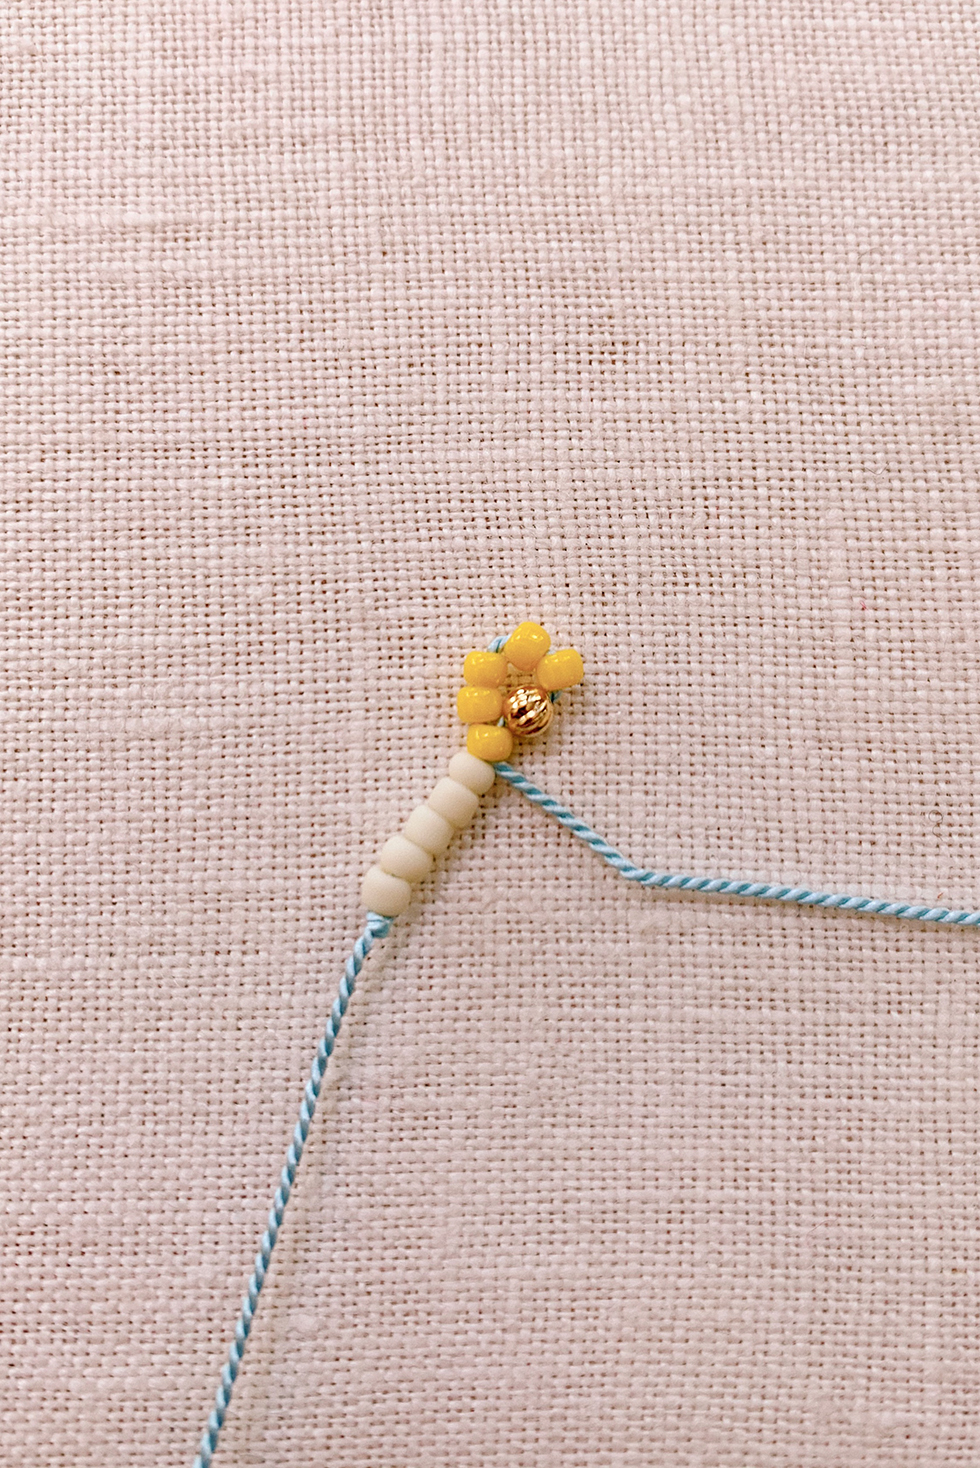
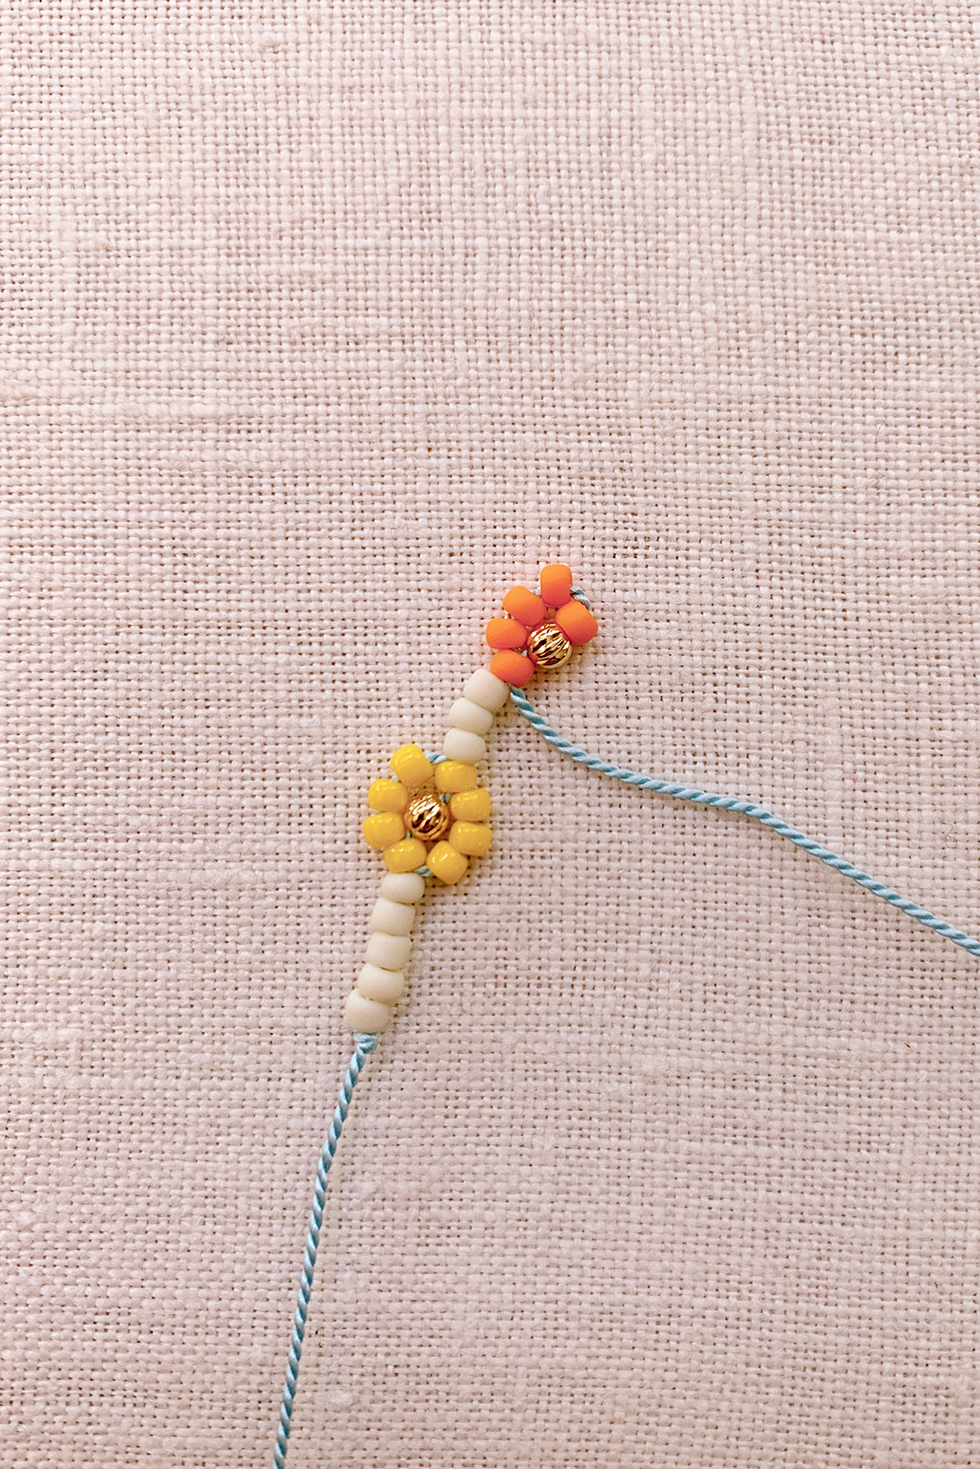
Add on three more colored beads. Then, take the needle and thread it through the last colored bead, before your center bead. This should be going in the direction opposite of the start of the bracelet.
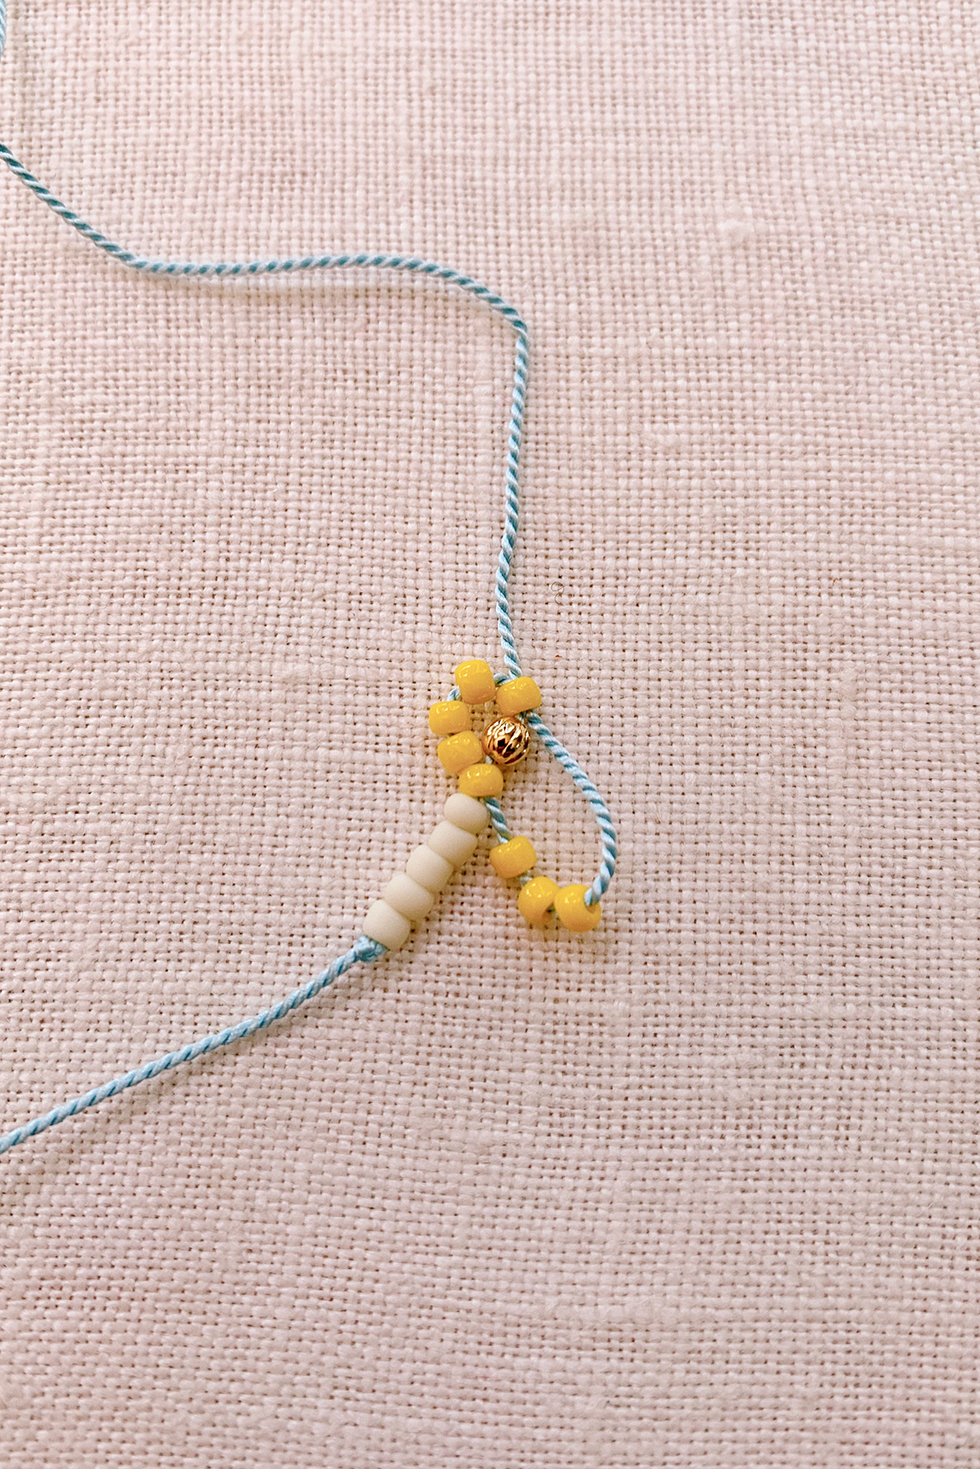
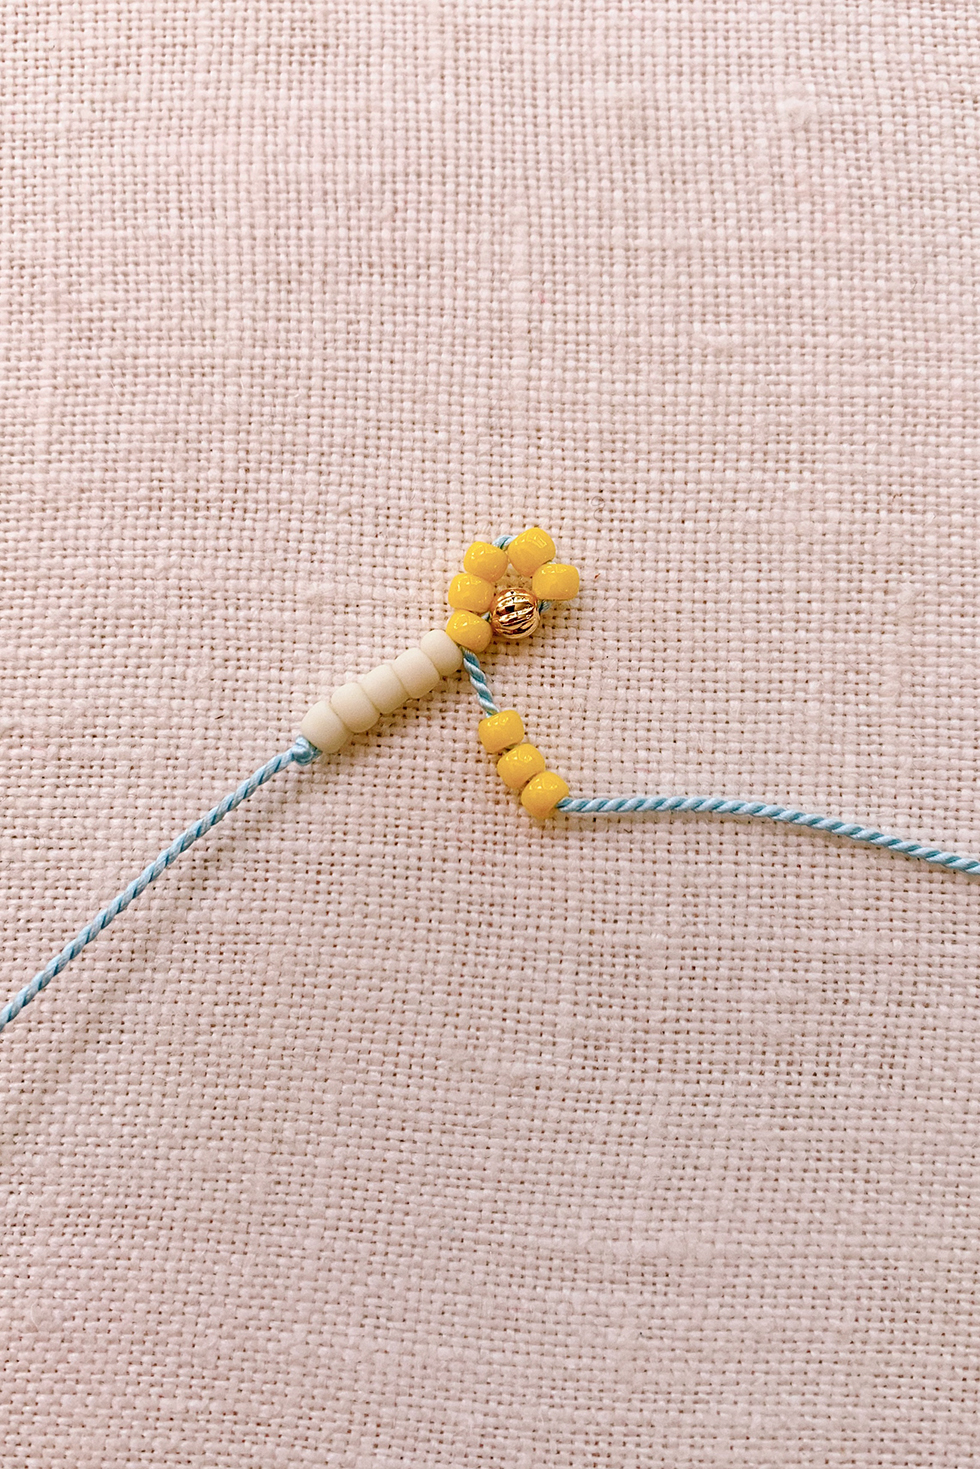
Pull the cord all the way, forming the daisy. You might want to adjust the beads as you tighten to pop them into place and make sure they're evenly distributed.
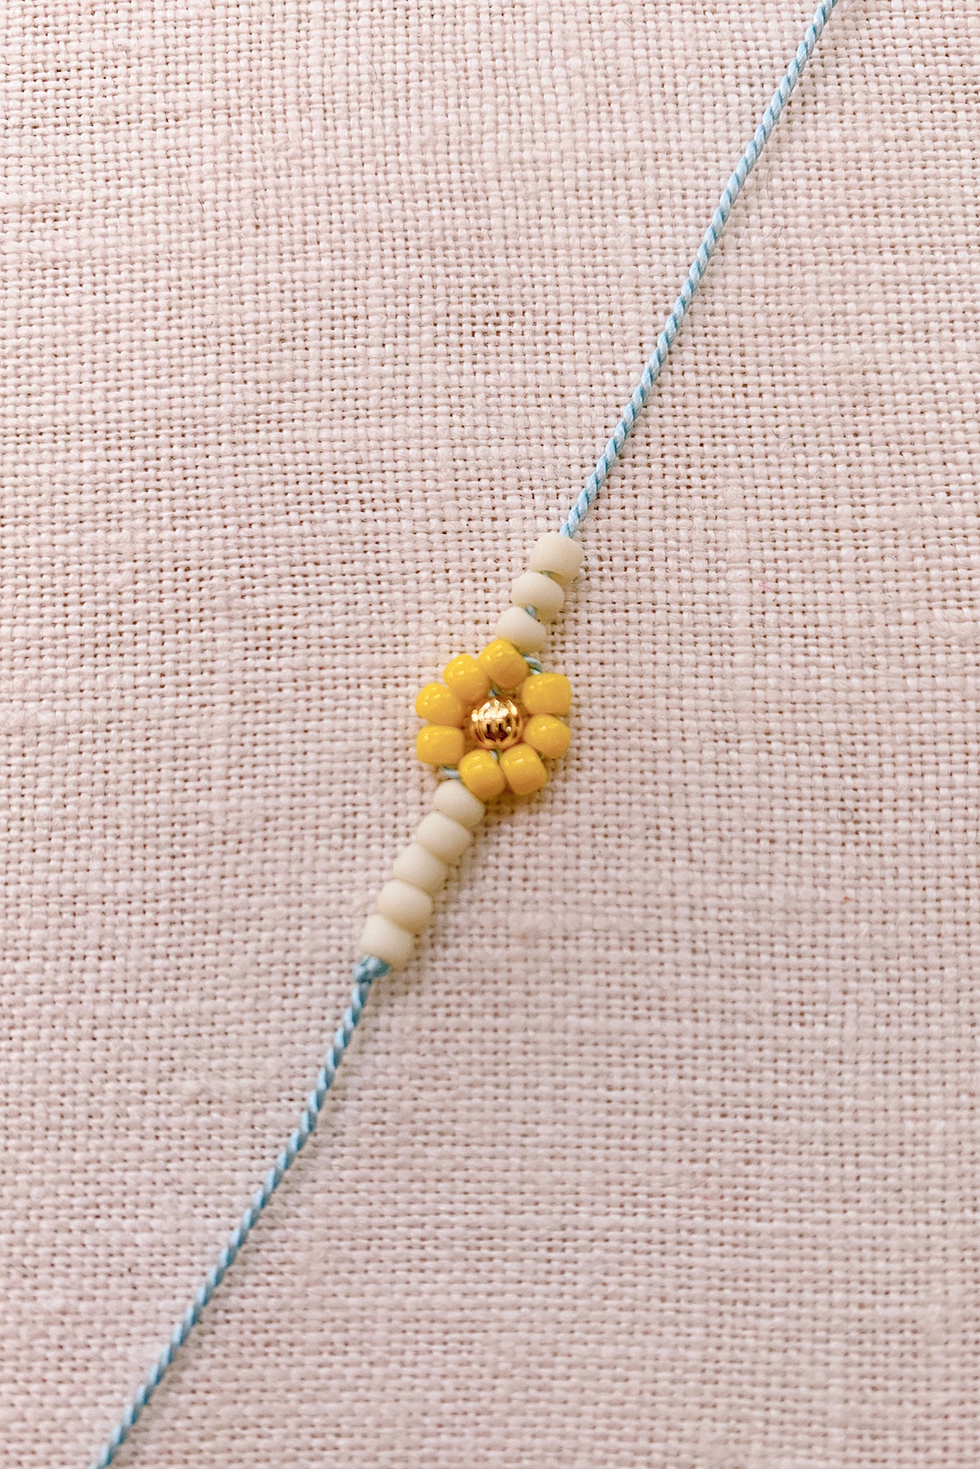
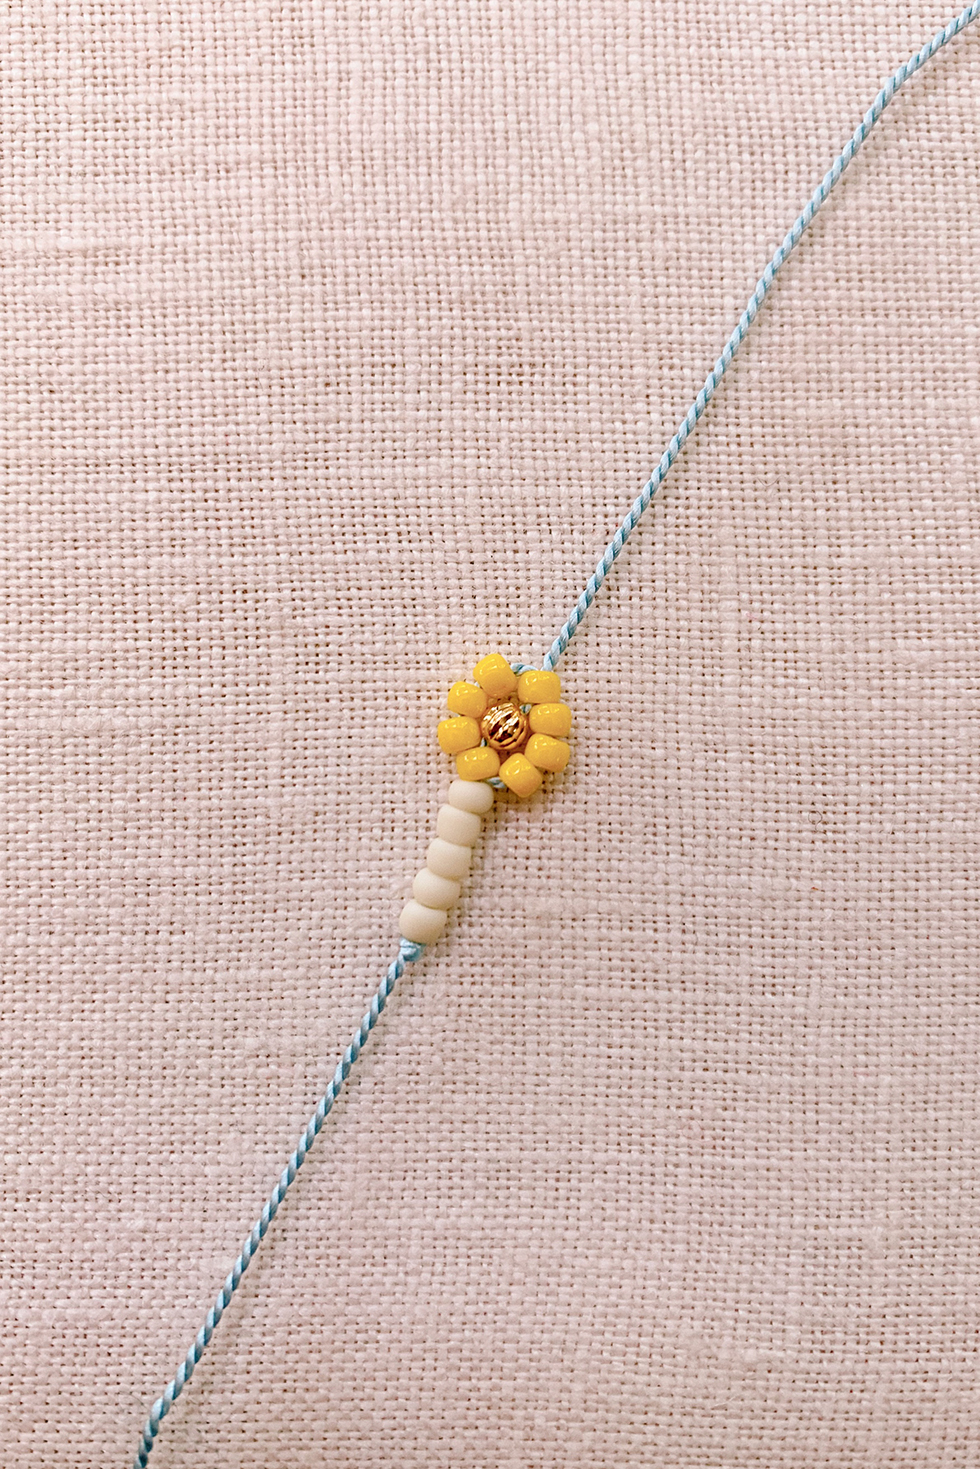
Once it all feels taut, add a few more spacer beads before starting the next daisy. Add the next set of colors (5) and the center bead.

Thread the needle through the first colored bead, add three more beads and then thread the needle through 5th bead, the last one before the center bead.

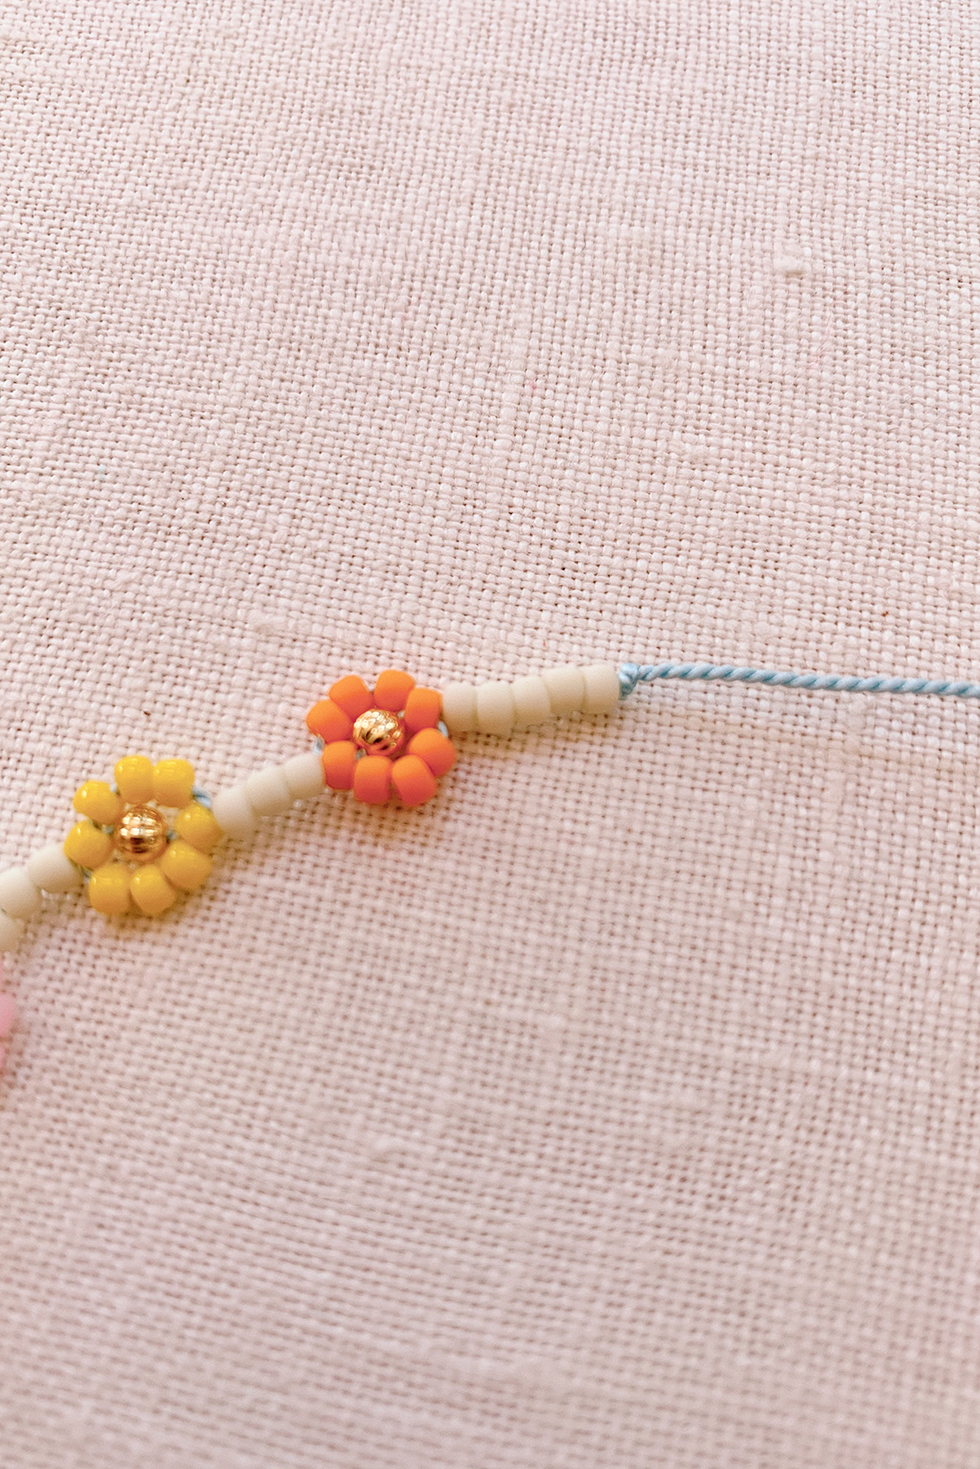
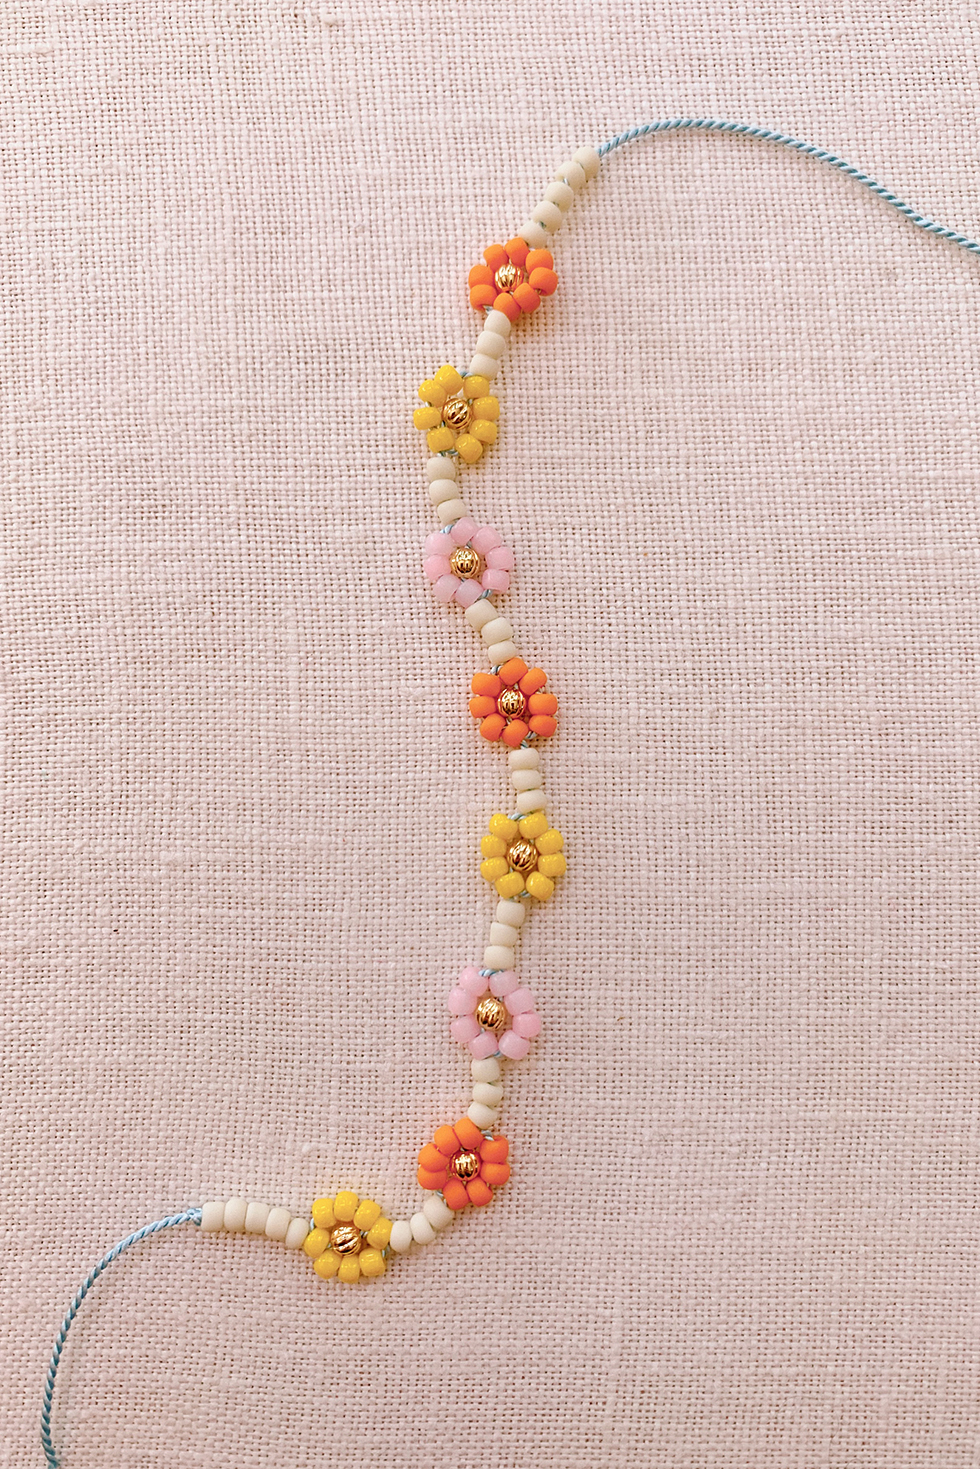
Pull and tighten. Continue the pattern until you're reached the ideal length.
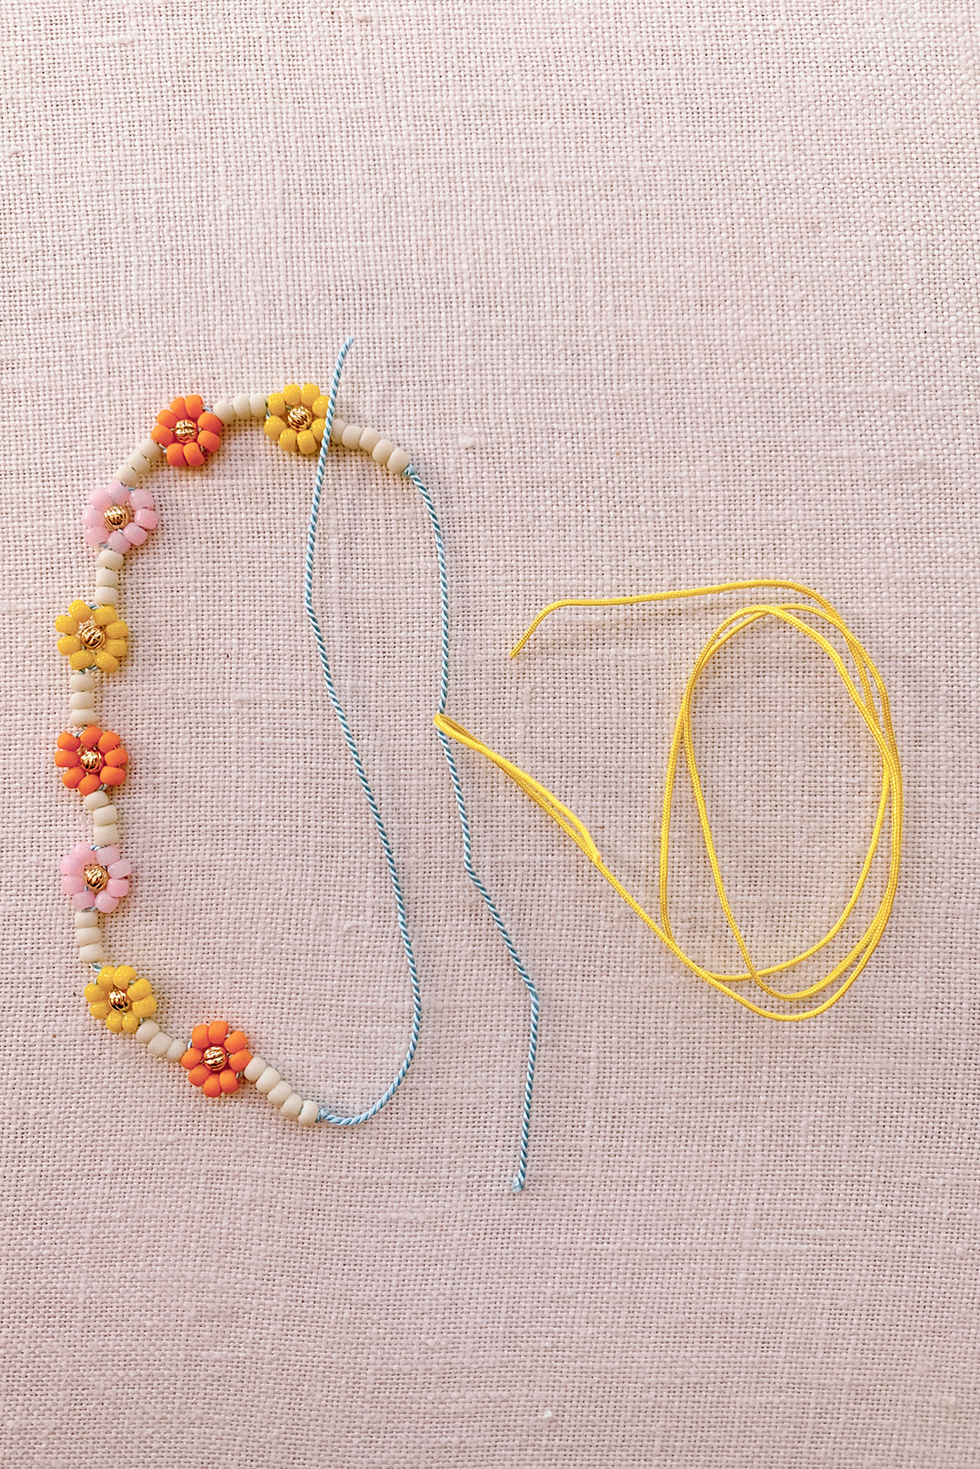
To close, I like using a sliding macrame closure. It's more work and I find it easier to loosen and tighten around your wrist versus a clasp. If you decide to do a sliding closure, leave about an inch of space. If you're just adding a clasp, you can leave about a 1/4-1/3" of space.
Note: I'm using Chinese knotting cord for the closure here because I was low on silk thread and wanted to have a contrasting color to help better visually explain. I actually prefer Chinese knotting cord for sliding closures. But if you don't want to bother buying it, you can use the silk thread - preferably a size up.
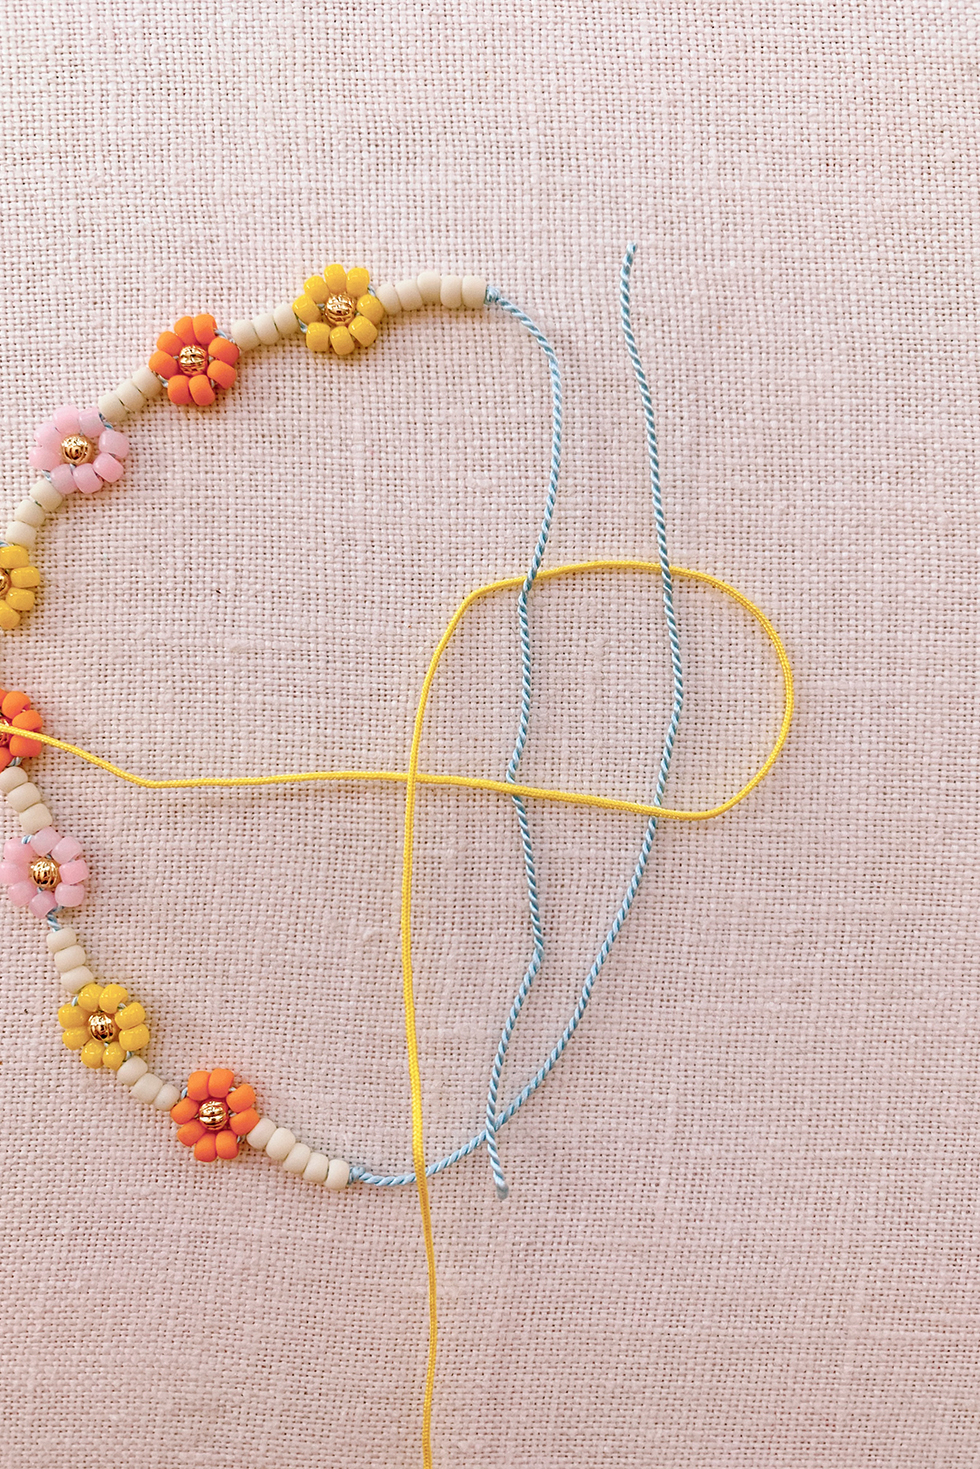
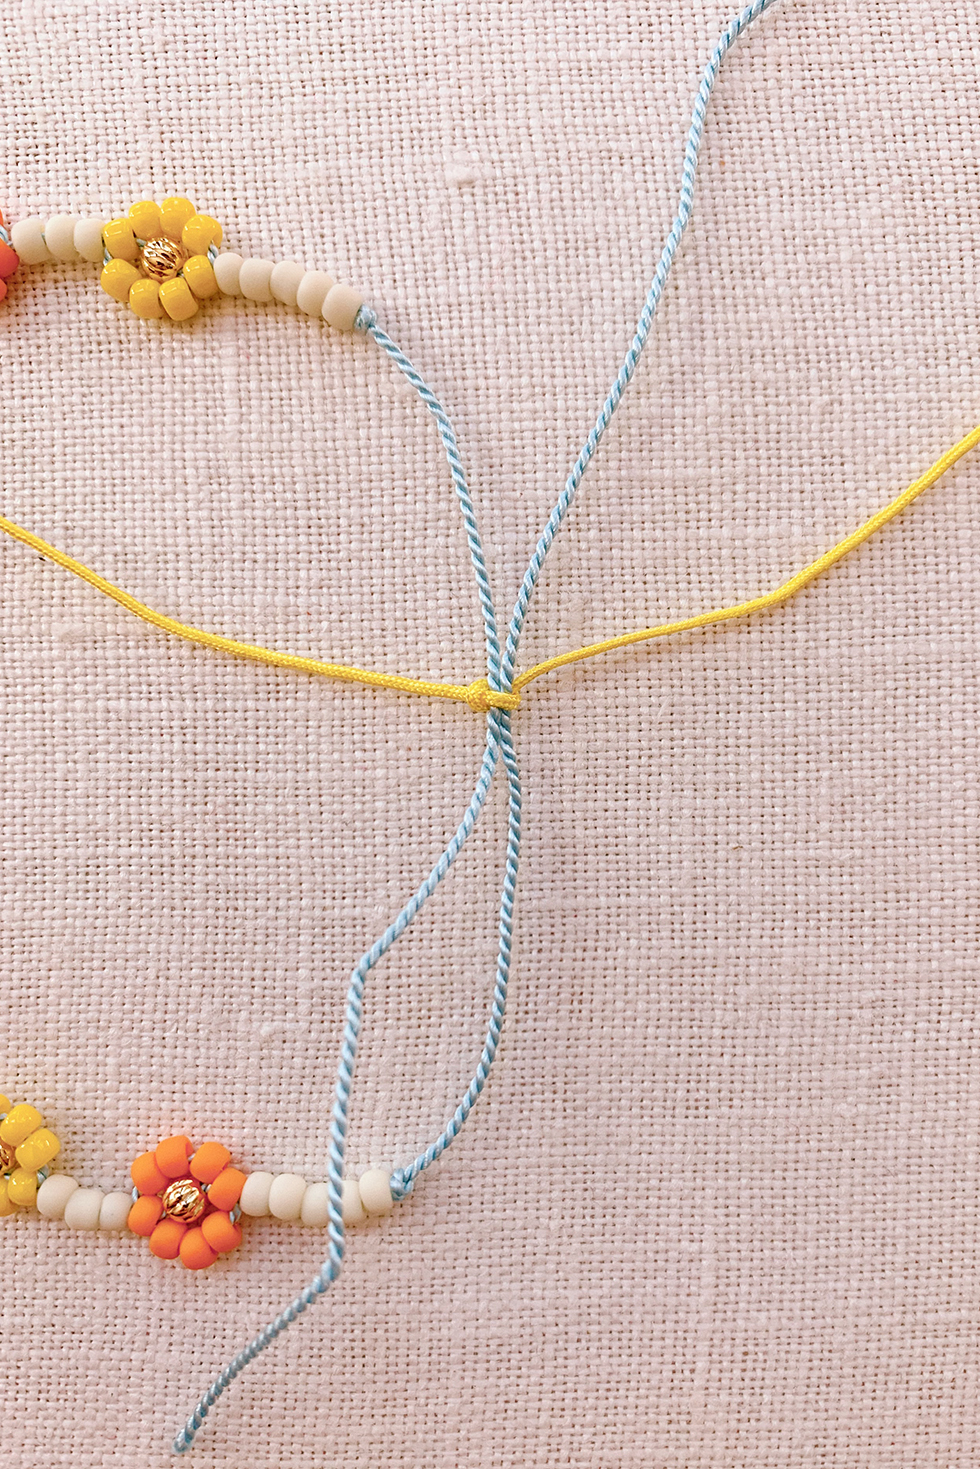
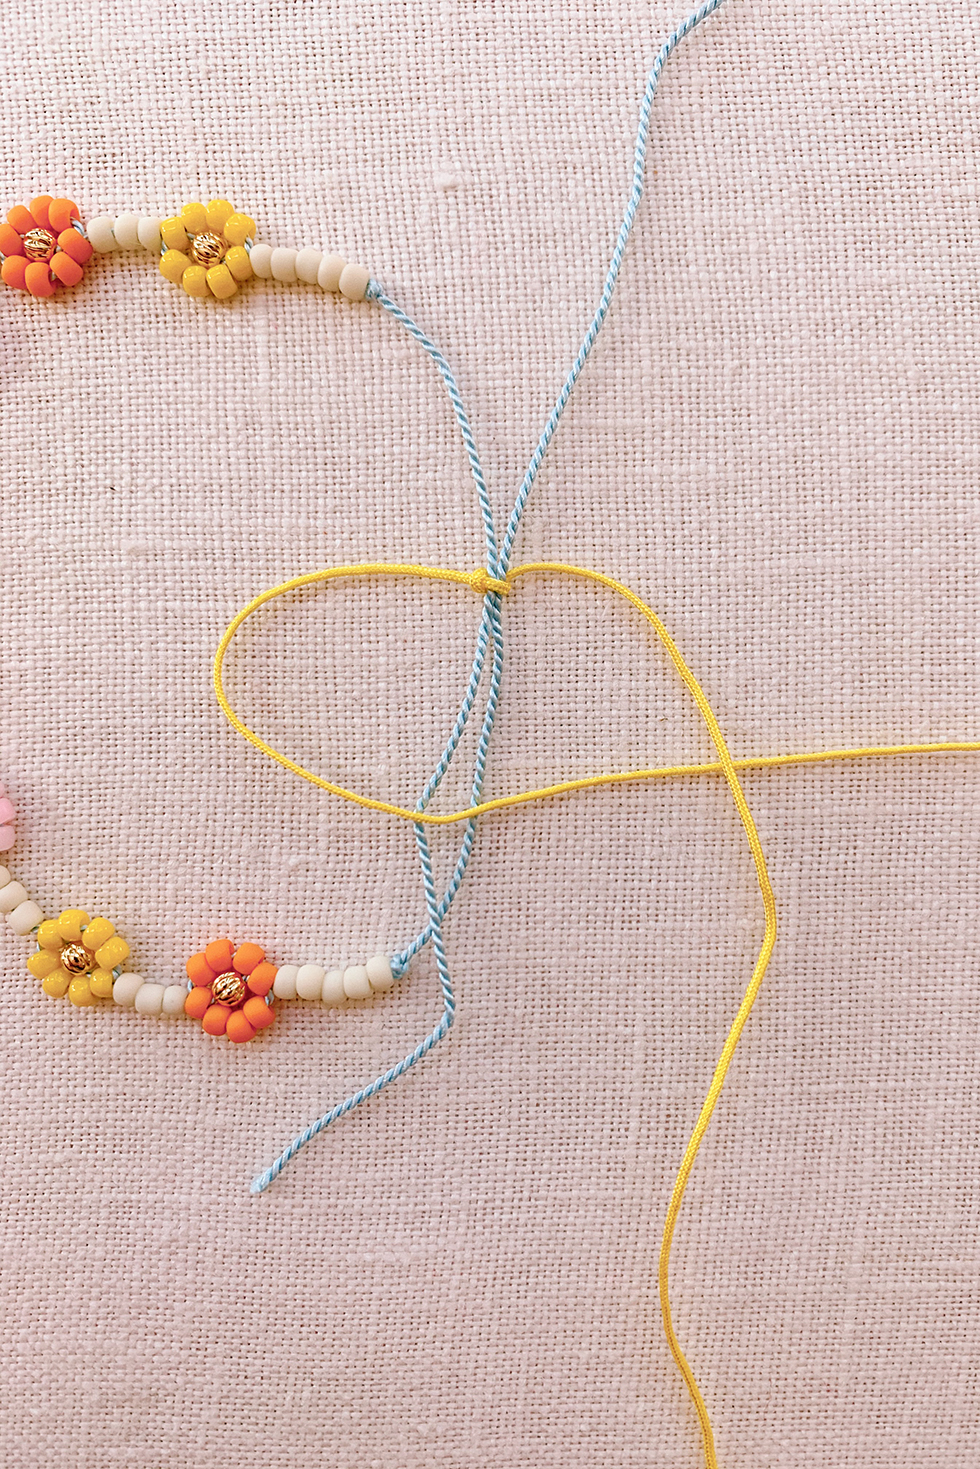
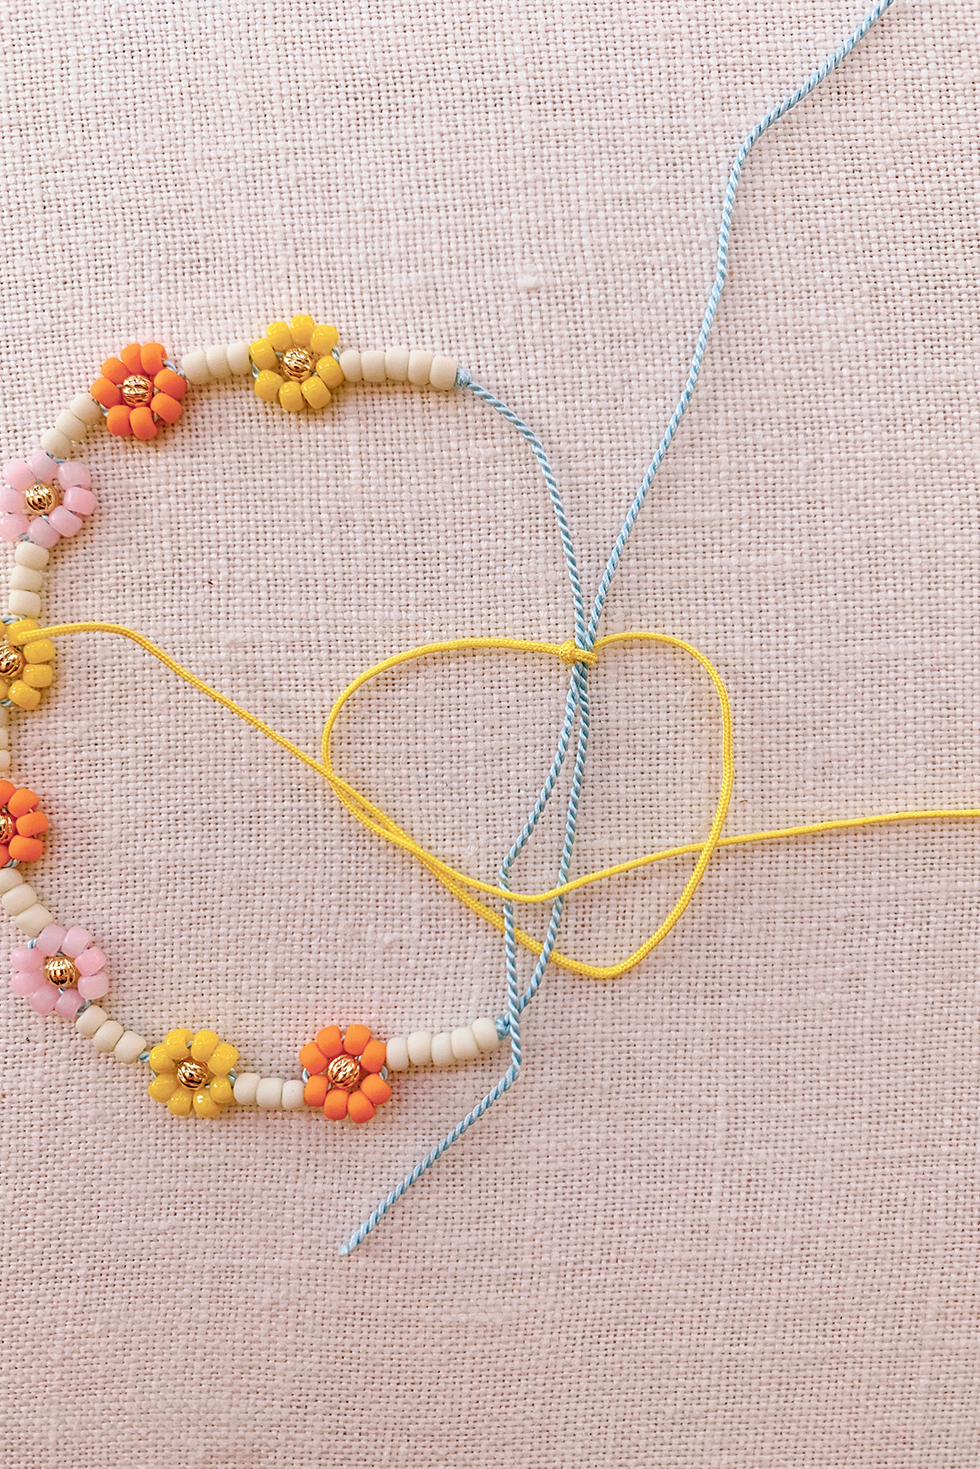
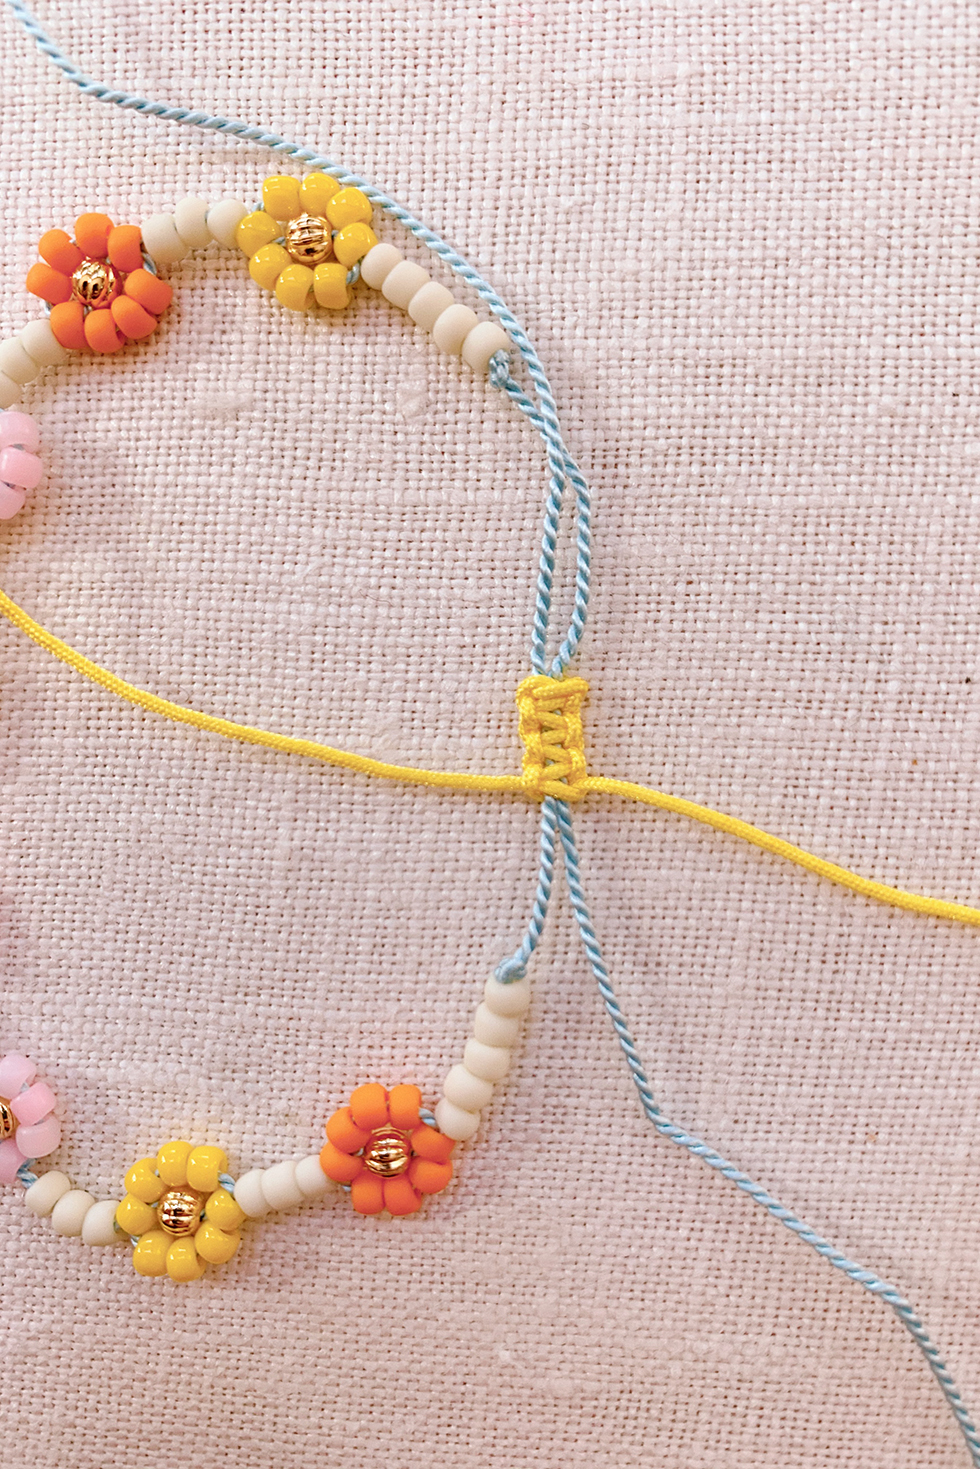
Cut a 8-10" piece of cord or thread. Lay the ends of the bracelet parallel and opposite of each other. Lay the center of the closure cord under your bracelet ends. Fold the right cord across the strands and then fold the left cord over the right cord, pointing down. Pull the left cord under the right and middle strands and then through the loop on the right side.
Note: reference this tutorial for a more in depth tutorial on the macrame knot.
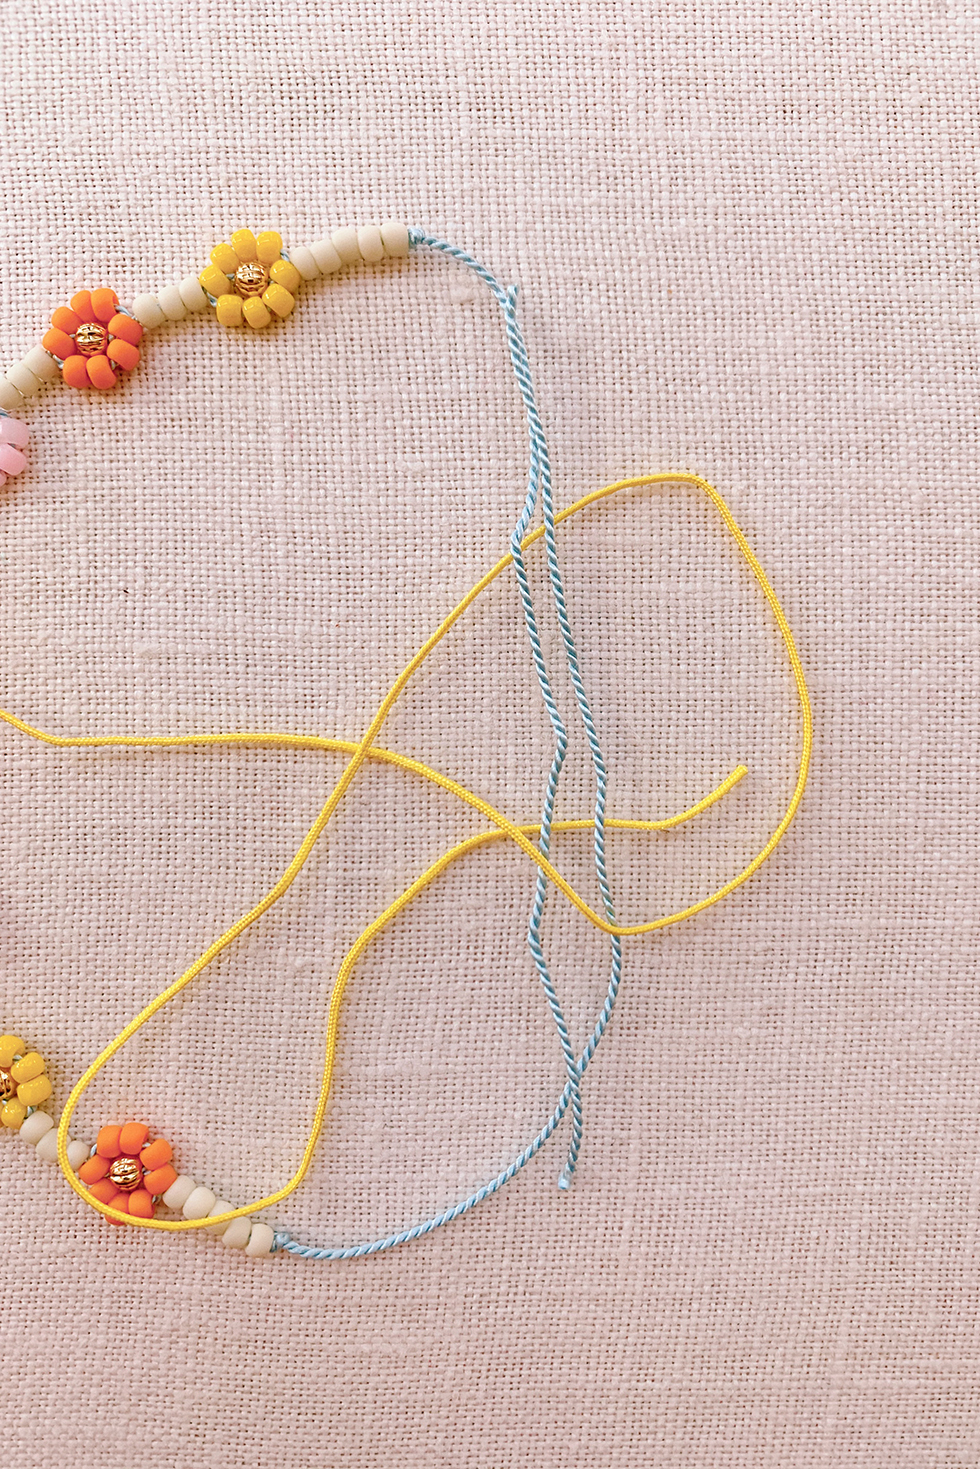
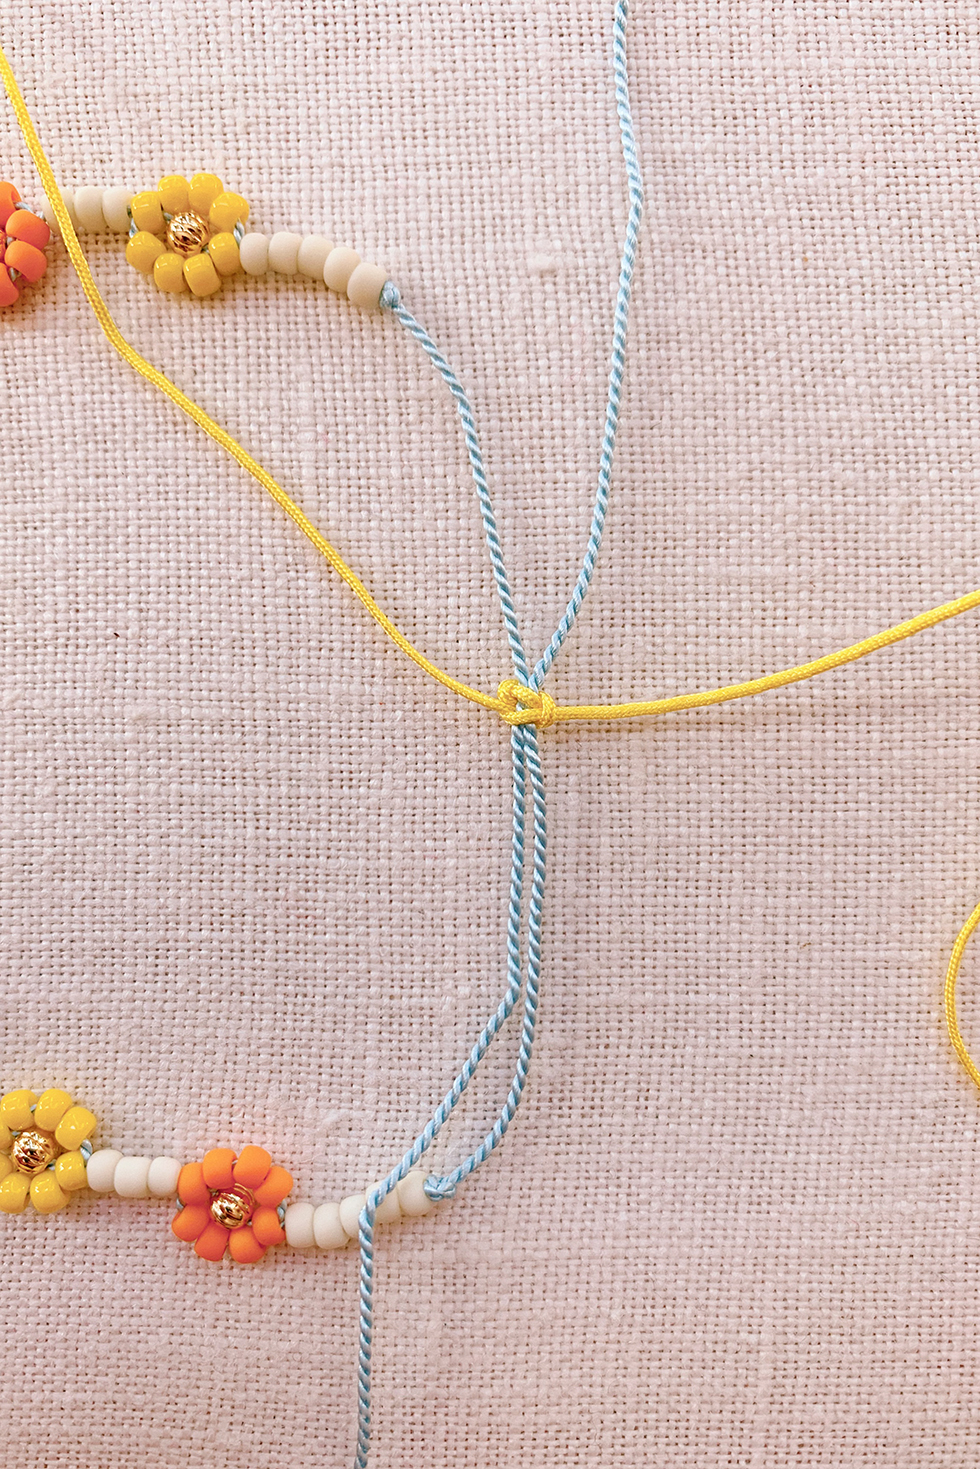
Pull tightly and the knot should look like this.
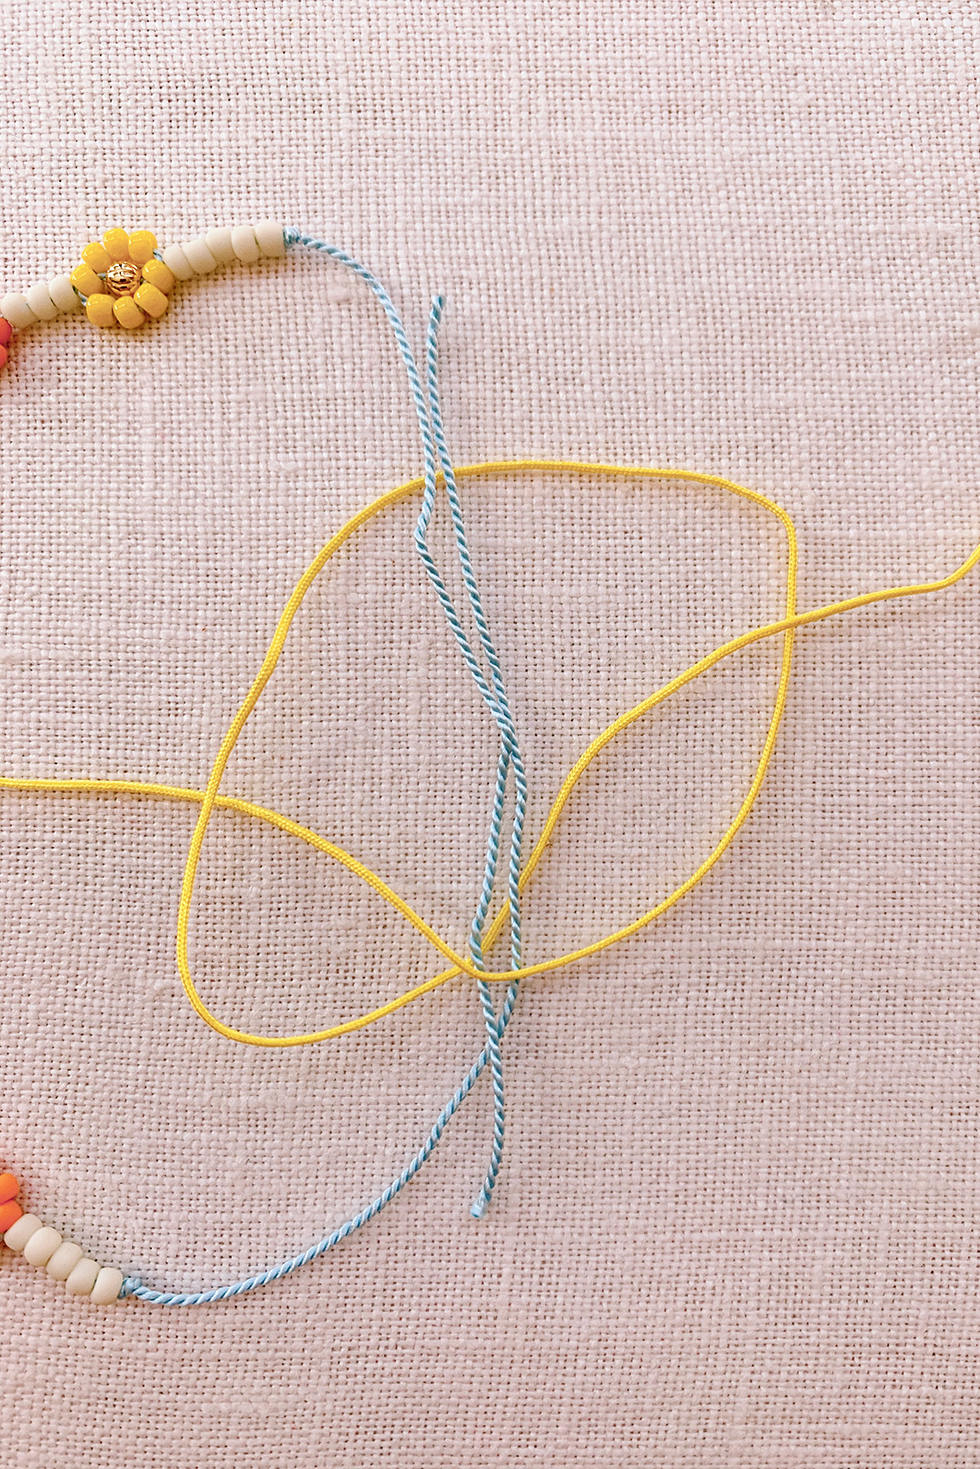
Now do the same thing on the opposite side, completing the square knot. Finish the 2nd half of the square knot by folding the left cord over the middle strands and under the right cord. Pull the right cord under the left and middle strands and through the loop on the left side.
Pull tight and continue working your way down until you have about 4-5 knots.
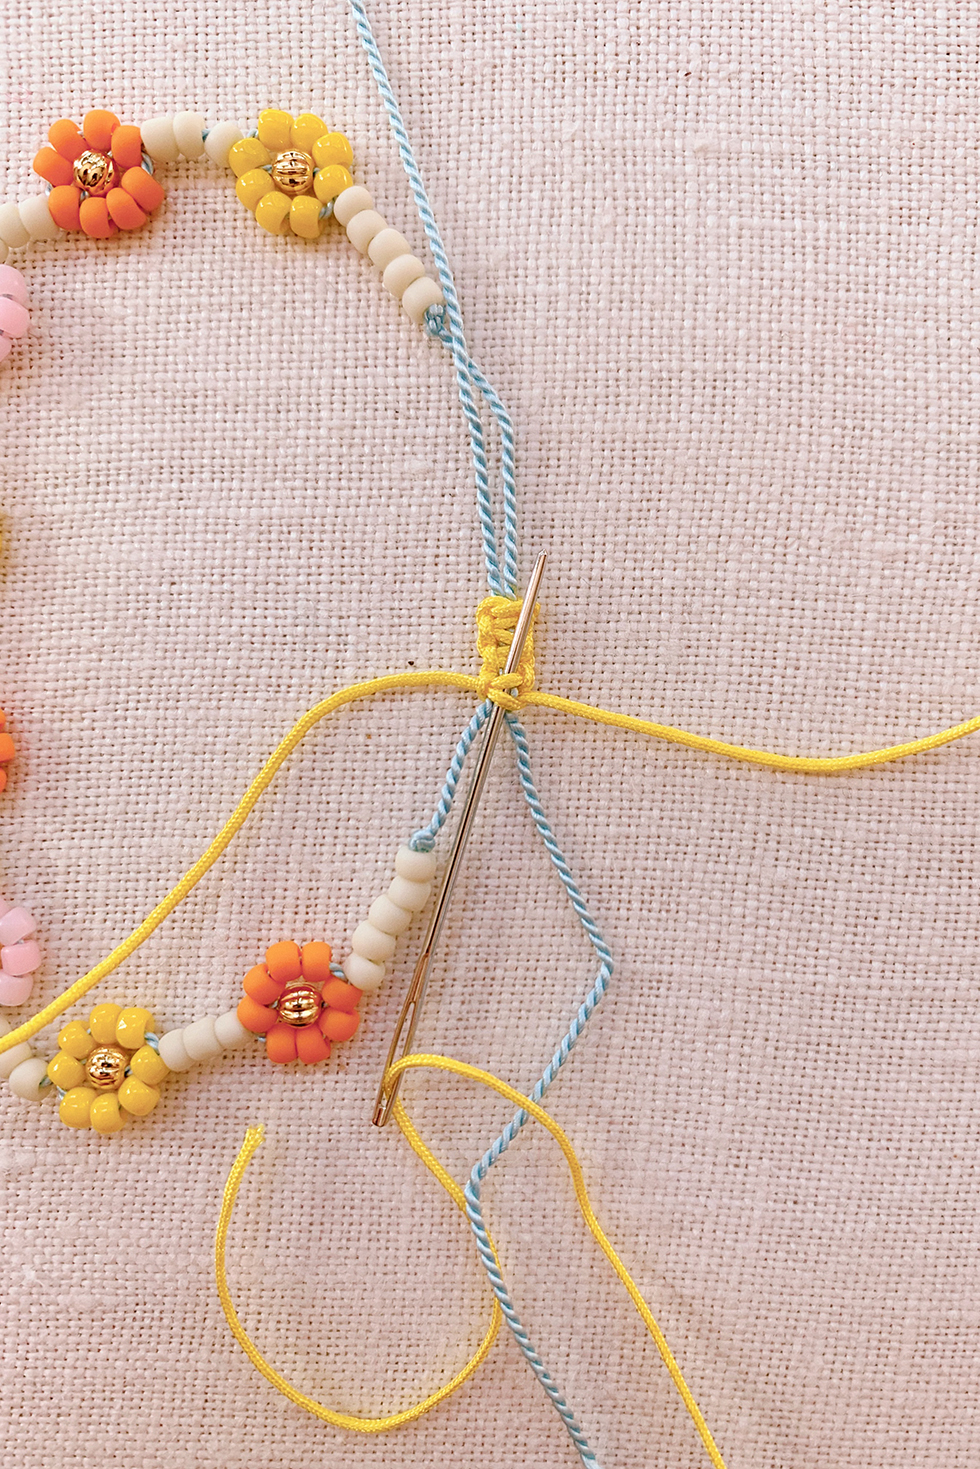
To finish the closure, thread one of the cords onto a needle and sew up the center of 2-3 knots along the backside. Pliers will help pull the needle through the tight knots.
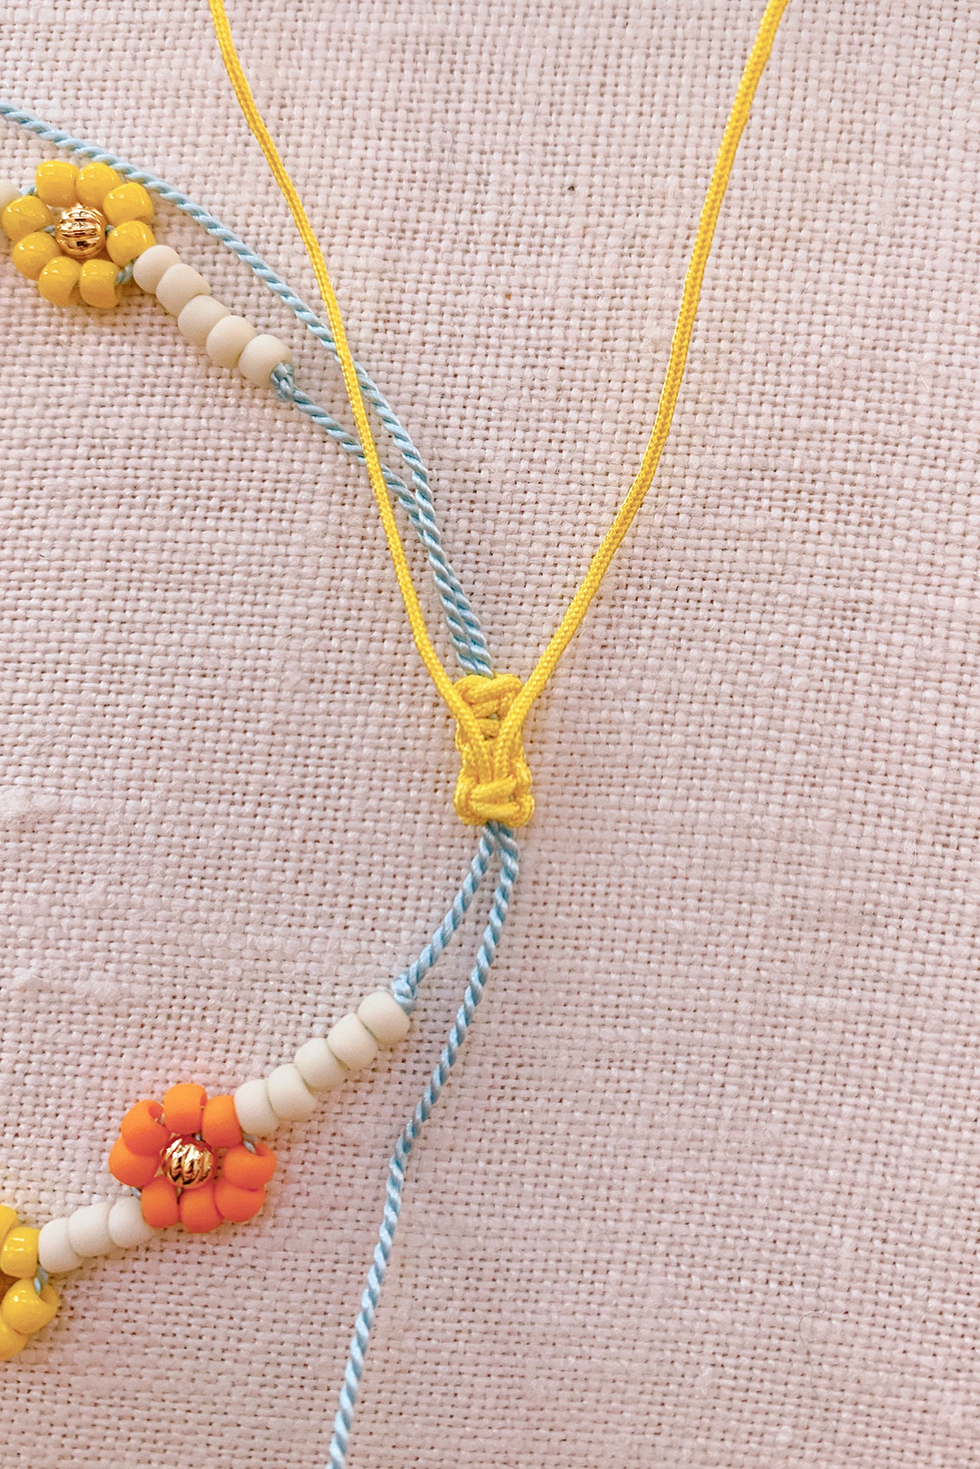

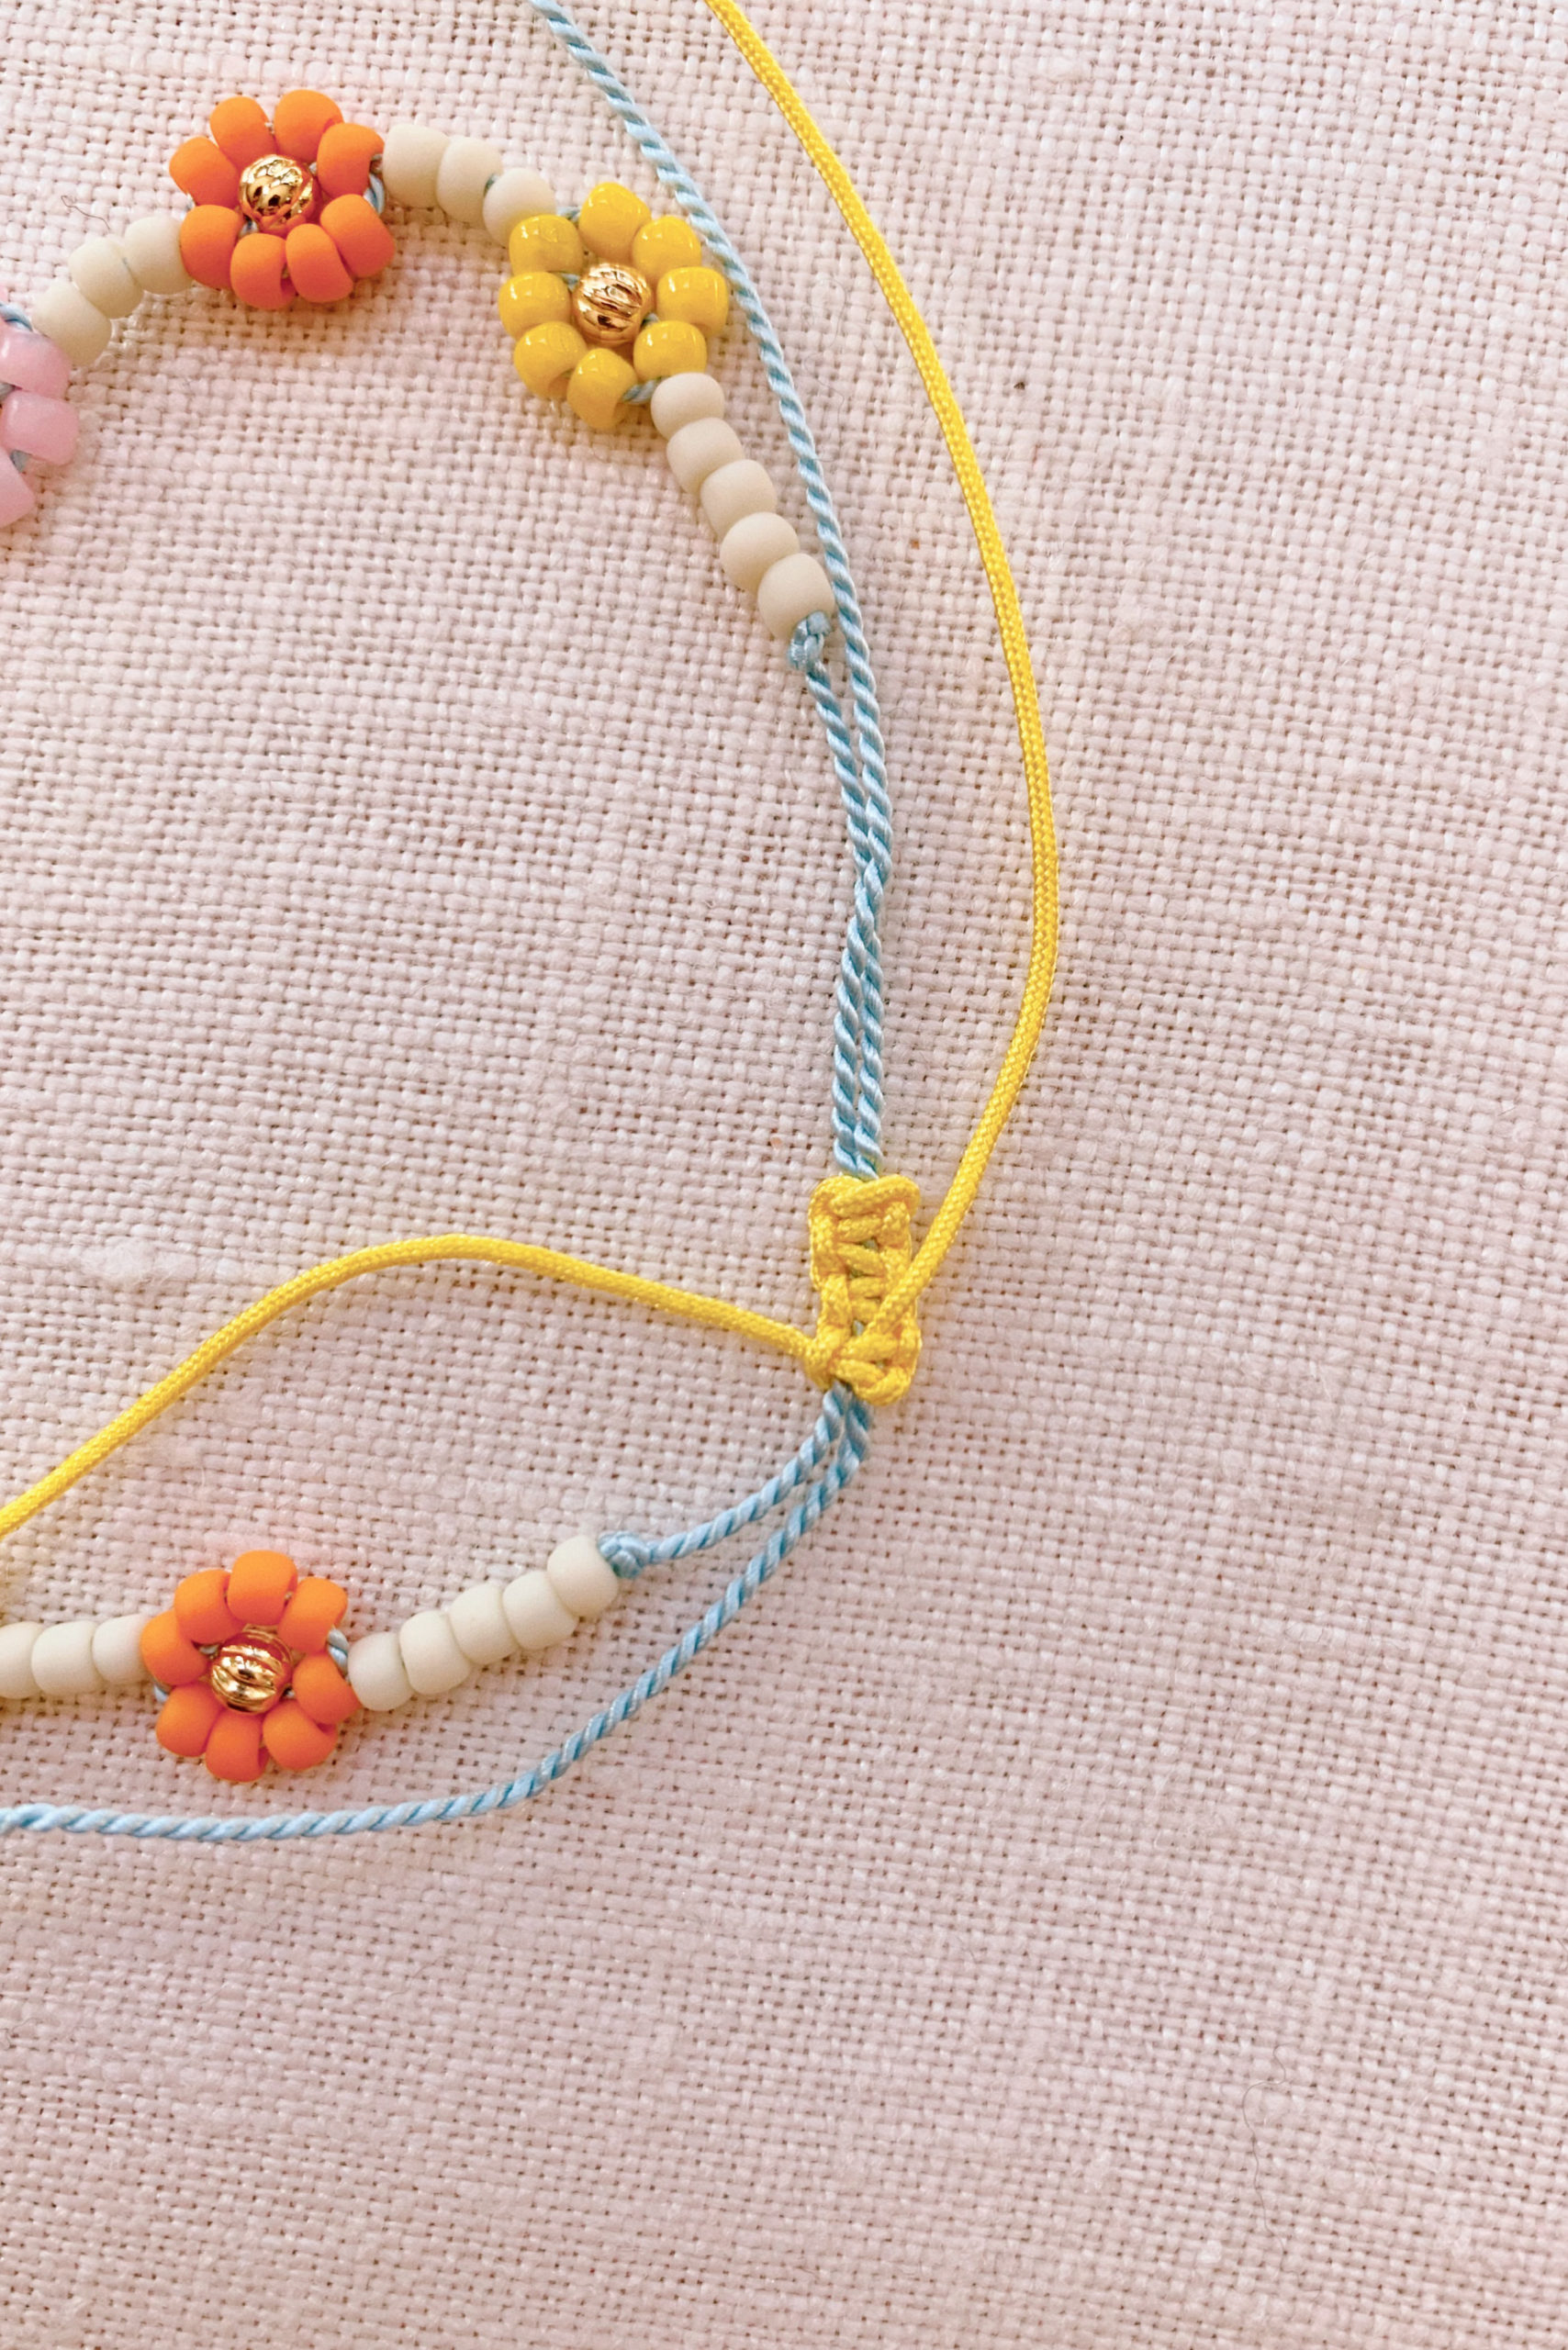
Pull the second end through and then trim both ends as close to the knots as possible. Now, your bracelet can tighten by pulling ends or loosen by pulling the bracelet apart. Measure to fit and then thread two seed beads onto each end and tie the tips into a knot. Trim.
Note that the plain beaded bracelets were threaded onto elastic thread and then tied into a triple knot. Happy beading!!
tutorial and images by HonestlyWTF

I am curious about the pearl bead (like on the gold bracelet with the yellow daisy on it)…..CAn you tell me where you got that?
I’ve linked to them in the supply list but here it is: https://rstyle.me/+Fkv_Ac1KDJamJH9i4dZGhw
You should always stretch your silk thread first if you want your work to stay tight. Otherwise, it will stretch over time and you won’t have it nice, neat and tight like you started with. Just an FYI. Just work in small sections pulling it taut until the kinks come out and you should be fine. Some people wet their silk and hang it dry with a weight at the bottom, but for something like these beads, rather than pearls, that shouldn’t be necessary.
Good advice. Thanks, Anna-Lisa!
Your crà gf t works are simple but technical with so much fun learning them. Love to learn more from you. Thanks for the information.
Thank you for this! It’s exactly what I needed right now. Hope you and yours are well and grateful for your site.
Yay! I’m so glad! 🙂
Love your instructions. You make it look easy
Going to try doing one and hope I get it right
Thank you
You’ve got this!! xx
Your crà gf t works are simple but technical with so much fun learning them. Love to learn more from you. Thanks for the information.
This is so cute! Can’t wait to make! I’m not finding the Matte cream beads…can you point me in the right direction? Thanks!
it looks like they sold out. try here
Cannot wait to try this out… thank you!
I can’t seem to find the gold bead used for the middle of the daisy. Do you have a link?
Also, curious how you store all your jewelry craft supplies. Would love to see how you do that!
Thank you!
Christy
These are the beads I used: https://www.firemountaingems.com/itemdetails/d813602mb?_rid=311607.1442945559.6984&wt.mc_id=tmorderconf
But any 3mm gold bead will do!
That was grreat
I was so excited about this project, and all of my beads finally arrived, but my 3mm gold bead won’t fit the no. 8 cord. Any suggestions ?
https://www.etsy.com/listing/267753409/gold-glass-beads-gold-czech-beads-3mm?ga_order=most_relevant&ga_search_type=all&ga_view_type=gallery&ga_search_query=3mm+gold+melon+bead&ref=sr_gallery-1-2&organic_search_click=1&pro=1
Hello there,
I’m having trouble finding the beads (I’m from Canada) without paying a big shipment fee. Do you think instead of 8/0 beads, it will presumably work with 10/0 sized beads?
Thanks!
Yes, it will work with 10/0 beads. They will be smaller so maybe string on 4 colored beads and then 2 versus 5 and 3. And you might want to size down on the silk thread as well.
Can i find these instructions again on DIY beade honestltwtf. Com . just found this going through my feed & cant save it. Can you direct me please!!!
These bracelets are so pretty!! Would elastic string also work instead of doing the macrame knot?
I don’t recommend using elastic for the daisies. It’s worth a try but I had a hard time getting the beads close enough together to make a taut flower. Alternatively, you can use a clasp for the ends if you use silk cord. The tutorial for attaching clasps is here: https://honestlywtf.com/diy/diy-beaded-shell-necklaces/
I actually used elastic cord for the daisies and it worked great, just a little less effortless than non-elastic cord but definitely doable!
What kind of elastic string did you use?
0.5mm elastic string!
Love this tutorial! The flowers are so simple but effective, thanks for all the bead recommendations too. I made a few of these for friends with the macrame sliding closure using the Chinese knotting cord and it worked well. I made them very tight and had to use pliers to pull the ends through, but each bracelet I gifted came apart almost immediately. The ends came undone and started to unravel the macrame closure. Has this happened to you? Any suggestions on how to fix this?
Hi Lauren, if you’re using Chinese Knotting Cord, you can burn the tips with a lighter. Certain cords can be pretty slippery, which is why it’s probably slipping out of the closure. If you carefully burn the tips, they’ll melt and create a little ball at the end, preventing the ends from slipping out of the closure. Hope that helps!
Hi – do you make a knot after each flower?
No, no need to!
Would you mind if I share with my customers? & I make kit to sell? Wanted to get your permission first. I will definitely give you ; Honestly WTF the “inspired by” and share your link. We plan on reopening our bead shop May 12th since we’ve been quarantined since Mid-March.
Best wishes Erica!
did you end up making a kit? i would be interested in purchasing it!
I really like it ad so pretty.
Your idea like it.
Hi. I purchased all the materials to make the daisy seed bead bracelets. I mistakenly bought 2mm Chinese cord instead of the .8-1mm you listed. Will the difference be insignificant or should I purchase the smaller size as well? Thank you. Very much looking forward to the process :).
The Chinese knotting cord is for the clasp. If you bought 2mm cord, it’ll just be pretty thick but it will work! It’s more of an aesthetic thing.
I am in love with this project— thank you so much for the inspiration and walk through! I am having trouble getting that last single bead on the loose bracelet ends once I cut them since I don’t have the help of the needle. Were you able to just wiggle each end into a single bead before knotting? Thought I would see if you had a suggestion!
hi, i can not find the color you used for the bracelet i have searched and can not find it , can you please give me the direct link to each bracelet please
You do beautiful work , I’m going to try this . Thank you
thank for sharing this pattern. I make it and my grand daughter love it.
I just stocked up on bags (and bags) of beads. Can’t wait to try this! Thanks so much for sharing!!
Can you just make these and purchase them?
cute!
Hi !
These are so pretty ! I live in india and am trying to find beads of the correct size but an only finding 11/0 seed beads here . Would they still work for these bracelets?
Thank you!
Very nice DIY ! Precise and clean 🙂
It is crazy lovely so that I have made some for me and my sister. Thank you for sharing!
Perfeito o passo a passo. Obrigada.
very helpful
Love your style so much !So cute and I already obsessed this DIY. This is so much fun , thank for sharing.
Hi, I absolutely love this idea! Do you by chance know if you can also leave out the beads in between the daisies to let the string show? I think that would add a lovely dainty effect.
Thank you so much!
Totally awesome bracelets. My granddaughter just has to have one.
NICE
Do you use the whole strand for one bracelet? Or can the strand be used on multiple?
Do you use the whole strand on one bracelet? Or can the strand be used for more than one?
This is so cute
Thanks for this tutorial! Did them with my 12 year old and she loved it.
very nice, just love it.
As slam allaikum sir plz give me chain work at home plz
Nice
Hi! My students and I want to use this. Do you have a printable version? Thanks!
Thank you so much. This is exactly what I needed. I’ve been trying a clearer instructions from you tube but I was not satisfied. This is so clear and I’m satisfied.
omg i have to try this they look so cute <3
I just found your website and I love it.
You color combos are awesome and your photo tutorials are greatly appreciated. ♥️
Very lovely article, nice
I absolutely love these and want to give them a try! I’m from Canada and struggling to find the griffin silk cord. Does it matter which silk cord I use and which number (I know you used no.8?)
Thank you!
Very interesting, I will try it.
I enjoyed reading this article about 7 crystals for anxiety healing. I have some of them at home and they really help me feel calm and relaxed. I also love fluorite for its soothing energy and beautiful colors. Check outfor some amazing fluorite products
what string, besides the no.8 griffin silk thread, would you recommend for this?
Thanks so much!
You make it look easy!
I absolutley love the daisys!!!!
you are a little poo